
[Z06] Insulation - The project begins
 02-25-2008, 01:29 AM
#1
Melting Slicks

Thread Starter
Member Since: Jan 2007
Location: SOUTHERN CALI - Most of the time California
Posts: 2,749
Likes: 0
Received 2 Likes
on
2 Posts
PART 1
I have been wanting to insulate my Z for some time now. It was on the to do list from the last 3-4 months.
You might ask, why would you insulate a fairly new Z06 and add all that weight, it's just going to slow it down. Yes and no.
Thanks to the QM and Charlie, 600 RWHP is plenty for the streets and some fun weekends at the track.
With all the modifications that I have done to the car, there was some compromises that had been made. The car is damn loud. The cabin is like a sauna. The tunes on my tires are louder than the Bose system. The vibration gave me a headache after sitting in traffic for a long time.
I thought I would spare my credit cards, not in a financial sense but to keep them from melting.
The Z rocks, but I also wanted to comfortably talk with friends and use the cell.
Before I started my project, I wanted to be able to measure my results, so I purchased a SPL meter.
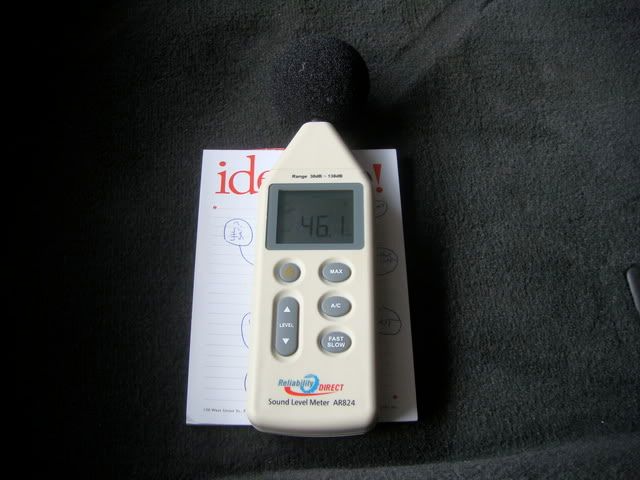
These were the notes I took. The A/C was off, windows up and radio off.
Sound Decibel Analysis
February 17, 2008
Cold idle: varies from 65DB- 75DB, avg 73DB
Warm idle (after driving): 75-78DB
1st gear: Approximate 25MPH 75-78DB
15MPH 79-82DB
3rd gear: 40MPH 77DB AVG
65-75MPH 79-83DB
WOT (up to about 5k RPM) 93DB
Driving down a mid-poor quality road about 80-85DB
5th gear: 65-75MPH 79-83DB
Hitting center divider,lol, I mean lane divider 85DB
Overall input: The majority of normal driving has a DB in the range of 77-85. There are times where there would be a spike in DB depending on road condition. Tire noise is very sensitive to certain roads and can give off a loud sound. The obvious sounds include, noise from the clutch, tire noise, exhaust noise and engine noise.
Know, just for comparison. My Ford truck with an aftermarket intake, has a 48-53 DB at idle. The avg DB while driving was about 57 DB.
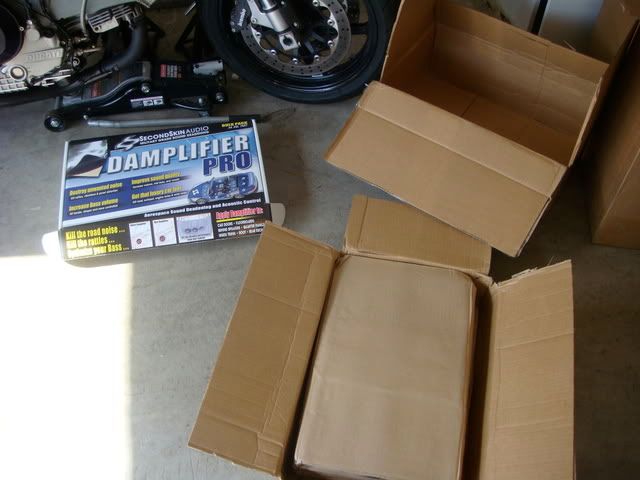
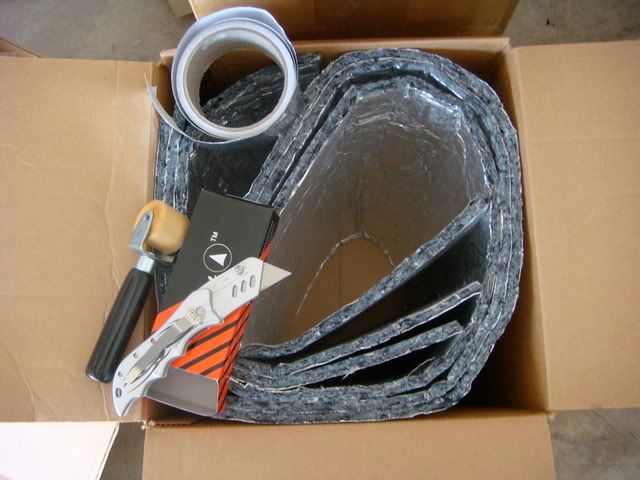
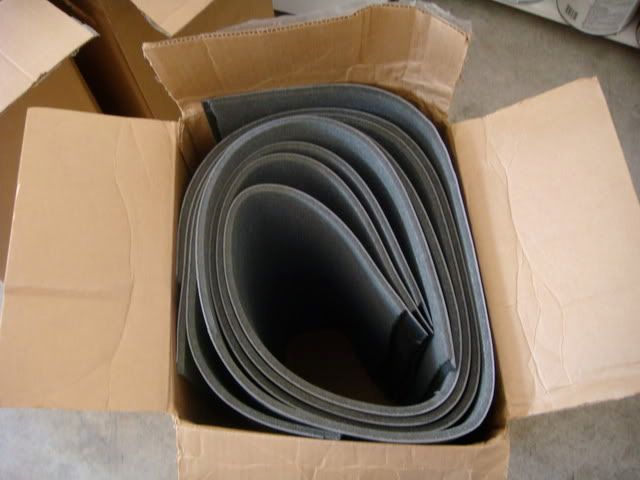
The product I ordered from Second Skin was;
1) 150 FT of foil tape
2) wooden hand roller
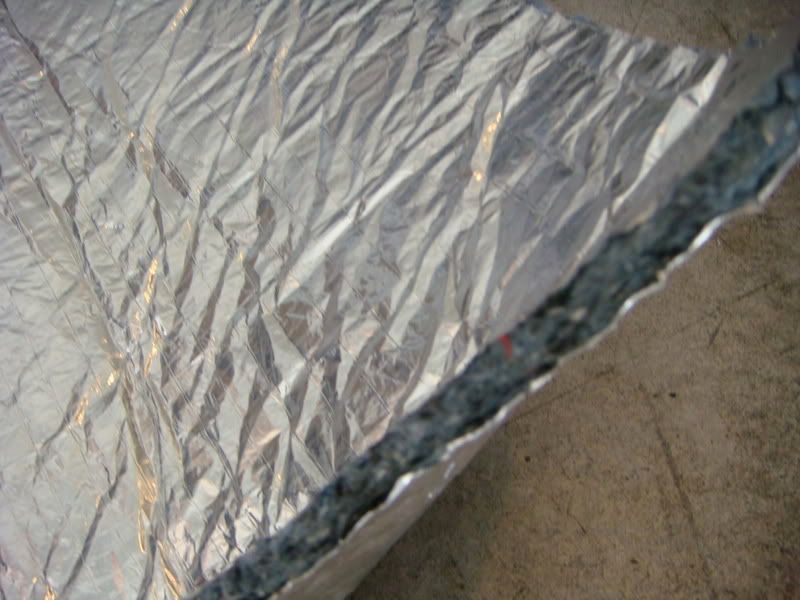
3) 3 sheets of Heat Wave Pro (27 SQFT)
4) razor blade
5) Damplifier PRO (116.5 SQFT)
6) OverKill Pro 1 sheet (9SQFT)
7) Luxury liner 8 sheets (72SQFT)
8) Motor Mat 2 sheets (18 SQFT)
9) 4 cans of adhesive spray
Just a warning, this is not light, somewhere in the range of 130+ lbs. Will see how much material I will use. I didn't think it would be this costly, but will just have to see the results in the end.
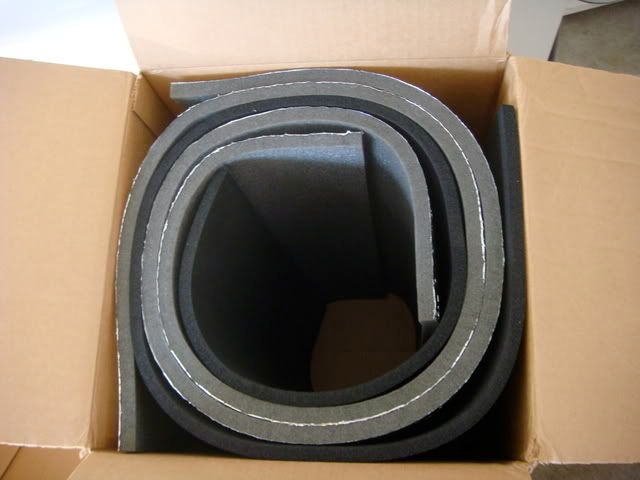
Here is some pics of the product.
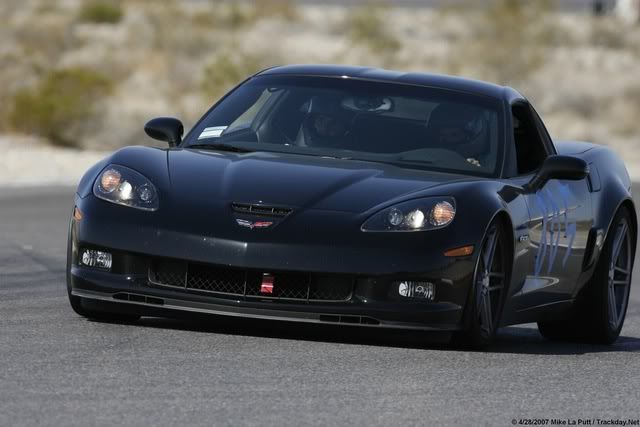
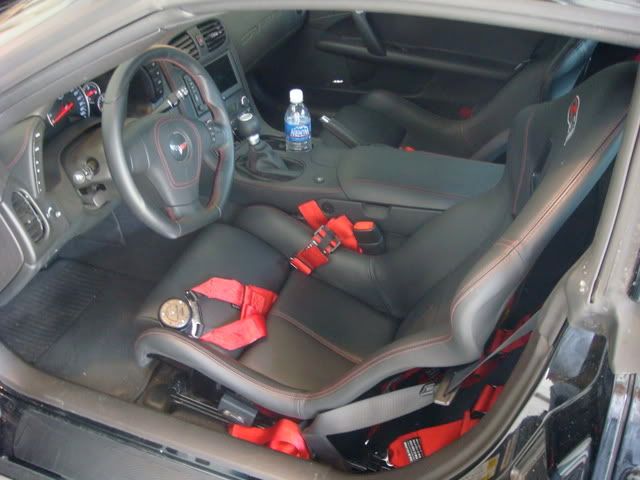
Before I gutted the car, I decided to take a pic before I forgot what it looked like
The work begins...

I have been working on this car for the last week. I spend about a 2-3 hours a day. I am in no rush to finish and I want to do a quality job.
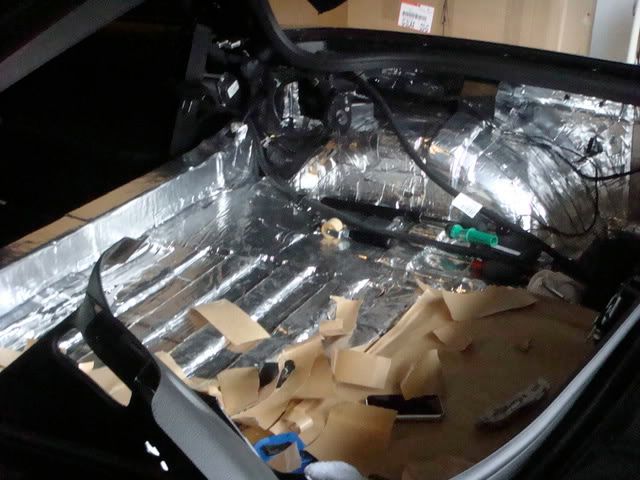
I got started installing the Damplifier Pro, the shiny stuff. I like the quality of it and it seems to offer good vibration, noise, heat protection.
Putting down Damplifier Pro, is a lot more work then you expect. On the C6, there are some tuff spots. The back hatch area has so many wires coming out, angeles, and lots of tuff spots. The area you want to cover is the tire well and it is quite difficult due to the obstacles.
After all these days of work, I'm really enjoy installing this stuff. In addition, I figured out all the mysterious stuff beneath the carpet and panels.
At first I didn't think it would be easy to gut the car out, it wasn't too hard. It has become addicting and I am getting a little overboard, trying to take everything out. Let's just hope I could put this back in some decent shape.
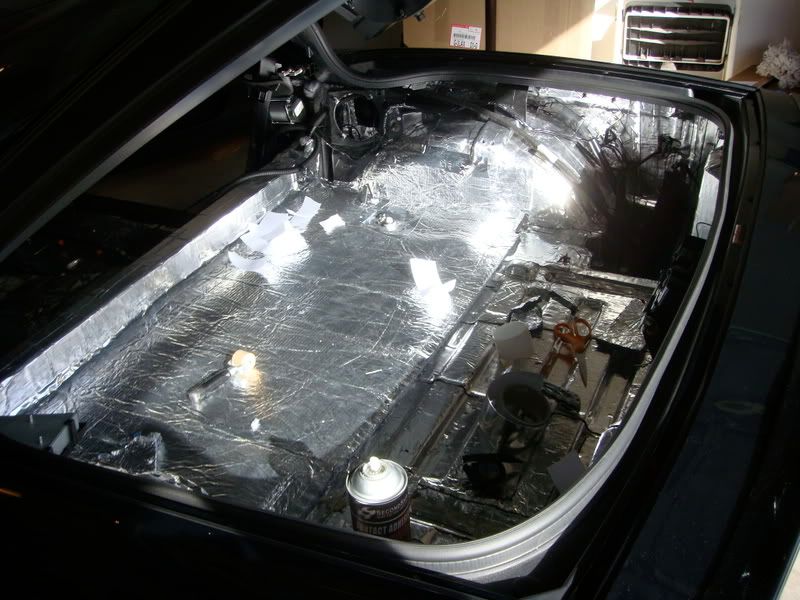
I am almost done with the first layer of Damplifier Pro on the bottom surface of the car. I still need to put some on the inner roof, door panels, and any tight or hidden spots I missed.
Once I get that done, I am going to put a second layer on key problem areas. The hatch and tire well, all the exhaust and tire noise comes from that area. Also, the passenger area, where heat and clutch noise is present.
I might order some more Damplifier Pro and Heat Wave Pro. The Heat Wave Pro is suppose to offer good heat insulation and noise reduction. The 3 sheets I have won't cut it. I think I will need at least six sheets, one for the drivers side, one for the passenger side, one for the drive shaft tunnel and 3 in the hatch area. I also plan on stuffing some material below the shifter, there is a lot of heat that comes out of there.
TO BE CONTINUED
I have been wanting to insulate my Z for some time now. It was on the to do list from the last 3-4 months.
You might ask, why would you insulate a fairly new Z06 and add all that weight, it's just going to slow it down. Yes and no.
Thanks to the QM and Charlie, 600 RWHP is plenty for the streets and some fun weekends at the track.
With all the modifications that I have done to the car, there was some compromises that had been made. The car is damn loud. The cabin is like a sauna. The tunes on my tires are louder than the Bose system. The vibration gave me a headache after sitting in traffic for a long time.
I thought I would spare my credit cards, not in a financial sense but to keep them from melting.
The Z rocks, but I also wanted to comfortably talk with friends and use the cell.
Before I started my project, I wanted to be able to measure my results, so I purchased a SPL meter.
These were the notes I took. The A/C was off, windows up and radio off.
Sound Decibel Analysis
February 17, 2008
Cold idle: varies from 65DB- 75DB, avg 73DB
Warm idle (after driving): 75-78DB
1st gear: Approximate 25MPH 75-78DB
15MPH 79-82DB
3rd gear: 40MPH 77DB AVG
65-75MPH 79-83DB
WOT (up to about 5k RPM) 93DB
Driving down a mid-poor quality road about 80-85DB
5th gear: 65-75MPH 79-83DB
Hitting center divider,lol, I mean lane divider 85DB
Overall input: The majority of normal driving has a DB in the range of 77-85. There are times where there would be a spike in DB depending on road condition. Tire noise is very sensitive to certain roads and can give off a loud sound. The obvious sounds include, noise from the clutch, tire noise, exhaust noise and engine noise.
Know, just for comparison. My Ford truck with an aftermarket intake, has a 48-53 DB at idle. The avg DB while driving was about 57 DB.
The product I ordered from Second Skin was;
1) 150 FT of foil tape
2) wooden hand roller
3) 3 sheets of Heat Wave Pro (27 SQFT)
4) razor blade
5) Damplifier PRO (116.5 SQFT)
6) OverKill Pro 1 sheet (9SQFT)
7) Luxury liner 8 sheets (72SQFT)
8) Motor Mat 2 sheets (18 SQFT)
9) 4 cans of adhesive spray
Just a warning, this is not light, somewhere in the range of 130+ lbs. Will see how much material I will use. I didn't think it would be this costly, but will just have to see the results in the end.
Here is some pics of the product.
Before I gutted the car, I decided to take a pic before I forgot what it looked like
The work begins...
I have been working on this car for the last week. I spend about a 2-3 hours a day. I am in no rush to finish and I want to do a quality job.
I got started installing the Damplifier Pro, the shiny stuff. I like the quality of it and it seems to offer good vibration, noise, heat protection.
Putting down Damplifier Pro, is a lot more work then you expect. On the C6, there are some tuff spots. The back hatch area has so many wires coming out, angeles, and lots of tuff spots. The area you want to cover is the tire well and it is quite difficult due to the obstacles.
After all these days of work, I'm really enjoy installing this stuff. In addition, I figured out all the mysterious stuff beneath the carpet and panels.
At first I didn't think it would be easy to gut the car out, it wasn't too hard. It has become addicting and I am getting a little overboard, trying to take everything out. Let's just hope I could put this back in some decent shape.
I am almost done with the first layer of Damplifier Pro on the bottom surface of the car. I still need to put some on the inner roof, door panels, and any tight or hidden spots I missed.
Once I get that done, I am going to put a second layer on key problem areas. The hatch and tire well, all the exhaust and tire noise comes from that area. Also, the passenger area, where heat and clutch noise is present.
I might order some more Damplifier Pro and Heat Wave Pro. The Heat Wave Pro is suppose to offer good heat insulation and noise reduction. The 3 sheets I have won't cut it. I think I will need at least six sheets, one for the drivers side, one for the passenger side, one for the drive shaft tunnel and 3 in the hatch area. I also plan on stuffing some material below the shifter, there is a lot of heat that comes out of there.
TO BE CONTINUED
Last edited by 805Z06; 04-06-2008 at 12:00 AM.
 02-25-2008, 01:46 AM
#2
Drifting


Thanks for sharing. I am planning on doing an insulation install after I return from the NCM delivery, so I'll be watching to see how it goes for you and what you find out that works and doesn't work to your satisfaction.


 02-25-2008, 08:17 AM
#8
Burning Brakes

Member Since: May 2002
Location: brooklyn ny
Posts: 970
Likes: 0
Received 0 Likes
on
0 Posts
While you're at it, a tunnel blanket or plate helps alot with the heat. I did the tunnel plate first and noticed a rduction of heat in the console area, then later, added insulation and it only made it better.
02-25-2008, 08:31 AM
#9
Le Mans Master


Come on you've gone this far, great time to put a cage in it! 
I'm happy to offer suggestions after that.
You have the right attitude doing it the right way the first time by being patient! Can't wait to hear if it was truly worth it.
Mike
I'm happy to offer suggestions after that.
You have the right attitude doing it the right way the first time by being patient! Can't wait to hear if it was truly worth it.
Mike
 02-25-2008, 11:41 PM
#13
Melting Slicks
Thread Starter
Member Since: Jan 2007
Location: SOUTHERN CALI - Most of the time California
Posts: 2,749
Likes: 0
Received 2 Likes
on
2 Posts
Around that, you might want to add a few bills if you want to get the center done
Don't want to go there, It might get close to 200 lbs, it will depend on how much of Luxury liner I use (the heavy stuff & sound barrier). This will be the final step.
I am nowhere near finished, I expect to get a good 3-4 layers in the front.. I think my car will be out of commission for at least a month. I like drinking my coffee in the morning while working on this. Best part of my day.
I thought it would be very difficult. I was able to take apart most of the interior in under 30 minutes.
There is a lot to come.
02-25-2008, 11:44 PM
#14
Melting Slicks
Thread Starter
Member Since: Jan 2007
Location: SOUTHERN CALI - Most of the time California
Posts: 2,749
Likes: 0
Received 2 Likes
on
2 Posts
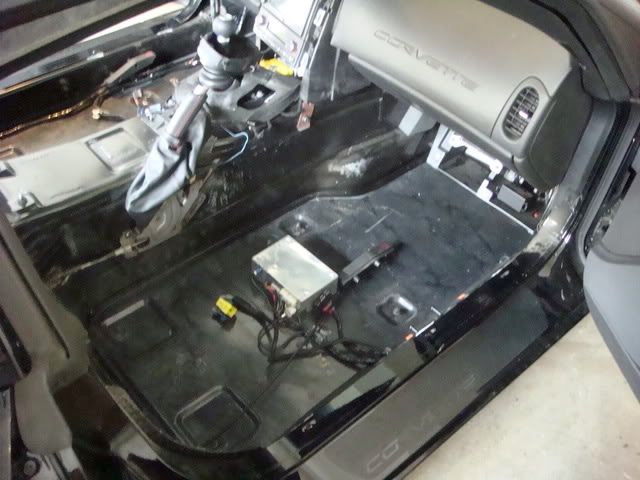
While I have already took apart the whole interior. I have decided too upgrade my audio system, add parking sensors (don't flame, my truck has them and I got used to being lazy), rear camera and more...
I got a good write up of the process here if you guys are interested.
http://forums.corvetteforum.com/show....php?t=1949736
It's a good thing I am doing this together. Once I finish the insulation, I could put in the wiring/equipment for all the other stuff I am doing before putting back the carpet and panels.
03-02-2008, 04:44 AM
#17
Melting Slicks
Thread Starter
Member Since: Jan 2007
Location: SOUTHERN CALI - Most of the time California
Posts: 2,749
Likes: 0
Received 2 Likes
on
2 Posts
Part 2
Removal – Rear Speaker Panel
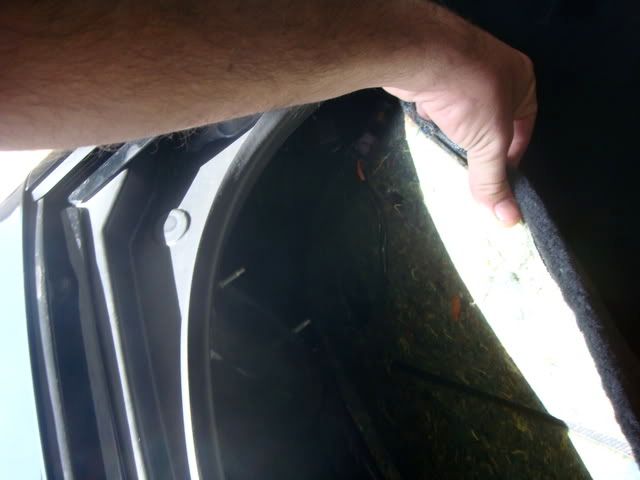
The rear speaker panels are quite difficult to remove. The hydraulic arm and rubber boot (that lifts the hatch open) goes through the speaker panel. Your first instinct is to pop the panel out from the clips. Once you have the panel loose, it’s stuck and offers very little clearance to the rear speaker area.
I wanted to have easy clearance to these areas. Behind the speaker, the remainder of the rear tire well is exposed with sheet metal. Proper insulation of this area would reduce tire noise.
The solution is to remove the hydraulic arm. Before proceeding further, get some good rope and tie the hatch door up to the garage door or something above. Once you remove one hydraulic arm the hatch will come down and it is quite heavy.
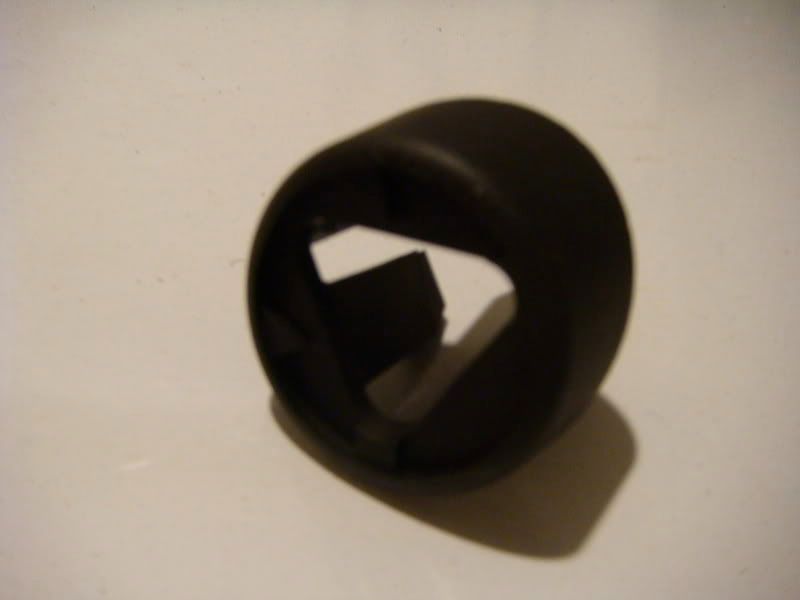
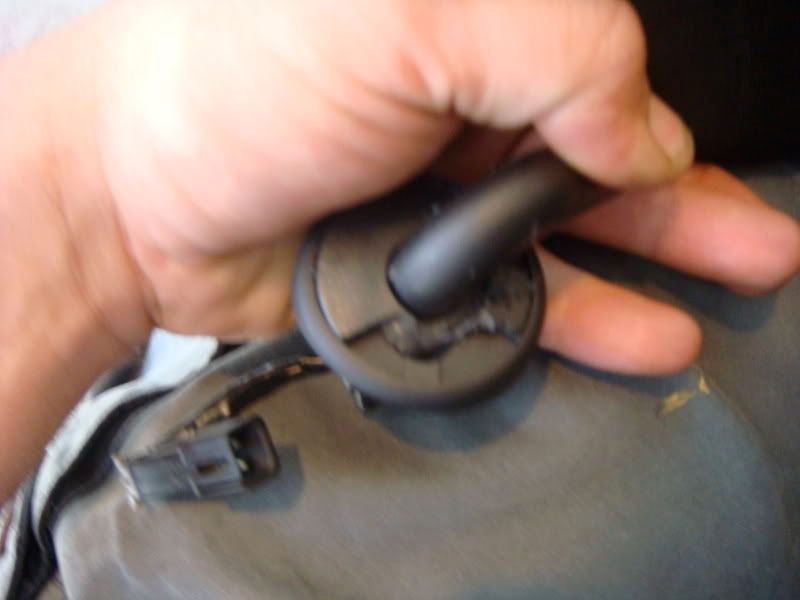
From the top of the hydraulic arm there is a little connector, just tug it off. Then twist the barrel until the top part detaches. You may have to lift the hatch door a little bit higher than it normaly sits.
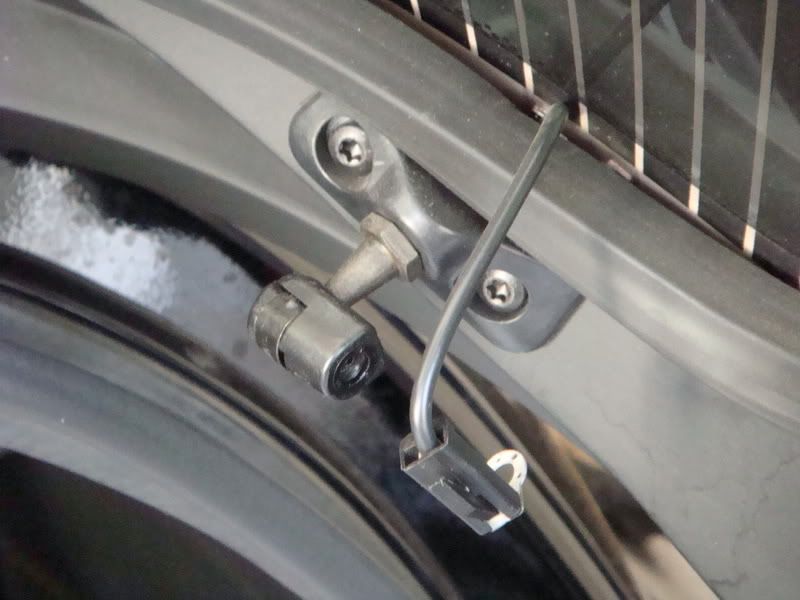
The second step, removal of the bottom part of the hydraulic arm is slightly more difficult. Find a small flat screwdriver; insert it onto the small lock ring. If you look closely, you can see the area to insert the screwdriver. From there, very slowly pull the lock ring out PARTIALLY. You do not want to take it off. I have read that others have done so, and it was a PITA to put it back. Once you have the lock ring partially out, just tug a bit and the hydraulic arm will come out.
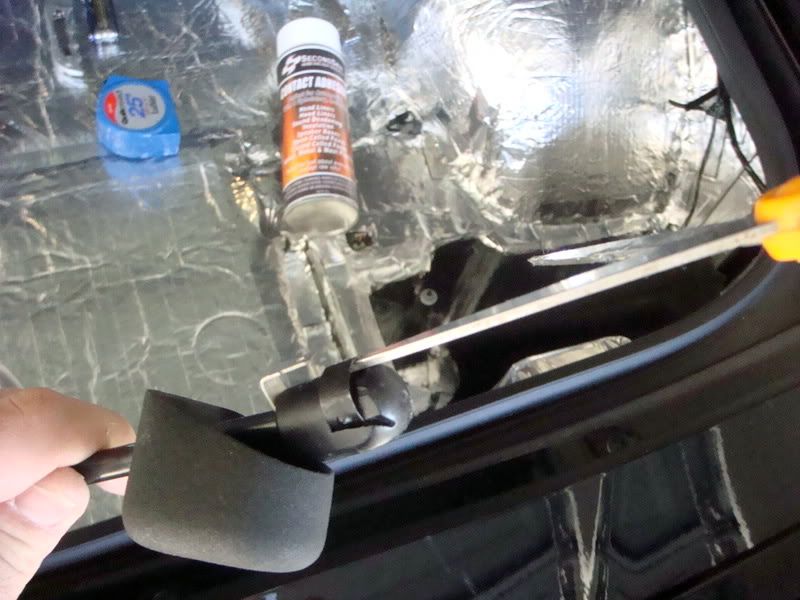
If you have a good understanding on this process, it shouldn’t take more than 5 minutes to do. Once you have the hydraulic arm and panels out, you will have good access to the rear speakers and rear portion of the tire tunnel.
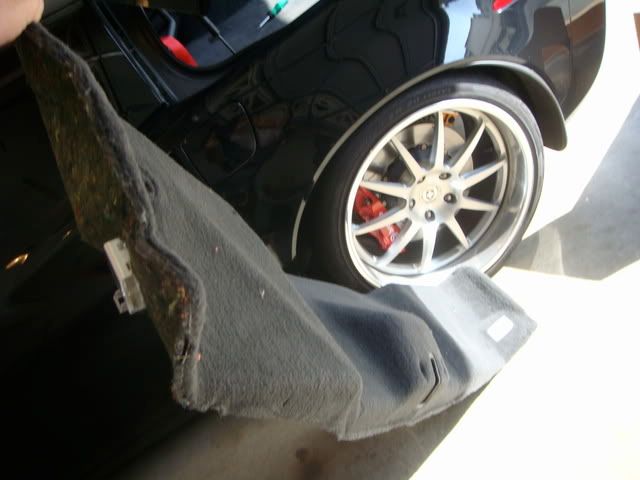
Removal – Headliner
Taking off the headliner is not that easy. Most of the rear portion pops off from the clips.
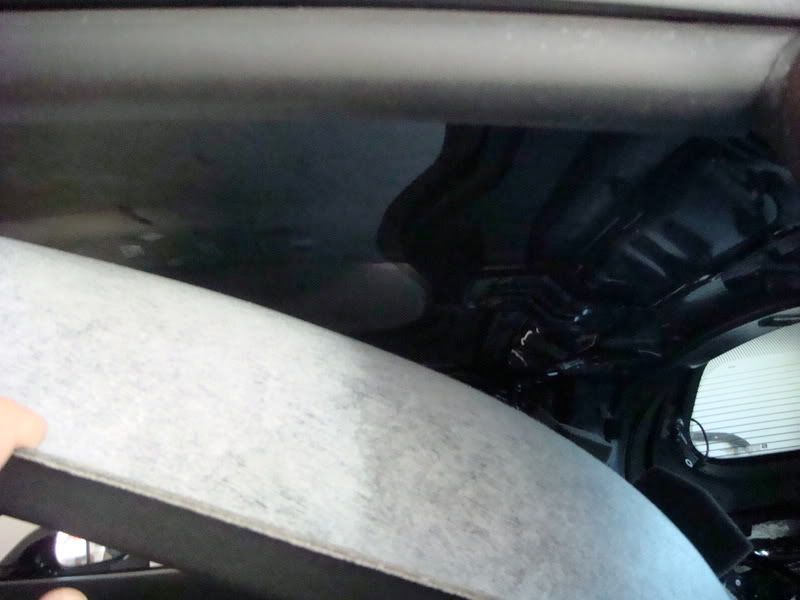
The front part is where it’s all secured down with bolts. The only problem is the sunshade. In order to take off the final bolts, you have to take off the lock cap from the sunshade. This one is a PITA.
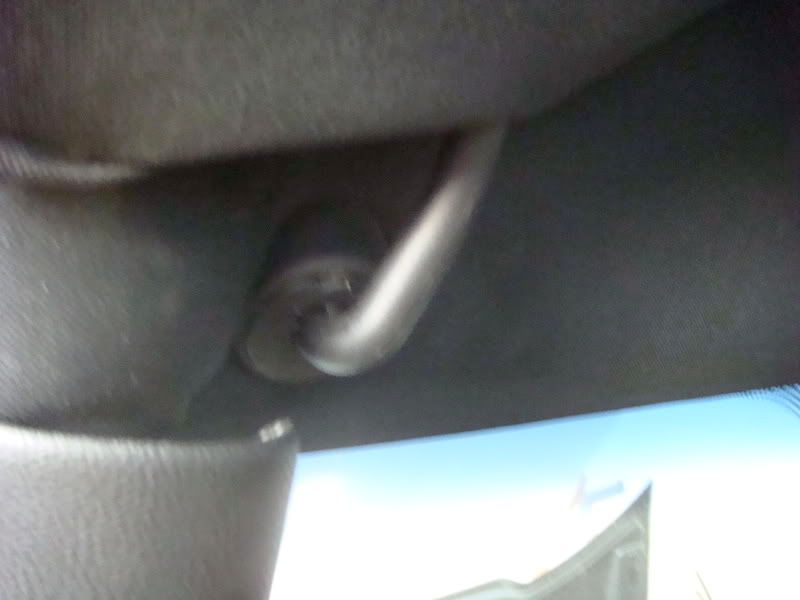
The first sunshade cap I tried to remove got fairly destroyed. Putting a flat screwdriver to pop off the cap does not work without destroying the cap. I got a replacement bezel (outside cap) for $6 on the way.
Don't mess up the inner plastic piece, you will have to order a new sunshade.
The second sunshade cap worked like magic. I tried a different strategy. I pretty much just tugged on the sunshade down. I tried different areas until the cap got loose. I carefully put the flat head screwdriver in and tugged more at different angles. Five minutes later it came out very clean, just have to disconnect the electric connectors going to the sunshade.
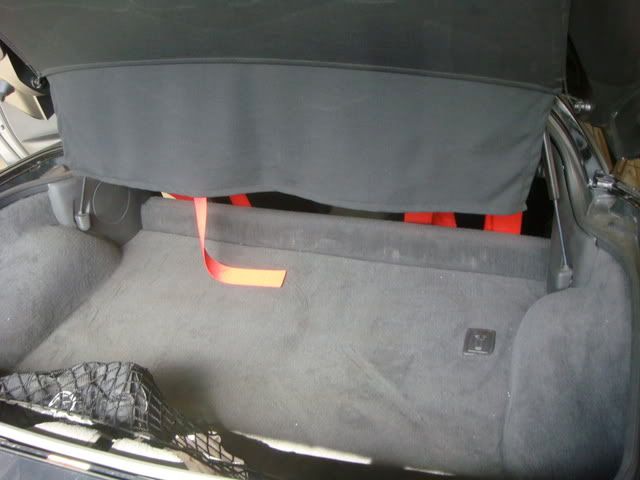
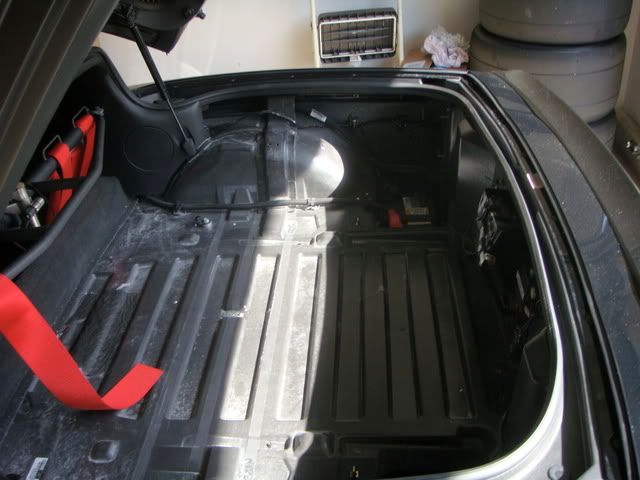
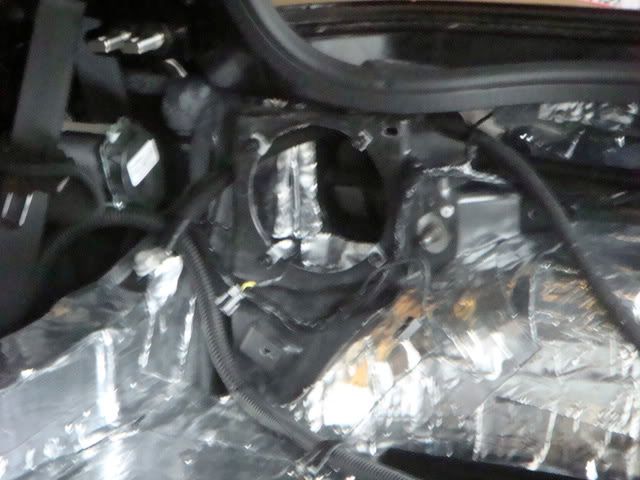
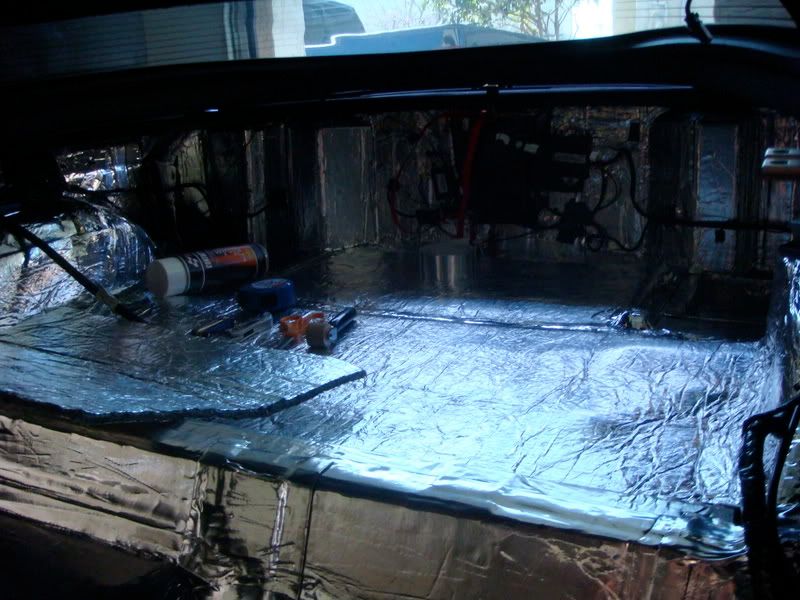
Rear Hatch – First Layer Completed
Damplifier Pro has covered 95% of the rear hatch area. I got all the areas that I could. This includes the entire battery box and behind the whole rear speaker area.
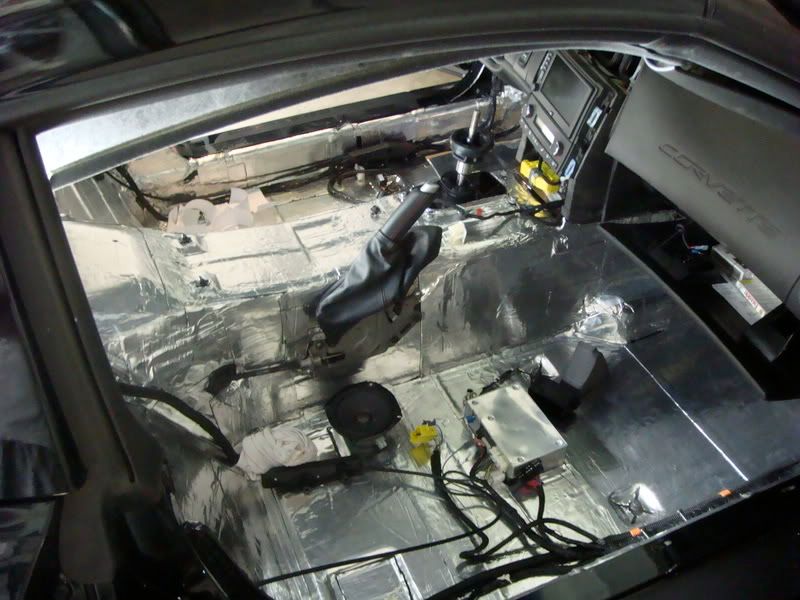
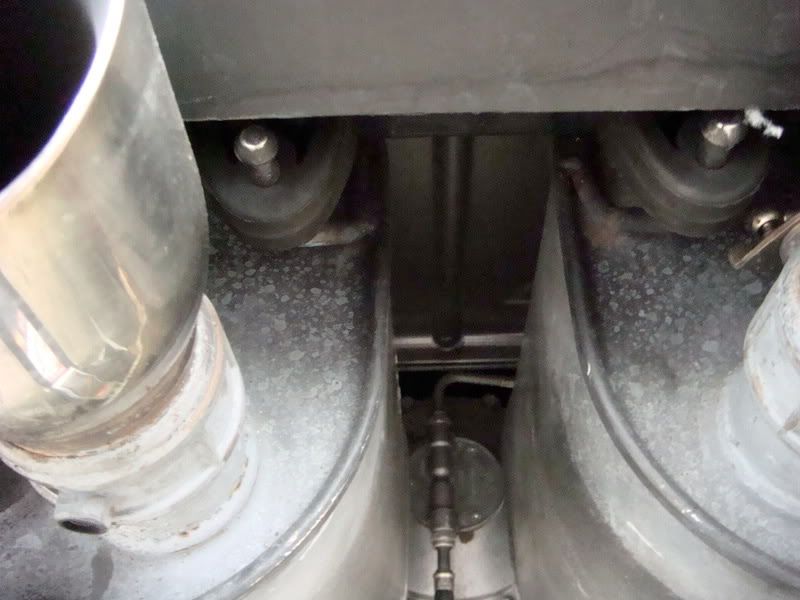
I inspected different areas of the hatch area by tapping onto the metal body. I noticed that the area below the hatch (directly under the exhaust) was a loose metal plate sound. It was obvious that the sound was originating from below the car.
I took out the car jack and lifted the car. Right behind the exhaust barrels, there is a thin metal plate (possibly a heat shield), it felt quite thin and it was creating noise. I covered the whole plate (2ft x 1 ft est. ) in Damplifier Pro, it’s a tight squeeze but it can be done without taking off the exhaust. I did the same test over and the metal clacking sound was obviously reduced from the inside and outside.
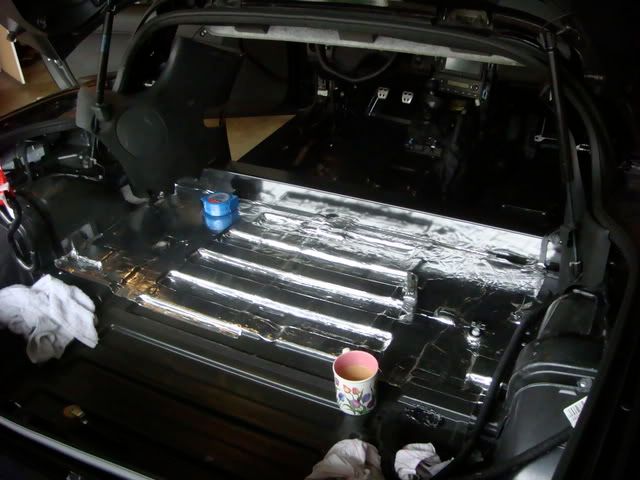
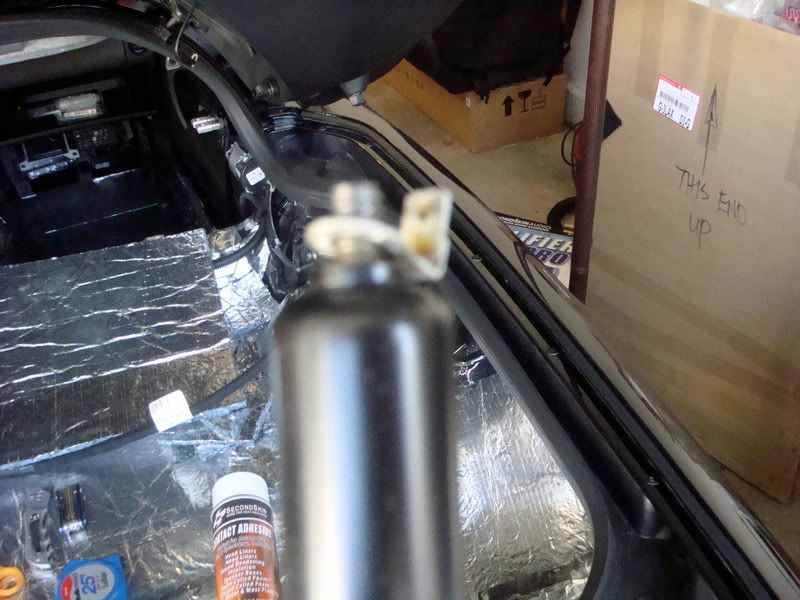
Second Layer – Heatwave Pro
The second layer I placed on the hatch was Heatwave Pro. It comes in large sheets and the material is light. It provides thermal and noise protection. Avoid using a razor blade, this material needs to be cut with some good scissors.
I sprayed on some adhesive to the Heatwave Pro mat and the area it was covering. Watch out for the adhesive over-spray, every time I use it, I get it all over my arms. If you don't have nail polish remover, you got some free hair wax removal.
The second step is to tape the edges with foil tape, it gives it a clean look and it presses the material down. I have almost used two sheets for the rear hatch. I could of used more material but I wanted to leave some space for the third layer (sound barrier material).
To Be Continued
Removal – Rear Speaker Panel
The rear speaker panels are quite difficult to remove. The hydraulic arm and rubber boot (that lifts the hatch open) goes through the speaker panel. Your first instinct is to pop the panel out from the clips. Once you have the panel loose, it’s stuck and offers very little clearance to the rear speaker area.
I wanted to have easy clearance to these areas. Behind the speaker, the remainder of the rear tire well is exposed with sheet metal. Proper insulation of this area would reduce tire noise.
The solution is to remove the hydraulic arm. Before proceeding further, get some good rope and tie the hatch door up to the garage door or something above. Once you remove one hydraulic arm the hatch will come down and it is quite heavy.
From the top of the hydraulic arm there is a little connector, just tug it off. Then twist the barrel until the top part detaches. You may have to lift the hatch door a little bit higher than it normaly sits.
The second step, removal of the bottom part of the hydraulic arm is slightly more difficult. Find a small flat screwdriver; insert it onto the small lock ring. If you look closely, you can see the area to insert the screwdriver. From there, very slowly pull the lock ring out PARTIALLY. You do not want to take it off. I have read that others have done so, and it was a PITA to put it back. Once you have the lock ring partially out, just tug a bit and the hydraulic arm will come out.
If you have a good understanding on this process, it shouldn’t take more than 5 minutes to do. Once you have the hydraulic arm and panels out, you will have good access to the rear speakers and rear portion of the tire tunnel.
Removal – Headliner
Taking off the headliner is not that easy. Most of the rear portion pops off from the clips.
The front part is where it’s all secured down with bolts. The only problem is the sunshade. In order to take off the final bolts, you have to take off the lock cap from the sunshade. This one is a PITA.
The first sunshade cap I tried to remove got fairly destroyed. Putting a flat screwdriver to pop off the cap does not work without destroying the cap. I got a replacement bezel (outside cap) for $6 on the way.
Don't mess up the inner plastic piece, you will have to order a new sunshade.
The second sunshade cap worked like magic. I tried a different strategy. I pretty much just tugged on the sunshade down. I tried different areas until the cap got loose. I carefully put the flat head screwdriver in and tugged more at different angles. Five minutes later it came out very clean, just have to disconnect the electric connectors going to the sunshade.
Rear Hatch – First Layer Completed
Damplifier Pro has covered 95% of the rear hatch area. I got all the areas that I could. This includes the entire battery box and behind the whole rear speaker area.
I inspected different areas of the hatch area by tapping onto the metal body. I noticed that the area below the hatch (directly under the exhaust) was a loose metal plate sound. It was obvious that the sound was originating from below the car.
I took out the car jack and lifted the car. Right behind the exhaust barrels, there is a thin metal plate (possibly a heat shield), it felt quite thin and it was creating noise. I covered the whole plate (2ft x 1 ft est. ) in Damplifier Pro, it’s a tight squeeze but it can be done without taking off the exhaust. I did the same test over and the metal clacking sound was obviously reduced from the inside and outside.
Second Layer – Heatwave Pro
The second layer I placed on the hatch was Heatwave Pro. It comes in large sheets and the material is light. It provides thermal and noise protection. Avoid using a razor blade, this material needs to be cut with some good scissors.
I sprayed on some adhesive to the Heatwave Pro mat and the area it was covering. Watch out for the adhesive over-spray, every time I use it, I get it all over my arms. If you don't have nail polish remover, you got some free hair wax removal
.The second step is to tape the edges with foil tape, it gives it a clean look and it presses the material down. I have almost used two sheets for the rear hatch. I could of used more material but I wanted to leave some space for the third layer (sound barrier material).
To Be Continued
Last edited by 805Z06; 04-10-2008 at 03:51 AM.
03-02-2008, 10:41 AM
#19
Racer


Member Since: Feb 2007
Location: Columbus Ohio
Posts: 474
Likes: 0
Received 0 Likes
on
0 Posts
St. Jude Donor '08
Hey. I see a Nav. You have an 07; 2LZ car. Where is the 'added acoustical' sound deadening stuff from the factory?
I can see myself doing a similar but not quite so involved project myself.
I can see myself doing a similar but not quite so involved project myself.
