
1620 lb Christmas Gift 4 post lift Install VERY Long
 01-07-2008, 09:33 AM
#1
Drifting

Thread Starter
Member Since: Oct 2004
Location: Greensboro, NC "REALITY IS MERELY AN ILLUSION, ALBEIT A VERY PERSISTENT ONE"...ALBERT EINSTEIN"
Posts: 1,413
Likes: 0
Received 0 Likes
on
0 Posts
St. Jude Donor '05-'06-'07
This is the second part of this thread.
This first part is at:
http://forums.corvetteforum.com/show....php?t=1897587
if you are interested, otherwise, here we go
This is a very long post, so sit back and relax while it loads and you take it all in.
Let me start the install portion of this post with a couple of comments / observations:
Good
The website is easy to use and has a ton of information.
Ordering & Customer service is very good. Everyone my wife & I spoke to very friendly & helpful
Delivery was quite fast at 2 days.
The lift is packaged well for shipping, and unpacking it was just as easy (having a chain hoist, pallet jack and a couple of floor jacks didn’t hurt).
Now for the Bad
The instructions were horrible at best. We had to rely almost solely on an exploded parts view that didn’t show enough detail. If I hadn’t printed a couple of pictures off their website and gotten some additional information from you guys, the install would have taken quite a bit longer.
Greg Smith should have a set of instructions that is as good as the lift. Include a few pictures and additional details why don’tcha!
What I used and you need to make the Install easy:
Some sort of lifting device. I had a pallet jack, floor jack and chain hoist. An engine hoist and a couple of floor jacks and stands would probably suffice.
4 strong and preferable taller friends. I actually had 5 but a couple of them were shorter. This really made moving pieces easier and far safer.
Lay down area for parts. Having some room to spread out was nice.
Large Metric sockets and wrenches. Adjustable wrenches won’t work in some of the tighter spots.
Flexible funnel
Now on to the install:
I will be bit@hing about the assembly instructions throughout this write up so get used to it. The instructions indicate that the locking plates and columns are shipped assembled

Not! But this is a good thing. Not having them assembled allows you and your friends to easily lift the cross support into the columns and lower it to the ground.

If you don’t have a lifting aide of some sort it would be a good idea to set the cross support on some blocking or jack stands. The instructions don’t mention about how you are going to be able to thread the cables later. They run on the underside of the ramps and you need to be able to get under them. Doing it now keeps you from having to lift all that additional weight of the ramps.
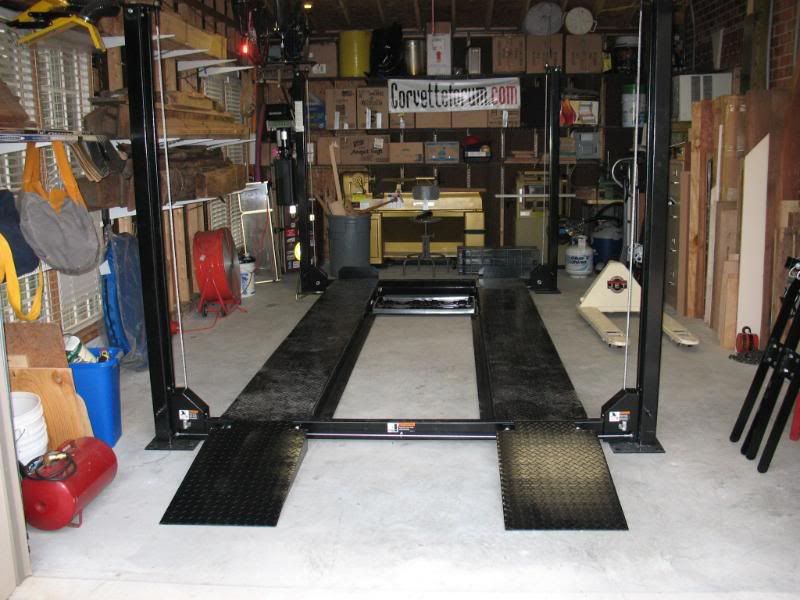
Once you have the cross support in the columns you can start to install the ramps

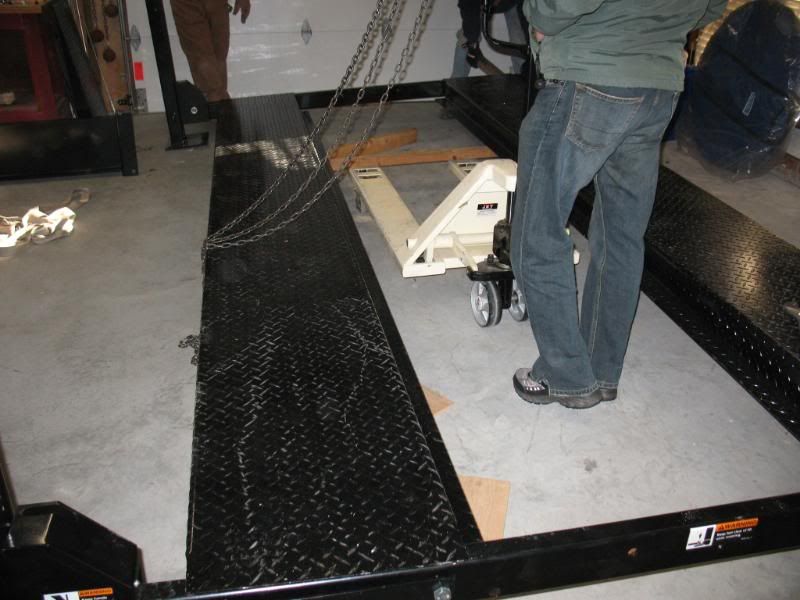
Here is where I got the blocking idea from. We had to lift the cross support and the ramps up to proceed after we installed the ramps. Having 5 people made is doable, but 2 or 3 normal humans would have a tough time lifting all that weight.
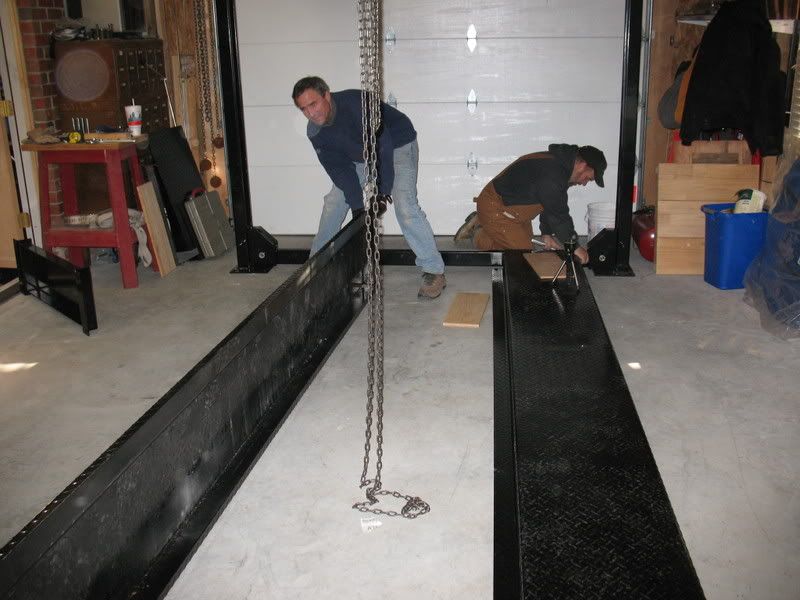
Once we got the ramp assembly off the floor we were able to use the pallet jack and some blocking to raise everything further.
Here is where having done this once will be helpful for future installations. Take the nuts off of the locking tracks and install the threaded end into the column caps.

Take special note of the location of the slotted hole. This needs to line up directly over the pulley in the cross support. Had this little nugget been explained in the instructions or the exploded view shown a bit more detail we wouldn’t have lost time taking them ALL back off and swapping them.

Now is a good time to install the locking tracks and column caps. They both can just be lowered inside the column and through the slots in the UHMW plastic runners.
They slide right on down and past the locking mechanisms.
They did not indicate how high or low these tracks need to be so we just settled on having the threaded end slightly proud of the locking nut. This should and did make all of the tracks an even distance from the top.
At this point we lifted the cross supports and ramps up until the locking mechanisms engaged. With no cable both the primary and secondary locks should engage. This was also a time when taller friends helped to lift the whole thing up to a height that you could work under or in our case a height where the shorter guys pressed it up even higher.
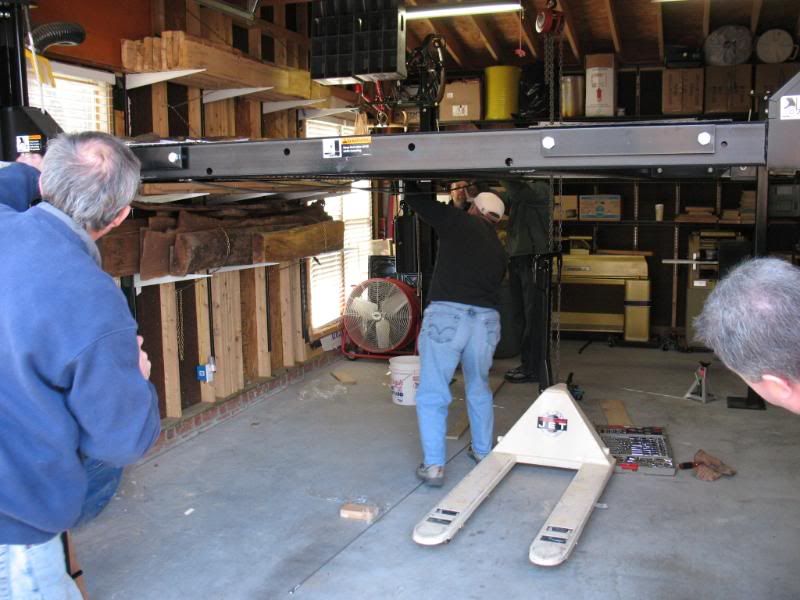
With all that done it was time to string the lifting cables. There was an exploded view for this but not labels on the diagram or cables so it was trial and error. Really not all that bad. It is pretty evident which length cables go where based on the location of the hydraulic cylinder.

Another important detail that was not covered in the directions and barely noticeable in the exploded view is the location of the cable as it passes through the cross support.

It needs to be in front of the nylon pulley and behind the metal pulley. Otherwise the secondary lock will not disengage.
All of the cables attach to the end of the hydraulic lift cylinder


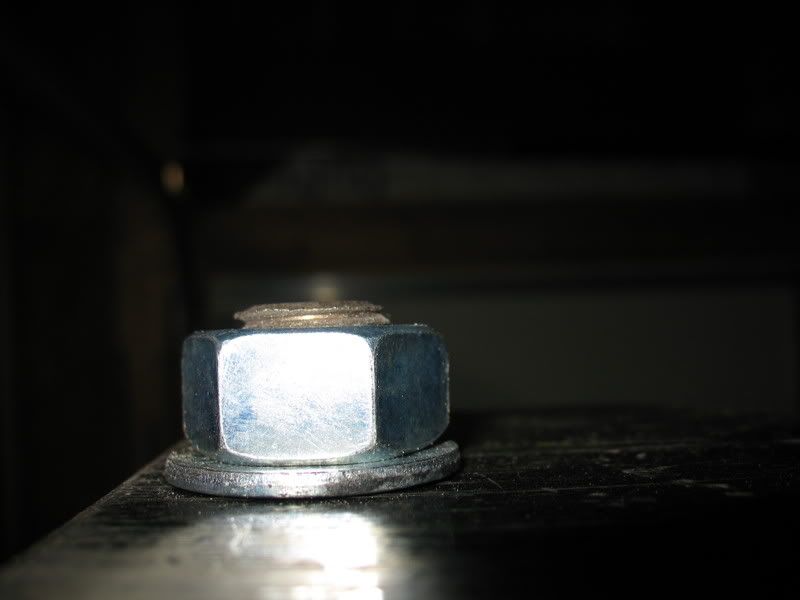
Make sure the locking nut is at least hand tight on the end of the cylinder. You need to go back and tighten it at the end (no mention again in the directions……Do you see a pattern!)
You just pull out the cylinder to get the cable as tight as possible by hand. Once you fire up the cylinder and pump this will take care of it’s self
Now is when we hung the hydraulic pump and attached the hoses. You can mount the pump any time after the ramps are in place, but it’s just one more thing to have to watch for as you move around the lift during assembly.
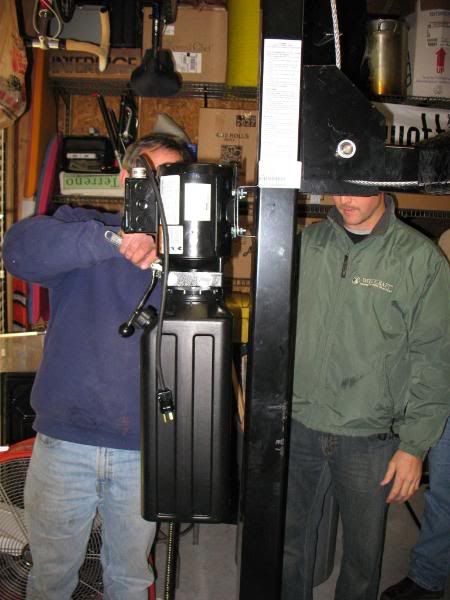
We added a large flat washer at the fitting as it goes though the ramp to take the pressure off the fitting. This is where the hose flexes as the lift goes up and down.

Before you hook the hose to the cylinder you need to run the pump to fill the line with fluid. I happens pretty quick. Have something to catch the oil and discard it. You don’t want any contaminates in the cylinder (this is actually covered in the instructions) Once you get all of the fittings tight you can add the hydraulic fluid. You will need a flexible funnel due to the size and angle of the fill port.
I would have been nice to have a translucent strip on the tank to keep track of how much fluid was in the tank.

It was no big deal, but it would be a nice touch. The directions call for 3 gallons so we estimated the best we could. We wound up adding more later.
When you first fire up the pump the manufacturer recommend doing it 2 second intervals while you fill the cylinder. 2 seconds on wait 2 and so on. You will start to see the cylinder move, and then notice a change in the sound of the pump as it loads up. At this point we raised the lift up until the pump started cavitating due to air in the pump from lack of fluid. We added some additional fluid and continued to the top. We then lowered the lift all the way to the bottom which purged all of the air out of the system. This will go a bit quicker if some of your help will stand on the lift the final 2-feet or so.
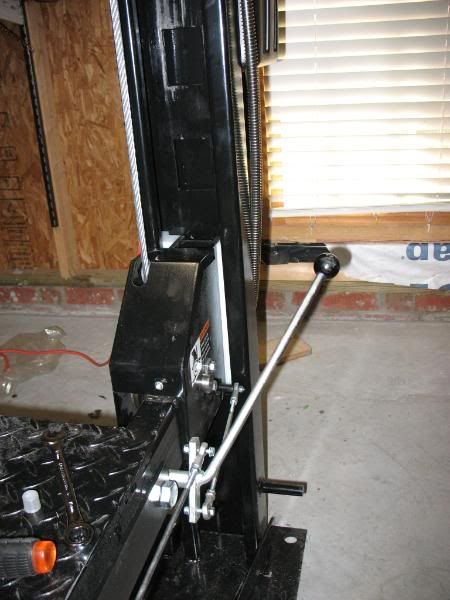
At this point they have you install the locking rods and handle. I would do this prior to attaching the hydraulic lines. Yet another shortfall of the instructions.
You need to make sure you have adequate room at both ends of the lift at this point since 1 rod is 9-feet long and the other is 4-feet. They have quite a bit of flex, but they will also bend easily.

Fully locked position.
You have to adjust the tie ends to make sure that both front and back assemblies are in the same position.
Remember to tighten the lock nuts. I forgot and they came loose and I couldn’t lower the lift since the locks we engaged.
Now you have to adjust the cables at all of the columns.
You start by raising the lift to a locking point of your choosing (my words not the manufacture’s. They have you do it at the second locking point but that is way too much bending for an old man) we raised the lift to about 3-feet off the concrete and started there.
You bring the lift up so that the top of one of the cross support pulley assemblies is flush with the top or bottom of a locking hole. We used the one near the handle since it was easy to watch while raising the lift.
You then go around to all of the remaining columns and find the highest one. This one may not be the one you used to start with.
Go to the column where the assembly is the highest and tighten the locking nut on the top of the column so 3 threads are exposed.
You mark this height and transfer it to the other columns and cables to get the lift equal all around by tightening the cable nut to raise the assembly to the desired height.

A lifting device will help here to take a bit of the weight off to ease in the wrench work raising the lift.
You will also need a pair of vice grips to hold the cable while tightening the top nut.

This first part is at:
http://forums.corvetteforum.com/show....php?t=1897587
if you are interested, otherwise, here we go
This is a very long post, so sit back and relax while it loads and you take it all in.
Let me start the install portion of this post with a couple of comments / observations:
Good
The website is easy to use and has a ton of information.
Ordering & Customer service is very good. Everyone my wife & I spoke to very friendly & helpful
Delivery was quite fast at 2 days.
The lift is packaged well for shipping, and unpacking it was just as easy (having a chain hoist, pallet jack and a couple of floor jacks didn’t hurt).
Now for the Bad
The instructions were horrible at best. We had to rely almost solely on an exploded parts view that didn’t show enough detail. If I hadn’t printed a couple of pictures off their website and gotten some additional information from you guys, the install would have taken quite a bit longer.
Greg Smith should have a set of instructions that is as good as the lift. Include a few pictures and additional details why don’tcha!
What I used and you need to make the Install easy:
Some sort of lifting device. I had a pallet jack, floor jack and chain hoist. An engine hoist and a couple of floor jacks and stands would probably suffice.
4 strong and preferable taller friends. I actually had 5 but a couple of them were shorter. This really made moving pieces easier and far safer.
Lay down area for parts. Having some room to spread out was nice.
Large Metric sockets and wrenches. Adjustable wrenches won’t work in some of the tighter spots.
Flexible funnel
Now on to the install:
I will be bit@hing about the assembly instructions throughout this write up so get used to it. The instructions indicate that the locking plates and columns are shipped assembled
Not! But this is a good thing. Not having them assembled allows you and your friends to easily lift the cross support into the columns and lower it to the ground.
If you don’t have a lifting aide of some sort it would be a good idea to set the cross support on some blocking or jack stands. The instructions don’t mention about how you are going to be able to thread the cables later. They run on the underside of the ramps and you need to be able to get under them. Doing it now keeps you from having to lift all that additional weight of the ramps.
Once you have the cross support in the columns you can start to install the ramps
Here is where I got the blocking idea from. We had to lift the cross support and the ramps up to proceed after we installed the ramps. Having 5 people made is doable, but 2 or 3 normal humans would have a tough time lifting all that weight.
Once we got the ramp assembly off the floor we were able to use the pallet jack and some blocking to raise everything further.
Here is where having done this once will be helpful for future installations. Take the nuts off of the locking tracks and install the threaded end into the column caps.
Take special note of the location of the slotted hole. This needs to line up directly over the pulley in the cross support. Had this little nugget been explained in the instructions or the exploded view shown a bit more detail we wouldn’t have lost time taking them ALL back off and swapping them.
Now is a good time to install the locking tracks and column caps. They both can just be lowered inside the column and through the slots in the UHMW plastic runners.
They slide right on down and past the locking mechanisms.
They did not indicate how high or low these tracks need to be so we just settled on having the threaded end slightly proud of the locking nut. This should and did make all of the tracks an even distance from the top.
At this point we lifted the cross supports and ramps up until the locking mechanisms engaged. With no cable both the primary and secondary locks should engage. This was also a time when taller friends helped to lift the whole thing up to a height that you could work under or in our case a height where the shorter guys pressed it up even higher.
With all that done it was time to string the lifting cables. There was an exploded view for this but not labels on the diagram or cables so it was trial and error. Really not all that bad. It is pretty evident which length cables go where based on the location of the hydraulic cylinder.
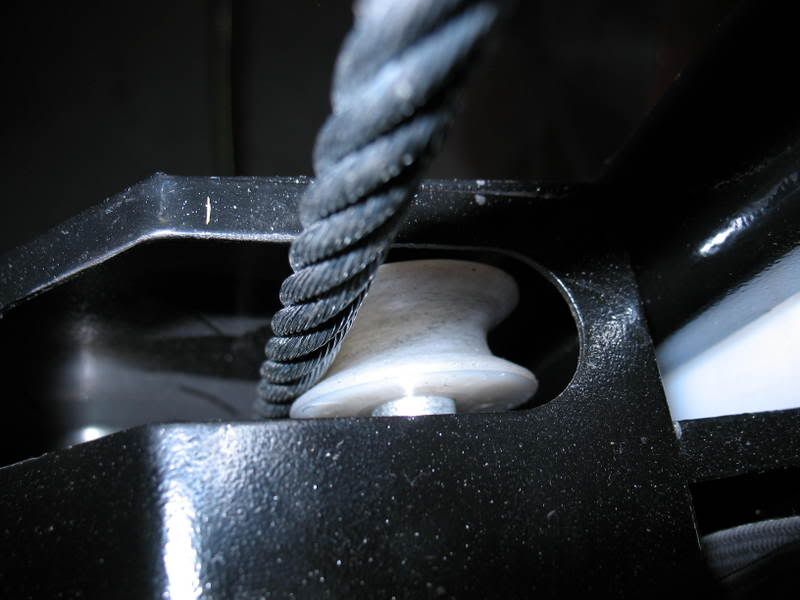
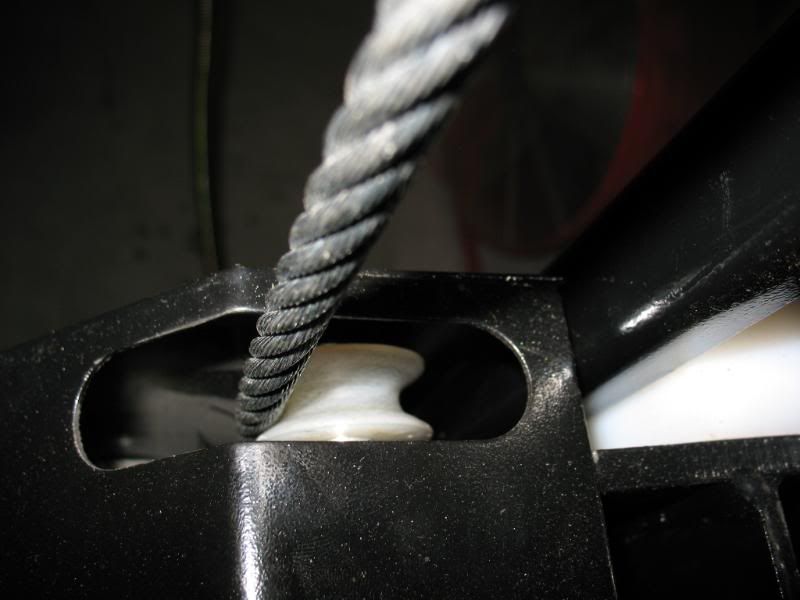
Another important detail that was not covered in the directions and barely noticeable in the exploded view is the location of the cable as it passes through the cross support.
It needs to be in front of the nylon pulley and behind the metal pulley. Otherwise the secondary lock will not disengage.
All of the cables attach to the end of the hydraulic lift cylinder
Make sure the locking nut is at least hand tight on the end of the cylinder. You need to go back and tighten it at the end (no mention again in the directions……Do you see a pattern!)
You just pull out the cylinder to get the cable as tight as possible by hand. Once you fire up the cylinder and pump this will take care of it’s self
Now is when we hung the hydraulic pump and attached the hoses. You can mount the pump any time after the ramps are in place, but it’s just one more thing to have to watch for as you move around the lift during assembly.
We added a large flat washer at the fitting as it goes though the ramp to take the pressure off the fitting. This is where the hose flexes as the lift goes up and down.
Before you hook the hose to the cylinder you need to run the pump to fill the line with fluid. I happens pretty quick. Have something to catch the oil and discard it. You don’t want any contaminates in the cylinder (this is actually covered in the instructions) Once you get all of the fittings tight you can add the hydraulic fluid. You will need a flexible funnel due to the size and angle of the fill port.
I would have been nice to have a translucent strip on the tank to keep track of how much fluid was in the tank.
It was no big deal, but it would be a nice touch. The directions call for 3 gallons so we estimated the best we could. We wound up adding more later.
When you first fire up the pump the manufacturer recommend doing it 2 second intervals while you fill the cylinder. 2 seconds on wait 2 and so on. You will start to see the cylinder move, and then notice a change in the sound of the pump as it loads up. At this point we raised the lift up until the pump started cavitating due to air in the pump from lack of fluid. We added some additional fluid and continued to the top. We then lowered the lift all the way to the bottom which purged all of the air out of the system. This will go a bit quicker if some of your help will stand on the lift the final 2-feet or so.
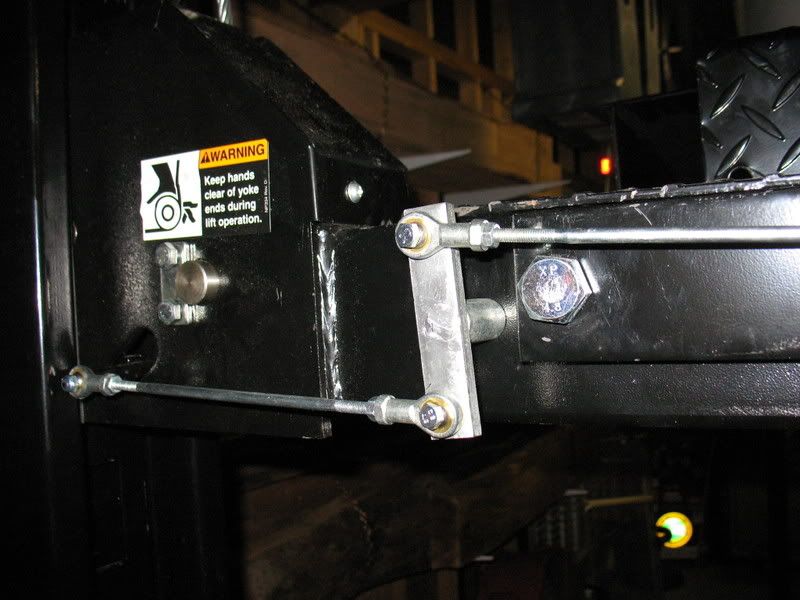
At this point they have you install the locking rods and handle. I would do this prior to attaching the hydraulic lines. Yet another shortfall of the instructions.
You need to make sure you have adequate room at both ends of the lift at this point since 1 rod is 9-feet long and the other is 4-feet. They have quite a bit of flex, but they will also bend easily.
Fully locked position.
You have to adjust the tie ends to make sure that both front and back assemblies are in the same position.
Remember to tighten the lock nuts. I forgot and they came loose and I couldn’t lower the lift since the locks we engaged.
Now you have to adjust the cables at all of the columns.
You start by raising the lift to a locking point of your choosing (my words not the manufacture’s. They have you do it at the second locking point but that is way too much bending for an old man) we raised the lift to about 3-feet off the concrete and started there.
You bring the lift up so that the top of one of the cross support pulley assemblies is flush with the top or bottom of a locking hole. We used the one near the handle since it was easy to watch while raising the lift.
You then go around to all of the remaining columns and find the highest one. This one may not be the one you used to start with.
Go to the column where the assembly is the highest and tighten the locking nut on the top of the column so 3 threads are exposed.
You mark this height and transfer it to the other columns and cables to get the lift equal all around by tightening the cable nut to raise the assembly to the desired height.
A lifting device will help here to take a bit of the weight off to ease in the wrench work raising the lift.
You will also need a pair of vice grips to hold the cable while tightening the top nut.
Last edited by NCSU SEE 5; 02-10-2008 at 11:42 AM.
 01-07-2008, 09:33 AM
#2
Drifting
Thread Starter
Member Since: Oct 2004
Location: Greensboro, NC "REALITY IS MERELY AN ILLUSION, ALBEIT A VERY PERSISTENT ONE"...ALBERT EINSTEIN"
Posts: 1,413
Likes: 0
Received 0 Likes
on
0 Posts
St. Jude Donor '05-'06-'07
Continued
You can now check to see if the secondary locks are working. These are designed to engage if any of the cables break or the hydraulic cylinder looses fluid or fails. Any slack in the cables for any reason releases tension on the nylon pulleys engaging the secondary locks
Tension = Secondary lock engaged.
Slack = Secondary lock NOT engaged.
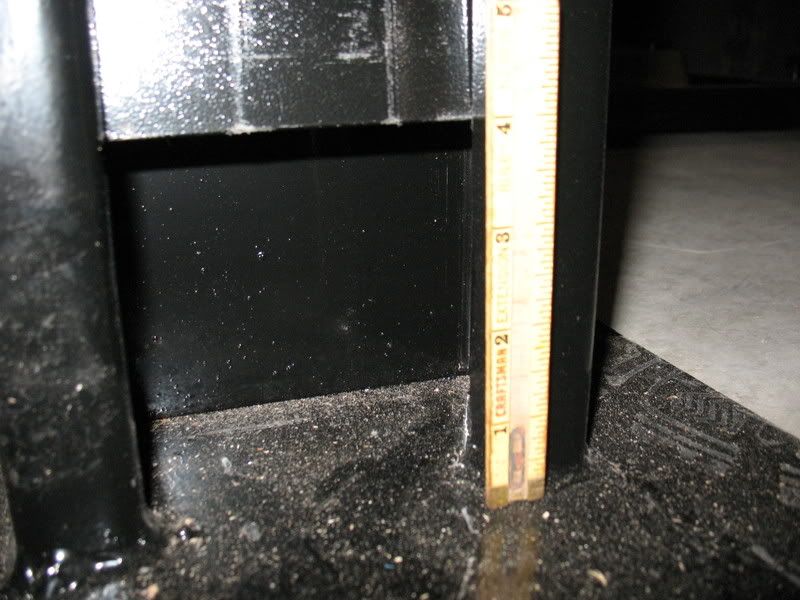
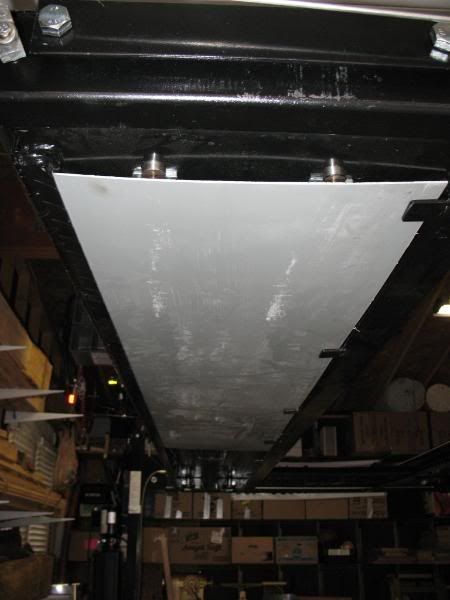
If the threaded rods holding the locking plates were to fail the maximum drop would be no more that about 4-inches. Here is a pic of the bottom of the locking plate as installed.
Well now it the time to attempt the first lift.
I used the DD as the sacrificial lamb.
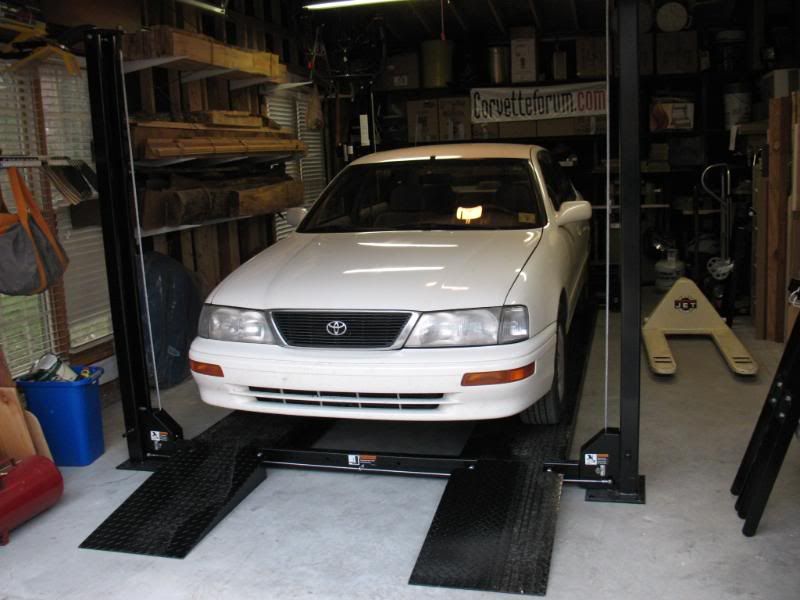
Success!!

No problems going up or down, so now for the Vette!

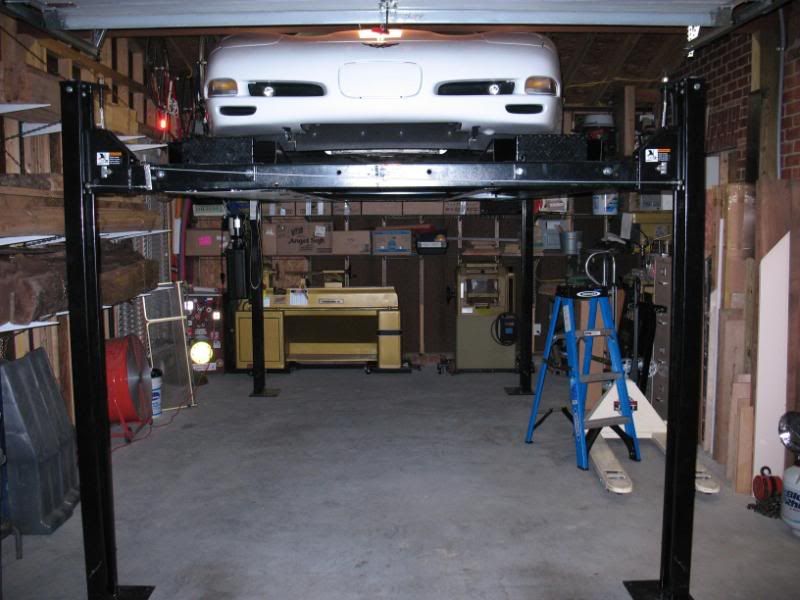
And again SUCCESS!!
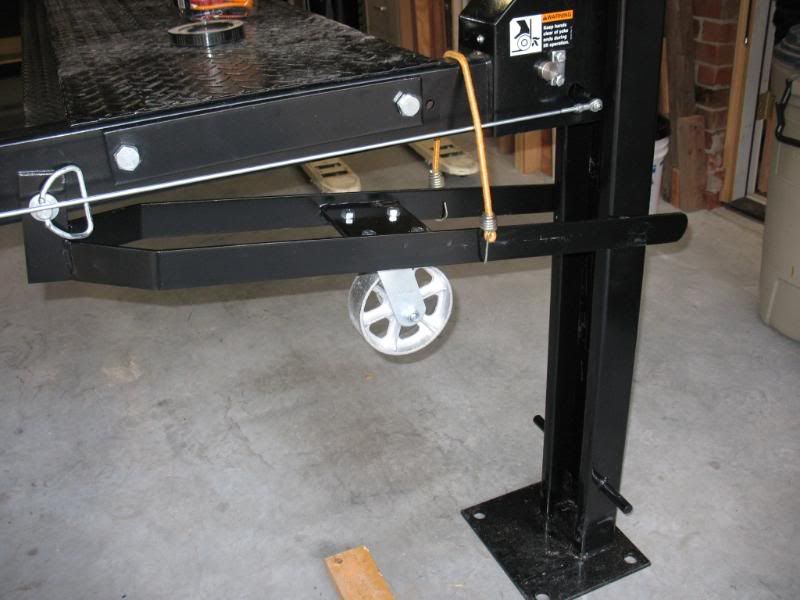
I had to move the lift around a bit after the initial Vette lift to maximize the ceiling height. The caster kit made quick easy work of this. It is unreal how easy this lift rolls. The urethane wheels would only be needed for a rough surface. On my garage floor it almost moved too freely.
Here are the casters attached.
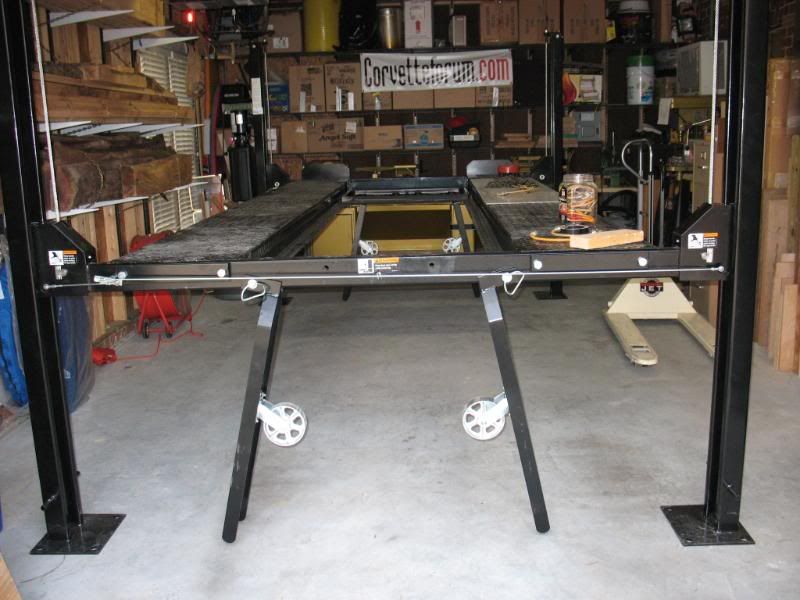
Here they are engaged. They ride up under the pegs on the columns creating a lever.

For future moves I will lower the lift a bit further before installing the casters. They would hang on the floor and hold the lift up so I did this.
Once I got the lift in the place I wanted I was able to raise the Vette to the maximum stop but it is a bit close for my taste.
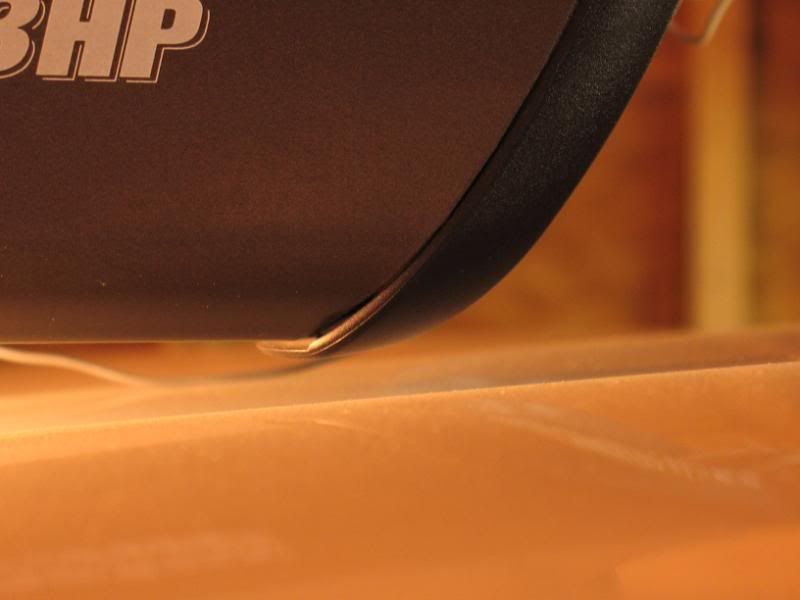


Once the lift settles back onto the locks it looks a little better.
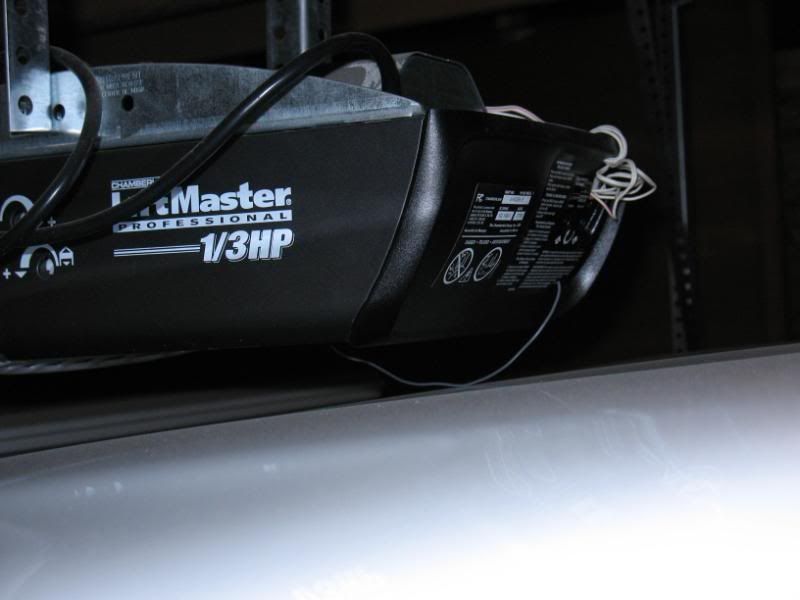

I can’t do anything about the beam but I should be able to adjust the garage door opener a bit and be OK with out any additional work to the garage door.
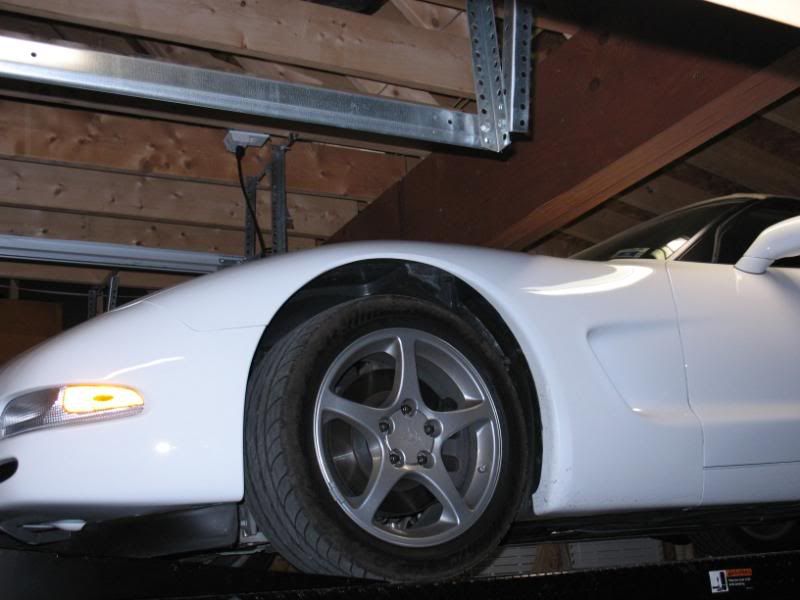
I will be putting some very bold and colorful marks on the column at the pump to remind me of how close things really are up there

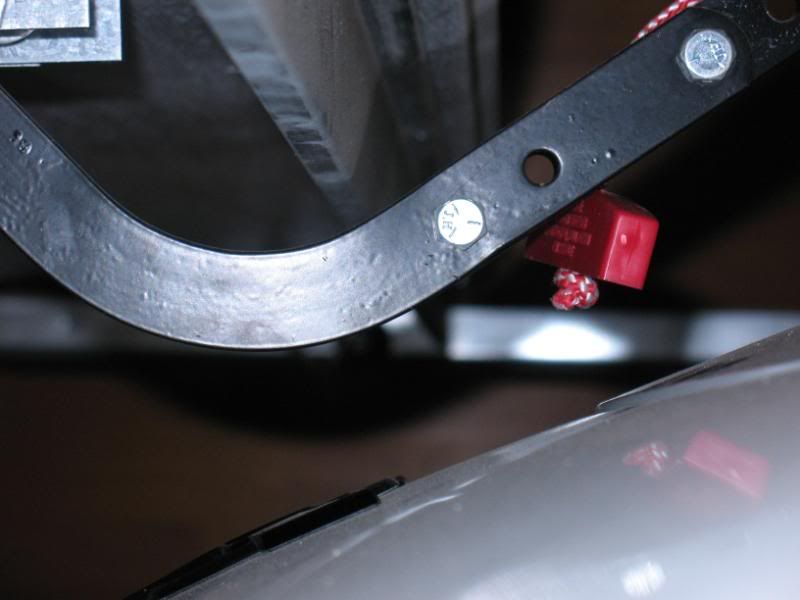
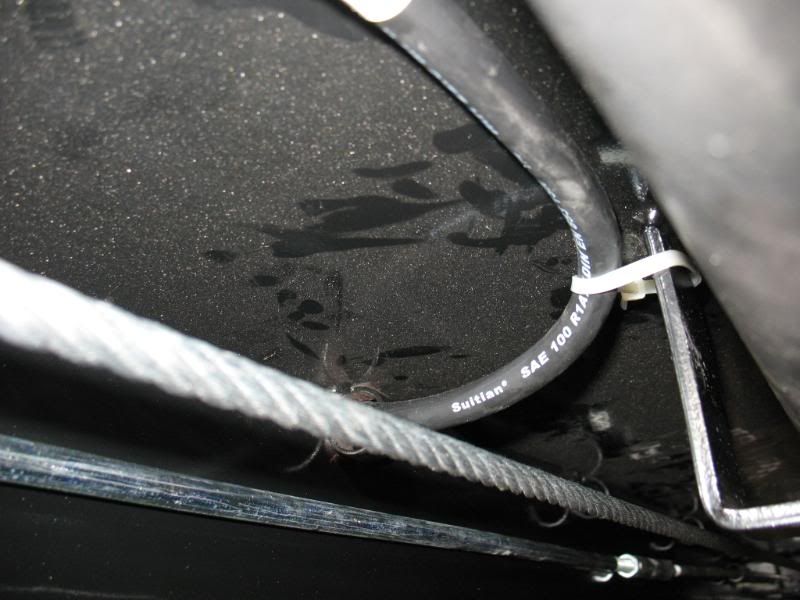
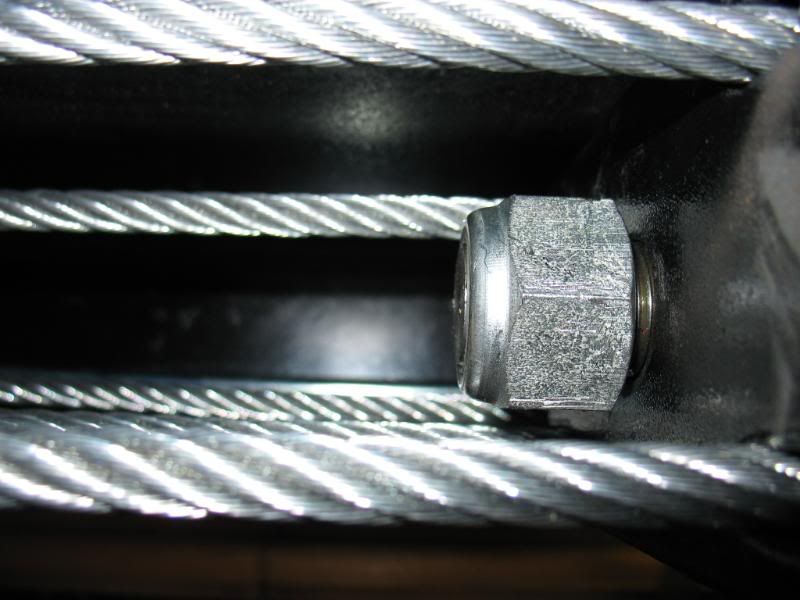
With all of this done it was time to button everything up. With the lift up I checked all of the cable, locking rods and hydraulic hoses. I am glad I took the time to do this. During the ‘walk around’ I found this.

The cable was rubbing the hydraulic line and could eventually cause it to fail. No big deal, I just adjusted the fitting to angle it up.
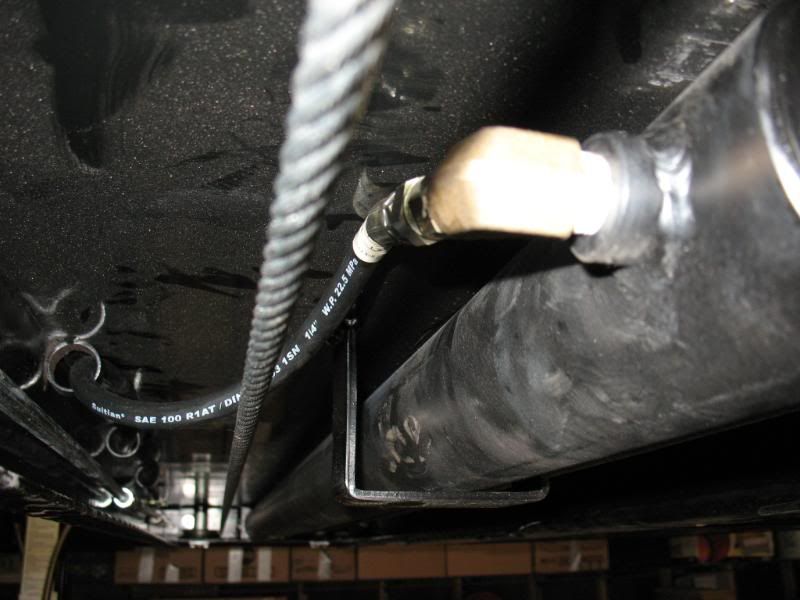
Added a wire tie and all should be OK, but I will check in a couple of months.
I installed the plastic panels under the lift cylinder ramp.
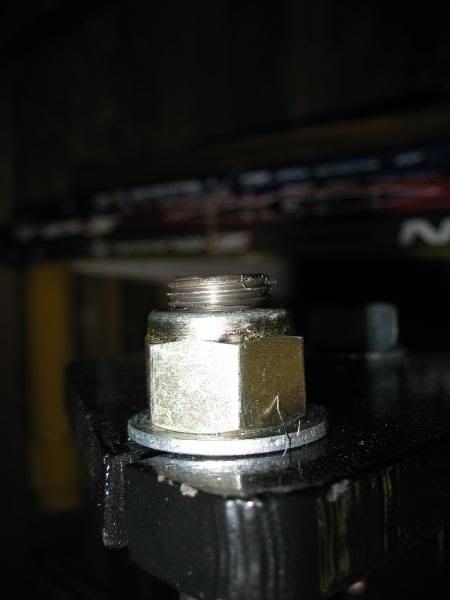
Repeated the cable adjustments described earlier and I was done. Or so I thought. Remember this
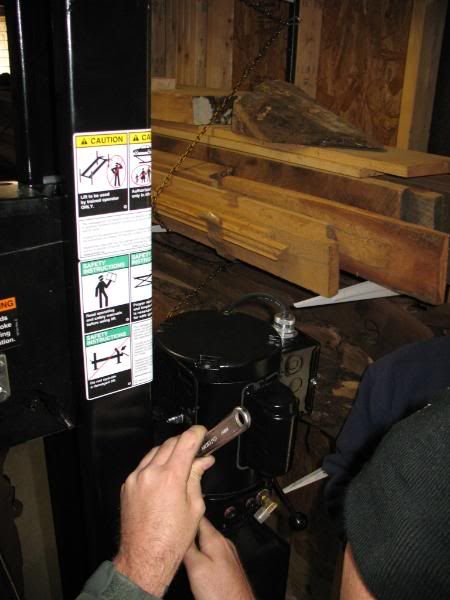
This was still only hand tight and no mention in the instructions to tighten it and I had forgotten it. Fortunately my brother-in-law remembered and called me. Pulled one of the panels and tightened it up. There is a slot on the hydraulic cylinder to get a wrench on so you can tighten the locking nut. Other wise the cylinder just spins.
I think that just about does it. Hope this wasn’t too long but I wanted to cover it in as much detail as possible you other will have an easier time with lift assemblies.
Here is where the rest of the pictures are if you want to have a look.
http://smg.photobucket.com/albums/v6...20Post%20Lift/
PLEASE let me know if find any errors or have any questions. I am sure I will be editing this for the next few days as I hear back from you or remember another detail.
Finally, A BIG THANKS to Jeff D., Guy R., Mark H., Clay B., and Chris D. for all of their help with this. If not for these guys, the lift would still be sitting on the floor of the garage.
Cheers and happy lifting!
Robbie
.
You can now check to see if the secondary locks are working. These are designed to engage if any of the cables break or the hydraulic cylinder looses fluid or fails. Any slack in the cables for any reason releases tension on the nylon pulleys engaging the secondary locks
Tension = Secondary lock engaged.
Slack = Secondary lock NOT engaged.
If the threaded rods holding the locking plates were to fail the maximum drop would be no more that about 4-inches. Here is a pic of the bottom of the locking plate as installed.
Well now it the time to attempt the first lift.
I used the DD as the sacrificial lamb.
Success!!
No problems going up or down, so now for the Vette!
And again SUCCESS!!
I had to move the lift around a bit after the initial Vette lift to maximize the ceiling height. The caster kit made quick easy work of this. It is unreal how easy this lift rolls. The urethane wheels would only be needed for a rough surface. On my garage floor it almost moved too freely.
Here are the casters attached.
Here they are engaged. They ride up under the pegs on the columns creating a lever.
For future moves I will lower the lift a bit further before installing the casters. They would hang on the floor and hold the lift up so I did this.
Once I got the lift in the place I wanted I was able to raise the Vette to the maximum stop but it is a bit close for my taste.
Once the lift settles back onto the locks it looks a little better.
I can’t do anything about the beam but I should be able to adjust the garage door opener a bit and be OK with out any additional work to the garage door.
I will be putting some very bold and colorful marks on the column at the pump to remind me of how close things really are up there
With all of this done it was time to button everything up. With the lift up I checked all of the cable, locking rods and hydraulic hoses. I am glad I took the time to do this. During the ‘walk around’ I found this.
The cable was rubbing the hydraulic line and could eventually cause it to fail. No big deal, I just adjusted the fitting to angle it up.
Added a wire tie and all should be OK, but I will check in a couple of months.
I installed the plastic panels under the lift cylinder ramp.
Repeated the cable adjustments described earlier and I was done. Or so I thought. Remember this
This was still only hand tight and no mention in the instructions to tighten it and I had forgotten it. Fortunately my brother-in-law remembered and called me. Pulled one of the panels and tightened it up. There is a slot on the hydraulic cylinder to get a wrench on so you can tighten the locking nut. Other wise the cylinder just spins.
I think that just about does it. Hope this wasn’t too long but I wanted to cover it in as much detail as possible you other will have an easier time with lift assemblies.
Here is where the rest of the pictures are if you want to have a look.
http://smg.photobucket.com/albums/v6...20Post%20Lift/
PLEASE let me know if find any errors or have any questions. I am sure I will be editing this for the next few days as I hear back from you or remember another detail.
Finally, A BIG THANKS to Jeff D., Guy R., Mark H., Clay B., and Chris D. for all of their help with this. If not for these guys, the lift would still be sitting on the floor of the garage.
Cheers and happy lifting!
Robbie
.
Last edited by NCSU SEE 5; 02-10-2008 at 11:44 AM.
 01-07-2008, 09:43 AM
#4
Drifting
Thread Starter
Member Since: Oct 2004
Location: Greensboro, NC "REALITY IS MERELY AN ILLUSION, ALBEIT A VERY PERSISTENT ONE"...ALBERT EINSTEIN"
Posts: 1,413
Likes: 0
Received 0 Likes
on
0 Posts
St. Jude Donor '05-'06-'07
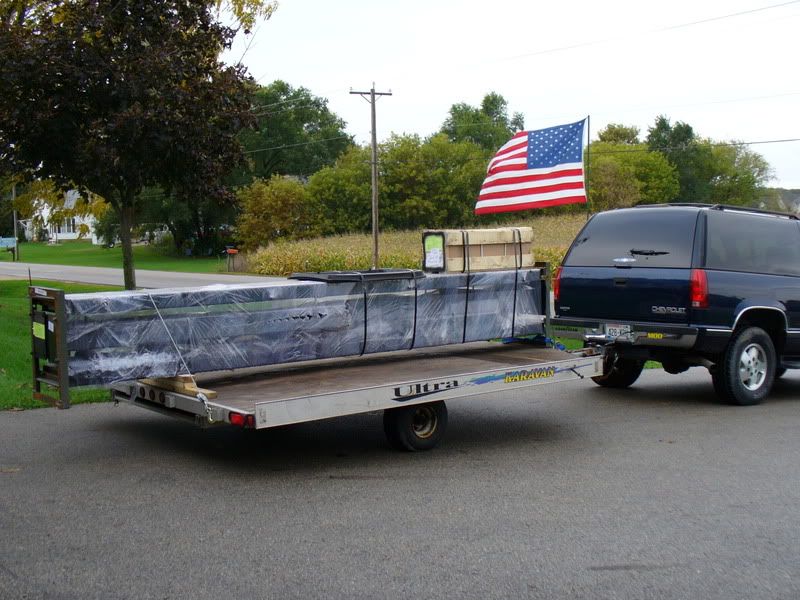
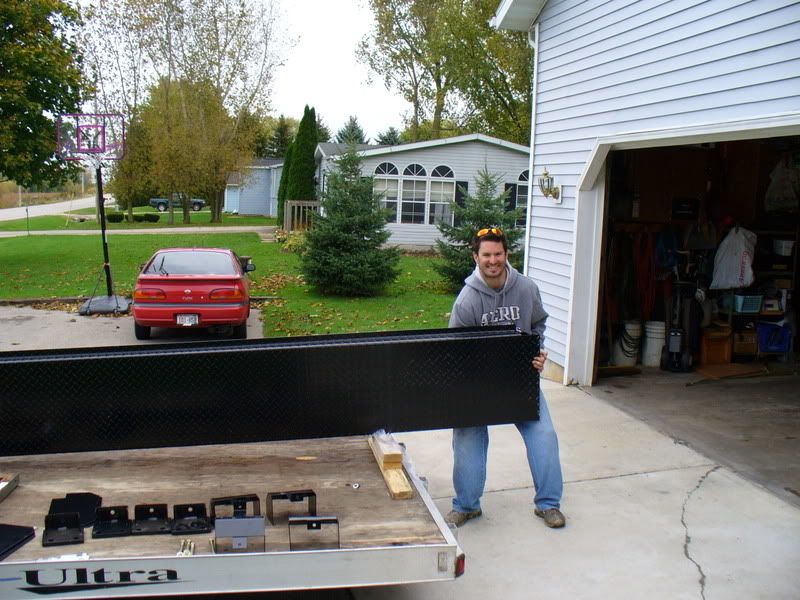
But with caster kit I can just roll it up on to a trailer and haul it.
.


 01-07-2008, 10:15 AM
#8
Drifting
Thread Starter
Member Since: Oct 2004
Location: Greensboro, NC "REALITY IS MERELY AN ILLUSION, ALBEIT A VERY PERSISTENT ONE"...ALBERT EINSTEIN"
Posts: 1,413
Likes: 0
Received 0 Likes
on
0 Posts
St. Jude Donor '05-'06-'07
I completely forgot. It should be the height of the car at it's tallest point plus ~6-inches. I will take a measurement when I get home. You have to lift the car a bit over 72-inches to get clear of the locks. Then it settles back to 72.
Thanks for the reminder.
.
Thanks for the reminder.
.
01-07-2008, 10:24 AM
#9
Le Mans Master


I marked mine with maximum height lines. Orange for the '99, and red for the '64. These marks are for the highest point that I can lift and get a lock. You don't have a lot of extra height, so you may want to do something like this to keep you from raising the car just a little too high and causing any damage.

01-07-2008, 10:47 AM
#10
Le Mans Master


Sweet! Do you feel the quality is sufficient? I was looking into backyard buddy put for 4200!!! +++ I saw this as an option...... Also would be interested in install quotes for VA/DC area.
01-07-2008, 12:11 PM
#11
Burning Brakes

Great write-up.Yours is a little different than mine.
I'm concerned about your beam.When you have to raise
the lift to clear the locks don't you need almost 2"?
I think the cables came connected to my beams on mine.Did yours?
Always watch all four corners when lowering to make sure a corner lock isn't catching!
Remember your helpers with oil changes.Enjoy!DINO
01-07-2008, 01:25 PM
#13
Burning Brakes
I picked it up at the depot.They loaded it with there forklift.Then when I got it home I uncrated it on the trailer.
01-07-2008, 05:18 PM
#14
Drifting
Thread Starter
Member Since: Oct 2004
Location: Greensboro, NC "REALITY IS MERELY AN ILLUSION, ALBEIT A VERY PERSISTENT ONE"...ALBERT EINSTEIN"
Posts: 1,413
Likes: 0
Received 0 Likes
on
0 Posts
St. Jude Donor '05-'06-'07
I marked mine with maximum height lines. Orange for the '99, and red for the '64. These marks are for the highest point that I can lift and get a lock. You don't have a lot of extra height, so you may want to do something like this to keep you from raising the car just a little too high and causing any damage.
.
01-07-2008, 05:23 PM
#15
Drifting
Thread Starter
Member Since: Oct 2004
Location: Greensboro, NC "REALITY IS MERELY AN ILLUSION, ALBEIT A VERY PERSISTENT ONE"...ALBERT EINSTEIN"
Posts: 1,413
Likes: 0
Received 0 Likes
on
0 Posts
St. Jude Donor '05-'06-'07
Sorry I don't have any pictures, but it was a bit scary. I had a fork lift to get it on the trailer so that part was cake.
.
01-07-2008, 05:33 PM
#16
Drifting
Thread Starter
Member Since: Oct 2004
Location: Greensboro, NC "REALITY IS MERELY AN ILLUSION, ALBEIT A VERY PERSISTENT ONE"...ALBERT EINSTEIN"
Posts: 1,413
Likes: 0
Received 0 Likes
on
0 Posts
St. Jude Donor '05-'06-'07
This is a well made lift. I don't have any complaints with the construction or operation of it. I would reccomend this to others.
Installation might get a bit pricey considering I have to bring along all my help. I can consider a consulting fee

.


 01-07-2008, 05:41 PM
#18
Scientific Negotiator

Member Since: Jul 2005
Location: USA
Posts: 6,400
Received 1,837 Likes
on
1,019 Posts
St. Jude Donor '07-'08-'10, '14

 And Jon really knows his stuff!!!!
01-07-2008, 09:16 PM
And Jon really knows his stuff!!!!
01-07-2008, 09:16 PM
#19
Drifting
Thread Starter
Member Since: Oct 2004
Location: Greensboro, NC "REALITY IS MERELY AN ILLUSION, ALBEIT A VERY PERSISTENT ONE"...ALBERT EINSTEIN"
Posts: 1,413
Likes: 0
Received 0 Likes
on
0 Posts
St. Jude Donor '05-'06-'07
Based on my vert. 72-inches to the bottom of the ramp and then 55-inches to clear the car = 127-inches total. That allows you to lift the car to the full height of the lift. You can certainly do with less if you can get by with less clearance under the lift.
.
.
01-07-2008, 09:18 PM
#20
Drifting
Thread Starter
Member Since: Oct 2004
Location: Greensboro, NC "REALITY IS MERELY AN ILLUSION, ALBEIT A VERY PERSISTENT ONE"...ALBERT EINSTEIN"
Posts: 1,413
Likes: 0
Received 0 Likes
on
0 Posts
St. Jude Donor '05-'06-'07