
1971 Journey
 04-15-2020, 06:42 PM
#1641
Melting Slicks

Thread Starter

Thanks for the comments Lars.
Yes i still have the carb but its only a display item now.
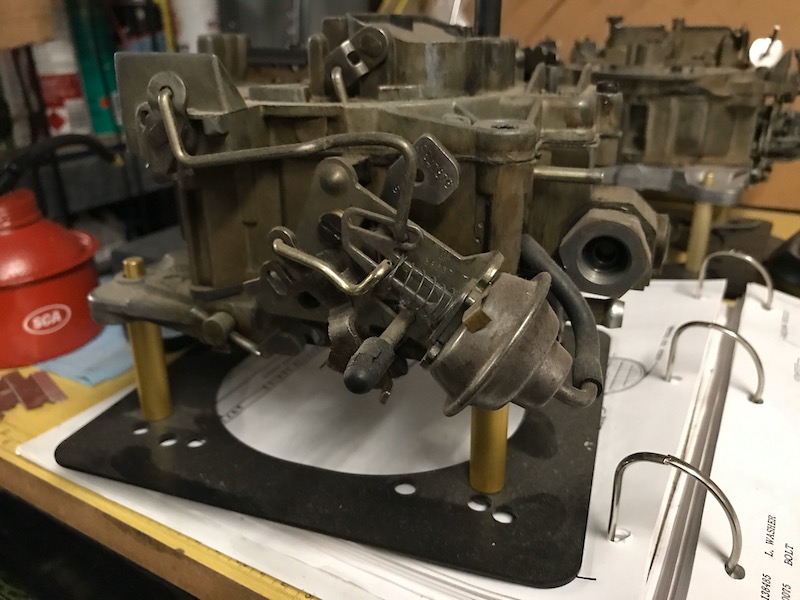
From its serial number its an early 70's truck carb and I cleaned and updated it so it worked fairly well. Being in Australia It was hard to get some of the parts but I purchased a few bare shell carbs on eBay and swapped parts.
I learned heaps pulling them all apart and finding the differences. I think at last count I have 7 or 8 carb shells in my shed.
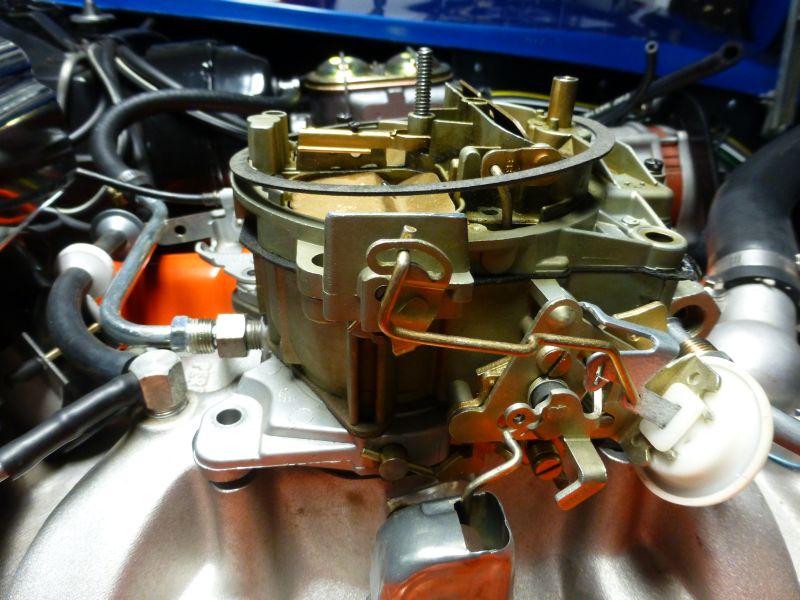
However I replace it with a restored correct month serial # one a few years later.
Yes i still have the carb but its only a display item now.
From its serial number its an early 70's truck carb and I cleaned and updated it so it worked fairly well. Being in Australia It was hard to get some of the parts but I purchased a few bare shell carbs on eBay and swapped parts.
I learned heaps pulling them all apart and finding the differences. I think at last count I have 7 or 8 carb shells in my shed.
However I replace it with a restored correct month serial # one a few years later.
Last edited by CraigH; 04-10-2023 at 06:59 AM.

The following users liked this post:
Primoz (04-16-2020)
04-19-2020, 07:31 PM
#1642
Melting Slicks
Thread Starter
While putting the dash back I noticed one of the electrical connectors on the wiper solenoid was broken so...I checked what a new one cost and how long it would take to get here then decided to pull it apart.
After drilling out the rivet heads I found a broken connection to the coil so with some brass wire I soldered a leg onto the electrical tab and then soldered the coil wire to that.
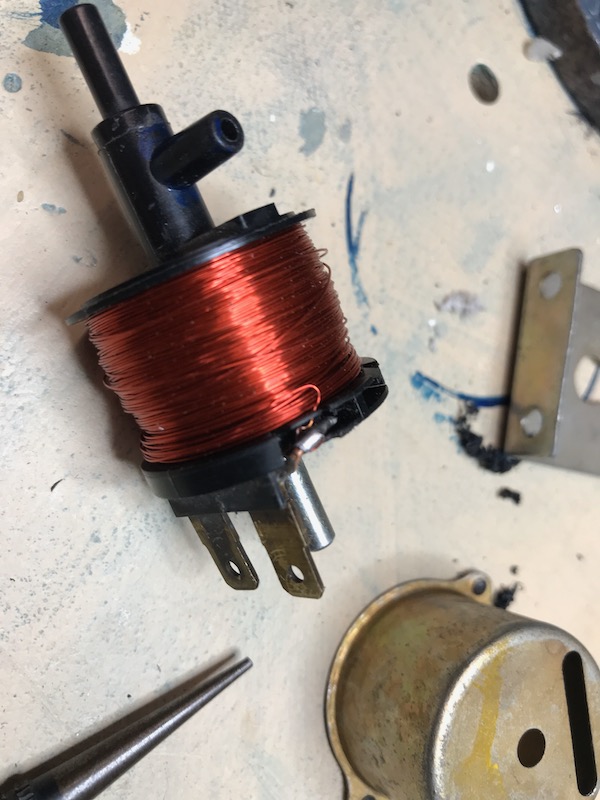
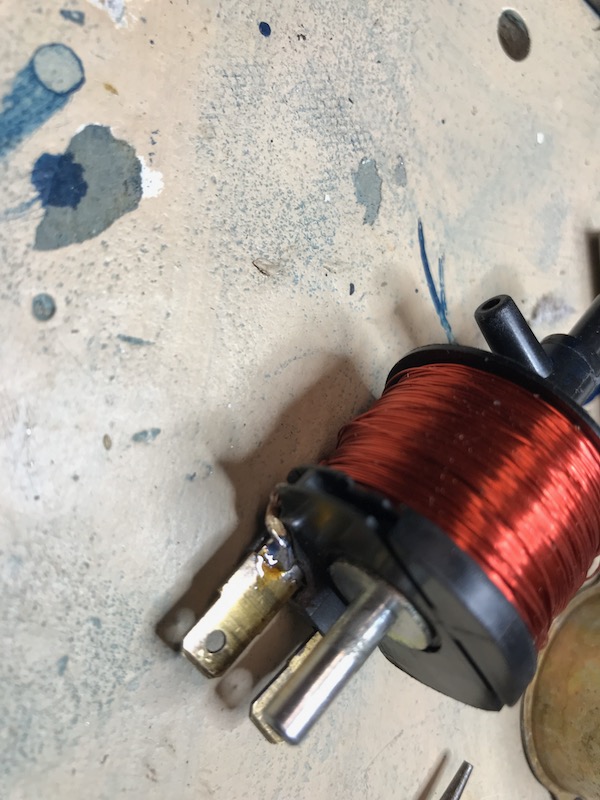
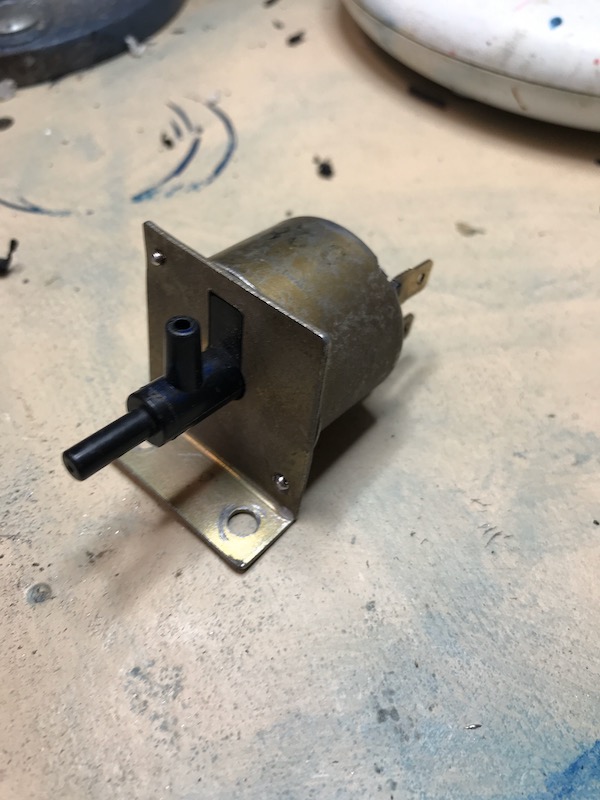
I needed to enlarge the hole the electrical tabs came through to ensure no short circuits but once back together it all worked fine.
To make the case close up I did not have any small rivets like used so just tapped the originals in place with a hammer and nail punch and added a dot of solder to each for good measure.
After drilling out the rivet heads I found a broken connection to the coil so with some brass wire I soldered a leg onto the electrical tab and then soldered the coil wire to that.
I needed to enlarge the hole the electrical tabs came through to ensure no short circuits but once back together it all worked fine.
To make the case close up I did not have any small rivets like used so just tapped the originals in place with a hammer and nail punch and added a dot of solder to each for good measure.
Last edited by CraigH; 04-10-2023 at 06:59 AM.
The following 4 users liked this post by CraigH:
The following users liked this post:
Primoz (04-22-2020)
04-21-2020, 08:52 PM
#1644
Melting Slicks
Thread Starter
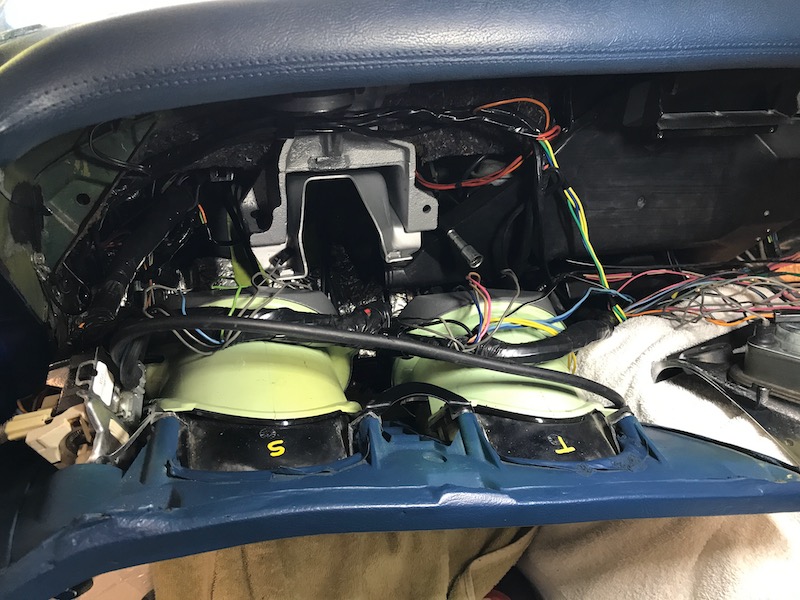
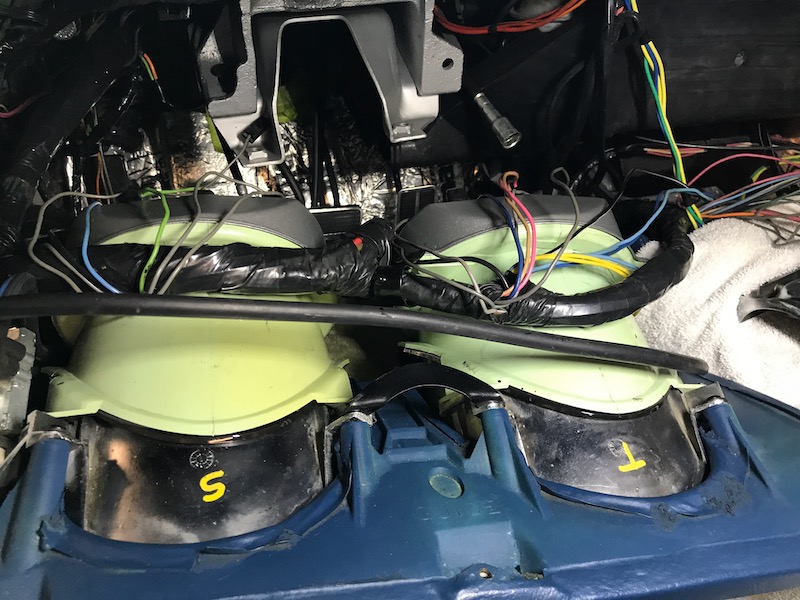
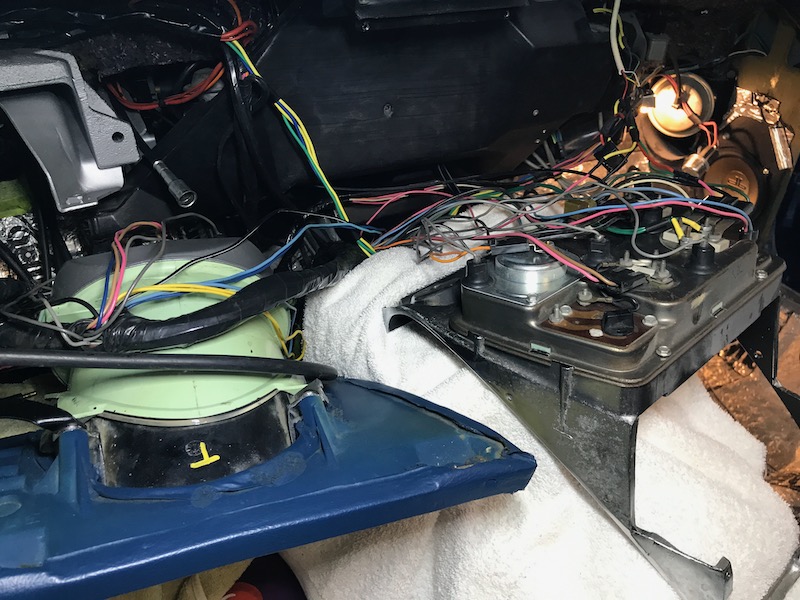
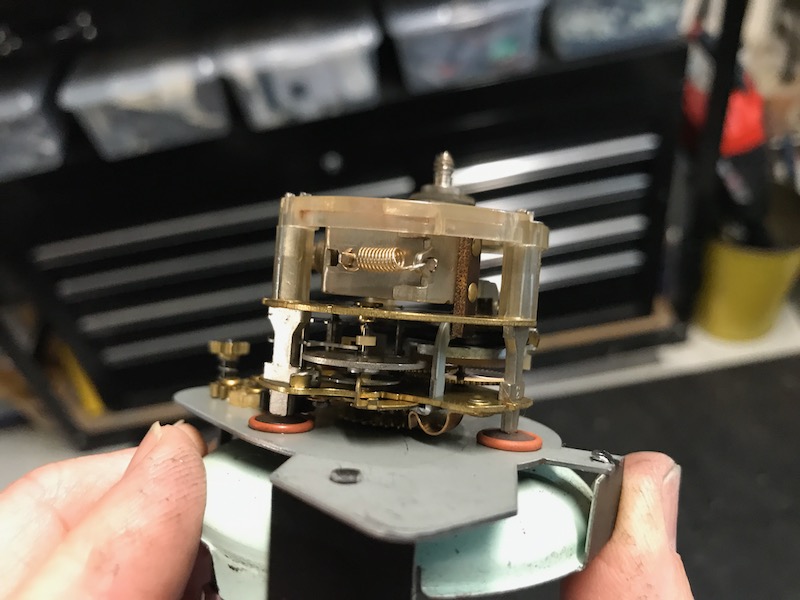
While i have the centre gauge cluster out I thought why not go back to the original clock.
So I found this great link posted a number of years back.... http://pcfred.com/Vettetip/FixC3Clock.htm
And went to work on my old one.
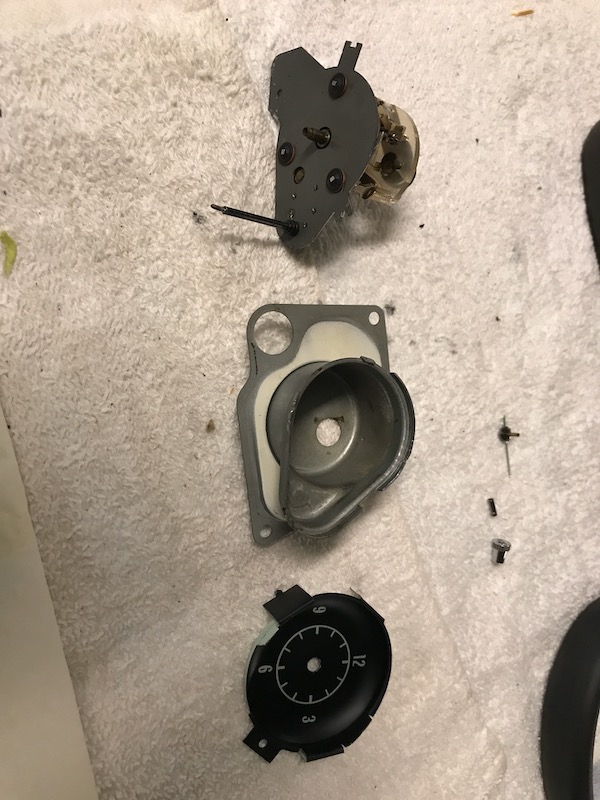
Easy to take apart and i had less fear after pulling the speedo and taco apart.
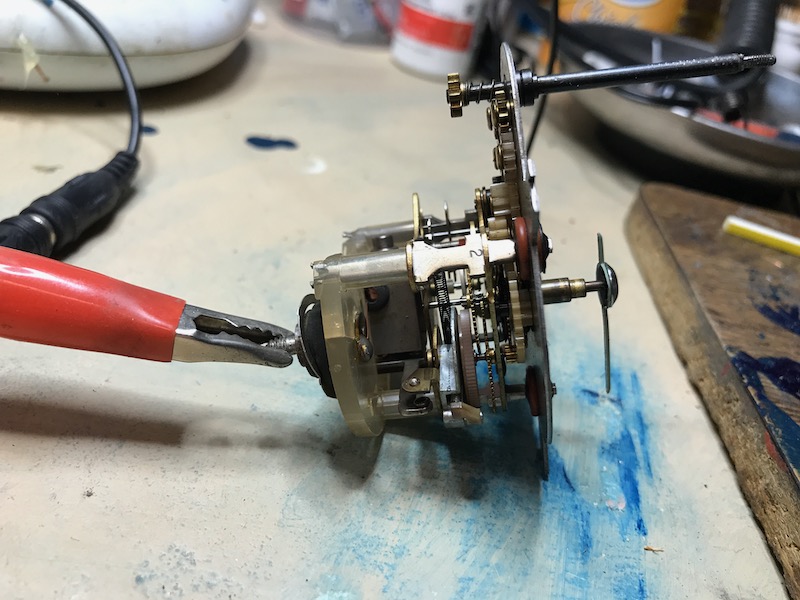
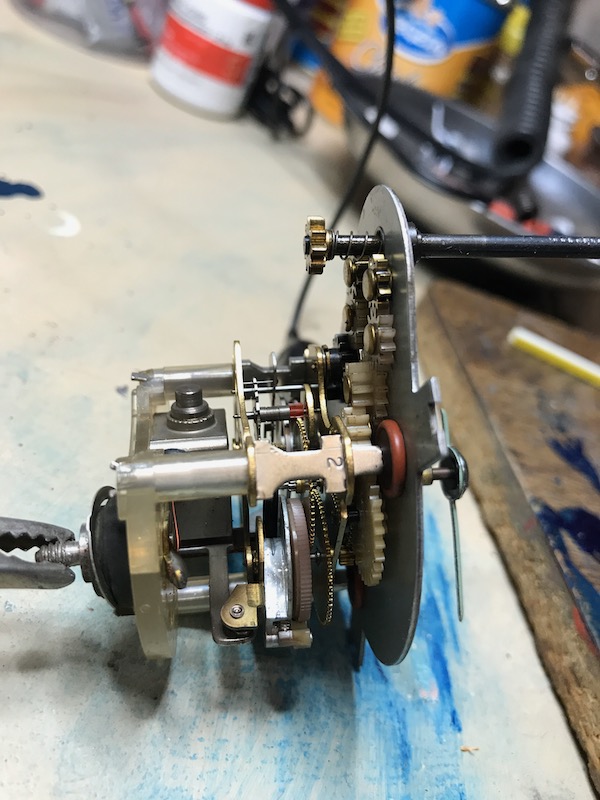
I am going to go out and get some White Spirits/ Mineral Spirits to clean the mechanism but with just a clean of the contacts (they were fairly rough from arching) it has at least started working.
So I found this great link posted a number of years back.... http://pcfred.com/Vettetip/FixC3Clock.htm
And went to work on my old one.
Easy to take apart and i had less fear after pulling the speedo and taco apart.
I am going to go out and get some White Spirits/ Mineral Spirits to clean the mechanism but with just a clean of the contacts (they were fairly rough from arching) it has at least started working.
Last edited by CraigH; 04-10-2023 at 06:59 AM.
The following users liked this post:
Primoz (04-22-2020)
04-21-2020, 09:09 PM
#1645
Melting Slicks
Thread Starter
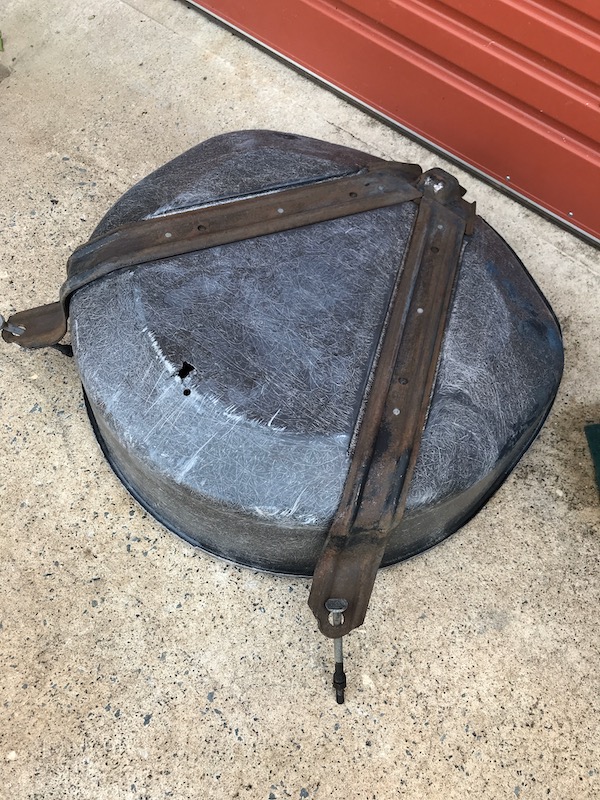
And the other part I have been working on is the spare wheel holder.
Was covered in black and blue paint so it has had an initial clean up.
I won't do the glass repairs on it yet I just need it ready so I can put it on when i take Vette for a new exhaust.

Was covered in black and blue paint so it has had an initial clean up.
I won't do the glass repairs on it yet I just need it ready so I can put it on when i take Vette for a new exhaust.
Last edited by CraigH; 04-10-2023 at 06:58 AM.
The following users liked this post:
Primoz (04-22-2020)
04-22-2020, 06:54 PM
#1647
Melting Slicks
Thread Starter
May be a while before i am ready for exhaust anyway so who knows it may get restored by then.
All good here, with 4 more weeks before a decision on pulling back some of the controls, better to wait till its safe to do so. I am sure your counting it down as well. Western Australia may open its borders then also.
Last edited by CraigH; 04-22-2020 at 06:55 PM.
The following users liked this post:
bazza77 (04-22-2020)
04-22-2020, 07:14 PM
#1648
Melting Slicks

Member Since: Jul 2010
Location: perth western australia
Posts: 3,100
Received 599 Likes
on
533 Posts

I ended up getting the frame on my spare tub powder coated black , then I learned how to glass by fixing the damage in the tub.
My car was so low , I believe the tub held the back up sometimes
Yeah , life is pretty normal here , for me anyway ,go to work (social distancing rules apply there ) go straight home or to the shops to buy food. On the week ends stay home and work in the shed . Was what I normally do anyway
My car was so low , I believe the tub held the back up sometimes
Yeah , life is pretty normal here , for me anyway ,go to work (social distancing rules apply there ) go straight home or to the shops to buy food. On the week ends stay home and work in the shed . Was what I normally do anyway
The following users liked this post:
CraigH (04-23-2020)
04-23-2020, 04:18 AM
#1649
Melting Slicks
Thread Starter
I ended up getting the frame on my spare tub powder coated black , then I learned how to glass by fixing the damage in the tub.
My car was so low , I believe the tub held the back up sometimes
Yeah , life is pretty normal here , for me anyway ,go to work (social distancing rules apply there ) go straight home or to the shops to buy food. On the week ends stay home and work in the shed . Was what I normally do anyway
My car was so low , I believe the tub held the back up sometimes
Yeah , life is pretty normal here , for me anyway ,go to work (social distancing rules apply there ) go straight home or to the shops to buy food. On the week ends stay home and work in the shed . Was what I normally do anyway
The following users liked this post:
Primoz (04-23-2020)
04-23-2020, 12:08 PM
#1651
Team Owner


Since those straps are riveted so securely, I didn't bother with removing them during the refurb operation. I chose to clean everything well, then mask off the rivets heads and tub to prime and paint the straps. Worked fine and still have the holding strength of 'real' rivets.
Also, if you have not installed your clock yet, I would strongly suggest that you reconsider putting the stock clock back in your car. I have never had [nor seen] one of those stock clocks last more than 5 years before it crapped out. I did exactly what you are doing and managed to rebuild the original to working condition. Three years is what I got. That was a few years ago and I still haven't replaced it with a quartz movement version....because I haven't had an "important" reason to dig back into the gauge bezel area. When I do, I will install a quartz unit.
Just for additional info: I have another vintage car which I did install a quartz clock; and it has been running flawlessly for nearly 8 years without fault--and I haven't had to reset it in over a year! Just wanted to offer you some real experience with those clocks. You are doing GREAT work!!!
The following 2 users liked this post by 7T1vette:
Andy Tuttle (04-29-2020),
Primoz (04-23-2020)
04-23-2020, 05:25 PM
#1652
Melting Slicks
Thread Starter
Since those straps are riveted so securely, I didn't bother with removing them during the refurb operation. I chose to clean everything well, then mask off the rivets heads and tub to prime and paint the straps. Worked fine and still have the holding strength of 'real' rivets.
Also, if you have not installed your clock yet, I would strongly suggest that you reconsider putting the stock clock back in your car. I have never had [nor seen] one of those stock clocks last more than 5 years before it crapped out. I did exactly what you are doing and managed to rebuild the original to working condition. Three years is what I got. That was a few years ago and I still haven't replaced it with a quartz movement version....because I haven't had an "important" reason to dig back into the gauge bezel area. When I do, I will install a quartz unit.
Just for additional info: I have another vintage car which I did install a quartz clock; and it has been running flawlessly for nearly 8 years without fault--and I haven't had to reset it in over a year! Just wanted to offer you some real experience with those clocks. You are doing GREAT work!!!
Also, if you have not installed your clock yet, I would strongly suggest that you reconsider putting the stock clock back in your car. I have never had [nor seen] one of those stock clocks last more than 5 years before it crapped out. I did exactly what you are doing and managed to rebuild the original to working condition. Three years is what I got. That was a few years ago and I still haven't replaced it with a quartz movement version....because I haven't had an "important" reason to dig back into the gauge bezel area. When I do, I will install a quartz unit.
Just for additional info: I have another vintage car which I did install a quartz clock; and it has been running flawlessly for nearly 8 years without fault--and I haven't had to reset it in over a year! Just wanted to offer you some real experience with those clocks. You are doing GREAT work!!!
I have a quartz clock that works great and looks good during the day but at night it seems to look a bit different. If the mechanical one fails I may consider swapping the facia over to the quarts one as that may be the difference.
Last edited by CraigH; 04-23-2020 at 05:26 PM.

 04-29-2020, 06:23 PM
#1655
Melting Slicks
Thread Starter
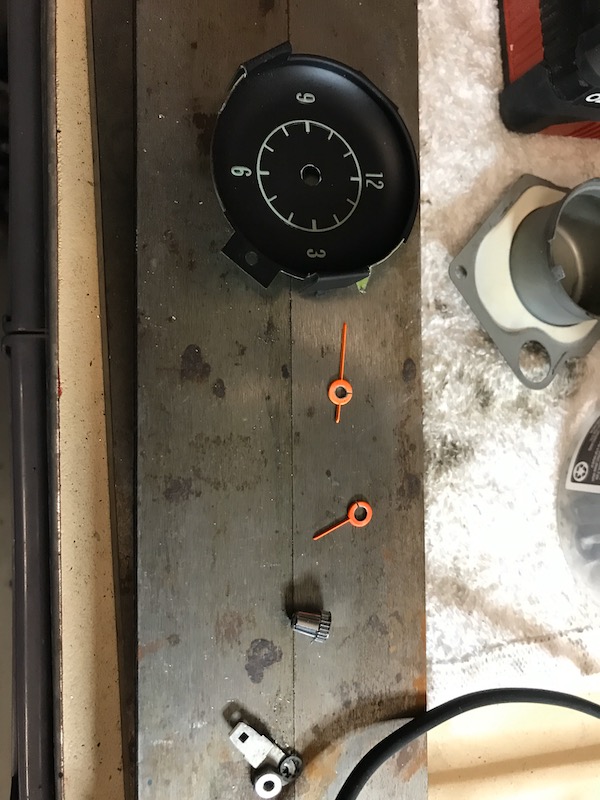
So the clock is now back together.
I repainted the hour and minute arms and put case back together.
It has been running for a week now and to start with was out by anything up to 30 minutes a day. I tried the method of adjusting time once a day but it did not seem to correct it quickly enough for the error I had so I adjusted the spring tensioner tang inside (as per article listed before) a number of times till I got it so its almost perfect.
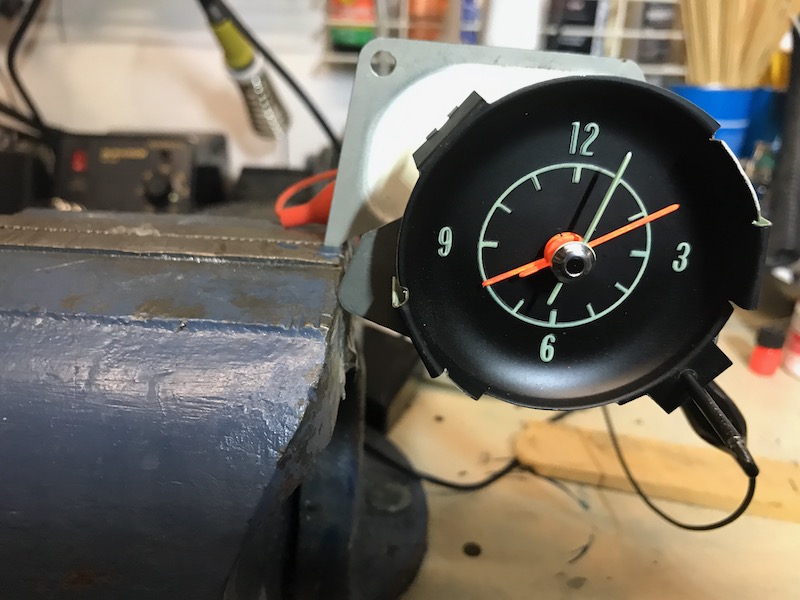
Even if it only lasts another 5 years I will be happy with the original and its strange tick every few minutes as the winder solenoid fires :-)
I repainted the hour and minute arms and put case back together.
It has been running for a week now and to start with was out by anything up to 30 minutes a day. I tried the method of adjusting time once a day but it did not seem to correct it quickly enough for the error I had so I adjusted the spring tensioner tang inside (as per article listed before) a number of times till I got it so its almost perfect.
Even if it only lasts another 5 years I will be happy with the original and its strange tick every few minutes as the winder solenoid fires :-)
Last edited by CraigH; 04-10-2023 at 06:58 AM.


The following users liked this post:
Primoz (04-30-2020)
04-29-2020, 09:36 PM
#1658
Melting Slicks
Gauge cluster looks great and enjoy your "ticking" clock!
The following users liked this post:
CraigH (05-06-2020)
05-10-2020, 12:49 AM
#1659
Melting Slicks
Thread Starter
Since those straps are riveted so securely, I didn't bother with removing them during the refurb operation. I chose to clean everything well, then mask off the rivets heads and tub to prime and paint the straps. Worked fine and still have the holding strength of 'real' rivets.
Also, if you have not installed your clock yet, I would strongly suggest that you reconsider putting the stock clock back in your car. I have never had [nor seen] one of those stock clocks last more than 5 years before it crapped out. I did exactly what you are doing and managed to rebuild the original to working condition. Three years is what I got. That was a few years ago and I still haven't replaced it with a quartz movement version....because I haven't had an "important" reason to dig back into the gauge bezel area. When I do, I will install a quartz unit.
Just for additional info: I have another vintage car which I did install a quartz clock; and it has been running flawlessly for nearly 8 years without fault--and I haven't had to reset it in over a year! Just wanted to offer you some real experience with those clocks. You are doing GREAT work!!!
Also, if you have not installed your clock yet, I would strongly suggest that you reconsider putting the stock clock back in your car. I have never had [nor seen] one of those stock clocks last more than 5 years before it crapped out. I did exactly what you are doing and managed to rebuild the original to working condition. Three years is what I got. That was a few years ago and I still haven't replaced it with a quartz movement version....because I haven't had an "important" reason to dig back into the gauge bezel area. When I do, I will install a quartz unit.
Just for additional info: I have another vintage car which I did install a quartz clock; and it has been running flawlessly for nearly 8 years without fault--and I haven't had to reset it in over a year! Just wanted to offer you some real experience with those clocks. You are doing GREAT work!!!
Have to laugh about it. Not sure why but have not done final fit on centre cluster yet so will pull it out again.
Better it failed now rather than later. May be swapping quartz mechanism with original face arms etc after all.
05-10-2020, 02:03 AM
#1660
Race Director

I purchased a quarts replacement clock from Corvette Central.
Sitting side by side you can’t tell the difference.
Sitting side by side you can’t tell the difference.