
1971 Journey
 04-27-2016, 09:15 AM
#861
Drifting

Member Since: Aug 2015
Location: NSW, Australia
Posts: 1,939
Received 472 Likes
on
344 Posts
C3 of Year Finalist (track prepared) 2019
Looks good! I actually really like how the white lines look, and I'm normally not a fan. What size and type are the tyres? I wonder how they'd look with a small spacer to fill out the wheel well a bit more?
 04-27-2016, 04:49 PM
#862
Melting Slicks

Thread Starter


They are 215/70/15 Michelins.
The rear could certainly benefit from a small spacer for looks
One side benefit is there in absolutely no Tramline in the steering -

Last edited by CraigH; 04-27-2016 at 04:50 PM.
05-01-2016, 12:20 PM
#863
Wow... what a great thread about a beautiful C3. Thanks so much for sharing all these details with technical descriptions and pictures.
In fact, I am currently also revising my complete Interior on my 72... getting rid of two dash wiring pigtails poorly added by a previous owner for a fog lamp and second alarm siren... replacing the heater core (A/C car)... replacing seatbelts and carpet.
So I found/find your thread outstanding helpful!!!
Much success and a lot of fun for this year�s Corvette season!
Cheers from Germany...
Ren�
The following users liked this post:
CraigH (06-22-2016)
06-22-2016, 07:51 AM
#864
Melting Slicks
Thread Starter
Wow... what a great thread about a beautiful C3. Thanks so much for sharing all these details with technical descriptions and pictures.
In fact, I am currently also revising my complete Interior on my 72... getting rid of two dash wiring pigtails poorly added by a previous owner for a fog lamp and second alarm siren... replacing the heater core (A/C car)... replacing seatbelts and carpet.
So I found/find your thread outstanding helpful!!!
Much success and a lot of fun for this year�s Corvette season!
Cheers from Germany...
Ren�
In fact, I am currently also revising my complete Interior on my 72... getting rid of two dash wiring pigtails poorly added by a previous owner for a fog lamp and second alarm siren... replacing the heater core (A/C car)... replacing seatbelts and carpet.
So I found/find your thread outstanding helpful!!!
Much success and a lot of fun for this year�s Corvette season!
Cheers from Germany...
Ren�
Glad you found it of value.
Will start updating it again soon.
Hopefully you will post your progress as well.
06-23-2016, 01:54 AM
#865
Melting Slicks
Thread Starter
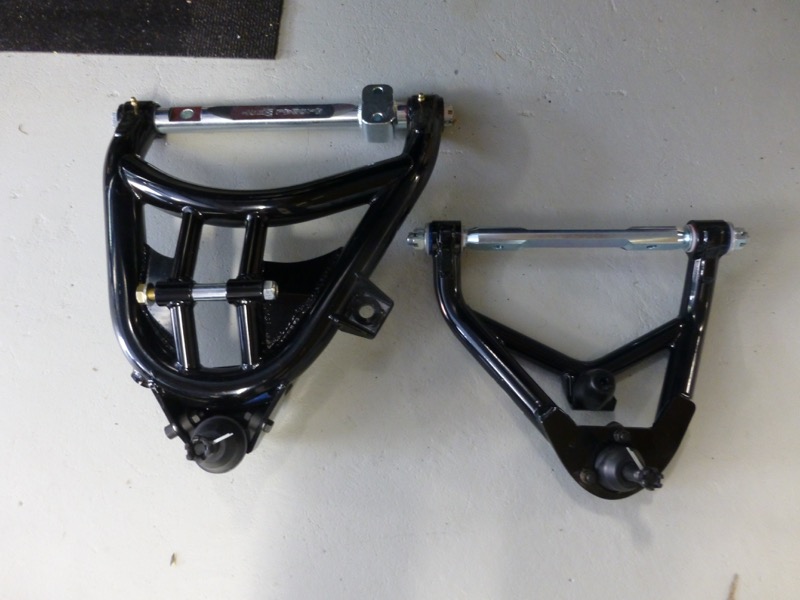
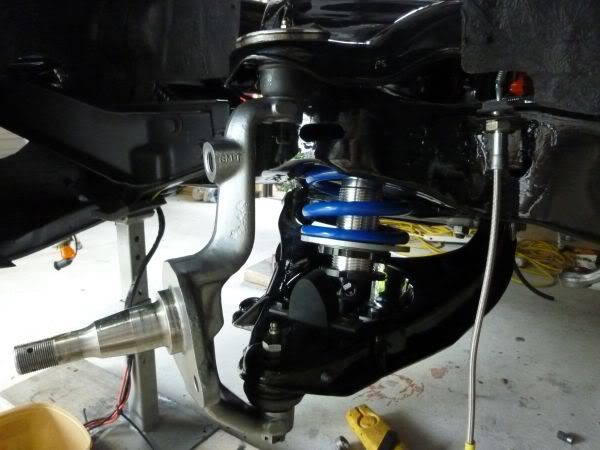
Getting ready to rework the front suspension again.
Last time I did a complete rebuild and all was good but I want to resolve two things.
1) Need more Caster to match the Borgeson Box. I have 4+ and it drives well but want to get even more without having excessive Camber.
2) I run the semi coil overs on front with it relatively low so the overall shock travel is not huge. Theses lower arms will let me get my shock travel back again without the spring base being wound down heaps. They will also provide a stronger bottom mount compared to the original shock mount point.
All the kit is from Global West.
Last edited by CraigH; 04-10-2023 at 05:19 AM.
06-24-2016, 12:36 AM
#866
Drifting
Member Since: Aug 2015
Location: NSW, Australia
Posts: 1,939
Received 472 Likes
on
344 Posts
C3 of Year Finalist (track prepared) 2019
Those lowers look nice! I run the same uppers, and am very happy with them. I actually am running through bolts with nuts for my shocks as I didn't trust the threads in the lower arms, and have it on my todo list to check shock travel and possibly add some spacers between shock and arm to compensate for my ride height. What coilovers are you running?
06-24-2016, 04:28 AM
#867
Melting Slicks
Thread Starter
Those lowers look nice! I run the same uppers, and am very happy with them. I actually am running through bolts with nuts for my shocks as I didn't trust the threads in the lower arms, and have it on my todo list to check shock travel and possibly add some spacers between shock and arm to compensate for my ride height. What coilovers are you running?
I am using Double Adjustable Semi Coilovers from Speed Direct. Not sure what they use now but when i got mine they were QA1 main bodies with their springs.
Last edited by CraigH; 04-10-2023 at 05:18 AM.
06-26-2016, 11:56 PM
#868
Drifting
Member Since: Aug 2015
Location: NSW, Australia
Posts: 1,939
Received 472 Likes
on
344 Posts
C3 of Year Finalist (track prepared) 2019
Very nice! I look forward to your impressions once you get the global west arms fitted. What swaybar size(s) and spring rates are you running?
The following users liked this post:
Metalhead140 (07-28-2016)
07-23-2016, 02:44 AM
#870
Melting Slicks
Thread Starter
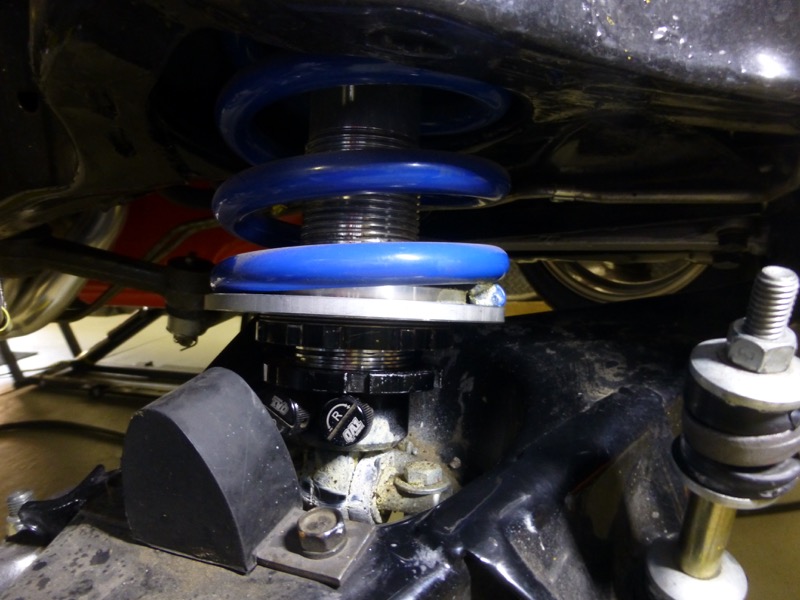
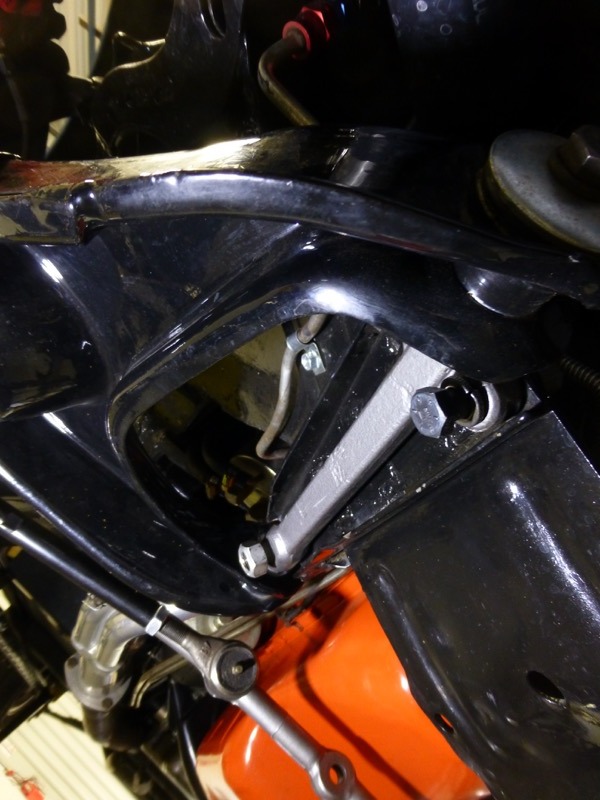
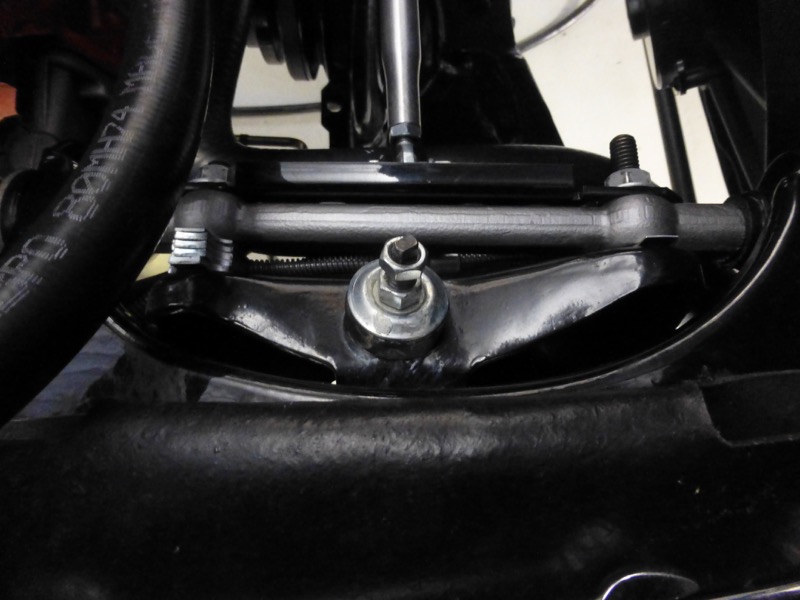
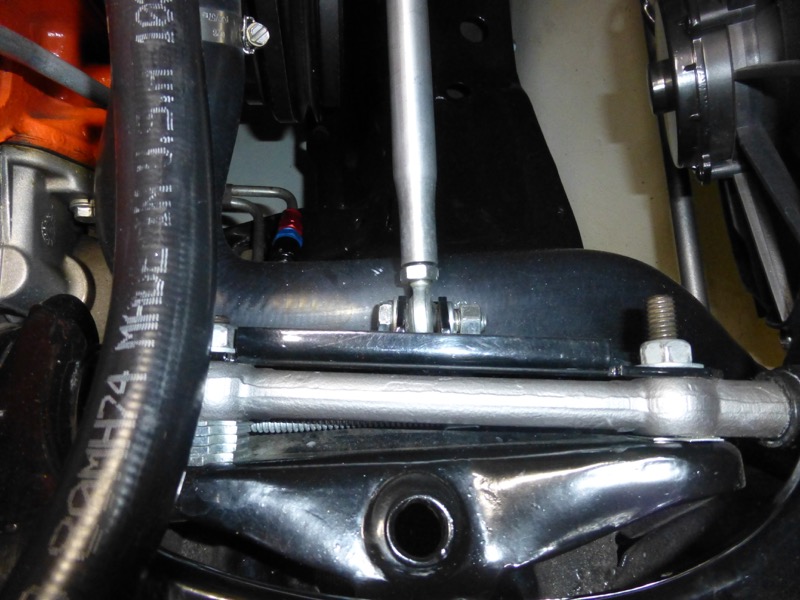
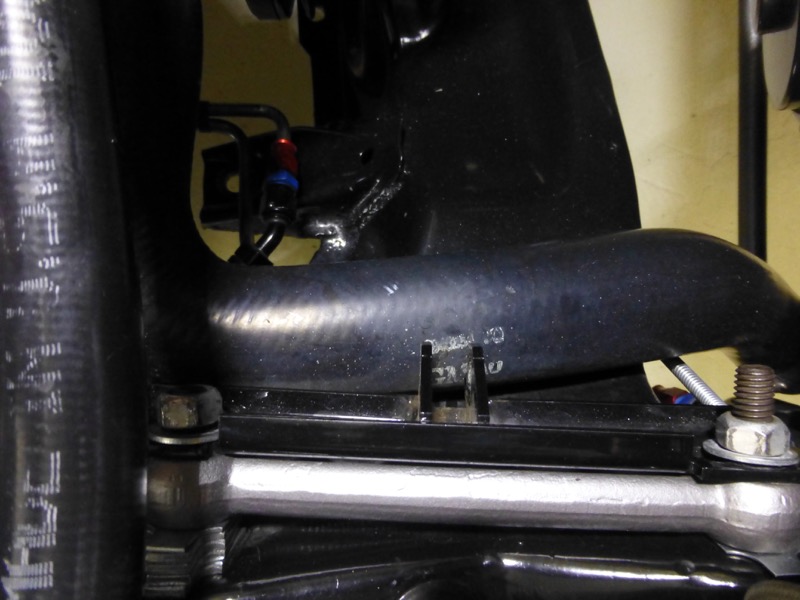
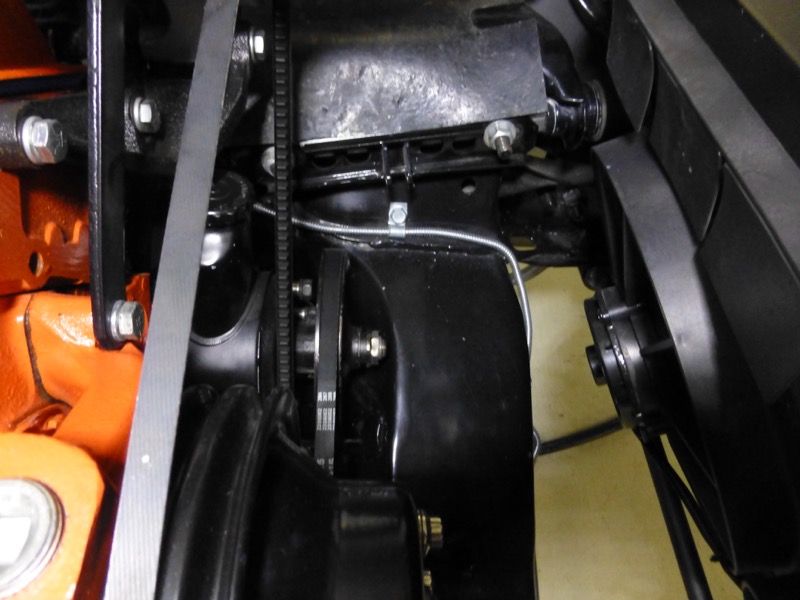
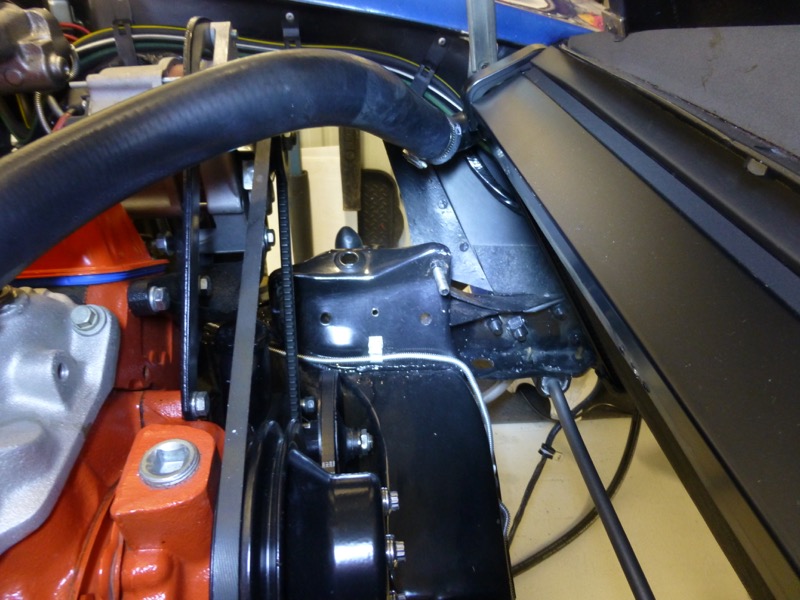
Got some time today to start the Control arm swaps.
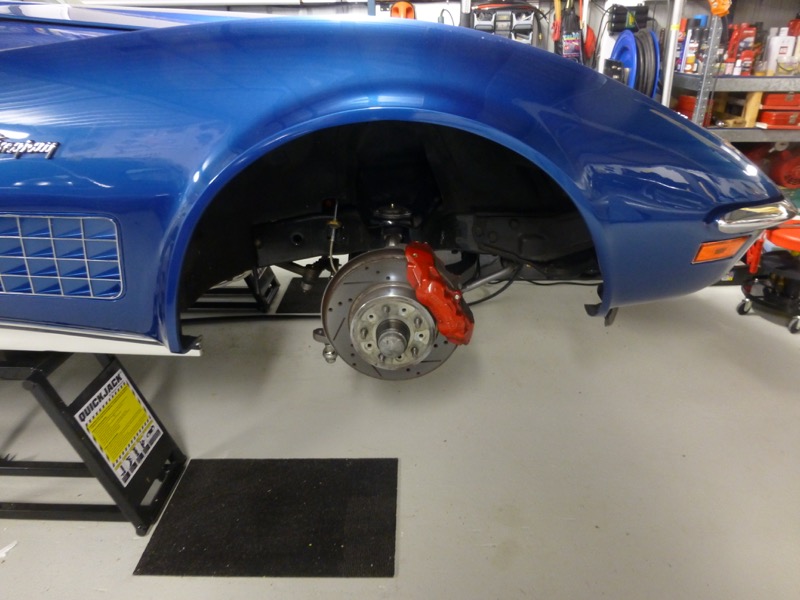
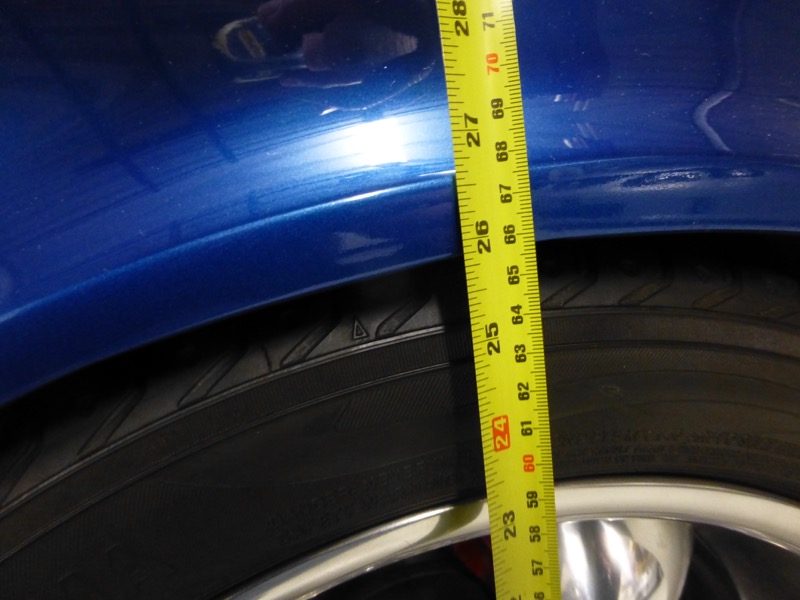
Started by measuring existing ride height at front
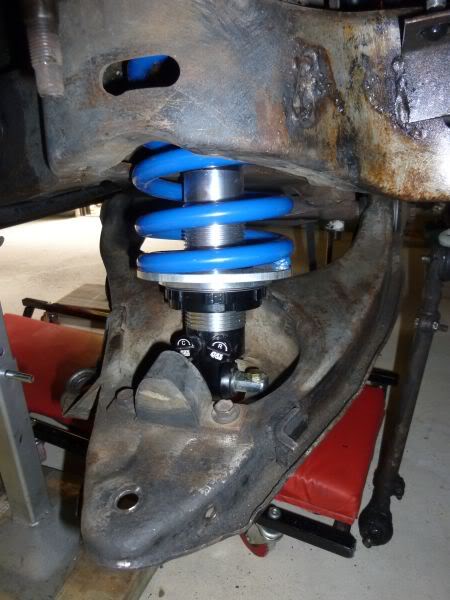
Turn steering to right and unlock lower coil over locking ring
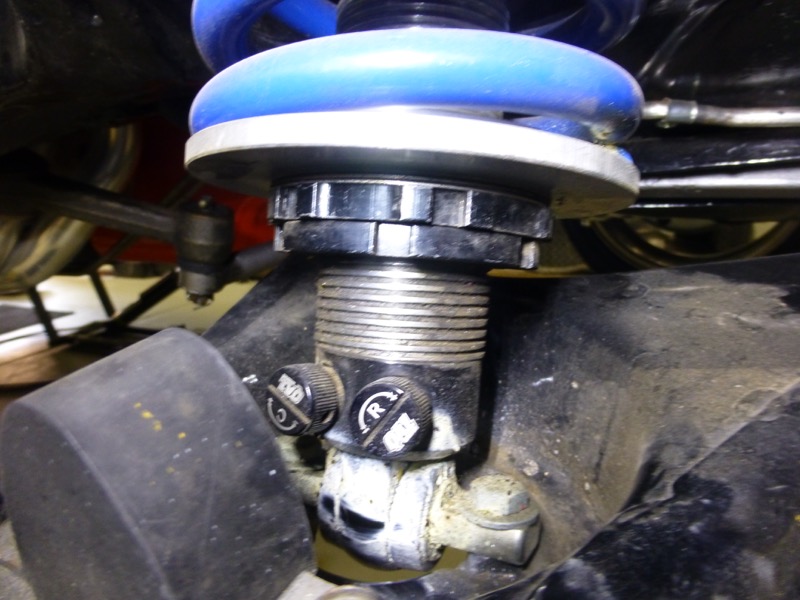
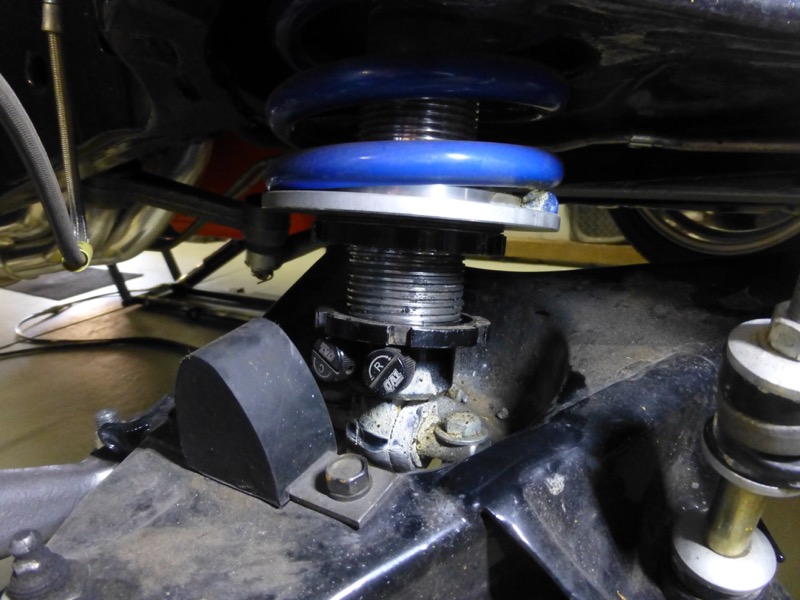
Next wind down the main ring that removes tension from the spring.
Disconnect the sway bar.

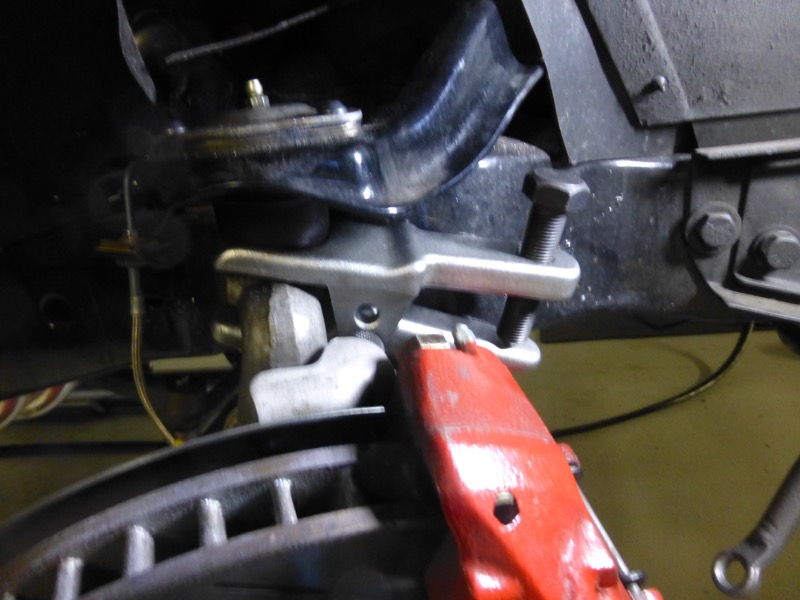
Remove cotter ping from lower ball joint and loosen castle nut..
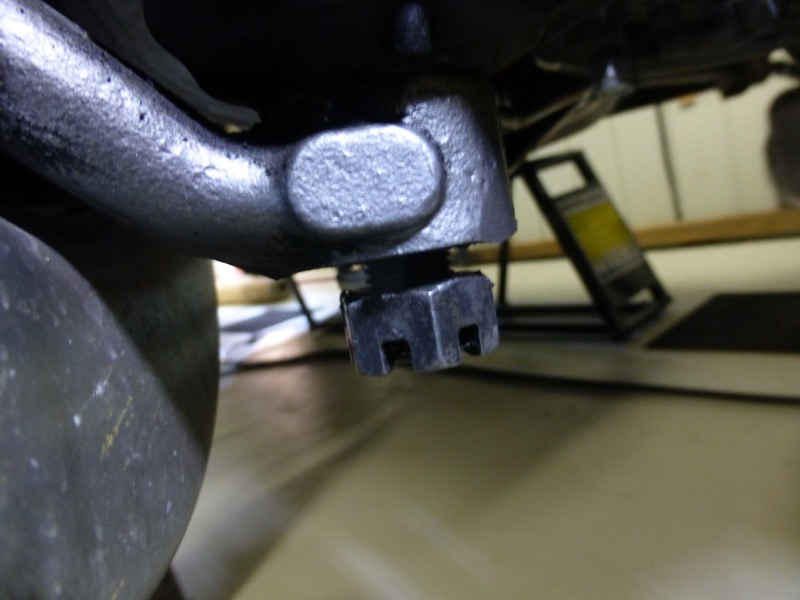
Disconnect the ball joint taper with tool.
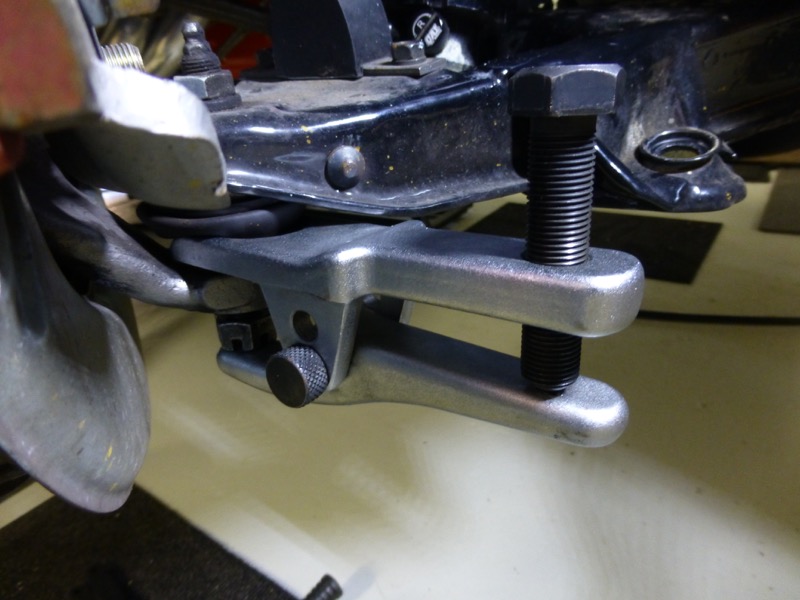
Loosten the 3 bolts that hold inner bottom side of control arm then remove.
Started by measuring existing ride height at front
Turn steering to right and unlock lower coil over locking ring
Next wind down the main ring that removes tension from the spring.
Disconnect the sway bar.
Remove cotter ping from lower ball joint and loosen castle nut..
Disconnect the ball joint taper with tool.
Loosten the 3 bolts that hold inner bottom side of control arm then remove.
Last edited by CraigH; 04-10-2023 at 05:18 AM.
 07-23-2016, 03:56 AM
#873
Melting Slicks
Thread Starter
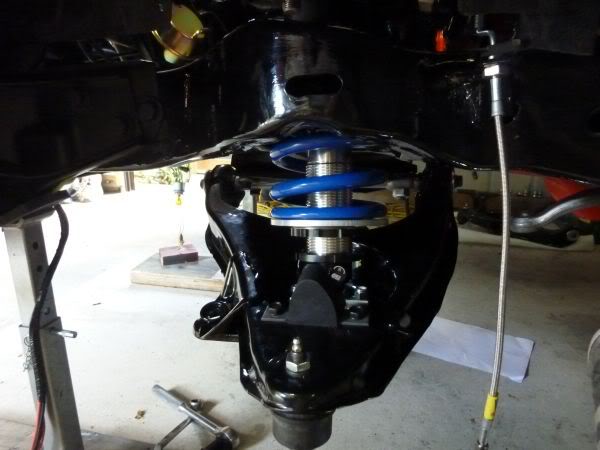
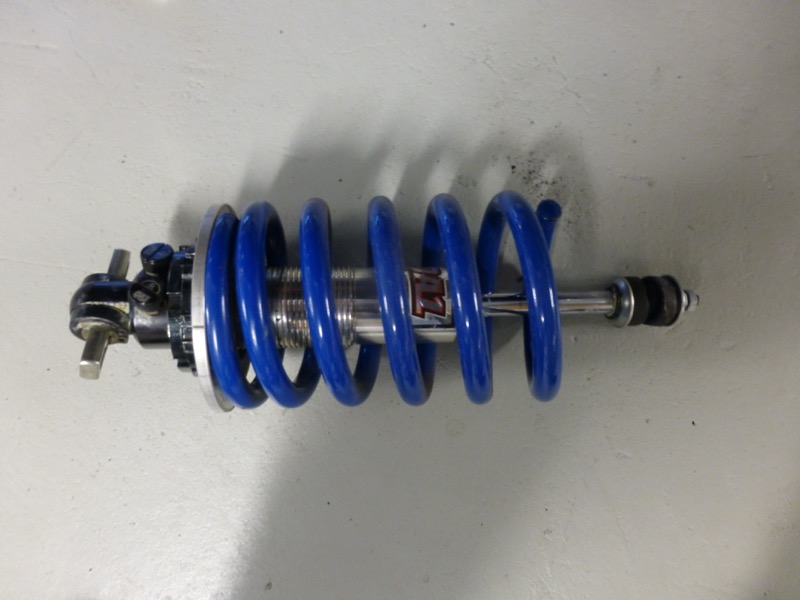
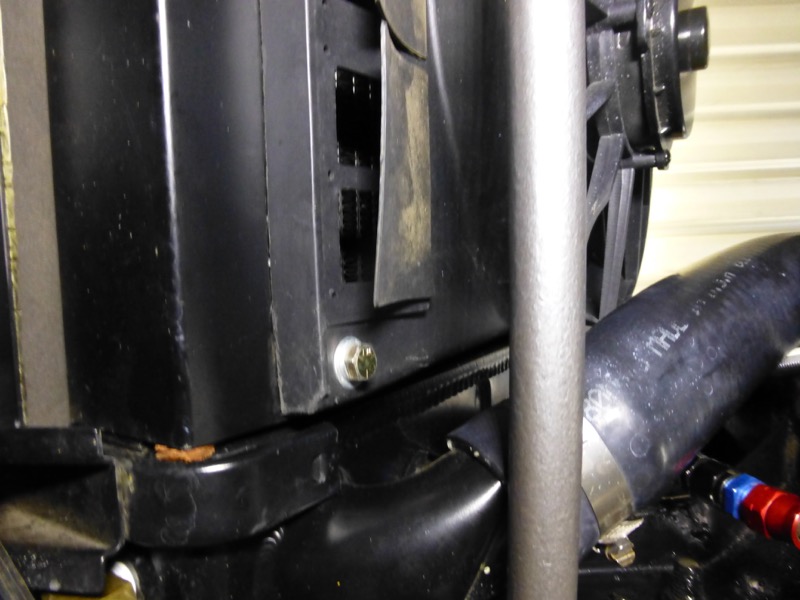
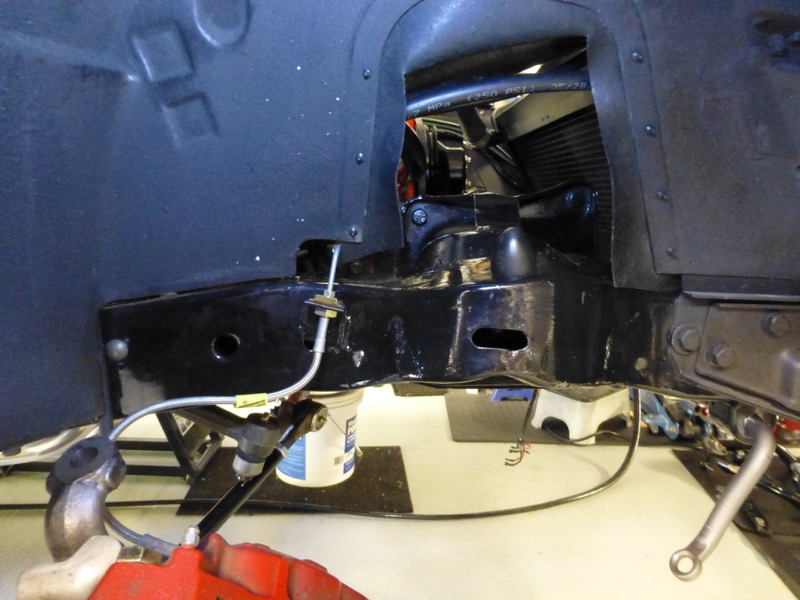
Removed damper from car and remove spring plates etc.
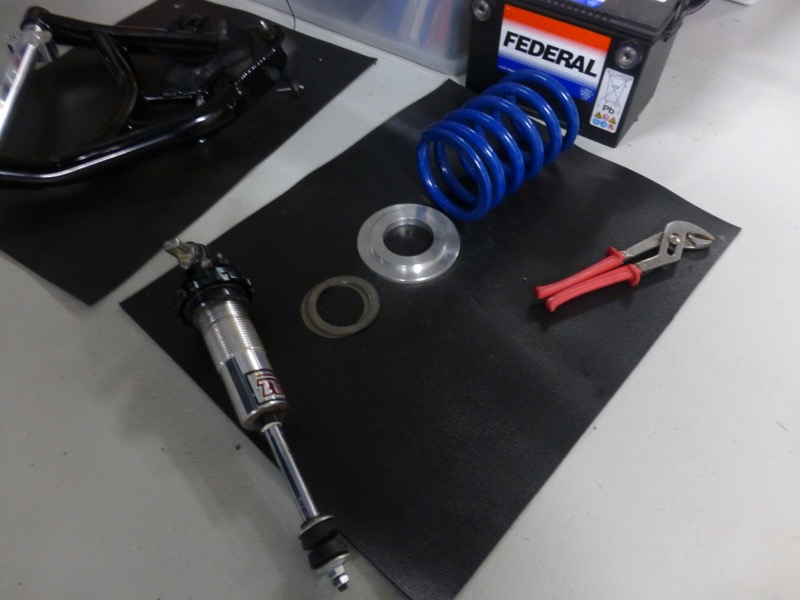
Now I needed to remove original bottom shock mount as it will use the new one from Global West.
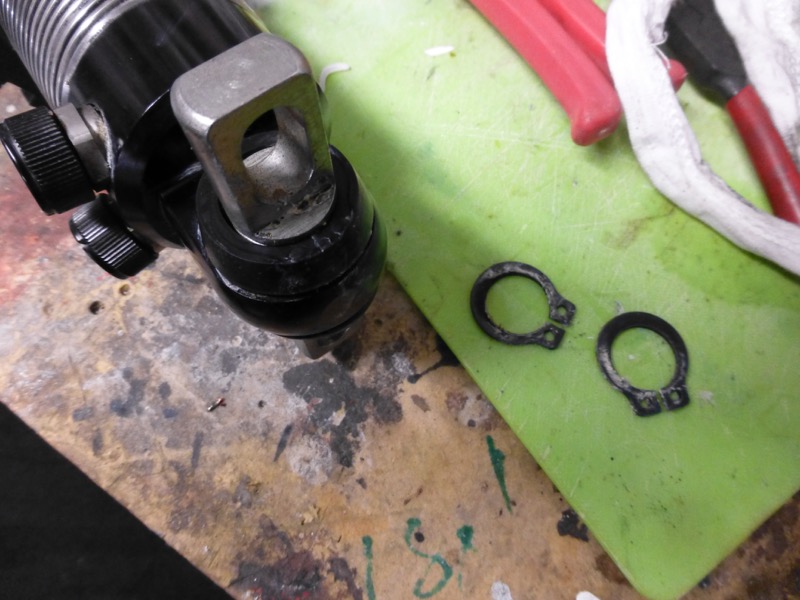
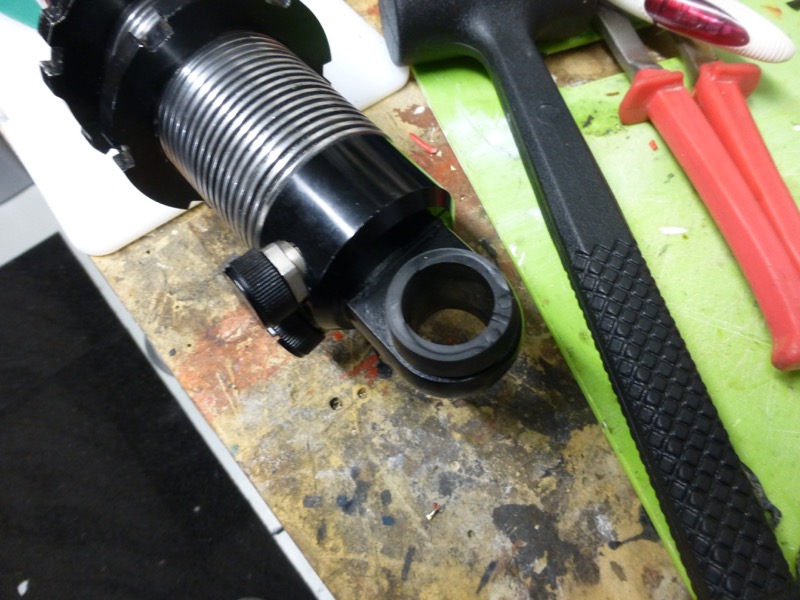
Now I need to stop till I can get some Mobil 1 synthetic grease to start the reassembly.
Will strip other side tomorrow if I have time.
Now I needed to remove original bottom shock mount as it will use the new one from Global West.
Now I need to stop till I can get some Mobil 1 synthetic grease to start the reassembly.
Will strip other side tomorrow if I have time.
Last edited by CraigH; 04-10-2023 at 05:18 AM.
The following users liked this post:
mysticpete (07-24-2016)
07-24-2016, 03:13 AM
#875
Instructor

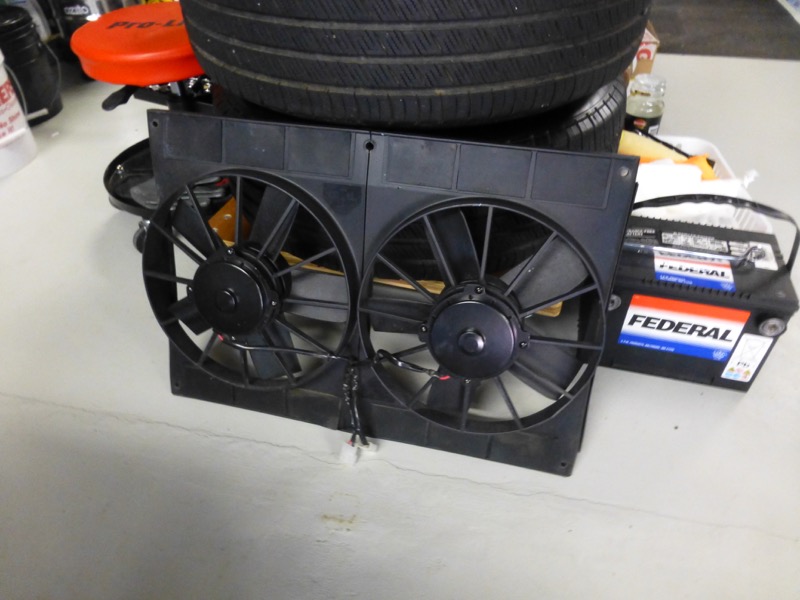
Are you being sponsored by Federal hahaha
Spent 45mins reviewing the Global West offerings last night, Thanks
Spent 45mins reviewing the Global West offerings last night, Thanks
Last edited by mysticpete; 07-24-2016 at 03:14 AM.
07-24-2016, 04:26 AM
#876
Melting Slicks
Thread Starter
The Federal battery is sitting there as it has died.
Got a new AC Delco one last week. Vette had been sitting and I had not fully closed the centre rear compartment lid so light had been on for many weeks...There was no coming back for the battery. :-(
07-24-2016, 08:08 AM
#877
Team Owner

Member Since: Sep 2006
Location: Westminster Maryland
Posts: 30,173
Likes: 0
Received 2,878 Likes
on
2,515 Posts

Hi Craig,
I couldn't sleep at night without a battery disconnect.
There was a period of time that I was so antsy about it that I would bring the **** In the house with me so I could be SURE it was disconnected without having to go back to the garage to check!
Regards,
Alan
I couldn't sleep at night without a battery disconnect.
There was a period of time that I was so antsy about it that I would bring the **** In the house with me so I could be SURE it was disconnected without having to go back to the garage to check!
Regards,
Alan
07-24-2016, 08:16 AM
#878
Melting Slicks
Thread Starter
Hi Craig,
I couldn't sleep at night without a battery disconnect.
There was a period of time that I was so antsy about it that I would bring the **** In the house with me so I could be SURE it was disconnected without having to go back to the garage to check!
Regards,
Alan
I couldn't sleep at night without a battery disconnect.
There was a period of time that I was so antsy about it that I would bring the **** In the house with me so I could be SURE it was disconnected without having to go back to the garage to check!
Regards,
Alan
Have flattened the battery 3 times in 7 years so has not been too bad.
Each time it was the light in the center rear storage compartment.
Now I just plug the car into the battery tender when it's not in use.
07-31-2016, 06:07 PM
#879
Melting Slicks
Thread Starter
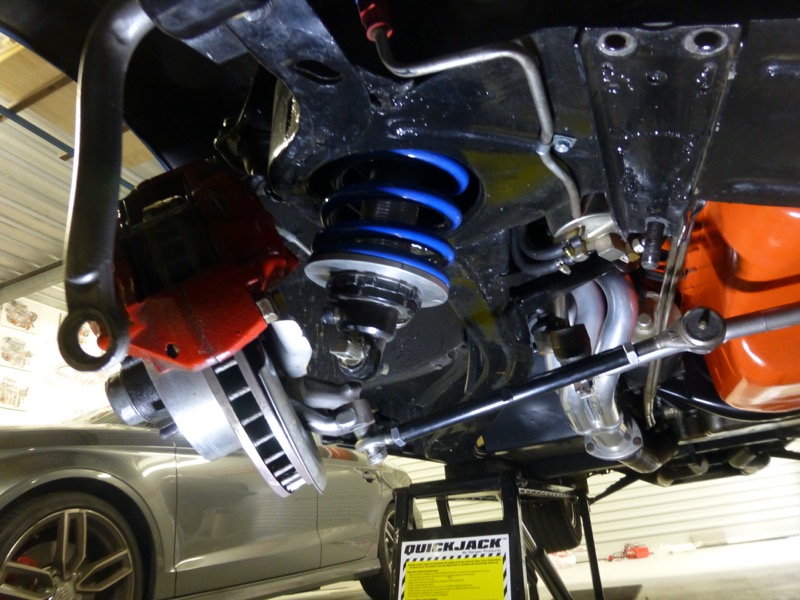
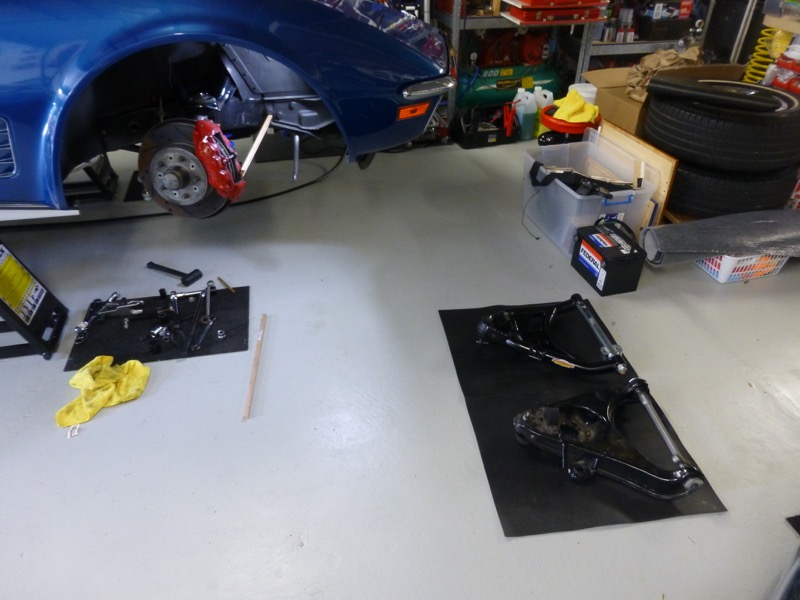
Slow progress but got some time on weekend to remove the remaining suspension and clean up.
First loosen and remove the cross brace.
Loosen upper arms and pop ball joint
However electric fans were in way stopping easy arm removal so luckily 6 bolts and its out quickly
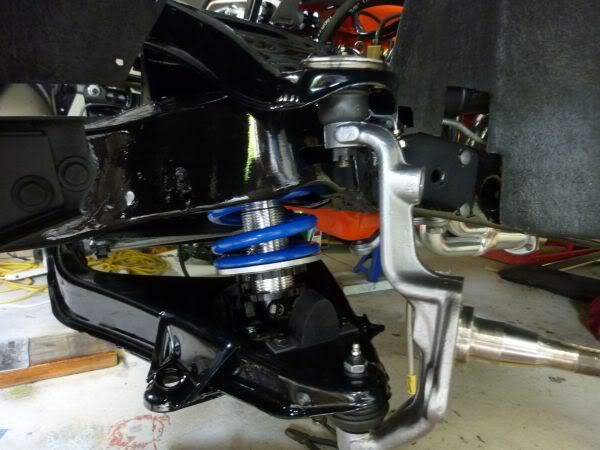
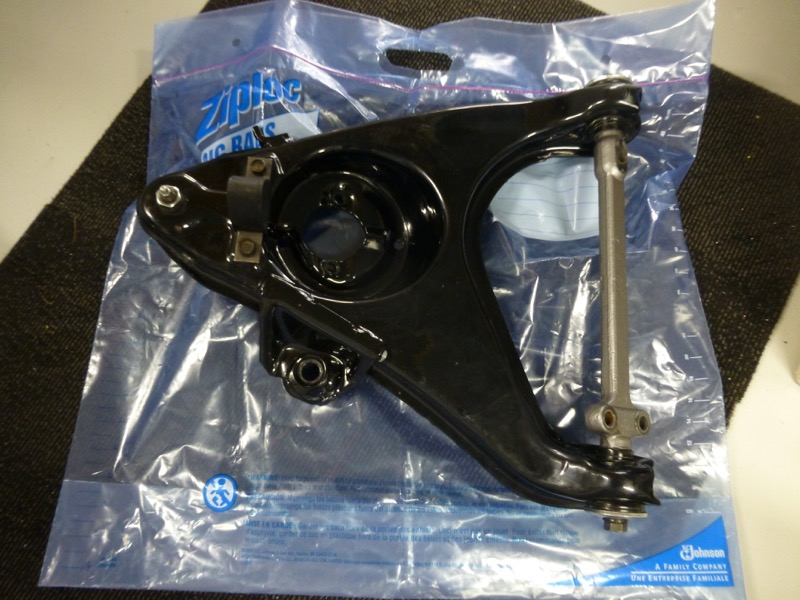
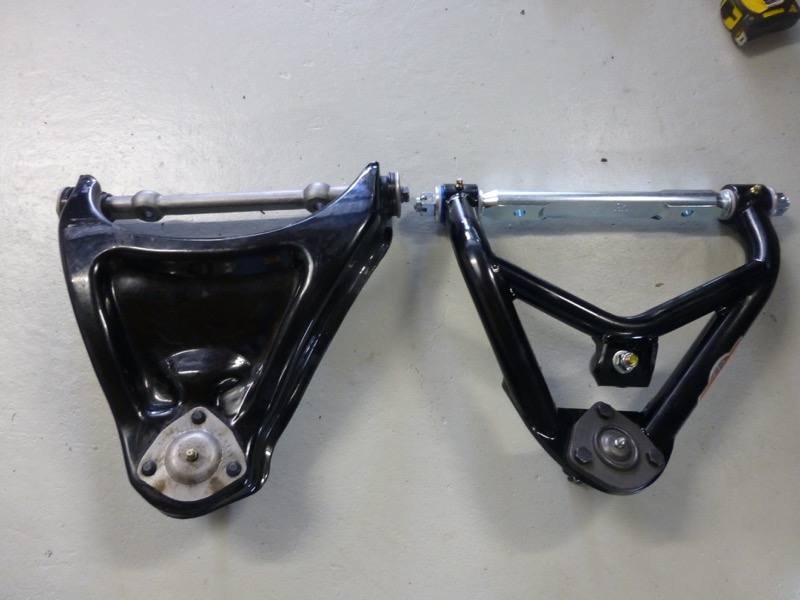
Upper arms out.
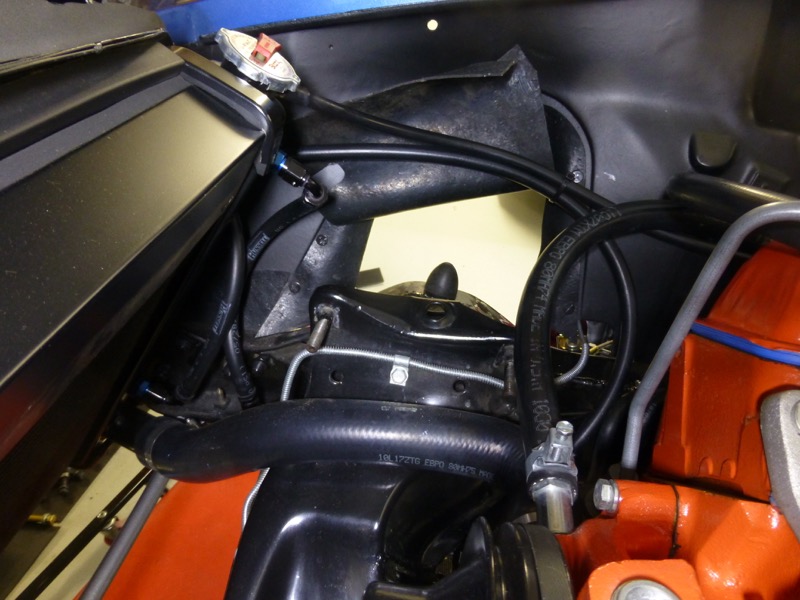
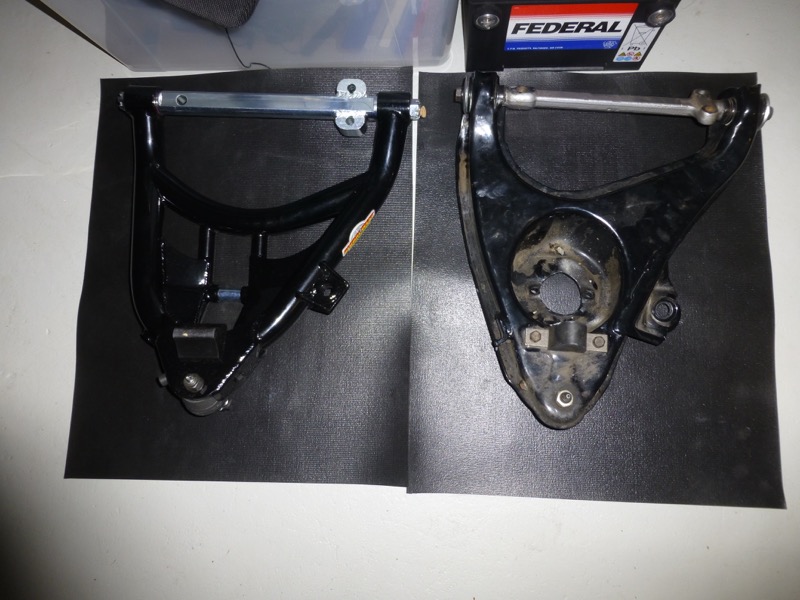
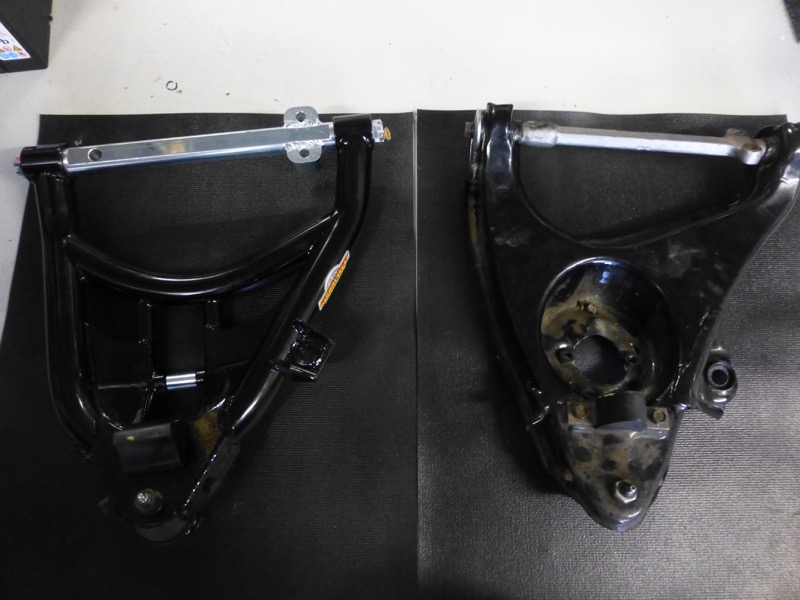
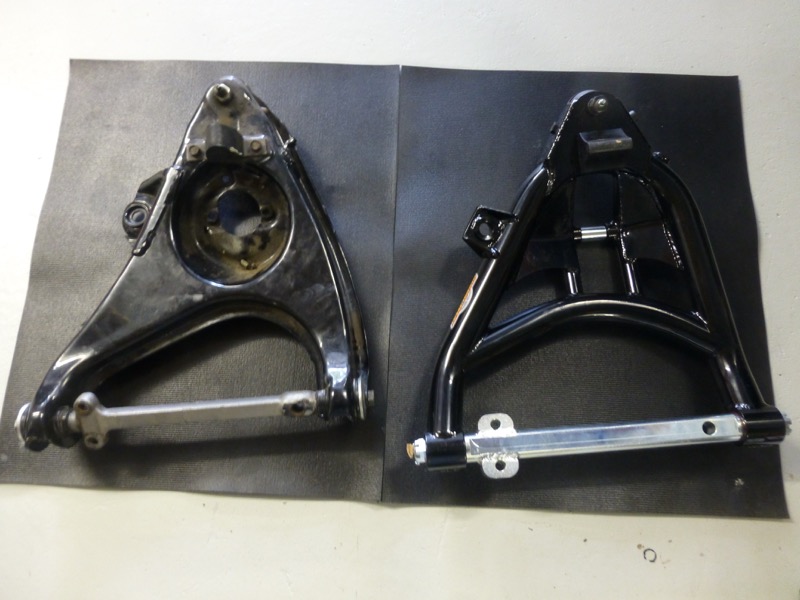
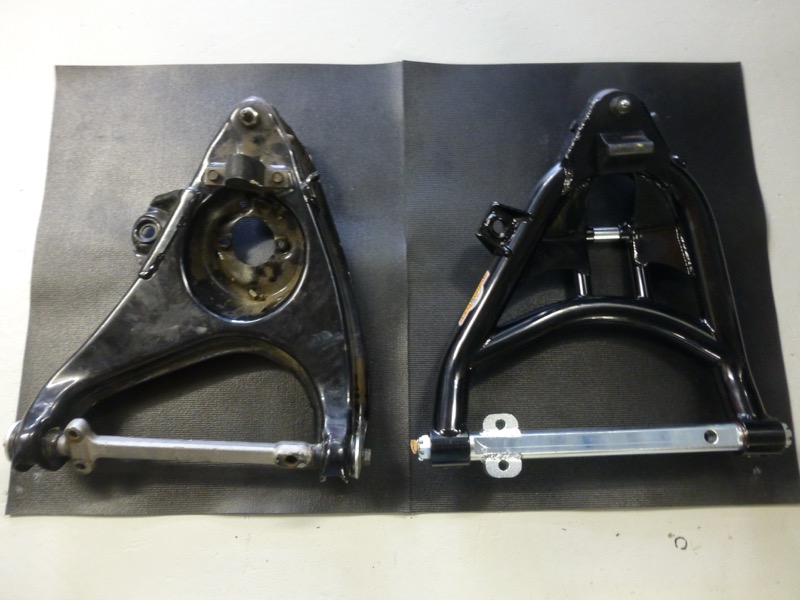
Comparison of upper arms shows the ball joint is offset further back on Global West arms.
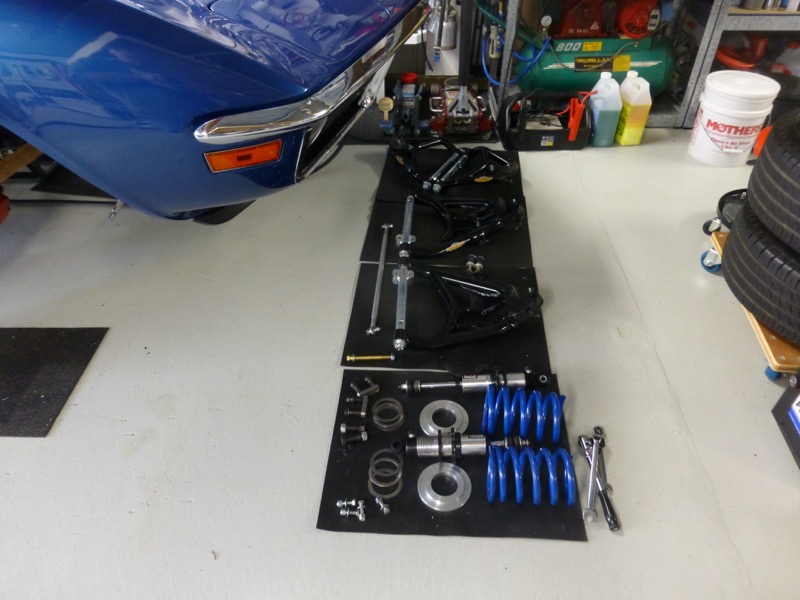
Kit ready to go in.
First loosen and remove the cross brace.
Loosen upper arms and pop ball joint
However electric fans were in way stopping easy arm removal so luckily 6 bolts and its out quickly
Upper arms out.
Comparison of upper arms shows the ball joint is offset further back on Global West arms.
Kit ready to go in.
Last edited by CraigH; 04-10-2023 at 05:18 AM.
The following users liked this post:
mysticpete (07-31-2016)
07-31-2016, 07:08 PM
#880
Race Director


Member Since: Nov 2006
Location: Athens GA
Posts: 19,446
Received 351 Likes
on
304 Posts
St. Jude Donor '12-'13, '15- '16-'17-'18-'19, '21
Love the look of those Global West arms.......
I have QA-1's new coilovers for the C3 sitting in my parts room just waiting for the body to come off the frame.
Just have to find the coin to get the GW arms......

I have QA-1's new coilovers for the C3 sitting in my parts room just waiting for the body to come off the frame.
Just have to find the coin to get the GW arms......