1971 Journey
 02-21-2013, 04:58 AM
#321
Melting Slicks

Thread Starter


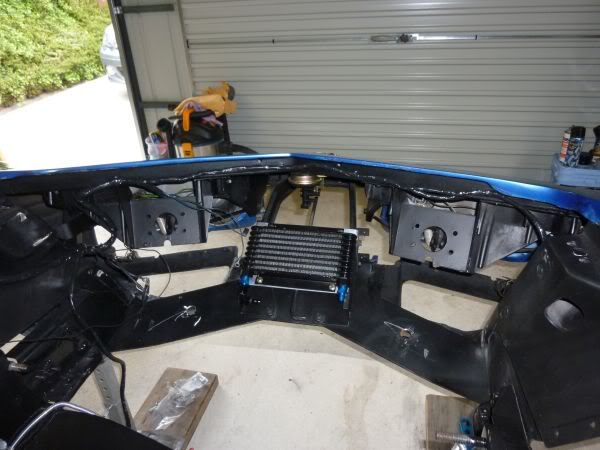
Fitted the transmission cooler behind the number plate area in front.
Had to make a couple of brackets to mount it to the brace.
First bracket.
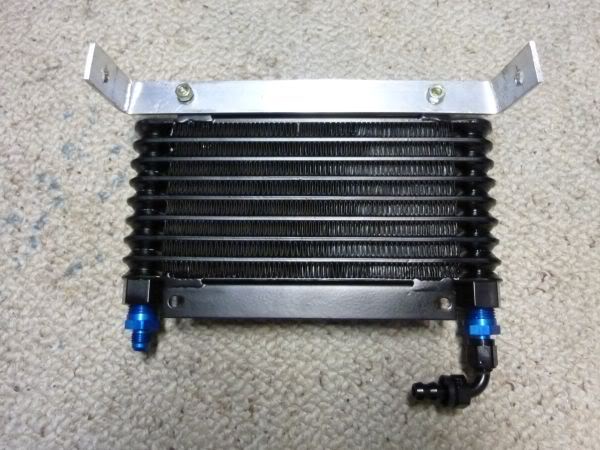
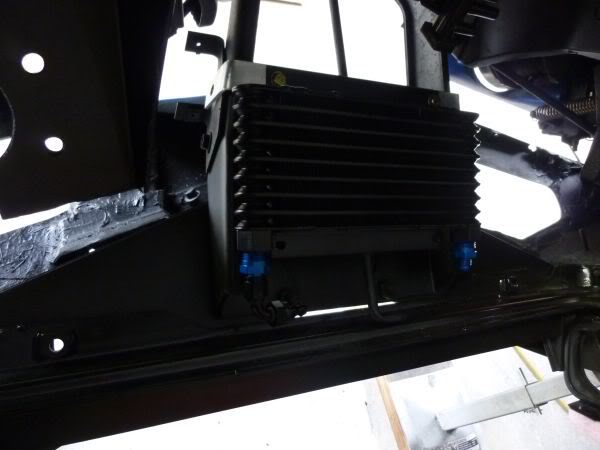
Both brackets and trial fit.

Will have to paint up brackets and route the hoses.
Had to make a couple of brackets to mount it to the brace.
First bracket.
Both brackets and trial fit.
Will have to paint up brackets and route the hoses.
Last edited by CraigH; 04-09-2023 at 09:35 PM.
 02-21-2013, 04:58 AM
#322
Melting Slicks
Thread Starter
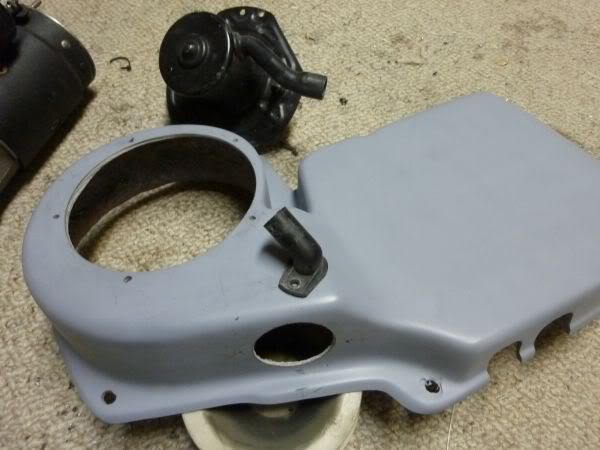
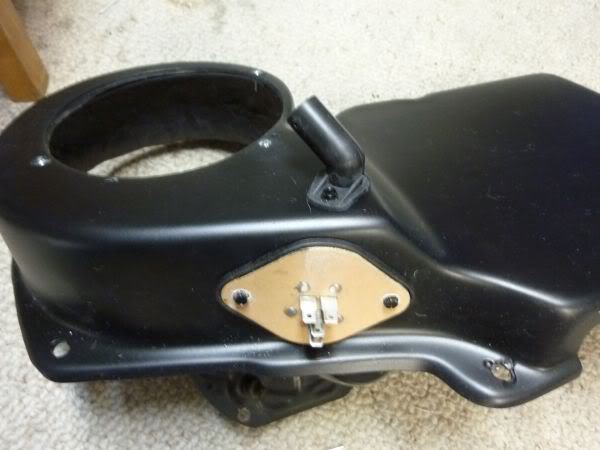
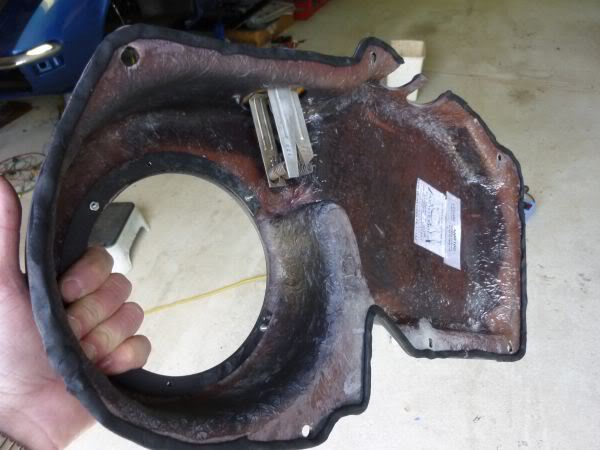
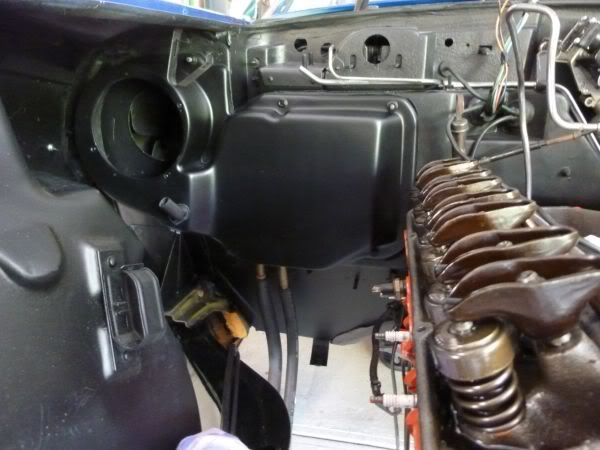
Started fitting the AC Delete fiberglass cover.
Took a bit of grinding and enlarging of the mount holes and it fits.
One area was a little low so I have built it up with glass.
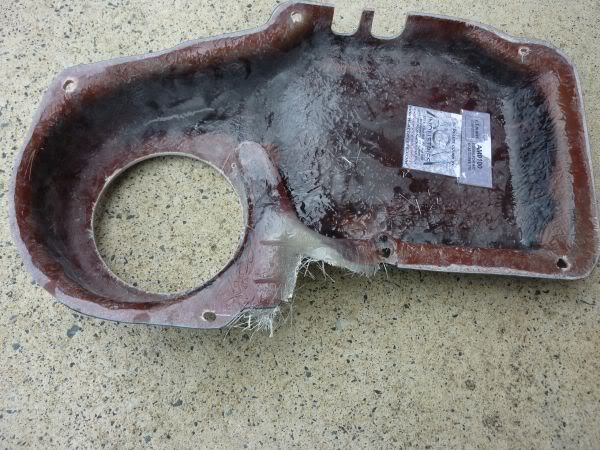
Once that sets i can start grinding it to shape and hopefully it will sit nice and flush.
Need to add the blower motor, reinforcing ring from original housing, drain tube and resistor.
Took a bit of grinding and enlarging of the mount holes and it fits.
One area was a little low so I have built it up with glass.
Once that sets i can start grinding it to shape and hopefully it will sit nice and flush.
Need to add the blower motor, reinforcing ring from original housing, drain tube and resistor.
Last edited by CraigH; 04-09-2023 at 09:35 PM.
02-21-2013, 05:02 AM
#323
Melting Slicks
Thread Starter
Glass has dried between races on TV so I gave it a sand and a reshape.
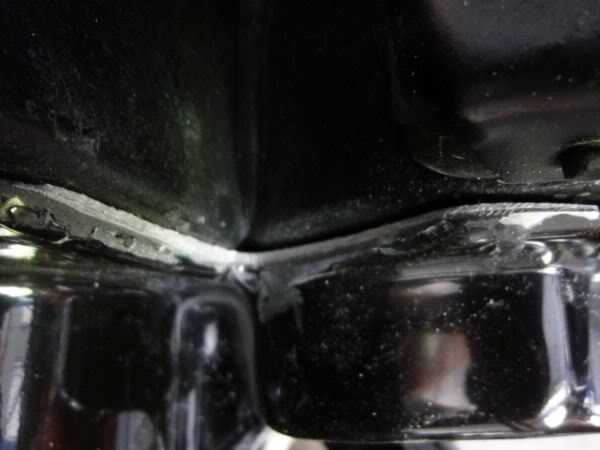
Fits the top edge much better now.
Once there is a bead of 3M seam sealer (Dumb Dumb) on the edge it should sit great.
Fits the top edge much better now.
Once there is a bead of 3M seam sealer (Dumb Dumb) on the edge it should sit great.
Last edited by CraigH; 04-09-2023 at 09:35 PM.
02-21-2013, 05:03 AM
#324
Melting Slicks
Thread Starter
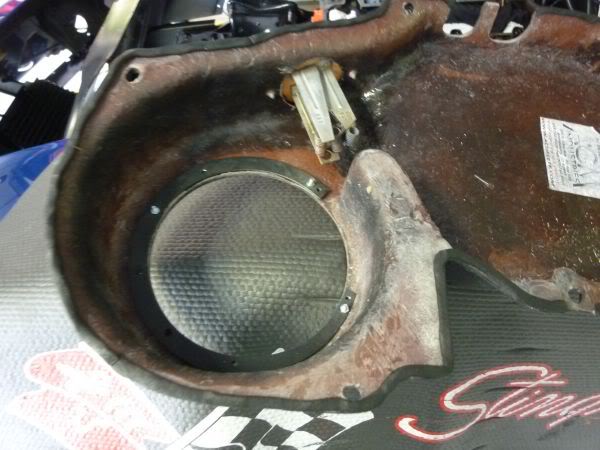
Sanded the AC delete housing ready for primer.
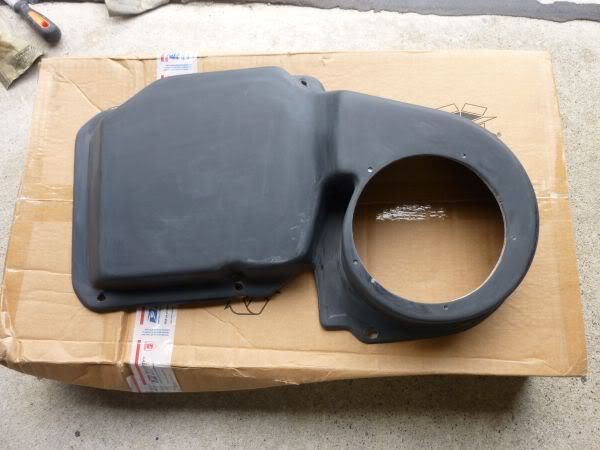
Then I needed to find a mount point for the resistor used to control the 3 lower fan speeds as well as the motor drain tube.
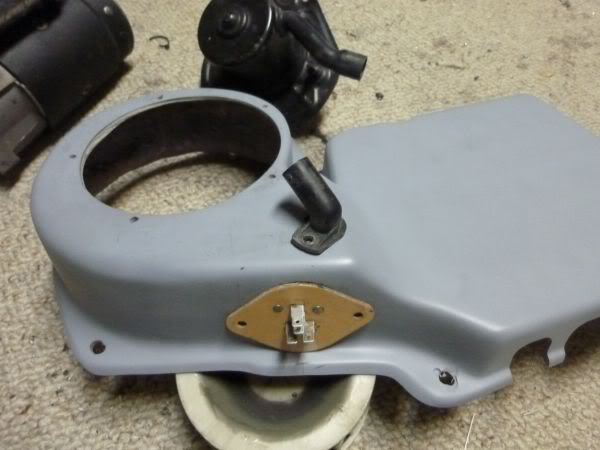
I gave it its first coat of satin black enamel and will finish it off tomorrow after a light sanding back and another coat.
Then I needed to find a mount point for the resistor used to control the 3 lower fan speeds as well as the motor drain tube.
I gave it its first coat of satin black enamel and will finish it off tomorrow after a light sanding back and another coat.
Last edited by CraigH; 04-09-2023 at 09:35 PM.
02-21-2013, 05:04 AM
#325
Melting Slicks
Thread Starter
I started to finish the AC Delete housing. Painted it again last night.
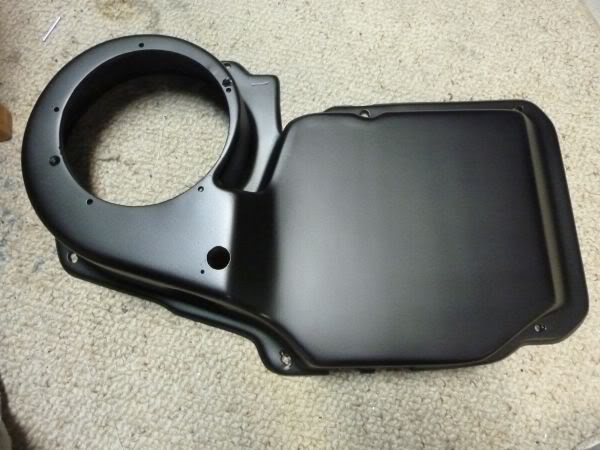
The Fan holding ring.
Fitted the Resistor and drain.
Then put 3M bituman sealer around the edges.
But I was not happy with how it attached at one point so its off again and having some more fiberglass work !!!!!!.
The Fan holding ring.
Fitted the Resistor and drain.
Then put 3M bituman sealer around the edges.
But I was not happy with how it attached at one point so its off again and having some more fiberglass work !!!!!!.
Last edited by CraigH; 04-09-2023 at 09:34 PM.
02-21-2013, 05:04 AM
#326
Melting Slicks
Thread Starter
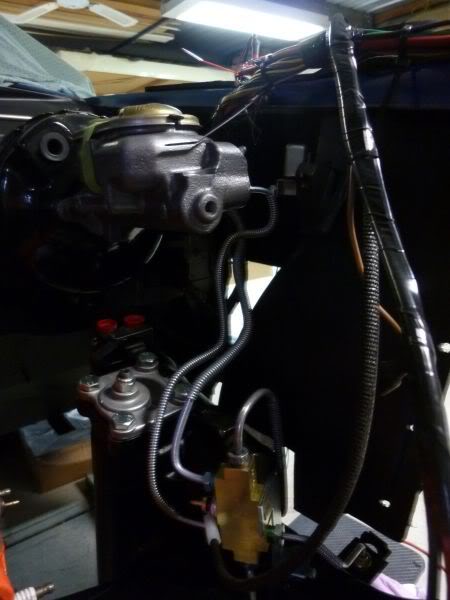
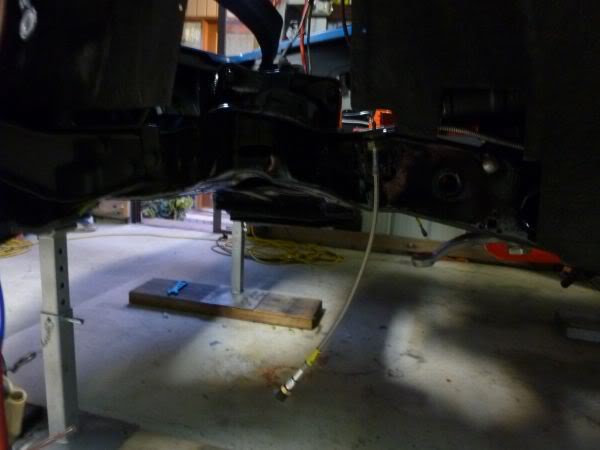
I fitted the new brake lines to the front.
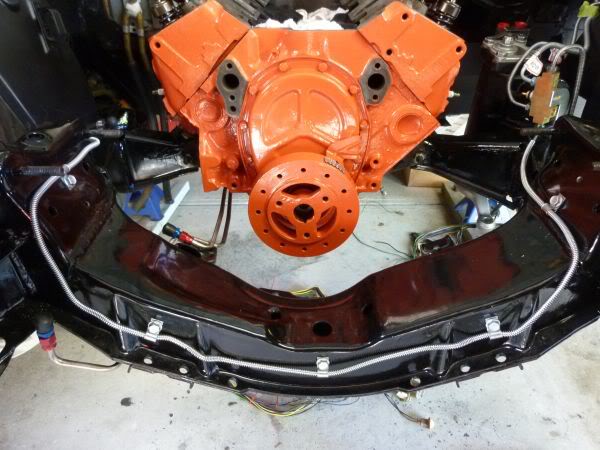
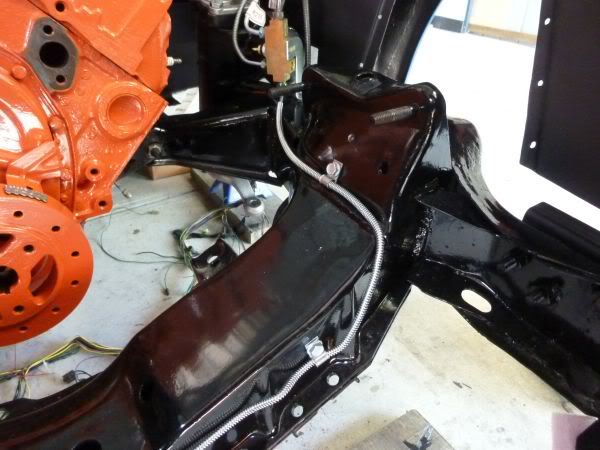
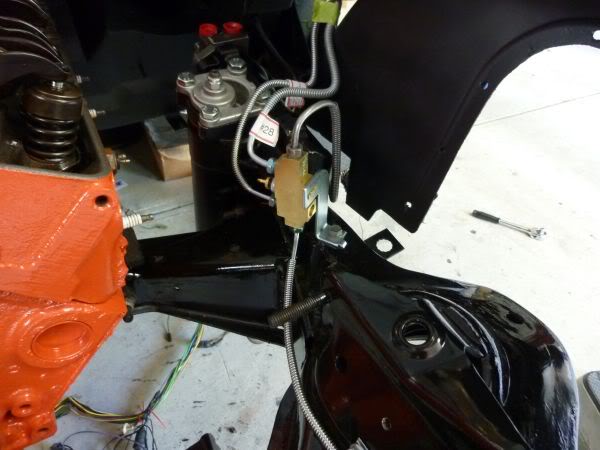
Also fitted the AN6 compression fittings to the original auto cooling lines after cutting them off clean.
Hope they don't leak but if they do I will run new lines from the transmission.
Also fitted the AN6 compression fittings to the original auto cooling lines after cutting them off clean.
Hope they don't leak but if they do I will run new lines from the transmission.
Last edited by CraigH; 04-09-2023 at 09:34 PM.
 02-22-2013, 06:43 AM
#328
Melting Slicks
Thread Starter
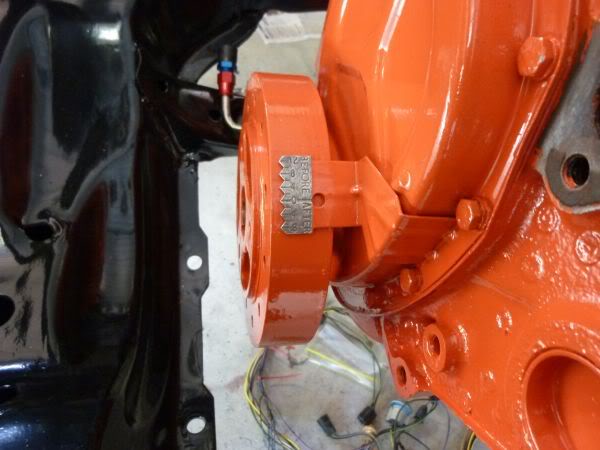
Also I went to tighten up the power steering bolts to 70 pounds and seemed to be doing up too much ..... then I realized they had stripped.
Bugger will have to order some new ones as the other set i have from Borgeson dont have the domed ends that lock into the chassis rail.
Its always a few steps forward then one back :oops: :evil:
Bugger will have to order some new ones as the other set i have from Borgeson dont have the domed ends that lock into the chassis rail.
Its always a few steps forward then one back :oops: :evil:
02-22-2013, 06:44 AM
#329
Melting Slicks
Thread Starter
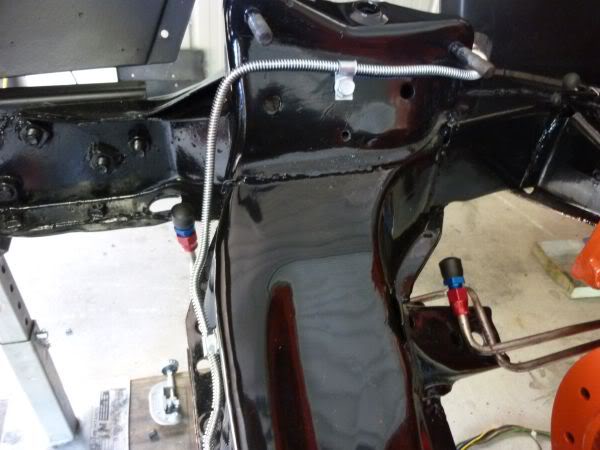
Front brake lines are now finished from the Master Cylinder to the flexible caliper connections.
I have read about people gravity bleeding the brakes before, well gravity had fluid at the end of the hoses in about a minute.
I have read about people gravity bleeding the brakes before, well gravity had fluid at the end of the hoses in about a minute.
Last edited by CraigH; 04-09-2023 at 09:34 PM.
02-22-2013, 06:44 AM
#330
Melting Slicks
Thread Starter
Started stripping the valve covers. Worked great on 80% of the surface with it wrinkling up very fast but not one side of each.
Last edited by CraigH; 04-09-2023 at 09:34 PM.
02-22-2013, 06:44 AM
#331
Melting Slicks
Thread Starter
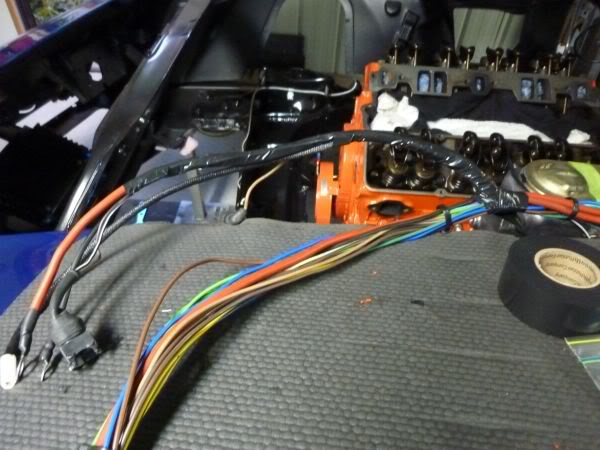
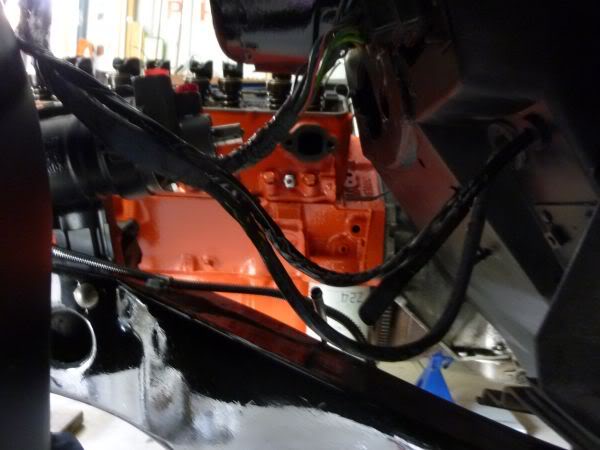
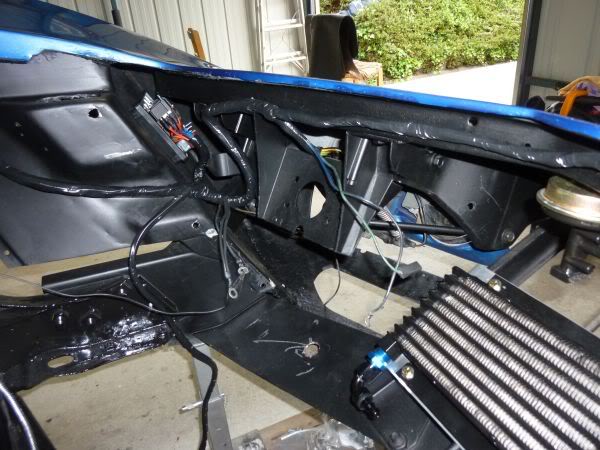
Back on the front wiring harness.
I decided to follow how Riverracer did his and went AWG 8 to the horn relay then AWG 8 to the new fuse/relay box in the front.
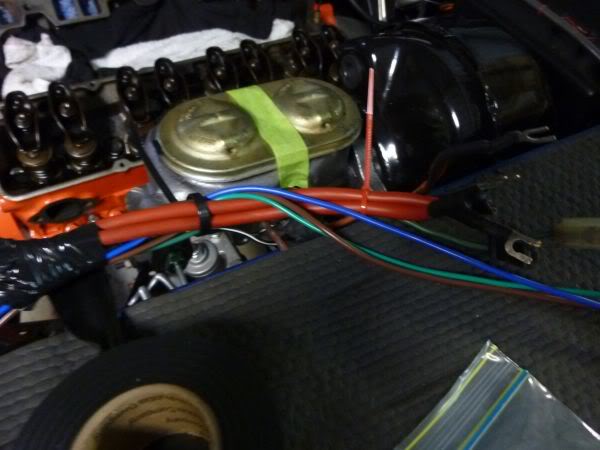
Also added the wires needed to trip the thermo fans, a new accessory wire and a temp sender wire for the fan controller.
Put a new pigtail for the temp sender as well and started to wrap it again.
I decided to follow how Riverracer did his and went AWG 8 to the horn relay then AWG 8 to the new fuse/relay box in the front.
Also added the wires needed to trip the thermo fans, a new accessory wire and a temp sender wire for the fan controller.
Put a new pigtail for the temp sender as well and started to wrap it again.
Last edited by CraigH; 04-09-2023 at 09:33 PM.
 02-22-2013, 06:45 AM
#333
Melting Slicks
Thread Starter
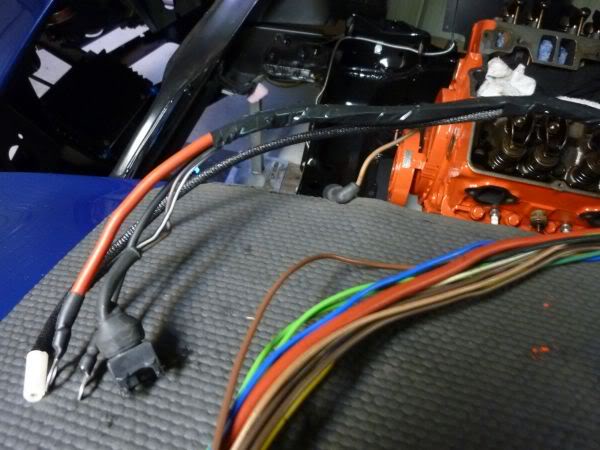
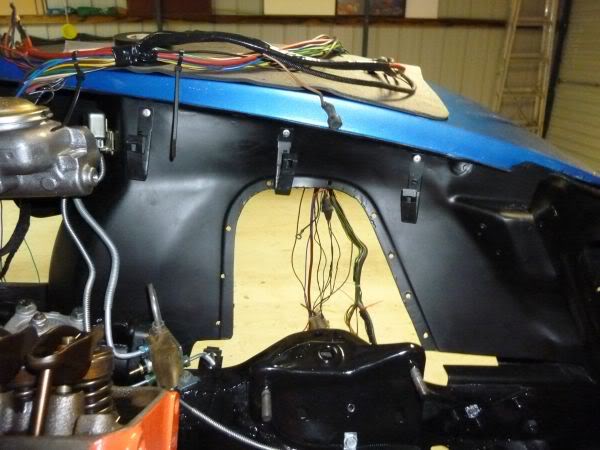
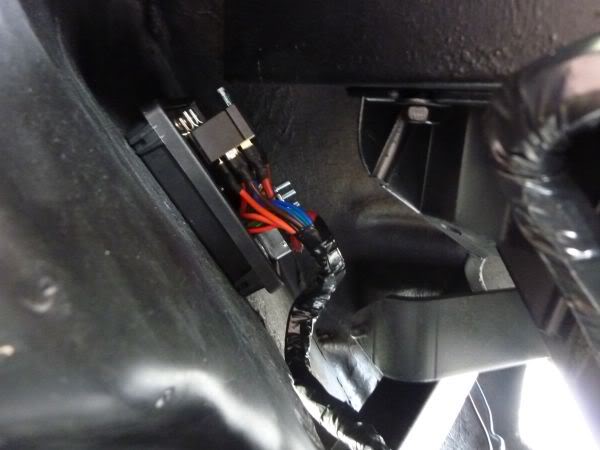
I have finished the harness from the firewall to the radiator support.
My control wires for the fan run through existing harness then drop into its own harness and go through the firewall next to the fiber optics.
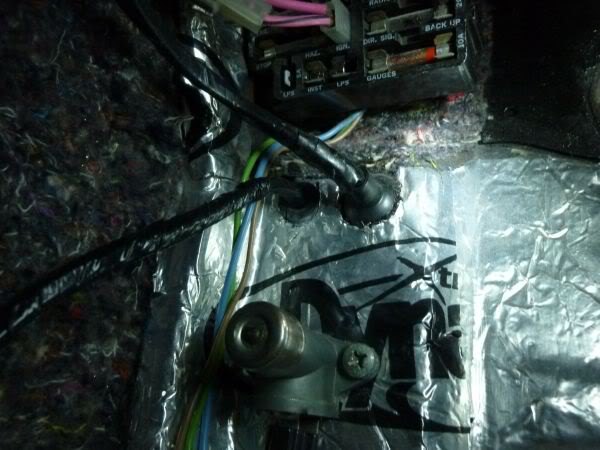
Horn Relay wired.
My control wires for the fan run through existing harness then drop into its own harness and go through the firewall next to the fiber optics.
Horn Relay wired.
Last edited by CraigH; 04-09-2023 at 09:33 PM.
 02-22-2013, 06:46 AM
#335
Melting Slicks
Thread Starter
Spent way too much time on the core support today.
Reproduction parts are just a hit and miss thing.
I should have tried getting the old one repaired as Jethro suggested but it has a good 10-12 inches on each side that just crumbles if you push it.
All the mount brackets were about 5-10 mm too far one way so after heaps of grinding, adjusting etc it now fits the radiator properly.
It will need to be resprayed as well.
What a pain. :evil: :evil:
02-22-2013, 06:47 AM
#336
Melting Slicks
Thread Starter
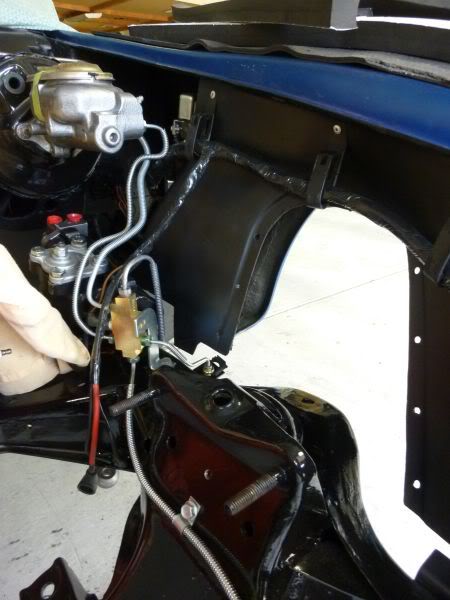
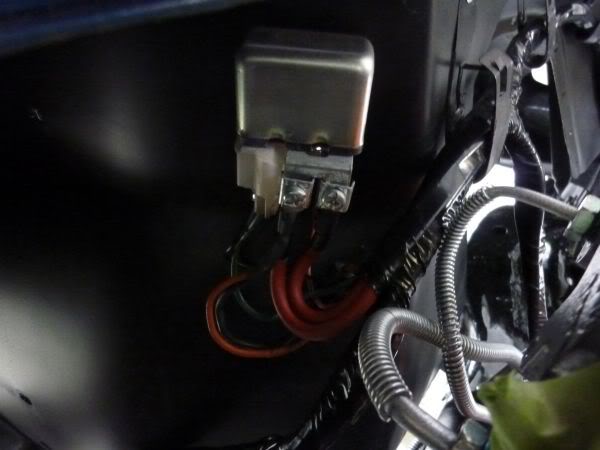
I spent today finishing the front light harness.
Wired up the circuit breakers and relays for the lights and thermo fans.
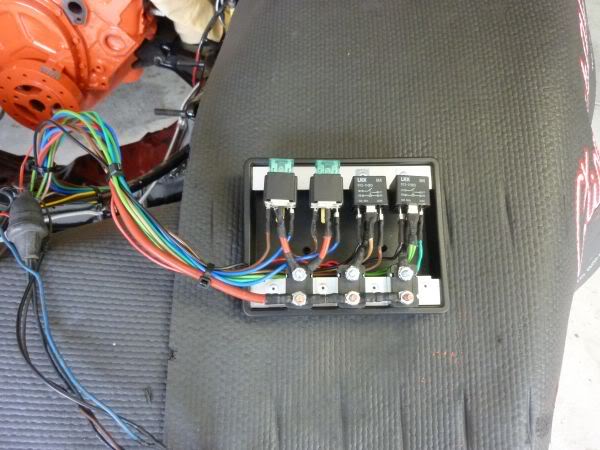
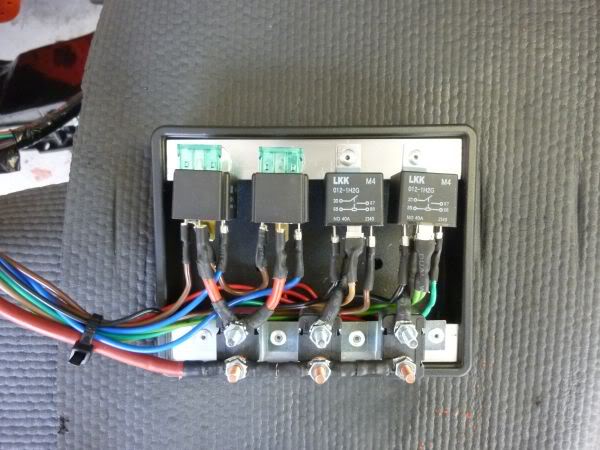
Wrapped the harness and mounted the box.
Wired up the circuit breakers and relays for the lights and thermo fans.
Wrapped the harness and mounted the box.
Last edited by CraigH; 04-09-2023 at 09:32 PM.
02-22-2013, 06:47 AM
#337
Melting Slicks
Thread Starter
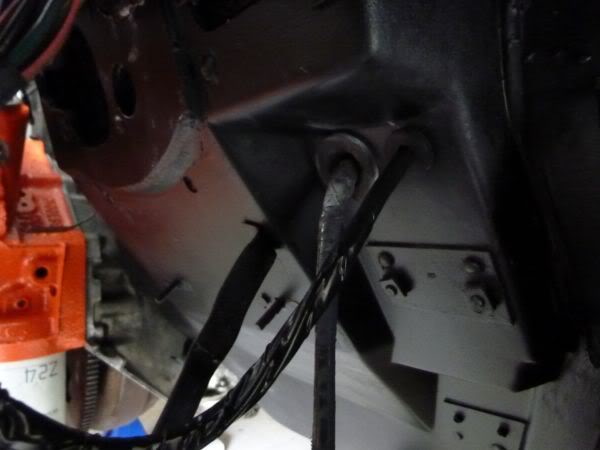
I got the proper mount clips to allow the harness to attach to the front header bar.
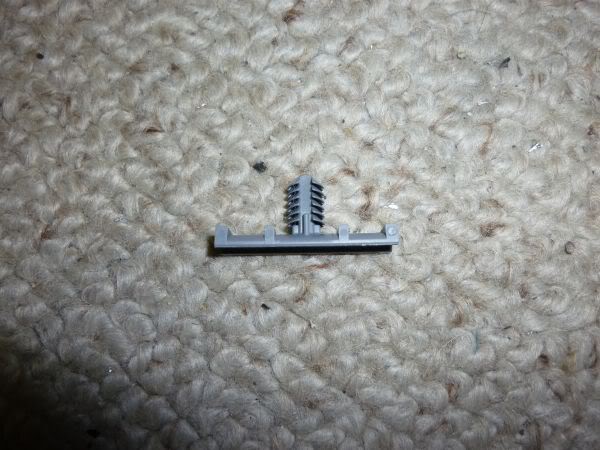
They are just wrapped into the harness as you go.
The harness hanging down on the left is for the fans and will run down the base of the radiator.
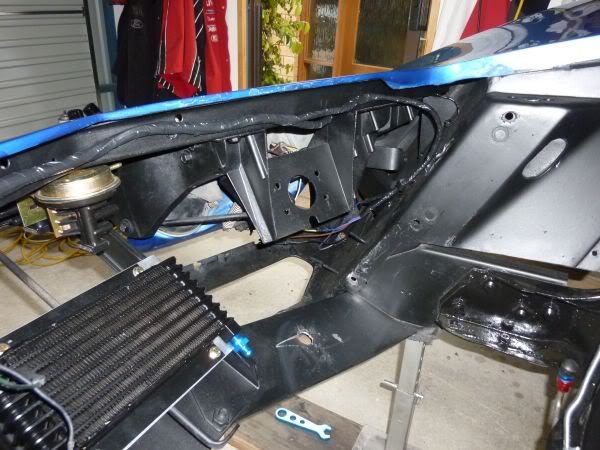
Ignore the scratches on the lower supports they were made when I had to enlarge the mount holes for the radiator support, will sand it back and respray. :-)
After getting it all on I ran a wire from the + lead for the starter to the horn relay then tested each circuit ( I still dont have the engine harness in yet).
All circuits worked so onto the next thing.
They are just wrapped into the harness as you go.
The harness hanging down on the left is for the fans and will run down the base of the radiator.
Ignore the scratches on the lower supports they were made when I had to enlarge the mount holes for the radiator support, will sand it back and respray. :-)
After getting it all on I ran a wire from the + lead for the starter to the horn relay then tested each circuit ( I still dont have the engine harness in yet).
All circuits worked so onto the next thing.
Last edited by CraigH; 04-09-2023 at 09:32 PM.
02-22-2013, 06:48 AM
#338
Melting Slicks
Thread Starter
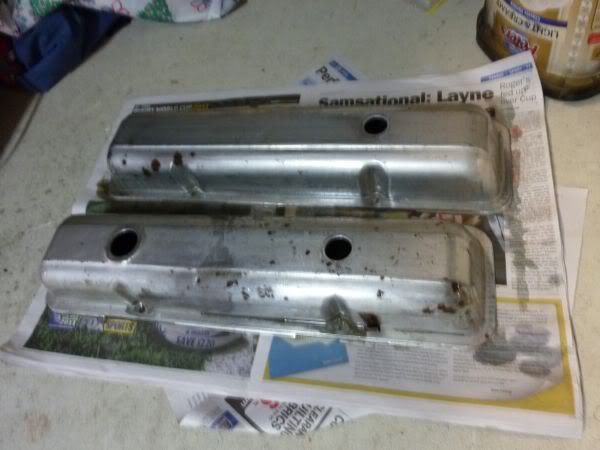
Needed a distraction this afternoon so cleaned up the valve covers.
They have now been given a coat of acid to kill some of the surface rust that was under the old paint.
The radiator and core support have been mocked up.
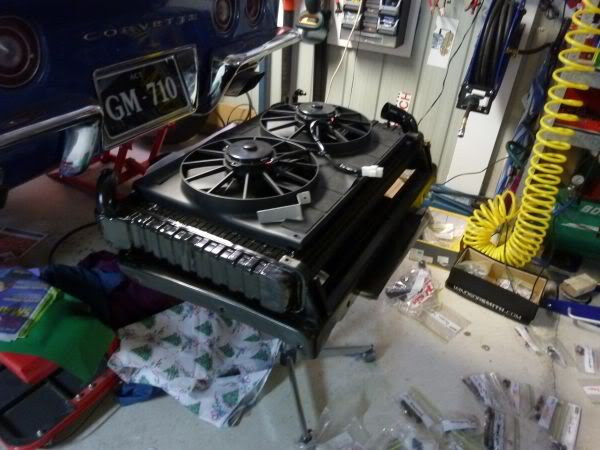
Now just need to make a bracket template and take it to a metal shop to be bent up for teh top and bottom to hold fans.
They have now been given a coat of acid to kill some of the surface rust that was under the old paint.
The radiator and core support have been mocked up.
Now just need to make a bracket template and take it to a metal shop to be bent up for teh top and bottom to hold fans.
Last edited by CraigH; 04-09-2023 at 09:32 PM.
02-22-2013, 06:48 AM
#339
Melting Slicks
Thread Starter
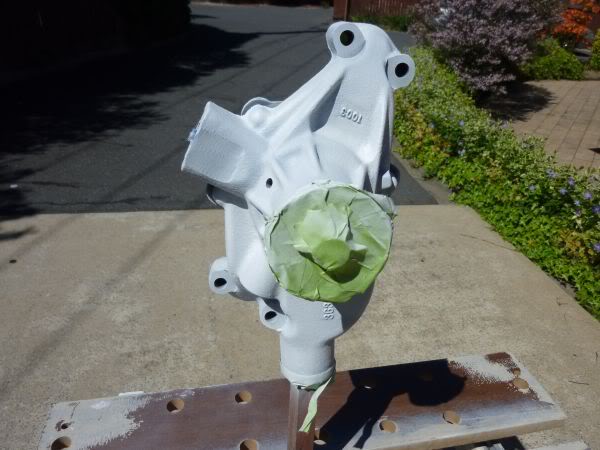
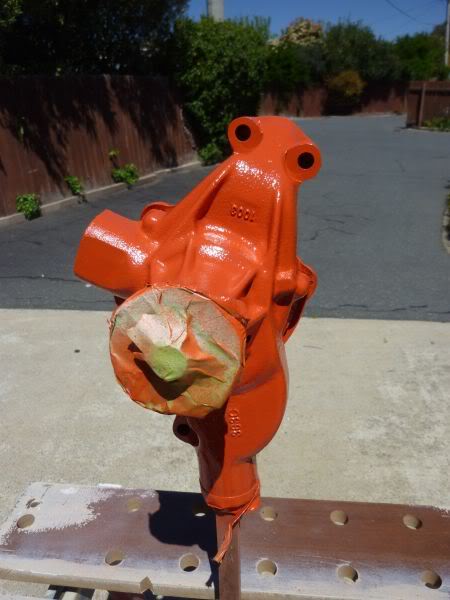
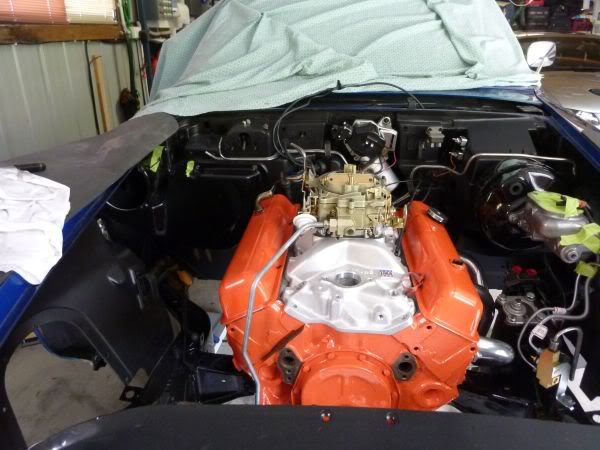
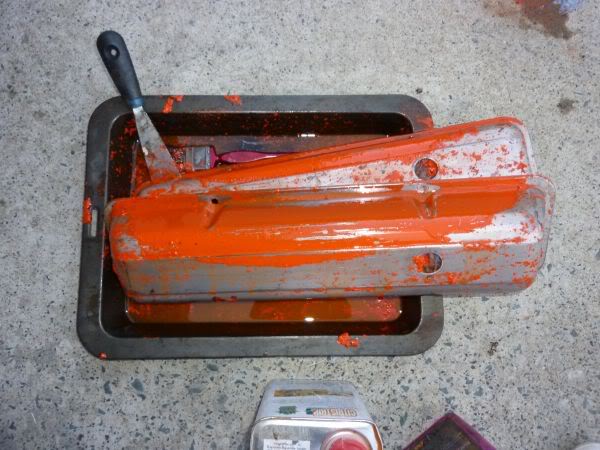
Finished off the valve covers this morning
Final clean up.
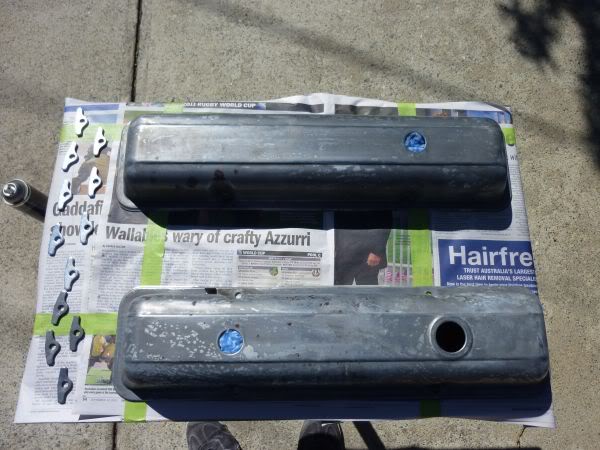
A couple of coats of etch primer.
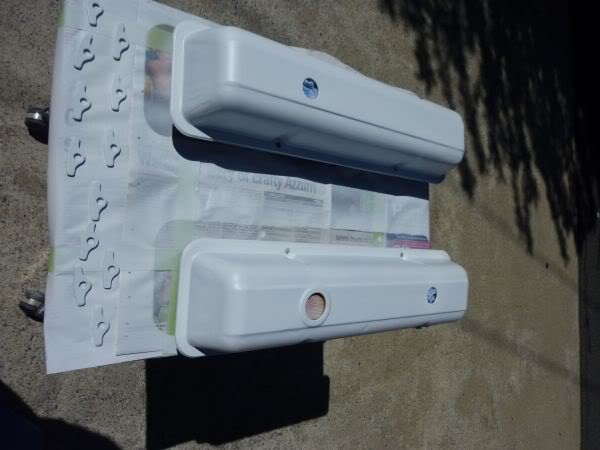
A light sand then Chevy Orange.
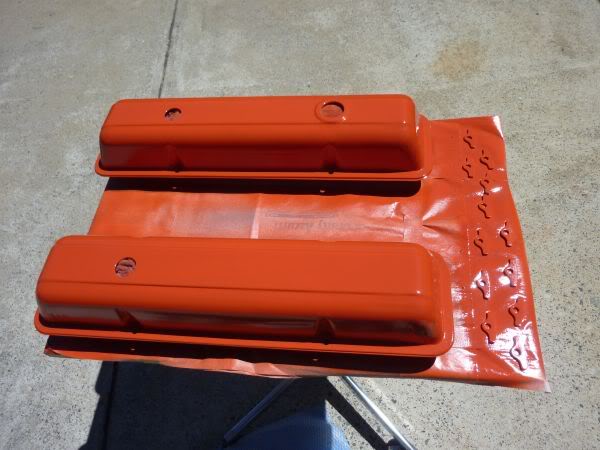
Final clean up.
A couple of coats of etch primer.
A light sand then Chevy Orange.
Last edited by CraigH; 04-09-2023 at 09:32 PM.