
2000 manual HVAC blower motor replacement info.......
 11-29-2006, 01:24 PM
#1
Race Director


Thread Starter
Our fan has been putting out very low volume air for a while & finally died.....while Julie was driving of course 
I did the diagnostic checks via the tech manual and in 5 minutes had it isolated to a bad blower motor. In another 5 minutes I had it out!
Now the fun��.my research has shown:
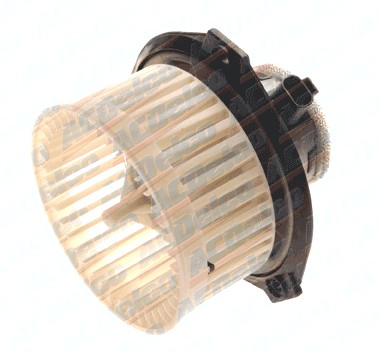
On the blower motor, there IS a first and second design for both manual and climate control a/c, and the way to tell them apart is by the GM service number on the OEM motor.
OEM # 52481315 (1st design) = AC Delco 15-8949 (GM # 52489321)
OEM # 52486835 (2nd design) = AC-Delco 15-8880 (GM # 52487083)
These numbers are for manual a/c, and there are two more part numbers for climate control a/c
There is a discrepancy between GM's documentation and real world facts.... The 2000 with manual supposedly only had the blower motor with part number 52487083. In other words no 2000 model vettes with manual HVAC ever had an alleged first design blower motor..........yet
Mine is a ............OEM # 52486835
A new OEM is around $100, should have in the PM
I did the diagnostic checks via the tech manual and in 5 minutes had it isolated to a bad blower motor. In another 5 minutes I had it out!
Now the fun��.my research has shown:
On the blower motor, there IS a first and second design for both manual and climate control a/c, and the way to tell them apart is by the GM service number on the OEM motor.
OEM # 52481315 (1st design) = AC Delco 15-8949 (GM # 52489321)
OEM # 52486835 (2nd design) = AC-Delco 15-8880 (GM # 52487083)
These numbers are for manual a/c, and there are two more part numbers for climate control a/c
There is a discrepancy between GM's documentation and real world facts.... The 2000 with manual supposedly only had the blower motor with part number 52487083. In other words no 2000 model vettes with manual HVAC ever had an alleged first design blower motor..........yet
Mine is a ............OEM # 52486835
A new OEM is around $100, should have in the PM
 12-07-2006, 01:20 PM
#2
Race Director
Thread Starter
Installed and perrrrrrfect now 
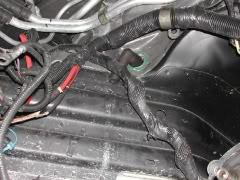
Were it goes under the PS dash.......


The new motor and the lower dash panel cover you remove to get to it


Motor in place, reinstall PS courtesy light, pop panel back on and its done!


Were it goes under the PS dash.......
The new motor and the lower dash panel cover you remove to get to it
Motor in place, reinstall PS courtesy light, pop panel back on and its done!
12-07-2006, 02:17 PM
#3
Burning Brakes


Been there done that. Like you say, simply replacement. I had the dreaded fan squeal noise. I have 99 with auto climate control. Mine had the 1st design. Got the 2nd design to replace it. The vent hose is longer and routes differently. Also I believe the bearings on the bottom of the fan are sealed better to prevent moisture contamination which leads to rust and the dreaded squeal. Tom
12-11-2006, 11:23 AM
#4
Advanced


Member Since: Mar 2005
Location: Suffield Connecticut
Posts: 58
Likes: 0
Received 0 Likes
on
0 Posts

As I understand there were two different fans that could be in my 99Can I just order a replacement from Rock Auto or do I need to pull the part # from the existing fan? (99 with Auto climate control )
12-11-2006, 11:28 AM
#5
Race Director
Thread Starter
Originally Posted by Bob Brooks
As I understand there were two different fans that could be in my 99Can I just order a replacement from Rock Auto or do I need to pull the part # from the existing fan? (99 with Auto climate control )

 Not as hard as I thought it was going to be... I did a few on Camaros, and a few 70's T Birds. and 1/2 the dash had to come out... Cool!
12-11-2006, 01:51 PM
Not as hard as I thought it was going to be... I did a few on Camaros, and a few 70's T Birds. and 1/2 the dash had to come out... Cool!
12-11-2006, 01:51 PM
#7
I did mine over 2 years ago, it was working but making all kinds of noise. It is fairly easy to replace but in very tight quarters, luckly I have a convertible so I let down the top and removed the seat before I started.
One issuse you might want to address and this is to all older model C5's be sure to clean your drain plugs. Over time they collect a lot of crap and get clogged causing a lot of problems.
One issuse you might want to address and this is to all older model C5's be sure to clean your drain plugs. Over time they collect a lot of crap and get clogged causing a lot of problems.
12-11-2006, 05:28 PM
#8
Burning Brakes


Originally Posted by Bob Brooks
As I understand there were two different fans that could be in my 99Can I just order a replacement from Rock Auto or do I need to pull the part # from the existing fan? (99 with Auto climate control )
Last edited by Allthrottleandsomebottle; 04-12-2011 at 02:44 PM. Reason: nsv
06-09-2011, 02:57 PM
#9
1st Gear

Member Since: Jun 2011
Posts: 1
Likes: 0
Received 0 Likes
on
0 Posts
The power wire connector can be a pain in the rear to get off. I broke the retaining clip on the blower to get mine out. Not an issue because I was replacing the blower motor anyways. But once I saw how it works, I found you have to be smarter than the clip. Make sure you use stuby flat head screw driver to depress the retainer clip while pulling the connector down.
03-19-2012, 11:52 AM
#10
Racer
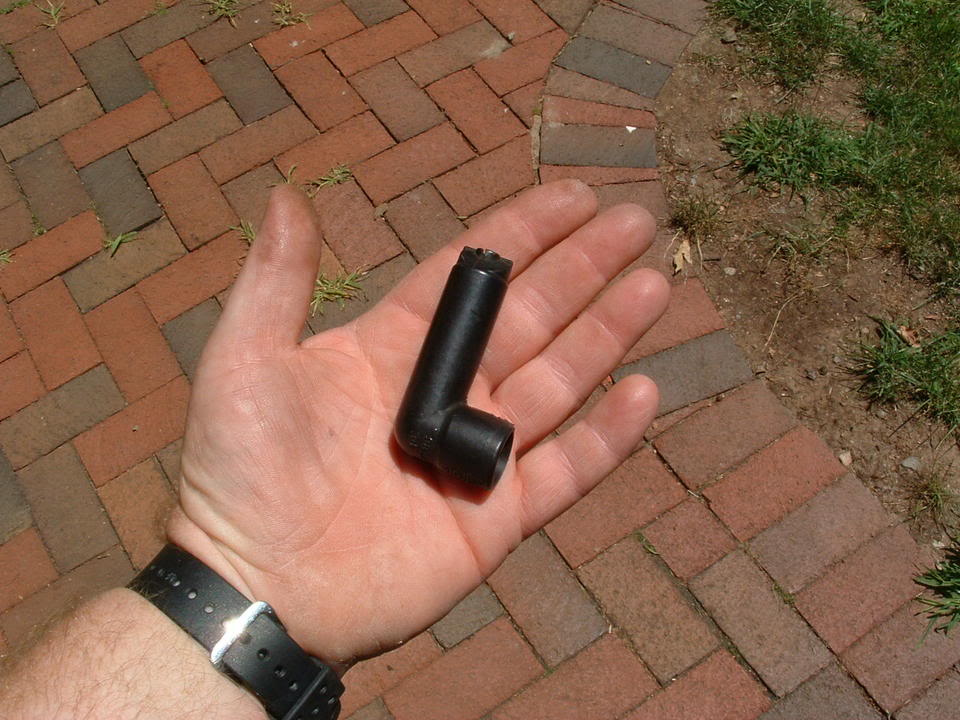
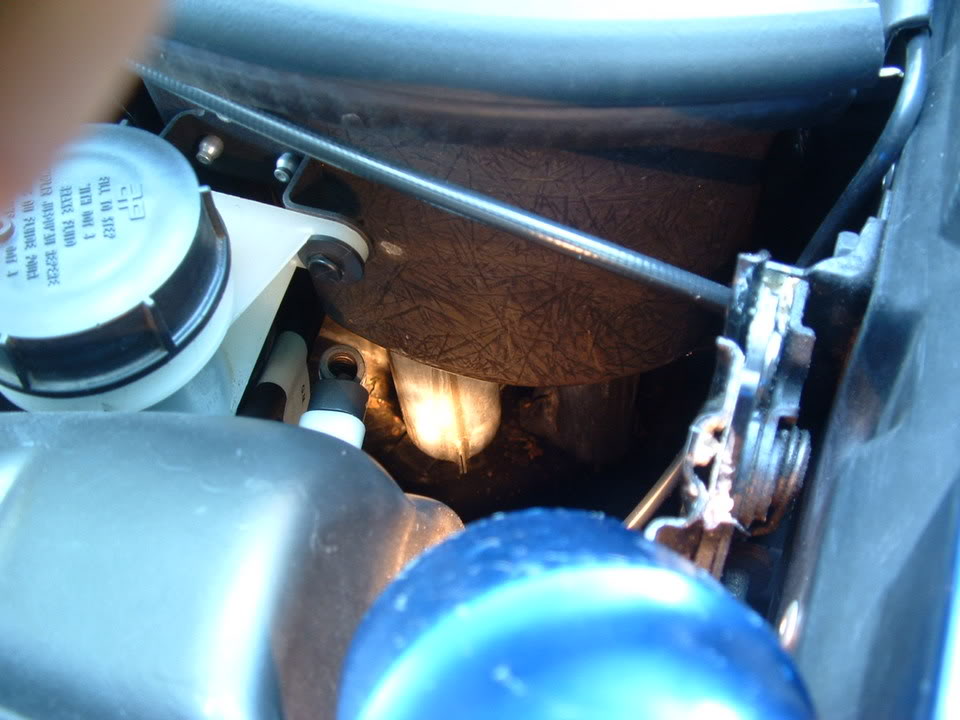
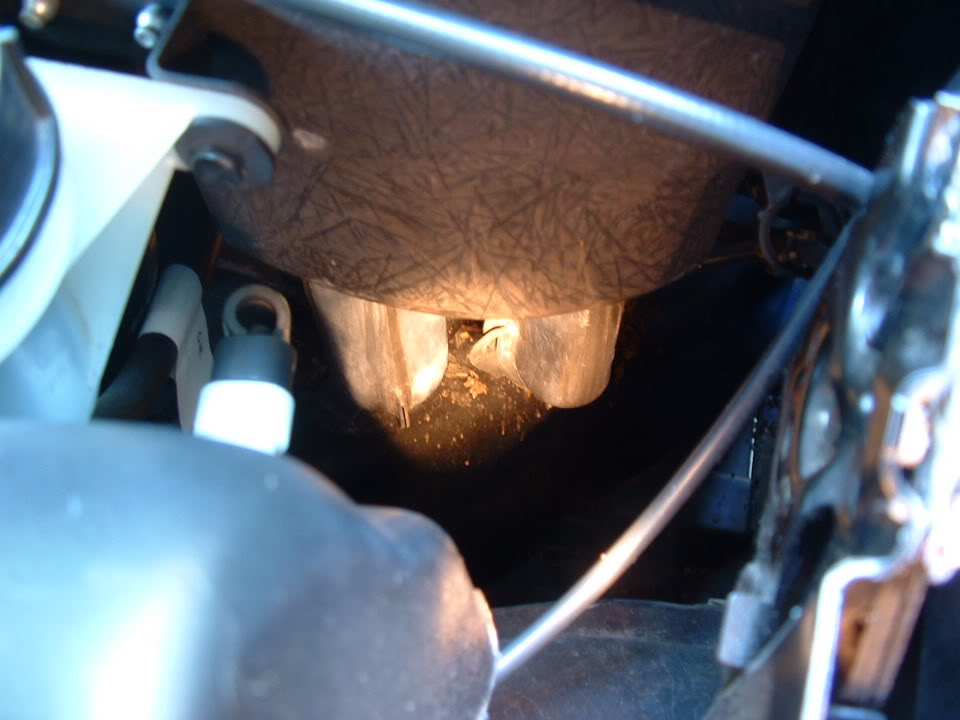
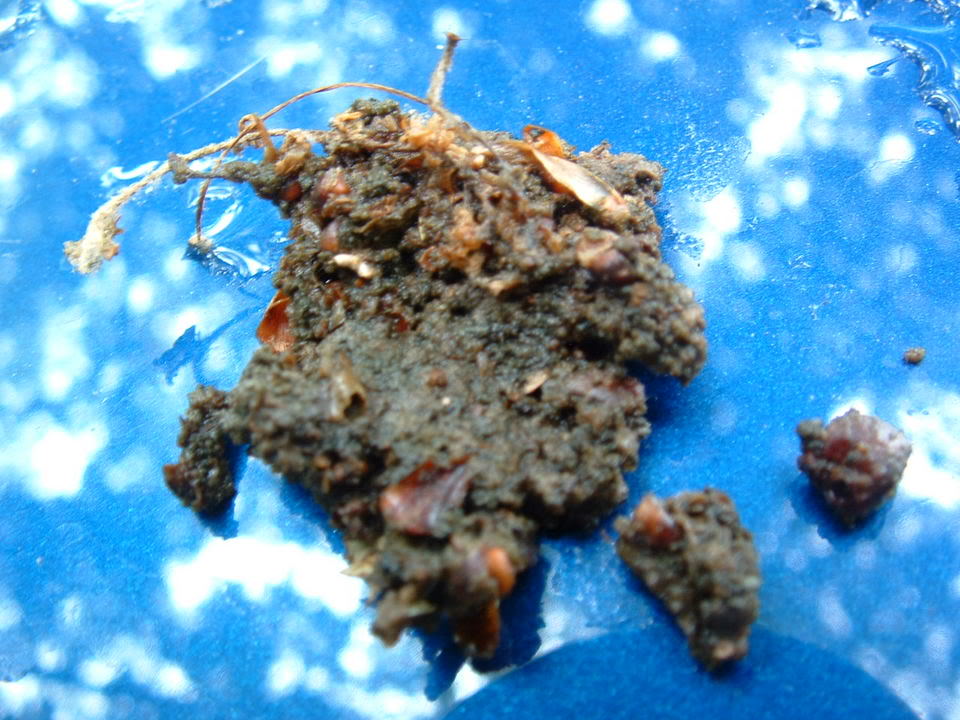
Thanks for the great write up on here. I went to follow this today to remove mine. I took out my blower motor without disconnecting the power and left it hanging a little and look what dropped out. About 8 oz of leaves, debri and even bark from a palm tree. My motor was vibrating really bad on any speed and would not blow full out the vents only about 1/2. Didn't need a blower motor after all. Just cleaned out the basket, replaced in 10 mins. Problem solve. Cheers

Uploaded with ImageShack.us
Uploaded with ImageShack.us

 08-27-2015, 04:30 PM
#13
Tech Contributor


Member Since: Dec 1999
Location: Anthony TX
Posts: 32,736
Received 2,180 Likes
on
1,583 Posts
CI 6,7,8,9,11 Vet
St. Jude Donor '08

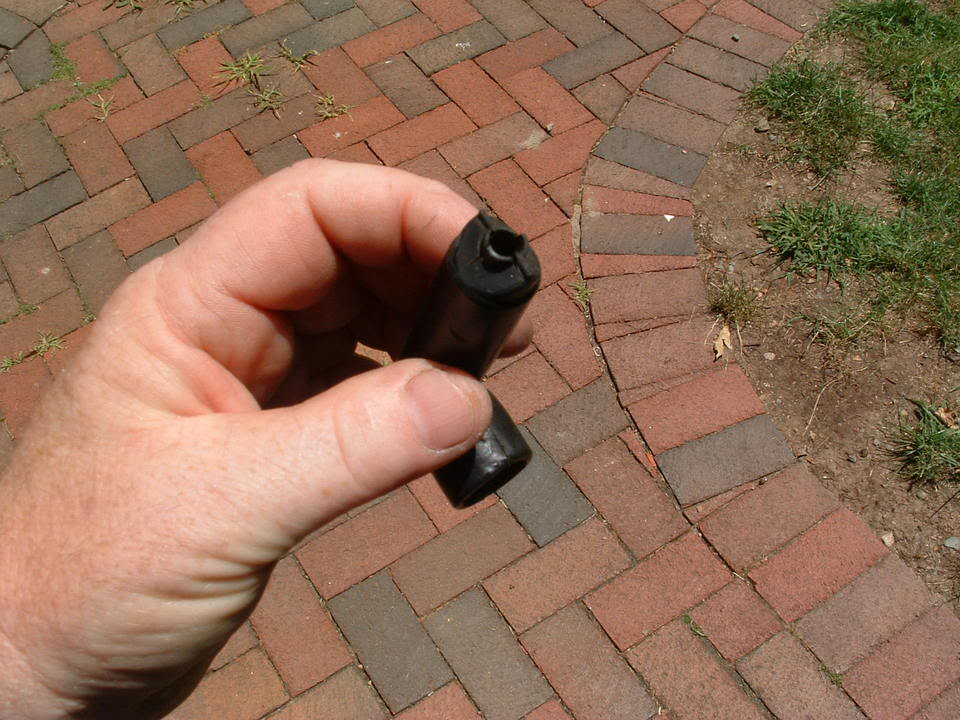
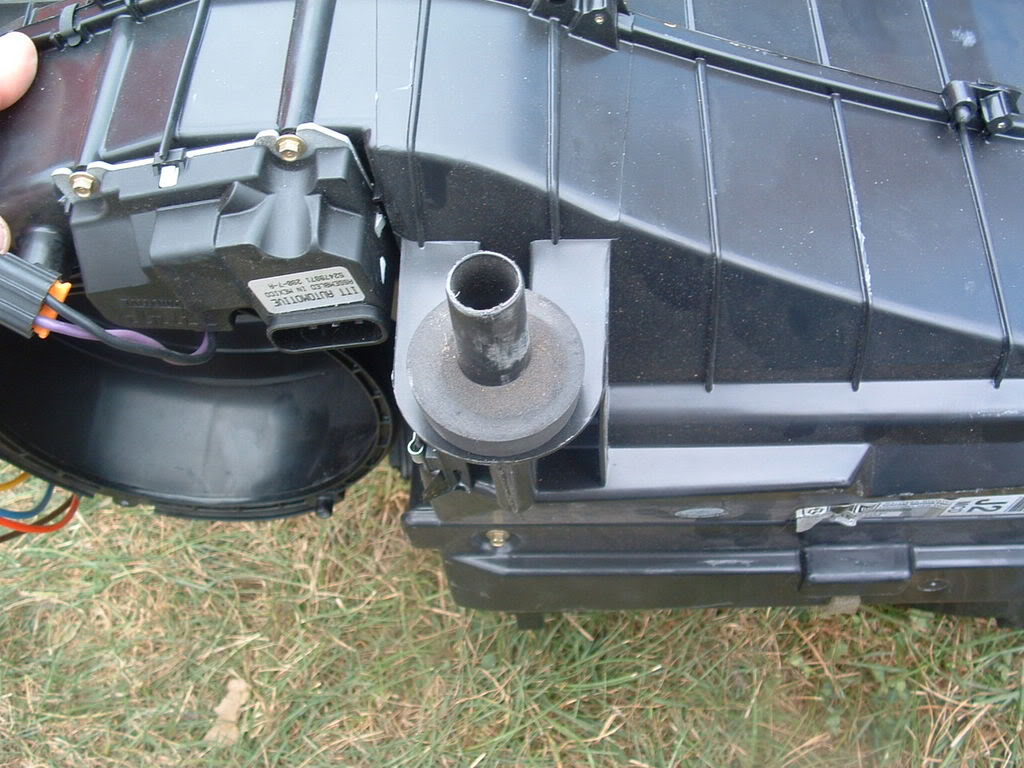
LOL!!!!!!!! Been there TOO many times. There is a 90 degree rubber BOOT with a pinch nipple on the end. Its either gummed shut or the HVAC drain tube is full of condensate SNOT.
Look on the PASSENGERS side of the engine compartment FIREWALL.
The fitting and rubber boot will be on the fire wall just below the back of the passengers cylinder head. ITS ALMOST IMPOSSIBLE to access from above. If you have headers, it is a ROYAL PITA to access it from below!

Anyway, pop off the rubber boot and see if condensate pours out.
You may have to suck or blow in the plastic tube if its stopped up inside the air box.
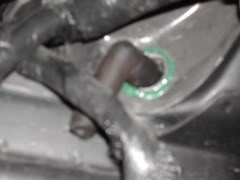
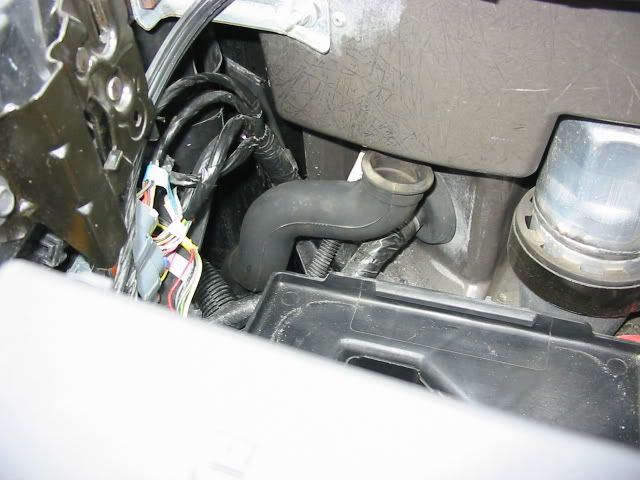
Behind the battery you will find this hose that connects to the windshield COWEL WELL. If it clogged it will allow the well to fill with rain water/ wash water and enter the AIR BOX.
DO NOT pull it out!!!!!!!!!!!!!!!!!!!!!!!!!!!!!!!!!!!!! !!!!!
Just pop it loose and FLUSH it out with a garden hose! Reconnect!
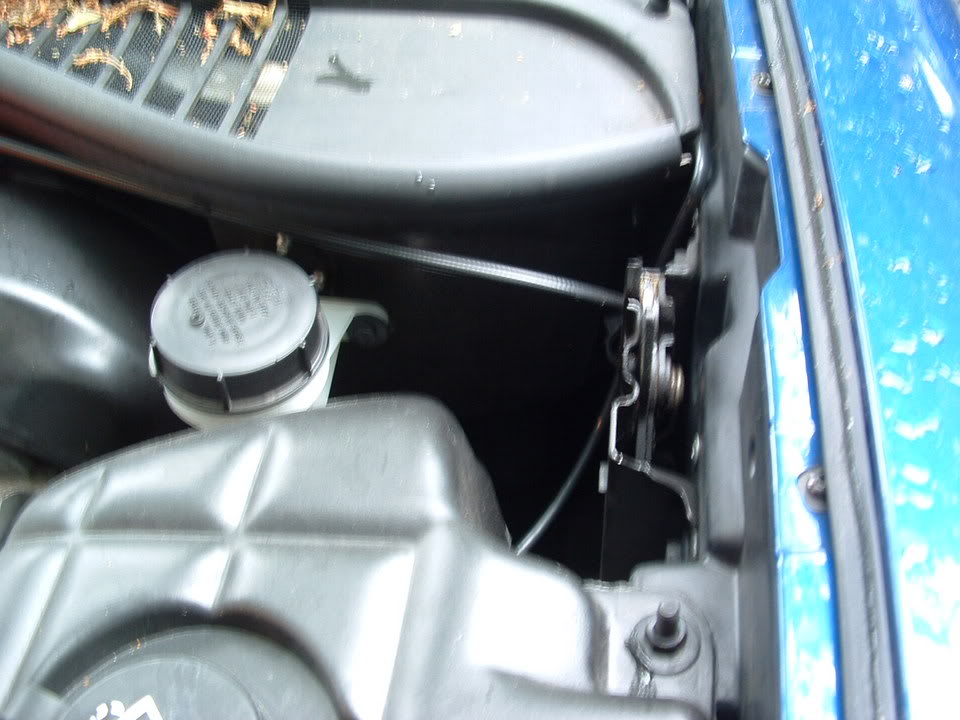
On the drivers side,,, look down between the clutch resivioure and the hood latch and you will see the other THREE drain udders. They always CLOG with GOOP!
Look on the PASSENGERS side of the engine compartment FIREWALL.
The fitting and rubber boot will be on the fire wall just below the back of the passengers cylinder head. ITS ALMOST IMPOSSIBLE to access from above. If you have headers, it is a ROYAL PITA to access it from below!
Anyway, pop off the rubber boot and see if condensate pours out.
You may have to suck or blow in the plastic tube if its stopped up inside the air box.
Behind the battery you will find this hose that connects to the windshield COWEL WELL. If it clogged it will allow the well to fill with rain water/ wash water and enter the AIR BOX.
DO NOT pull it out!!!!!!!!!!!!!!!!!!!!!!!!!!!!!!!!!!!!! !!!!!
Just pop it loose and FLUSH it out with a garden hose! Reconnect!
On the drivers side,,, look down between the clutch resivioure and the hood latch and you will see the other THREE drain udders. They always CLOG with GOOP!