
LED Tail Lights, Screens, and Fat Mammas Oh My!! 56K Nuked!
 08-31-2008, 10:24 PM
#1
Drifting

Thread Starter
Member Since: Oct 2004
Location: Greensboro, NC "REALITY IS MERELY AN ILLUSION, ALBEIT A VERY PERSISTENT ONE"...ALBERT EINSTEIN"
Posts: 1,413
Likes: 0
Received 0 Likes
on
0 Posts
St. Jude Donor '05-'06-'07
Since I had a long weekend ahead of me I figured I would do a few of mods/installs I had been putting off for no good reason other than sheer laziness.
I had purchased the following Items over the past year and I was hell bent on getting everything installed this weekend:
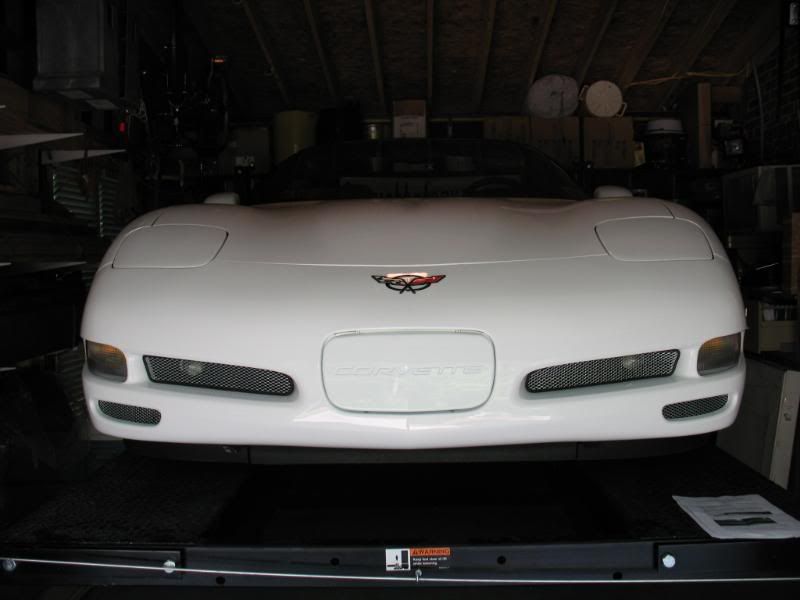
1. Smooth Air Bridge
2. Stainless ZO6 Screens
3. Fat Mammas
4. Modified LED Halo Tail Lights (see this thread: http://forums.corvetteforum.com/show....php?t=1997851)
5. Flush mounting tail lights using Lowes parts
Now on to the day’s installs:
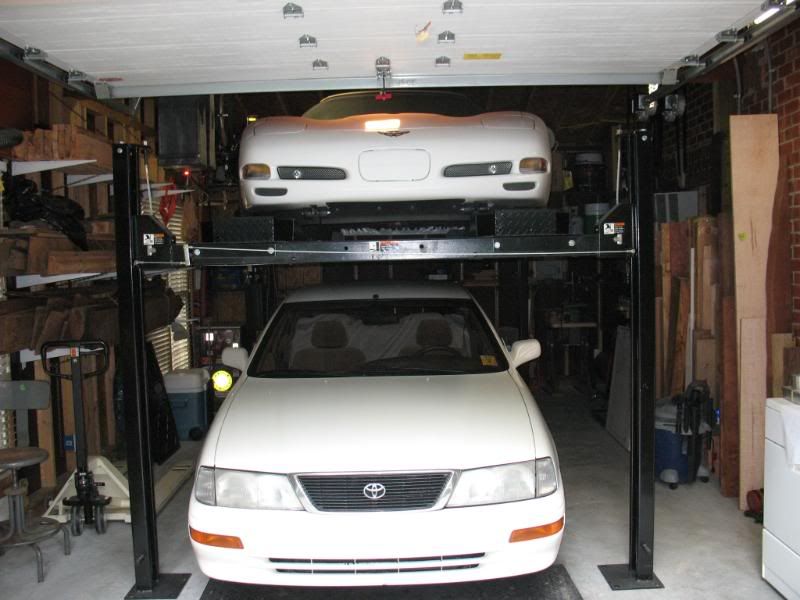
I hadn’t had the Vette out in about 3 weeks so it was time to get it down off the lift (see this thread for the lift assembly: http://forums.corvetteforum.com/show....php?t=1906810)
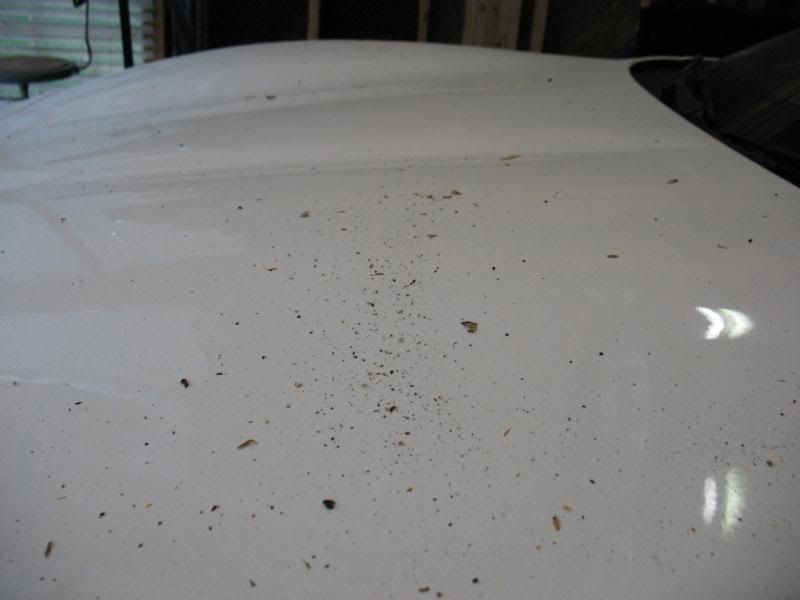
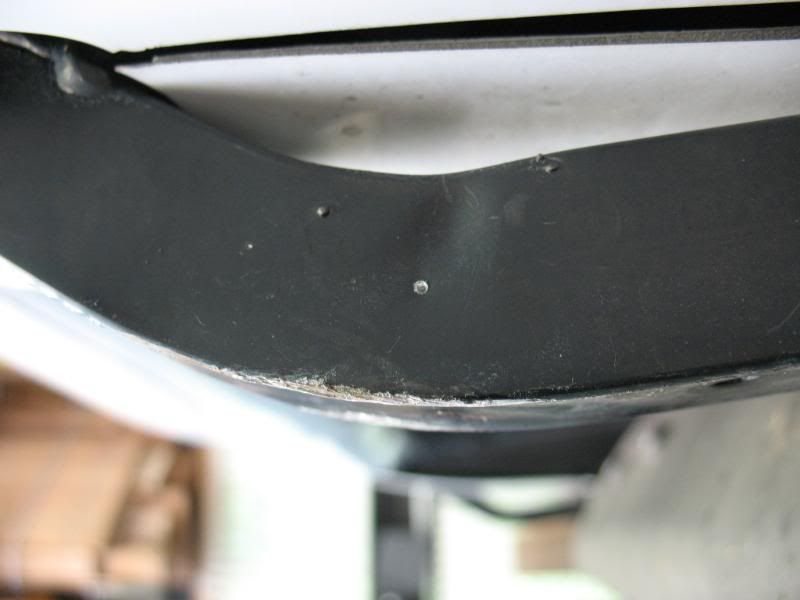
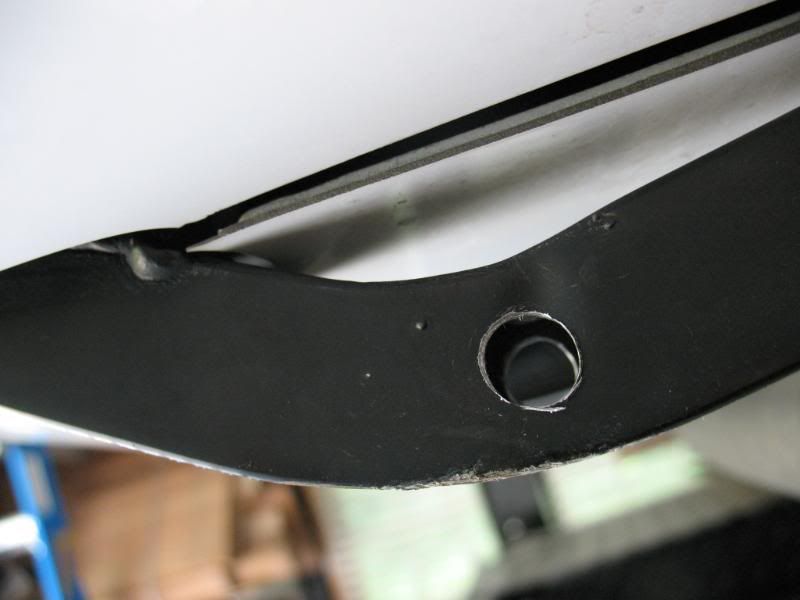
Once the car was on the ground I had had quite a surprise that was followed by some rather protracted profanity. Imagine my surprise when I found this:
And this:
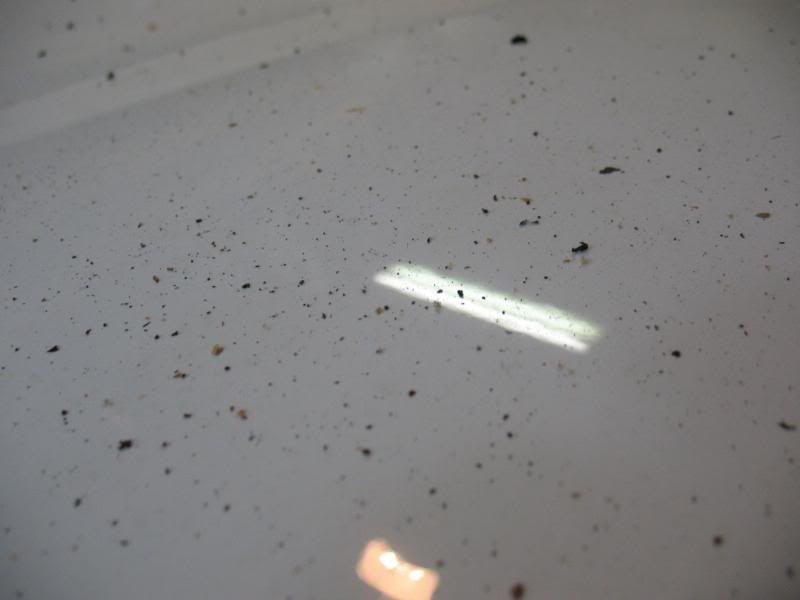
The entire car was covered with debris. It only took a second to realize the all the mess had been created when the roof on the garage and house had been torn off and replaced due to hail damage (pics here: http://smg.photobucket.com/albums/v6...m%205-31-2008/)
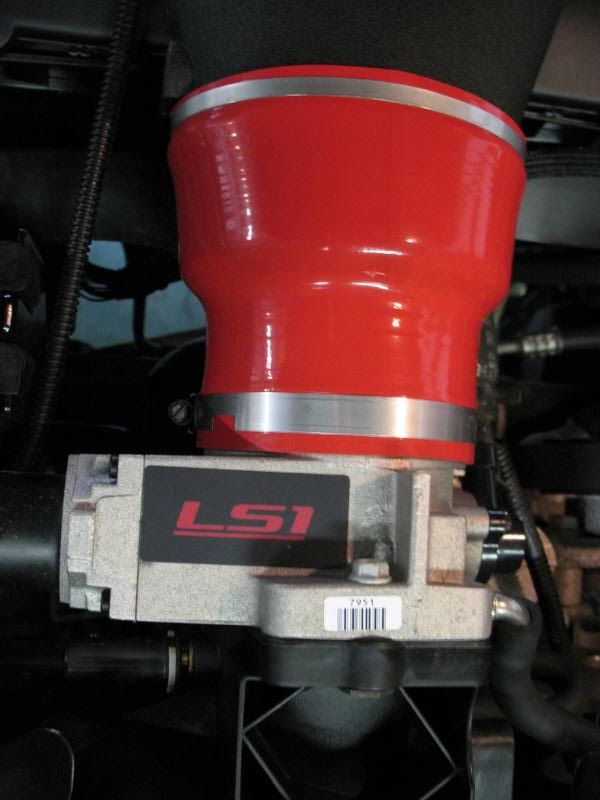
I started with the easiest thing first, so on goes the smooth coupler.
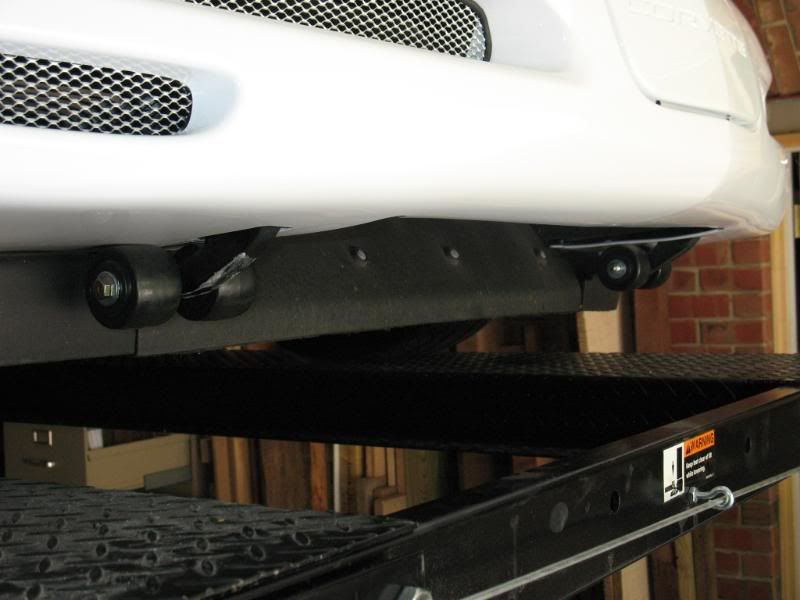
Time for the ZO6 screens. These are fairly inexpensive items and they are not as sturdy as the OEM screens, but they look OK especially from a distance.

These are designed to be a friction fit, but the plastic is way too flexible, so I added a black ziptie to make sure if/when they comes loose I won’t loose the screens. The lower screens fit in between the bumper and the brake cooling duct and shouldn’t go anywhere.

And then just twist it out of site….sorta

All done
Next up were the fat mammas. I have needed to get these on for some time. I have had a couple of run ins with my driveway.

These are some stout well built items.


I started with a center punch to locate the hole.
Then dilled the first of 2 holes starting with the smaller one first.

Then the final size.
On go the wheels.
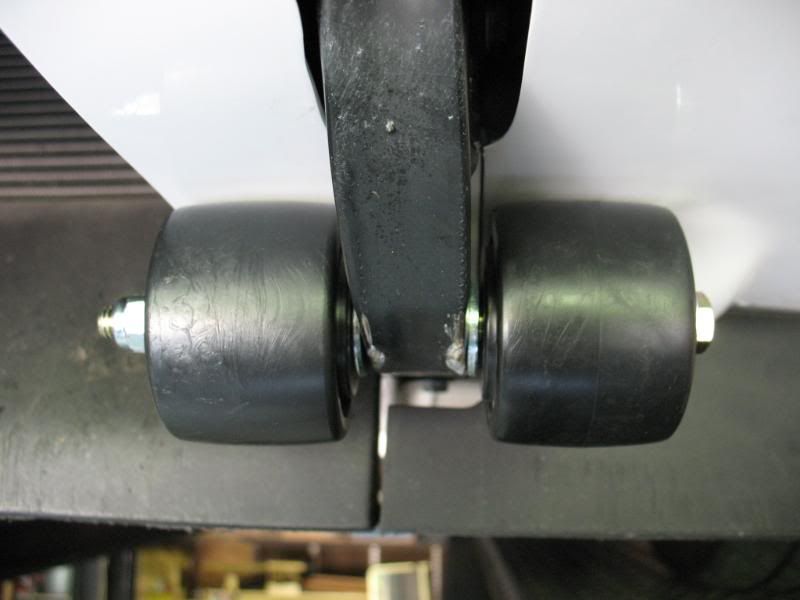
I tightened them just enough for them to turn on the axles freely, but with no play side to side.
Both pairs installed.
Now it’s time for the tail lights. I really was looking forward to this mod. I have always liked the LED tail lights and finally pulled the trigger when Brian was able to get them modded through a Forum member (KOLDNRG)and really take them up a notch.
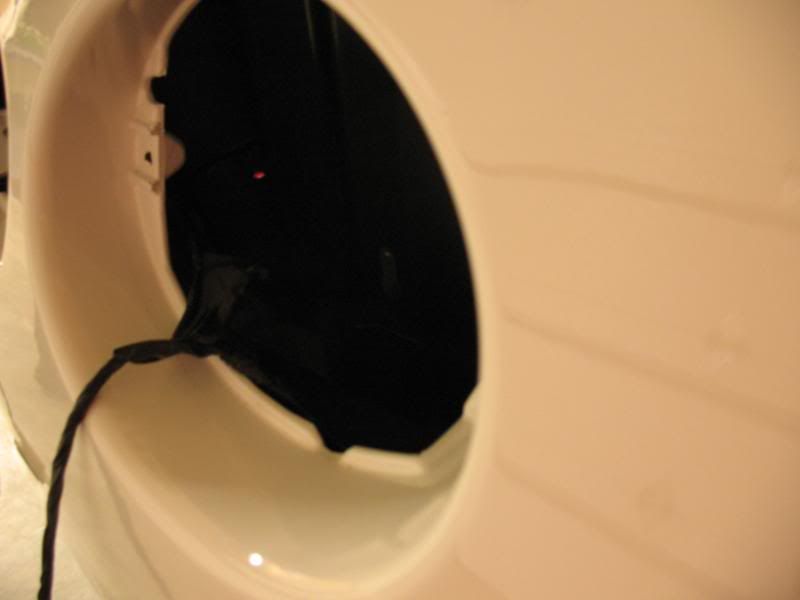
First thing was to remove the old tail lights and clean out the sockets. From this

To this
These tail lights are very sweet looking and appear to be well made. They require that the polarity of all of the connections be correct or the brake portion of the lights won’t work. You should plug in all the lights and test them prior to trying to install them. Once you have all the polarities correct it is a good idea to mark each light at the connection.

The lights come marked R & L from the manufacturer and once I had all the polarities checked and marked I even marked them for inside and outside location. This would come in handy when I went on to flush mount the lights.


Since I was planning to flush mount the lights it was off to Lowes to get the necessary parts. I had seen 2 different versions posted and what follows is the version I chose. This one did not require any cutting of spacers and seemed to give a more finished look to the outboard lights. I know this mod has been posted many times but I tried to take a few more pictures to show everyone how things look as they go together, plus I added the screw covers.
Here is the parts list I used: (This will work for OEM tail lights too)
(4) 2 packs of �-inch diameter round nylon spacers w/ .194 hole �-inch long
(3) 2 packs of �-inch diameter round nylon spacers w/ .194 hole �-inch long
(4) 2 packs of #4 & #6 Black Screw Covers Hinged
(2) 5 packs of #8 X 2-inch long stainless panhead screws
(1) package of black 5/16-inch X 3/8-inch auto/marine closed cell foam weatherseal

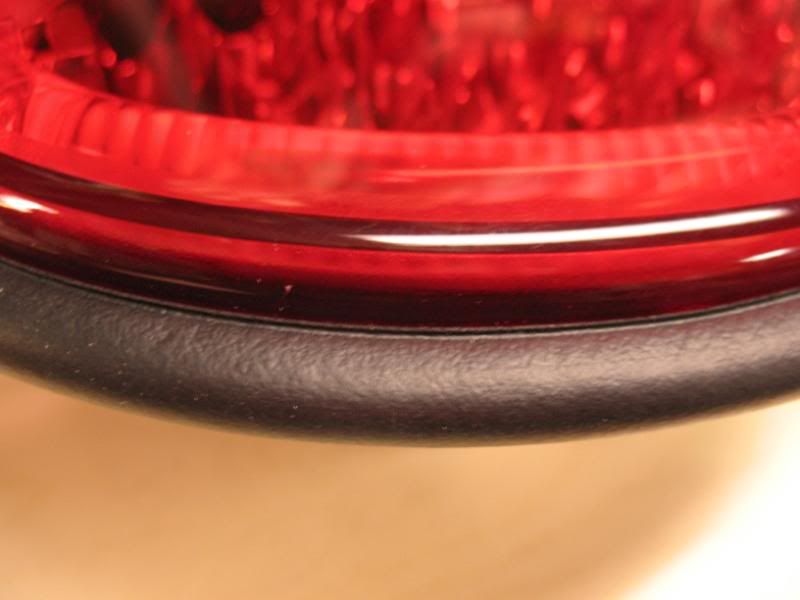
Start by installing the weatherseal around the light.

I had purchased the following Items over the past year and I was hell bent on getting everything installed this weekend:
1. Smooth Air Bridge
2. Stainless ZO6 Screens
3. Fat Mammas
4. Modified LED Halo Tail Lights (see this thread: http://forums.corvetteforum.com/show....php?t=1997851)
5. Flush mounting tail lights using Lowes parts
Now on to the day’s installs:
I hadn’t had the Vette out in about 3 weeks so it was time to get it down off the lift (see this thread for the lift assembly: http://forums.corvetteforum.com/show....php?t=1906810)
Once the car was on the ground I had had quite a surprise that was followed by some rather protracted profanity. Imagine my surprise when I found this:
And this:
The entire car was covered with debris. It only took a second to realize the all the mess had been created when the roof on the garage and house had been torn off and replaced due to hail damage (pics here: http://smg.photobucket.com/albums/v6...m%205-31-2008/)
I started with the easiest thing first, so on goes the smooth coupler.
Time for the ZO6 screens. These are fairly inexpensive items and they are not as sturdy as the OEM screens, but they look OK especially from a distance.
These are designed to be a friction fit, but the plastic is way too flexible, so I added a black ziptie to make sure if/when they comes loose I won’t loose the screens. The lower screens fit in between the bumper and the brake cooling duct and shouldn’t go anywhere.
And then just twist it out of site….sorta
All done
Next up were the fat mammas. I have needed to get these on for some time. I have had a couple of run ins with my driveway.
These are some stout well built items.
I started with a center punch to locate the hole.
Then dilled the first of 2 holes starting with the smaller one first.
Then the final size.
On go the wheels.
I tightened them just enough for them to turn on the axles freely, but with no play side to side.
Both pairs installed.
Now it’s time for the tail lights. I really was looking forward to this mod. I have always liked the LED tail lights and finally pulled the trigger when Brian was able to get them modded through a Forum member (KOLDNRG)and really take them up a notch.
First thing was to remove the old tail lights and clean out the sockets. From this
To this
These tail lights are very sweet looking and appear to be well made. They require that the polarity of all of the connections be correct or the brake portion of the lights won’t work. You should plug in all the lights and test them prior to trying to install them. Once you have all the polarities correct it is a good idea to mark each light at the connection.
The lights come marked R & L from the manufacturer and once I had all the polarities checked and marked I even marked them for inside and outside location. This would come in handy when I went on to flush mount the lights.
Since I was planning to flush mount the lights it was off to Lowes to get the necessary parts. I had seen 2 different versions posted and what follows is the version I chose. This one did not require any cutting of spacers and seemed to give a more finished look to the outboard lights. I know this mod has been posted many times but I tried to take a few more pictures to show everyone how things look as they go together, plus I added the screw covers.
Here is the parts list I used: (This will work for OEM tail lights too)
(4) 2 packs of �-inch diameter round nylon spacers w/ .194 hole �-inch long
(3) 2 packs of �-inch diameter round nylon spacers w/ .194 hole �-inch long
(4) 2 packs of #4 & #6 Black Screw Covers Hinged
(2) 5 packs of #8 X 2-inch long stainless panhead screws
(1) package of black 5/16-inch X 3/8-inch auto/marine closed cell foam weatherseal
Start by installing the weatherseal around the light.
Last edited by NCSU SEE 5; 04-14-2009 at 11:12 AM.
 08-31-2008, 10:25 PM
#2
Drifting
Thread Starter
Member Since: Oct 2004
Location: Greensboro, NC "REALITY IS MERELY AN ILLUSION, ALBEIT A VERY PERSISTENT ONE"...ALBERT EINSTEIN"
Posts: 1,413
Likes: 0
Received 0 Likes
on
0 Posts
St. Jude Donor '05-'06-'07
Next I installed the screw covers.
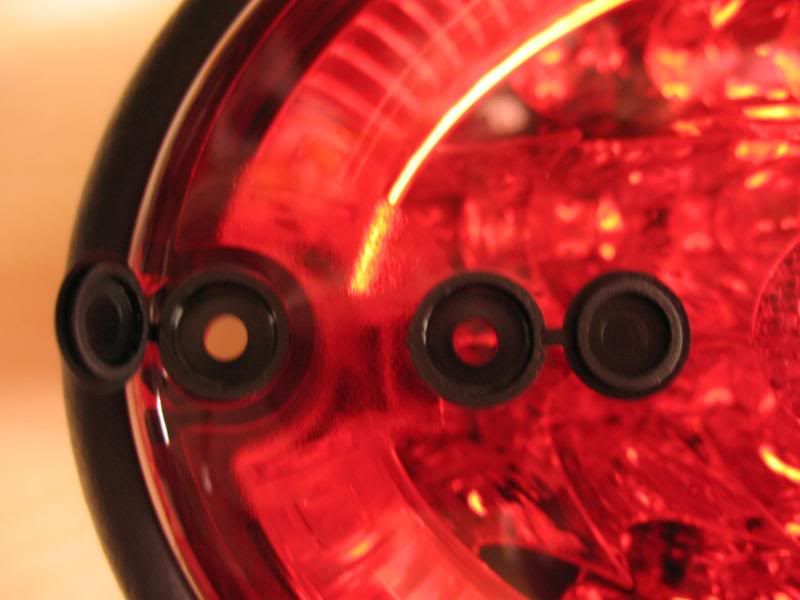
And then added the screws. The screws do a nice job of holding the screw covers in place during the install.

Now you can add the spacers. Take your time and pay attention to the combination needed for each light. For both of the inboard lights (see why marking them helps) you need (1) �-inch long and (1) �-inch long spacer on each screw.

On the outboard lights you need (1) �-inch long and (1) �-inch long spacer on the inboard screws and just (1) �-inch long spacer on the outboard screws.
[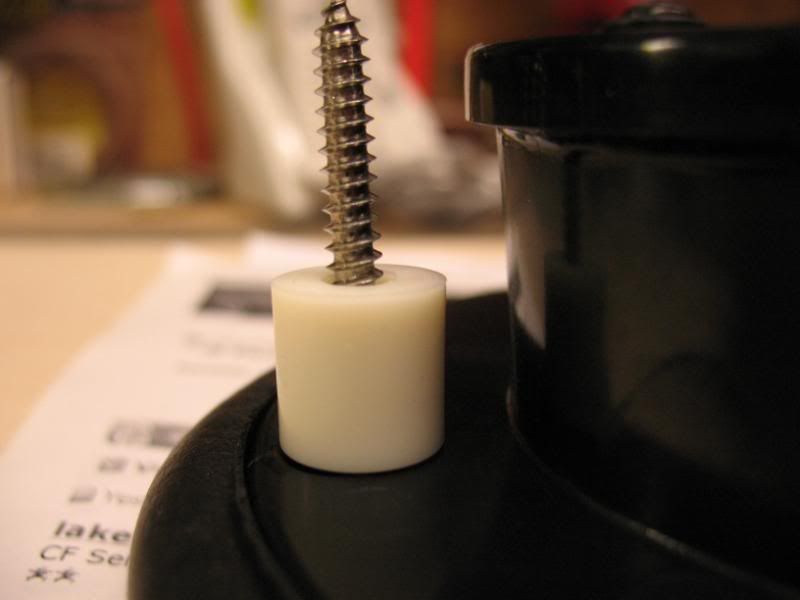
A little drop of rubber cement works wonders to keep the spacers on the screw while you are finagling the screws back into the holes. Take your time tightening the screws. You need to press on the lights and the weatherseal as you work back and forth on the screws. Once tightened you should see something that looks like this.

All that is left to do is to snap the screw covers into place. I used a nut driver to evenly distribute the force around the cover. You will feel it snap as it locks.

Here is the finished product


This write up would not be complete without a couple of night shots of the tail lights.
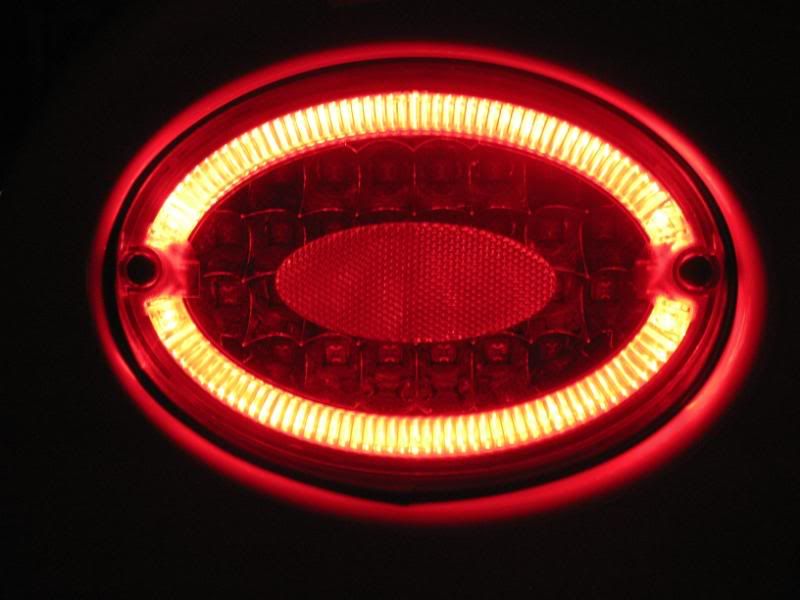
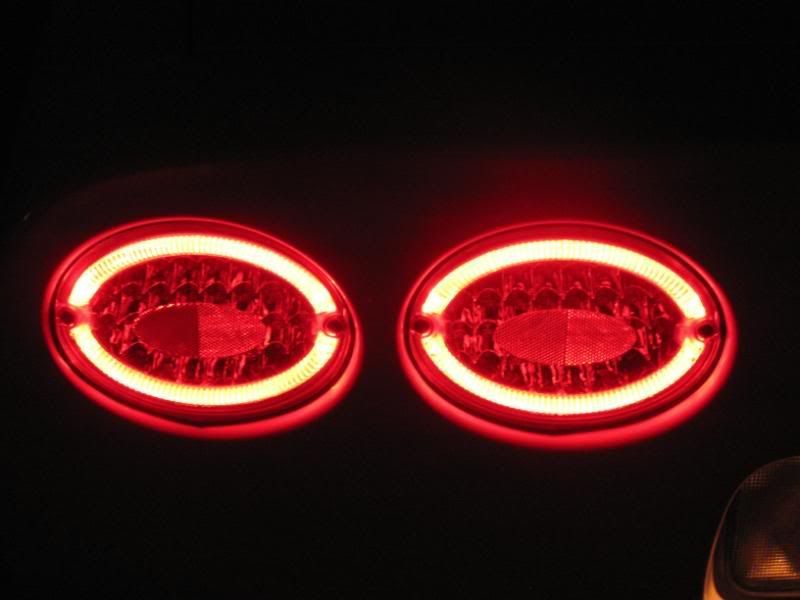
Now with the brakes engaged


I know this an extremely long post, but I wanted to give back to the Forum in the way it has given to me over the years. None of this would have happened if I hadn’t been a member.
Feel free to PM me if you have any questions or more importantly if you find any errors or suggestions to clarify any of the instructions.
Thanks again! Robbie
.
And then added the screws. The screws do a nice job of holding the screw covers in place during the install.
Now you can add the spacers. Take your time and pay attention to the combination needed for each light. For both of the inboard lights (see why marking them helps) you need (1) �-inch long and (1) �-inch long spacer on each screw.
On the outboard lights you need (1) �-inch long and (1) �-inch long spacer on the inboard screws and just (1) �-inch long spacer on the outboard screws.
[
A little drop of rubber cement works wonders to keep the spacers on the screw while you are finagling the screws back into the holes. Take your time tightening the screws. You need to press on the lights and the weatherseal as you work back and forth on the screws. Once tightened you should see something that looks like this.
All that is left to do is to snap the screw covers into place. I used a nut driver to evenly distribute the force around the cover. You will feel it snap as it locks.
Here is the finished product
This write up would not be complete without a couple of night shots of the tail lights.
Now with the brakes engaged
I know this an extremely long post, but I wanted to give back to the Forum in the way it has given to me over the years. None of this would have happened if I hadn’t been a member.
Feel free to PM me if you have any questions or more importantly if you find any errors or suggestions to clarify any of the instructions.
Thanks again! Robbie
.
Last edited by NCSU SEE 5; 09-01-2008 at 09:11 AM.
08-31-2008, 10:33 PM
#3
Team Owner


Nice job and they look great!
You need to re-submitt your pics! This happens when you move them to a folder or a different part of PhotoBucket
Thanks,Matt
You need to re-submitt your pics! This happens when you move them to a folder or a different part of PhotoBucket
Thanks,Matt
08-31-2008, 10:56 PM
#4
Drifting
Thread Starter
Member Since: Oct 2004
Location: Greensboro, NC "REALITY IS MERELY AN ILLUSION, ALBEIT A VERY PERSISTENT ONE"...ALBERT EINSTEIN"
Posts: 1,413
Likes: 0
Received 0 Likes
on
0 Posts
St. Jude Donor '05-'06-'07


 08-31-2008, 11:21 PM
#8
Drifting
Thread Starter
Member Since: Oct 2004
Location: Greensboro, NC "REALITY IS MERELY AN ILLUSION, ALBEIT A VERY PERSISTENT ONE"...ALBERT EINSTEIN"
Posts: 1,413
Likes: 0
Received 0 Likes
on
0 Posts
St. Jude Donor '05-'06-'07
 09-01-2008, 02:25 AM
#10
Race Director


Member Since: Apr 2007
Location: Ideals are peaceful...History is violent...St.Charles, MO.
Posts: 17,952
Received 441 Likes
on
228 Posts
2020 Corvette of the Year Finalist (appearance mods)
C5 of Year Winner (appearance mods) 2019
St. Jude Donor '08-'09-'12-'13-'14-'15-'16-'17-'18-'19-'20-'21-'22


Superb detailed write-up man,you out did yourself seriously.Very
nice bling and functional bit of modding
nice bling and functional bit of modding
 09-01-2008, 09:14 AM
#12
Drifting
Thread Starter
Member Since: Oct 2004
Location: Greensboro, NC "REALITY IS MERELY AN ILLUSION, ALBEIT A VERY PERSISTENT ONE"...ALBERT EINSTEIN"
Posts: 1,413
Likes: 0
Received 0 Likes
on
0 Posts
St. Jude Donor '05-'06-'07
 Just trying to make it easier for the next person.

 09-05-2008, 04:07 PM
#20
Administrator


Member Since: Mar 2001
Location: In a parallel universe. Currently own 2014 Stingray Coupe.
Posts: 343,370
Received 19,410 Likes
on
14,035 Posts
C7 of the Year - Modified Finalist 2021
MO Events Coordinator
St. Jude Co-Organizer
St. Jude Donor '03-'04-'05-'06-'07-'08-'09-'10-'11-'12-'13-'14-'15-'16-'17-'18-'19-
'20-'21-'22-'23-'24
NCM Sinkhole Donor
CI 5, 8 & 11 Veteran


Nicely done. Good set of mods you did.