
2008 Console Installation Tips?
 11-13-2007, 09:41 AM
#1
Safety Car

Thread Starter

I'm swapping my '06 for an '08 center console.
Anyone have any pointers to assist in removal and re-installation of the center console?
I'm thinking it would be wise to mask off the edges of the radio and HVAC stack with painter tape to avoid scratches?
Are the electrical connectors typical GM and hard to figure out how to disconnect?
Anyone have any pointers to assist in removal and re-installation of the center console?
I'm thinking it would be wise to mask off the edges of the radio and HVAC stack with painter tape to avoid scratches?
Are the electrical connectors typical GM and hard to figure out how to disconnect?
Last edited by bub; 11-13-2007 at 09:46 AM.


 11-13-2007, 01:18 PM
#3
Melting Slicks

I just replaced my 06 console with an 08. Painter's tape is not a bad idea around the edges of the radio to make sure you don't scratch the radio when you remove or reinstall the console, although I didn't use any on mine.
Getting the console loose isn't that hard. Take the armrest cover off by removing the four screws that hold it on. Then pop the plastic plate/cover towards the back of the stock console (were the F55 switch would be) loose from underneath in the storage area using a small screw driver to reveal two screws that need to be removed and remove them. Then pull up on the e-bake boot to remove two more screws that hold the console and the side trim piece on and remove them. Then you can start pulling the console loose starting at the back. It should pop right out with a little effort. Once you get it loose pick it up about three or four inches and start unclipping the plugs that connect the traction control, lighter, seat heaters if you have them and hazard lights. Once all the connectors are undone remove the shift **** and then the entire console should lift out.
Once you get the console out remove the shift boot from the console. It has five tabs that fit into the console and reinstall it in the new console. It has a plastic base that is flexible to allow you to work it out of the mounting points. If your console didn't come with a new hazard lights button you will need to remove it and reinstall it in the new console. It clips into place. Then place the new console in the car and reattach all the plugs and then check them to make sure everything working. Then press the console back in place starting at the top so the clips lock and then reinstall the screws and then the center console cover and shift ****.
The biggest problem I had was getting the connector for the lighter disconnected. As it turns out the lighter on my 06 console was installed upside down so the clip on the plug was underneath the console and very hard to get to. Also if you don't have the F55 suspension there is still a plug under the console for it so don't worry about having to plug it in somewhere. Just ignore it.
I am very happy with mine. Now when I get my new matching boots I'll be set. Good luck!
Last edited by ZPirate; 11-13-2007 at 03:29 PM.
11-13-2007, 01:27 PM
#4
8th Gear


Member Since: Nov 2007
Posts: 8
Likes: 0
Received 0 Likes
on
0 Posts
11-13-2007, 01:34 PM
#5
Melting Slicks
Here's a detail write-up.
http://forums.corvetteforum.com/show....php?t=1490531
http://forums.corvetteforum.com/show....php?t=1490531
11-13-2007, 06:05 PM
#8
Safety Car
Thread Starter
 ...
...No thanks. No way, no how a dealer's gonna be tasked with this one...
From studying the posts, it looks to be easier than the steering angle sensor TSB that I did myself...and allot easier than pulling the nose off to adjust my ProCharger IC...
At least I don't have to crawl "under" the dash...this time.
Last edited by bub; 11-28-2007 at 06:51 PM.
11-13-2007, 09:27 PM
#9
Melting Slicks

 11-14-2007, 08:49 PM
#10
Safety Car
Thread Starter
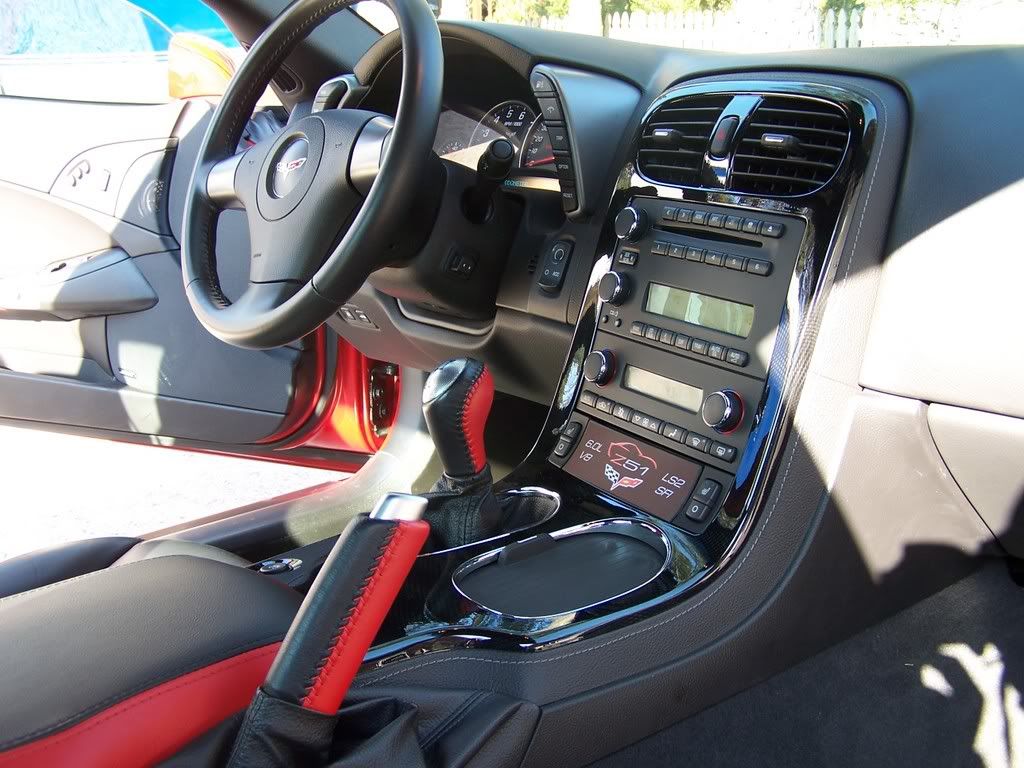
Installation went smoothly tonight...pics follow...
2008 1LT, 2LT, 3LT style console (CF with leather surround) and OEM GM packaging box to expect:

GM P/N (15939774) without the unnecessary "spare" heated seat switches...can be changed out from your existing console...cheaper that way...$359.95 + $24.99 from Bob @ Fichtner

2008 QA/QC Labels...

2006 "Before" shots for posterity (and fit-up reference)...

2006 Shifter **** torx screw attachment and boot ferrule...

Console lid off (four T15 screws)...

Console back F55 panel and screws....

Console side trim screws

Console side trim screws under parking brake boot...

Console side trim panel removed...

2008 1LT, 2LT, 3LT style console (CF with leather surround) and OEM GM packaging box to expect:
GM P/N (15939774) without the unnecessary "spare" heated seat switches...can be changed out from your existing console...cheaper that way...$359.95 + $24.99 from Bob @ Fichtner
2008 QA/QC Labels...
2006 "Before" shots for posterity (and fit-up reference)...
2006 Shifter **** torx screw attachment and boot ferrule...
Console lid off (four T15 screws)...
Console back F55 panel and screws....
Console side trim screws
Console side trim screws under parking brake boot...
Console side trim panel removed...
Last edited by bub; 11-15-2007 at 12:01 PM.
11-14-2007, 09:01 PM
#11
Safety Car
Thread Starter
2006 loose and ready to pull...

Masking to avoid inadvertent scratches from metal side clips...

Nav and HVAC masked...

Lighter and passenger seat heater plugs...

Storage power plug and TC/AH plug (F55 [white one] not used)...

2006 noise foam...

"Foam Alone"...

Foam off console.....

2006 vs. 2008 console comparison...I swapped heater and ashtray from my '06 to the '08...cheaper to buy '08 that way....

I noticed that the 2006 ash tray was affixed with star washers. 2008 was not. Re-used star washers during the change-over.
5 phillips screws hold them on...

Masking to avoid inadvertent scratches from metal side clips...
Nav and HVAC masked...
Lighter and passenger seat heater plugs...
Storage power plug and TC/AH plug (F55 [white one] not used)...
2006 noise foam...
"Foam Alone"...
Foam off console.....
2006 vs. 2008 console comparison...I swapped heater and ashtray from my '06 to the '08...cheaper to buy '08 that way....
I noticed that the 2006 ash tray was affixed with star washers. 2008 was not. Re-used star washers during the change-over.
5 phillips screws hold them on...
Last edited by bub; 03-27-2008 at 10:19 PM.
11-14-2007, 09:08 PM
#12
Safety Car
Thread Starter
Shift boot off...held with 5 perimeter tabs......

2006 parts going onto '08 (shift boot, ashtray/htr switches, hazard switch, foam)...

Hazard switch mount (I removed vents from '06 to get it out). As with everything on this install, be careful ....
....

Foam in '08...

'08 fully dressed out...

'08 view from backside with heater switch/astray assy from '06 installed (note 5th screw at bottom)...

Almost there...goes in allot easier than it comes out...use new pieces for reference how plug fasteners are attached...'08 console power plug is rotated so it is easier to get to release tab...

2006 parts going onto '08 (shift boot, ashtray/htr switches, hazard switch, foam)...
Hazard switch mount (I removed vents from '06 to get it out). As with everything on this install, be careful
....Foam in '08...
'08 fully dressed out...
'08 view from backside with heater switch/astray assy from '06 installed (note 5th screw at bottom)...
Almost there...goes in allot easier than it comes out...use new pieces for reference how plug fasteners are attached...'08 console power plug is rotated so it is easier to get to release tab...
Last edited by bub; 11-28-2007 at 07:00 PM.
11-14-2007, 09:12 PM
#13
Safety Car
Thread Starter


Do a quality check to make sure everything works (including power plugs and lighter), then go for a test trive to check for any squeaks or rattles...I had none...other than my pre-existing condition from the crap mounting design transparent targa top...(Update 3/27/08: 5/32" e-clips awaiting install to silence top - thanks Mr Toner!!!)

Last edited by bub; 07-03-2008 at 12:35 AM.

 12-02-2007, 12:11 AM
#17
Safety Car
Member Since: Aug 2006
Location: Makena, Maui & NM
Posts: 4,206
Likes: 0
Received 5 Likes
on
4 Posts

Great install w/pics!! I can use this to get into and modify my Nav so I can edit it while on the move. Though I still like the gunmetal console look better than the '08 faux carbon fiber look.
12-02-2007, 12:41 AM
#19
Drifting

The hardest part was definitely getting the cigarette lighter and the active handling button unplugged. Fingers got pretty cut up but the end result was worth it. I also found it easier to get the hazard button out by removing the vents from the '07 console. It pulled right out.
12-14-2007, 09:59 PM
#20
Safety Car
Thread Starter
If you have a set of pick tools, a curved one makes it easier to release the tab holding the auxiliary power plug at the back of the console...notice that one is rotated on the '08 so it would be easier to remove.
As always, having the right tools....priceless...

As always, having the right tools....priceless...
Last edited by bub; 12-14-2007 at 10:03 PM.