Midyear Hardtop assembly pics..
 08-07-2007, 04:54 PM
#1
Race Director


Thread Starter

Okay well I don't have the pics down loaded yet but I'm in the middle of redoing my hardtop. I hope to post the pics tonight. Currently though I'm working on the rear stainless as I've completed the front. It looks good and I hope that I have put enough 3M sealant in the low spots so I don't have a bunch of leaks..
My question this afternoon though is on the rear upper surround clips I removed 8 and the Hardtop shop kit came with 12... Where do the other 4 go? I talked to the Hardtop shop and they said the number varied but I just want confirmation from the forum. Also how much of the 3M gumball sealant did you guys use in the past around the rear window. The stuff I bought came in 1ft long pencil lengths. I laid a run in the weatherstrip channel to the hardtop but I was curious about the bottom weatherstrip as I think I remember a bunch of it there. Thanks..
Dave
My question this afternoon though is on the rear upper surround clips I removed 8 and the Hardtop shop kit came with 12...
Where do the other 4 go? I talked to the Hardtop shop and they said the number varied but I just want confirmation from the forum. Also how much of the 3M gumball sealant did you guys use in the past around the rear window. The stuff I bought came in 1ft long pencil lengths. I laid a run in the weatherstrip channel to the hardtop but I was curious about the bottom weatherstrip as I think I remember a bunch of it there. Thanks..Dave

 08-07-2007, 09:42 PM
#4
Drifting


Okay well I don't have the pics down loaded yet but I'm in the middle of redoing my hardtop. I hope to post the pics tonight. Currently though I'm working on the rear stainless as I've completed the front. It looks good and I hope that I have put enough 3M sealant in the low spots so I don't have a bunch of leaks..
My question this afternoon though is on the rear upper surround clips I removed 8 and the Hardtop shop kit came with 12... Where do the other 4 go? I talked to the Hardtop shop and they said the number varied but I just want confirmation from the forum. Also how much of the 3M gumball sealant did you guys use in the past around the rear window. The stuff I bought came in 1ft long pencil lengths. I laid a run in the weatherstrip channel to the hardtop but I was curious about the bottom weatherstrip as I think I remember a bunch of it there. Thanks..
Dave
My question this afternoon though is on the rear upper surround clips I removed 8 and the Hardtop shop kit came with 12...
Where do the other 4 go? I talked to the Hardtop shop and they said the number varied but I just want confirmation from the forum. Also how much of the 3M gumball sealant did you guys use in the past around the rear window. The stuff I bought came in 1ft long pencil lengths. I laid a run in the weatherstrip channel to the hardtop but I was curious about the bottom weatherstrip as I think I remember a bunch of it there. Thanks..Dave
08-07-2007, 10:10 PM
#5
Race Director
Thread Starter
I have sized the pics now, however I don't know how much help that they will be for those that need this after me so I'll do my best to describe my concerrns.
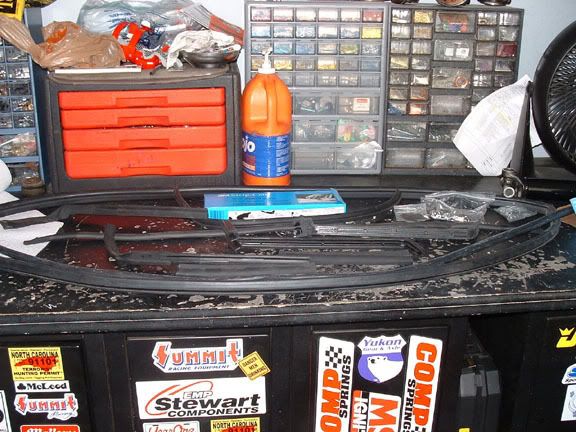
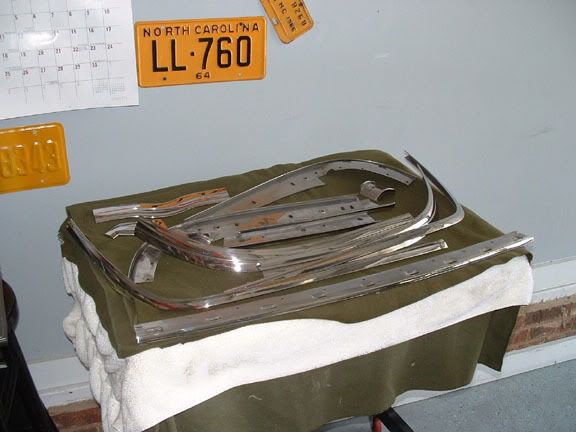
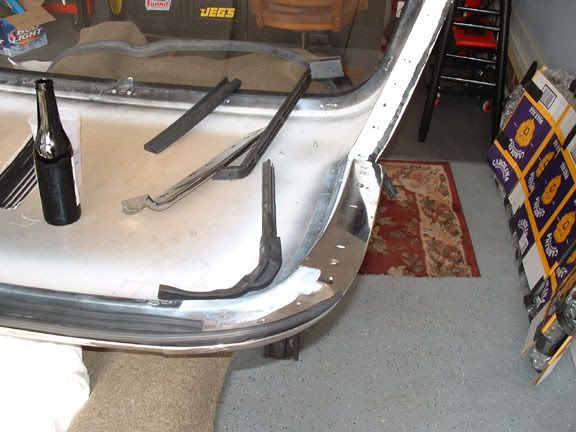
I started by setting all of the stainless on one table and the weather stripping on another.
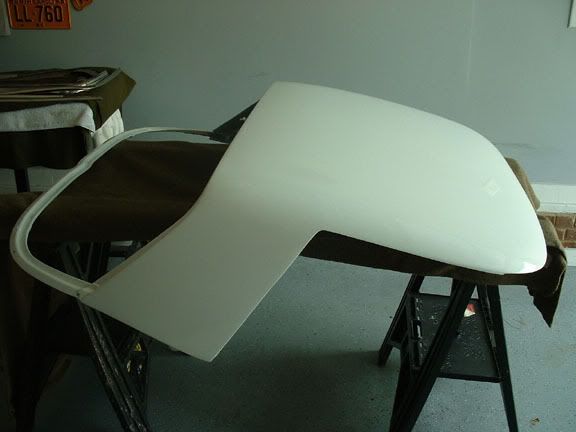
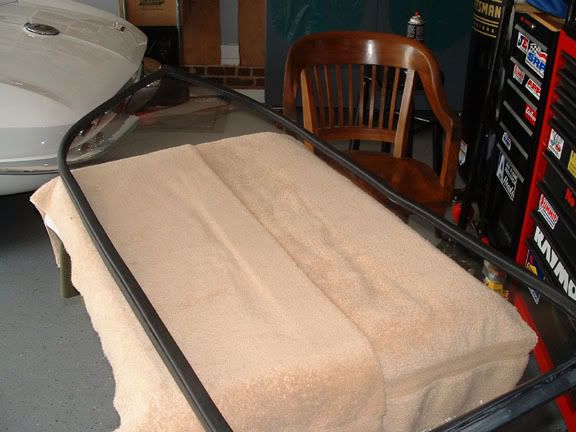
I put the hardtop right side up on a set of saw horses with two 2x4s 5 feet long covered with the all mighty ARMY/NAVY Wool blanket... The blankets are by far my favorite item in the garage. (Need to protect something, need to cover something, need to get on the ground and not get nasty...etc etc.)
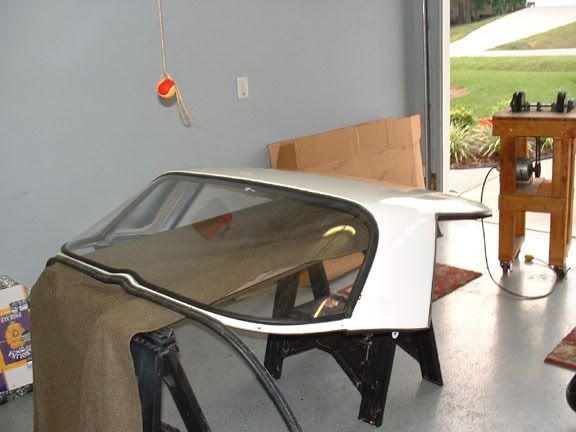
I then put the weather stripping on the window. The on thing that I had to look at my old window was which way. Right there is only one way.. Well unless you don't know. The square edge goes toward the inside.
The next step is to install the window. I found that I could start the bottom edge. Then flip the top over so it's upside down. Now don't do what I did and forget to put in the top SS clips.. The AIM shows 8 used but I have found out this a suggestion. Through my research all have at least 8 some have 10 some have 12. So it boils down to that it depends. I'm going to increase mine to 10 but that means I have to back track again and pop the window out a little bit. No big deal just backing up.

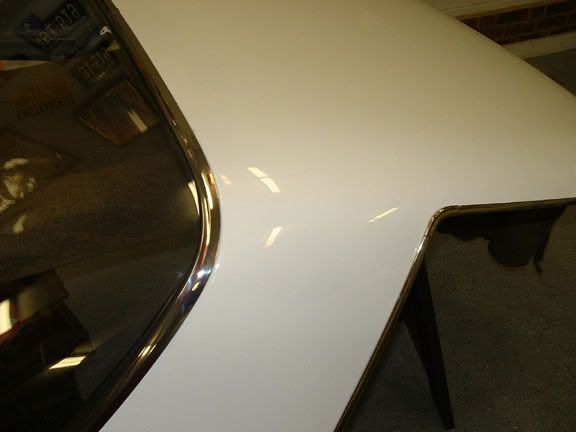
This is the first piece of SS to go on, it the front header. Now the little clips are no big deal just it takes a few minutes to figure out how they work. The side with the hole in it goes towards you if you are working like I did with it upside down. Then you must bend the little tab that is facing away from you. This will hold the clip against the SS once you install the weather stripping. Okay now you can install the ws. Just lift up on the clip and slide the long end of the ws under and work your way around. Then adjust side to side to make sure you have equal lengths on each end.

Next are the hocky stick SS pieces that also have the same clips in them. I would not recommend tightening any of these pieces yet. Then slide them into each side of the header.
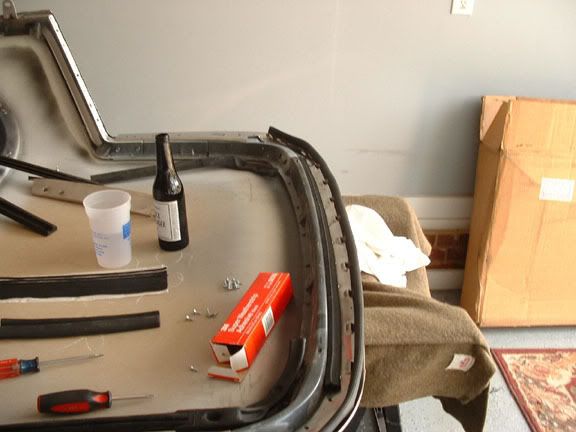
Next you can move onto the corner piece and the back piece.
Then you can attach the ws for the top and backside of the window. The little piece that of ws that is between there and the back trim can be installed now or wait until the other back ws is in place. If you wait it will allow you to fit everything nicely.
Here is what I have so far, all of the front trim and ws is installed. The rear is still in need of the rear SS but then I will be done for a few days. I still have to sand and prime all of the internal trim..
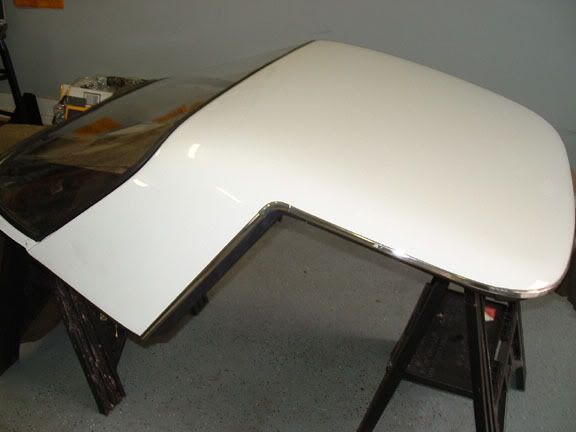
Not bad for an afternoon's work.

 I hope this helps some one out as I know there have been quite a few questions about it in the past. Just like the rest of these cars, not hard just time consuming. See you on the road. Dave
Last edited by Hitch; 08-08-2007 at 08:43 AM.
08-08-2007, 01:13 AM
#6
Racer


Member Since: Oct 2006
Location: Elgin South Carolina
Posts: 294
Likes: 0
Received 0 Likes
on
0 Posts

That was very interesting and very informative. I don't have a hardtop but I am getting ready to put my windshield back together again and it would be a great help if someone familar with this would go through the steps like you did.
How about it, anyone fixing to do a windshield?
Thanks,
Wade
How about it, anyone fixing to do a windshield?
Thanks,
Wade
08-08-2007, 08:34 AM
#7
Drifting
That was very interesting and very informative. I don't have a hardtop but I am getting ready to put my windshield back together again and it would be a great help if someone familar with this would go through the steps like you did.
How about it, anyone fixing to do a windshield?
Thanks,
Wade
How about it, anyone fixing to do a windshield?
Thanks,
Wade
There are some great tips for installing the windshield...if you can find them. I recommend installing the outside lower molding BEFORE installing the glass. I found a post where someone had recommended it and thought "what the...." I gave it a try and it worked out great! No fear of having to muscle it over the rubber and beat it down on the clips after the fact, try it...you'll like it.
Why do we not have a "tech" section on this forum with this type of info readily available??? I know...you can search for it using the search engine but dang....that can be frustrating when you have to plow through a ton of hay to find the needle your looking for. This forum has provided me some great information and we have the luxury of having folks like John Z, Rich Lagasse and a host of other folks that we should be capturing this knowledge into appropriate categories that are easy to navigate. The info and pics that Dave has posted above are priceless to those of us you may have disassembled something long ago and did not capture some of the details such as clip orientation, direction of w/s etc... Let's face it, we all forget stuff...heck sometimes it's hard enough to remember what you did with all of the parts!! It's always nice to review something like that with pics to prepare yourself for the job.
Is there a reason why we do not have a tech section to store this type info???
Great job Dave,
I will make sure there is plenty of cold barley soup in the fridge
08-08-2007, 09:05 AM
#8
Le Mans Master

Dave, looking good Bud. Nice work and write up of the installation.
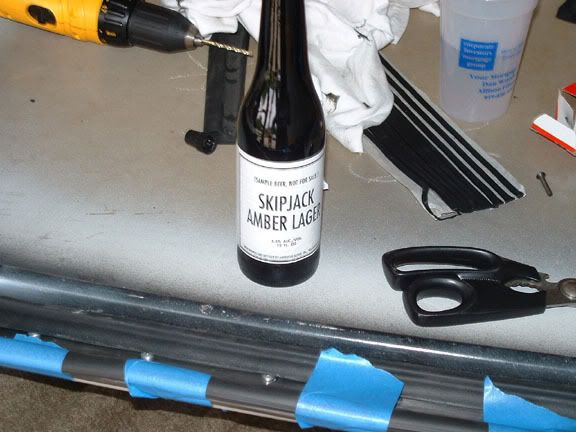
Just one question, what's up with the "Skip Jack" Lager? Did you deplete all the Carolina Pale Ale at the local grocery stores?
Nice job man, it's going to look killer on the car.
Just one question, what's up with the "Skip Jack" Lager? Did you deplete all the Carolina Pale Ale at the local grocery stores?
Nice job man, it's going to look killer on the car.

 08-08-2007, 10:06 AM
#10
Race Director
Thread Starter
08-08-2007, 10:24 PM
#11
Race Director
Thread Starter
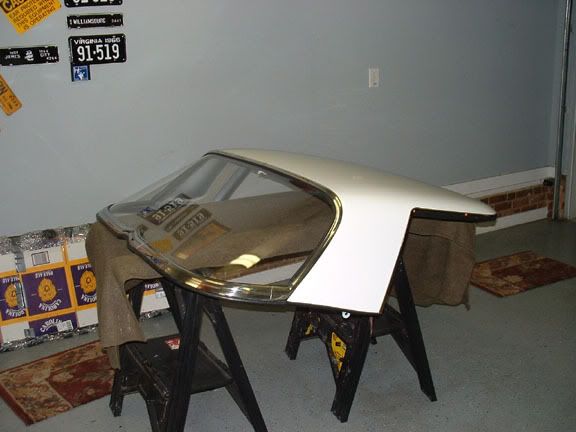
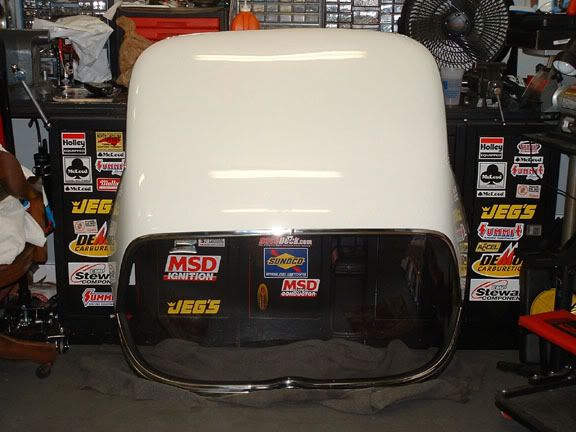
Well I have completed the Stainless now it's on to the interior parts. Which I have not decided on the color yet so you guys can provide input.
First though lets finish with the pics.
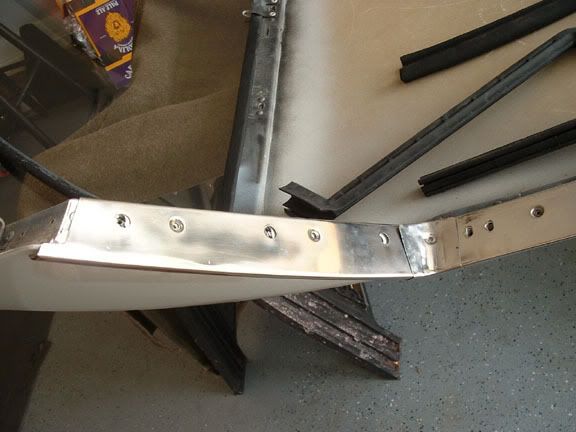
I would have to say the one thing that worked out the best was using some long screws to get the rear lower molding aligned right. Instead of adjusting the 10 clips that are screwed in. I put long #10 screws in and it allowed me to adjust the clips installed and didn't have to put the trim on... take it off.. adjust.. install... over and over..
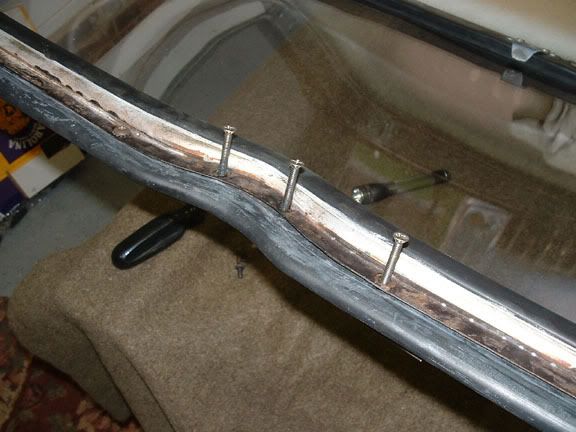
Then I put the extra 2 clips in that I talked about above. I screwed up but I didn't realize until it was to late... Make sure that get the extra 2 clips further away from the corners than I did.
First though lets finish with the pics.
I would have to say the one thing that worked out the best was using some long screws to get the rear lower molding aligned right. Instead of adjusting the 10 clips that are screwed in. I put long #10 screws in and it allowed me to adjust the clips installed and didn't have to put the trim on... take it off.. adjust.. install... over and over..
Then I put the extra 2 clips in that I talked about above. I screwed up but I didn't realize until it was to late... Make sure that get the extra 2 clips further away from the corners than I did.
08-08-2007, 10:55 PM
#12
Race Director
Thread Starter
One question for the group though. What is the hole for in the rear window trim that is hidden behind the small corner piece? It would seem that there would be a screw but I see no hole. Anyone know why.. Okay two questions... I have a white car with saddle interior with a black dash. Yep it's not correct. However with that being said I'm thinking doing the headliner tan (which I have) then paint the trim black vs saddle. What does CF think?
08-09-2007, 06:58 AM
#13
Drifting
One question for the group though. What is the hole for in the rear window trim that is hidden behind the small corner piece? It would seem that there would be a screw but I see no hole. Anyone know why.. Okay two questions... I have a white car with saddle interior with a black dash. Yep it's not correct. However with that being said I'm thinking doing the headliner tan (which I have) then paint the trim black vs saddle. What does CF think?
I will look at my disassembled hardtop today and see if I have holes in the corners that you mentioned. I think the black contrast of the moldings would look great inside.
 Like it would be the first thing that is not stock on your ride! Post some pics once you mount the HT, should look killer.
Jeff
 09-21-2007, 09:35 PM
#15


How did any of you install the rear window vertical molding? I am having difficulty getting the molding to engage the clips. I am referring to the 2 moldings for the rear window that runs along the side and around the top of the rear window. 4 clips per piece, according to my AIM. One man told me to get a body sanding rubber block (thin one) and lay on molding and using a piece of wood use a hammer and drive the molding into the clip (ouch). One slip and I'll be screwed. I have done almost all the work on this car but these 2 moldings are kicking my butt. Anyone? Thanks DG
09-21-2007, 10:18 PM
#16
Race Director
Thread Starter
How did any of you install the rear window vertical molding? I am having difficulty getting the molding to engage the clips. I am referring to the 2 moldings for the rear window that runs along the side and around the top of the rear window. 4 clips per piece, according to my AIM. One man told me to get a body sanding rubber block (thin one) and lay on molding and using a piece of wood use a hammer and drive the molding into the clip (ouch). One slip and I'll be screwed. I have done almost all the work on this car but these 2 moldings are kicking my butt. Anyone? Thanks DG
Dave
10-30-2007, 12:28 PM
#17
Intermediate

Dave,
The original headliner in my 65 has started to droop and stretch, so I just recieved a beautiful replacement from Full Throttle Corvettes. I haven't started to replace it yet, but it seems that all I would have to do is to unscrew the interior trim pieces; remove the old headliner and clean the roof; then install the new headliner... Did you use some type of spray adhesive when you installed your headliner? Any tips would be appreciated. Thanks in advance!
Phil
10-30-2007, 07:58 PM
#18
Race Director
Thread Starter
Dave,
The original headliner in my 65 has started to droop and stretch, so I just recieved a beautiful replacement from Full Throttle Corvettes. I haven't started to replace it yet, but it seems that all I would have to do is to unscrew the interior trim pieces; remove the old headliner and clean the roof; then install the new headliner... Did you use some type of spray adhesive when you installed your headliner? Any tips would be appreciated. Thanks in advance!
Phil
The original headliner in my 65 has started to droop and stretch, so I just recieved a beautiful replacement from Full Throttle Corvettes. I haven't started to replace it yet, but it seems that all I would have to do is to unscrew the interior trim pieces; remove the old headliner and clean the roof; then install the new headliner... Did you use some type of spray adhesive when you installed your headliner? Any tips would be appreciated. Thanks in advance!
Phil
Phil,
You are correct all you have to do is remove the interior trim to install the new head liner. I did not use any spray adhesive as I don't think it was used originally however I could be wrong on that. You will most likely have to trim you headliner be careful and go slow. It will take some persuasion to get the headliner to fit correctly don't get to crazy though as the vinyl backing and the headliner can get separated.
10-30-2007, 08:39 PM
#20
Race Director
Thread Starter
It's done, how do you add it to the FAQ thread? The interior is really easy to put together so I didn't do a write up on it. Here are my pics of the final interior shots.


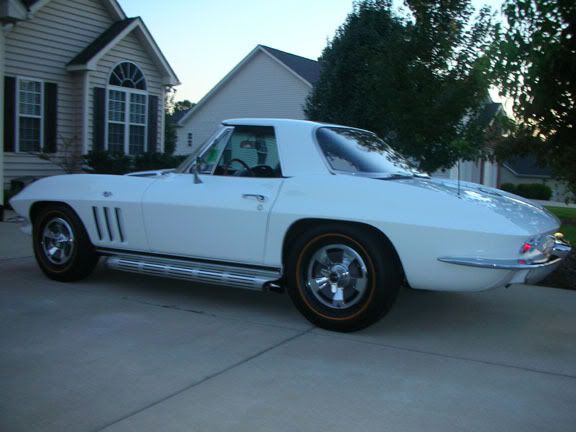
I hope this thread helps some guys out because this isn't a difficult job just a tedious one.
I hope this thread helps some guys out because this isn't a difficult job just a tedious one.