
DRM/LG ducts install (Warning picture intensive=Dial-up death)
 05-11-2007, 11:31 PM
#1
Coolest Guy Evar!

Thread Starter

Part 1 of 3
Over the past few days I have been fully engaged in installing some new parts on my car. When I began my “project” I only had plans to install Koni FSD shocks and the DRM brake ducts along with the LG spindle ducts.
For the record, I bought my spindle ducts a little over two years ago to date; something which would bite me in the *** during the install but more on that later. At the same time I bought the ducts I also bought some turbo grade duct hose and couplers from a race shop whose name I no longer remember – sorry bout that. Installing new shocks is a relatively easy and straightforward job however since I was also adding the ducts, my install would also involve disassembly of the front suspension knuckle and the subsequent removal of the wheel bearing hubs. The steps to do this are also straightforward and honestly any novice “backyard” mechanic(caveman) could do it but caution should be taken because there are a few things that can go wrong which will turn something so straightforward into a “costly” nightmare. Anyway, follow along below as I detail my install.
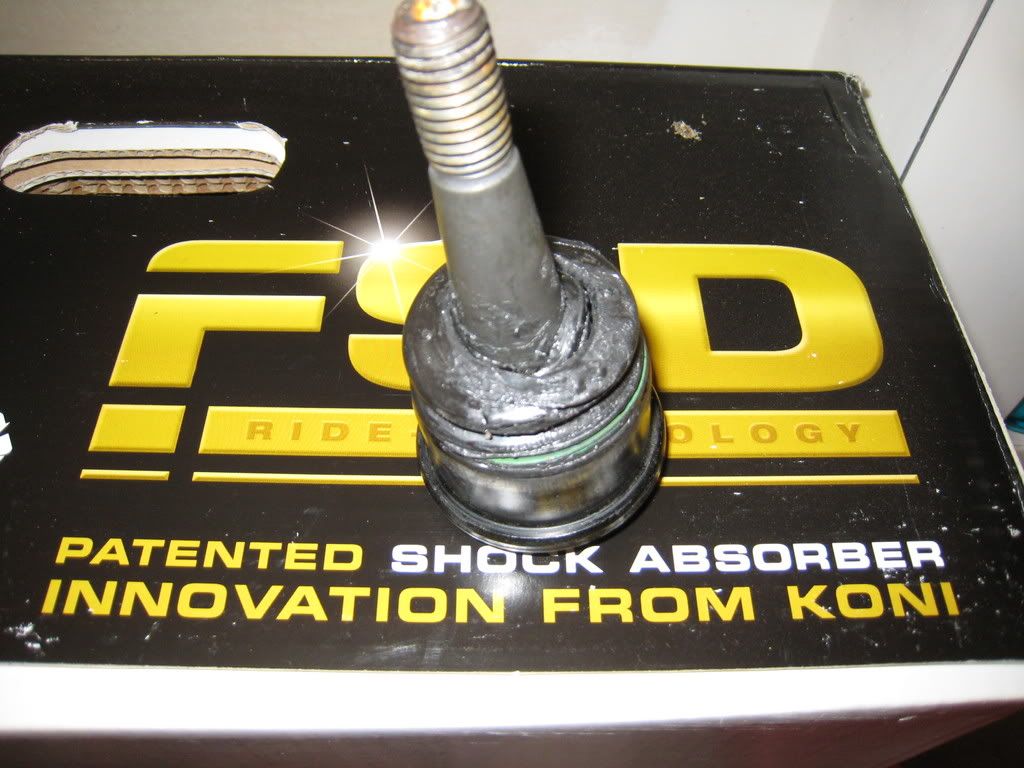
First, here’s a look at the “initial” parts and tools. You will notice in this picture a ball joint separator aka “pickle fork”. Take my advice, remove it from your tool box. That thing is of the devil.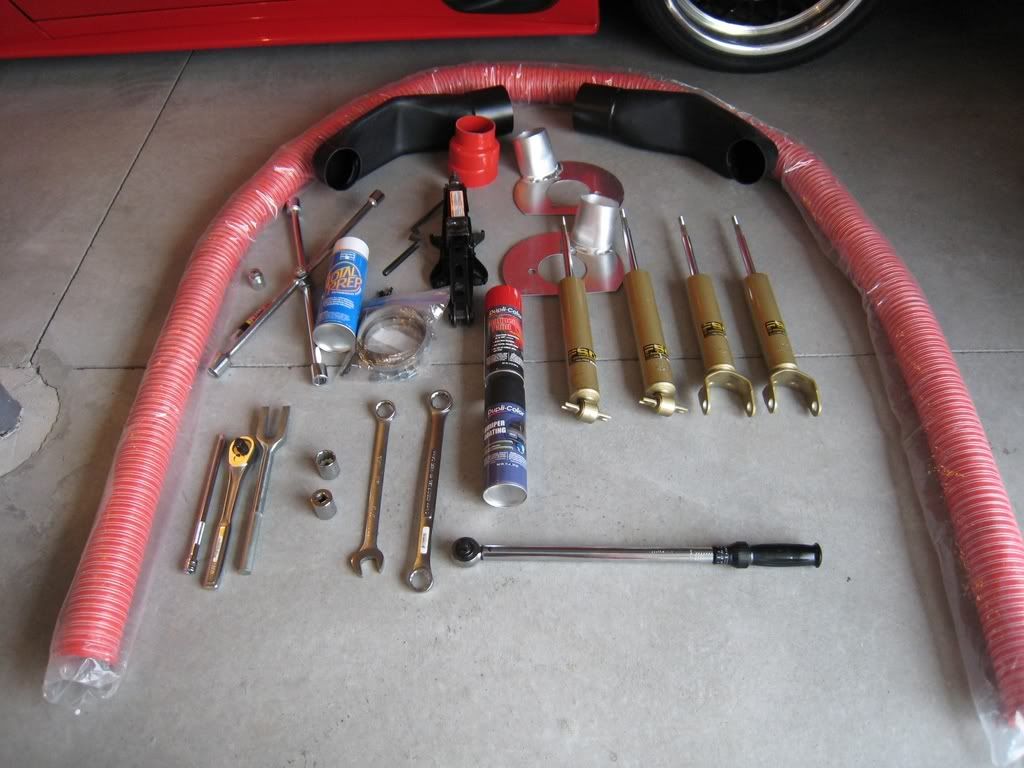
To do this install I followed the combined/modified instructions posted on the internet for shock removal/install (http://fuzzydiceracing.com/test.htm) and hub bearing removal/install (http://www.jakelatham.com/c5/misc/). The first thing of course was to raise the car on jackstands.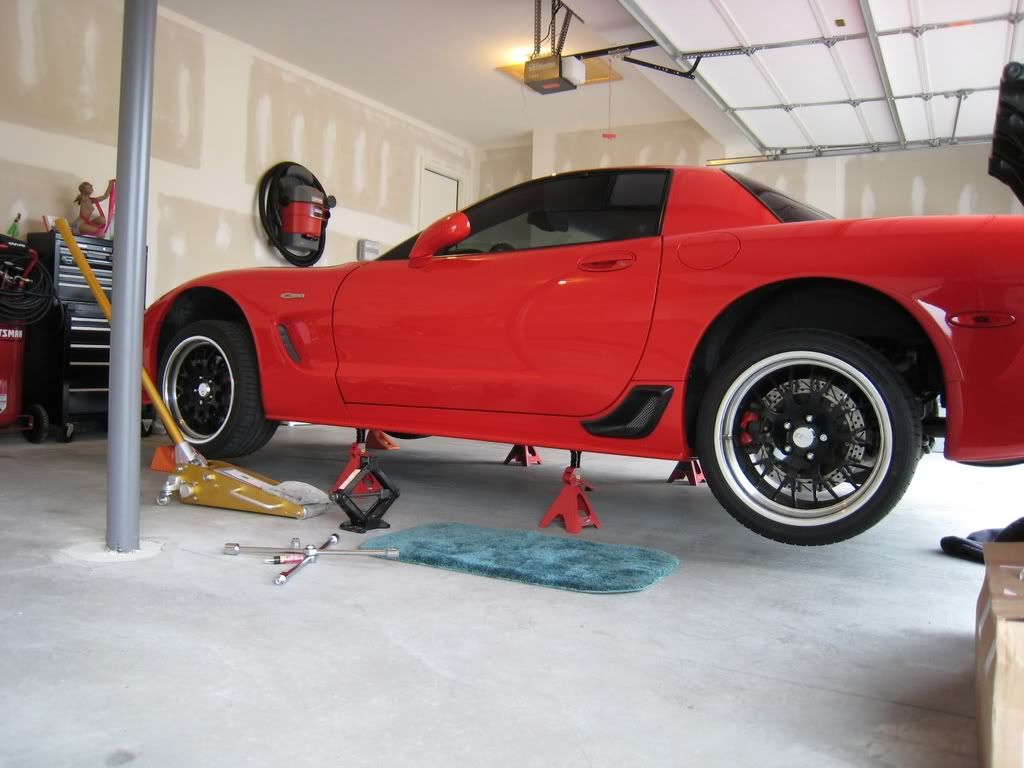
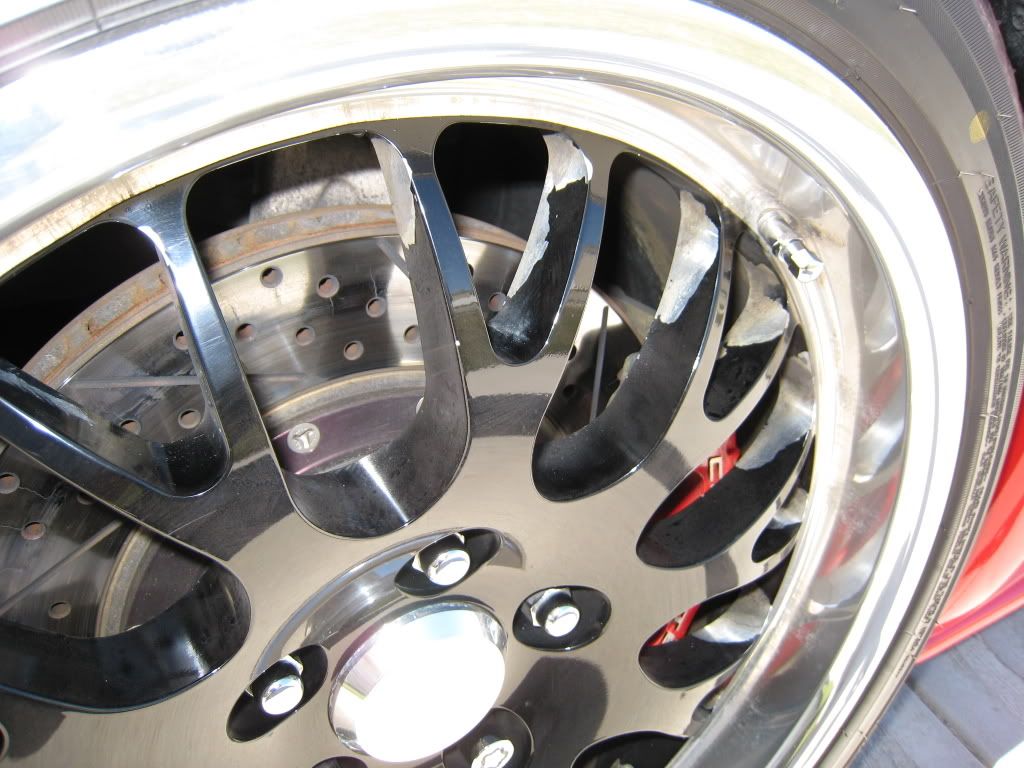
Once raised and secured on jackstands, I removed the wheels and set them out of the way. The wheels are CCW SP20s with black painted centers that are being replaced with the same wheels however with black powdercoated centers instead. The paint simply was not durable and began to flake off almost immediately. It has been an extremely long wait but hopefully I will have them this week.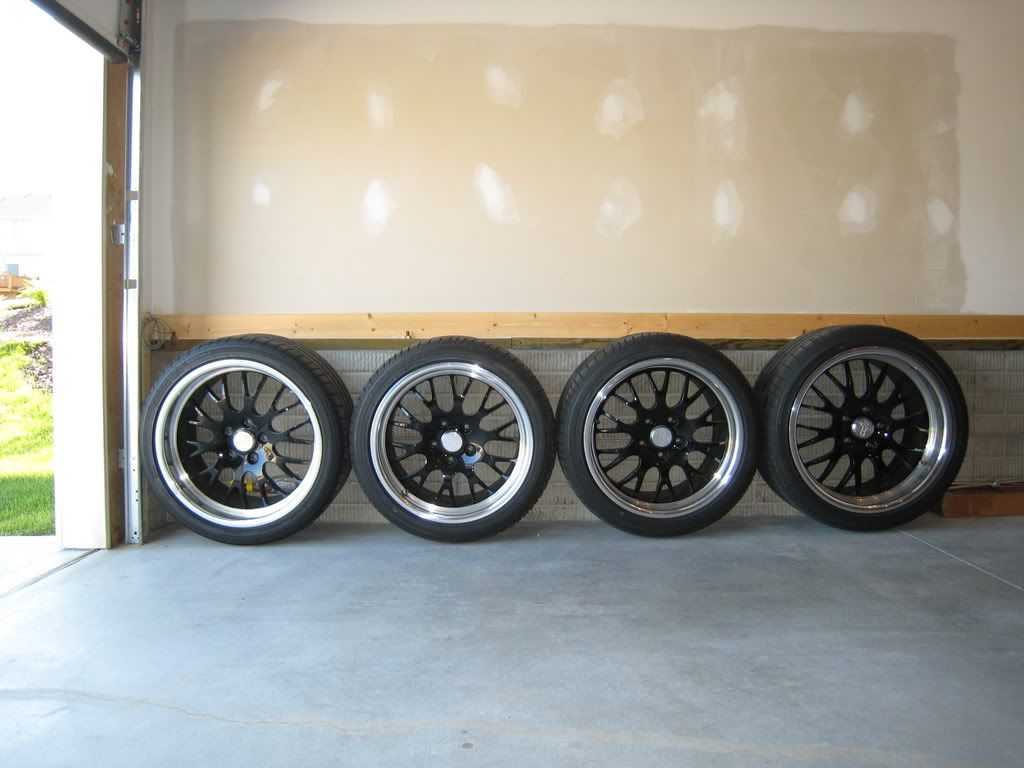
A closer look…
Here is the “patient” prepped and ready for operation.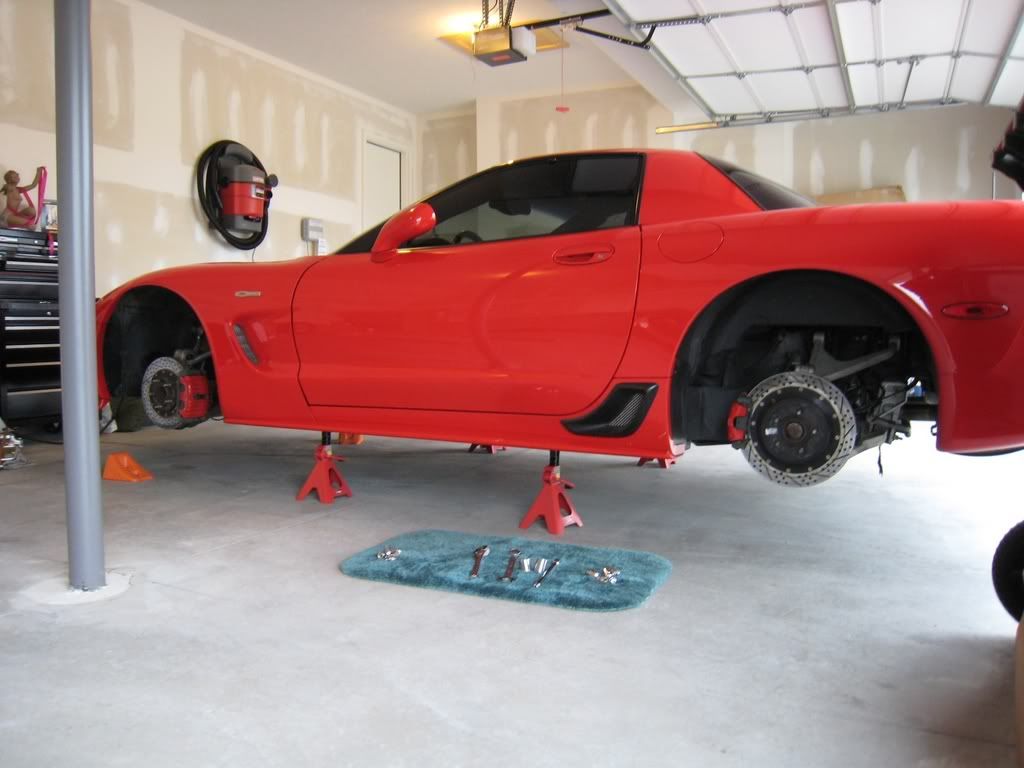
Since removal of the rear shocks is so easy “that even a caveman could do it”, I started with them first. Nothing extraordinary in the removal, however compressing the shocks by hand gave me a great upper body workout.
Before
After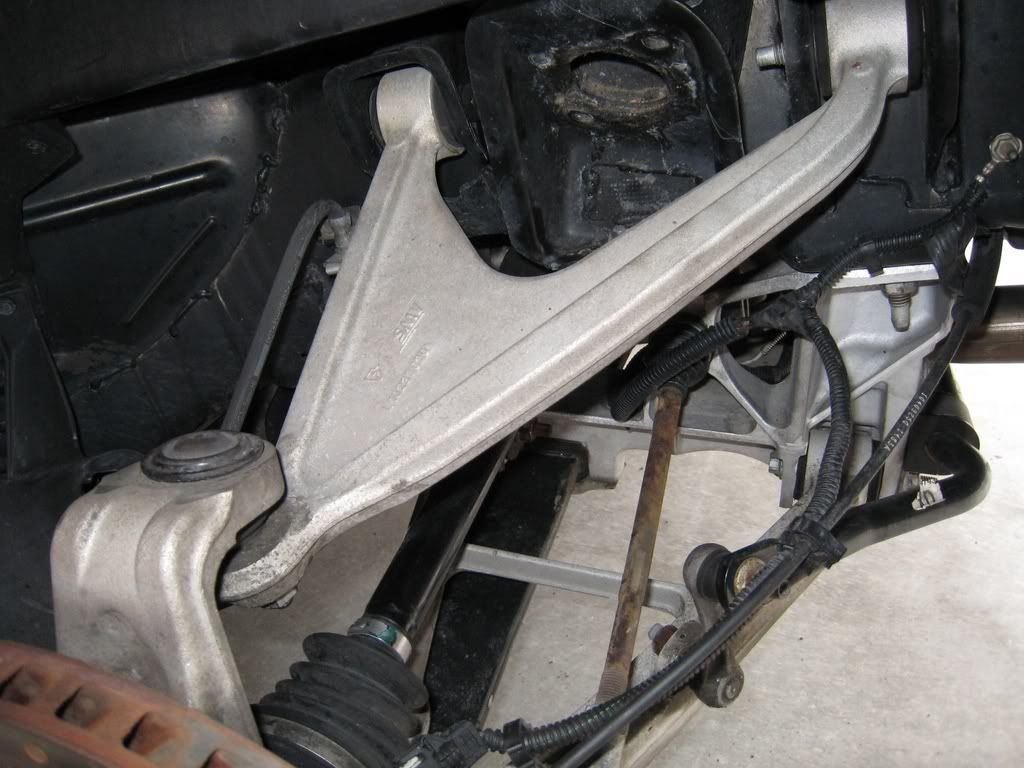
Before
After
As you may have noticed in the pictures that the wheel wells and suspension look pretty mankie, so I decided to remove the well liners to facilitate cleaning things up. Take a look at what had accumulated since the last time I removed them for cleaning - about 15k miles ago. Shocking!!!
Now that the rear shocks were out I decided to go ahead and start on the front disassembly.
Before removal of the shock, and knuckle – left side
Before removal of the shock, and knuckle – right side
It was during this stage of the install that life began to really suck. I was able to remove the shocks without any real difficulty and once again enjoyed a great upper body workout by compressing them by hand for removal. Things were smooth going with the removal of the knuckles, that is until I tried to lift them off the lower ball joint. I tried hammering away at the lower control arm with a block of wood and my rubber mallet for leverage but they just would not budge. So I got the bright idea to use my ball joint separator tool aka the “pickle fork”. Guess what they still did not budge and I was concerned that if I tried too hard that I would damage the rubber boots. Unfortunately (as I would later realize) the damage had already been done. Anyway, I took a think break and decided I needed another tool; a specialty tool. So off to NAPA I went to get this nifty two pronged thingy.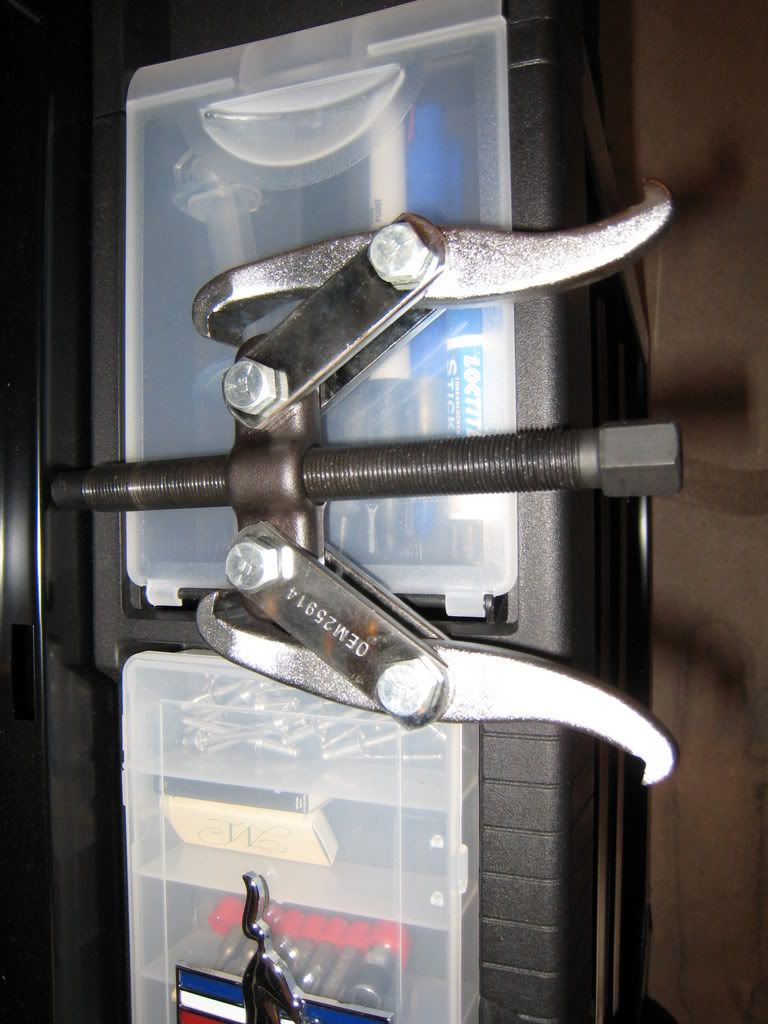
With that tool I was able to remove the knuckle from the lower ball joints in a matter of seconds – literally.
Here are the very grimey knuckles with hub bearings removed:
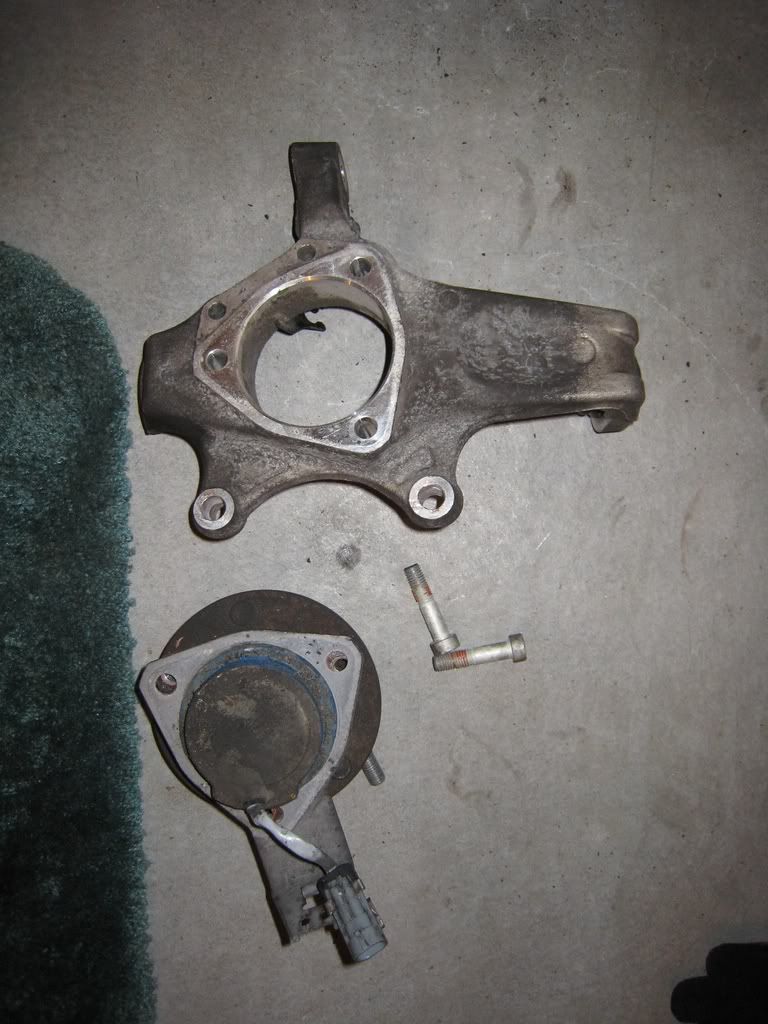
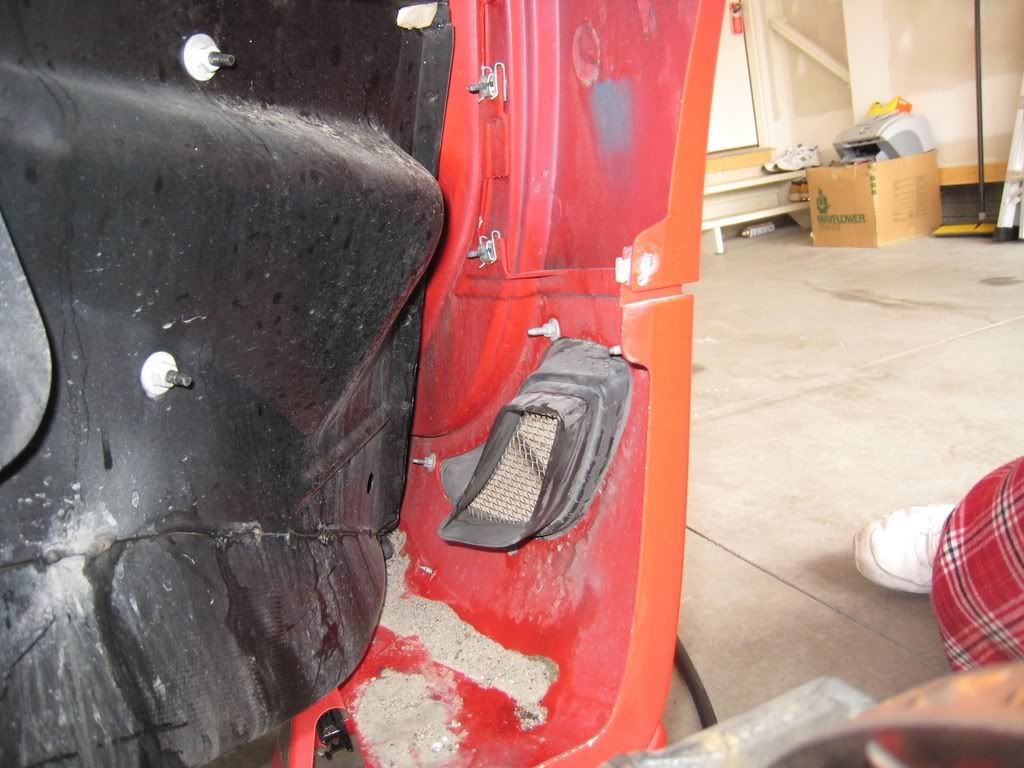
With those now out of the way, I pulled the front brake duct access liners to remove the OEM ducts and prepare for the DRM install.
Here are the rear wheel well liners, front access liners and OEM brake ducts all removed and clean.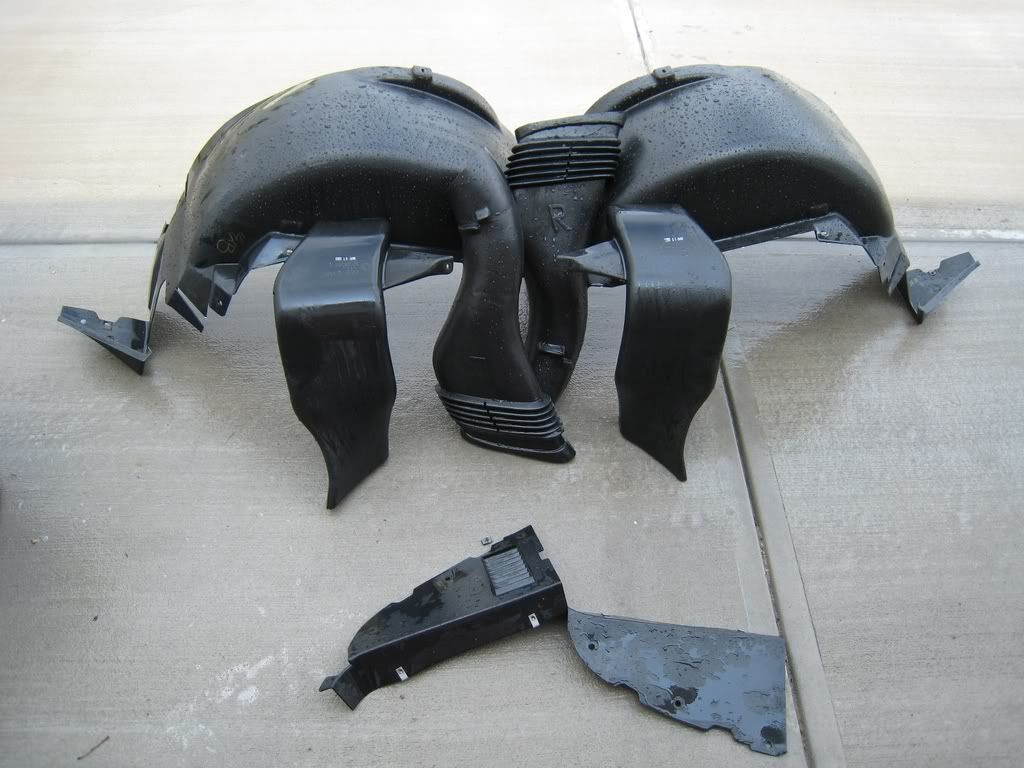
By the way, the DRM install instructions are actually not that bad however they could include arguably the most important guidance of all i.e. a template for modifying the duct opening. Thank heavens for the Dremel (a tool which I would find immensely helpful throughout this entire install of mods). Here’s how things looked with the knuckle out of the way and the DRM ducts mocked up in place.
Here are the DRM’S all bolted in:
To keep the duct hose in place I used a coupler along with some self tapping screws as seen here:
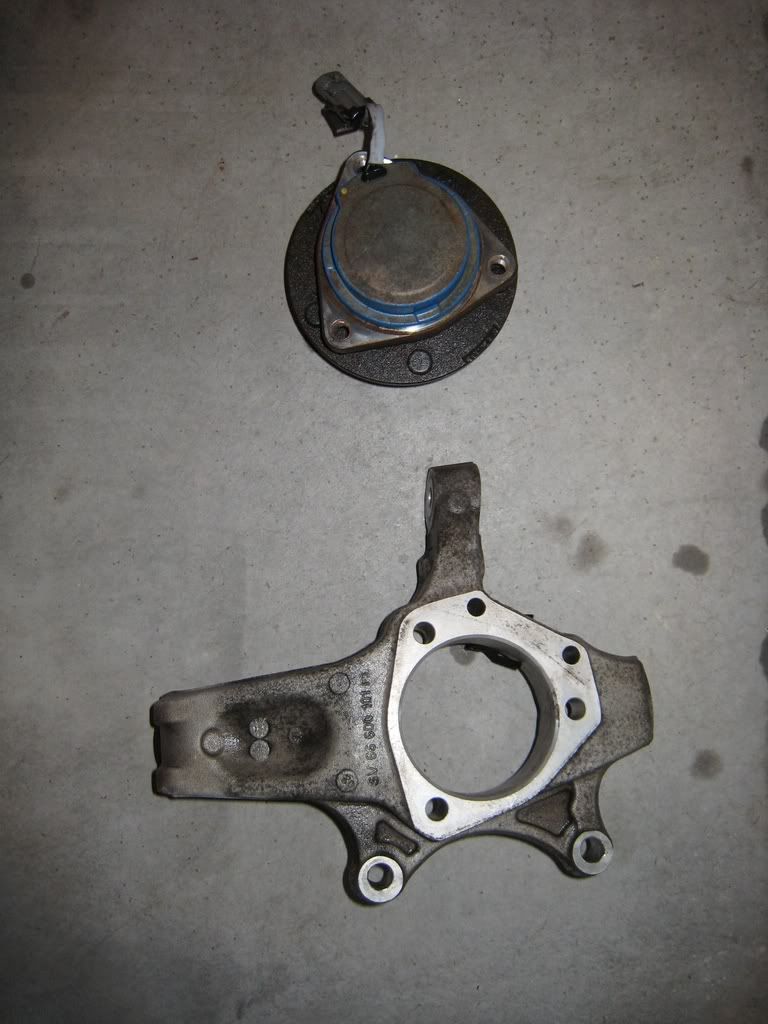
Before going further I decided to clean up the suspension parts prior to re-assembling the knuckle/hub with the LG spindle ducts.
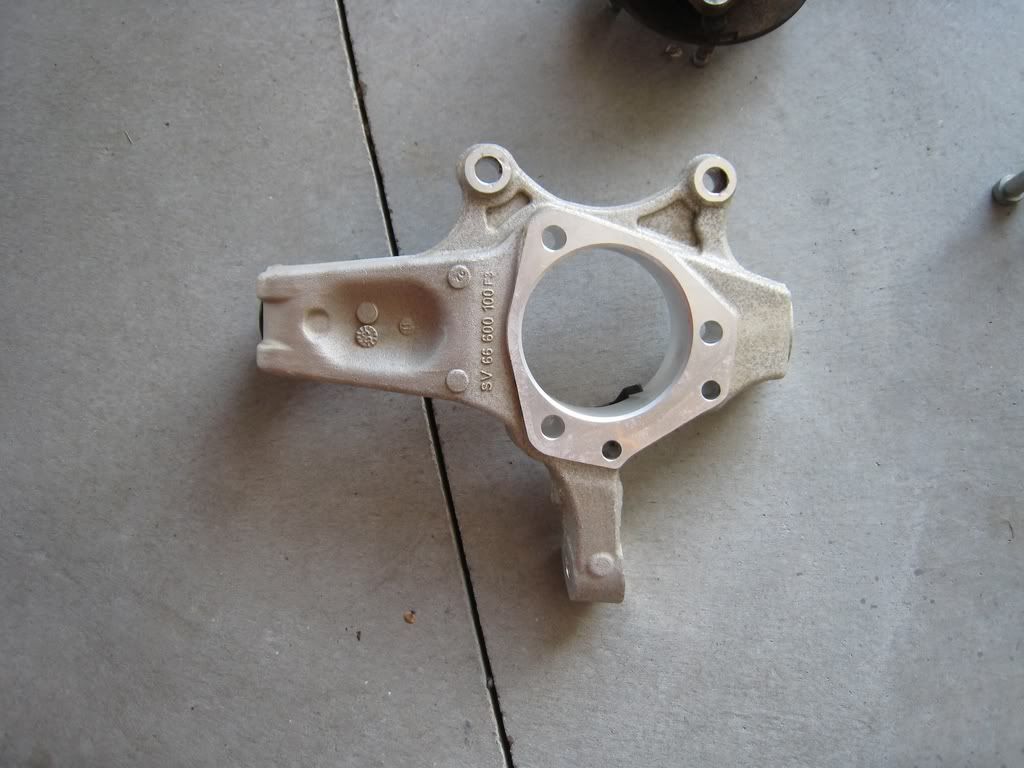
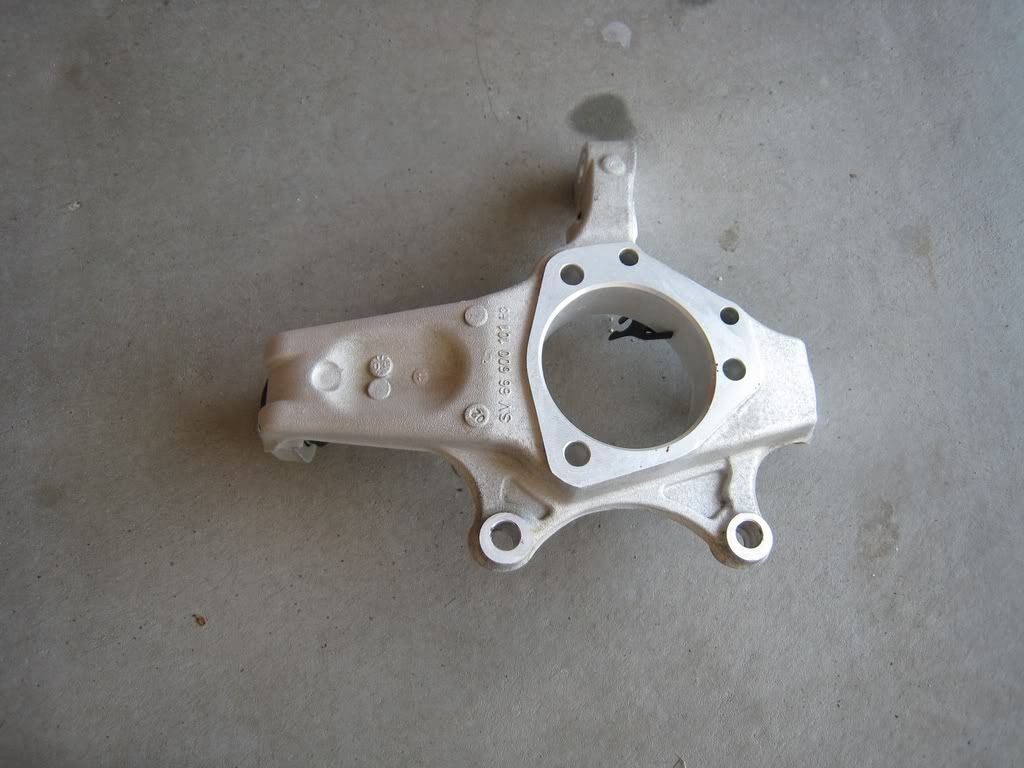
Here are pictures of the cleaned knuckles. So clean you can eat off of them.
Over the past few days I have been fully engaged in installing some new parts on my car. When I began my “project” I only had plans to install Koni FSD shocks and the DRM brake ducts along with the LG spindle ducts.
For the record, I bought my spindle ducts a little over two years ago to date; something which would bite me in the *** during the install but more on that later. At the same time I bought the ducts I also bought some turbo grade duct hose and couplers from a race shop whose name I no longer remember – sorry bout that. Installing new shocks is a relatively easy and straightforward job however since I was also adding the ducts, my install would also involve disassembly of the front suspension knuckle and the subsequent removal of the wheel bearing hubs. The steps to do this are also straightforward and honestly any novice “backyard” mechanic(caveman) could do it but caution should be taken because there are a few things that can go wrong which will turn something so straightforward into a “costly” nightmare. Anyway, follow along below as I detail my install.
First, here’s a look at the “initial” parts and tools. You will notice in this picture a ball joint separator aka “pickle fork”. Take my advice, remove it from your tool box. That thing is of the devil.
To do this install I followed the combined/modified instructions posted on the internet for shock removal/install (http://fuzzydiceracing.com/test.htm) and hub bearing removal/install (http://www.jakelatham.com/c5/misc/). The first thing of course was to raise the car on jackstands.
Once raised and secured on jackstands, I removed the wheels and set them out of the way. The wheels are CCW SP20s with black painted centers that are being replaced with the same wheels however with black powdercoated centers instead. The paint simply was not durable and began to flake off almost immediately. It has been an extremely long wait but hopefully I will have them this week.
A closer look…
Here is the “patient” prepped and ready for operation.
Since removal of the rear shocks is so easy “that even a caveman could do it”, I started with them first. Nothing extraordinary in the removal, however compressing the shocks by hand gave me a great upper body workout.
Before
After
Before
After
As you may have noticed in the pictures that the wheel wells and suspension look pretty mankie, so I decided to remove the well liners to facilitate cleaning things up. Take a look at what had accumulated since the last time I removed them for cleaning - about 15k miles ago. Shocking!!!
Now that the rear shocks were out I decided to go ahead and start on the front disassembly.
Before removal of the shock, and knuckle – left side
Before removal of the shock, and knuckle – right side
It was during this stage of the install that life began to really suck. I was able to remove the shocks without any real difficulty and once again enjoyed a great upper body workout by compressing them by hand for removal. Things were smooth going with the removal of the knuckles, that is until I tried to lift them off the lower ball joint. I tried hammering away at the lower control arm with a block of wood and my rubber mallet for leverage but they just would not budge. So I got the bright idea to use my ball joint separator tool aka the “pickle fork”. Guess what they still did not budge and I was concerned that if I tried too hard that I would damage the rubber boots. Unfortunately (as I would later realize) the damage had already been done. Anyway, I took a think break and decided I needed another tool; a specialty tool. So off to NAPA I went to get this nifty two pronged thingy.
With that tool I was able to remove the knuckle from the lower ball joints in a matter of seconds – literally.
Here are the very grimey knuckles with hub bearings removed:
With those now out of the way, I pulled the front brake duct access liners to remove the OEM ducts and prepare for the DRM install.
Here are the rear wheel well liners, front access liners and OEM brake ducts all removed and clean.
By the way, the DRM install instructions are actually not that bad however they could include arguably the most important guidance of all i.e. a template for modifying the duct opening. Thank heavens for the Dremel (a tool which I would find immensely helpful throughout this entire install of mods). Here’s how things looked with the knuckle out of the way and the DRM ducts mocked up in place.
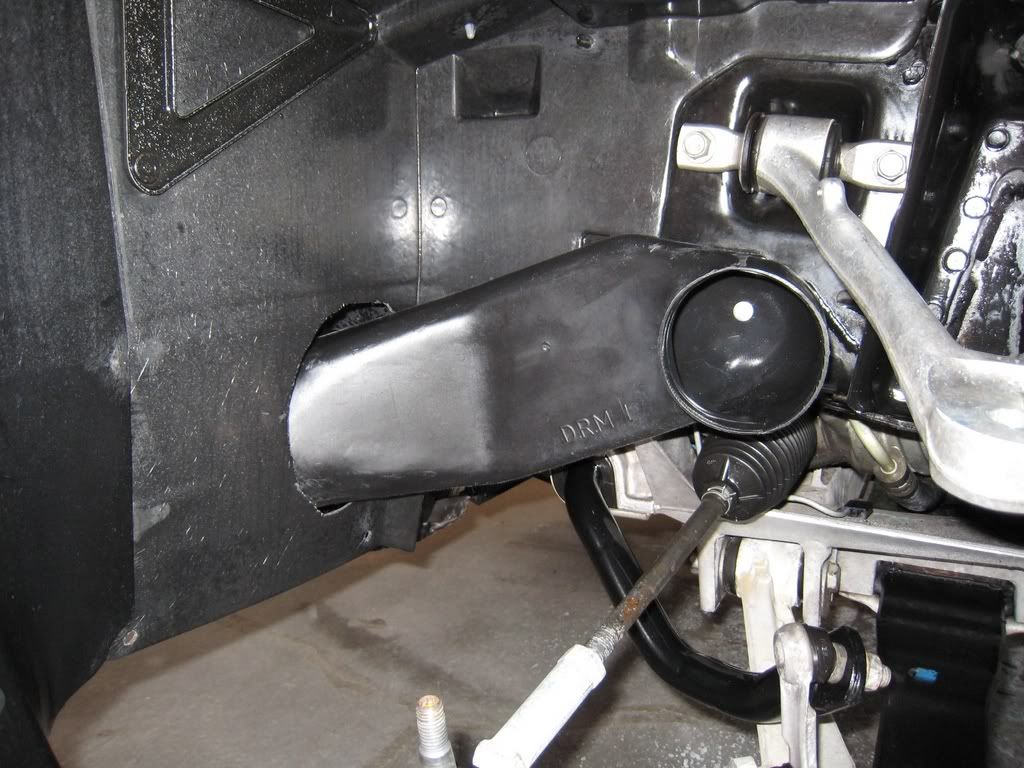
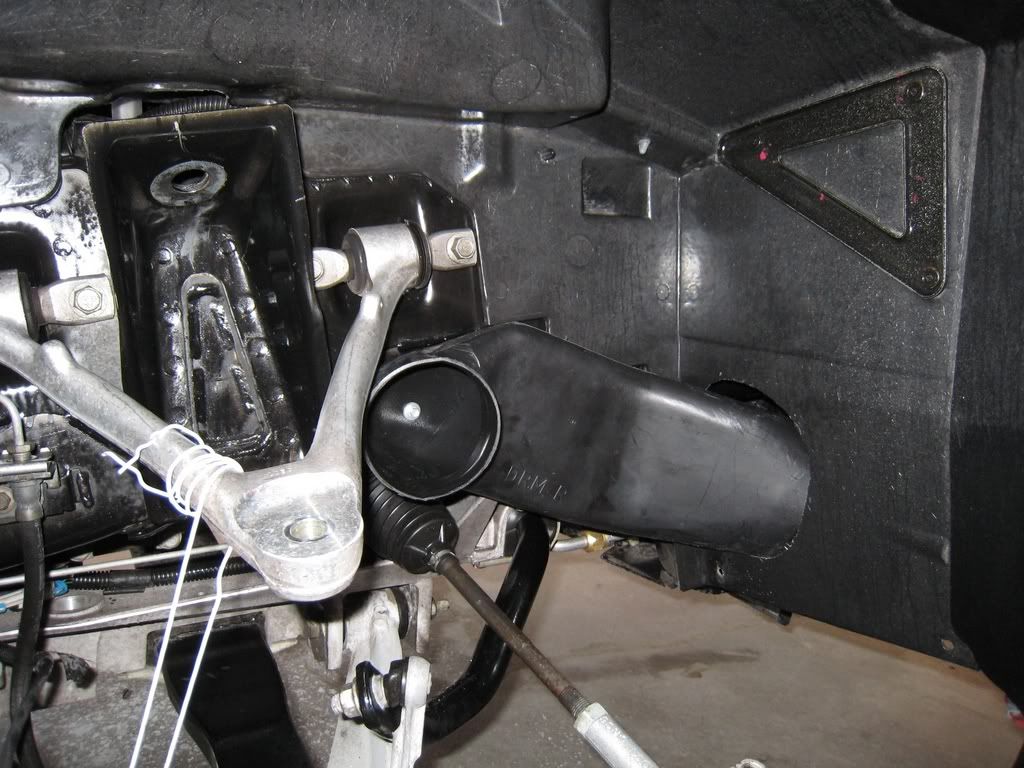
Here are the DRM’S all bolted in:
To keep the duct hose in place I used a coupler along with some self tapping screws as seen here:
Before going further I decided to clean up the suspension parts prior to re-assembling the knuckle/hub with the LG spindle ducts.
Here are pictures of the cleaned knuckles. So clean you can eat off of them.
 05-11-2007, 11:33 PM
#2
Coolest Guy Evar!
Thread Starter
Part 2 of 3
Now a comment regarding those spindle ducts, no disrespect to Lou and company but the ones I bought (albeit two years ago) turned out quite frankly to be crap. Specifically, the holes did not line up and the ducts themselves had to be modified EXTENSIVELY in order to fit correctly onto the knuckle/hub assembly. Unfortunately for me, I didn’t realize just how bad they were right away as it seemed that at every stage of install I had to modify the damn things in some way to fit. Anyway, here’s how I prepped them.
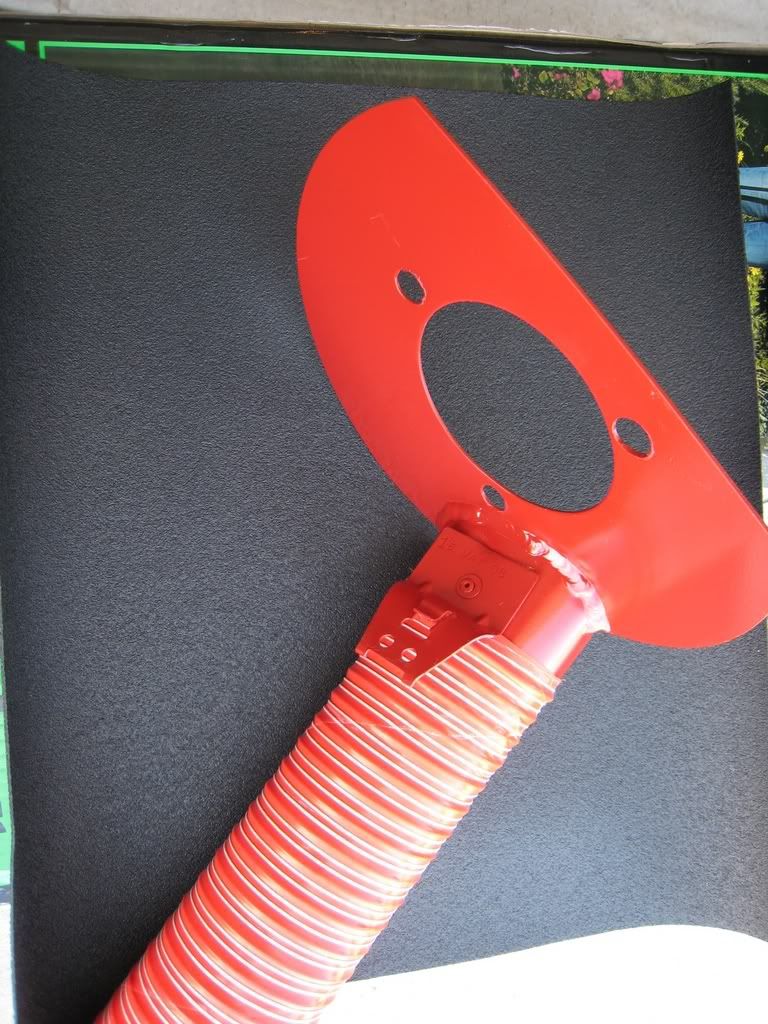
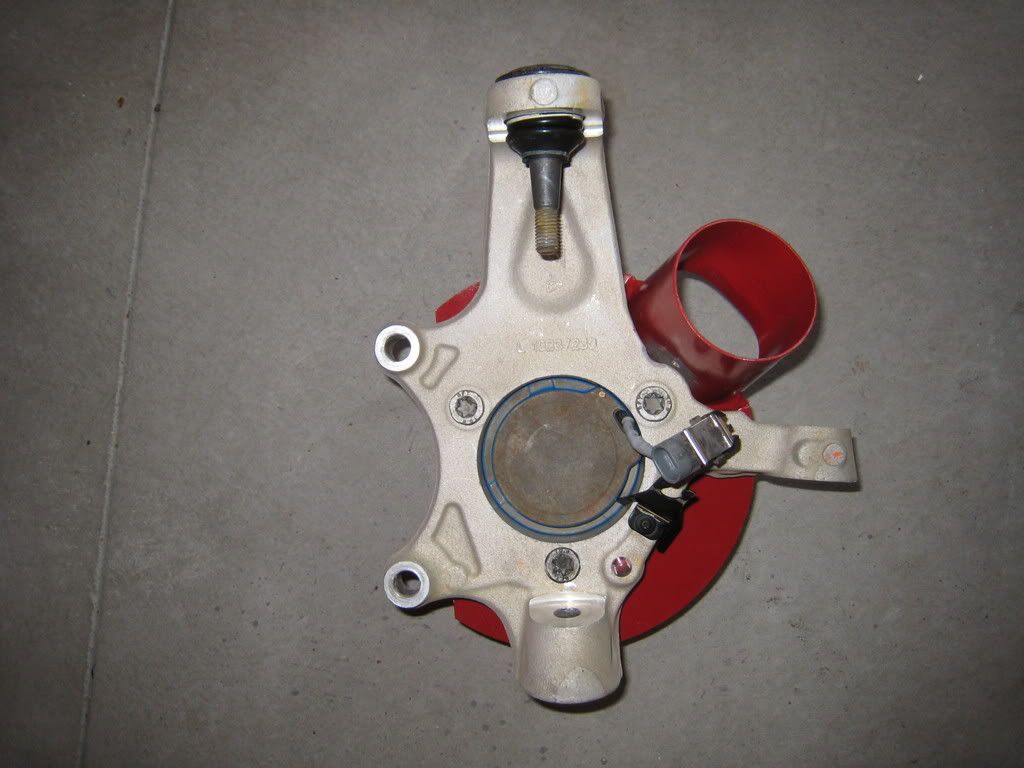
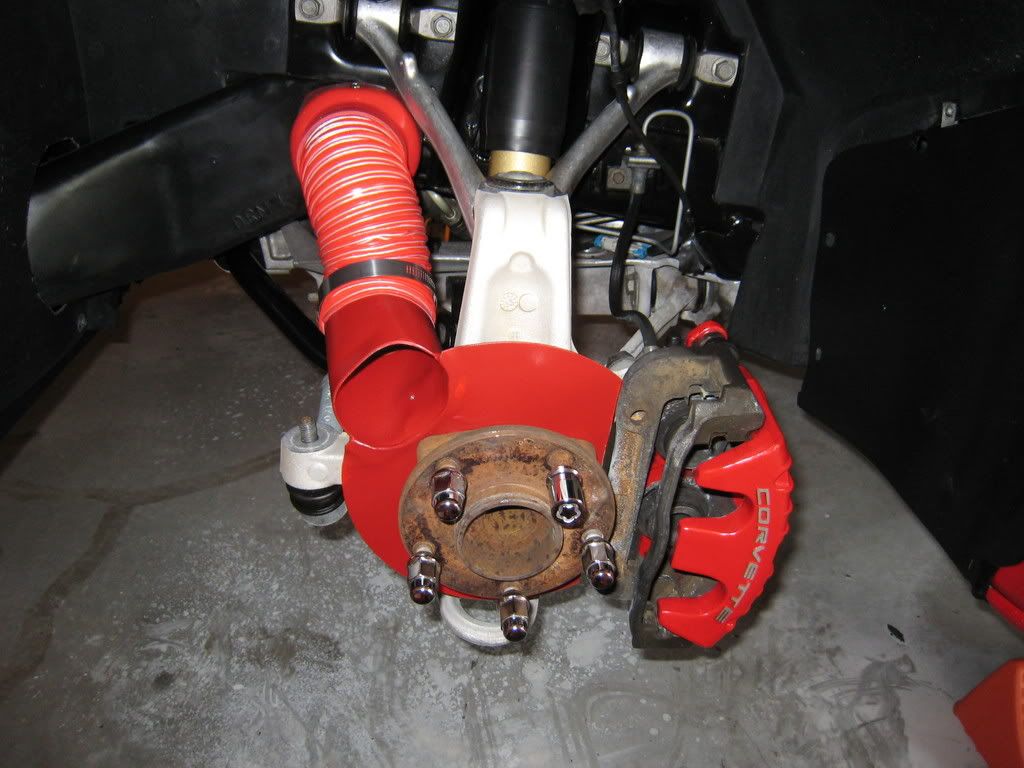
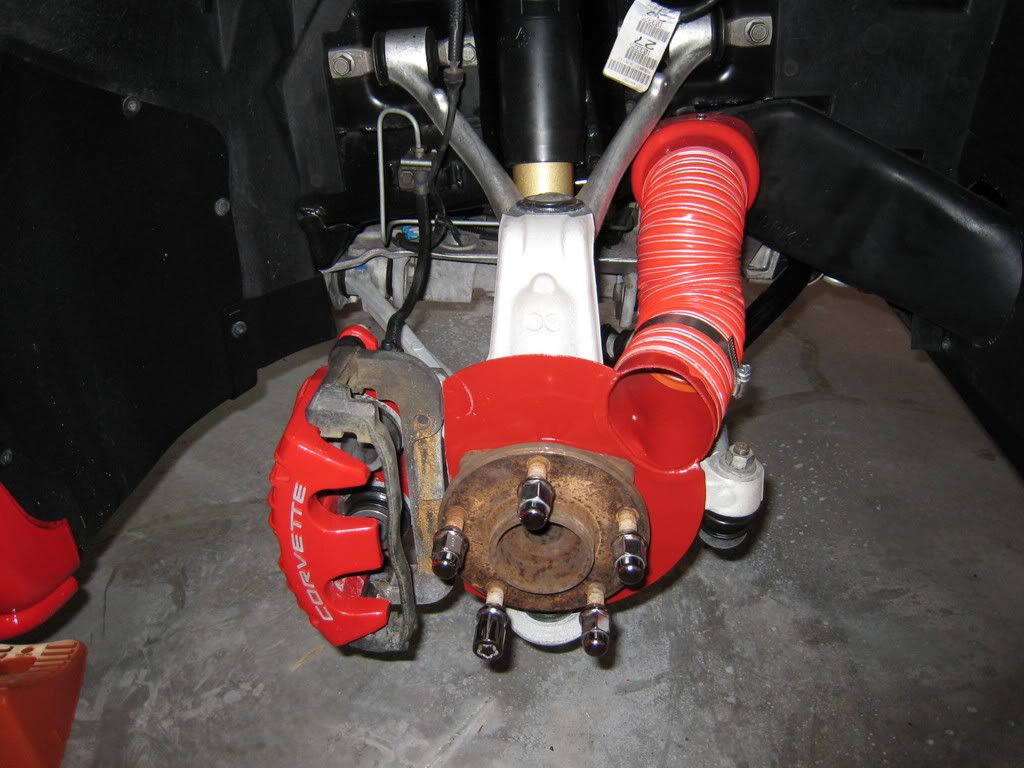
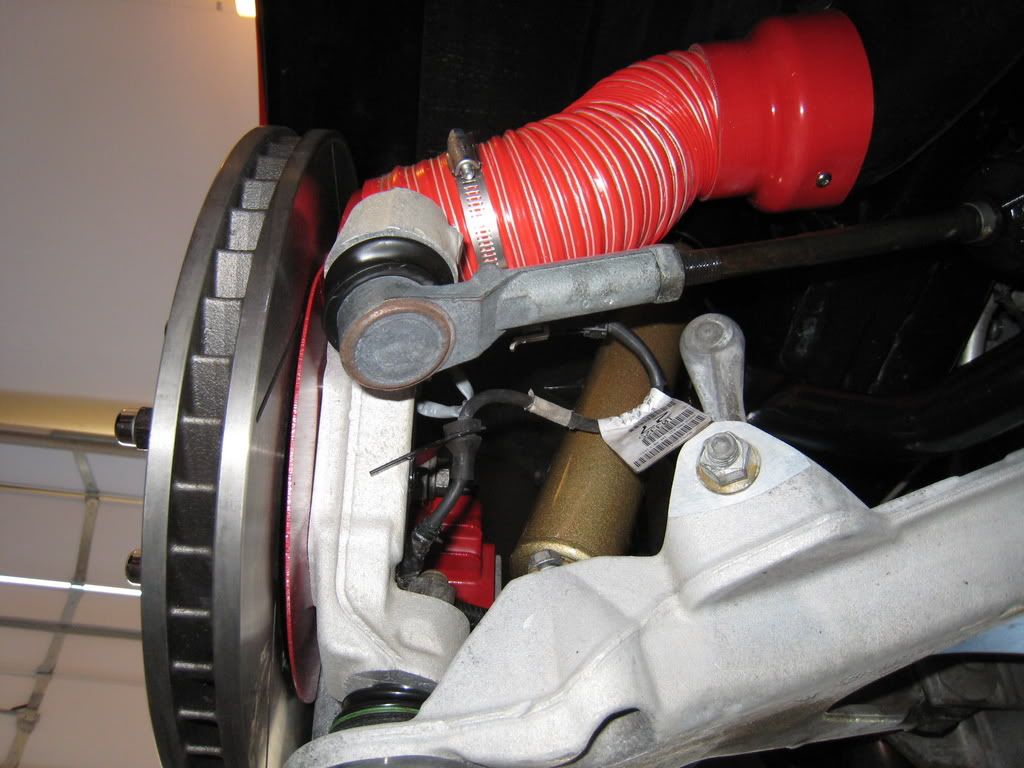
I painted them with hi-temp paint first (bad move due to the additional modifying needed to make them fit). If you notice in the picture above you can see where I pop-riveted the ABS sensor mount which I cut from the OEM part. Great idea (or so I thought) that I came up with to keep the sensor in the OEM location. However as mentioned above these things required a lot of modifying to fit and once assembled on to the hub there was just no room for my trick sensor mount due to clearance issues between the duct opening and the knuckle. Here’s a picture of a fully re-assembled knuckle/hub assembly with spindle duct in place.
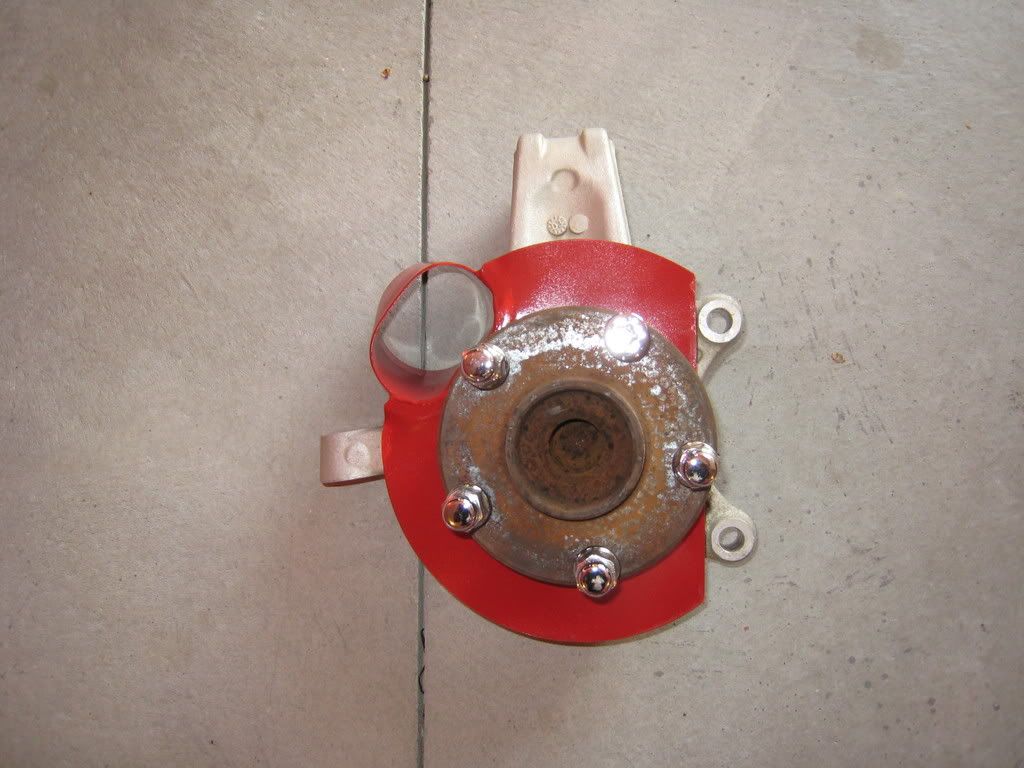
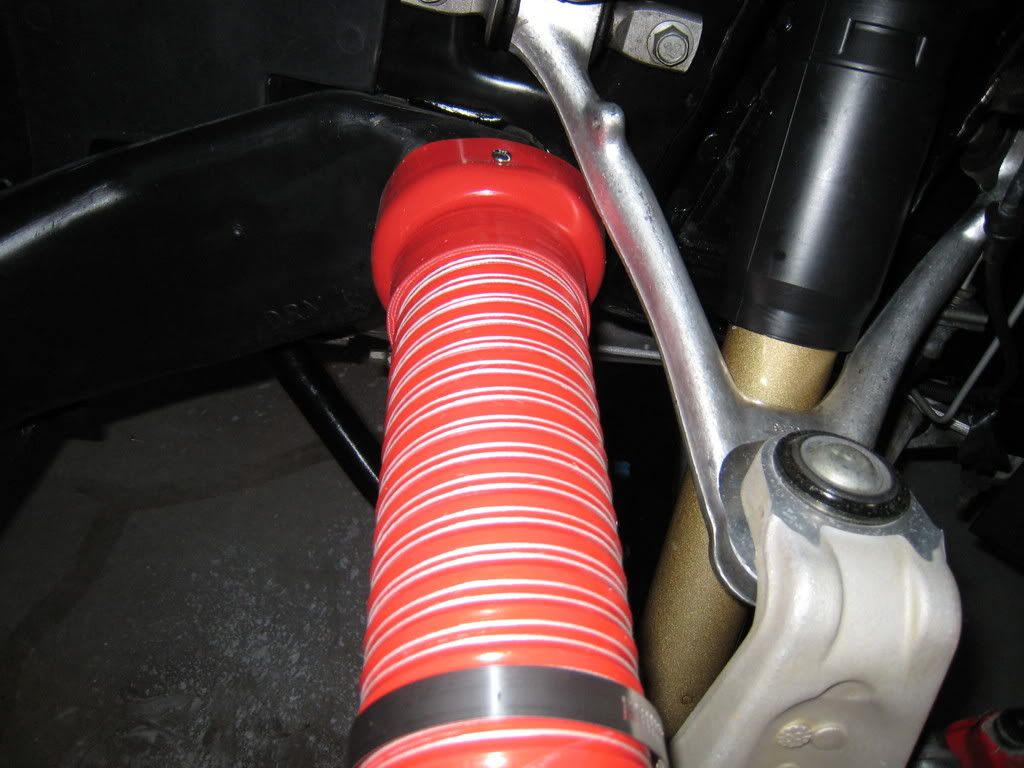
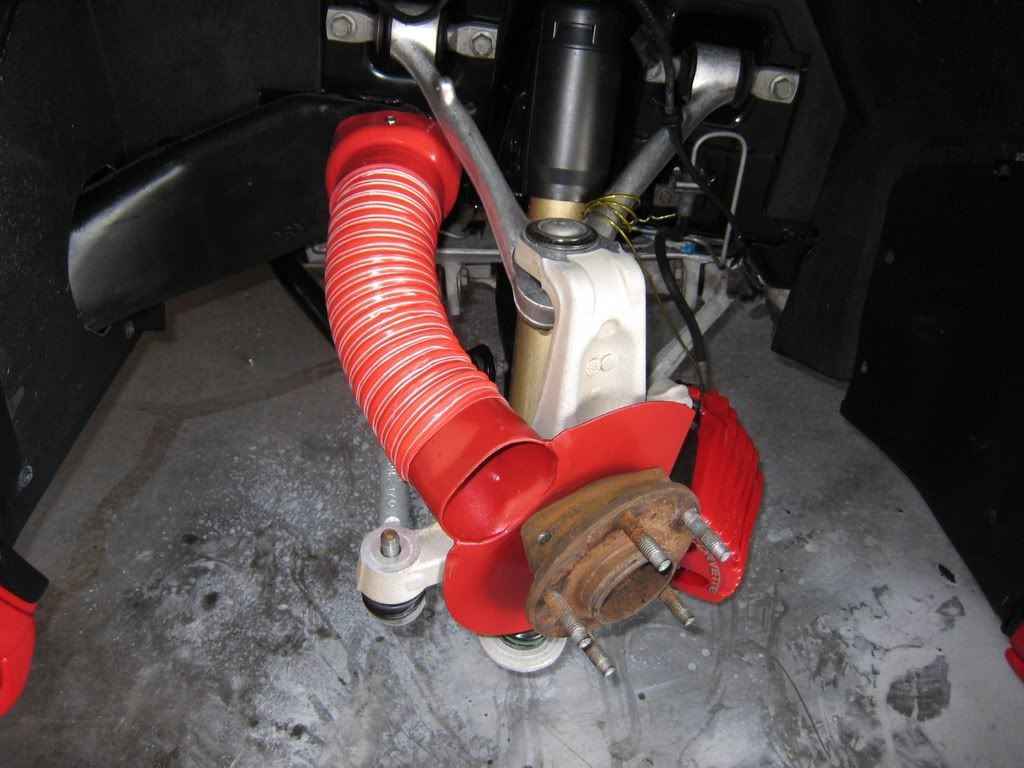
Of course my spindle duct problems didn’t stop there, I pre-fit the assembly with a rotor and had to hammer more clearance so it wouldn’t scrape. I then pre-fit the assembly to the suspension but not before installing the Koni shocks as seen here:
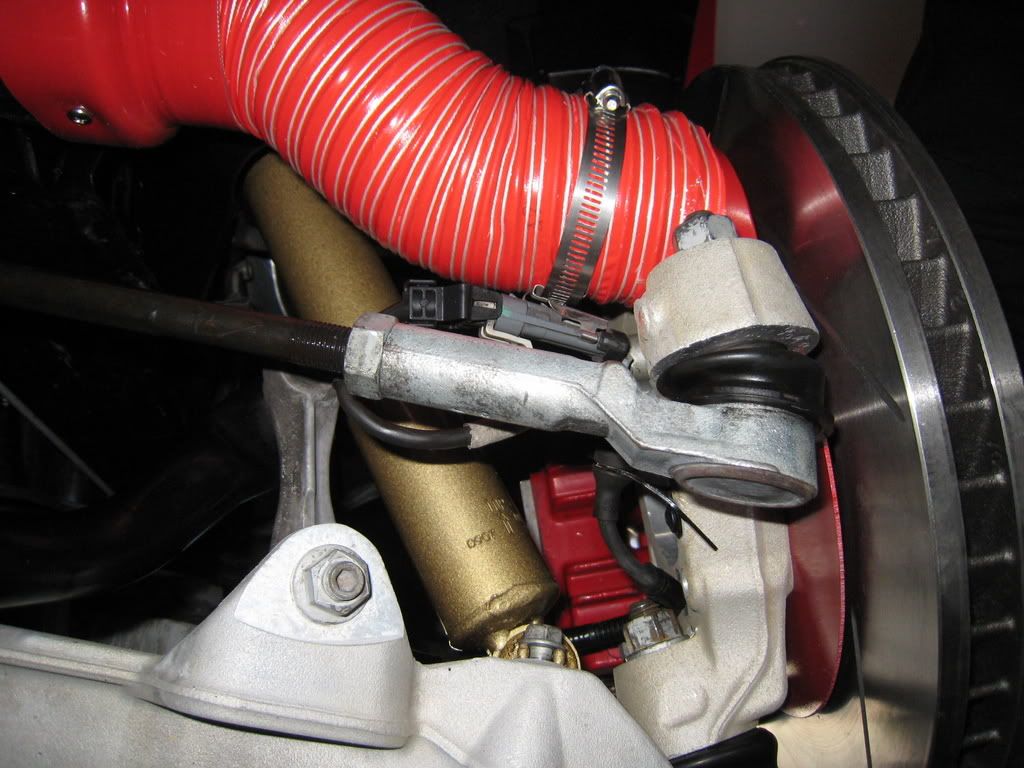
Next I pre-fit the calipers to the knuckle/hub/duct assembly and discovered my last problem. I could not bolt on the calipers because the damn spindle ducts taperd about ¼ inch up top right into the area the top caliper bolt should go. Out came the Dremel again to trim it and of course touch-up paint.
** Note to LG, I really hope I just got a bad set because honestly they were just a few notches above junk and hardly worth the $200.00 I paid. **
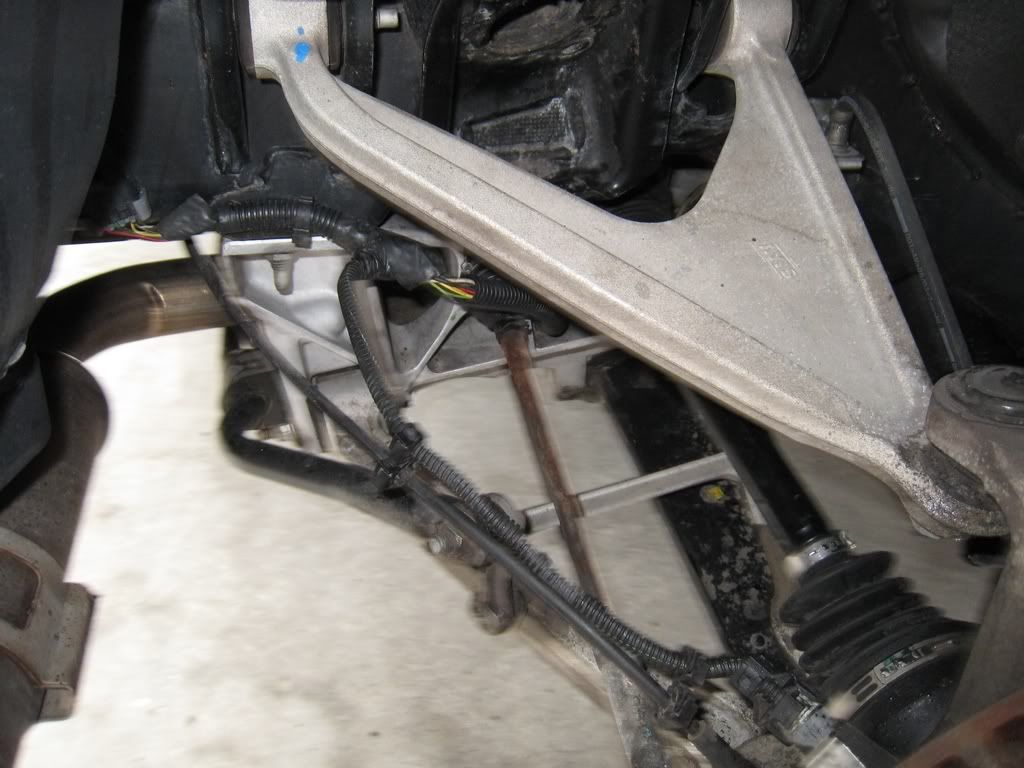
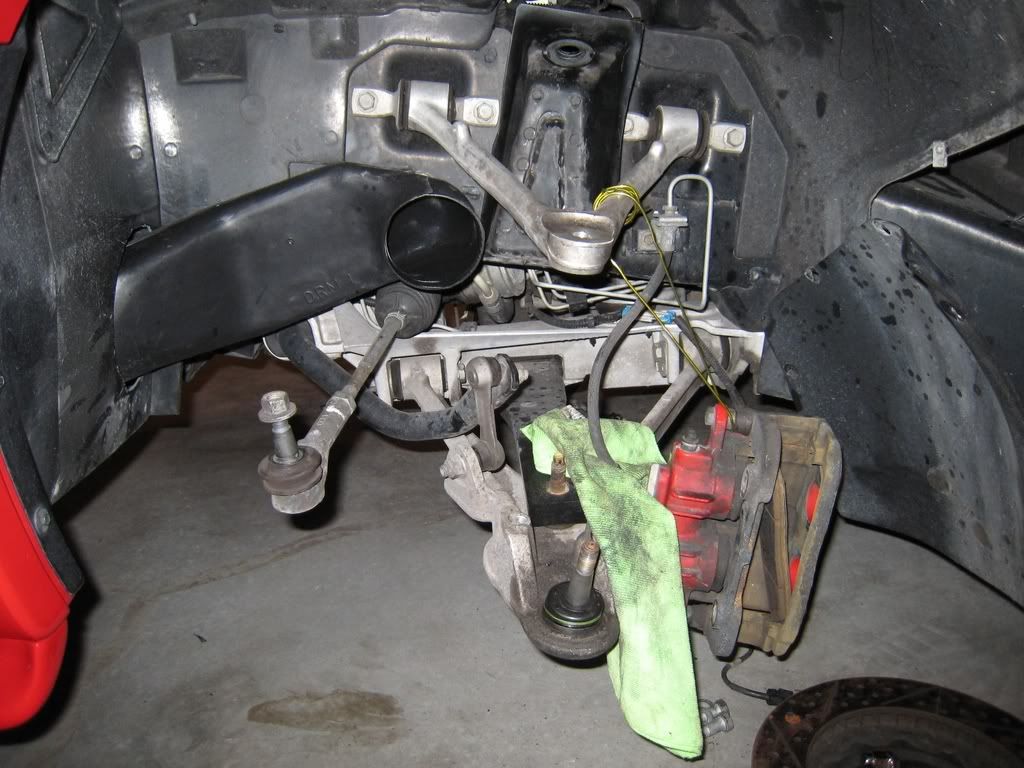
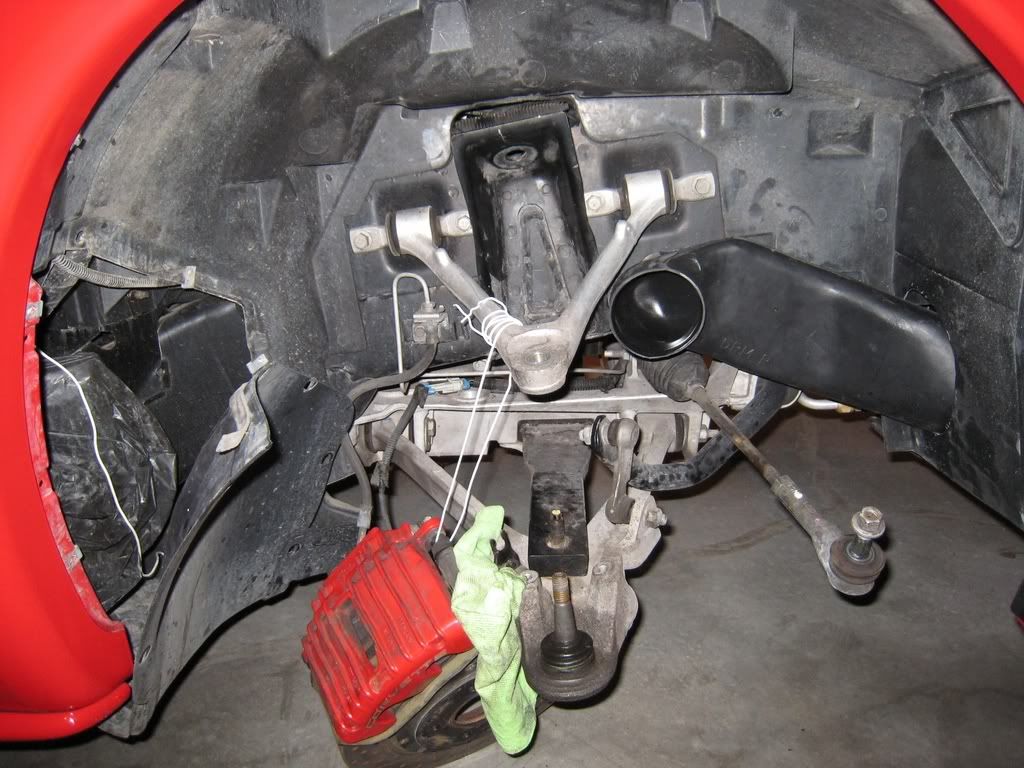
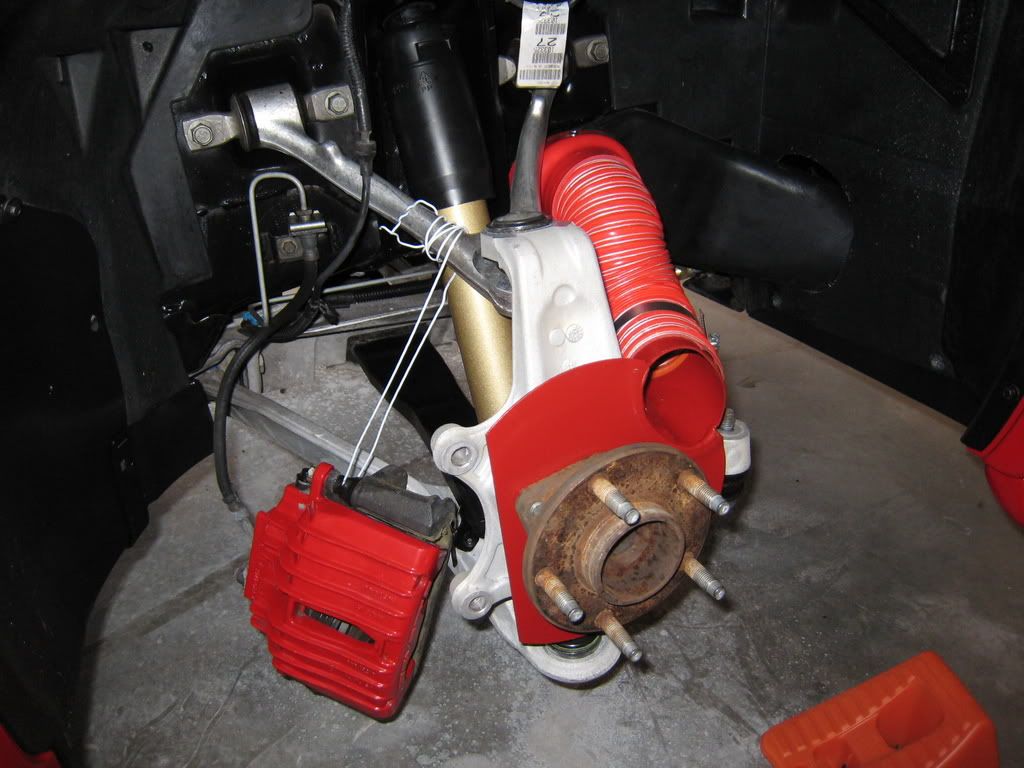
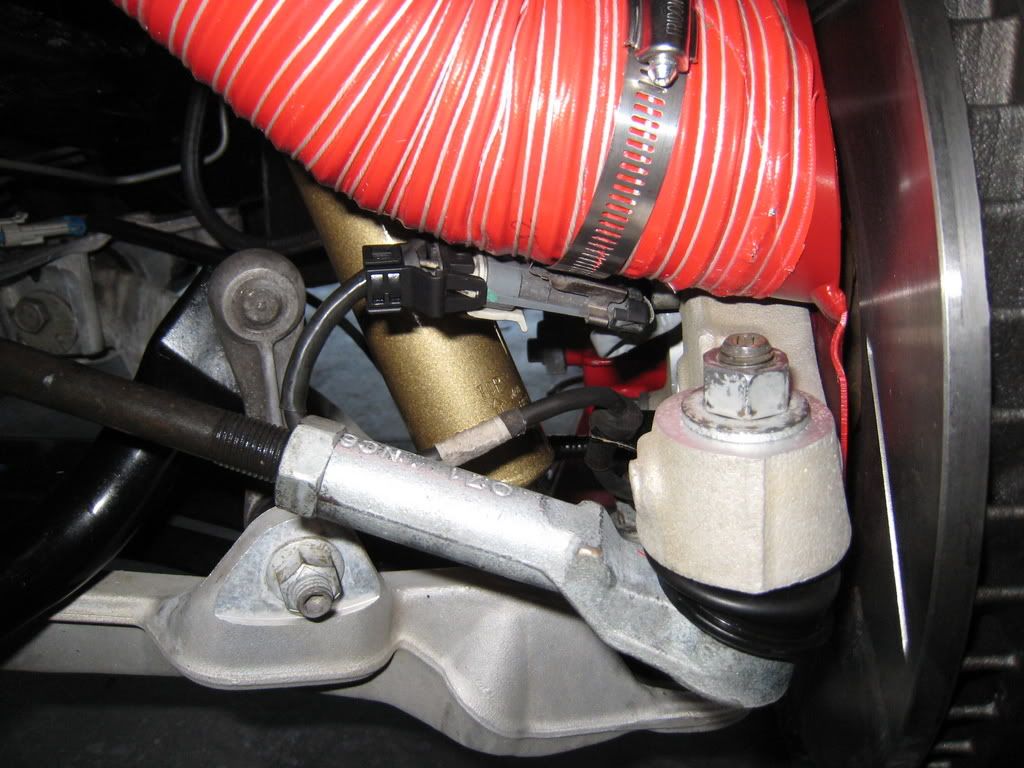
Anyway, here is what it all looked like with the suspension cleaner and everything in place but not torqued down.
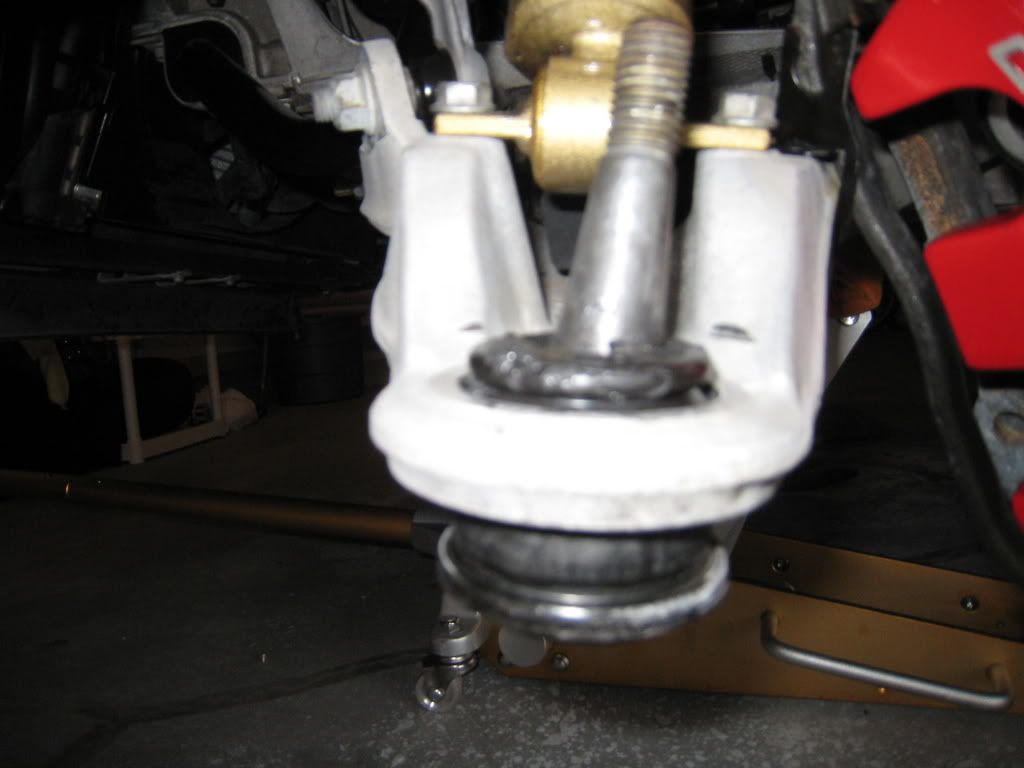
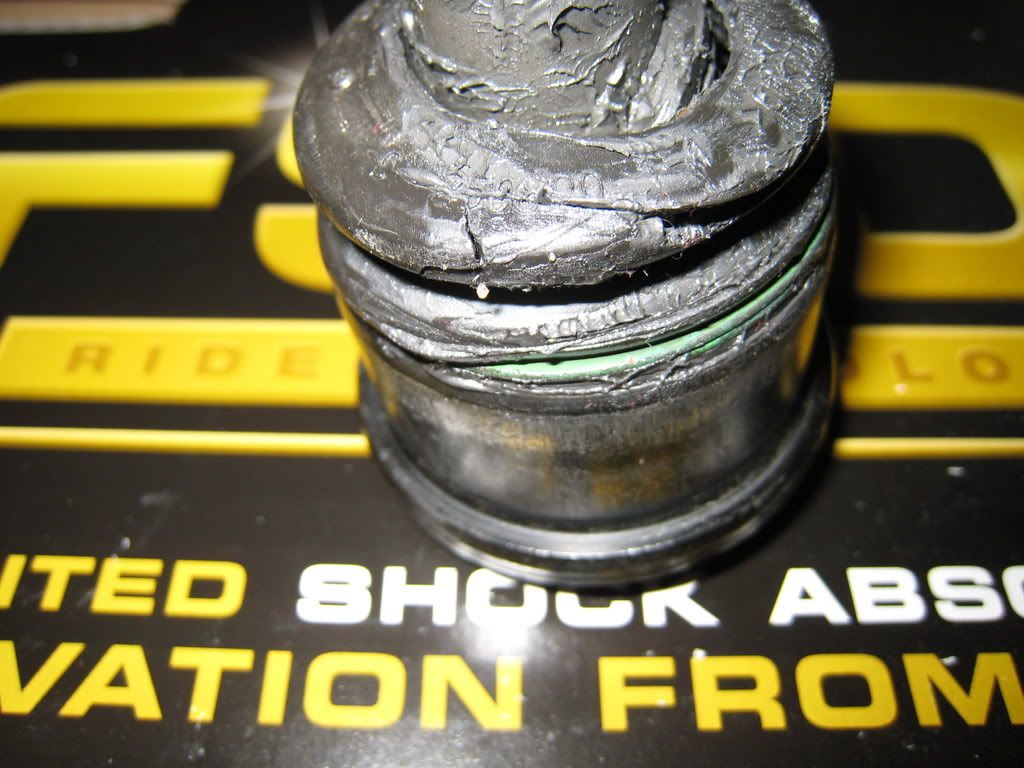
It was around this time that I noticed while cleaning up the suspension that my worst fear was realized from briefly using that damned “pickle fork”. I gouged my lower ball joint boot – FAUK!!!! Here is where things got really bad before getting worse. I had three choices; 1. assemble everything with the gouged ball joint boot in place and let a dealersip replace it, 2. buy a new lower control arm (which comes with a ball joint mounted) and remove old and install new, 3. buy a new ball joint and remove/install into the lower control arm. I chose option 3 which also meant finding and buying the ball joint and a tool to remove/install it. Of course as luck would have it I received the wrong part. So I just used the boot from the wrong part and put it on the original after packing the bearing with grease. What a freakin nightmare. Did I already mention to toss the FAUKIN “pickle fork”?!?!?!?!?
Here’s the gouged ball joint:

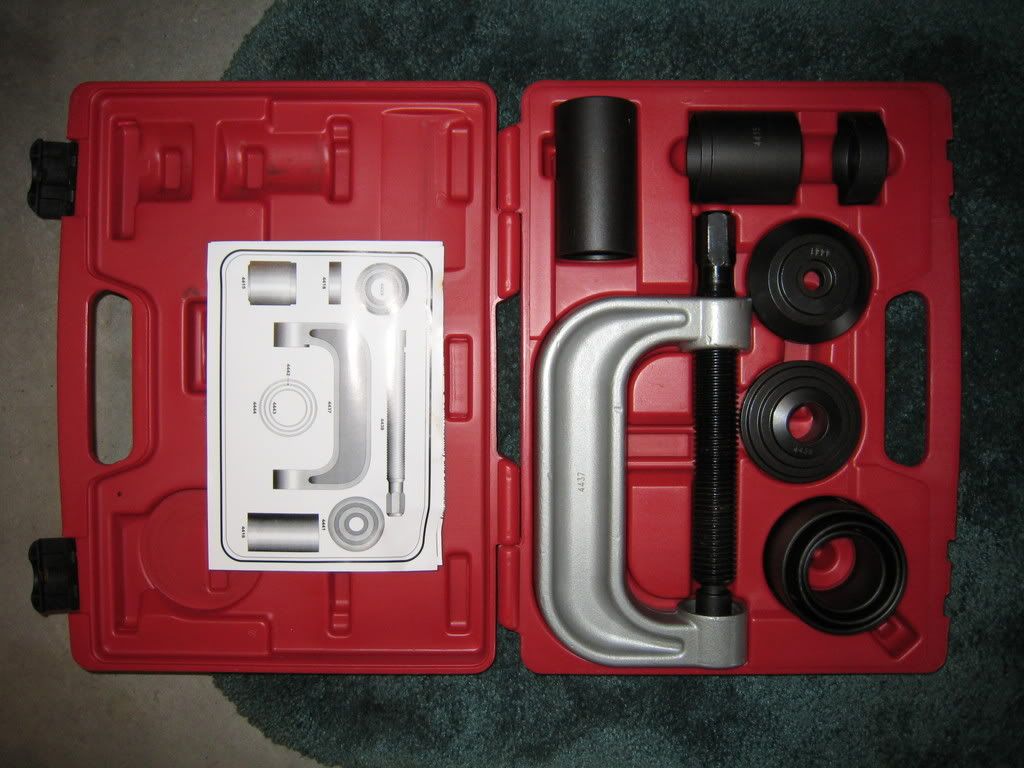
Here’s the ball joint removal/installation tool, this thing ain’t small (or cheap) but if I should ever need to do this again I’ll be ready.
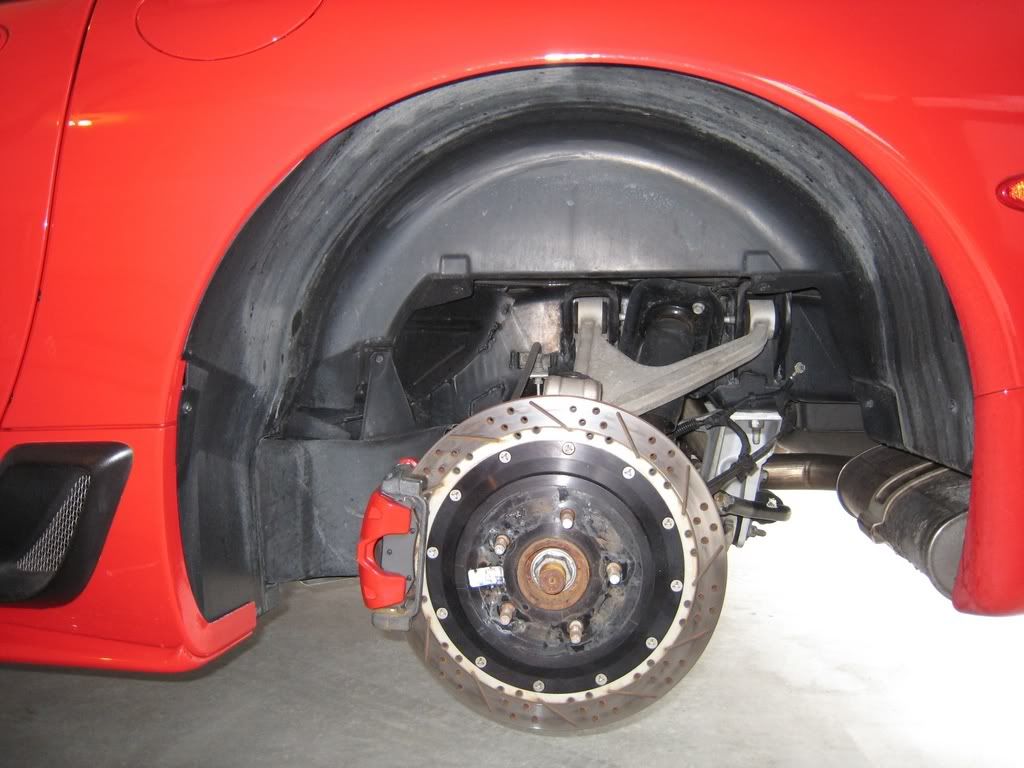
Having gone this far, I decided it would be a good time to replace my front Eradispeed rotors, an expensive mod that I truly regret. I have never tracked or raced my car, yet after 15k miles I have surface cracks (however none on the back side).
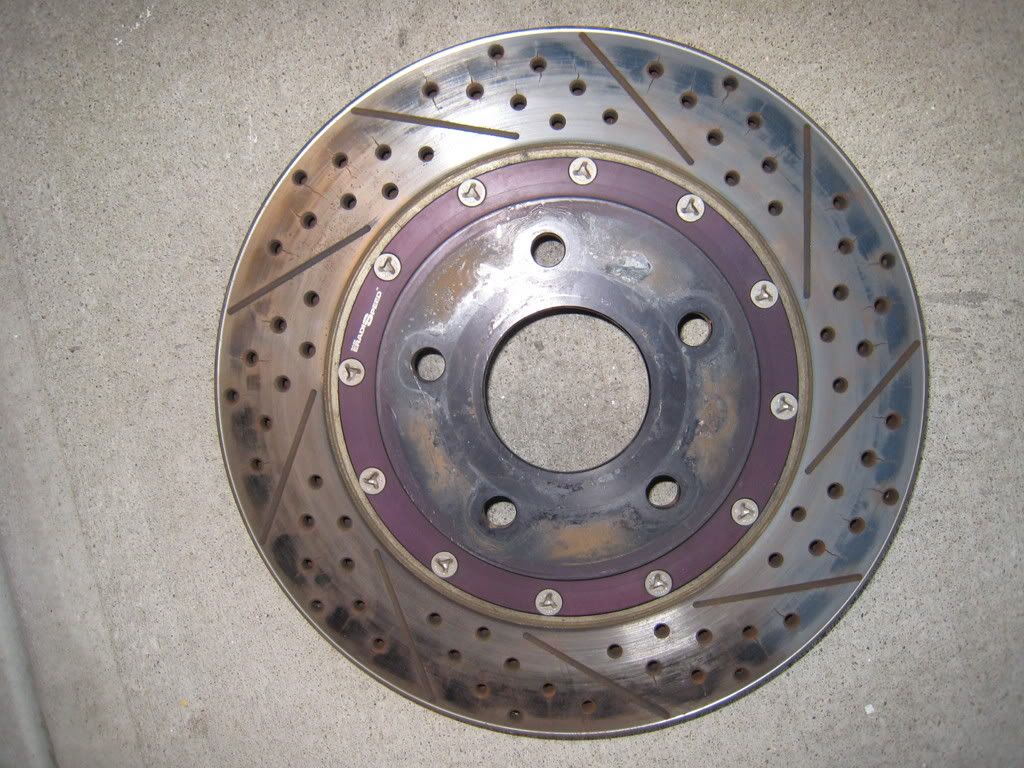
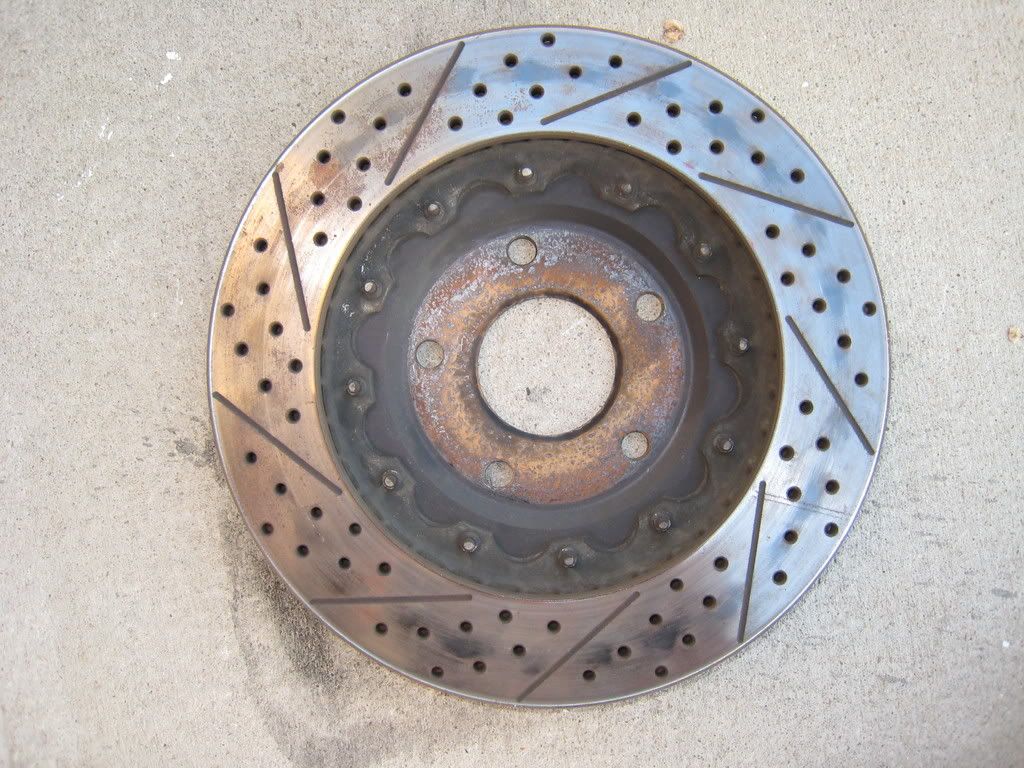
I knew I would need to replace them eventually so I decided to go ahead and do it now. I ordered these beauties from LG (ironically). Despite the spindle duct nightmare I gave them my business again to get these StopTech rotors.
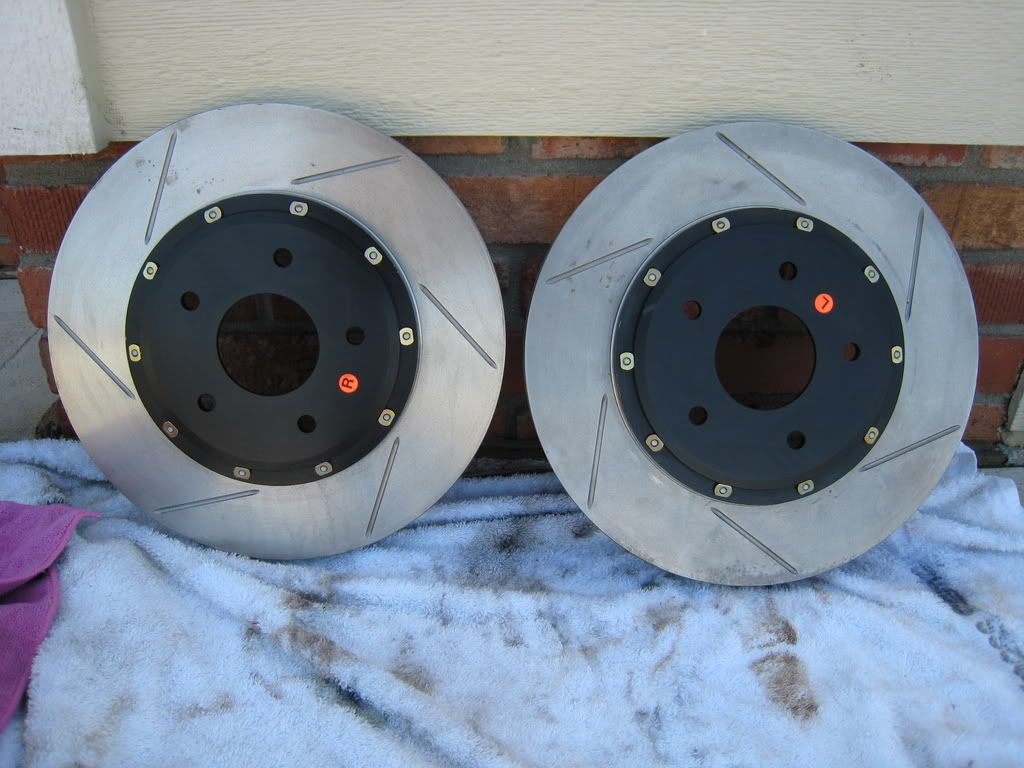
Now a comment regarding those spindle ducts, no disrespect to Lou and company but the ones I bought (albeit two years ago) turned out quite frankly to be crap. Specifically, the holes did not line up and the ducts themselves had to be modified EXTENSIVELY in order to fit correctly onto the knuckle/hub assembly. Unfortunately for me, I didn’t realize just how bad they were right away as it seemed that at every stage of install I had to modify the damn things in some way to fit. Anyway, here’s how I prepped them.
I painted them with hi-temp paint first (bad move due to the additional modifying needed to make them fit). If you notice in the picture above you can see where I pop-riveted the ABS sensor mount which I cut from the OEM part. Great idea (or so I thought) that I came up with to keep the sensor in the OEM location. However as mentioned above these things required a lot of modifying to fit and once assembled on to the hub there was just no room for my trick sensor mount due to clearance issues between the duct opening and the knuckle. Here’s a picture of a fully re-assembled knuckle/hub assembly with spindle duct in place.
Of course my spindle duct problems didn’t stop there, I pre-fit the assembly with a rotor and had to hammer more clearance so it wouldn’t scrape. I then pre-fit the assembly to the suspension but not before installing the Koni shocks as seen here:
Next I pre-fit the calipers to the knuckle/hub/duct assembly and discovered my last problem. I could not bolt on the calipers because the damn spindle ducts taperd about ¼ inch up top right into the area the top caliper bolt should go. Out came the Dremel again to trim it and of course touch-up paint.
** Note to LG, I really hope I just got a bad set because honestly they were just a few notches above junk and hardly worth the $200.00 I paid. **
Anyway, here is what it all looked like with the suspension cleaner and everything in place but not torqued down.
It was around this time that I noticed while cleaning up the suspension that my worst fear was realized from briefly using that damned “pickle fork”. I gouged my lower ball joint boot – FAUK!!!! Here is where things got really bad before getting worse. I had three choices; 1. assemble everything with the gouged ball joint boot in place and let a dealersip replace it, 2. buy a new lower control arm (which comes with a ball joint mounted) and remove old and install new, 3. buy a new ball joint and remove/install into the lower control arm. I chose option 3 which also meant finding and buying the ball joint and a tool to remove/install it. Of course as luck would have it I received the wrong part. So I just used the boot from the wrong part and put it on the original after packing the bearing with grease. What a freakin nightmare. Did I already mention to toss the FAUKIN “pickle fork”?!?!?!?!?
Here’s the gouged ball joint:
Here’s the ball joint removal/installation tool, this thing ain’t small (or cheap) but if I should ever need to do this again I’ll be ready.
Having gone this far, I decided it would be a good time to replace my front Eradispeed rotors, an expensive mod that I truly regret. I have never tracked or raced my car, yet after 15k miles I have surface cracks (however none on the back side).
I knew I would need to replace them eventually so I decided to go ahead and do it now. I ordered these beauties from LG (ironically). Despite the spindle duct nightmare I gave them my business again to get these StopTech rotors.
05-11-2007, 11:35 PM
#3
Coolest Guy Evar!
Thread Starter
Part 3 of 3
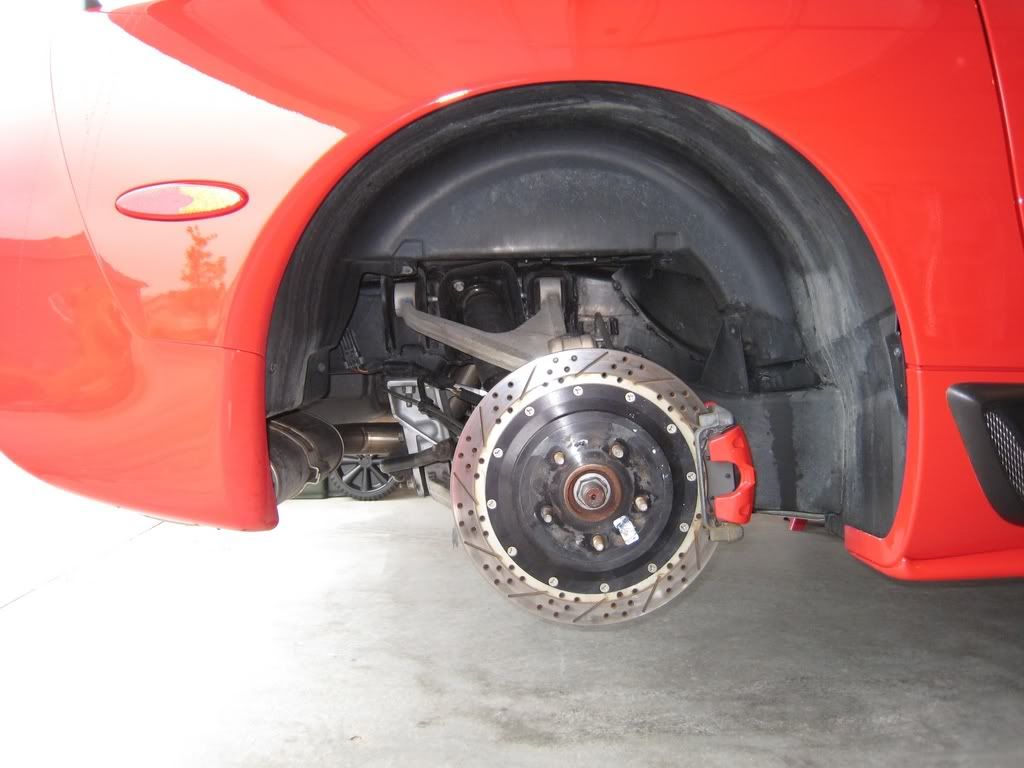
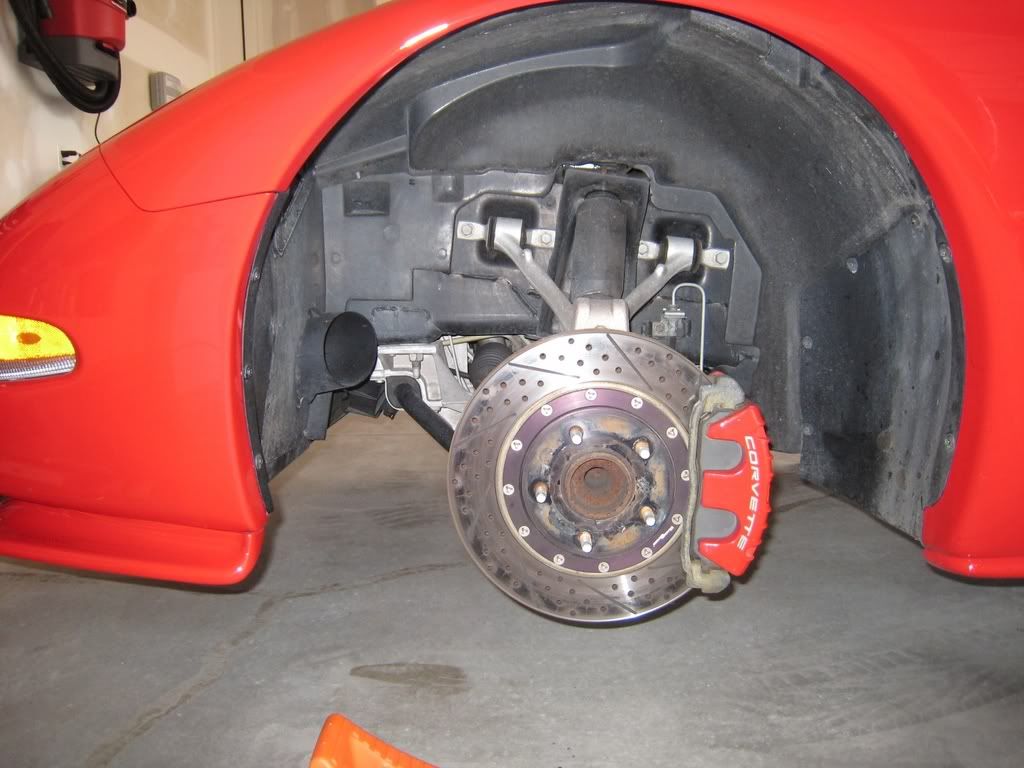
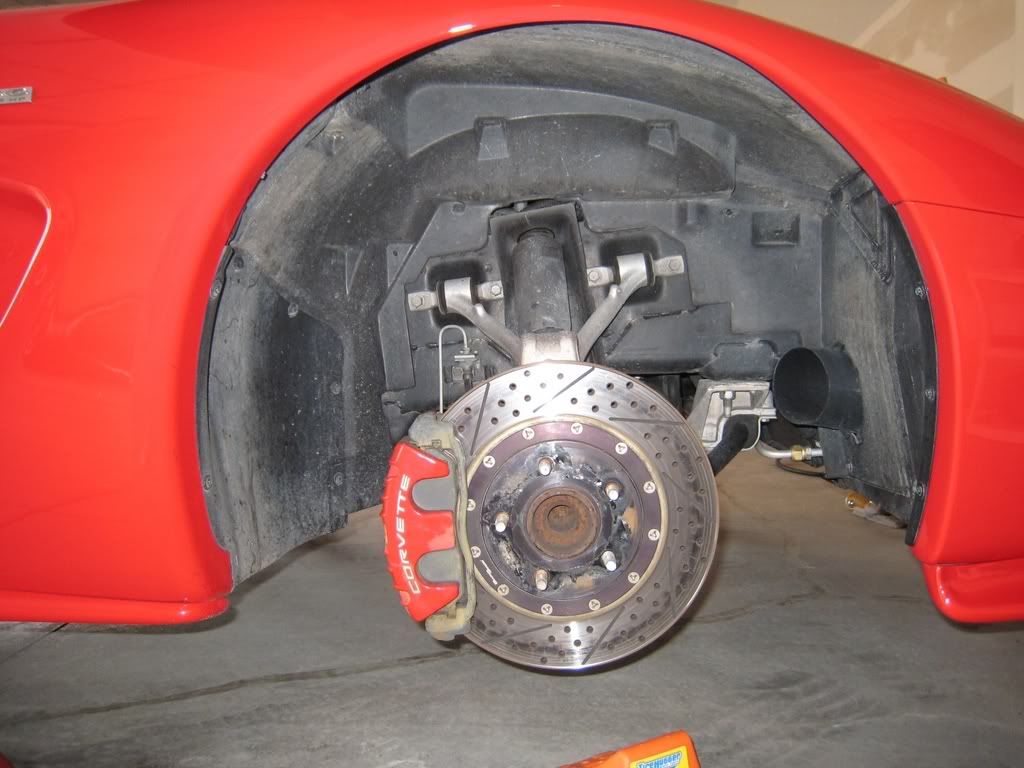
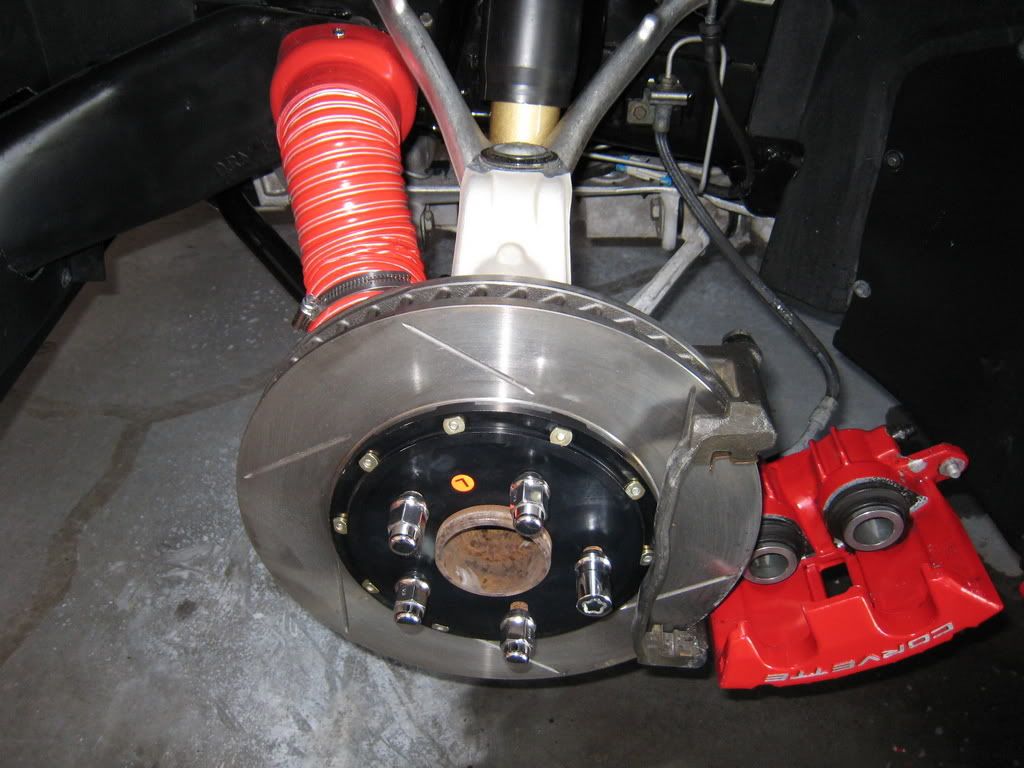
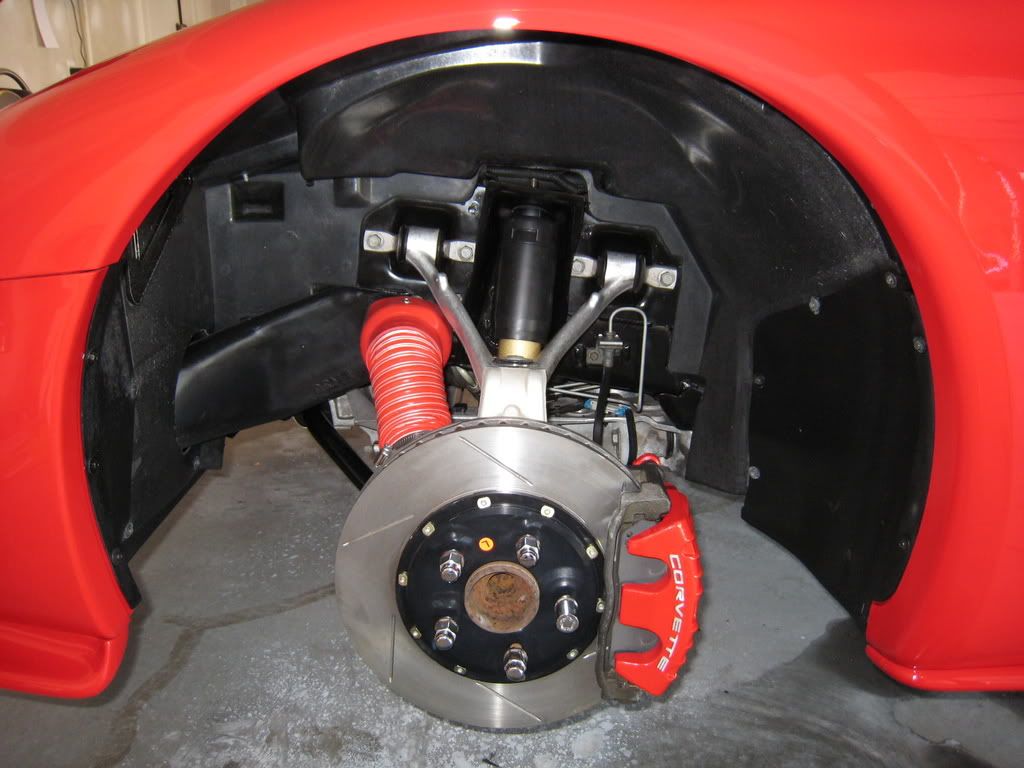
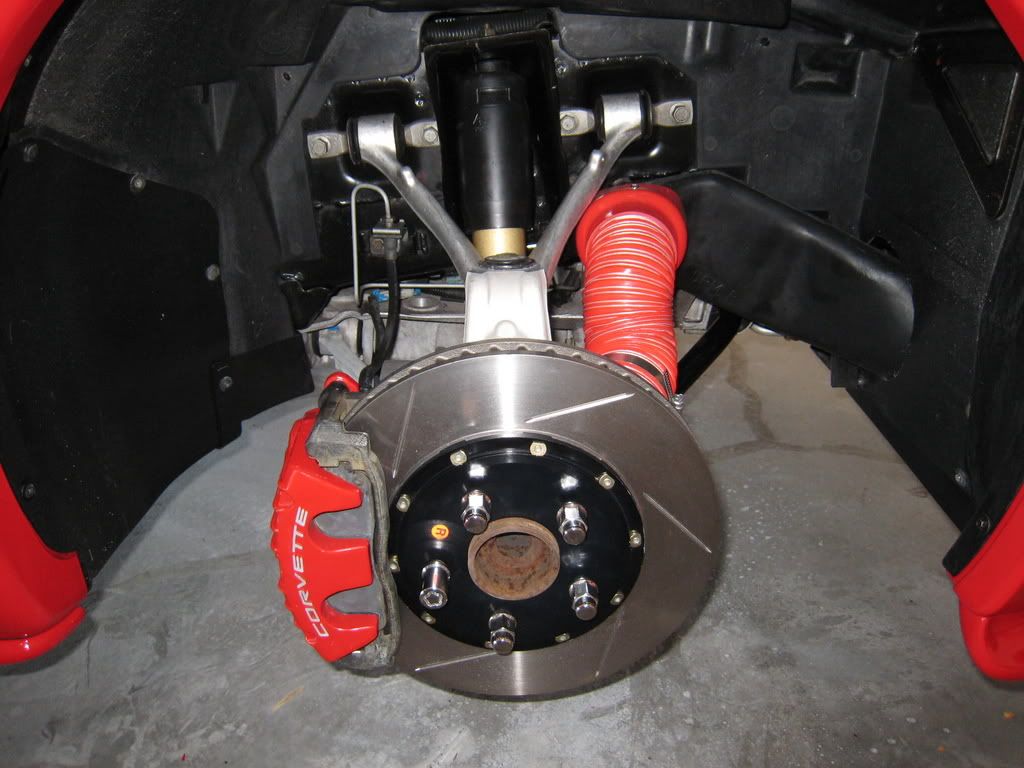
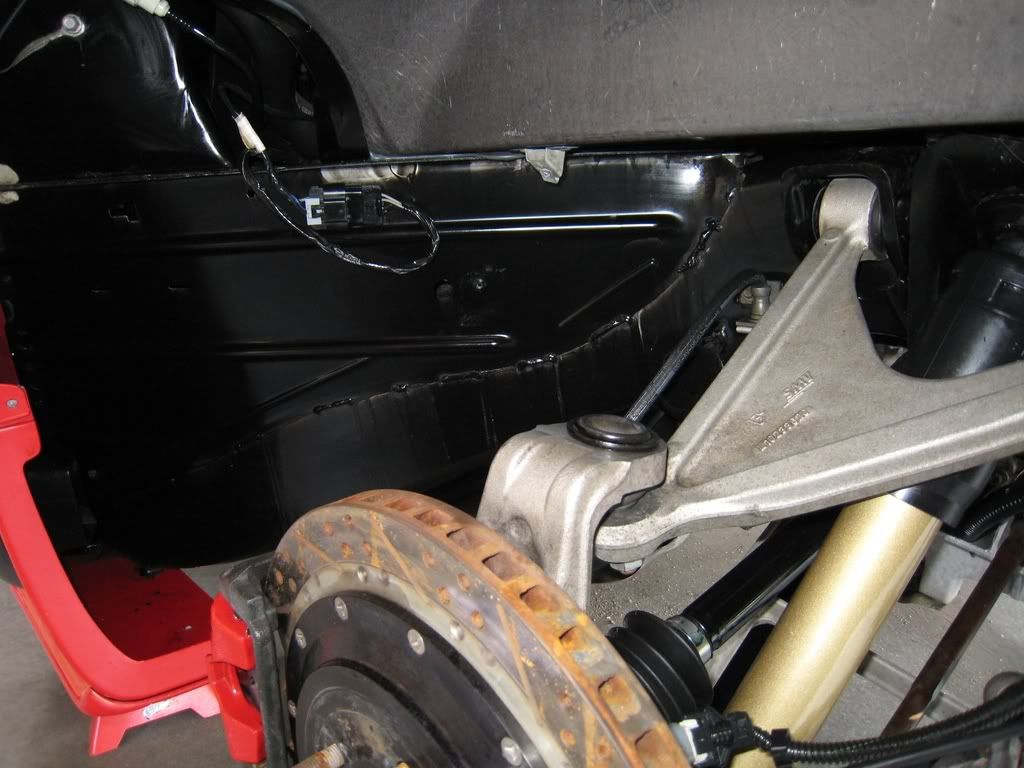
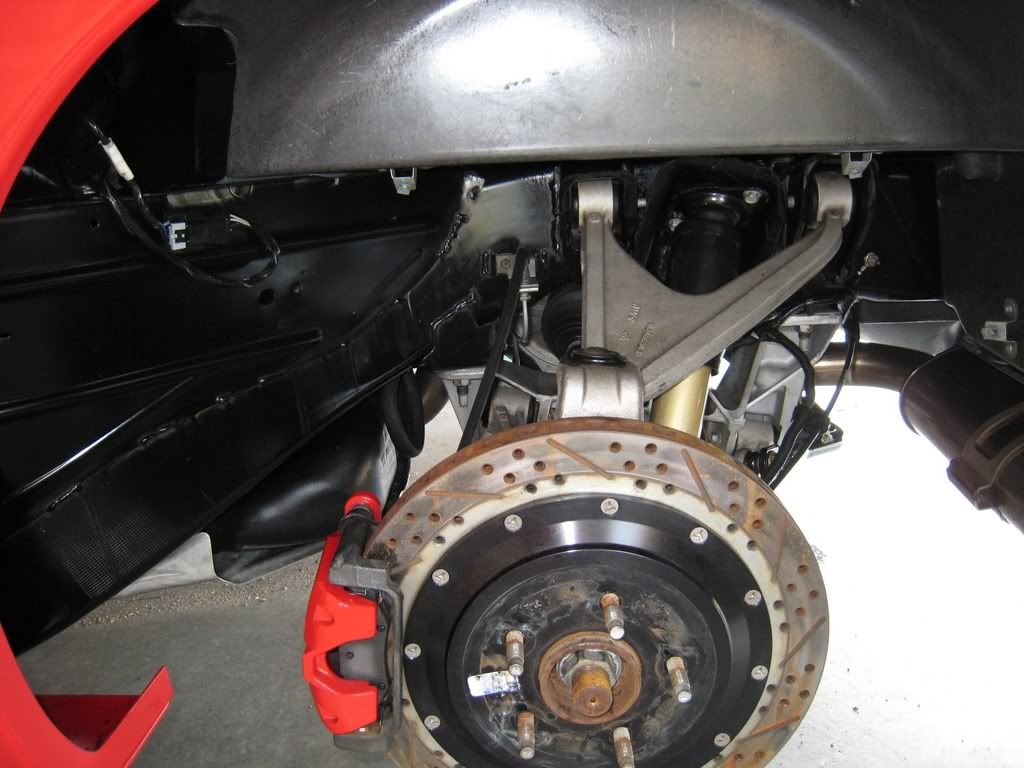
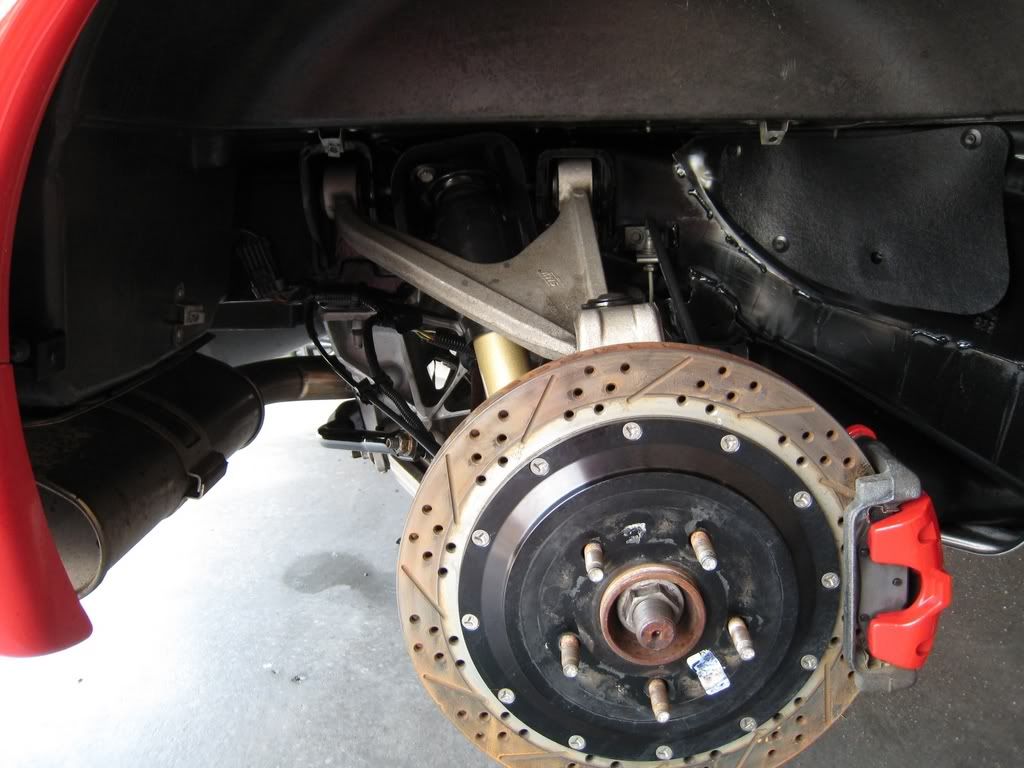
Finally, here are shots of the whole front end all assembled.
I almost forgot to include pictures of the rear after clean-up and shock install. Anyway, here are some shots.
Left rear clean
Left rear Koni installed
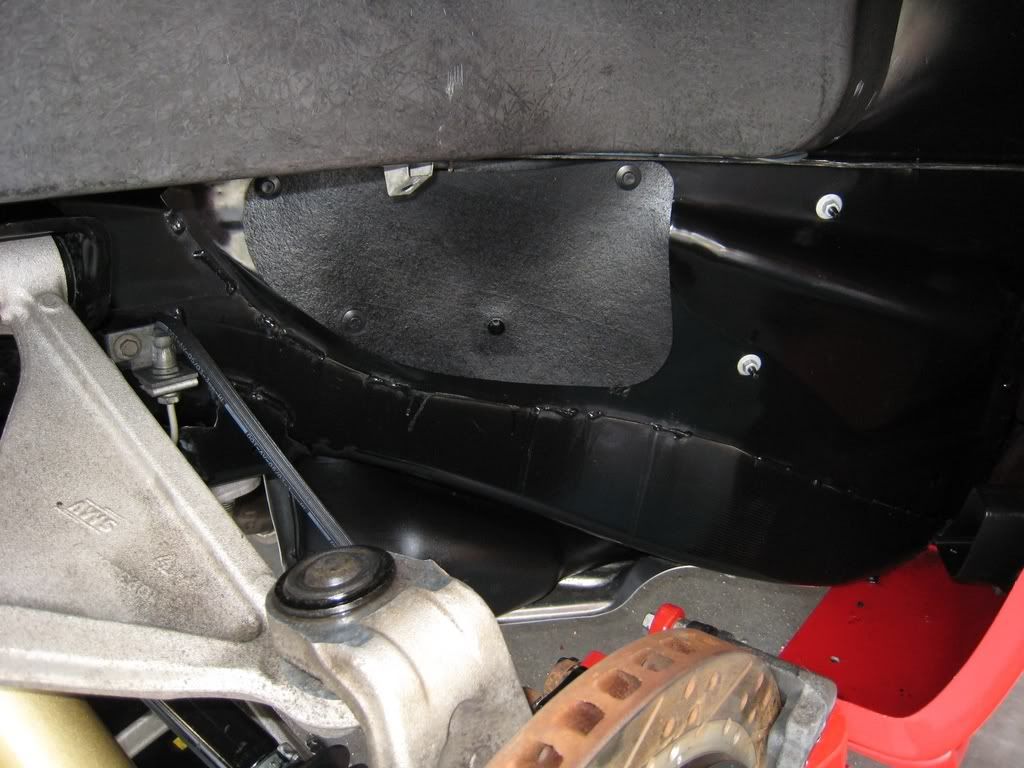
Remember that sandbox from above? Now take a look…no more sandbox
Right rear Koni installed
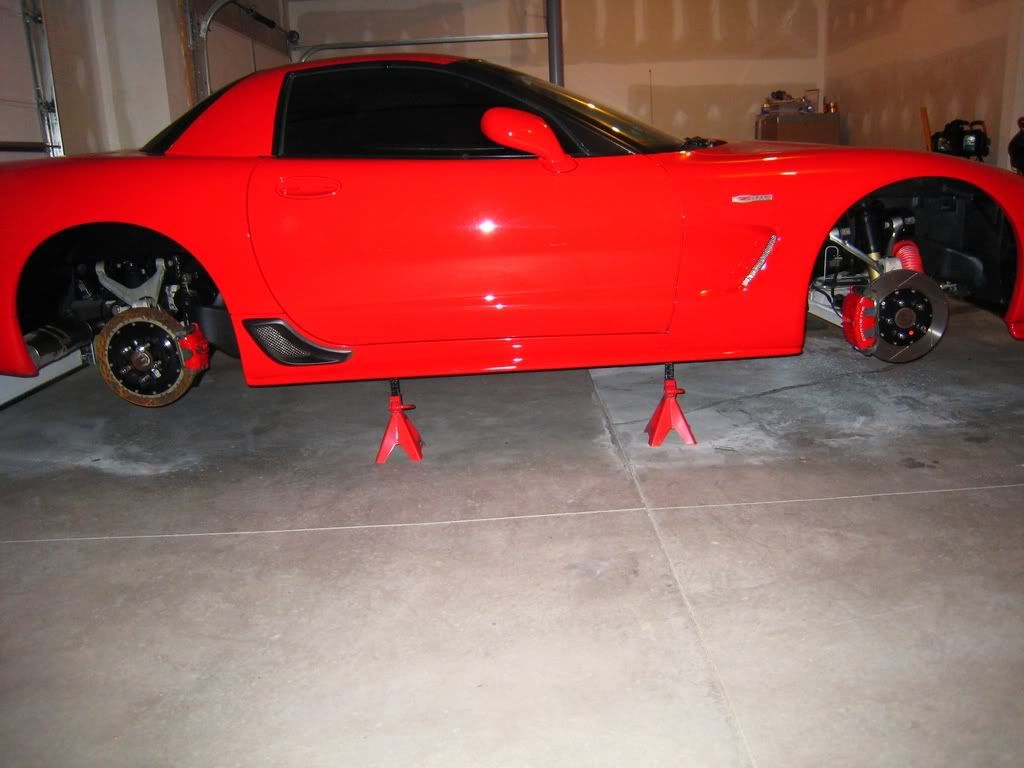
I will make a follow-up to this post with complete outside pictures of the car and some other mods that I’ll be doing over the weekend. Hopefully John has finally shipped my replacement wheels to me and not let me down again. Anyway, here’s a side view as it sits waiting in the garage.
.
Lessons learned:
1. RESIST EVERY URGE TO USE THE FORK ON YOUR BALL JOINTS, IN FACT GET RID OF IT. Buy a two pronged thingy instead.
2. If you plan to install LG’s spindle ducts you better make sure they have been revised and corrected to fit.
3. If you plan to install the DRM ducts, you will need to cut a larger opening for which there is no template – you gots to wing it.
4. Take your time.
Regards,
-RR
Finally, here are shots of the whole front end all assembled.
I almost forgot to include pictures of the rear after clean-up and shock install. Anyway, here are some shots.
Left rear clean
Left rear Koni installed
Remember that sandbox from above? Now take a look…no more sandbox
Right rear Koni installed
I will make a follow-up to this post with complete outside pictures of the car and some other mods that I’ll be doing over the weekend. Hopefully John has finally shipped my replacement wheels to me and not let me down again. Anyway, here’s a side view as it sits waiting in the garage.
.
Lessons learned:
1. RESIST EVERY URGE TO USE THE FORK ON YOUR BALL JOINTS, IN FACT GET RID OF IT. Buy a two pronged thingy instead.
2. If you plan to install LG’s spindle ducts you better make sure they have been revised and corrected to fit.
3. If you plan to install the DRM ducts, you will need to cut a larger opening for which there is no template – you gots to wing it.
4. Take your time.
Regards,
-RR
 05-12-2007, 12:09 AM
#6
Team Owner

Member Since: Mar 2001
Location: Virginia Beach
Posts: 25,889
Likes: 0
Received 5 Likes
on
5 Posts
CI 3-5-6-7-8 Veteran

Not to be rude... but if you don't track the car why bother w/ the stoptech rotors and spindle ducts etc?
I have the DRM ducts w/ about 6" oh hose on them... no spindle ducts. Works well w/o the hassle of installing the spindle ducts.
I see that you mod like me.... can't take one thing apart w/o cleaning everything or doing lots of "might as well do this because I allready took that apart"
BTW I used a pickle fort w/o issue when replacing my front hub/bearings in early '06... ok ok... Brad Neff (Subdriver - T1 racer) did that part for me and the ball joints were fine.
Maybe I got lucky.
I have the DRM ducts w/ about 6" oh hose on them... no spindle ducts. Works well w/o the hassle of installing the spindle ducts.
I see that you mod like me.... can't take one thing apart w/o cleaning everything or doing lots of "might as well do this because I allready took that apart"
BTW I used a pickle fort w/o issue when replacing my front hub/bearings in early '06... ok ok... Brad Neff (Subdriver - T1 racer) did that part for me
and the ball joints were fine.Maybe I got lucky.
05-12-2007, 12:11 AM
#7
Team Owner
Member Since: Mar 2001
Location: Virginia Beach
Posts: 25,889
Likes: 0
Received 5 Likes
on
5 Posts
CI 3-5-6-7-8 Veteran
Oh... and as far as CCWs peeling... I've had two sets of classic centers PC'd. Both peeled... both times the metal underneath looks smooth like yours.
Whoever they outsource that to doesn't know how to prep aluminum wheels for paint or powder.
I'm currently having my centers stripped, blasted, and re powdered by a local coatings company.
Whoever they outsource that to doesn't know how to prep aluminum wheels for paint or powder.
I'm currently having my centers stripped, blasted, and re powdered by a local coatings company.
05-12-2007, 12:22 AM
#8
Coolest Guy Evar!
Thread Starter
Why mod at all and why not just drive econo-boxes? I do it for the pure joy of doing it. As for Brad, he's done some amazing things with tools trackside so there is no doubt that he is more capable than I. I still say better safe than sorry and believe me if you damage that boot you will be sorry.
05-12-2007, 12:23 AM
#9
Coolest Guy Evar!
Thread Starter
Oh... and as far as CCWs peeling... I've had two sets of classic centers PC'd. Both peeled... both times the metal underneath looks smooth like yours.
Whoever they outsource that to doesn't know how to prep aluminum wheels for paint or powder.
I'm currently having my centers stripped, blasted, and re powdered by a local coatings company.
Whoever they outsource that to doesn't know how to prep aluminum wheels for paint or powder.
I'm currently having my centers stripped, blasted, and re powdered by a local coatings company.
Well hopefully John gets it right this time, after all he's had the time.
05-12-2007, 12:27 AM
#10
Team Owner
Member Since: Mar 2001
Location: Virginia Beach
Posts: 25,889
Likes: 0
Received 5 Likes
on
5 Posts
CI 3-5-6-7-8 Veteran
I udnerstand the shocks etc... oh well it's your money man


 05-12-2007, 12:35 AM
#13
Coolest Guy Evar!
Thread Starter
Ancient Chinese secret

Seriously though, after inquiring all around various forums and coming up empty, I went to a local Wal-Mart and bought some off the shelf cleaner - Eagle One Etching Mag Cleaner. I will be doing the entire undercarriage and engine block this weekend. Great stuff!
Originally Posted by captcruz
Forget the installment. How did you do the write up on the installation. Nice job and thanks.
 05-12-2007, 01:20 AM
#14
Drifting


Member Since: Oct 2004
Location: Southwest Virginia
Posts: 1,383
Likes: 0
Received 6 Likes
on
6 Posts

Nice write up!
Got any photos of the front with car back on the ground? Does the duct work show much?
And were did you get that nice looking hose??? Think damit think!
Got any photos of the front with car back on the ground? Does the duct work show much?
And were did you get that nice looking hose??? Think damit think!
 05-12-2007, 11:44 AM
#16
Burning Brakes

Pretty work! I used to be like that and when I was, I would never have left those fugly rusty hubs like that...Well, just looked at mine.. and the hub centers are still showing good paint..Oh and painted the centers on the new Napa rotors.. ona track only car..hmm
05-12-2007, 12:58 PM
#17
Coolest Guy Evar!
Thread Starter
-RR


