
My 82's re-assembly photos
 08-07-2006, 04:57 PM
#1
Drifting

Thread Starter
Member Since: Jun 2005
Location: Hanover Maryland
Posts: 1,725
Likes: 0
Received 0 Likes
on
0 Posts
The jams and firewall are painted 2006 Corvette Dark Blue LeMans Metallic (paint code 19U) and the body work is complete. Will be setting the body on the finished frame next weekend
These pictures really don't do the paint justice due to the dust floating around in the shop
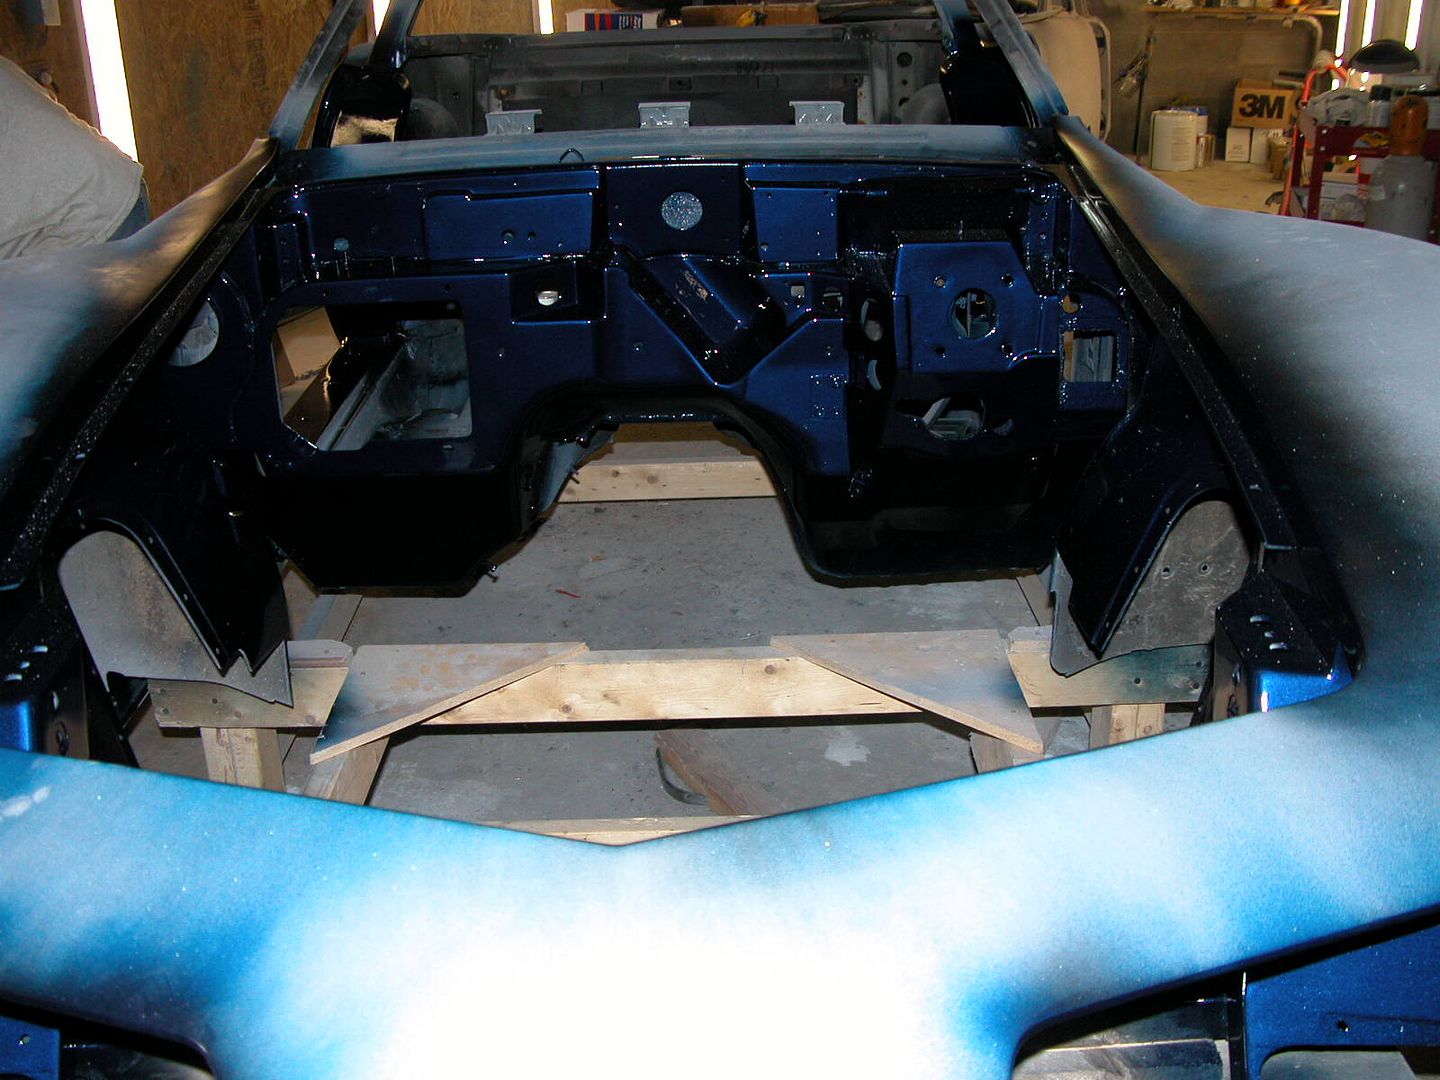
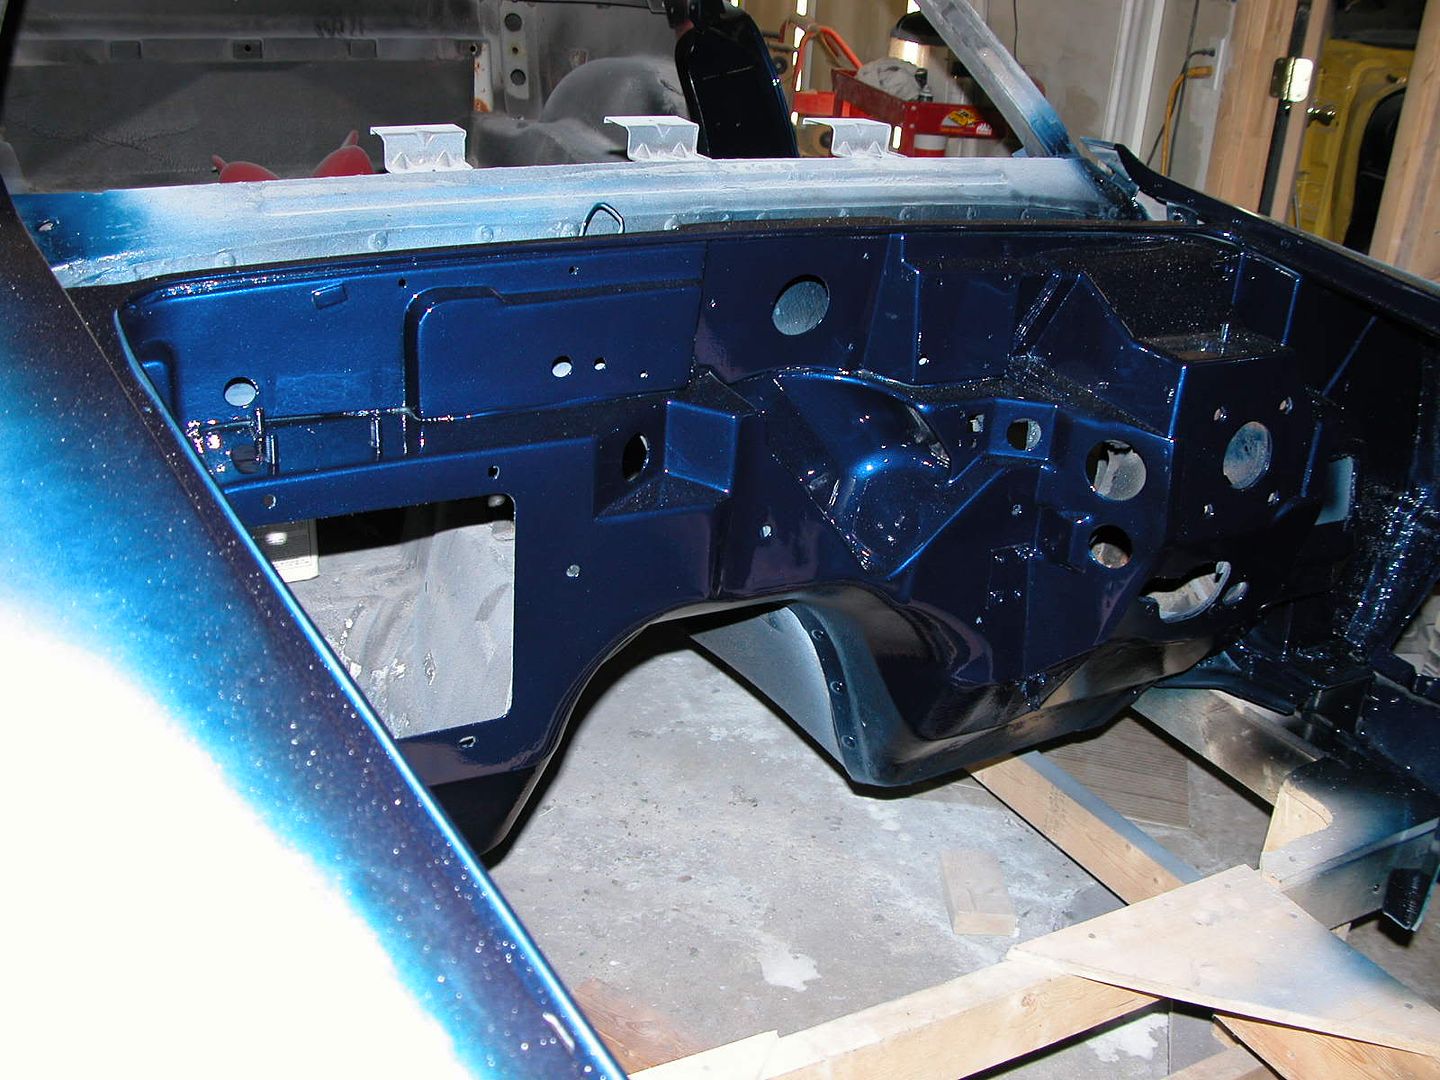
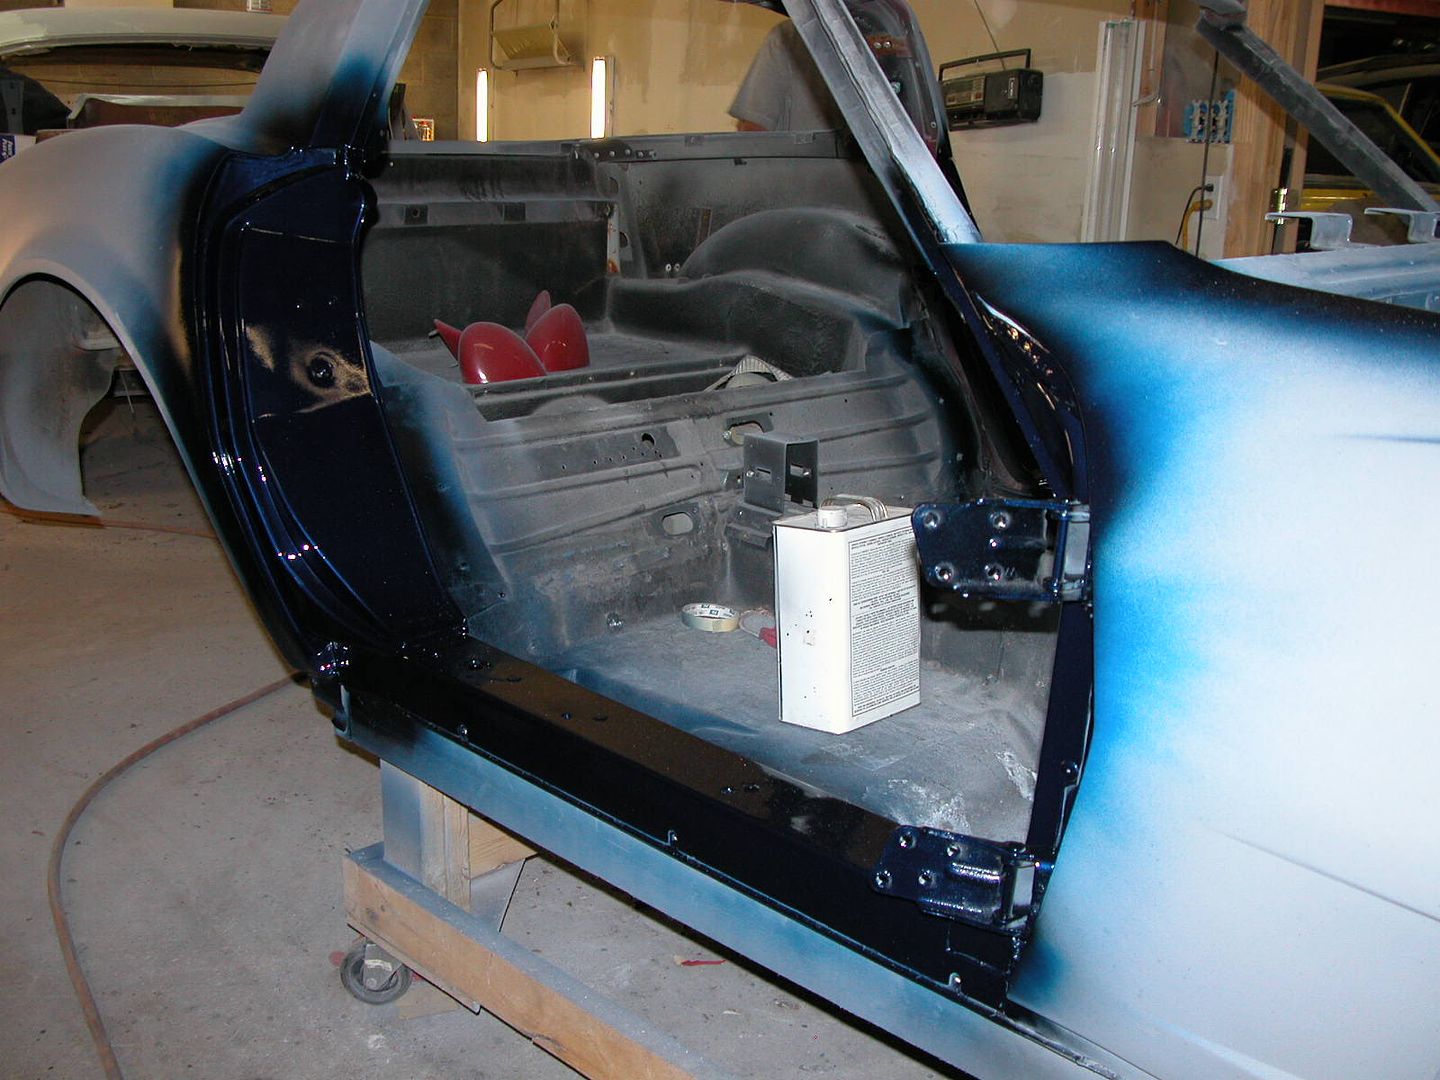
Sorry I am not to good at getting these photos posted. I have done alot in getting the body ready to set back on the frame.
Below are some recent photos:
ZZ4 crate motor with LOTS of polished billet
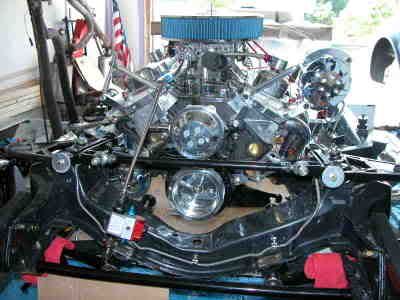
All Lokar cables and dipsticks, Billet Specialties Cross Flagged valve covers, Zoops wire looms, MSD ignition & wires. Edelbrock Permastar Intake, Edelbrock Endurashine 650 CFM w/ electric choke
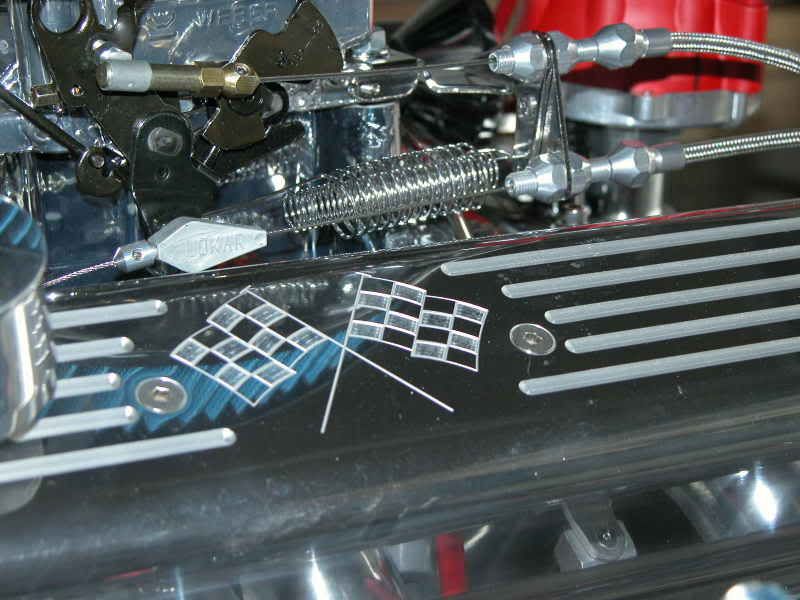
Hooker headers and sidepipes/ Jet-Hot coated, All stainless steel brake line, 100 AMP alternator
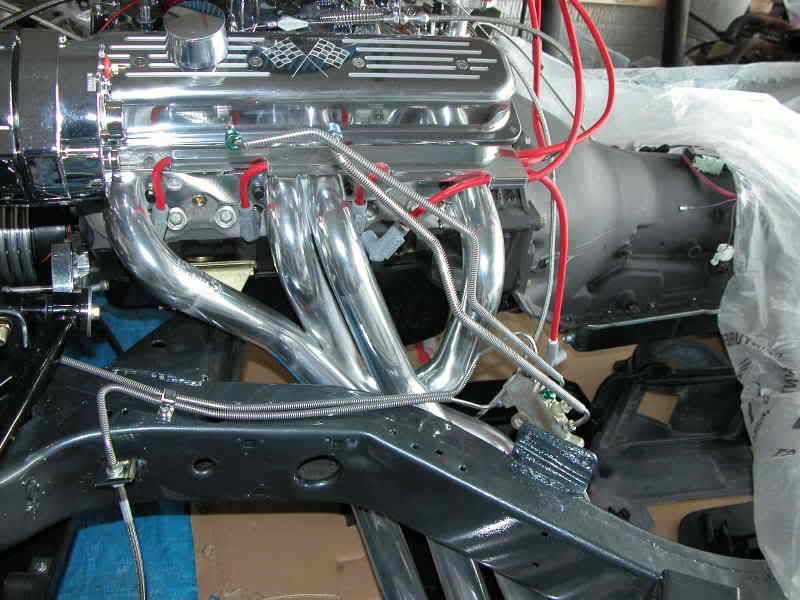
Completely Rebuilt 700R4 tranny with Trans Kit shift kit, Painless Wire kickdown, POR-15 High Temp flat black paint, 2800 stall converter
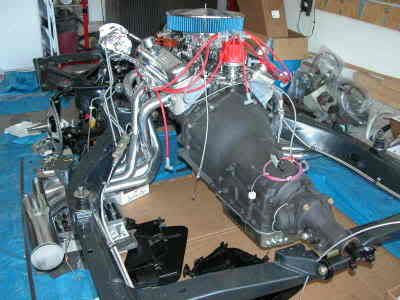
Chrome mini-starter and Lokar dipstick
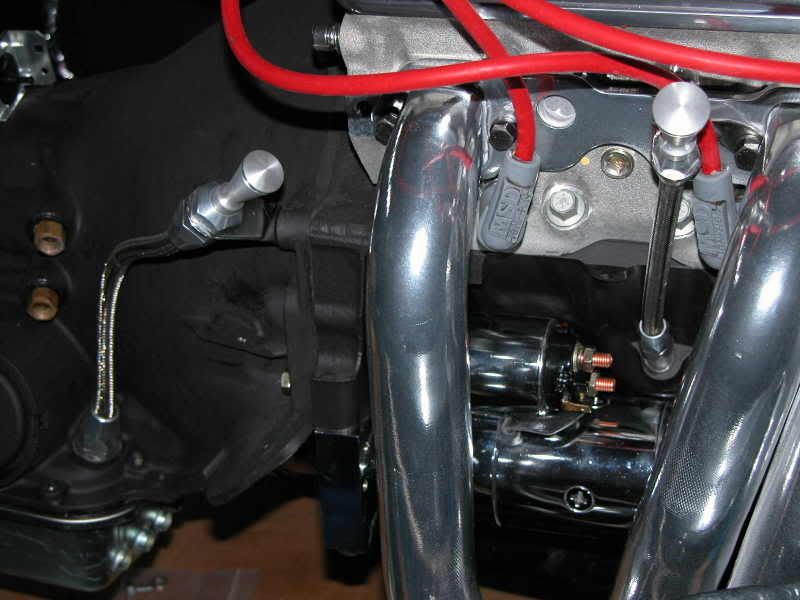
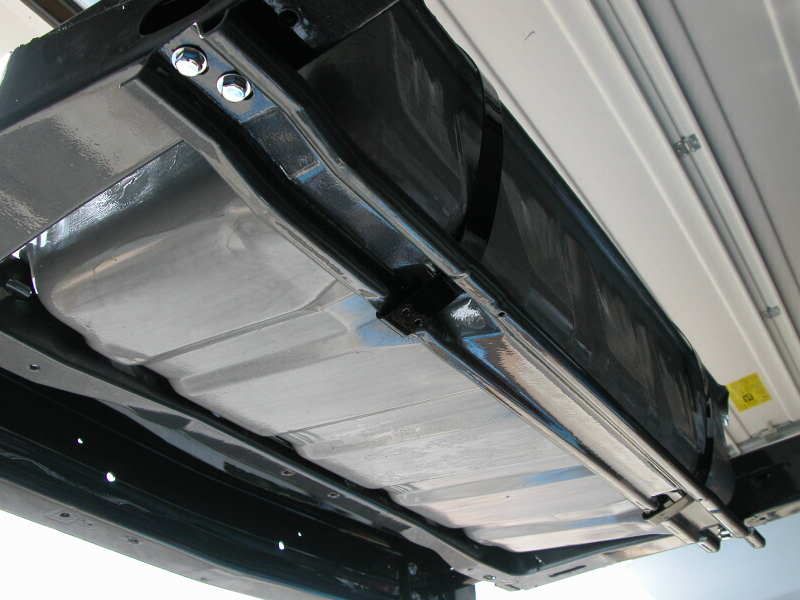
All line were run with stainless steel clamps and chrome bolts were used on the entire underside except Grade 8 bolts for the suspensions components

These pictures really don't do the paint justice due to the dust floating around in the shop
Sorry I am not to good at getting these photos posted. I have done alot in getting the body ready to set back on the frame.
Below are some recent photos:
ZZ4 crate motor with LOTS of polished billet
All Lokar cables and dipsticks, Billet Specialties Cross Flagged valve covers, Zoops wire looms, MSD ignition & wires. Edelbrock Permastar Intake, Edelbrock Endurashine 650 CFM w/ electric choke
Hooker headers and sidepipes/ Jet-Hot coated, All stainless steel brake line, 100 AMP alternator
Completely Rebuilt 700R4 tranny with Trans Kit shift kit, Painless Wire kickdown, POR-15 High Temp flat black paint, 2800 stall converter
Chrome mini-starter and Lokar dipstick
All line were run with stainless steel clamps and chrome bolts were used on the entire underside except Grade 8 bolts for the suspensions components
Last edited by 82MDVette; 09-09-2006 at 01:42 PM.


 08-07-2006, 10:19 PM
#7
Drifting
Thread Starter
Member Since: Jun 2005
Location: Hanover Maryland
Posts: 1,725
Likes: 0
Received 0 Likes
on
0 Posts
THANKS ALOT GUYS. Sometimes it seems overwhelming. I am doing just ablout all of it myself (except bodywork/paint and the tranny rebuild).
I hoping to take a few trophies with her next summer.
The body should be going back on the frame in 1 1/2 to 2 months. Have to detail the bottom side of the body and finish the rear suspension/Dana 44 rebuild with 3.73 gears.
If I get a chance later tonight I will post some additional photos.
I hoping to take a few trophies with her next summer.
The body should be going back on the frame in 1 1/2 to 2 months. Have to detail the bottom side of the body and finish the rear suspension/Dana 44 rebuild with 3.73 gears.
If I get a chance later tonight I will post some additional photos.
08-08-2006, 07:07 AM
#8
Drifting
Thread Starter
Member Since: Jun 2005
Location: Hanover Maryland
Posts: 1,725
Likes: 0
Received 0 Likes
on
0 Posts
The original gas tank with surface rust

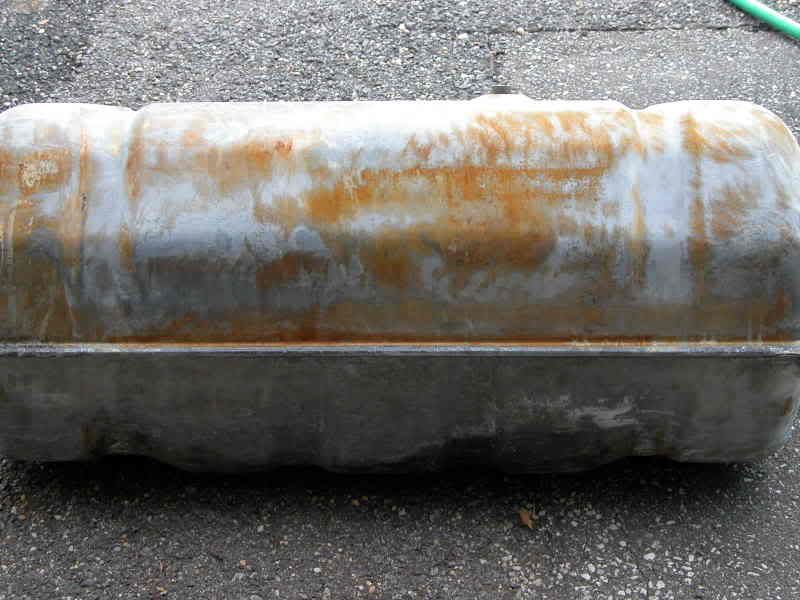
The tank after wire wheel stripping, POR-15 tank sealer, and POR-15 silver paint on the outside. Swapped out the 82 Fuel pick-up with a '80's unit due to ditching the computer and fuel injection. 8-AN braided fuel lines. Cleaned the eggcrate bumper cushions and used steel rivets to reassemble.

In later photos you can see where I again removed the tank and painted it Metallic Aluminum to match the Dana 44 rearend
The tank after wire wheel stripping, POR-15 tank sealer, and POR-15 silver paint on the outside. Swapped out the 82 Fuel pick-up with a '80's unit due to ditching the computer and fuel injection. 8-AN braided fuel lines. Cleaned the eggcrate bumper cushions and used steel rivets to reassemble.
In later photos you can see where I again removed the tank and painted it Metallic Aluminum to match the Dana 44 rearend
Last edited by 82MDVette; 09-09-2006 at 01:43 PM.
 08-08-2006, 01:36 PM
#10
Drifting
Thread Starter
Member Since: Jun 2005
Location: Hanover Maryland
Posts: 1,725
Likes: 0
Received 0 Likes
on
0 Posts
RPOZ4Z,
Not a problem. They are currently sharing the same garage.
I also have numerous left over OEM parts if you want to look through and purchase. I will give you a real good deal due to the fact that I will not have to package and mail.
Not a problem. They are currently sharing the same garage.
I also have numerous left over OEM parts if you want to look through and purchase. I will give you a real good deal due to the fact that I will not have to package and mail.


 08-09-2006, 10:51 AM
#15
Drifting
Thread Starter
Member Since: Jun 2005
Location: Hanover Maryland
Posts: 1,725
Likes: 0
Received 0 Likes
on
0 Posts
Ya, Cruise Control, RIGHT! NO, but I will be selling it.
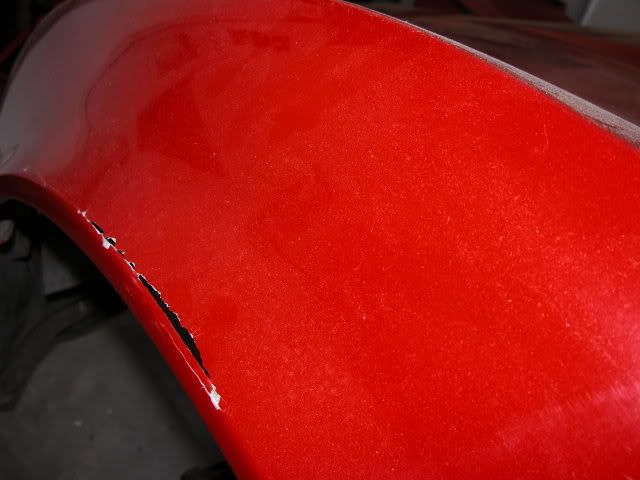
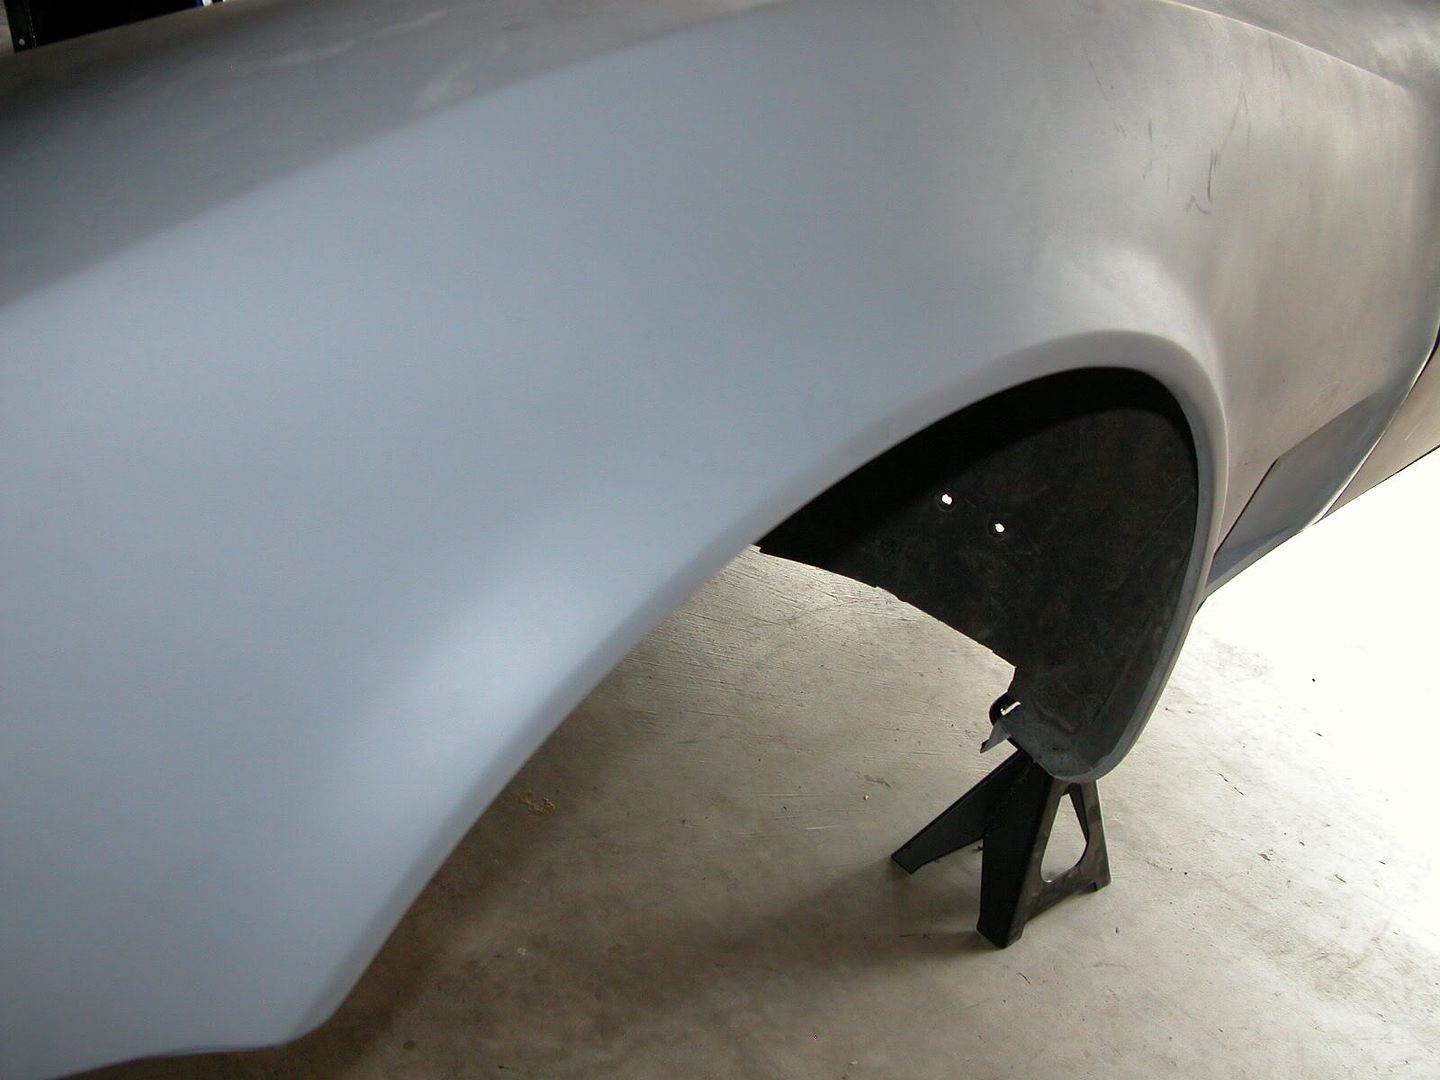
Here is a photo of the left front fender when I bought the car and after my bodywork man was done with it. This appeared to be the only area damaged on the vehicle. Minor hit to the left front quarter.
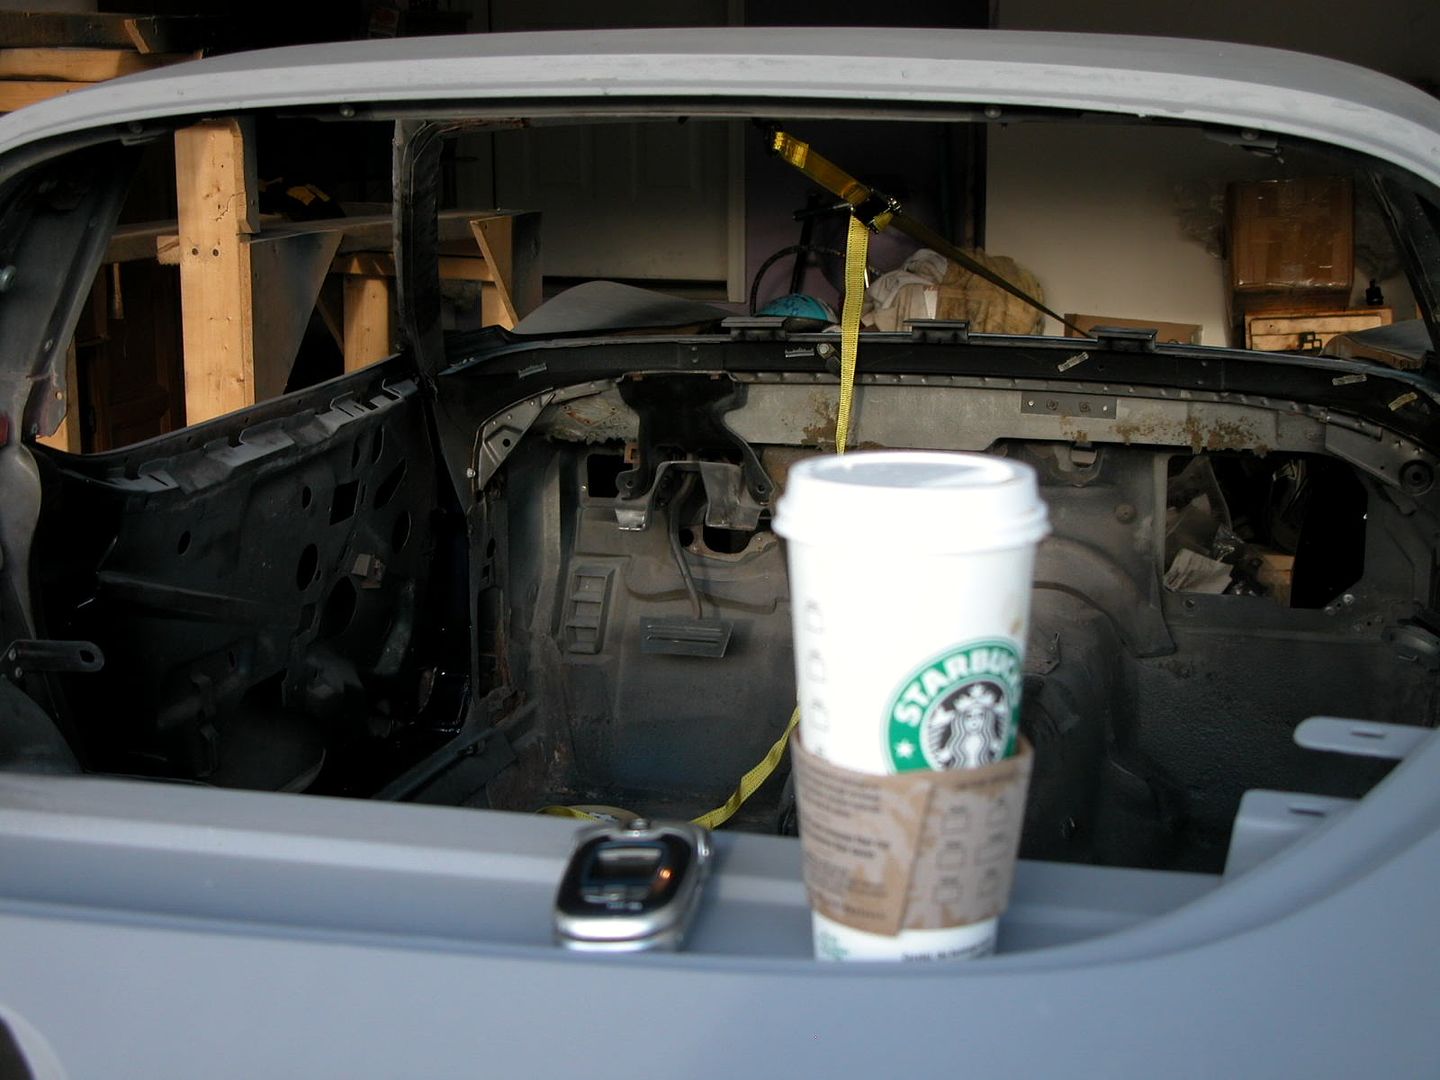
And my GO-GO juice for this project
NO, but I will be selling it.Here is a photo of the left front fender when I bought the car and after my bodywork man was done with it. This appeared to be the only area damaged on the vehicle. Minor hit to the left front quarter.
And my GO-GO juice for this project
Last edited by 82MDVette; 09-09-2006 at 01:44 PM.
08-10-2006, 03:34 PM
#16
Drifting
Thread Starter
Member Since: Jun 2005
Location: Hanover Maryland
Posts: 1,725
Likes: 0
Received 0 Likes
on
0 Posts
Well, I finally able to get rid of the FREE body dolly today. Took a month, but Tom (from the Forum) came and picked it up. Thank goodness, now I have some room to work again.
08-10-2006, 11:25 PM
#18
Melting Slicks

Holy crap dude yer doing a spectacular job. great attn to detail in every phase. thats gonna be a head snapper when u get it done. kudoos to u!
08-11-2006, 12:44 AM
#19
Race Director

Looks terrific!
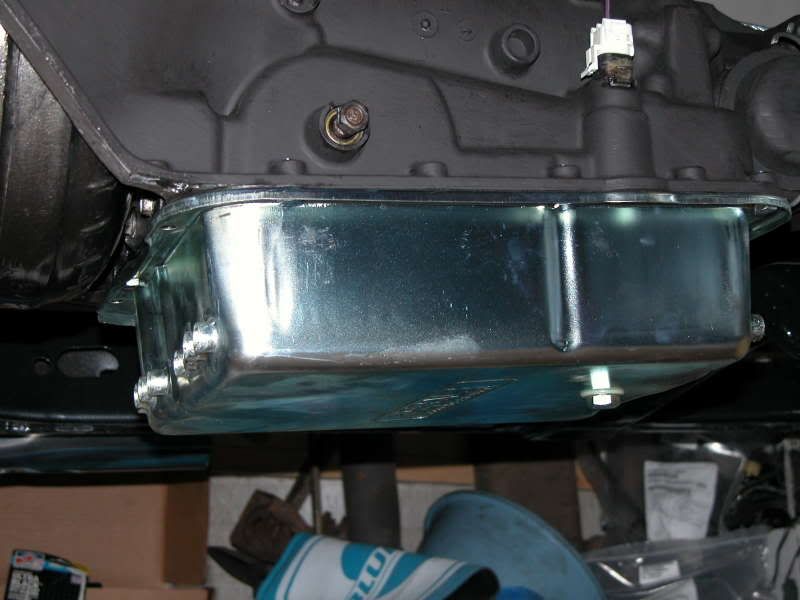
Is that an air flow through tranny pan? I saw one of these and wanted to ry it but was afraid of ground clearance issues. i'd love to hear how it works out for you.
Is that an air flow through tranny pan? I saw one of these and wanted to ry it but was afraid of ground clearance issues. i'd love to hear how it works out for you.
