
How to Fit the Fender Guards
 06-10-2006, 10:06 AM
#1
Tech Contributor
Thread Starter
Member Since: Dec 2003
Location: Horncastle Lincolnshire, England
Posts: 19,384
Likes: 0
Received 79 Likes
on
61 Posts
2023 C5 of the Year Finalist - Unmodified

How To Fit C6 Fender Guards to a C5.
Big to jdmvette and cmyc5 for their original ideas and write ups.
I'll update this as I finish the job. I know quite a few members plan to fit the guards this weekend so I'm sure others will chip in with refinements.
Step 1 Tools and parts:
Parts:
Part Number: Left Molding. #15818637
Part Number: Right Molding. #15818636
Clips #11519444
Tools:
Dremel with sanding and cutting disks
Sandpaper
Snips
Drill and bits. Small working up to a 3/8" for the clip holes.
Pliars
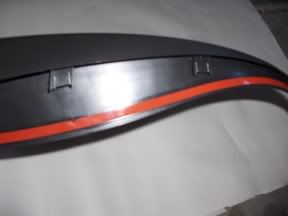
This is the molding as it arrives in the box:
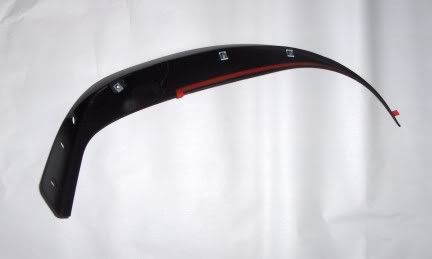
Broad View
The Clips
The Bracket

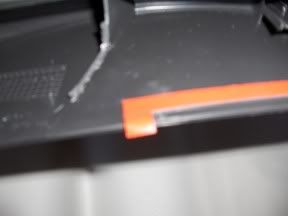
The "Shoe"
The "Notch"
Big
to jdmvette and cmyc5 for their original ideas and write ups. I'll update this as I finish the job. I know quite a few members plan to fit the guards this weekend so I'm sure others will chip in with refinements.
Step 1 Tools and parts:
Parts:
Part Number: Left Molding. #15818637
Part Number: Right Molding. #15818636
Clips #11519444
Tools:
Dremel with sanding and cutting disks
Sandpaper
Snips
Drill and bits. Small working up to a 3/8" for the clip holes.
Pliars
This is the molding as it arrives in the box:
Broad View
The Clips
The Bracket
The "Shoe"
The "Notch"
Last edited by DeeGee; 07-15-2014 at 04:02 AM.

The following users liked this post:
Keev1414 (04-29-2020)
06-10-2006, 10:07 AM
#2
Tech Contributor
Thread Starter
Member Since: Dec 2003
Location: Horncastle Lincolnshire, England
Posts: 19,384
Likes: 0
Received 79 Likes
on
61 Posts
2023 C5 of the Year Finalist - Unmodified
Offer up the molding to the wheel arch to see where the cuts will need to be made. Work slowly and take small pieces out at a time. The wrong cut will ruin the molding. You may want to put masking tape on the outside face to make sure you don’t damage the trim as you work.
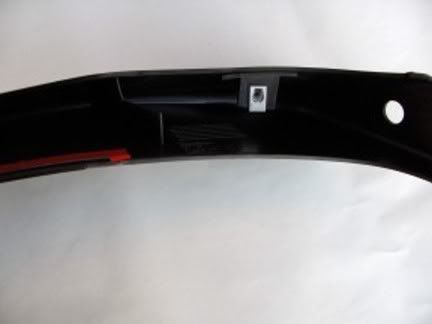
Remove the bracket on the inside of the molding with a dremel cutting wheel
Pull the metal clips off and remove the plastic tabs with a dremel cutting wheel.
Remove the bracket on the inside of the molding with a dremel cutting wheel
Pull the metal clips off and remove the plastic tabs with a dremel cutting wheel.
Last edited by DeeGee; 06-10-2006 at 12:06 PM.
06-10-2006, 10:07 AM
#3
Tech Contributor
Thread Starter
Member Since: Dec 2003
Location: Horncastle Lincolnshire, England
Posts: 19,384
Likes: 0
Received 79 Likes
on
61 Posts
2023 C5 of the Year Finalist - Unmodified
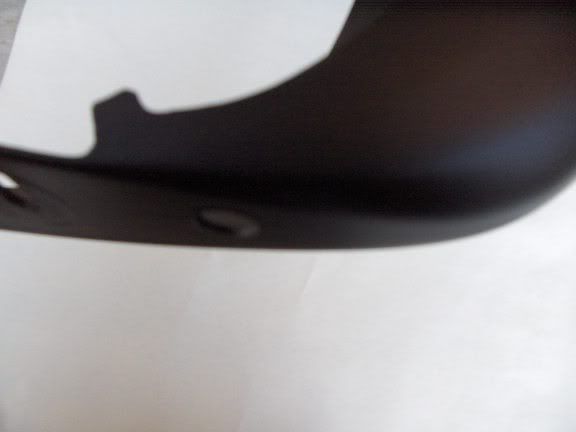
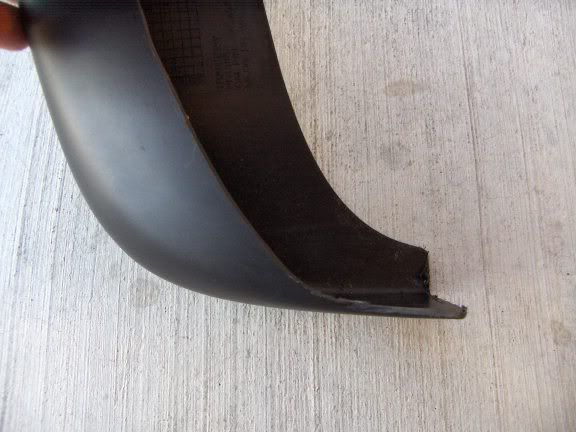
Lower Curve. Remove the notch and trim the excess from the base of the molding. You need to take out quite a large piece from the marked area to adapt to the curve of the C5 fender. Offer the molding to the arch and mark a rough curve. Slowly trim the excess back to form the lower radius around the fender. Mark with a sharpie and slowly grind back to form the curve.
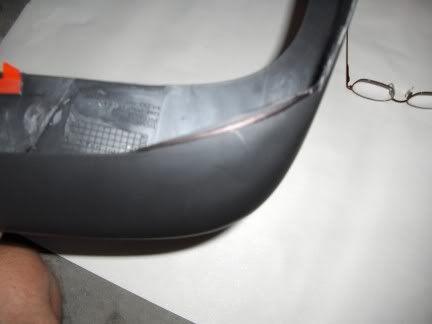
Work the shape of the lower curve first to get a good fit. Make sure you push the fender flush with the wheel arch at the base as you trim the molding. Once you are happy with the rough fit at the base switch to the upper section.

Work the shape of the lower curve first to get a good fit. Make sure you push the fender flush with the wheel arch at the base as you trim the molding. Once you are happy with the rough fit at the base switch to the upper section.
Last edited by DeeGee; 06-10-2006 at 11:03 AM.
06-10-2006, 10:08 AM
#4
Tech Contributor
Thread Starter
Member Since: Dec 2003
Location: Horncastle Lincolnshire, England
Posts: 19,384
Likes: 0
Received 79 Likes
on
61 Posts
2023 C5 of the Year Finalist - Unmodified
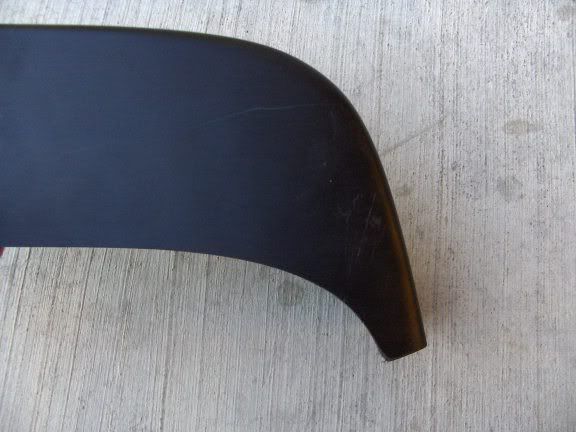
Upper Curve. Offer up the molding to the fender and mark the upper area of the flare where the curve is shaped to fit the C6. This is just above the joint in the fender and is very obvious. Start to trim the excess to fit the shape of the C5 flare with long strokes of the dremel sanding disk. Keep checking against the fender. Because of the complex curve, the top part of the molding pulls away from the fender. This can be held in place later with pins.
Last edited by DeeGee; 06-10-2006 at 11:03 AM.
06-10-2006, 10:08 AM
#5
Tech Contributor
Thread Starter
Member Since: Dec 2003
Location: Horncastle Lincolnshire, England
Posts: 19,384
Likes: 0
Received 79 Likes
on
61 Posts
2023 C5 of the Year Finalist - Unmodified
Step 5. Trim the “Shoe”. Mark the edge of the existing fender underneath the car with a sharpie. Mark a square line across the molding. Cut the shoe to fit.

Last edited by DeeGee; 06-10-2006 at 10:41 AM.
06-10-2006, 10:08 AM
#6
Tech Contributor
Thread Starter
Member Since: Dec 2003
Location: Horncastle Lincolnshire, England
Posts: 19,384
Likes: 0
Received 79 Likes
on
61 Posts
2023 C5 of the Year Finalist - Unmodified
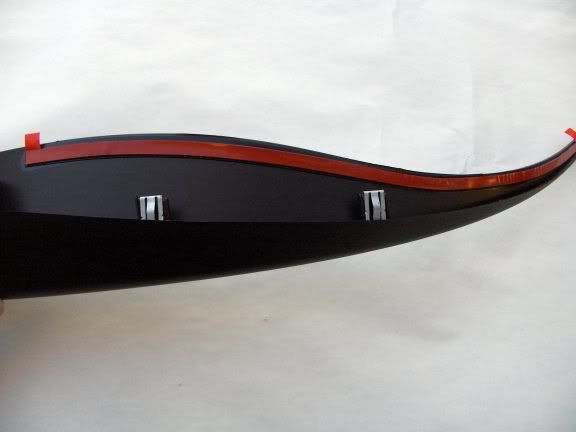
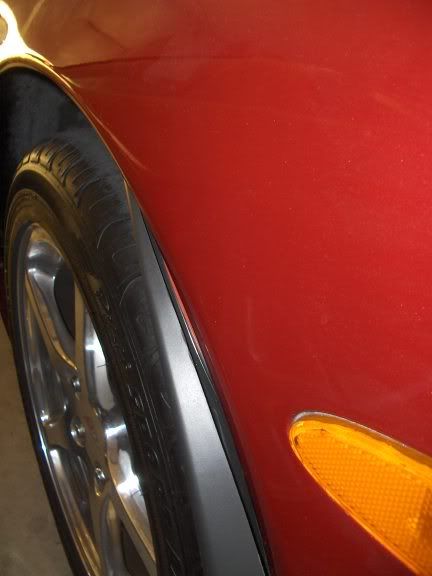
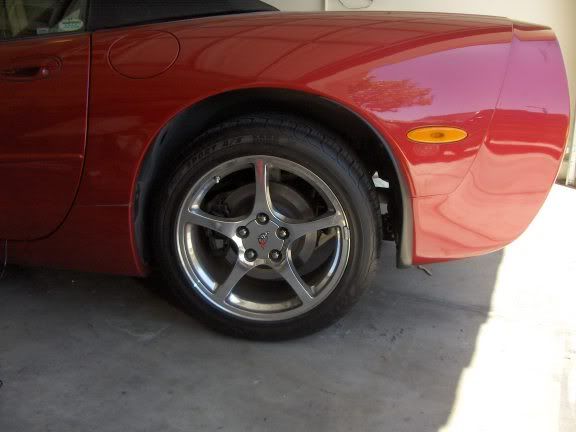
Step 6. Final Sanding. Carry on sanding by hand around the inner edge of the molding until you are happy with the final fit.
The curves should look like this:
Lower Curve
Inside Fender
One problem is the infamous poor panel fit on the Vette. You may find a gap where the upper and lower panels don’t fit flush at the join. Either live with the gap or notch the molding to fit closer.
The curves should look like this:
Lower Curve
Inside Fender
One problem is the infamous poor panel fit on the Vette. You may find a gap where the upper and lower panels don’t fit flush at the join. Either live with the gap or notch the molding to fit closer.
Last edited by DeeGee; 06-10-2006 at 12:04 PM.
06-10-2006, 10:08 AM
#7
Tech Contributor
Thread Starter
Member Since: Dec 2003
Location: Horncastle Lincolnshire, England
Posts: 19,384
Likes: 0
Received 79 Likes
on
61 Posts
2023 C5 of the Year Finalist - Unmodified
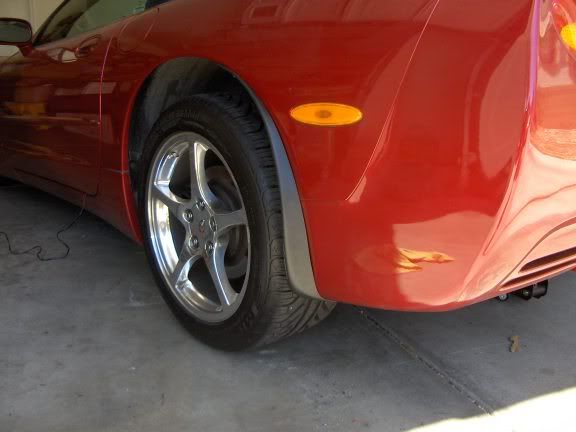
Step 7. Fitting. When drilling the fixing holes start with a small pilot drill and gradually increase in size to the 3/8 drill. MAKE SURE THE MOLDING IS IN ITS FINAL POSITION BEFORE DRILLING.
Fit the molding tight at the base and mark the hole underneath the fender with a sharpie. Drill a 3/8” hole in the underside of the fender. Reposition the molding and fasten in place with a push clip.

Check the clearance inside the fender arch behind the molding. Measure downwards and mark a point for the upper clip. It needs to be far enough down to allow the clip collar to sit inside the molding edges. It needs to be far enough inboard that the push clip goes all the way through the fender lip and not into the well cover.
Drill a hole for the bottom clip inside the fender and fit a push clip
Measure the half way point and drill a pilot hole. Again the hole needs to be positioned to go through the molding, through the fender lip and have space behind.
This picture shows the rough location of the 3 holes.
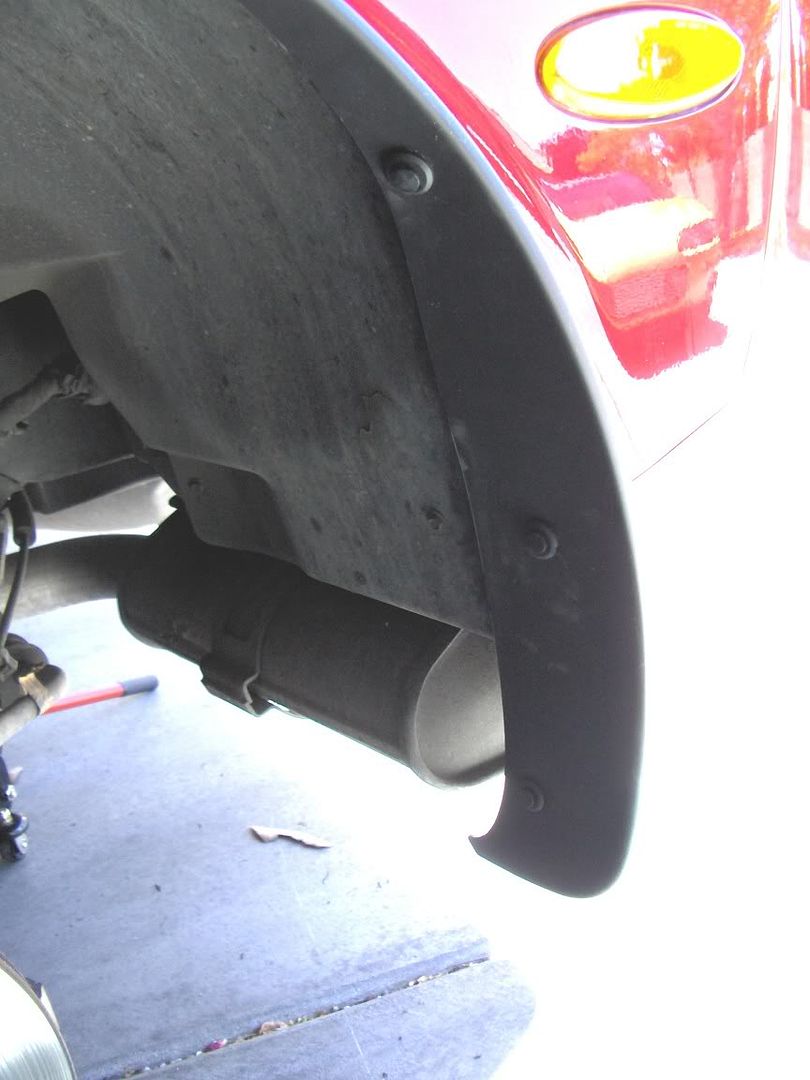
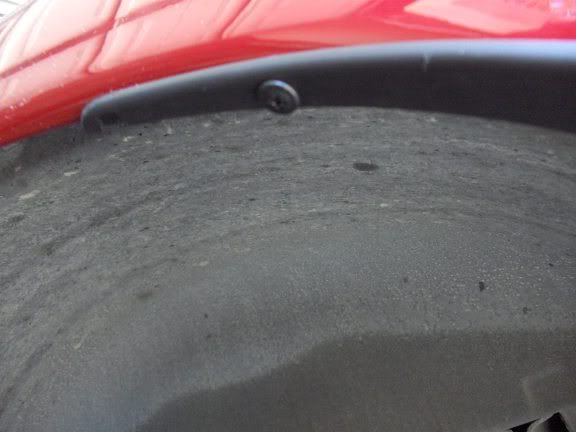
Drill a small hole and put a small black screw in to hold the top of the molding securely
Fit the molding tight at the base and mark the hole underneath the fender with a sharpie. Drill a 3/8” hole in the underside of the fender. Reposition the molding and fasten in place with a push clip.
Check the clearance inside the fender arch behind the molding. Measure downwards and mark a point for the upper clip. It needs to be far enough down to allow the clip collar to sit inside the molding edges. It needs to be far enough inboard that the push clip goes all the way through the fender lip and not into the well cover.
Drill a hole for the bottom clip inside the fender and fit a push clip
Measure the half way point and drill a pilot hole. Again the hole needs to be positioned to go through the molding, through the fender lip and have space behind.
This picture shows the rough location of the 3 holes.
Drill a small hole and put a small black screw in to hold the top of the molding securely
Last edited by DeeGee; 06-10-2006 at 02:25 PM.
 06-10-2006, 02:38 PM
#10
Burning Brakes


Member Since: Sep 2002
Location: South Glastonbury CT
Posts: 1,135
Likes: 0
Received 0 Likes
on
0 Posts
St. Jude Donor '06
NO! On the contrary, its looks great and very informative write up. I should have you do this to my car. Given that you are now an expert! 
 06-10-2006, 02:57 PM
#12
Race Director

Originally Posted by BAD AZZ C5
NO! On the contrary, its looks great and very informative write up. I should have you do this to my car. Given that you are now an expert!
 Dave gave me some very good advice and photos when I installed my heated seats. Once again very helful information here. Nice work Dave!
Steve.
06-10-2006, 03:17 PM
#13
Life Time NCM #2196


Wow that is one great write-up and if you lived in my part of Texas I would have you do mine. In fact I am going to order a set and have one of my buddies do the install on my coupe an I will use these pictures to assist. Thanks


 06-10-2006, 04:02 PM
#16
Team Owner


Great write up!
I'm going to bookmark this bad boy as I intend on installing the fender guards at a later date.
I'm going to bookmark this bad boy as I intend on installing the fender guards at a later date.

 06-10-2006, 04:22 PM
#18
Tech Contributor
Thread Starter
Member Since: Dec 2003
Location: Horncastle Lincolnshire, England
Posts: 19,384
Likes: 0
Received 79 Likes
on
61 Posts
2023 C5 of the Year Finalist - Unmodified
Originally Posted by Hams
Thanks, Nice write up how long did the install take you? It would look great on my black.
 06-10-2006, 04:32 PM
#19
Tech Contributor
Thread Starter
Member Since: Dec 2003
Location: Horncastle Lincolnshire, England
Posts: 19,384
Likes: 0
Received 79 Likes
on
61 Posts
2023 C5 of the Year Finalist - Unmodified
I've written this up in a word document and embedded the pictures.
PM me with your E Mail if you'd like a copy.
Just a warning if you're on dial up. Because of the pictures its in 3 parts each about 5Mb. (It's now 3 smaller .PDF files)
PM me with your E Mail if you'd like a copy.
Just a warning if you're on dial up. Because of the pictures its in 3 parts each about 5Mb. (It's now 3 smaller .PDF files)
Last edited by DeeGee; 06-25-2006 at 10:20 AM.
06-10-2006, 05:14 PM
#20
Race Director
Member Since: Feb 2004
Location: HOW FAST WAS I GOING OFFICER? Los Angeles Hating GM Dealership Service Dept.'s Since Sept. 2004
Posts: 11,651
Likes: 0
Received 6 Likes
on
5 Posts
St. Jude Donor '04-'05-'06-'07
Originally Posted by red97vette
wow awsome write-up! very detailed, ive been debating on doing this mod too, thanks!
I think I just got pushed over the edge...Thanks JB and DG!
PS- Any word on the fronts? Thanks all...