My VettePC - Pics [Dialup Unfriendly]
 04-28-2006, 02:15 PM
#1


Well, I finally got around to taking some pictures of my system. It has been complete for about 4 months and is working perfectly. I had pictures of the whole install, but the SD card in the camera got corrupted and the pics were trashed.
Here are the specs :
VIA EPIA SP-13000 Mobo
512Meg RAM
250 Gig drive
M1-ATX Power Supply
Xenarc 7" Touchscreen
BU-353 USB GPS Receiver
Custom wood box
Windows XP SP2
Road Runner Front End
Map Monkey
Winamp
DIVX Codec
Custom Skin (modified from ones that I found around the Net)
Kicker SX700.5 5 channel Amp
CDT 2-way 6.5" components in front (Crossovers are under the seats)
CDT 6.5" Coax drivers in back
MTX 12" Sealed Sub in an 'NVTHIS' stealth box
RAAMmat BXT and Ensolite over the entire interior and doors.
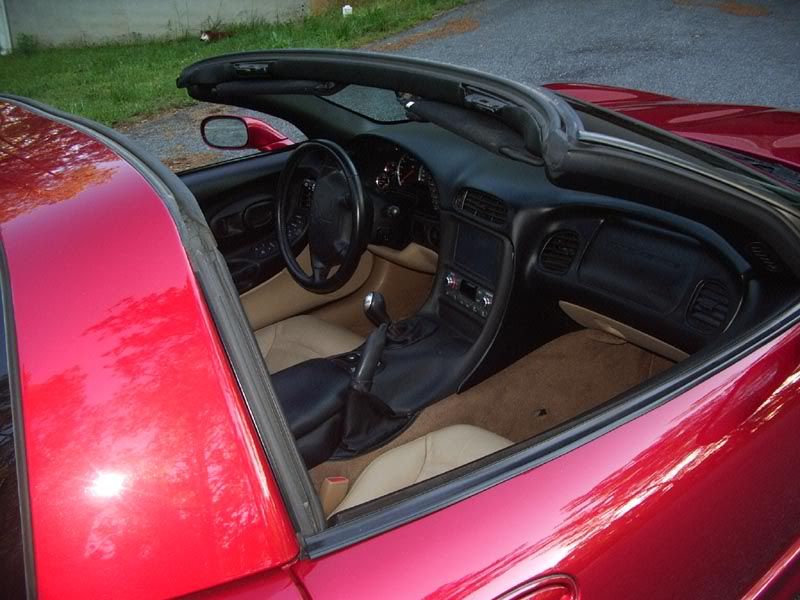
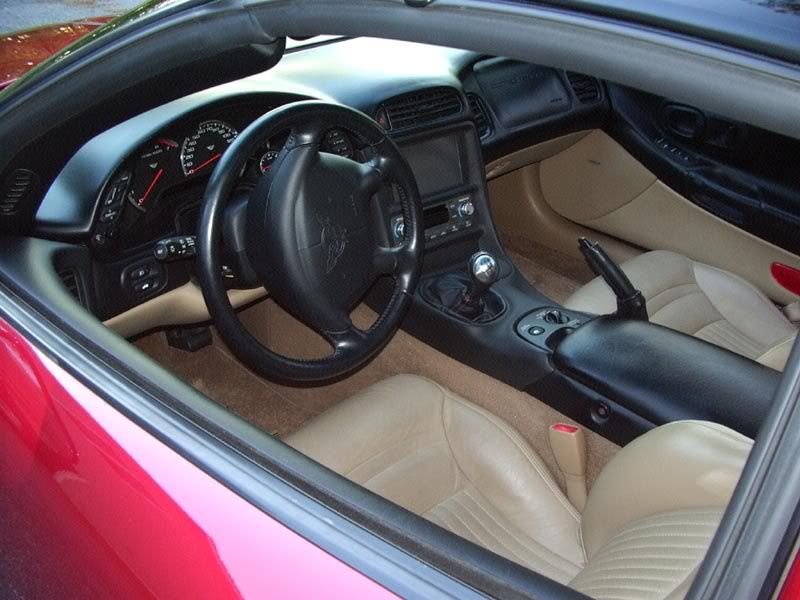
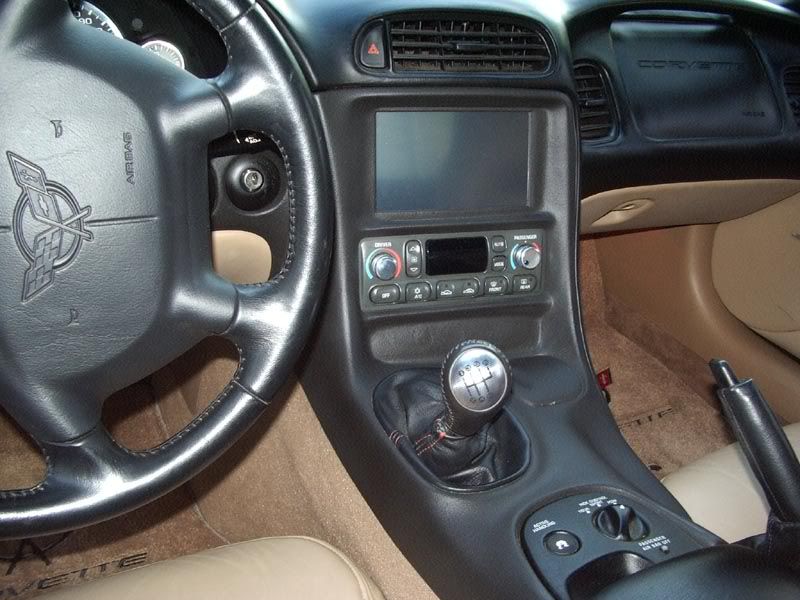
I used the now familiar method of cutting the entire A/C part of the bezel out and sliding it down. Then mounted the Xenarc frame to the top of the bezel and gluing the A/C framework to the bottom. Then tape up from behind and fill in with the Oatey ABS cement from Lowes. I did not mess with trying to melt my own plastic. The cement was easy to use (get a sqeezie mustard bottle) and readily available. I cut the ashtray door down to half its size and used it to fill the hole in the bottom. My original plan was to mount the computer reset button and Sub level control there, but decided I liked the cleaner look better .. plus it's a great place to lay sunglasses. The sub level control and switches are mounted under the dash. After the filling .. then sanding, filling, sanding, red Bondo glaze, sanding, glaze, sanding, a high fill primer, sanding, primer, sanding, then the SEM Texture paint and SEM Clear finish. I covered up the buttons for the monitor for a more OEM look but extended the wires on the IR recever and placed it behind the grill of the internal temp sensor. Plus the Xenarc has auto turn on/off .. so I really never need the remote.
To move the A/C Controls down, I had to cut out an aluminum support brace in the dash. A Dremel tool was EXTREAMLY handy for this and all the plastic cutting that had to be done for the project.
There is no CD or DVD drive in the car, but I can pull the entire computer out of the car in 20 seconds. I have a 12v power supply in the house I use to power it up and transfer movies/songs/maps/skins to the drive. I also have easy access to the USB ports on the back and can load new music on with a 2 Gig USB Flash drive when I want to do updates in the car. The GPS receiver is mounted right above the brakelight on the passenger side. It is held in place with industrial strength Velcro.
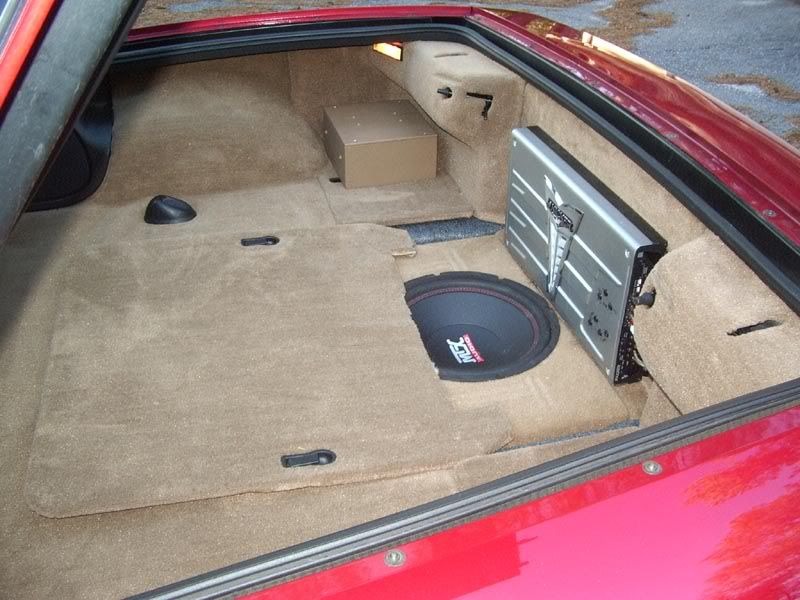
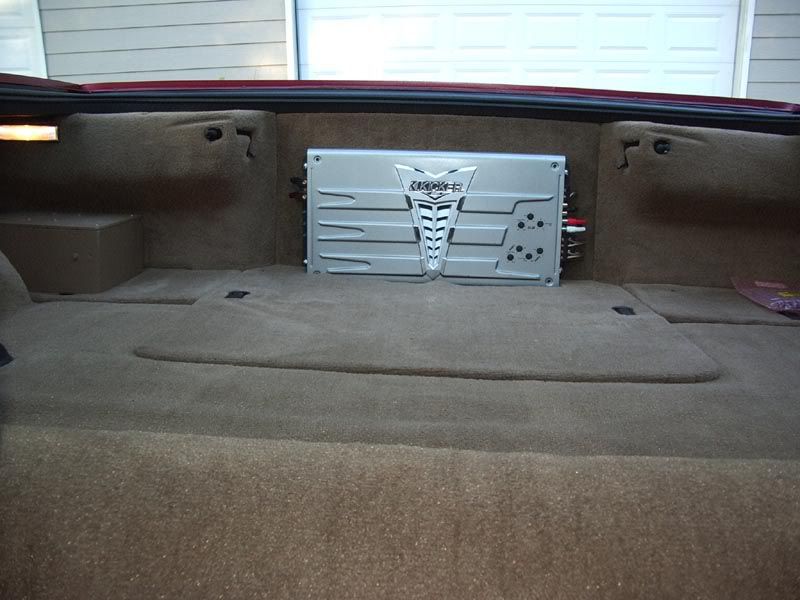
The cover over the sub has holes drilled in it so it can stay on top of the sub and protect it. I kinda over cut the cover a little around the amp and will probably order another one .. then use the carpet from the first to cover the computer.
The PC Box. The motherboard is on the bottom. power supply is mounted to the side, and the hard drive is on the top (upside-down) There are 2 posts that come up through the bottom of the removable panel that fit into holes on the computer case. This holds it in place .. but makes it very easy to lift out. The side of the box that is against the back of the car has 10 holes drilled in it for ventilation. The only fan inside the case is the CPU fan. It is very quiet and the VIA chip does not generate much heat. All the power and switch connections to the PC are on a single connector. The power supply also has a built in sequencer to control the Amp on/off .. that way, the computer has a chance to start up before the amp is turned on .. so no 'THUMP!' The back of the PC is ugly ... but functional (and you can't see it in the car)

The GPS receiver is mounted right above the brakelight on the passenger side. It is held in place with industrial strength Velcro.
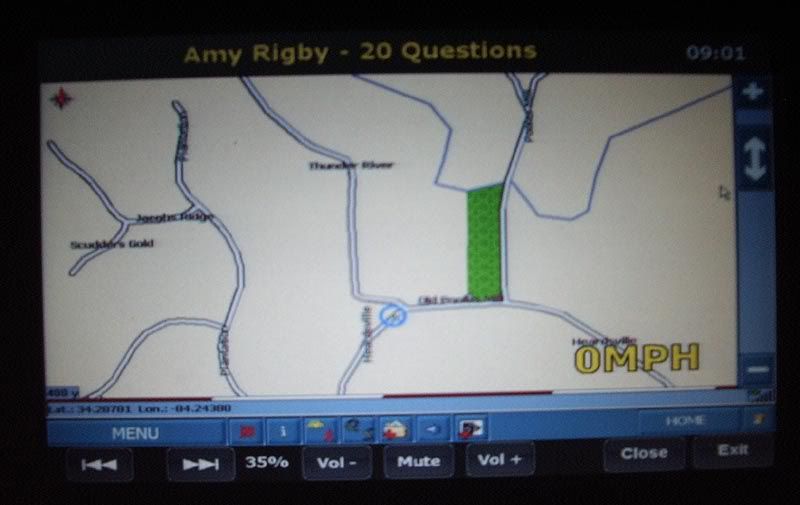
The software driving the whole thing is Road Runner. RR is a FANTASTIC program written and maintained by Guino. It's free and there is a great support forum for it over at MP3Car.com. It is totally skinnable and there are many skins that have been created for it. I basically took several different ones and mashed my own together ... moving buttons and functions around. Here are some screen shots .. sorry for the bad quality .. time for a new digital camera.
Props to the original authors of these screens (most from MP3Car.com)

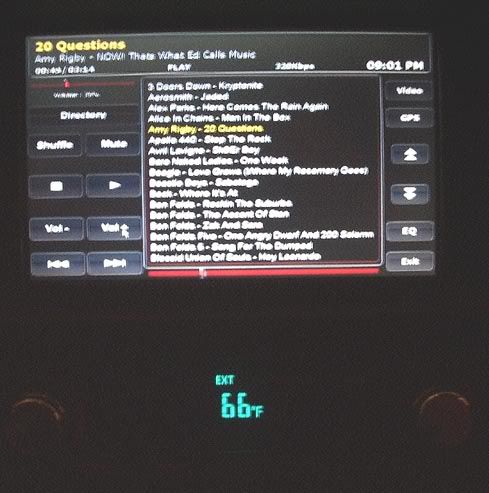
Right now, the hard drive has about 15,000 songs, 50 movies (in DIVX format), about 100 audio books, and a bunch of comedy albums .. and there is still over 100 Gig free. Song/album selection is very easy .. no mouse required. It is also possible to build playlists on the fly and shuffle at will. Who needs XM!
As soon as someone comes out with some good Bluetooth software for the Blackberry, I will add Bluetooth to the PC and an in-car mic for phone calls and voice commands.
So there you go. I could not have done it without the help and support of this forum and MP3Car.com. If you have any questions .. hit me at rhubarb9999@gmail.com
Thanks for listening.
Oh .. the Car :
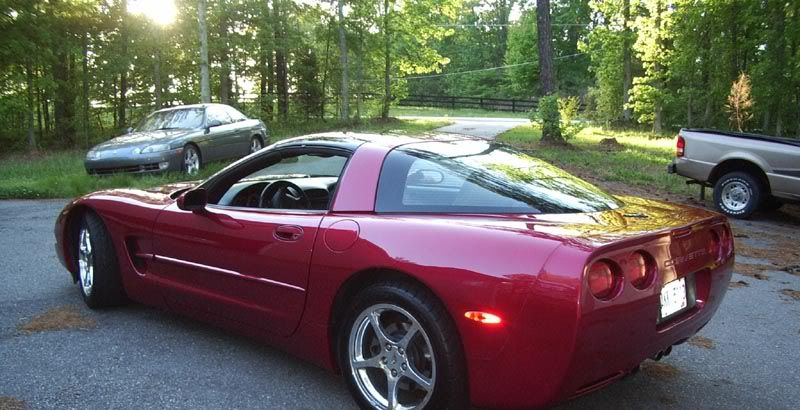
The Lexus SC300 in the background is my daily driver .. it has a CarPC too !
Here are the specs :
VIA EPIA SP-13000 Mobo
512Meg RAM
250 Gig drive
M1-ATX Power Supply
Xenarc 7" Touchscreen
BU-353 USB GPS Receiver
Custom wood box
Windows XP SP2
Road Runner Front End
Map Monkey
Winamp
DIVX Codec
Custom Skin (modified from ones that I found around the Net)
Kicker SX700.5 5 channel Amp
CDT 2-way 6.5" components in front (Crossovers are under the seats)
CDT 6.5" Coax drivers in back
MTX 12" Sealed Sub in an 'NVTHIS' stealth box
RAAMmat BXT and Ensolite over the entire interior and doors.
I used the now familiar method of cutting the entire A/C part of the bezel out and sliding it down. Then mounted the Xenarc frame to the top of the bezel and gluing the A/C framework to the bottom. Then tape up from behind and fill in with the Oatey ABS cement from Lowes. I did not mess with trying to melt my own plastic. The cement was easy to use (get a sqeezie mustard bottle) and readily available. I cut the ashtray door down to half its size and used it to fill the hole in the bottom. My original plan was to mount the computer reset button and Sub level control there, but decided I liked the cleaner look better .. plus it's a great place to lay sunglasses. The sub level control and switches are mounted under the dash. After the filling .. then sanding, filling, sanding, red Bondo glaze, sanding, glaze, sanding, a high fill primer, sanding, primer, sanding, then the SEM Texture paint and SEM Clear finish. I covered up the buttons for the monitor for a more OEM look but extended the wires on the IR recever and placed it behind the grill of the internal temp sensor. Plus the Xenarc has auto turn on/off .. so I really never need the remote.
To move the A/C Controls down, I had to cut out an aluminum support brace in the dash. A Dremel tool was EXTREAMLY handy for this and all the plastic cutting that had to be done for the project.
There is no CD or DVD drive in the car, but I can pull the entire computer out of the car in 20 seconds. I have a 12v power supply in the house I use to power it up and transfer movies/songs/maps/skins to the drive. I also have easy access to the USB ports on the back and can load new music on with a 2 Gig USB Flash drive when I want to do updates in the car. The GPS receiver is mounted right above the brakelight on the passenger side. It is held in place with industrial strength Velcro.
The cover over the sub has holes drilled in it so it can stay on top of the sub and protect it. I kinda over cut the cover a little around the amp and will probably order another one .. then use the carpet from the first to cover the computer.
The PC Box. The motherboard is on the bottom. power supply is mounted to the side, and the hard drive is on the top (upside-down) There are 2 posts that come up through the bottom of the removable panel that fit into holes on the computer case. This holds it in place .. but makes it very easy to lift out. The side of the box that is against the back of the car has 10 holes drilled in it for ventilation. The only fan inside the case is the CPU fan. It is very quiet and the VIA chip does not generate much heat. All the power and switch connections to the PC are on a single connector. The power supply also has a built in sequencer to control the Amp on/off .. that way, the computer has a chance to start up before the amp is turned on .. so no 'THUMP!' The back of the PC is ugly ... but functional (and you can't see it in the car)
The GPS receiver is mounted right above the brakelight on the passenger side. It is held in place with industrial strength Velcro.
The software driving the whole thing is Road Runner. RR is a FANTASTIC program written and maintained by Guino. It's free and there is a great support forum for it over at MP3Car.com. It is totally skinnable and there are many skins that have been created for it. I basically took several different ones and mashed my own together ... moving buttons and functions around. Here are some screen shots .. sorry for the bad quality .. time for a new digital camera.
Props to the original authors of these screens (most from MP3Car.com)
Right now, the hard drive has about 15,000 songs, 50 movies (in DIVX format), about 100 audio books, and a bunch of comedy albums .. and there is still over 100 Gig free. Song/album selection is very easy .. no mouse required. It is also possible to build playlists on the fly and shuffle at will. Who needs XM!
As soon as someone comes out with some good Bluetooth software for the Blackberry, I will add Bluetooth to the PC and an in-car mic for phone calls and voice commands.
So there you go. I could not have done it without the help and support of this forum and MP3Car.com. If you have any questions .. hit me at rhubarb9999@gmail.com
Thanks for listening.
Oh .. the Car :
The Lexus SC300 in the background is my daily driver .. it has a CarPC too !
Last edited by rhubarb74roadster; 04-28-2006 at 02:18 PM.


 04-28-2006, 05:13 PM
#6
Administrator


Member Since: Mar 2001
Location: In a parallel universe. Currently own 2014 Stingray Coupe.
Posts: 344,250
Received 19,641 Likes
on
14,175 Posts
C7 of the Year - Modified Finalist 2021
MO Events Coordinator
St. Jude Co-Organizer
St. Jude Donor '03-'04-'05-'06-'07-'08-'09-'10-'11-'12-'13-'14-'15-'16-'17-'18-'19-
'20-'21-'22-'23-'24
NCM Sinkhole Donor
CI 5, 8 & 11 Veteran


Very clean install - nice job.

 04-28-2006, 11:25 PM
#10
Le Mans Master

Member Since: Aug 2005
Location: DP(oh you know where) IL
Posts: 7,201
Likes: 0
Received 0 Likes
on
0 Posts
St. Jude Donor '06
Originally Posted by scott_fx
we need a subforum for all the car pc guys 

 04-29-2006, 12:32 PM
#12
Team Owner


Member Since: May 2000
Location: Plantation Florida USAF(Retired) 1966-1990
Posts: 48,070
Received 4,523 Likes
on
3,603 Posts
U.S. Air Force
St. Jude Donor '05-'06-'07-'08-'09-'10-'11-'12-'13-'14-'15-'16-'17-'18-'19-'20-'21-'22-'23-'24
NCM Sinkhole Donor
SWEET
 04-30-2006, 12:56 AM
#14
Le Mans Master
wicked...for basic computer you're looking at about $1200 you'll need an amp as well and might as well go with speakers as you start customizing you'll see the price go up quickly but it sure is fun! I finally found a soundcard that meets the voltage output that most good quality h/u have, and you always can get a usb dac for even better sound quality. the sky is the limit!
as you start customizing you'll see the price go up quickly but it sure is fun! I finally found a soundcard that meets the voltage output that most good quality h/u have, and you always can get a usb dac for even better sound quality. the sky is the limit!
04-30-2006, 08:38 AM
#15
I was able to put the computer together for around $875 including the monitor and cable. I can send the links if anyone is interested.
That does not include a case or any kind of CD/DVD drive.
With the amp, speakers, sound deadening, materials for the bezel, wire, and misc stuff the whole project came to $2000. I bought the amp used from eBay, the door speakers from a forum member here (including the door mounting plates), and the sub from a forum member.
I am using the on-board audio from the motherboard to feed the amp directly. The amp has a built-in crossover for the sub. I am happy with the sound quality but always tweaking the EQ to get it a little better. I used to own a recording studio .. so I am a little picky when it comes to sound ScottFX pointed me to the VST plugins .. so I am going to try an EQ module I found for that and see if its better.
Most of the work is in the bezel. It's not hard to do, but you have to go slow. If you mess it up, a new one is $100 (ask me how I know).
That does not include a case or any kind of CD/DVD drive.
With the amp, speakers, sound deadening, materials for the bezel, wire, and misc stuff the whole project came to $2000. I bought the amp used from eBay, the door speakers from a forum member here (including the door mounting plates), and the sub from a forum member.
I am using the on-board audio from the motherboard to feed the amp directly. The amp has a built-in crossover for the sub. I am happy with the sound quality but always tweaking the EQ to get it a little better. I used to own a recording studio .. so I am a little picky when it comes to sound
ScottFX pointed me to the VST plugins .. so I am going to try an EQ module I found for that and see if its better.Most of the work is in the bezel. It's not hard to do, but you have to go slow. If you mess it up, a new one is $100 (ask me how I know).
 05-01-2006, 12:26 AM
#19
Le Mans Master
Originally Posted by rhubarb74roadster
I was able to put the computer together for around $875 including the monitor and cable. I can send the links if anyone is interested.
That does not include a case or any kind of CD/DVD drive.
With the amp, speakers, sound deadening, materials for the bezel, wire, and misc stuff the whole project came to $2000. I bought the amp used from eBay, the door speakers from a forum member here (including the door mounting plates), and the sub from a forum member.
I am using the on-board audio from the motherboard to feed the amp directly. The amp has a built-in crossover for the sub. I am happy with the sound quality but always tweaking the EQ to get it a little better. I used to own a recording studio .. so I am a little picky when it comes to sound ScottFX pointed me to the VST plugins .. so I am going to try an EQ module I found for that and see if its better.
Most of the work is in the bezel. It's not hard to do, but you have to go slow. If you mess it up, a new one is $100 (ask me how I know).
That does not include a case or any kind of CD/DVD drive.
With the amp, speakers, sound deadening, materials for the bezel, wire, and misc stuff the whole project came to $2000. I bought the amp used from eBay, the door speakers from a forum member here (including the door mounting plates), and the sub from a forum member.
I am using the on-board audio from the motherboard to feed the amp directly. The amp has a built-in crossover for the sub. I am happy with the sound quality but always tweaking the EQ to get it a little better. I used to own a recording studio .. so I am a little picky when it comes to sound
ScottFX pointed me to the VST plugins .. so I am going to try an EQ module I found for that and see if its better.Most of the work is in the bezel. It's not hard to do, but you have to go slow. If you mess it up, a new one is $100 (ask me how I know).
hmm.. i think i was including the alpine pxa-701 in the $1200 quote.... can't remember though.
I didn't know you were using onboard audio! do yourself a favor and go online and buy yourself a used soundblaster live 5.1 for about 10 bucks on ebay. then download the 'kxproject' drivers and you'll open yourself to a completely new experience with system adjustability! I paired this up with an audio control line driver/x-over and i was amazed at the sound quality improvement as well.
if anyone is interested i have a lot of the pieces to my old system laying around. pretty much the entire thing sans the computer itself (even the pxa-h701 got ripped out today) pm me if you want details ...sorry you can have you thread back

