
Rear Bearign Rebuild
 11-08-2005, 06:44 PM
#1
Tech Contributor
Thread Starter
Hi Guys,
Since this is always a favorite here and I'm rebuilding a set of arms now I'll post some pictures along the way.
These are off a 69 BB car and someone has been in there before. I found one strut rod was changed over to the larger head. The right arm was never apart- still had the factory seal and NDH bearings.
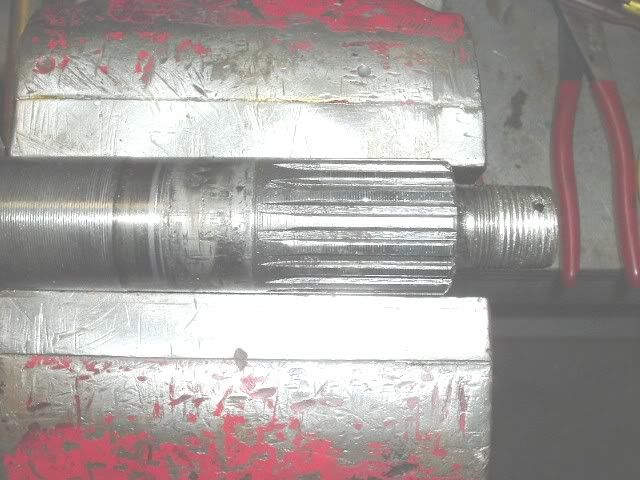
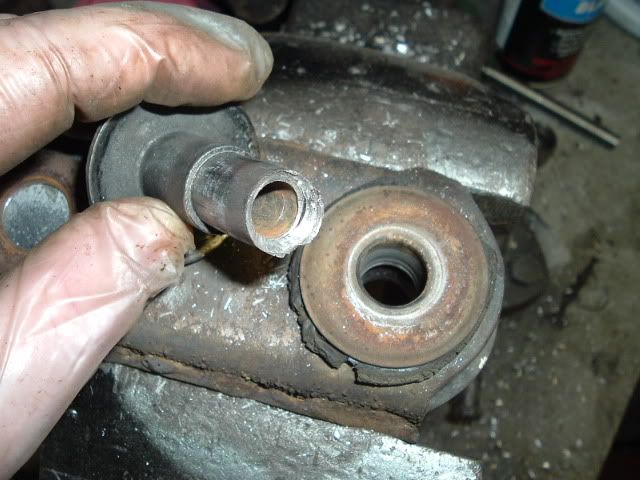
The left one had .030" endplay and a new cotter pin- bad sign. The threads were rolled and the inner bearing journal was crap after Bubba hammered the replacement Timken bearing on the journal.
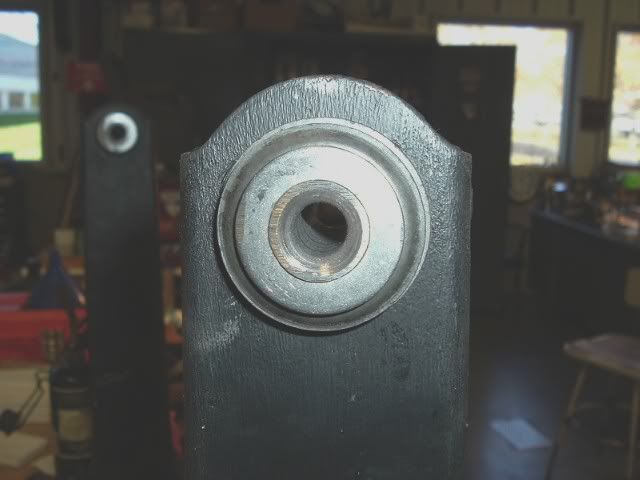
Here is the spindle with the bad journal and threads
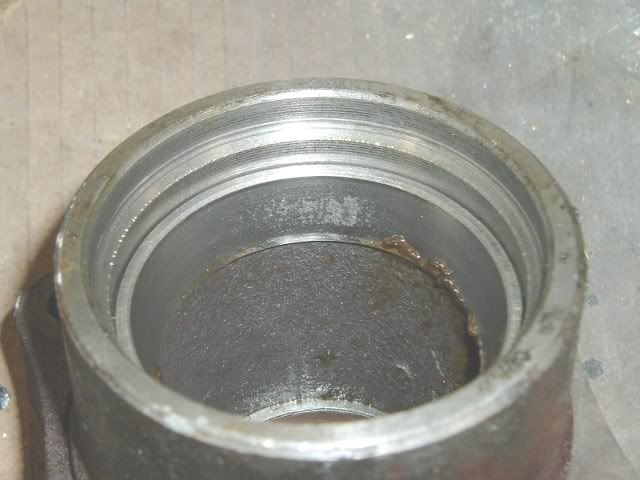
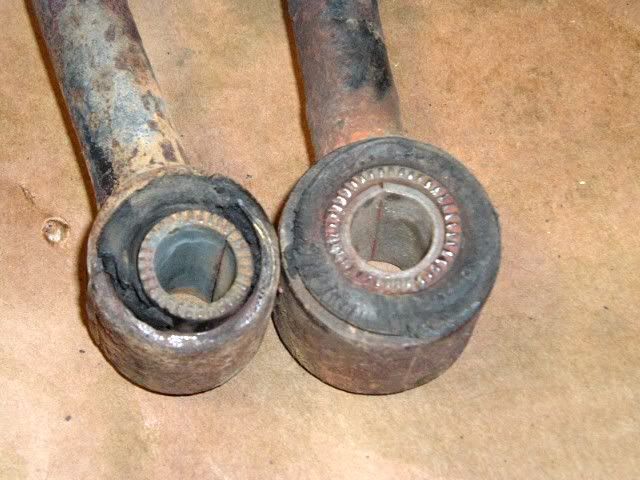
Here the race starting to go bad:
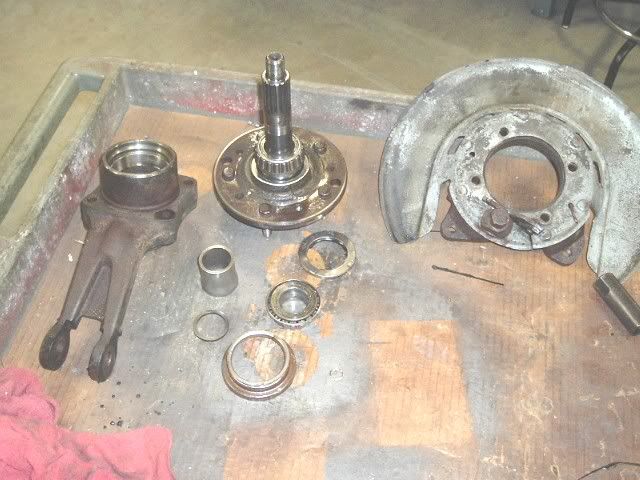
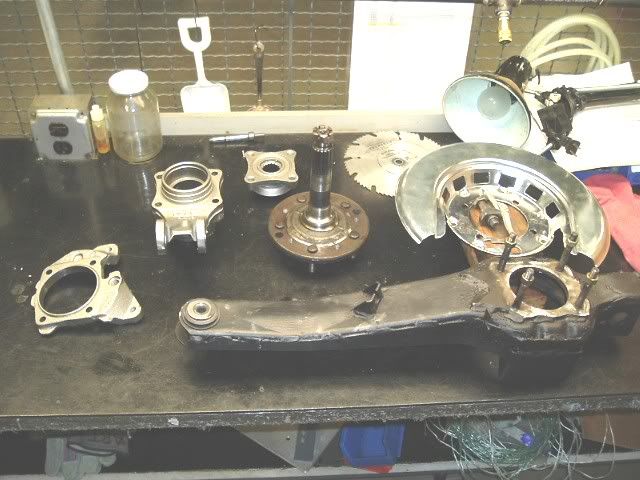
Here are the parts of the right spindle.
Gary
Since this is always a favorite here and I'm rebuilding a set of arms now I'll post some pictures along the way.
These are off a 69 BB car and someone has been in there before. I found one strut rod was changed over to the larger head. The right arm was never apart- still had the factory seal and NDH bearings.
The left one had .030" endplay and a new cotter pin- bad sign. The threads were rolled and the inner bearing journal was crap after Bubba hammered the replacement Timken bearing on the journal.
Here is the spindle with the bad journal and threads
Here the race starting to go bad:
Here are the parts of the right spindle.
Gary
Last edited by GTR1999; 06-22-2019 at 08:40 PM.


 11-08-2005, 06:57 PM
#3
Tech Contributor
Thread Starter
The races in the housing are removed by hammer and drift. There are spots to hit the race and drive it out.
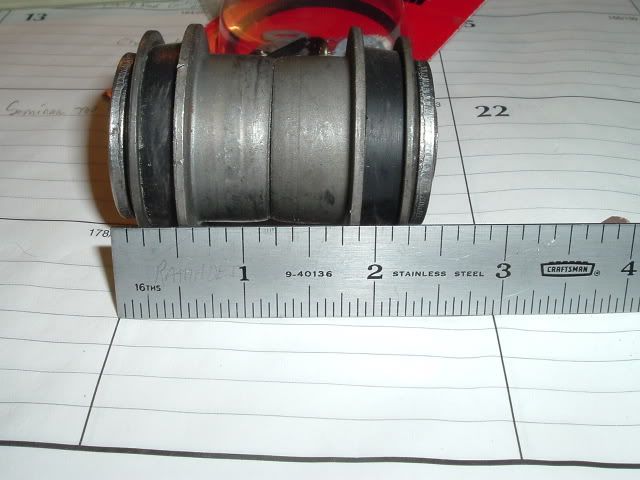
Here what the front bushings look like- dry rotted and falling out:
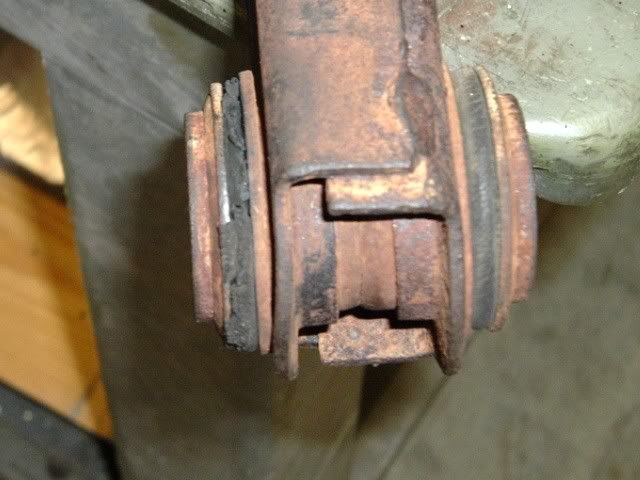
Here what the front bushings look like- dry rotted and falling out:
Last edited by GTR1999; 06-22-2019 at 08:37 PM.
11-08-2005, 07:03 PM
#4
Tech Contributor
Thread Starter
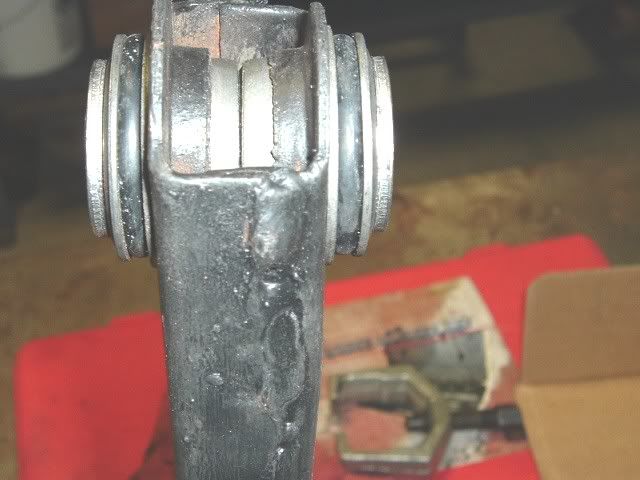
Here are those strut rods ends,both arms are bent BTW.
Last edited by gtr1999; 06-04-2006 at 07:53 PM.


 11-08-2005, 09:13 PM
#7
Burning Brakes


Member Since: Feb 2004
Location: In the Beautiful Shenandoah Valley of VA
Posts: 958
Likes: 0
Received 1 Like
on
1 Post

Originally Posted by gtr1999
The races in the housing are removed by hammer and drift. There are spots to hit the race and drive it out.
Here is the press setup I use

Here is the press setup I use
I am getting ready to press my rear bearings apart and have the same press setup as you have. I'm curious how you managed to get those two plates in between the spindle and the bearing housing to press the two apart. I'm having trouble making that setup. Thanks.
Steve
11-09-2005, 09:13 AM
#8
Tech Contributor
Thread Starter
Mike, This car is being worked on by a local garage. I saw a lot of things that need to be fixed but the garage guy is calling the shots. I'm just rebuilding the rear end, T arms,and 1/2 shafts.
Rip, yes the endplay was pretty bad but it was a result of poor workmanship from a previous "mechanic" I doubt it was driven much in that condition. That's probably why I got the call- to fix someone else's mistake.
Steve, I strip the PB shoes out and always replace the backing plate so I can get the black plates under the plate and use a spindle knocker to protect the threads and press apart. This job the right came apart without much force build up and the left was so screwed up it came out as I was tapping off the spindle support.
Gary
11-09-2005, 12:58 PM
#9
Burning Brakes
Member Since: Feb 2004
Location: In the Beautiful Shenandoah Valley of VA
Posts: 958
Likes: 0
Received 1 Like
on
1 Post
Originally Posted by gtr1999
Steve, I strip the PB shoes out and always replace the backing plate so I can get the black plates under the plate and use a spindle knocker to protect the threads and press apart. This job the right came apart without much force build up and the left was so screwed up it came out as I was tapping off the spindle support.
Gary
Thanks Gary, that makes sense.

Steve
11-09-2005, 08:43 PM
#11
Tech Contributor
Thread Starter
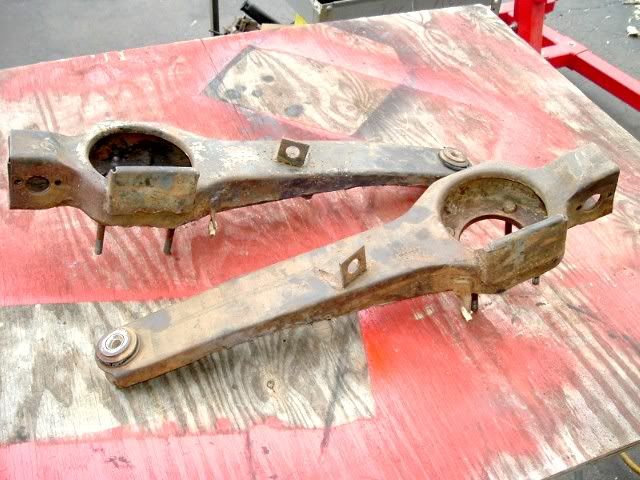
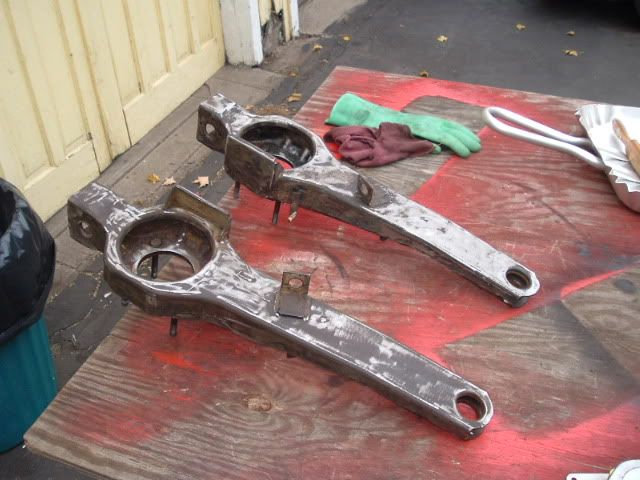
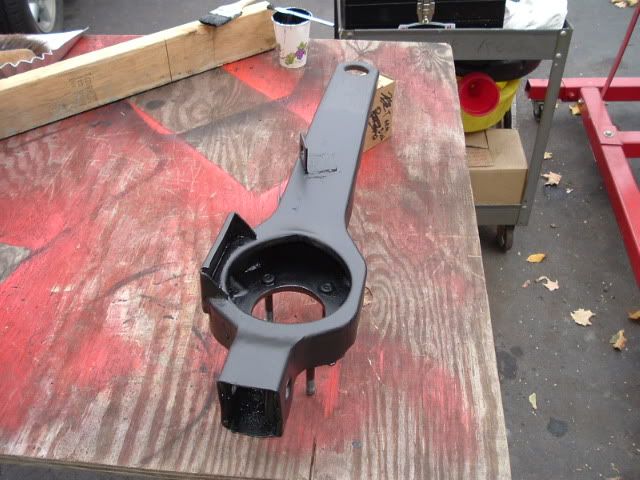
Worked on the arms today. removed the bushings, stripped, washed, and painted with Eastwoods rust encapsulator. This is the 1st time using the eastwood product,usually I use POR15.
Gary
Gary
Last edited by gtr1999; 06-04-2006 at 07:57 PM.
11-09-2005, 09:14 PM
#12
Burning Brakes
Gary, I've always been curious about something. Do you ever find the spindle journals to be slightly egged? Mine were close to half a thou egged to the plus side.....at least according to my bearing charts. The finishes were still near perfect......just egged....which is not terribly uncommon on a shaft ground between centers. Half a thou doesn't sound like much, but it essentially doubles the amount of interference on two sides of the journal.
11-09-2005, 09:30 PM
#13
Le Mans Master


Hey Gary,
What do you get for a TA rebuild (assuming spindles are OK)? I may be interested in running mine down to you this spring. PM me if you want.
Thanks,
What do you get for a TA rebuild (assuming spindles are OK)? I may be interested in running mine down to you this spring. PM me if you want.
Thanks,
11-10-2005, 08:04 AM
#14
Tech Contributor
Thread Starter
Originally Posted by goinbroke
Gary, I've always been curious about something. Do you ever find the spindle journals to be slightly egged? Mine were close to half a thou egged to the plus side.....at least according to my bearing charts. The finishes were still near perfect......just egged....which is not terribly uncommon on a shaft ground between centers. Half a thou doesn't sound like much, but it essentially doubles the amount of interference on two sides of the journal.
I do remember you telling me that last year. I know you know your machining trade very well, so I would doubt it. I haven't go beyond checking for damge to the journal or surface but will check and see. I have the used spindles here and a new one on the way. It will interesting to compare the two.
Gary
11-10-2005, 09:14 AM
#16
Team Owner


Originally Posted by gtr1999
Worked on the arms today. removed the bushings, stripped, washed, and painted with Eastwoods rust encapsulator. This is the 1st time using the eastwood product,usually I use POR15.
Gary


Gary
11-10-2005, 09:26 AM
#17


If you want to get the races out without a chance of damaging the housing use a tig welder and lay a bead on the race, it'll practically fall out. If you don't have tig but a mig it'll work too as long as you leave the housing a bit greasy to avoild splatter from sticking (or use anti splatter spray)
11-10-2005, 02:38 PM
#18
Tech Contributor
Thread Starter
The races in the spindle housing should come out without much effort since they were sealed against the elements.
The Eastwood paint doesn't self level as good as the POR15. It sets up much faster and has a satin/flat sheen. I may or may not top coat it.
Steve I PM'd you some info this AM.
Gary
The Eastwood paint doesn't self level as good as the POR15. It sets up much faster and has a satin/flat sheen. I may or may not top coat it.
Steve I PM'd you some info this AM.
Gary
11-12-2005, 08:39 PM
#19
Tech Contributor
Thread Starter
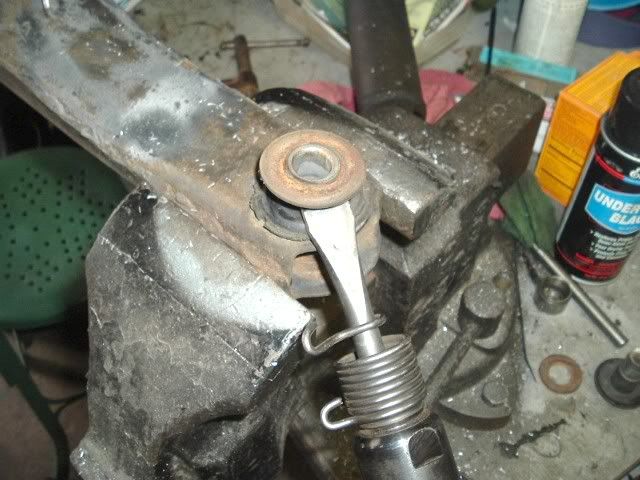
Installed the front bushings this AM. I touch the sides quick on a belt sander to remove any hgh spots.
Gary
Here are the Right side parts cleaned and ready to set the end play and assemble.
Gary
Here are the Right side parts cleaned and ready to set the end play and assemble.
Last edited by gtr1999; 06-04-2006 at 08:00 PM.
11-12-2005, 10:15 PM
#20
Melting Slicks

Nice pics! Thanks for sharing.