
Suspension rebuild to commence soon!
 12-03-2007, 10:23 AM
#1
Pro

Thread Starter
[1968 vert std car]
Hi, everyone!
Well, the next major project has been put into motion. I'll be ordering my suspension parts this week for a full rebuild. I'd like everyone to chime in here with tips, suggestions, etc. as they can!
I will be using reproduction parts as would be original for the car. I'll be getting the delux rebuild kits in rubber, 7-leaf spring/bolts (long so I can adjust ride height), and T/A shims from VolVette. I have free shipping and big discount due to my last winter's order for the wiring.
Are there any tips to follow? Are there any parts that I need that wouldn't be in the kits, or other items that I should do at the same time? Any special tools that will be needed, ie. spring compressor for the front coil springs? I'll probably start with the rear of the car then do the front.
I plan to rebuild the trans and find a shop to do the rear-end next winter. I hope to lift the body off as well to clean and paint the frame and replace the body mounts.
Thanks for your input!
Last edited by bwellisley; 12-10-2007 at 08:54 PM. Reason: Update
 12-04-2007, 09:12 PM
#2
Pro
Thread Starter
Ok, order is in!
I went with the "correct" reproduction parts. Boy am I going to be busy...like a kid on Christmas. Oh wait...it IS Christmas!
SPRING ANCHOR BOLT & WASHER SET
REAR SPRING ANCHOR PLATE
BACK-UP LAMP SWITCH TO REVERSE LEVER ROD W/C
BACK-UP LAMP SWITCH BRACKET
BACK-UP SWITCH
BACK-UP LAMP SWITCH SCREW & LW SET
REAR SPRING MOUNTING KIT WITH LONG BOLTS
FRONT END REBUILD KIT DELUXE-RUBBER BUSHINGS
REAR SUSPENSION MOUNTING & HARDWARE COMBO KT (Correct Strut Rods)
REAR LEAF SPRING (9-LEAF)
TRAILING ARM SHIM KIT (STAINLESS) 18PCS (with hardware)
Headlight Switch
I'll be documenting my rebuild here for others with pics/problems/solutions along the way.
12-04-2007, 09:33 PM
#3
Melting Slicks


[1968 vert std car]
Hi, everyone!
Well, the next major project has been put into motion. I'll be ordering my suspension parts this week for a full rebuild. I'd like everyone to chime in here with tips, suggestions, etc. as they can! ...
Are there any tips to follow? ...
Thanks for your input!
Hi, everyone!
Well, the next major project has been put into motion. I'll be ordering my suspension parts this week for a full rebuild. I'd like everyone to chime in here with tips, suggestions, etc. as they can! ...
Are there any tips to follow? ...
Thanks for your input!
 12-05-2007, 07:57 PM
#6
Pro
Thread Starter
I'm planning to keep the car as original as possible, just in-case I decide to sell the car later on. I'm even staying with the correct rods/leaf-spring, not the heavy-duty upgrade.
 12-10-2007, 08:17 PM
#8
Pro
Thread Starter
This past weekend I was able to spend a few hours starting the rebuild of the suspension. So far I've had 2 bolts snap that required me to drill them out; 1 bolt head stripped which will need to be cut out; 1 bolt was cut out using a hacksaw (still don't have a cutting disc - 5 mins instead of 5secs!).  So, so far I have the leaf spring seperated from the wheels but still mounted to the rear end. These 4 bolts will take some work to remove. I've been heating them and soaking them with PB-Blaster. I'll need to get help from a friend heating the casting while I try to loosen the 4 bolts holding the leaf spring in place. I have the driver side completed down to the trailing arm which is next. The passenger side still has the inner bolt of the strut rod (needing cut-out as it is the one with the stripped bolt head on the camber bolt) and the trailing arm.
Here is the start, putting it on the jacks. Nice and solid!
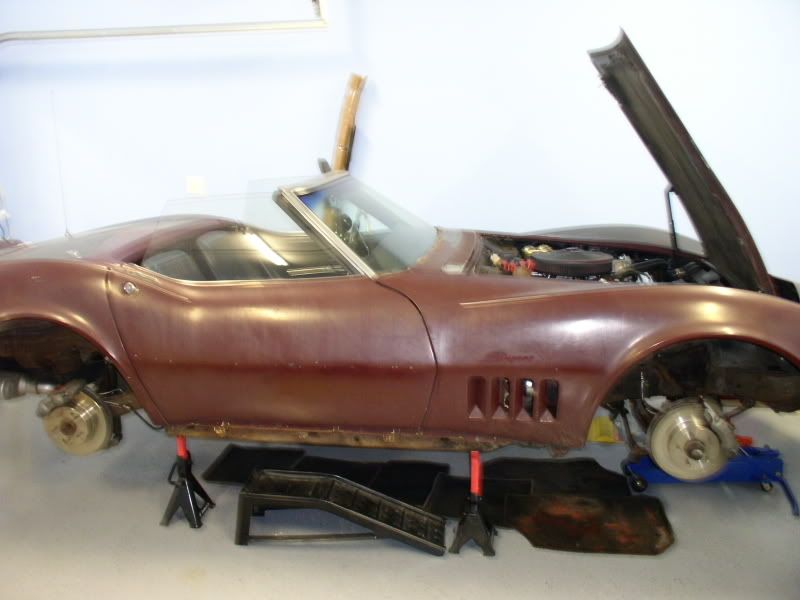
Before:


The sway bar bracket on the pass side had both bolt heads break off. This required me to drill them out. I also had to cut the spring bolt to remove it. I have both the correct bolts and longer bolts for the re-install. I'm having new plates made at the office since I was unable to salvage the threaded holes in the 3"x1" steal support plate for the sway bar bracket. I'll be cleaning and painting everything that is not new prior to re-install, ie. brackets, plates, and shock mounts.
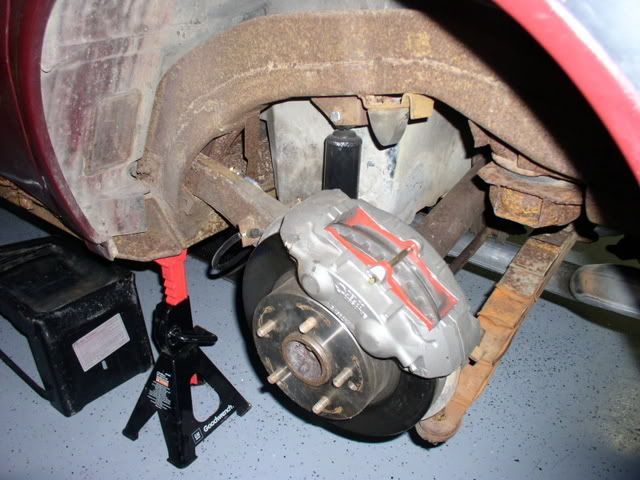
Here everything is removed from the drv side leaving just the trailing arm.
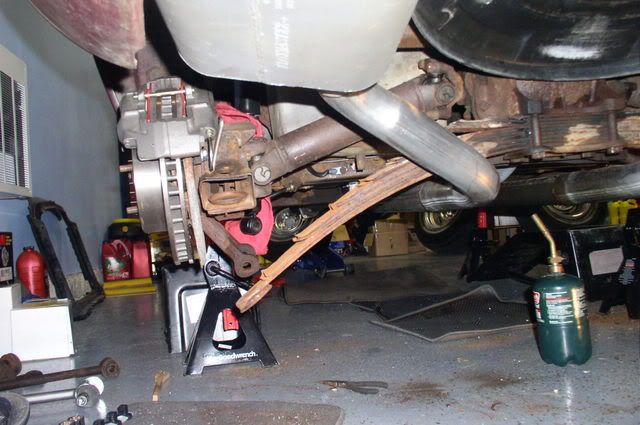
In the last pic you can see that I've started heating and soaking (with PB Blaster) the 4 main bolts for the leaf spring. I just need to get a hotter torch to be able to break the bolts free. No luck so far... I've also started soaking the bolts for the trailing arms, but have not tried to break them free yet. Hessitant to put heat on them that close to the body. The shock mount for the drv side has not budged! I hit on it until my head was pounding! I'm going to try heating and soaking the trailing arm and strut rod more before whacking it more. I'm using a block of wood and a heavy hammer to keep from damaging the mount or threads.
Not sure if I'll buy the DVD from Van Steel, as it seems rather easy to just make notes/photos of how it is assembled and how I dissassemble it to put it back together. Plus there are a few people here who have been a great help, and others who have done this as well. Following x-mas my father-in-law will be visiting for about a week and he has his own mechanic shop, so if all else fails I can get a hand from him also. Thanks for the idea.
So, so far I have the leaf spring seperated from the wheels but still mounted to the rear end. These 4 bolts will take some work to remove. I've been heating them and soaking them with PB-Blaster. I'll need to get help from a friend heating the casting while I try to loosen the 4 bolts holding the leaf spring in place. I have the driver side completed down to the trailing arm which is next. The passenger side still has the inner bolt of the strut rod (needing cut-out as it is the one with the stripped bolt head on the camber bolt) and the trailing arm.Here is the start, putting it on the jacks. Nice and solid!
Before:
The sway bar bracket on the pass side had both bolt heads break off. This required me to drill them out. I also had to cut the spring bolt to remove it. I have both the correct bolts and longer bolts for the re-install. I'm having new plates made at the office since I was unable to salvage the threaded holes in the 3"x1" steal support plate for the sway bar bracket. I'll be cleaning and painting everything that is not new prior to re-install, ie. brackets, plates, and shock mounts.
Here everything is removed from the drv side leaving just the trailing arm.
In the last pic you can see that I've started heating and soaking (with PB Blaster) the 4 main bolts for the leaf spring. I just need to get a hotter torch to be able to break the bolts free. No luck so far... I've also started soaking the bolts for the trailing arms, but have not tried to break them free yet. Hessitant to put heat on them that close to the body. The shock mount for the drv side has not budged! I hit on it until my head was pounding! I'm going to try heating and soaking the trailing arm and strut rod more before whacking it more. I'm using a block of wood and a heavy hammer to keep from damaging the mount or threads.
Not sure if I'll buy the DVD from Van Steel, as it seems rather easy to just make notes/photos of how it is assembled and how I dissassemble it to put it back together. Plus there are a few people here who have been a great help, and others who have done this as well. Following x-mas my father-in-law will be visiting for about a week and he has his own mechanic shop, so if all else fails I can get a hand from him also. Thanks for the idea.
Last edited by bwellisley; 12-10-2007 at 08:53 PM.
12-14-2007, 06:50 PM
#9
Pro
Thread Starter
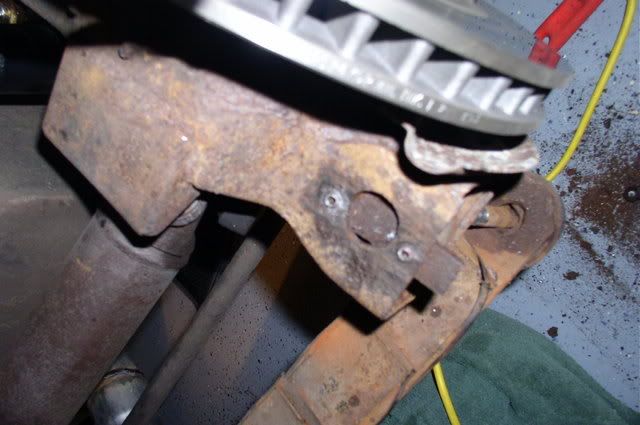
Upper cushion from the differential...I think the bushings are over-due for changing, eh?!


Murphy decided to help out as well. While removing the last bolt, front drv, from the leaf spring mount it snapped off in the housing!

Now I'm carefully trying to drill-out the center to try to extract it with an easy-out tool. I'm continuing to soak it with PB-Blaster as well. I guess I was lucky to get 3 of the 4 out being that this 68 car is 7yrs older than I turning 40 this year!
Murphy decided to help out as well. While removing the last bolt, front drv, from the leaf spring mount it snapped off in the housing!
Now I'm carefully trying to drill-out the center to try to extract it with an easy-out tool. I'm continuing to soak it with PB-Blaster as well. I guess I was lucky to get 3 of the 4 out being that this 68 car is 7yrs older than I turning 40 this year!
12-15-2007, 12:04 AM
#11
Pro
Thread Starter
how would that help get the bolt out of the casting? is it better to heat the bolt prior to drilling out the center? i was thinking drill the center, get an easy-out to bit then heat up the bolt again to try to extract it...
Looks like i'll need to cut out the bolts on the trailing arms...can't get the cotter pins out, or get a socket onto the bolts...
Removed some of the front end suspension tonight also.
Looks like i'll need to cut out the bolts on the trailing arms...can't get the cotter pins out, or get a socket onto the bolts...
Removed some of the front end suspension tonight also.
12-15-2007, 07:55 AM
#12
Team Owner


Member Since: Oct 2004
Location: Springfield MO
Posts: 23,831
Likes: 0
Received 6 Likes
on
6 Posts
St. Jude Donor '07

how would that help get the bolt out of the casting? is it better to heat the bolt prior to drilling out the center? i was thinking drill the center, get an easy-out to bit then heat up the bolt again to try to extract it...
Looks like i'll need to cut out the bolts on the trailing arms...can't get the cotter pins out, or get a socket onto the bolts...
Removed some of the front end suspension tonight also.
Looks like i'll need to cut out the bolts on the trailing arms...can't get the cotter pins out, or get a socket onto the bolts...
Removed some of the front end suspension tonight also.
 12-15-2007, 02:39 PM
#14
Safety Car

Just did my ENTIRE suspension on my 72. Not ONE broken bolt! Guess I was really lucky. I soaked everything for several days before I started. From your pictures, you have alot more rust than I had. I used poly, and went with a fiberglass spring. Got everything from VBP.

12-15-2007, 02:45 PM
#15
Tech Contributor
Look over the arms when you get them out. Looks like some separation on the end, if not bad you can weld the ends.
12-15-2007, 03:42 PM
#16
Pro
Thread Starter
yes, there's some seperation on the ends of the arms...is that really bad, or can i just have them tacked back together?
i'm using heat, pb blaster, and both hand/air tools. yes, there's a good amount of surface rust, but i haven't found anything that looks very bad.
i'm using heat, pb blaster, and both hand/air tools. yes, there's a good amount of surface rust, but i haven't found anything that looks very bad.
12-15-2007, 04:18 PM
#17
Tech Contributor
As long as they are not bent or rotted I would weld the ends up. It's one thing I do when rebuilding them. Since you'll have them out if you have a welder give it a shot.
12-15-2007, 05:10 PM
#18
Racer

Member Since: Nov 2007
Location: Upstate New York
Posts: 320
Likes: 0
Received 0 Likes
on
0 Posts
What I mean is that bernz-o-matic doesn't cut it when you are removing rusted bolts that big, you need oxy-acetylene heat with a rosebud tip if you've got one. Then heat around the bolt area, not the bolt itself and have your father-in-law hold the fire extinguiser!
12-15-2007, 10:11 PM
#19
Pro
Thread Starter

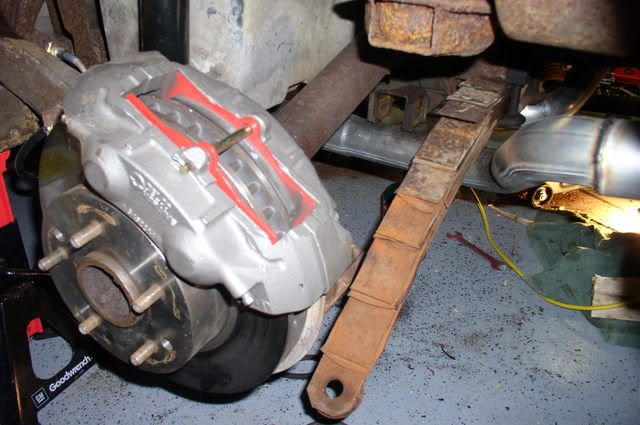
can anyone tell me about this bumper looking thing on the front of the lower a-arm. it has a bolt through the lower ball-joint on the inside. can't see how to get it out, i have the nut off but it won't knock out from the inside. should i just cut it?
thnx
12-15-2007, 10:46 PM
#20
Instructor
I am in the middle of the same project. That is a bolt for a replacement lower ball joint. It should come out after you remove the nut on the inside of the ball joint. It would be easier to remove with the A-arm in a vise and tap on the threaded end with a punch if it is difficult to remove.
I see the A-arm is still in the car. You cannot/ sjould not remove the ball joint with the lower A-arm loaded by the spring. I suggest you remove the spring and then the lower A-arm from the car prior to worrying about the ball joint.
By the way, my newly aquired air hammer was a tremendous help in the dis-assembly process for difficult bolts like this.
Last edited by 70454Convert; 12-15-2007 at 10:52 PM.