WTB: Rear View Mirror Wiring Harness


 10-08-2007, 07:41 PM
#4
Melting Slicks


Great article on this here: http://www.c5forum.com/diy/electro_mirror.php
When I did mine, I got the mirror off of Ebay and it had a short wiring pigtail, along with the connector (changed from a 4-pin to a 7-pin). The only thing I had to change was the one wire that supplies power when the headlights come on. I connected it so that it supplies power when the key is on. Otherwise, the mirror only works when the headlights are on. This may not matter if the mirror is only electrochromic, but mine has the compass in it also, so it needed to be powered all the time.
When I did mine, I got the mirror off of Ebay and it had a short wiring pigtail, along with the connector (changed from a 4-pin to a 7-pin). The only thing I had to change was the one wire that supplies power when the headlights come on. I connected it so that it supplies power when the key is on. Otherwise, the mirror only works when the headlights are on. This may not matter if the mirror is only electrochromic, but mine has the compass in it also, so it needed to be powered all the time.
Last edited by 'VETTE PHASE; 10-08-2007 at 07:50 PM.
 10-08-2007, 08:14 PM
#7
Melting Slicks
I just bought an autodimming mirror off ebay, it came with the harness, I only wanted the mirror, I'm going to do a mod on the LED's and I didn't want to screw up my mirror if it didn't work out, send me your email address and I'll send you some pics to see if this is what you want. I was supposed to come off a 2002 C5. I'll sell it for $30 shipped if this is what you need.
10-08-2007, 08:31 PM
#8
Melting Slicks
 ). It is nearly the exact same mirror that comes in the 01-up vettes. The only difference is it doesn't have the yellow light that shines on the shifter area when the headlights are on. I would guess that 90% of all mirrors have the same wedge type of attachment to the windshield as the corvette has. The wiring isn't that difficult until you get into OnStar, cell phone, etc.
 10-10-2007, 12:52 AM
#11
Melting Slicks
I can't post a link, but if anyone is interested, there is one up for auction. It's at $17.00 so far. Search for Chrysler Sebring Auto Dim.
11-10-2007, 03:45 PM
#15
Melting Slicks
This is part of a PM between Yanni and I. I figured I'd post it here in case someone pulls this up in a search at some time in the future.
Hey Yanni,
I was going to reply last night, but I decided to take a few pictures to make it easier to understand. OK, so here is the layout on the wiring:
Black = Ground
Brown = Hot from the headlights
Orange 1 = Hot all the time
Orange 2 = Hot from the door switch
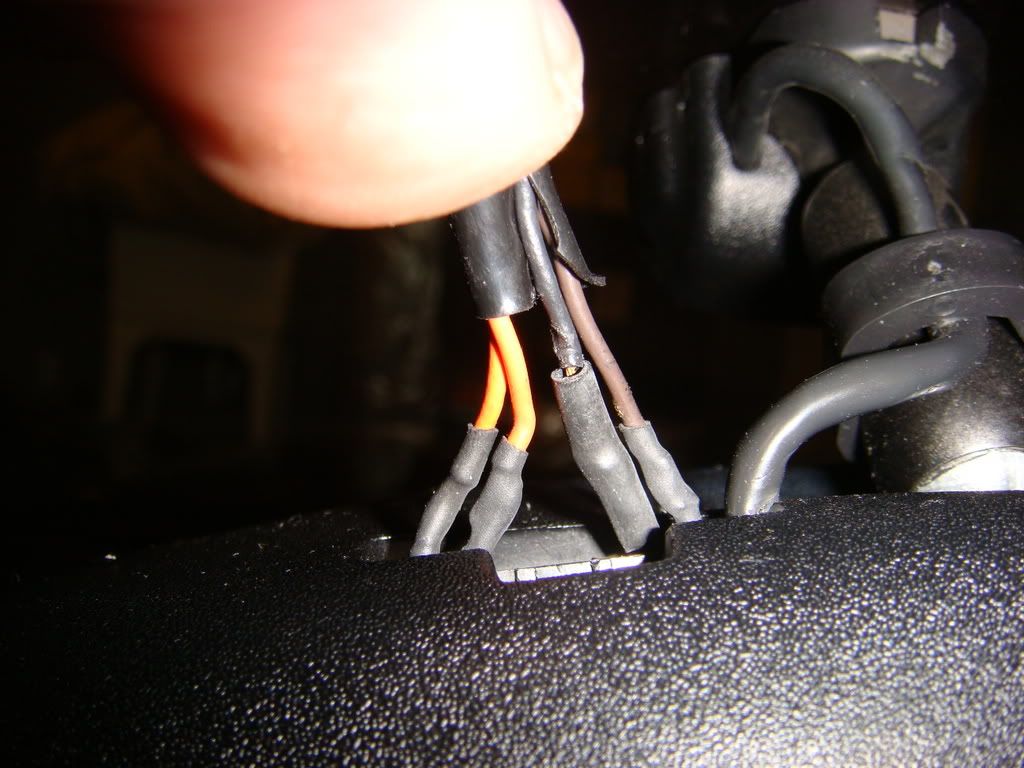
If you are holding the mirror, looking at the back of it, the connector should be numbered 1-7, starting near the middle and going outward towards the outer edge of the mirror. The wires should be inserted like so:
1 = Brown (Hot from headlight switch)
2 = Black (Ground)
3 = no wire
4 = no wire
5 = no wire
6 = Orange 2 (Hot from the door switch)
7 = Orange 1 (Hot all the time)
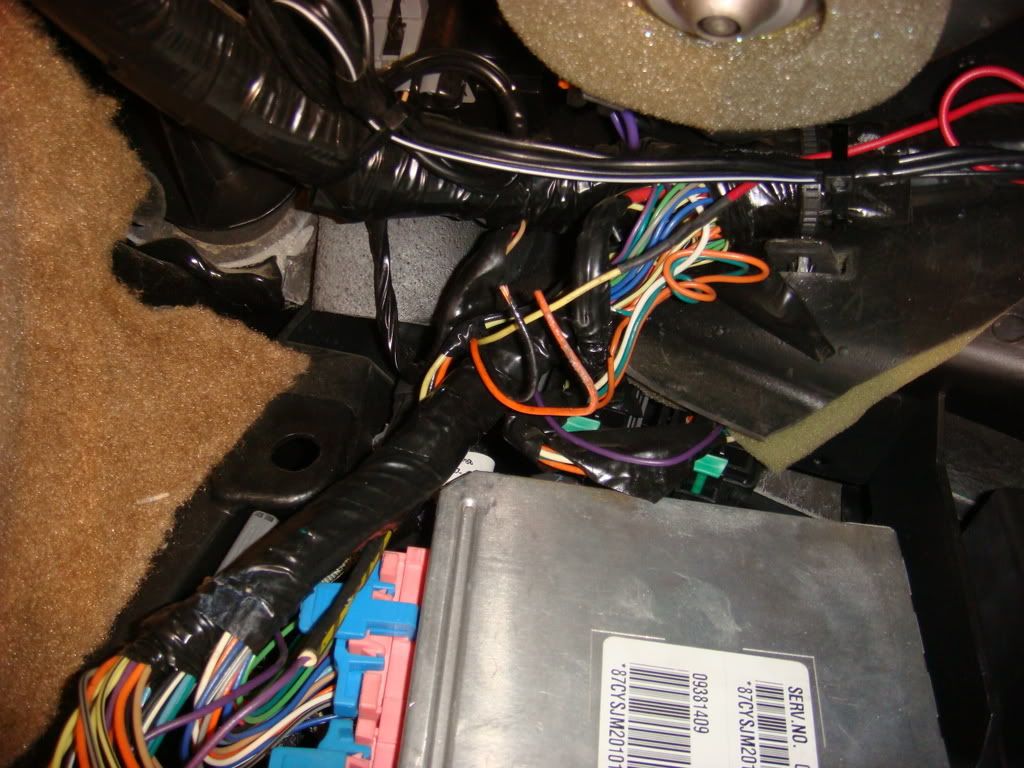
What you want to do is, remove the floor mat on the passenger side, remove the carpeted cover at the very front end of the passenger footwell (this will expose the fuse panel and the BCM), directly above this, remove the black rubber-like panel from the bottom of the dash (it's the piece with the light in it).
Just above the BCM, you should find three wires (black, yellow, orange) that are covered with a piece of duct tape. The yellow wire is the one you want, it will be hot off the ignition.
Now comes the fun part, finding the little brown wire that goes up to the mirror from the headlight switch. If you look at the bottom of the dash, you will see a small group of wires that goes towards the bottom of the glove box and then "tees". The brown wire you want is in here. It goes up around the glove box, up the windshield pillar and over to the mirror. There are only two or three brown wires, but only one will be hot when you turn on the headlight switch. This wire will have to be cut and then tied into the yellow wire that you previously found with the duct tape covering it.
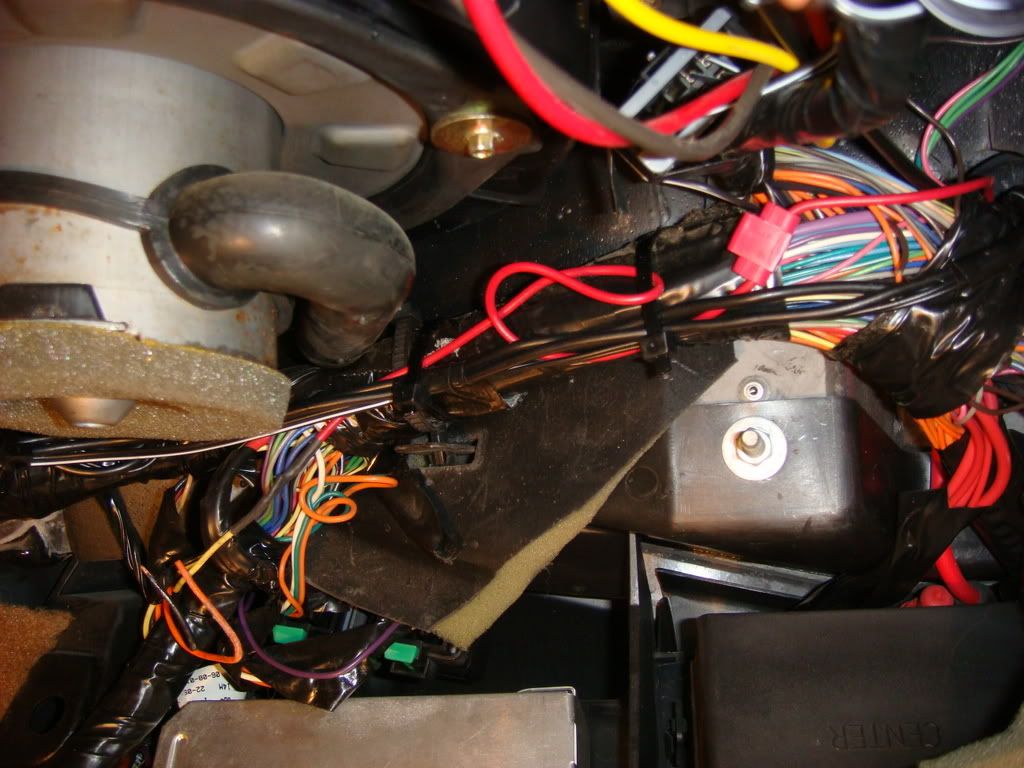
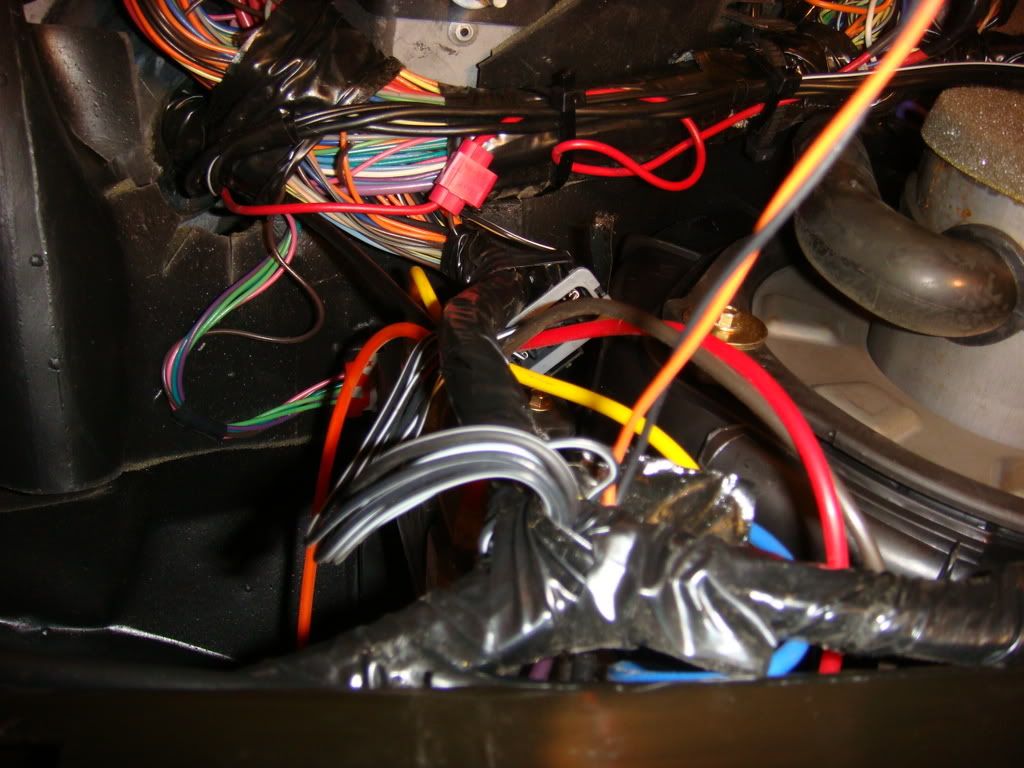
In the pictures, I have attached a red wire to the yellow wire with the duct tape. This wire feeds power to my wideband 02 sensor. I attached the brown wire going to the mirror to this wire, with a squeeze on type connector, instead of running another wire over to the yellow one. It is hard to see the brown wire in the pictures, but it is connected to the red wire with the red, squeeze on type connector. I didn't want you to be confused because there is a red wire connected to my brown wire in the pictures. It is still all connected to the yellow wire. Good luck. Let me know how it turns out.
~Tim
Three duct tape wires. Orange and black are bent, the yellow is attached to the red.
Brown wire attached to red wire (from yellow wire) via red squeeze on type connector.
Another shot.
Wiring at mirror. I bent the mirror down to take the pic, so this is looking at it from the top of the mirror.
Hey Yanni,
I was going to reply last night, but I decided to take a few pictures to make it easier to understand. OK, so here is the layout on the wiring:
Black = Ground
Brown = Hot from the headlights
Orange 1 = Hot all the time
Orange 2 = Hot from the door switch
If you are holding the mirror, looking at the back of it, the connector should be numbered 1-7, starting near the middle and going outward towards the outer edge of the mirror. The wires should be inserted like so:
1 = Brown (Hot from headlight switch)
2 = Black (Ground)
3 = no wire
4 = no wire
5 = no wire
6 = Orange 2 (Hot from the door switch)
7 = Orange 1 (Hot all the time)
What you want to do is, remove the floor mat on the passenger side, remove the carpeted cover at the very front end of the passenger footwell (this will expose the fuse panel and the BCM), directly above this, remove the black rubber-like panel from the bottom of the dash (it's the piece with the light in it).
Just above the BCM, you should find three wires (black, yellow, orange) that are covered with a piece of duct tape. The yellow wire is the one you want, it will be hot off the ignition.
Now comes the fun part, finding the little brown wire that goes up to the mirror from the headlight switch. If you look at the bottom of the dash, you will see a small group of wires that goes towards the bottom of the glove box and then "tees". The brown wire you want is in here. It goes up around the glove box, up the windshield pillar and over to the mirror. There are only two or three brown wires, but only one will be hot when you turn on the headlight switch. This wire will have to be cut and then tied into the yellow wire that you previously found with the duct tape covering it.
In the pictures, I have attached a red wire to the yellow wire with the duct tape. This wire feeds power to my wideband 02 sensor. I attached the brown wire going to the mirror to this wire, with a squeeze on type connector, instead of running another wire over to the yellow one. It is hard to see the brown wire in the pictures, but it is connected to the red wire with the red, squeeze on type connector. I didn't want you to be confused because there is a red wire connected to my brown wire in the pictures. It is still all connected to the yellow wire. Good luck. Let me know how it turns out.
~Tim
Three duct tape wires. Orange and black are bent, the yellow is attached to the red.
Brown wire attached to red wire (from yellow wire) via red squeeze on type connector.
Another shot.
Wiring at mirror. I bent the mirror down to take the pic, so this is looking at it from the top of the mirror.
06-20-2008, 09:34 PM
#16
Instructor


Member Since: Jul 2005
Location: CT
Posts: 236
Likes: 0
Received 0 Likes
on
0 Posts
I just bought an autodimming mirror off ebay, it came with the harness, I only wanted the mirror, I'm going to do a mod on the LED's and I didn't want to screw up my mirror if it didn't work out, send me your email address and I'll send you some pics to see if this is what you want. I was supposed to come off a 2002 C5. I'll sell it for $30 shipped if this is what you need.