Egg Crate Prep
 02-12-2014, 10:06 PM
#1
Burning Brakes

Thread Starter

Hey guys,
What do you do, or how do you prep the side egg crates?
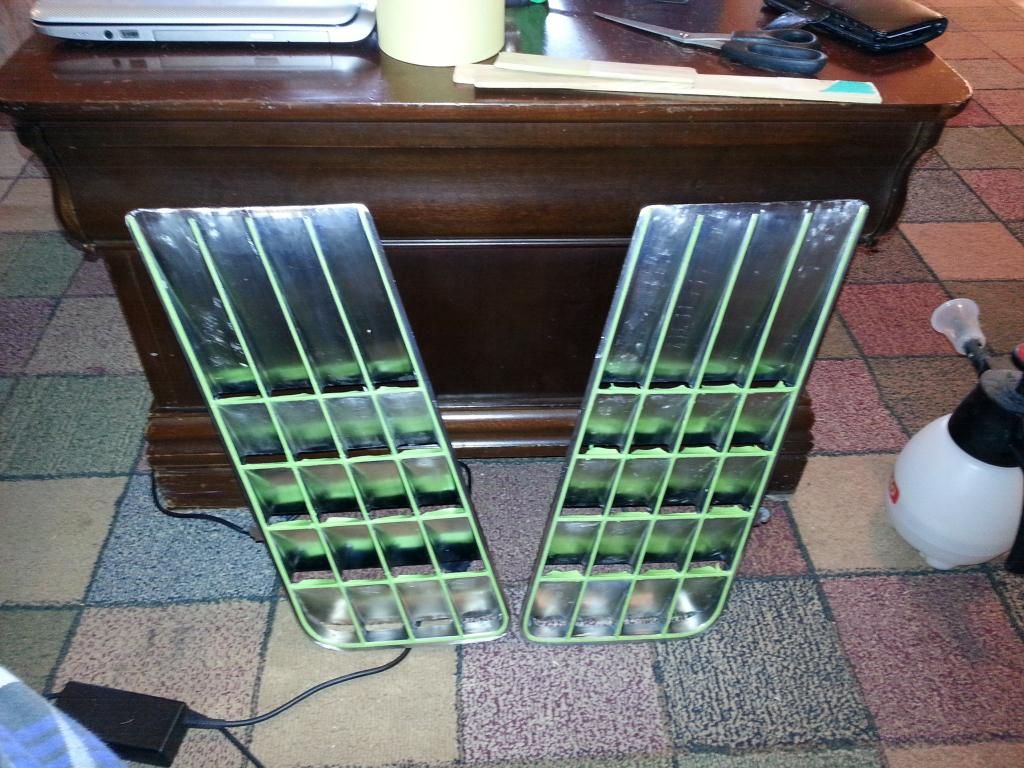
I just stripped all the paint on mine.

Do you just scuff it with sand paper and tape the edges and paint it?
Or do you paint the entire thing and wet sand the edges to get the chrome edges to show?
Also, there is a couple of bubbles in the chrome. Should I dig those out and fill it in with filler or what other things should I do?
Thanks for the advice all.
KO
What do you do, or how do you prep the side egg crates?
I just stripped all the paint on mine.
Do you just scuff it with sand paper and tape the edges and paint it?
Or do you paint the entire thing and wet sand the edges to get the chrome edges to show?
Also, there is a couple of bubbles in the chrome. Should I dig those out and fill it in with filler or what other things should I do?
Thanks for the advice all.
KO
 02-13-2014, 05:43 PM
#2
Race Director


I have a specific primer that I use for bonding to chrome....which has been discontinued. So I am very careful on how much I mix. I have heard that PPG epoxy primer is good to use...but I can not endorse it.
I aluminum oxide blast the area to be painted to give it some mechanical adhesion benefits.
And I have encountered the pits also...which I use my Dremel tool and a tip and clean them out and fill them in.
I mask off the edges that stay chrome and prime...then I unmask and prep that primer...re-mask and paint...and after the clear...I remove the tape again.
I have spent SEVERAL hours on these egg crate molding before...so do not be surprised. You can have quite a lot of time in getting the molding primed correctly...due to all the cut-outs and sides.
DUB
02-17-2014, 12:28 AM
#3
Burning Brakes
Thread Starter
I have a specific primer that I use for bonding to chrome....which has been discontinued. So I am very careful on how much I mix. I have heard that PPG epoxy primer is good to use...but I can not endorse it.
I aluminum oxide blast the area to be painted to give it some mechanical adhesion benefits.
And I have encountered the pits also...which I use my Dremel tool and a tip and clean them out and fill them in.
I mask off the edges that stay chrome and prime...then I unmask and prep that primer...re-mask and paint...and after the clear...I remove the tape again.
I have spent SEVERAL hours on these egg crate molding before...so do not be surprised. You can have quite a lot of time in getting the molding primed correctly...due to all the cut-outs and sides.
DUB
I aluminum oxide blast the area to be painted to give it some mechanical adhesion benefits.
And I have encountered the pits also...which I use my Dremel tool and a tip and clean them out and fill them in.
I mask off the edges that stay chrome and prime...then I unmask and prep that primer...re-mask and paint...and after the clear...I remove the tape again.
I have spent SEVERAL hours on these egg crate molding before...so do not be surprised. You can have quite a lot of time in getting the molding primed correctly...due to all the cut-outs and sides.
DUB
Thanks for the info. As far as filling in the pits, I have some old Bondo and some Evercoat Rage Xtreme. Do you recommend one over the other?
Also for taping the chrome edges off, I have both the blue 3M fine line tape and the green automotive tape. I would assume that the blue 3M would be better for this. Is there any reason to use the green tape? or does it even matter?
Thanks,
KO
02-17-2014, 05:15 PM
#4
Race Director
You can use the RAGE extreme and the blue tape. The green fine line has its uses...but the blue tape will work well...just watch how you tape the sharp corners because it can peel back if you stretch the tape AT ALL when making the curve.
DUB
DUB
02-20-2014, 09:02 PM
#5


I'm going to chime in on regards to the PPG epoxy primer. The DP was a great product, the DPLF is good but not quite as good as regular DP. the LF stands for lead free. For the primer to adhere properly the surface will need to be etched either by bead blasting or sanding, if not expect the epoxy to flake off. We did a set of chrome VW emblems with marginal results. What I like and have had great results with very little to NO prep is SEM Trim Black. This is on my 82 rocker panels with no more than a scotch brite scuff and is going strong.. I also have reconditioned all the window trim which is stainless and also used it on rear foot stays and pegs on a sport bike motorcycle with absolutely NO prep. All I did is wiped the dirt off with wax and grease remover and sprayed, two years later no peal ups or flakes. These are my opinions and experiences, DUB has great advice also...
02-21-2014, 06:04 PM
#6
Race Director
I'm going to chime in on regards to the PPG epoxy primer. The DP was a great product, the DPLF is good but not quite as good as regular DP. the LF stands for lead free. For the primer to adhere properly the surface will need to be etched either by bead blasting or sanding, if not expect the epoxy to flake off. We did a set of chrome VW emblems with marginal results. What I like and have had great results with very little to NO prep is SEM Trim Black. This is on my 82 rocker panels with no more than a scotch brite scuff and is going strong.. I also have reconditioned all the window trim which is stainless and also used it on rear foot stays and pegs on a sport bike motorcycle with absolutely NO prep. All I did is wiped the dirt off with wax and grease remover and sprayed, two years later no peal ups or flakes. These are my opinions and experiences, DUB has great advice also...
But I have to comment on stating that you are doing much of this with "NO prep" as you wrote.
I will get up with a guy I know personally who is involved with SEM and ask him about what chemicals are in this "trim black" and actually see if being an aerosol product(1K)...it has the "moxy" to actually chemically bond....because you stated you are not even abrading the surface. I am honestly skeptical that is has the required chemicals/acids for etching and covering in one step. I know I would not use it on the egg-crates at no cost and I LOVE SEM products....but they have their place.
I have repainted the stainless trim also and I have found that I have to remove it and etch it in the blast cabinet to get the etch primers something more to stick to...because I have seen the paint peel off of them several years down the road ( more than 2 years) when subjected to the environment and not garaged all the time.....which I know you did not state you did. The original stainless had a green-gray zinc-chromate type etch primer applied before it was painted black...and that stuff is hard to get due to the zinc-chromate in it...which the EPA is not fond of currently...along with other heavy metals.
NOW...I will be the first to admit when I am incorrect....because I do know there are 1K products that do etch a surface and allow for a good chemical bond.
Thanks for your post because it gives me something to look into and see if you might have found a product that I might have dismissed due to it being an aerosol paint...and actually test out and begin using with the same results you have experienced.
DUB
03-01-2014, 02:50 PM
#7
Pro


Hello kortens,
I just finished stripping my egg crates. What brand and type of paint are you using? I am going to prime mind like what dubs said.
Thanks,
Nelson007
QUOTE=kortensi;1586160173]Hey guys,
What do you do, or how do you prep the side egg crates?
I just stripped all the paint on mine.
Do you just scuff it with sand paper and tape the edges and paint it?
Or do you paint the entire thing and wet sand the edges to get the chrome edges to show?
Also, there is a couple of bubbles in the chrome. Should I dig those out and fill it in with filler or what other things should I do?
Thanks for the advice all.
KO[/QUOTE]
03-05-2014, 09:48 AM
#8
Burning Brakes
Thread Starter
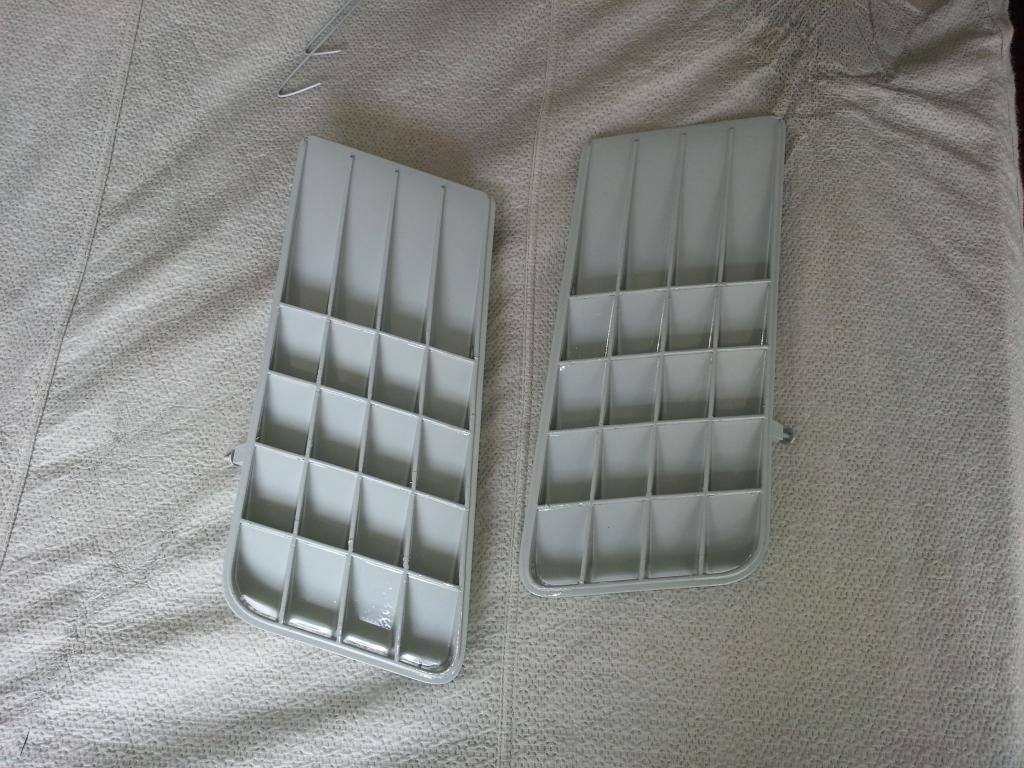
I taped all the edges first and then sanded with 180. It would have been easier to sand first and then tape, however, I was worried about messing up the chrome edges. I then cleaned them with a water based wax and grease remover. I then used the SPI Epoxy Primer. If it warms up enough here, I plan on shooting the 2K primer this afternoon.

KO


 03-05-2014, 01:26 PM
#9
Pro
That looks great. I know how long it takes to tape, i had to tape my 68 grills last year. I used the blue tape. Does it make a difference what tape to use?
Thanks,
Nelson 007
Thanks,
Nelson 007
I taped all the edges first and then sanded with 180. It would have been easier to sand first and then tape, however, I was worried about messing up the chrome edges. I then cleaned them with a water based wax and grease remover. I then used the SPI Epoxy Primer. If it warms up enough here, I plan on shooting the 2K primer this afternoon.
KO
KO
03-05-2014, 06:16 PM
#10
Race Director
Hate to be a "Debbie-downer".
For what it is worth...again...and I do not want anyone "back-tracking" and doing something over again...but go to POST#2 and read the second paragraph.
When dealing with a chrome surface that is to be painted. Adding ANY etching or roughness IS what you want for a primer to adhere...and is IN YOUR BEST INTEREST....and the more shine to can break into a dull finish is what you want due to not being able to obtain the correct primer that was used in the past when it could be applied directly onto shiny chrome and adhere. The primer I have can do just like what the original primer did....but I still etch the surface completely regardless...because I want the best possible adhesion. ESPECIALLY in the tight corners of this egg-crate. 100% dull finish when blasting is completed.
When I blast these egg-crates...I do it until there is NO SHINE in the chrome...and this includes the backside so I do not run into paint peeling from the back and creeping around to the front surface.
I...along with many of you...do not have the time to do this again in the future IF something were to "pop" off. (Experience talking there). I hate to write it, but they would have to be stripped and blasted and then re-shot. And yes...I use the blue vinyl 3M tape to protect the top edges of the chrome when blasting them...and keeping an eye on the tape when doing it.
Some areas of prep are REALLY, REALLY CRITICAL....and this is one of those areas...in my opinion. The same gpoes for teh upper trim for teh wiper door and teh top of the fneders....which are stainl;ess steel and they also get blasted to get them dull EXCEPT for teh thin portion of teh molding that remains shiny stainless.
****TIP*****
If any of you go and put that long trim molding for the wiper door into a blast cabinet to get it etched and dull. MAKE SURE YOUR BLAST NOZZLE TIP IS A GOOD DISTANCE AWAY FROM THE MOLDING. IF you go and try to blast it up close and get it done quickly...the air pressure and the media will warp the trim. SO doing it about 6-8 inches away will still allow the media to etch it and not warp it...it may take a bit of time to get it all dull...but you won't hurt the molding....and do not ask me how I KNOW THIS....because I guess you know already how I know this FACT. Certain areas of the car take time to prep so I do not have to try to fix something down the road.
If you do not have a blast cabinet...I know you know someone who does. Or there is a business that has one. TRUST ME...it would be worth the effort to do these parts as described...BUT...then again...what do I know.
DUB
03-10-2014, 11:37 PM
#11
Burning Brakes
Thread Starter
Hate to be a "Debbie-downer".
For what it is worth...again...and I do not want anyone "back-tracking" and doing something over again...but go to POST#2 and read the second paragraph.
When dealing with a chrome surface that is to be painted. Adding ANY etching or roughness IS what you want for a primer to adhere...and is IN YOUR BEST INTEREST....and the more shine to can break into a dull finish is what you want due to not being able to obtain the correct primer that was used in the past when it could be applied directly onto shiny chrome and adhere. The primer I have can do just like what the original primer did....but I still etch the surface completely regardless...because I want the best possible adhesion. ESPECIALLY in the tight corners of this egg-crate. 100% dull finish when blasting is completed.
When I blast these egg-crates...I do it until there is NO SHINE in the chrome...and this includes the backside so I do not run into paint peeling from the back and creeping around to the front surface.
I...along with many of you...do not have the time to do this again in the future IF something were to "pop" off. (Experience talking there). I hate to write it, but they would have to be stripped and blasted and then re-shot. And yes...I use the blue vinyl 3M tape to protect the top edges of the chrome when blasting them...and keeping an eye on the tape when doing it.
Some areas of prep are REALLY, REALLY CRITICAL....and this is one of those areas...in my opinion. The same gpoes for teh upper trim for teh wiper door and teh top of the fneders....which are stainl;ess steel and they also get blasted to get them dull EXCEPT for teh thin portion of teh molding that remains shiny stainless.
****TIP*****
If any of you go and put that long trim molding for the wiper door into a blast cabinet to get it etched and dull. MAKE SURE YOUR BLAST NOZZLE TIP IS A GOOD DISTANCE AWAY FROM THE MOLDING. IF you go and try to blast it up close and get it done quickly...the air pressure and the media will warp the trim. SO doing it about 6-8 inches away will still allow the media to etch it and not warp it...it may take a bit of time to get it all dull...but you won't hurt the molding....and do not ask me how I KNOW THIS....because I guess you know already how I know this FACT. Certain areas of the car take time to prep so I do not have to try to fix something down the road.
If you do not have a blast cabinet...I know you know someone who does. Or there is a business that has one. TRUST ME...it would be worth the effort to do these parts as described...BUT...then again...what do I know.
DUB
For what it is worth...again...and I do not want anyone "back-tracking" and doing something over again...but go to POST#2 and read the second paragraph.
When dealing with a chrome surface that is to be painted. Adding ANY etching or roughness IS what you want for a primer to adhere...and is IN YOUR BEST INTEREST....and the more shine to can break into a dull finish is what you want due to not being able to obtain the correct primer that was used in the past when it could be applied directly onto shiny chrome and adhere. The primer I have can do just like what the original primer did....but I still etch the surface completely regardless...because I want the best possible adhesion. ESPECIALLY in the tight corners of this egg-crate. 100% dull finish when blasting is completed.
When I blast these egg-crates...I do it until there is NO SHINE in the chrome...and this includes the backside so I do not run into paint peeling from the back and creeping around to the front surface.
I...along with many of you...do not have the time to do this again in the future IF something were to "pop" off. (Experience talking there). I hate to write it, but they would have to be stripped and blasted and then re-shot. And yes...I use the blue vinyl 3M tape to protect the top edges of the chrome when blasting them...and keeping an eye on the tape when doing it.
Some areas of prep are REALLY, REALLY CRITICAL....and this is one of those areas...in my opinion. The same gpoes for teh upper trim for teh wiper door and teh top of the fneders....which are stainl;ess steel and they also get blasted to get them dull EXCEPT for teh thin portion of teh molding that remains shiny stainless.
****TIP*****
If any of you go and put that long trim molding for the wiper door into a blast cabinet to get it etched and dull. MAKE SURE YOUR BLAST NOZZLE TIP IS A GOOD DISTANCE AWAY FROM THE MOLDING. IF you go and try to blast it up close and get it done quickly...the air pressure and the media will warp the trim. SO doing it about 6-8 inches away will still allow the media to etch it and not warp it...it may take a bit of time to get it all dull...but you won't hurt the molding....and do not ask me how I KNOW THIS....because I guess you know already how I know this FACT. Certain areas of the car take time to prep so I do not have to try to fix something down the road.
If you do not have a blast cabinet...I know you know someone who does. Or there is a business that has one. TRUST ME...it would be worth the effort to do these parts as described...BUT...then again...what do I know.
DUB
Thanks Dub.
My sandblaster is dead (harbor freight). A buddy at work has one that said I can use it. I hope to get over to his place tomorrow.
KO
03-11-2014, 05:51 PM
#12
Race Director
I use 80 grit aluminum oxide....and it "frosts" the chrome very well and gives it a really good surface for epoxy to grip onto. Just make sure that you clean it very well after you blast it.
These "egg crates" will allow you to get up somewhat close to it so you can get inside all of the "nooks and crannies". Test it on teh backside first to make sure ti is going to do what you want it to do.
If you are doing your stainless steel trim for the wiper door and upper fender trims...make sure that you do the one for the wiper door at a distance and take you time and keep moving the gun across it instead of staying in just one spot. PATIENCE here pays off on this molding trim. It may take a little while...but like I always tell the guys who have worked for me...."The time spent now prepping these parts correctly will easily out weigh a poor prep job and a paint failure and taking the time to re-do it all over again." Spending 2 hours... for example.... is NOTHING compared to having to have to do it again...where 2 hours will be a "drop in a bucket".
DUB

