Mounting this rear bumper (w/pics)...
 07-04-2009, 03:56 PM
#1
Pro

Thread Starter

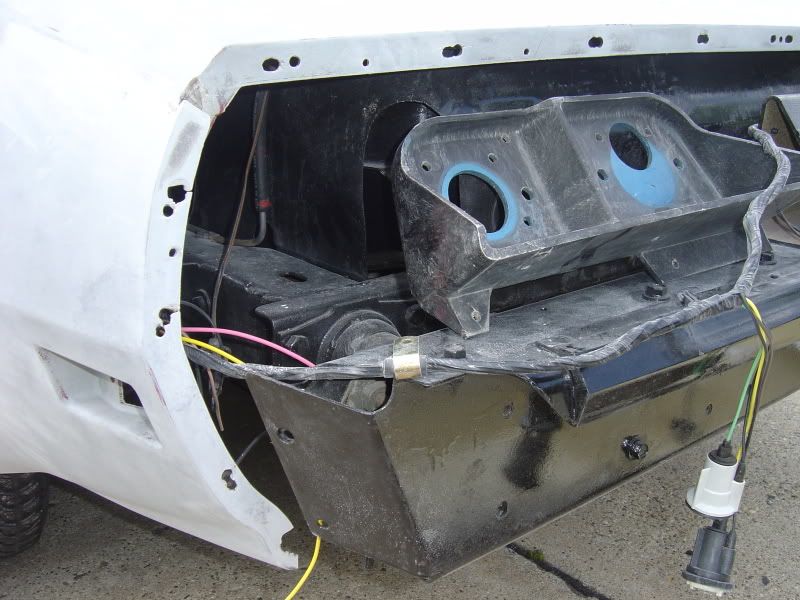
I could really use some step-by-step help with this. I have a '77 and a new 80's style ACI fiberglass bumper. The plan is to glass-in the seams but I just want to first make sure I have the proper materials and then if someone could offer some mounting advice and any tools needed, that would be EXTREMELY helpful!
One question I do have too is if the taillight mounting plastic brackets are required if I am bolting, gluing and glassing-in this bumper?
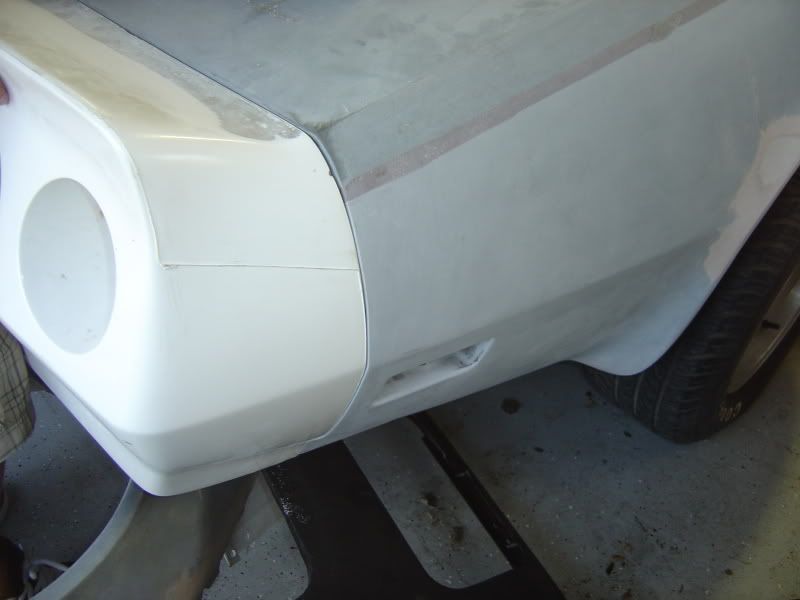
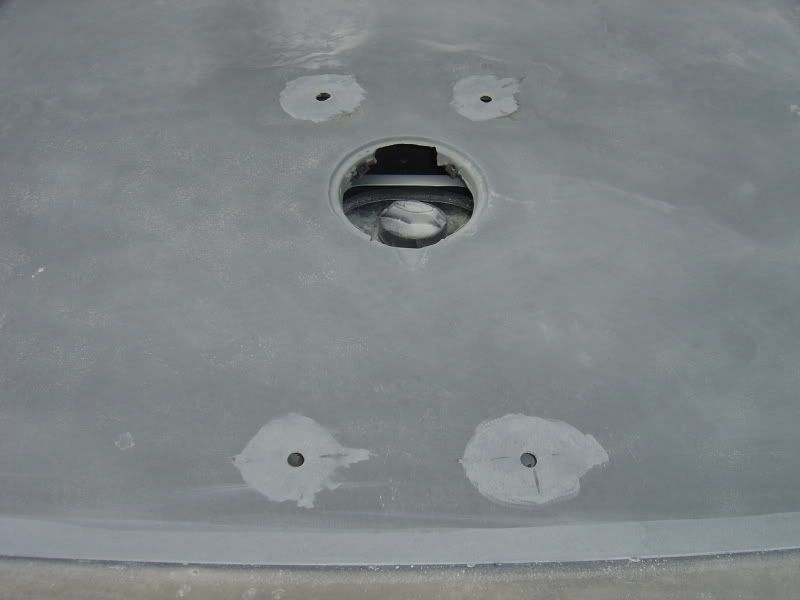
Here is the bumper and another pic of the brackets and rear mounting flange of the car:

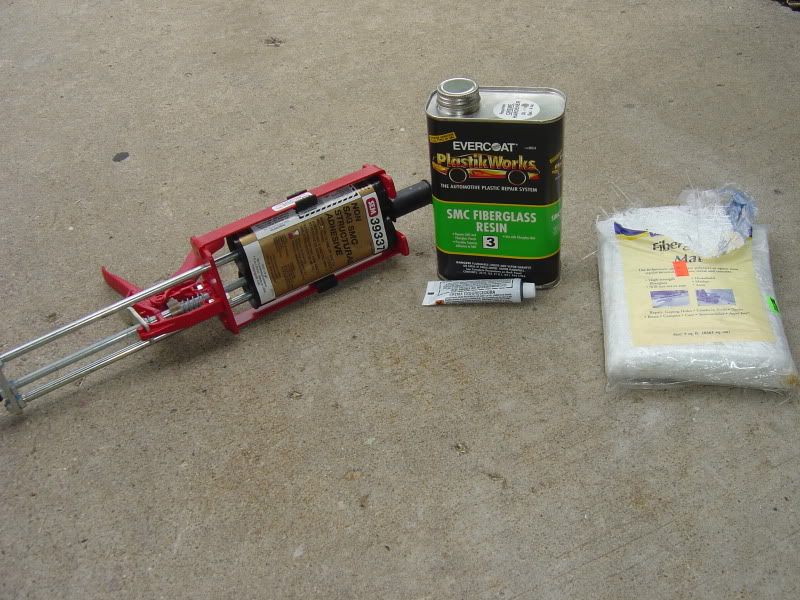
Here are the materials:
One question I do have too is if the taillight mounting plastic brackets are required if I am bolting, gluing and glassing-in this bumper?
Here is the bumper and another pic of the brackets and rear mounting flange of the car:
Here are the materials:
 07-08-2009, 10:40 AM
#2
Drifting

If you are going to bond the bumper to the body you don't need the tail light brackets and you also need to remove the rubber cushion on the reinforcement shown in the photo. I would leave the reinforcement in place for crash protection.
Here is a high level procedure, open for questions.
I would use 3M 8115 adhesive for the bonding because it is paintable and contains glass beads. This means that the product is stable under paint and the glass beads allow it to be clamped without squeezing all the adhesive out. The SEM you show is not paintable which means it could expand and contract with temperature swings causing surface problems at the bond joint such as lifting or sinking and could eventually crack the filler and paint. Your resin and cloth choice are okay.
You need to secure the bumper to the body during bonding for alignment and securement reasons. Once the adhesive starts to cure, the bumper will not move and you are stuck with the fit. Your body mounting holes are too large and worn out for good alignment so you need to make new holes that are the same size as the fasteners to lock the bumper in position while the adhesive cures. Make a template from poster board to transfer the new hole locations from the bumper to the body. 3 holes across the top and 2 on each side at the body flex points.
You want to mount the bumper about 1/16" to 1/8" lower than the the rear deck so that you can transition the body shape easier from the rear deck to the bumper. The bumpers are molded narrower than the body for better fit, your body has been repaired so if the body is narrower, let me know. If the bumper is wider, it will be impossible to transition the quarter panels into the bumper smoothly.
Carefully grind out your old quarter panel bonding strip filler before you start since you'll be filling these with glass at the same time. Make sure all the gel coat is removed from the bumper in the mounting area and beyond several inches.
After the bumper is bonded, clean up the adhesive at the seam and prepare for the resin and mat. "V" the seam about 1" wide and lay 2 layers of fiberglass mat across. A narrow strip set in the "V" followed by a wider strip extending into the panels. The rear deck is wide so make sure to spread evenly to eliminate high spots.
Before applying filler run a block accross the surface and remove any high spots. Evercoat Rage Extreme works well for the final filling.
Fit your tail lights and license light before you bond the bumper to the body. You will have to notch the reinforcement for license light clearance.
07-09-2009, 09:27 PM
#3
Pro
Thread Starter
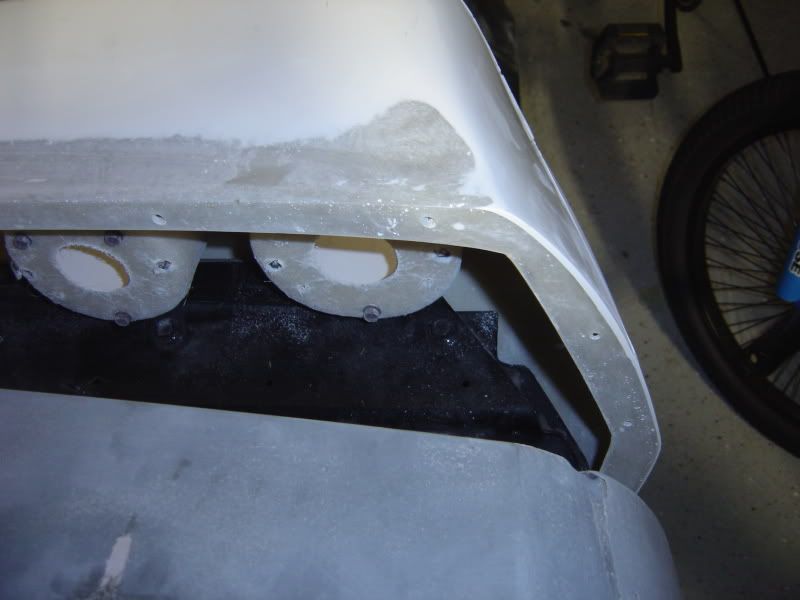
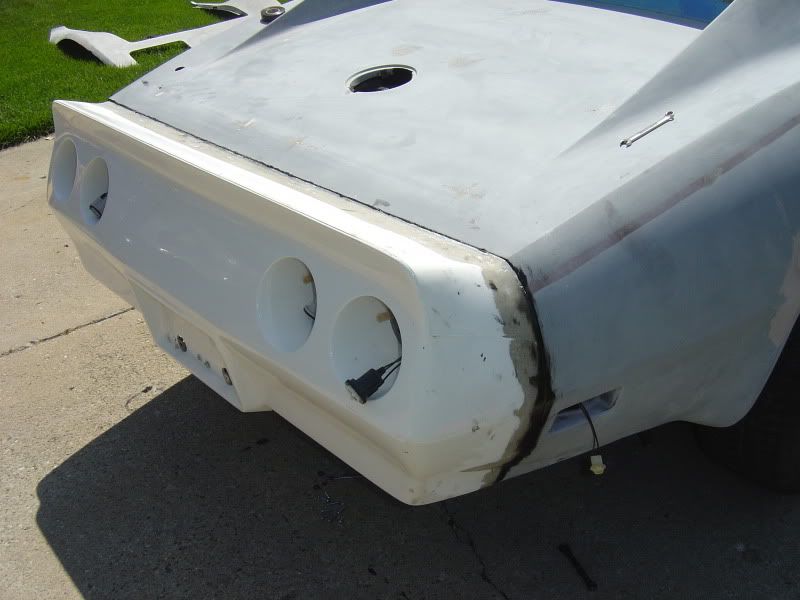
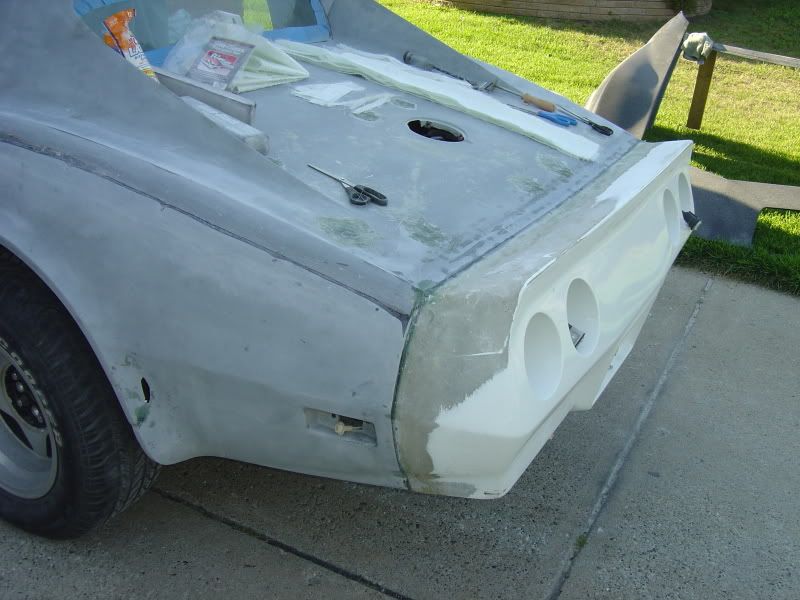
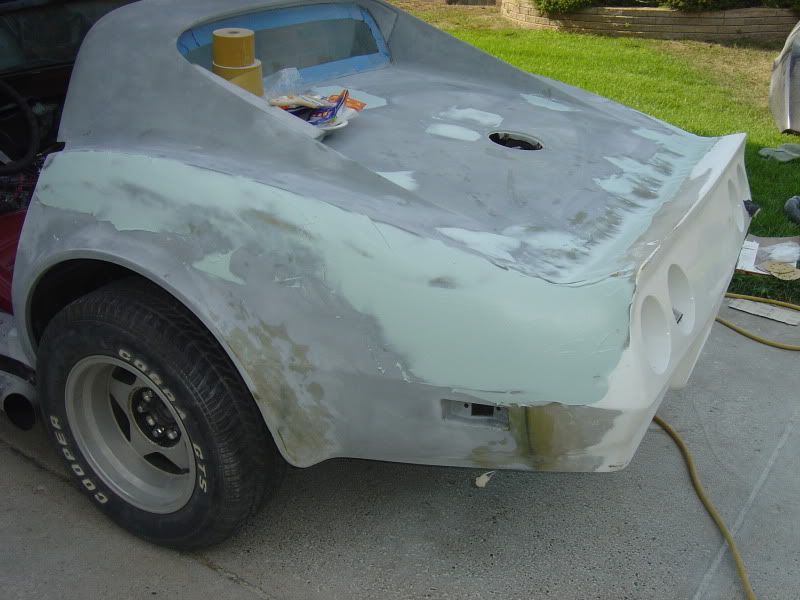
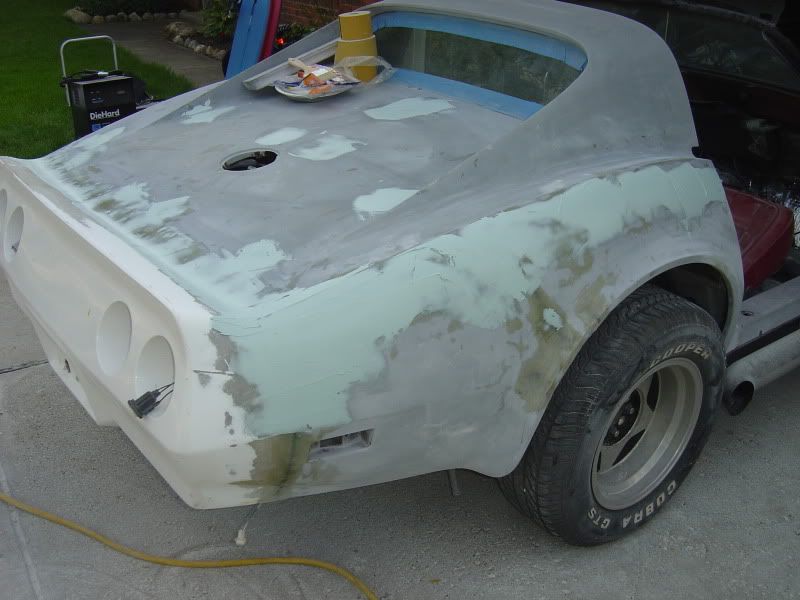
OK, I still have more sanding but heres where I'm at today:
I will plan to sell the brackets & remove rubber strip.
The 8115 Adhesive is in stock at GNE for $45 but I need to confirm if my gun will fit this new 2-part adhesive tube. Probably not so this may end up being another $90.
I bought general #10 fasteners along with fender washers and nuts. I will probably need to "D" shape these before assy. I'll make the templates and drill the holes when I mount the bumper this weekend. Brian (Onaqwst) has offered to come by and help.
Generally, the new bumper seems smaller, including all the rear-light pockets. I cut all the holes into the bumper except the plate light. I think I'm missing a bracket and I don't think it protrudes down so you can see the bulb. Anyone want to offer a pic of looking upward into the pocket (please)?
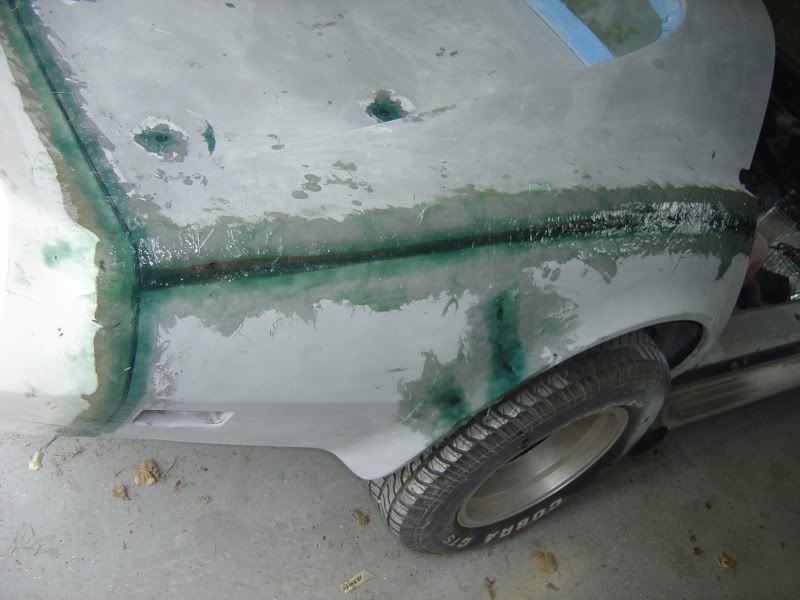
The bottom LH side is about 1/2 inch apart. I beleive the bottom left quarter has been replaced and is actually inboard of where its supposed to be. You can see this in the pics below. The body side is a bit flimsy so I think we'll be OK if we "pursuede" it into position.
Why would we fill the bonding strip channels with glass? I thought you just use a filler (Rage Extreme) for the channels? I also found the min 1-gallon Evercoat in stock at GNE for $65.
How deep should the "V" groove be? (1" wide x ?).

I will plan to sell the brackets & remove rubber strip.
The 8115 Adhesive is in stock at GNE for $45 but I need to confirm if my gun will fit this new 2-part adhesive tube. Probably not so this may end up being another $90.
I bought general #10 fasteners along with fender washers and nuts. I will probably need to "D" shape these before assy. I'll make the templates and drill the holes when I mount the bumper this weekend. Brian (Onaqwst) has offered to come by and help.
Generally, the new bumper seems smaller, including all the rear-light pockets. I cut all the holes into the bumper except the plate light. I think I'm missing a bracket and I don't think it protrudes down so you can see the bulb. Anyone want to offer a pic of looking upward into the pocket (please)?
The bottom LH side is about 1/2 inch apart. I beleive the bottom left quarter has been replaced and is actually inboard of where its supposed to be. You can see this in the pics below. The body side is a bit flimsy so I think we'll be OK if we "pursuede" it into position.
Why would we fill the bonding strip channels with glass? I thought you just use a filler (Rage Extreme) for the channels? I also found the min 1-gallon Evercoat in stock at GNE for $65.
How deep should the "V" groove be? (1" wide x ?).

 07-10-2009, 07:43 AM
#5
Drifting
I cut all the holes into the bumper except the plate light. I think I'm missing a bracket and I don't think it protrudes down so you can see the bulb.
Why would we fill the bonding strip channels with glass? I thought you just use a filler (Rage Extreme) for the channels? I also found the min 1-gallon Evercoat in stock at GNE for $65.
How deep should the "V" groove be? (1" wide x ?).
Why would we fill the bonding strip channels with glass? I thought you just use a filler (Rage Extreme) for the channels? I also found the min 1-gallon Evercoat in stock at GNE for $65.
How deep should the "V" groove be? (1" wide x ?).
If you leave the old factory filler or redo the bonding strips with fresh body filler it will shrink and one day down the road it will crack. Removing the factory filler and glassing the seams is permanent and there will be no signs of the seam after the car is painted provided you take time to block sand the seams. The drawback of glassing is future panel replacement since the panels will no longer separate at the seam.
The "V" should be 1/2 the thickness of the panels. You can make it wider, it just needs to be wide enough to lay glass over the seam so that the seam does not come back to haunt you one day.
The bumper fit looks good enough to bond. The adhesive will fill gaps up to 3/16". Snug it against the body before you bond it and check the gaps and fit especially accross the rear deck. Don't overtighten the bolts when you bond it.
Once you block the new glass then it's ready for epoxy primer and body filler so you'll need the whole back end ready for priming.
07-12-2009, 09:08 AM
#6
Pro
Thread Starter
I got the goods - Rage Extreme w/blue hardener & the 3M-8115 Adhesive. LUCKILY, my gun did work with the dual tubes.
I finished sanding the bonding areas for both parts w/80 grit and cleaned. As for the fasteners, I was worried that i would not be able to get access inside the bumper to hold the other end during tightening and the metal retainers seemed to actually fit into the most of the smaller holes on the body. We used these retainers and pre-assembled the nuts so that we could pull the bumper back about 1/2". Squeezed the adhesive in and spead it around then tightened (not too tight).
THE GOOD: Brians (Onaqwst) help and a good fit on the passenger side & along the top deck.
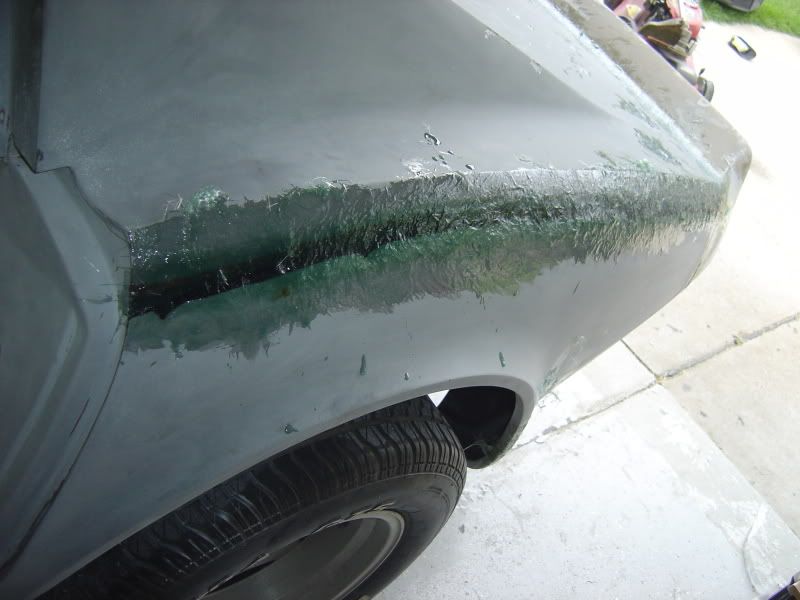
THE BAD: We forced a good fit to the bottom drivers side but the top corner of the bumper is inboard about 3/8". We figured we would glass & fill-in on the bumper transitioning rearward. That LH rear quarter has difinately been replaced and didn't want to line-up unless we caused a bunch of other fit issues elsewhere. Also, it was hot & sunny and seemed like the adhesive wanted to start curing within 10 min instead of the 90 min advertised time.
Next steps this week? Grind out the seem channels and sand some more on the rear (after I get a palm sander). Brian is going to come over next weekend to help with the glass-work. Am I OK with using an old brush for the fiberglass, or should I get a roller? We'll also plan to fill-in the holes on top of the rear deck. I'll update my other posts when we do this.
I finished sanding the bonding areas for both parts w/80 grit and cleaned. As for the fasteners, I was worried that i would not be able to get access inside the bumper to hold the other end during tightening and the metal retainers seemed to actually fit into the most of the smaller holes on the body. We used these retainers and pre-assembled the nuts so that we could pull the bumper back about 1/2". Squeezed the adhesive in and spead it around then tightened (not too tight).
THE GOOD: Brians (Onaqwst) help
and a good fit on the passenger side & along the top deck.THE BAD: We forced a good fit to the bottom drivers side but the top corner of the bumper is inboard about 3/8". We figured we would glass & fill-in on the bumper transitioning rearward. That LH rear quarter has difinately been replaced and didn't want to line-up unless we caused a bunch of other fit issues elsewhere. Also, it was hot & sunny and seemed like the adhesive wanted to start curing within 10 min instead of the 90 min advertised time.
Next steps this week? Grind out the seem channels and sand some more on the rear (after I get a palm sander). Brian is going to come over next weekend to help with the glass-work. Am I OK with using an old brush for the fiberglass, or should I get a roller? We'll also plan to fill-in the holes on top of the rear deck. I'll update my other posts when we do this.
07-12-2009, 10:50 AM
#7
Drifting
As long as the bumper is inboard of the quarter panels and below the upper deck you'll be okay. This kind of fit makes the transition from body to bumper easier. It looks like you forgot to clean the filler out of the bonding strips. This would have been easier at the rear without the bumper in place but needs to be done before you start fiberglassing the bumper seam. I am also concerned that the adhesive started to cure before you were fully clamped. You may not achieve the full shear strength if some areas were partially cured before you clamped. Make sure to use resins, adhesives, and fillers in the shade.
07-12-2009, 11:21 AM
#8
Le Mans Master

once we 'v' the rear bumper in, i think we should be ok with the bonding/etc. we will be working on the bonding strips next week and will 'v' those in also.
07-13-2009, 10:43 AM
#9
Pro
Thread Starter
In the shade - noted... The adhesive didn't cure too much. The excess was squeezing out and dripping down a bit during tightening. Once we were done, the skin of the adhesive beading was a little hard but you could easily put your finger into it.
I'll post some updates and pics this weekend when we do the "V"'ing & glass work (in the shade)!
I'll post some updates and pics this weekend when we do the "V"'ing & glass work (in the shade)!
07-19-2009, 08:45 AM
#10
Pro
Thread Starter
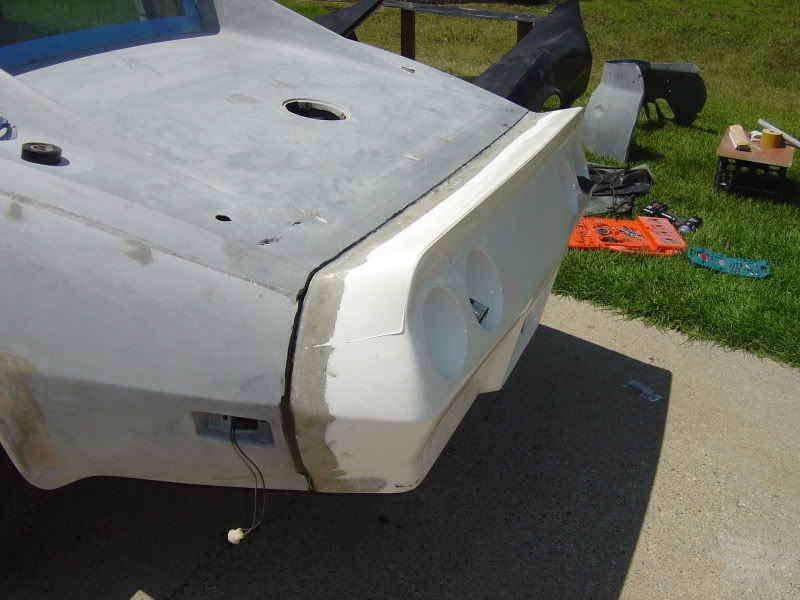
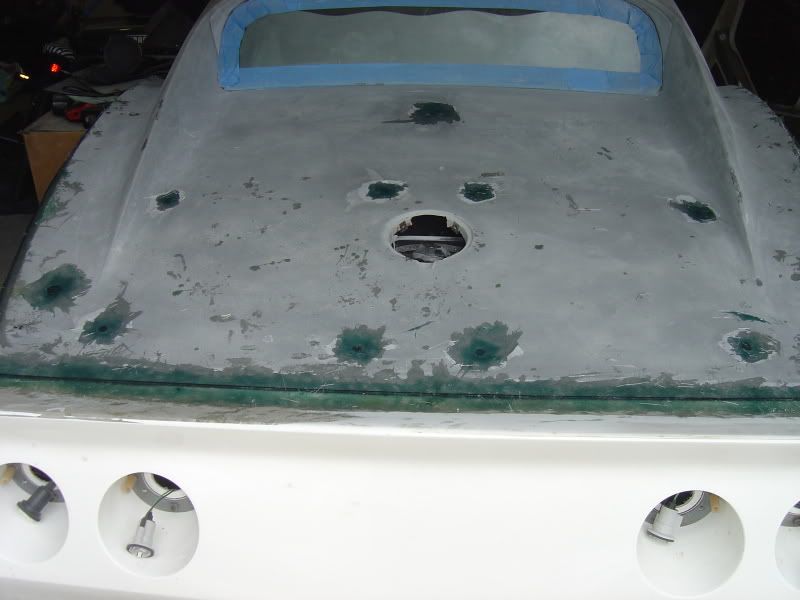
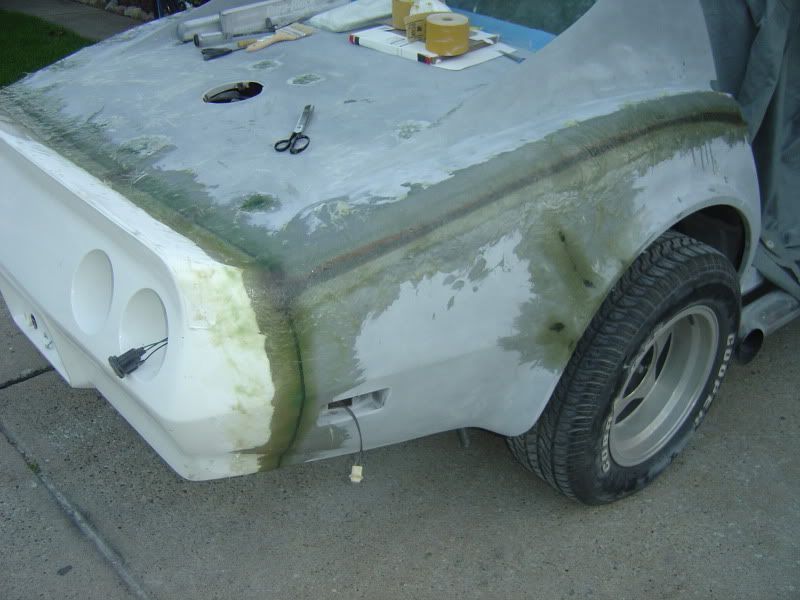
Yesterday Brian and I ground-out the seam channels on the sides & feathered in a "v" slopes around the bumper, channels & top holes.
After that, we glassed in everything. Due to poor planning on my part, we got 2-layers of glass & resin on the channels, top holes and on the rear quarter cracks but only 1-layer around the rear bumper periphery due to running out of resin.
Questions:
1.) Anything against simply going back and add another layer of mat & resin around the bumper seam? The resin will be partially cured (2-days).
2.) I'm noticing some "suck-back" or dimpling in the holes, even a little bit of concave valleys in the channels. Should I put some drops of resin in those valley's to get a concave surface to sand on? Or, do we sand flat & fill with the Rage Extreme as needed. I put resin & fiberglass on the backside of the larger antenna hole but we didn't have access to the smaller rack ones.
07-19-2009, 04:16 PM
#11
Le Mans Master
once we layer it up a few more times we should be good. i wish that resin would setup/cure faster though. i think i layered my bumpers about 4-5 times total then figure sanding/filling/etc
b
b

 07-30-2009, 05:51 PM
#13
Pro
Thread Starter
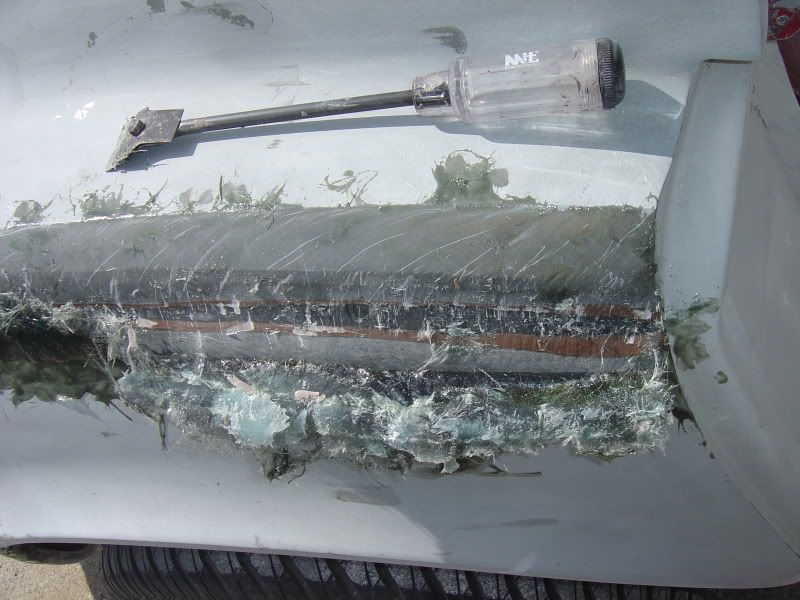
So those of you that saw my "Soft Curing" post, we had a little set-back - the resin never hardened... Two things may have happened, first the resin & hardener I had was almost a year old after I opened them (shelf-life?) and secondly I simply didn't use enough hardener. Anyways... here is what I took off after buying a new gallon of resin & new hardener:
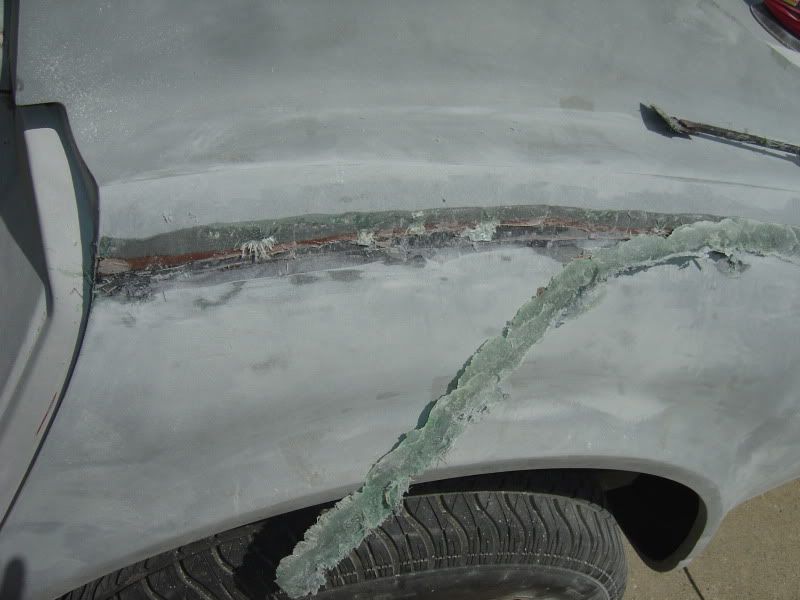
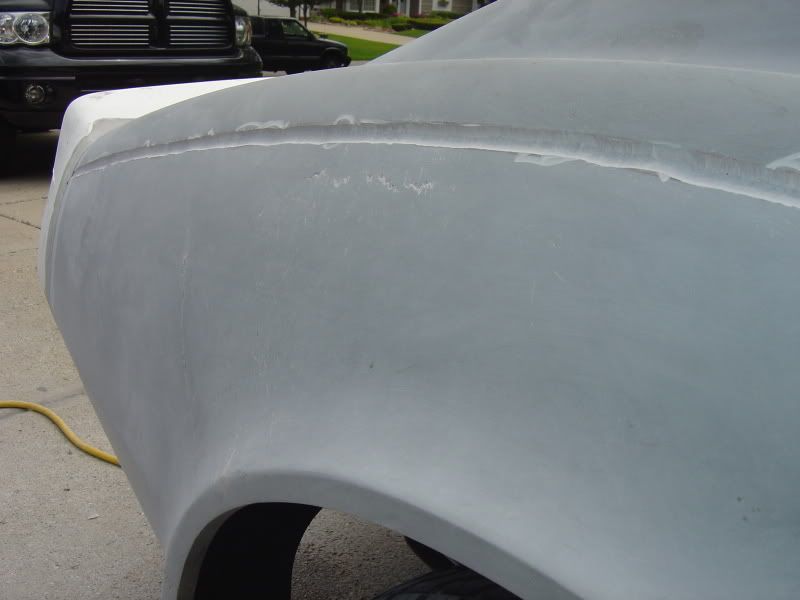
Here is the redo. It started curing after just an hour and was pretty cured by morning. We plan to sand/scuff a bit if necessary to fill-in some valley's.

Here is the redo. It started curing after just an hour and was pretty cured by morning. We plan to sand/scuff a bit if necessary to fill-in some valley's.
08-02-2009, 10:01 PM
#14
Pro
Thread Starter
Just an update - after we sanded and roughed up this layer of glass, we added one more layer around the seams & channels. After that cured, a bunch more hours sanding. It definately sounds good to add fiberglass to strengthen everything up until it comes time to sand it off...
We mixed up a batch of the Evercoat Rage w/hardener and only applied around the top. Somewhat of a test - just want to make sure I don't have anymore soft-curing issues. Any technique recommendations? Anything we're missing? This stuff seems like it will be easier for sanding.
What grit do you use for final sanding prior to primer?
08-04-2009, 01:59 AM
#17
Pro
Member Since: Apr 2008
Location: Wichita Kansas
Posts: 538
Likes: 0
Received 0 Likes
on
0 Posts

You did the right thing by taking off the bad batch of glass! More work now but happier later. I try to use the concept the "If I have to ask the question, I probably already know the answer". Looks good, keep after it and keep using good judgement.
08-04-2009, 05:12 PM
#18
Instructor

I'd put rear wheel flares on it now since you've got everything there already.
what you call 'harderner' is reffered to as catalyst (MEKP)
it has a shelf life of 3 to 6 months depending on temperature. I keep mine in the fridge so it won't go bad. It would have gotten hard eventually, maybe in a few months :-)
what you call 'harderner' is reffered to as catalyst (MEKP)
it has a shelf life of 3 to 6 months depending on temperature. I keep mine in the fridge so it won't go bad. It would have gotten hard eventually, maybe in a few months :-)
08-10-2009, 08:47 PM
#19
Race Director


Depends on the primer. We used K36 on mine which has some build to it and that one takes 80 grit for the first coat of primer. It gets blocked with 220 wet, then a second coat of primer is blocked to 400 wet. At that paint the primer actually has a shine to it and looks perfectly even.
BTW, sorry for not seeing this thread until now but you would have saved a lot of time if you had run a tape line below and above the seam and also masked it off. You can then use a grinder and make short work of cutting the seam down until you hit the tape. That way you know the new glass is level with the panel and you need much less filler.
Here's what it looks like:

And here's what it looked like ready for first coat of primer. Yes, that's all the filler that is on it... basically none...

BTW, sorry for not seeing this thread until now but you would have saved a lot of time if you had run a tape line below and above the seam and also masked it off. You can then use a grinder and make short work of cutting the seam down until you hit the tape. That way you know the new glass is level with the panel and you need much less filler.
Here's what it looks like:
And here's what it looked like ready for first coat of primer. Yes, that's all the filler that is on it... basically none...
08-15-2009, 07:53 AM
#20
Pro
Thread Starter
Question:
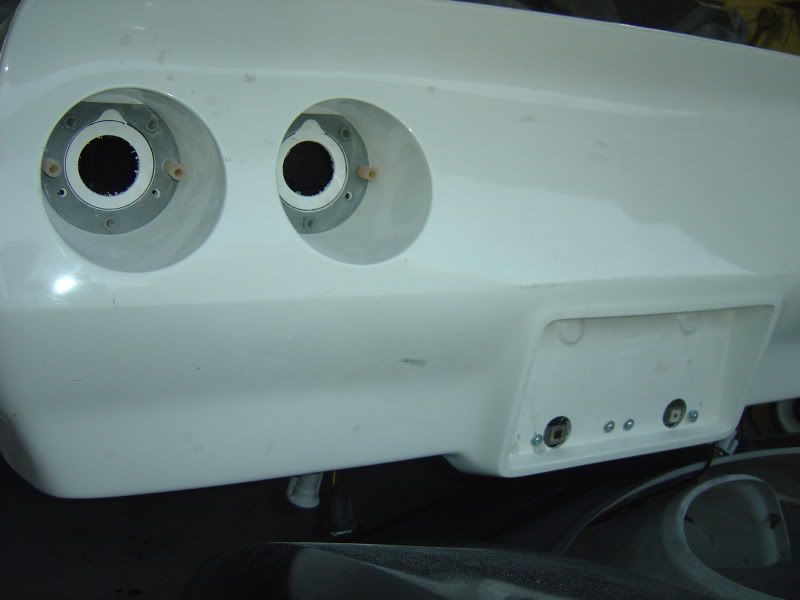
Can I paint over the white gel-coating you see on the rear bumper? It will be sanded smooth. I am planing on a PPG Epoxy Primer.
I also have this same condition for my 1-pc front clip. It came from Vanacor and is black gel-coated.
Can I paint over the white gel-coating you see on the rear bumper? It will be sanded smooth. I am planing on a PPG Epoxy Primer.
I also have this same condition for my 1-pc front clip. It came from Vanacor and is black gel-coated.