How to Use Photobucket & Post Photos here - Tutorial Inside
 03-16-2006, 04:31 PM
#1
Safety Car

Thread Starter


This is the second tutorial I have made. This assumes that you have already registered for photobucket, and are logged in. All of that is covered in that tutorial, HERE.
2/12/08 - UPDATE: I have compiled a PDF download if anyone is interested in it of this tutorial that will print pretty nicely. I do know that this guide is a little out of date, but I will update it again soon. Anyhow, here is the LINK.
Step One
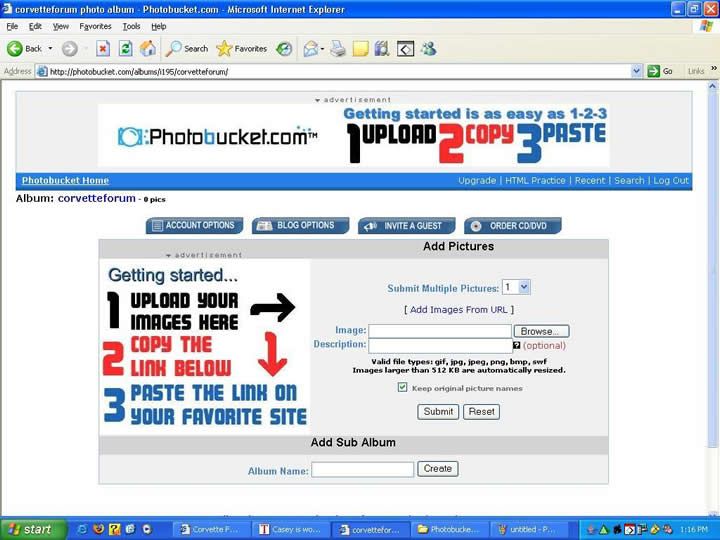
This is what your main page should look like:
Step Two
Now that you are at your Photobucket main page, here you can create folders (called subalbums) to keep your picture collection neat. This is also where you go to upload your pictures. First we’ll go over how to create the subalbums.
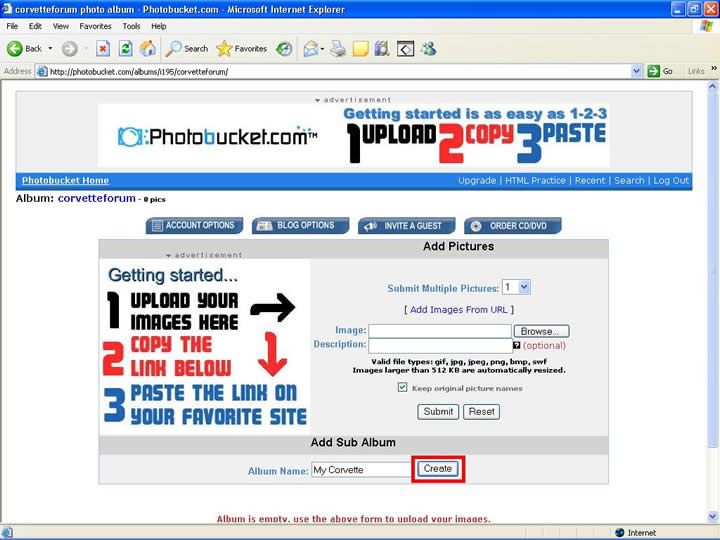
Type in the box whatever you want to call that folder. Then click create.
Step Three
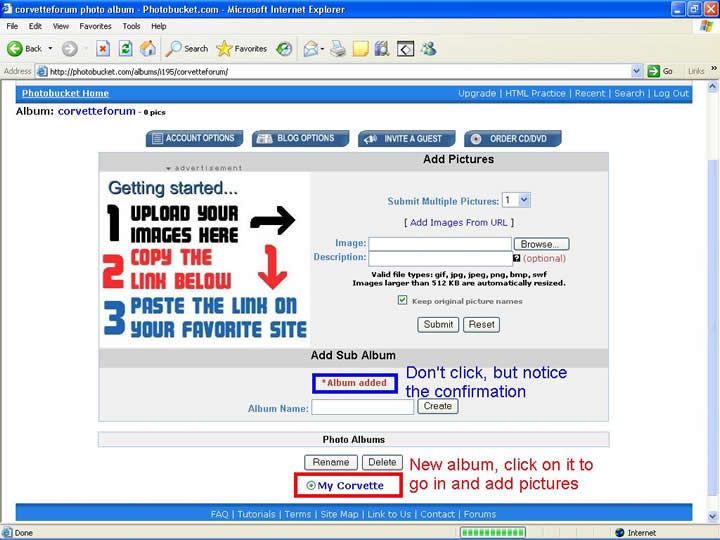
This is a picture showing that it went through and created the folder:
Step Four
Now that you know how to create subalbums, now I'm going to show you how to upload photos. There is a box that has a number in it, that corresponds with how many blanks there are to upload pictures with. Use it whenever you have more than 1 picture to upload, it just goes quicker.
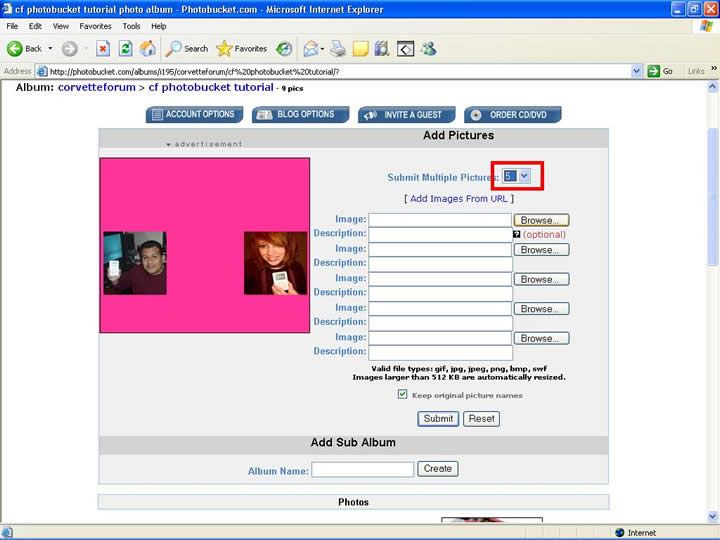
Step Five
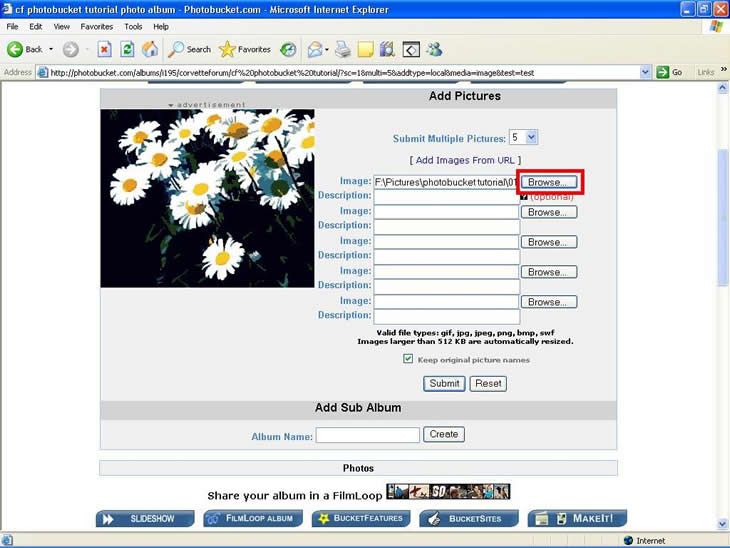
Now click browse, and find where your picture is, and double click the picture. Here is a picture showing that the text box next to the browse button should now be filled with text, that should be the file path where the picture is. Repeat this with the other unused lines to upload more than one picture. Once you have as many as you can (up to 10 uploads a page) or as many as you want, click "Submit".
It will take a minute to upload, just let it be and it'll go just fine.
Step Six
After it's done it will bring you back to the page, and say that they were uploaded successfully. Scroll down that page and you'll see something similar to this:
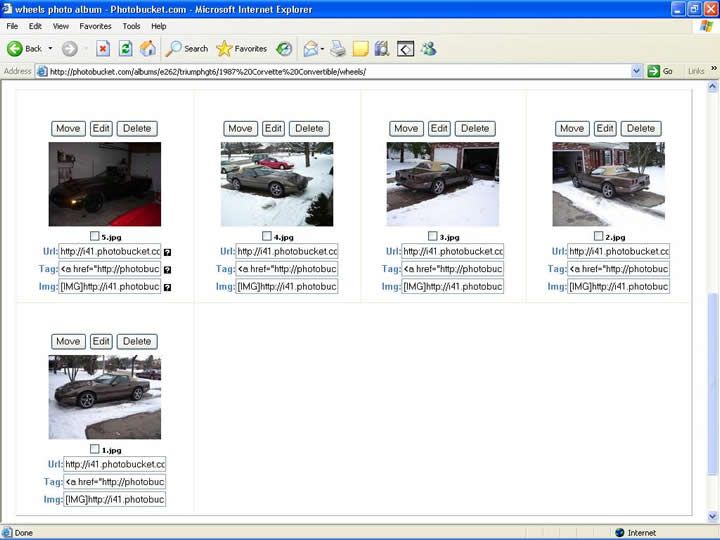
NOTE - It doesn't rename your stuff, I just happened to name my images 1, 2, 3, 4 & 5.
Step Seven
Go to the IMG text box underneath the picture you want to show off at CF. Click it so it all turns blue, or highlight it all. Then right click it and click copy. This will copy this text out of that box.

Step Eight
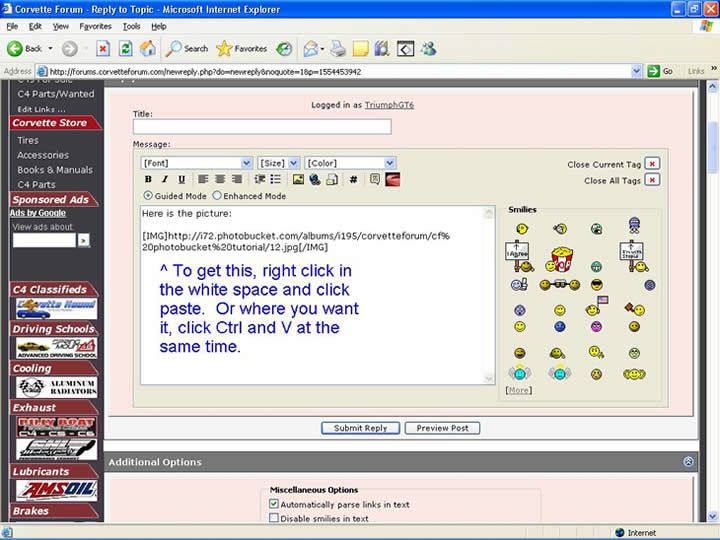
Go open a window and go to the corvetteforum if you haven't already. In the post you want to put the image, just paste that text, nothing special, just paste the text in.
Step Nine
Once you finish typing your message, click "Preview Post". Do this to make sure that nothing is wrong with the picture. If it won't show up, try copying the image location from photobucket again (step seven) and repasting it at corvetteforum. If it goes fine (which it usually does), then click submit post and it'll post for all to see.
Any ideas welcome about improvement of this.
GT6
2/12/08 - UPDATE: I have compiled a PDF download if anyone is interested in it of this tutorial that will print pretty nicely. I do know that this guide is a little out of date, but I will update it again soon. Anyhow, here is the LINK.
Step One
This is what your main page should look like:
Step Two
Now that you are at your Photobucket main page, here you can create folders (called subalbums) to keep your picture collection neat. This is also where you go to upload your pictures. First we’ll go over how to create the subalbums.
Type in the box whatever you want to call that folder. Then click create.
Step Three
This is a picture showing that it went through and created the folder:
Step Four
Now that you know how to create subalbums, now I'm going to show you how to upload photos. There is a box that has a number in it, that corresponds with how many blanks there are to upload pictures with. Use it whenever you have more than 1 picture to upload, it just goes quicker.
Step Five
Now click browse, and find where your picture is, and double click the picture. Here is a picture showing that the text box next to the browse button should now be filled with text, that should be the file path where the picture is. Repeat this with the other unused lines to upload more than one picture. Once you have as many as you can (up to 10 uploads a page) or as many as you want, click "Submit".
It will take a minute to upload, just let it be and it'll go just fine.
Step Six
After it's done it will bring you back to the page, and say that they were uploaded successfully. Scroll down that page and you'll see something similar to this:
NOTE - It doesn't rename your stuff, I just happened to name my images 1, 2, 3, 4 & 5.
Step Seven
Go to the IMG text box underneath the picture you want to show off at CF. Click it so it all turns blue, or highlight it all. Then right click it and click copy. This will copy this text out of that box.
Step Eight
Go open a window and go to the corvetteforum if you haven't already. In the post you want to put the image, just paste that text, nothing special, just paste the text in.
Step Nine
Once you finish typing your message, click "Preview Post". Do this to make sure that nothing is wrong with the picture. If it won't show up, try copying the image location from photobucket again (step seven) and repasting it at corvetteforum. If it goes fine (which it usually does), then click submit post and it'll post for all to see.
Any ideas welcome about improvement of this.
GT6
Last edited by 80sRule; 02-12-2008 at 01:02 AM.


 05-03-2006, 10:21 AM
#3
Advanced


 08-01-2006, 08:22 PM
#14
Large Impressive Member

Member Since: Jul 2003
Location: Good health is merely the slowest possible rate at which one can die
Posts: 65,789
Received 68 Likes
on
34 Posts
St. Jude Donor '04-'05-'06-'07

If you made it possible for me, you've accomplished something!  Piece of cake.

Piece of cake.


 09-18-2006, 10:01 PM
#18
Instructor
Member Since: Apr 2006
Location: Nolensville Tennessee
Posts: 129
Likes: 0
Received 0 Likes
on
0 Posts
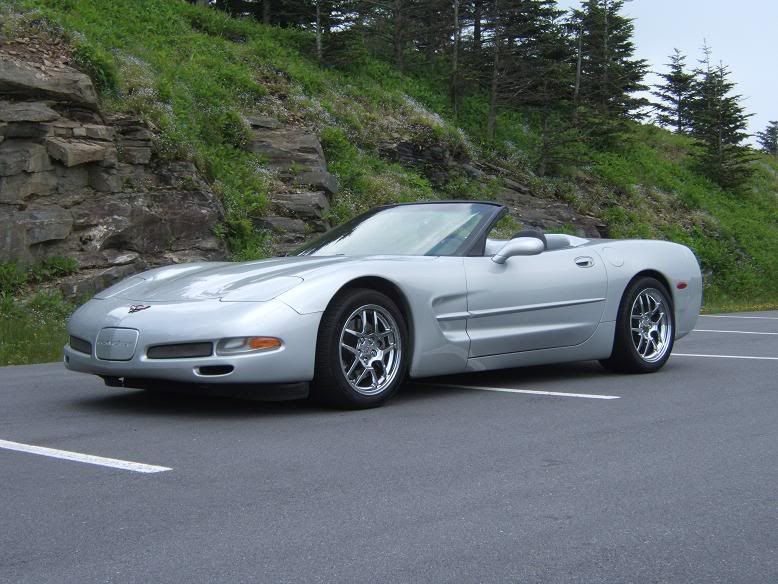
Thanks for posting the instructions on how to post pictures. Here is a sample that I will use for the covered bridge tour.