
BK Harness Bar and Sub-Mount Install
 02-26-2006, 01:48 PM
#1
Team Owner

Thread Starter
Member Since: Jul 2004
Location: NJ
Posts: 24,652
Received 297 Likes
on
94 Posts
St. Jude Donor '05-'08

Installation of BK Harness Bar and Sub Mounts
After looking all over I did not see a total write-up of how to install the BK Harness Bar and Sub Mounts. I decided that write one up to help others. If you take a minute to read this it will save you time in the long run.
If someone reads this and finds something wrong please tell me and I will fix my write-up and fix my set-up.
If you are doing both the Harness Bar and the Sub Mounts I suggest starting with the mounts first then the Harness Bar and then the Side Bars. This will stop any rework that you would have if you did the harness bar and the side poles first since you have to remove the seat to do the sub mounts.
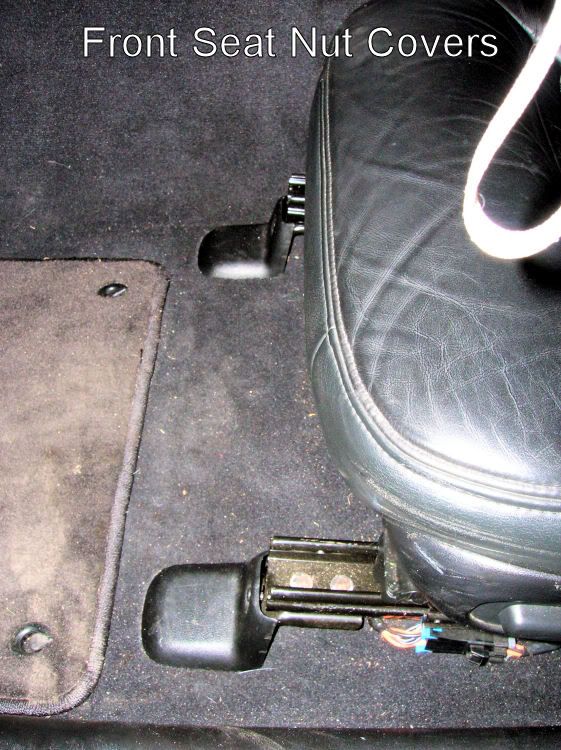
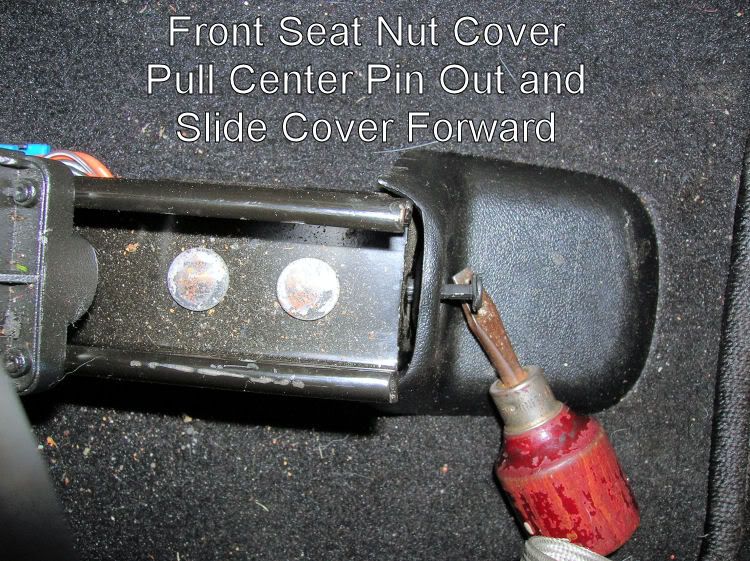
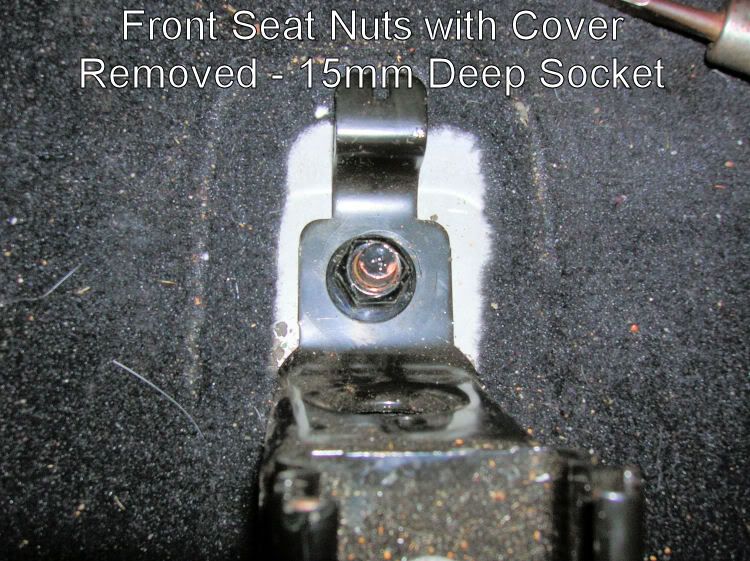
1. The first step is to remove the seat on both sides. This is very easy to do since there are only 4 15mm nuts holding the seat to the seat bracket.
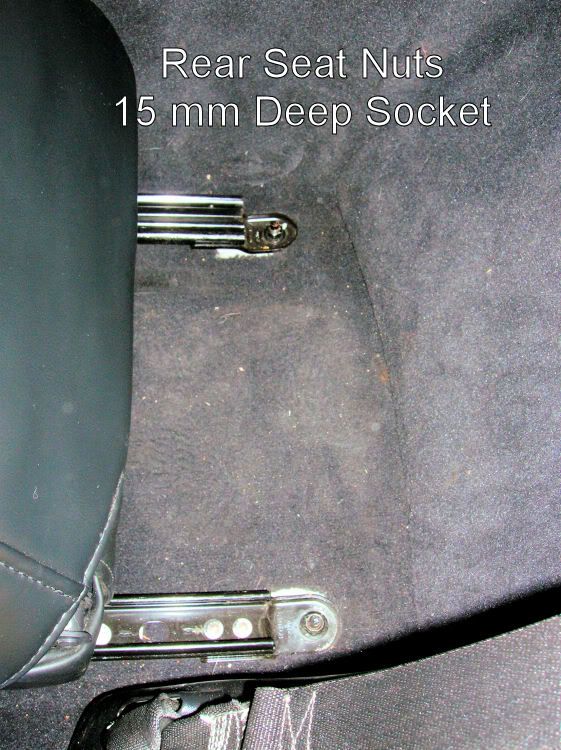
2. After removing the nuts you can pull the seats straight up. Here you can either turn the seat sideways and remove disconnect the wiring to take the seat out or you can turn it on its side to remove the inside nut. I was able to do the work without taking the seat out, but it was tight on the driver�s side with the steering wheel in the way.
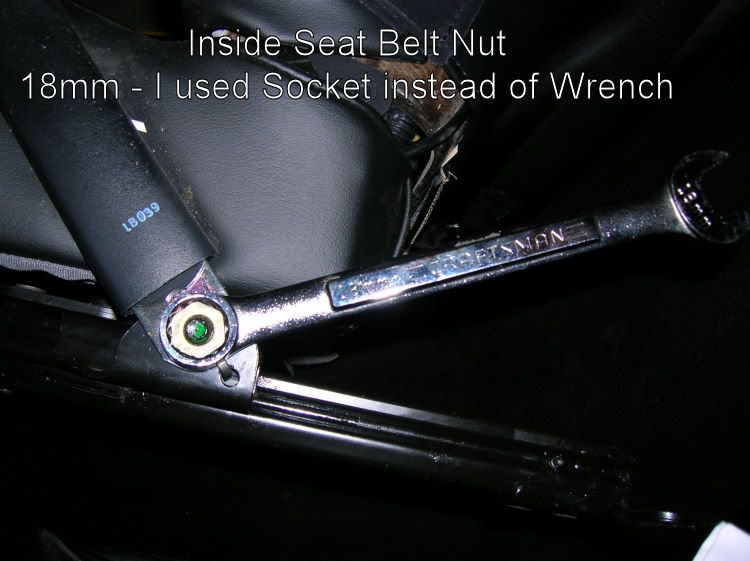
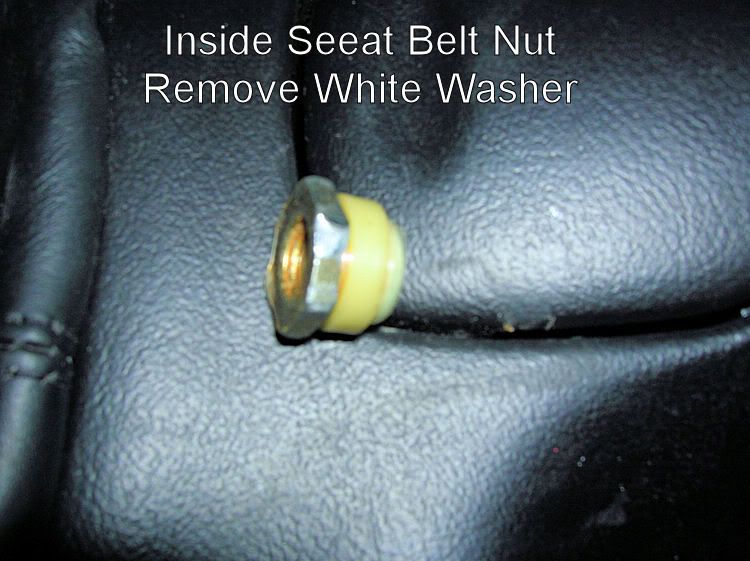
3. Now remove the seatbelt nut with an 18mm socket by tilting the seat to one side. I show an 18mm wrench in the picture, but before I did it I decided to use the socket. Once the nut is out remove the white washer that is on the nut can be thrown away.
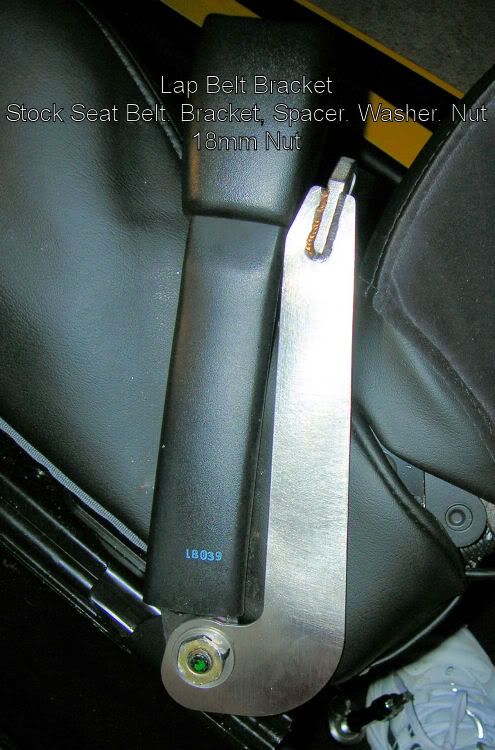
4. Install the BK Mounting bracket by aligning it with the hole and then use the spacer followed by the washer and then the bolt. The basic setup is seat belt, BK bracket, spacer (which fits inside the BK bracket), washer and then nut. The washer will press between the spacer and the nut.
After looking all over I did not see a total write-up of how to install the BK Harness Bar and Sub Mounts. I decided that write one up to help others. If you take a minute to read this it will save you time in the long run.
If someone reads this and finds something wrong please tell me and I will fix my write-up and fix my set-up.
If you are doing both the Harness Bar and the Sub Mounts I suggest starting with the mounts first then the Harness Bar and then the Side Bars. This will stop any rework that you would have if you did the harness bar and the side poles first since you have to remove the seat to do the sub mounts.
1. The first step is to remove the seat on both sides. This is very easy to do since there are only 4 15mm nuts holding the seat to the seat bracket.
2. After removing the nuts you can pull the seats straight up. Here you can either turn the seat sideways and remove disconnect the wiring to take the seat out or you can turn it on its side to remove the inside nut. I was able to do the work without taking the seat out, but it was tight on the driver�s side with the steering wheel in the way.
3. Now remove the seatbelt nut with an 18mm socket by tilting the seat to one side. I show an 18mm wrench in the picture, but before I did it I decided to use the socket. Once the nut is out remove the white washer that is on the nut can be thrown away.
4. Install the BK Mounting bracket by aligning it with the hole and then use the spacer followed by the washer and then the bolt. The basic setup is seat belt, BK bracket, spacer (which fits inside the BK bracket), washer and then nut. The washer will press between the spacer and the nut.
 02-26-2006, 01:49 PM
#2
Team Owner
Thread Starter
Member Since: Jul 2004
Location: NJ
Posts: 24,652
Received 297 Likes
on
94 Posts
St. Jude Donor '05-'08
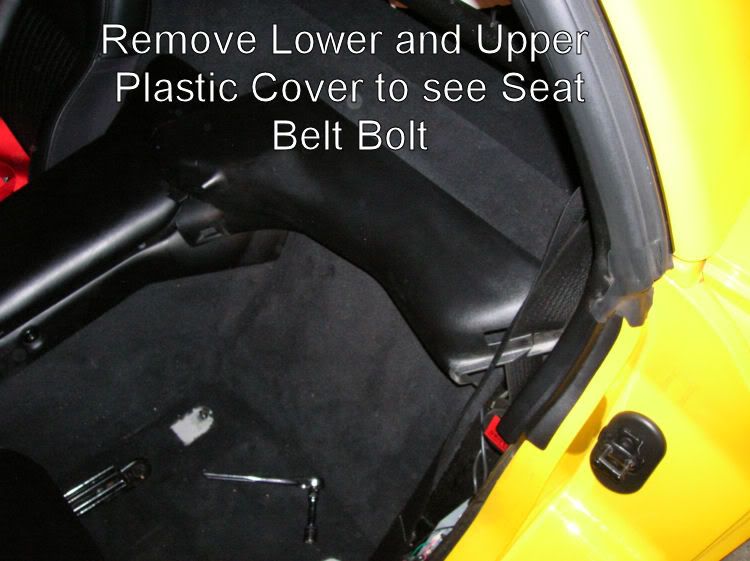
5. Now move the seat as far forward as possible to give you room to remove the lower and middle plastic which hides the outer seat belt. The lower plastic pulls straight up and the middle pulls away from the car.
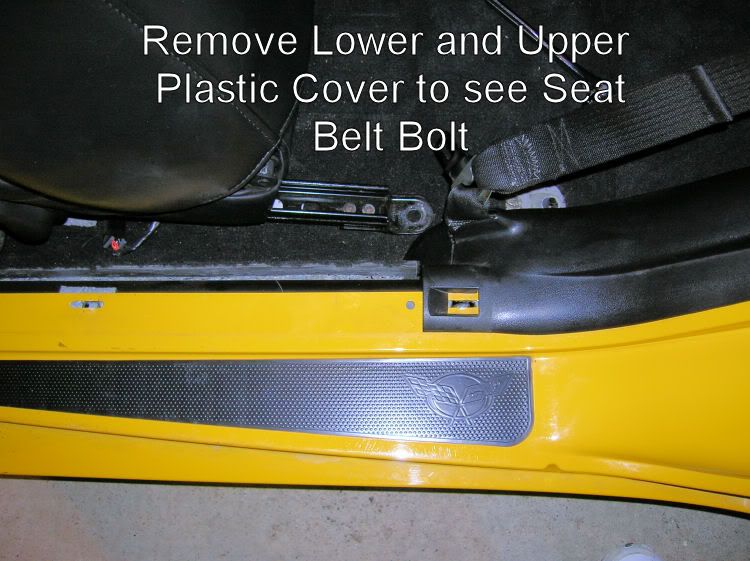
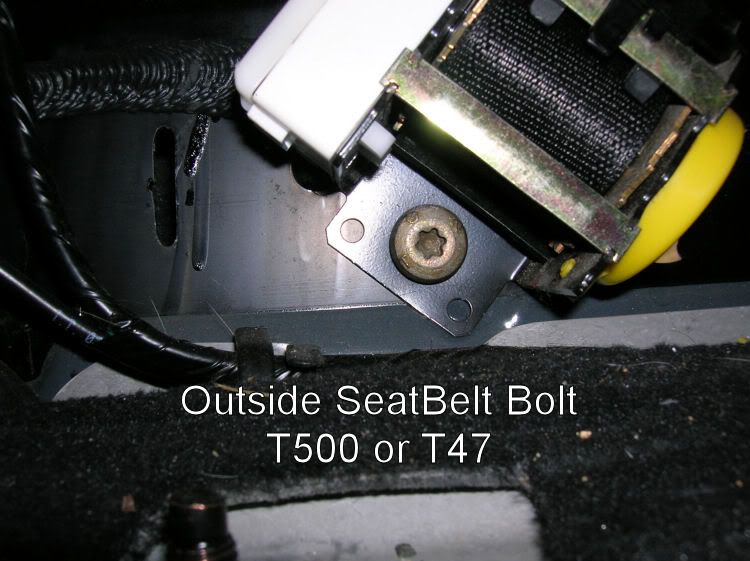
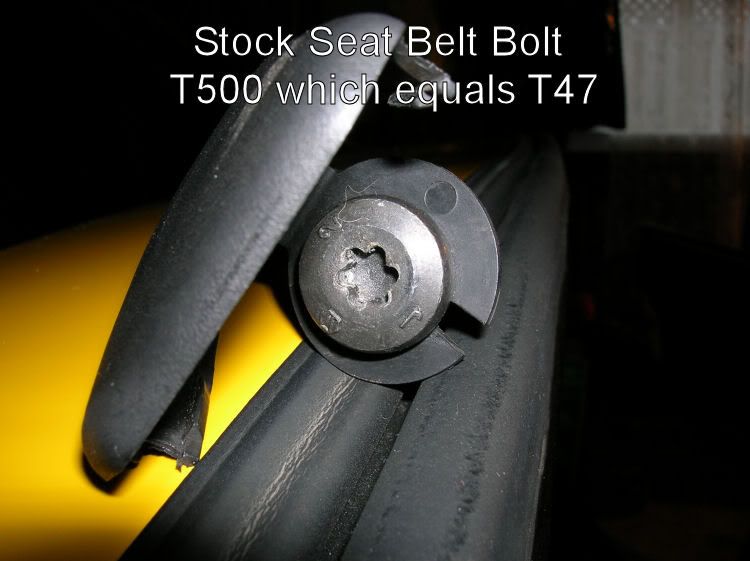
6. Once the plastic is removed you will see under the seat belt mechanism the seat belt bolt. This needs to be backed out with the T47 or T500 (the T500 is the official number, but I found the T47 at NAPA that fit just the same).
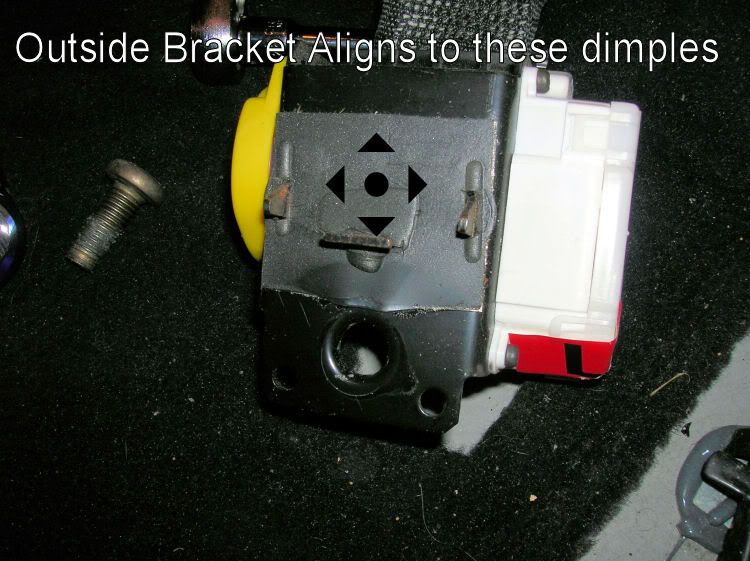
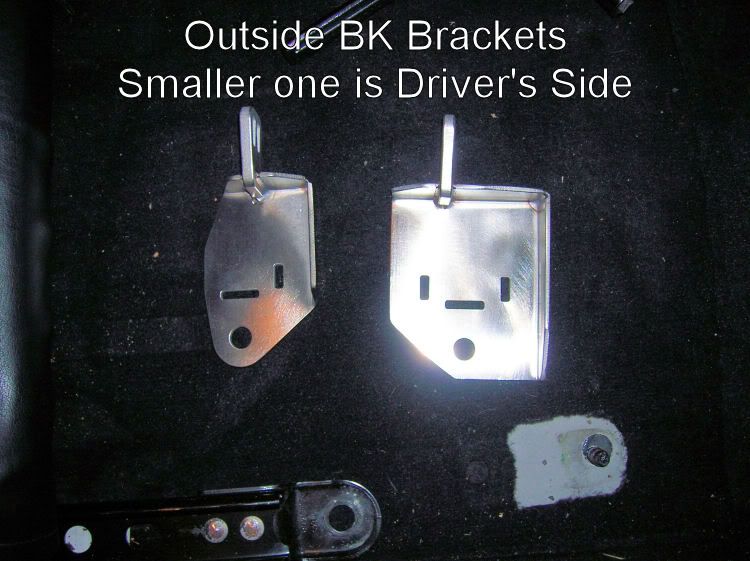
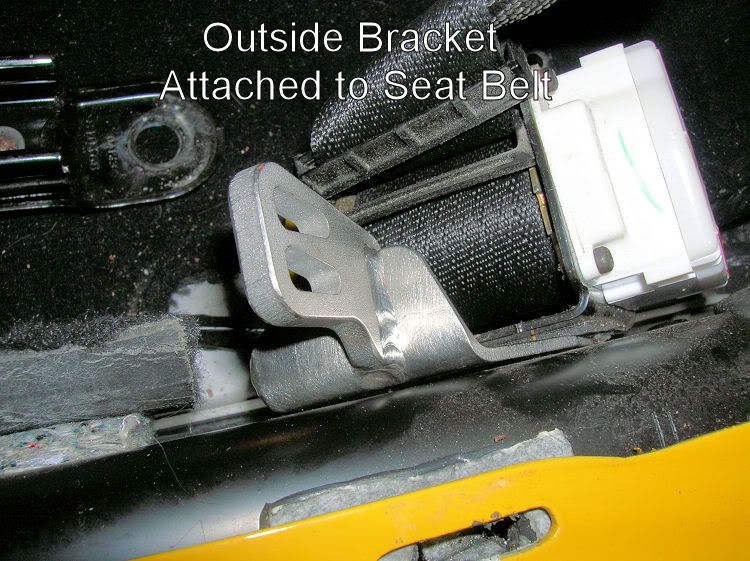
7. On the back of the seatbelt mechanism you will see 3 dimples. Those dimples align to the BK bracket. Note that the smaller BK bracket is used on the driver side.
8. Reattach the seatbelt and bracket to the wall of the car. The BK bracket flat side will be against the wall of the car.
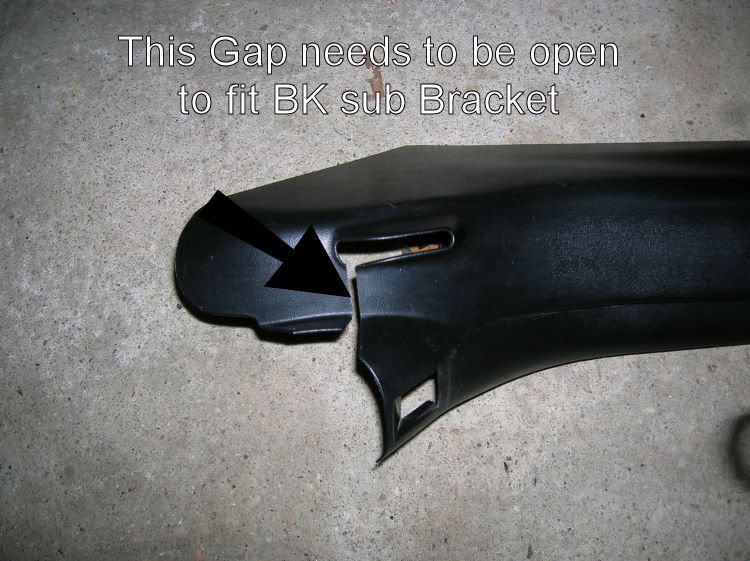
9. In order of the BK bracket to fit you will have to open the slot on the middle piece of plastic. I used a utility knife to open it, but if you have a dremmel I would suggest that. It does not need to be opened much. Once opened you can then replace the middle and lower plastic.
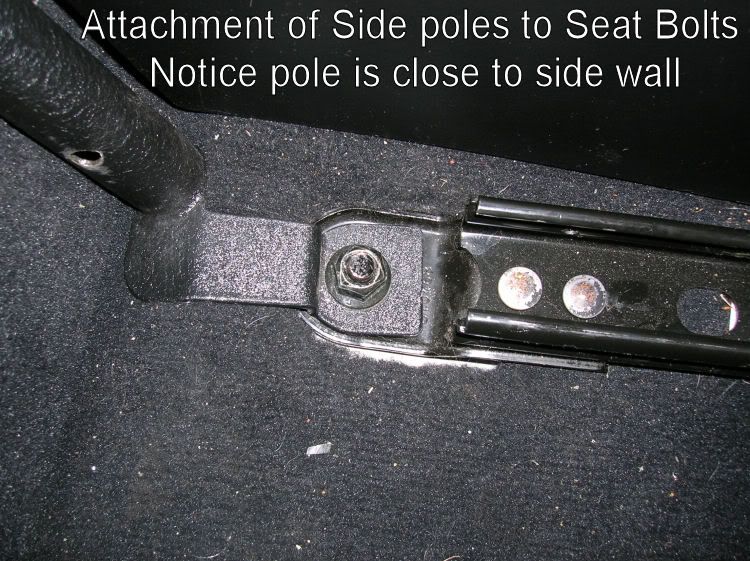
10. You can now put the seat back on the seat rails. You can tighten all of the nuts except the rear nut closest to the door. That will be used to hold the side pipes of the BK Harness Bar.
11. Repeat Steps 3-10 for the other side.
6. Once the plastic is removed you will see under the seat belt mechanism the seat belt bolt. This needs to be backed out with the T47 or T500 (the T500 is the official number, but I found the T47 at NAPA that fit just the same).
7. On the back of the seatbelt mechanism you will see 3 dimples. Those dimples align to the BK bracket. Note that the smaller BK bracket is used on the driver side.
8. Reattach the seatbelt and bracket to the wall of the car. The BK bracket flat side will be against the wall of the car.
9. In order of the BK bracket to fit you will have to open the slot on the middle piece of plastic. I used a utility knife to open it, but if you have a dremmel I would suggest that. It does not need to be opened much. Once opened you can then replace the middle and lower plastic.
10. You can now put the seat back on the seat rails. You can tighten all of the nuts except the rear nut closest to the door. That will be used to hold the side pipes of the BK Harness Bar.
11. Repeat Steps 3-10 for the other side.
02-26-2006, 01:49 PM
#3
Team Owner
Thread Starter
Member Since: Jul 2004
Location: NJ
Posts: 24,652
Received 297 Likes
on
94 Posts
St. Jude Donor '05-'08
12. Now you are done with the hardest part of the installation and you can move onto the Harness Bar. First you have to remove the upper seatbelt. This is done by popping open the plastic cover and inside is a T500 or T47 bolt. This bolt needs to be taken out and will not be used again (either will the cover). Do both sides.

13. At this point if there is a person around to help it will make it easier because it is easier to install the BK bar on both sides at the same time. Mine was a perfect fit across the back of my 01 coupe which also means it is a tight fit so keep that in mind. The install is spacer, BK Bar, seatbelt, washer and then the BK Bolt which is a hex socket Letter G (I am not sure why I had this size hex socket, but I am glad I did). At this point put the bar up, but do not tighten all the way because the side poles have to be attached and it is easier if you can move the BK bar up and down to give you some room.
14. Now it is time to attach the side poles. The side poles have 2 different sides. The correct pole will run closest to the car wall. Again having 2 people here makes it easier. Here you will have to figure out how high you need the poles to make the BK Harness Bar Level. Since I bought mine used the correct height for the poles were already done, but I can see a new one would need to be adjusted.
15. To attach to the BK Harness Bar you will need a 14mm socket and 14mm open end wrench. After attaching both sides you will need to lift the BK Harness Bar to align the bottom of the poles with the outer part of the seat which you left the nut off of. It is easier with 2 people because each person can align their side. I struggled by myself though.
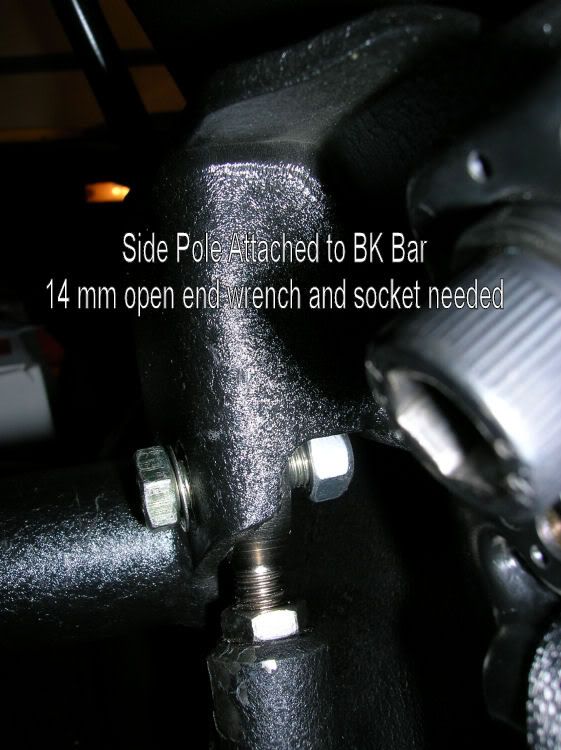
16. Once the poles are lined up with the bolts you can attach the last 2 nuts.
17. YAHOO you have completed the install.
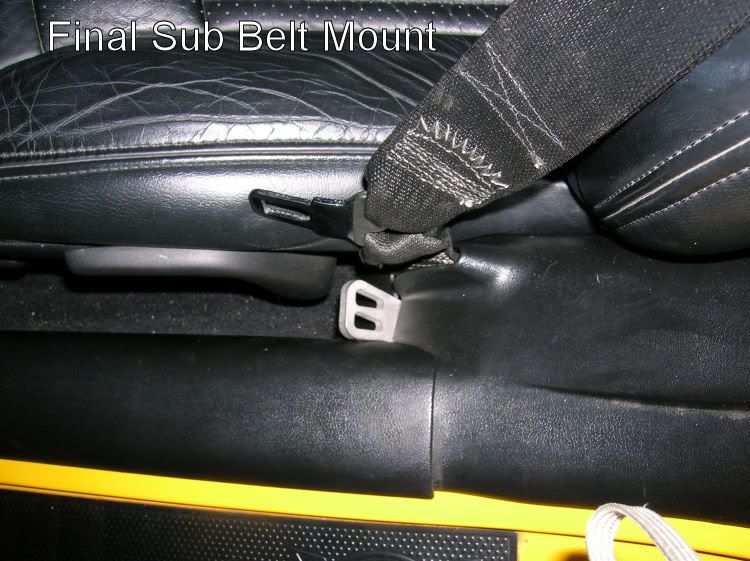
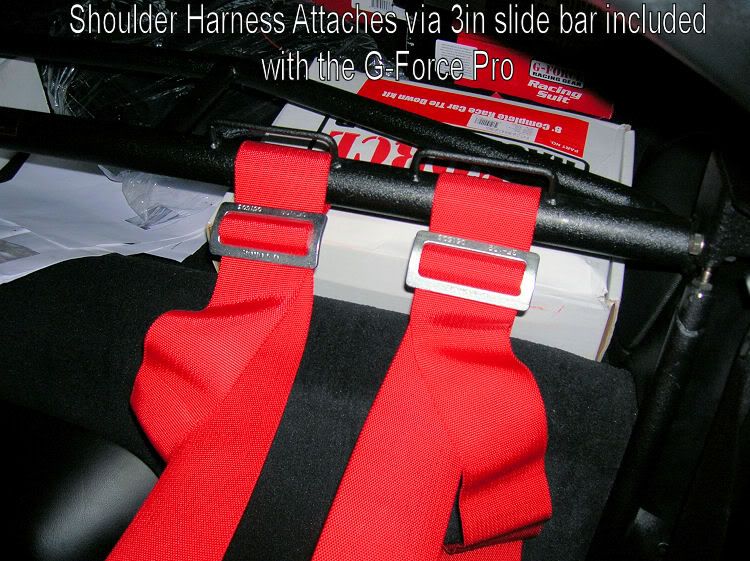
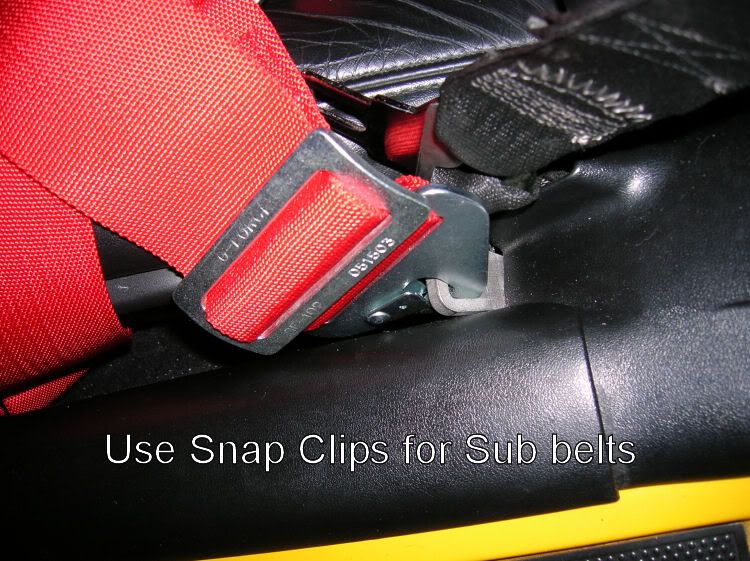
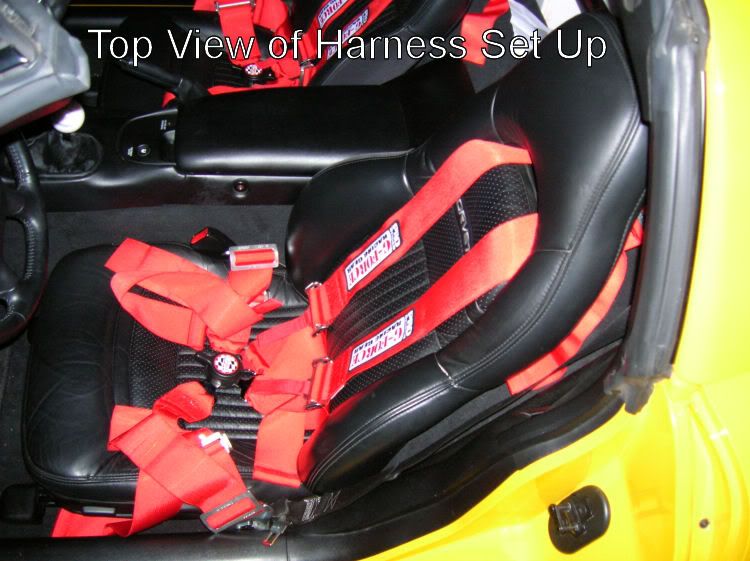
18. Next piece would be the harnesses belts. I will not go into this too deep since really it is alignment of the belts that you need to play with. To help though I used 3 inch slide brackets that was part of the G-Force Belts to wrap the belt around the BK Harness Bar. I used a 3inch snap clip for the mid belt that attaches to the BK Bracket and I used a 2inch snap clip for the sub-belt that also attached to the BK Bracket. I made sure that all of my snap clips faced down once they were installed.
Good luck. It is really not a hard install, but it will take some time.
13. At this point if there is a person around to help it will make it easier because it is easier to install the BK bar on both sides at the same time. Mine was a perfect fit across the back of my 01 coupe which also means it is a tight fit so keep that in mind. The install is spacer, BK Bar, seatbelt, washer and then the BK Bolt which is a hex socket Letter G (I am not sure why I had this size hex socket, but I am glad I did). At this point put the bar up, but do not tighten all the way because the side poles have to be attached and it is easier if you can move the BK bar up and down to give you some room.
14. Now it is time to attach the side poles. The side poles have 2 different sides. The correct pole will run closest to the car wall. Again having 2 people here makes it easier. Here you will have to figure out how high you need the poles to make the BK Harness Bar Level. Since I bought mine used the correct height for the poles were already done, but I can see a new one would need to be adjusted.
15. To attach to the BK Harness Bar you will need a 14mm socket and 14mm open end wrench. After attaching both sides you will need to lift the BK Harness Bar to align the bottom of the poles with the outer part of the seat which you left the nut off of. It is easier with 2 people because each person can align their side. I struggled by myself though.
16. Once the poles are lined up with the bolts you can attach the last 2 nuts.
17. YAHOO you have completed the install.
18. Next piece would be the harnesses belts. I will not go into this too deep since really it is alignment of the belts that you need to play with. To help though I used 3 inch slide brackets that was part of the G-Force Belts to wrap the belt around the BK Harness Bar. I used a 3inch snap clip for the mid belt that attaches to the BK Bracket and I used a 2inch snap clip for the sub-belt that also attached to the BK Bracket. I made sure that all of my snap clips faced down once they were installed.
Good luck. It is really not a hard install, but it will take some time.
 02-26-2006, 03:14 PM
#5
Team Owner
Thread Starter
Member Since: Jul 2004
Location: NJ
Posts: 24,652
Received 297 Likes
on
94 Posts
St. Jude Donor '05-'08
Originally Posted by yellow01
They have these things these days, called vacuums... 
j/k! And great writeup!
j/k! And great writeup!
I know. After I had things out I was amazed by how much crude was under the seat.
02-27-2006, 10:03 AM
#6
Team Owner
Member Since: Mar 2001
Location: Virginia Beach
Posts: 25,889
Likes: 0
Received 5 Likes
on
5 Posts
CI 3-5-6-7-8 Veteran

Originally Posted by yellow01
They have these things these days, called vacuums...
j/k! And great writeup!
j/k! And great writeup!
That's the first thing I was thinking... man that's a dirty car 
Great install write-up, I have all the same equipment

Are you sure the BK harness bar upright bar is attached with 14mm stuff? I could have sworn it was standard sizes like a 9/16th.
02-27-2006, 10:08 AM
#7
Team Owner
Thread Starter
Member Since: Jul 2004
Location: NJ
Posts: 24,652
Received 297 Likes
on
94 Posts
St. Jude Donor '05-'08
Originally Posted by Cobra4B
That's the first thing I was thinking... man that's a dirty car Great install write-up, I have all the same equipment
Are you sure the BK harness bar upright bar is attached with 14mm stuff? I could have sworn it was standard sizes like a 9/16th.
It is much cleaner now and my wife would be happy that you mentioned it since she is always on my case about it. when I took the seats out I was floored by how much stuff was under the seat. At that point I decided to make it a point to vaccum the car more often.


