

 03-05-2015, 07:05 PM
Last edit by: IB Advertising
See related guides and technical advice from our community experts:
Browse all: Steering and Suspension How-Tos
- How to Install Shock Absorbers
Step by step instructions for do-it-yourselfers.
Browse all: Steering and Suspension How-Tos

How-To: Remove/Replace Rear Shock Absorbers (without FE2,FE4)
06-19-2014, 05:33 PM
#1
Tech Contributor
Thread Starter
Member Since: Jan 2006
Location: Saint Louis MO
Posts: 4,761
Likes: 0
Received 218 Likes
on
110 Posts
St. Jude Donor '14-'15
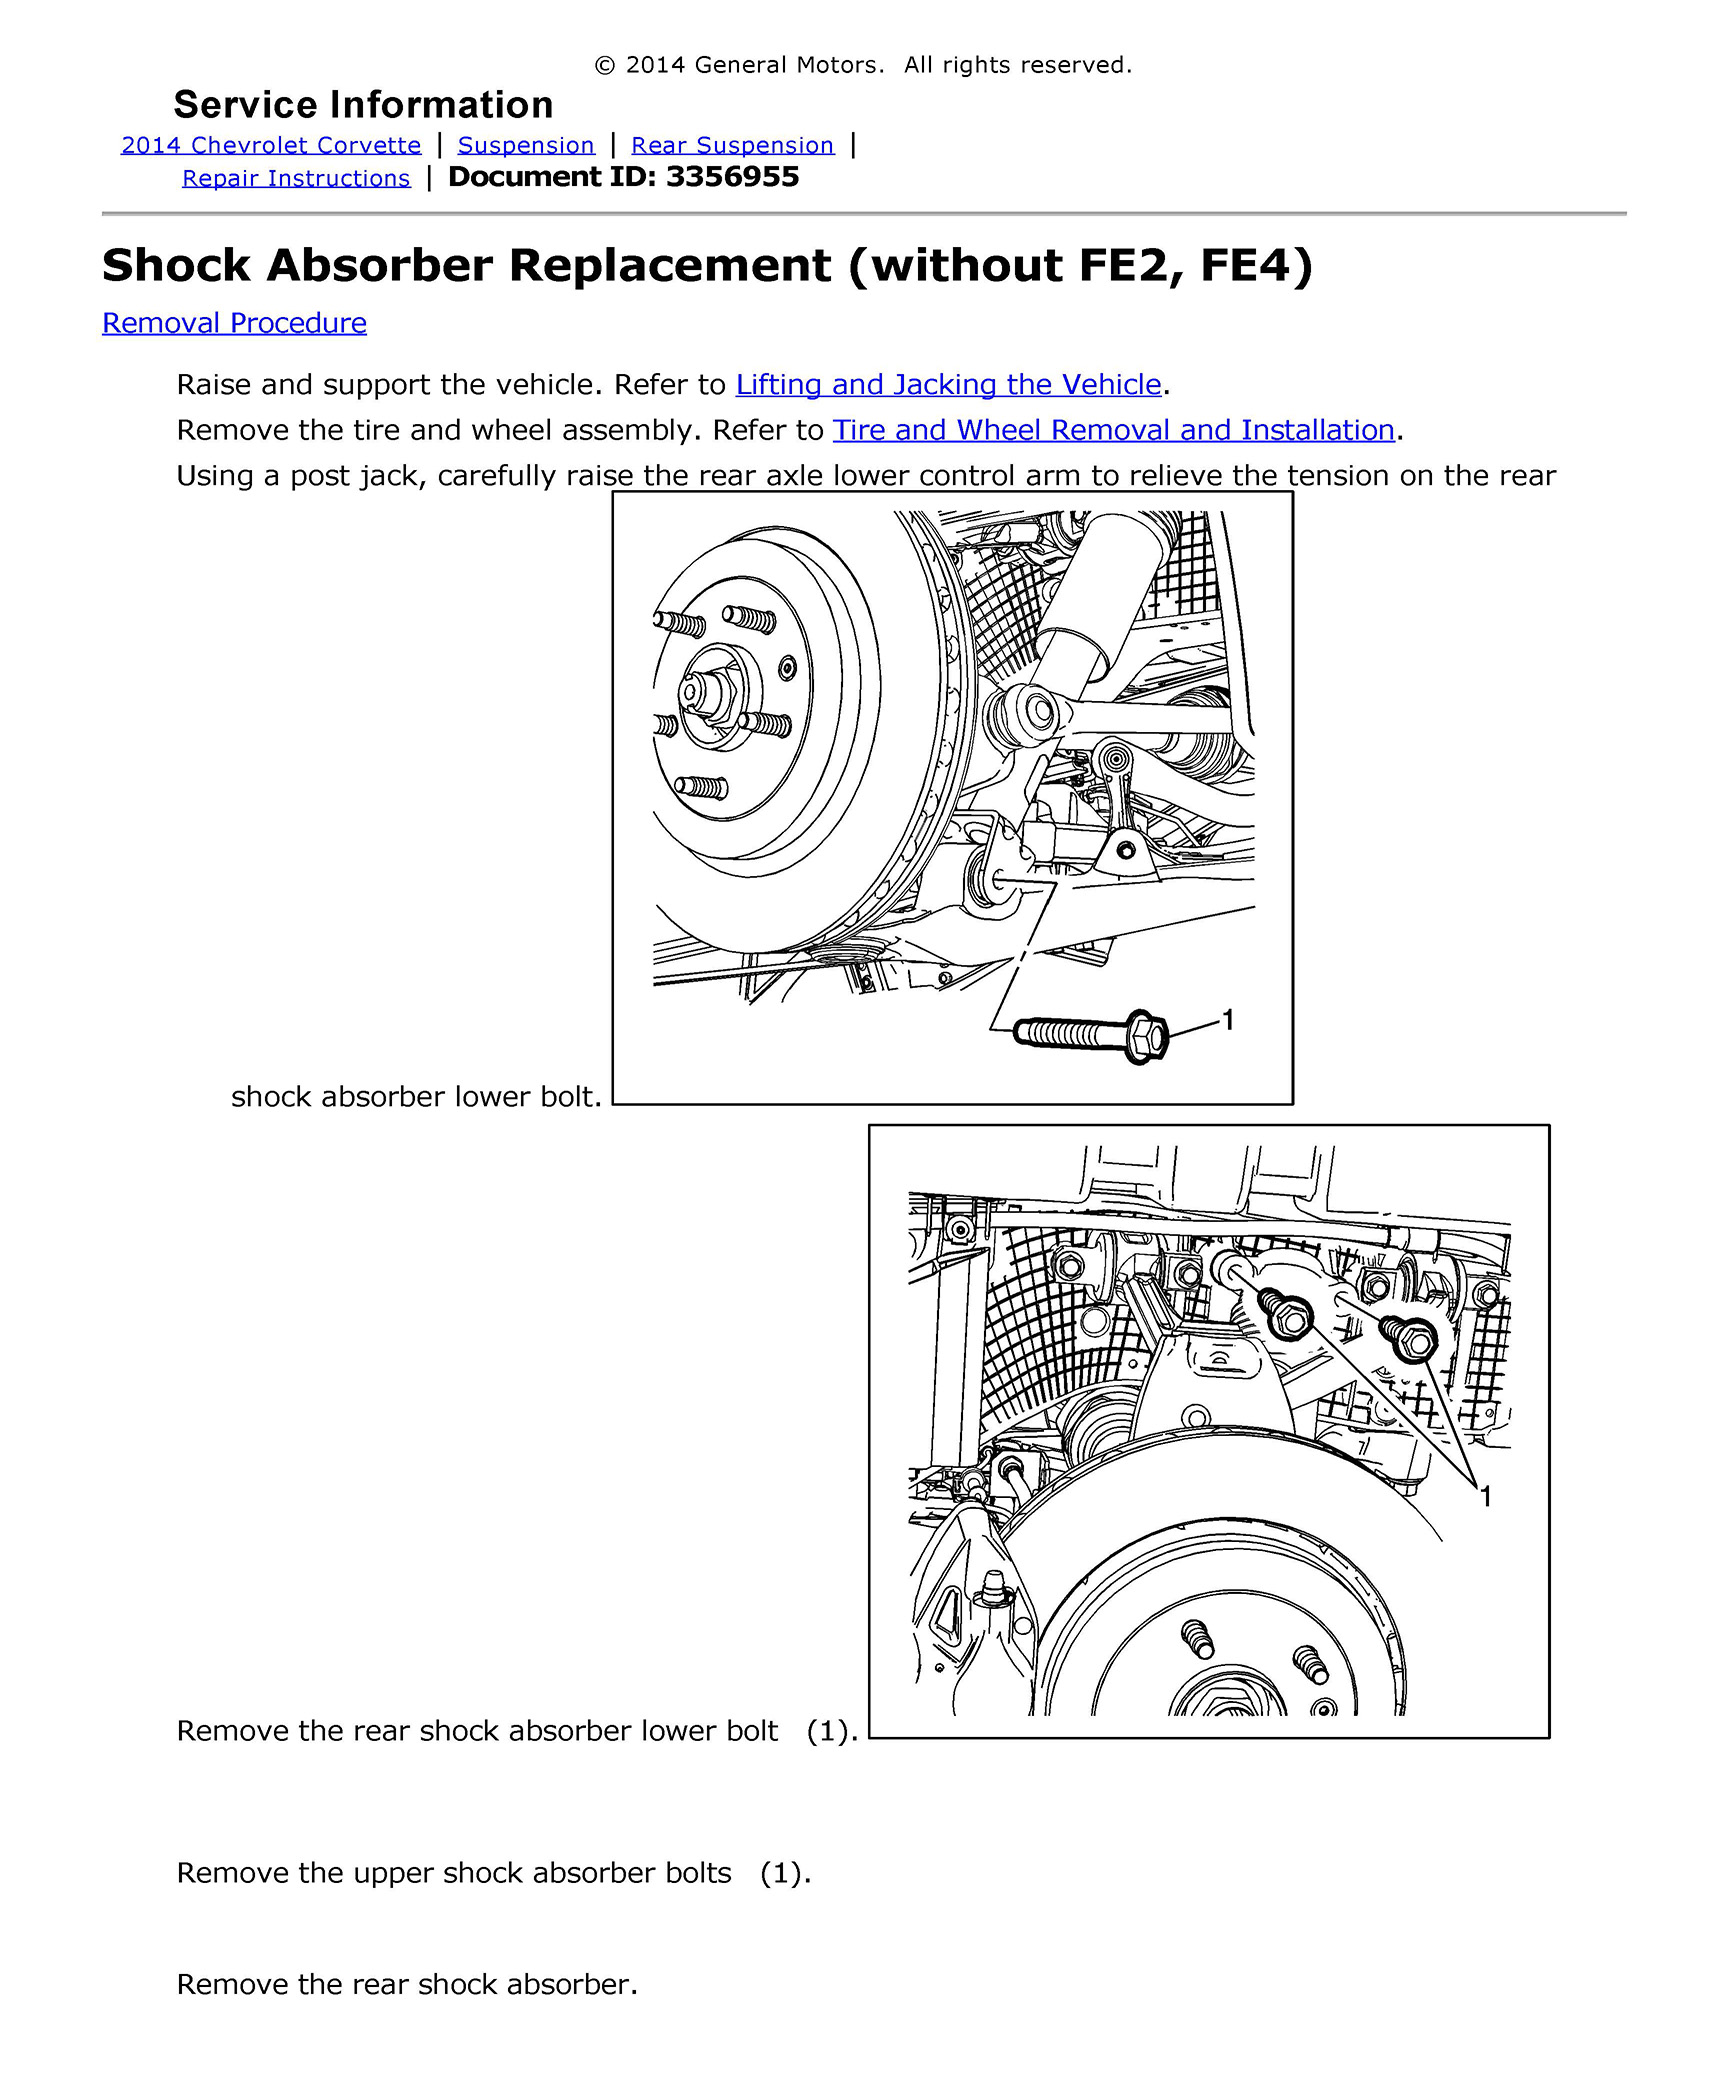
The following How-To covers the explanation of how to Remove/Replace the Rear Shock Absorbers without the FE2,FE4 Options and includes specifications, schematics, etc.
These How-To guides are neither endorsed by or property of Corvette Forum or myself in any way/shape/form. All liability stemming from any actions taken in relation to these guides is solely placed upon the user.
We hope you will find these guides useful.
These How-To guides are neither endorsed by or property of Corvette Forum or myself in any way/shape/form. All liability stemming from any actions taken in relation to these guides is solely placed upon the user.
We hope you will find these guides useful.

The following users liked this post:
Pineapple (07-21-2018)
10-28-2019, 12:36 AM
#4


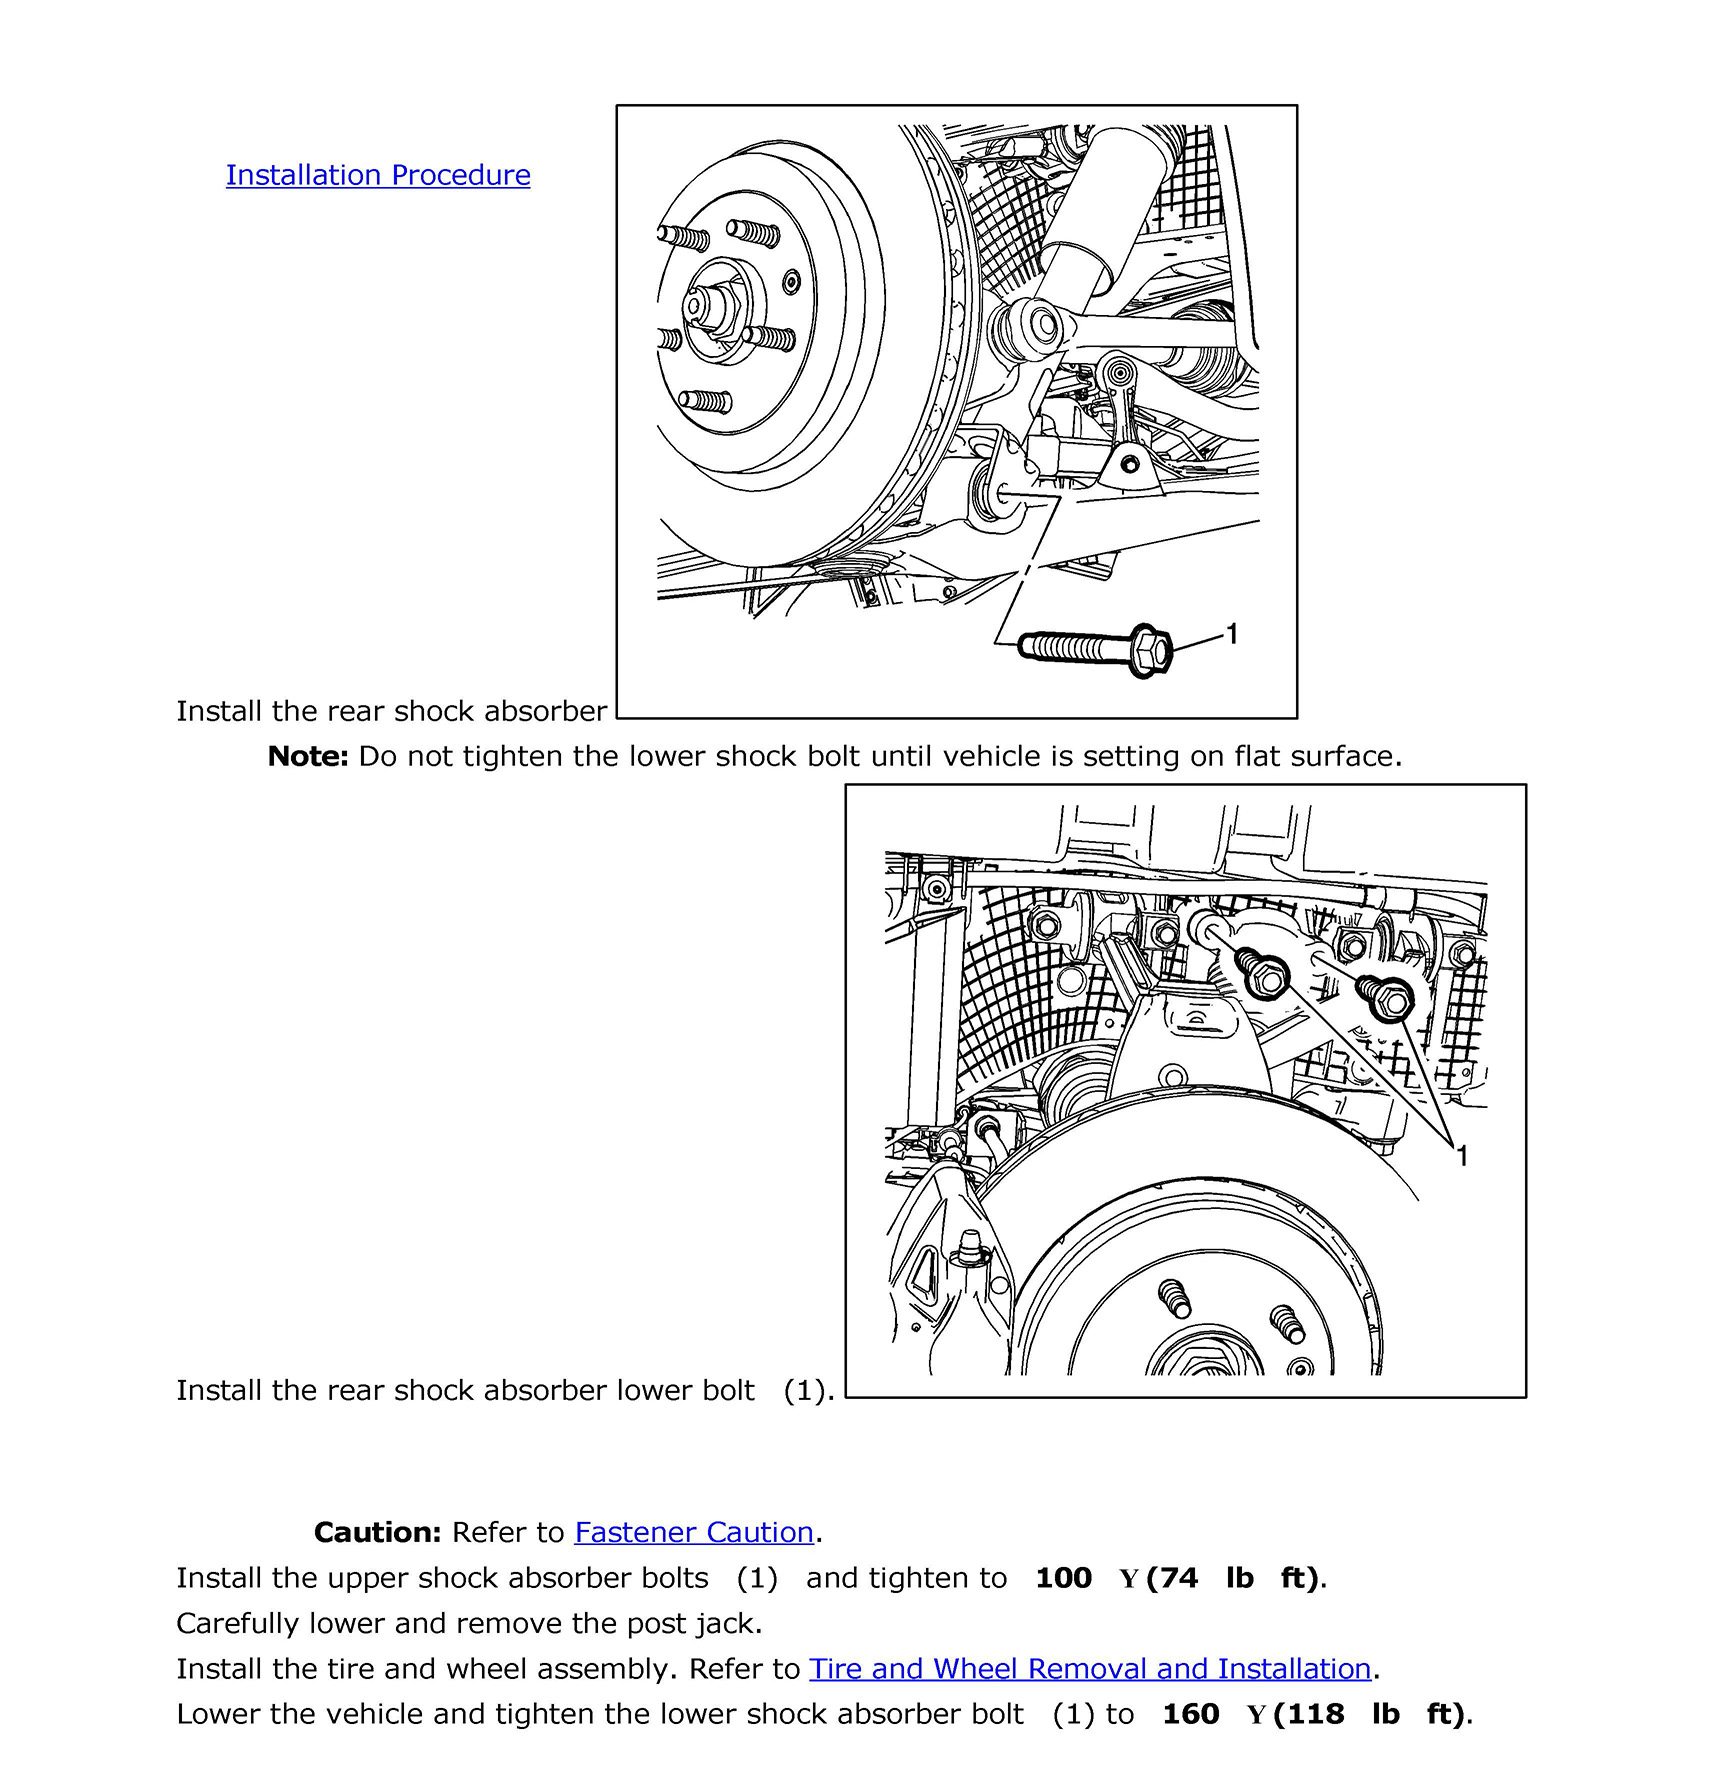
I did some improvisation regarding the note "Do not tighten the lower shock bolt until the vehicle is sitting on a flat service." With the car on the ground, I measured the compression of the old shock absorber by drawing a line on the shock body at the level reached by the shock's black collar. I replicated the the same line on the new shock, which in my case is the Z51 shock so it is the same length as the base suspension shock. I then installed the new shock. With the car still jacked up, I pushed up the lower control arm using another jack until the shock got compressed to the line I drew. My hope is that this compressed the suspension to the same level as when the car was sitting level on the ground. I now tightened the lower shock bolt to the required torque spec. By doing this, I avoided having to torque the lower shock bolt with the wheel installed, which is more difficult even if you have the car on ramps. Any comments whether this approach is allowable?

 10-28-2019, 01:43 PM
#6
Burning Brakes


If there is more pressure in the new shock, the ride height may be slightly higher and so you would need a different reference mark. But I doubt there is much difference (unless the old shock was completely wasted and had zero nose pressure) so I'd say you were fine.
10-31-2019, 06:14 AM
#7
Drifting

Springs support the weight of the car, shocks absorb spring oscillation. So even if the shock were worn out it wouldn’t matter since they don’t support the weight of the car.
If you jack the car at the control arm till the suspension stops moving and your raising the whole car that’s a good time to tumor time your bushings.
If you jack the car at the control arm till the suspension stops moving and your raising the whole car that’s a good time to tumor time your bushings.
10-31-2019, 11:54 AM
#8
Burning Brakes
Springs support the weight of the car, shocks absorb spring oscillation. So even if the shock were worn out it wouldn�t matter since they don�t support the weight of the car.
If you jack the car at the control arm till the suspension stops moving and your raising the whole car that�s a good time to tumor time your bushings.
If you jack the car at the control arm till the suspension stops moving and your raising the whole car that�s a good time to tumor time your bushings.
If you jack up the car under an A-arm, that corner will be bearing more of the weight than the other three corners, so its not a good time to tighten your bushings. Not seeing your logic on this one.