Last edit by: IB Advertising
See related guides and technical advice from our community experts:
Browse all: Brake How-Tos
- How to Replace Parking Brake Shoe and Electronic Parking Brake Module
Step by step instructions for do-it-yourselfers.
Browse all: Brake How-Tos
How-To: Replace Parking Brake Shoe, Electronic Emergency Brake Module + Schematics
#1
Tech Contributor
Thread Starter
Member Since: Jan 2006
Location: Saint Louis MO
Posts: 4,761
Likes: 0
Received 219 Likes
on
110 Posts
St. Jude Donor '14-'15
The following How-To covers the explanation and repair of the Parking/Emergency Brake Hardware and Control Unit and includes specifications, schematics, etc.
These How-To guides are neither endorsed by or property of Corvette Forum or myself in any way/shape/form. All liability stemming from any actions taken in relation to these guides is solely placed upon the user.
We hope you will find these guides useful.
These How-To guides are neither endorsed by or property of Corvette Forum or myself in any way/shape/form. All liability stemming from any actions taken in relation to these guides is solely placed upon the user.
We hope you will find these guides useful.

The following users liked this post:
jonesaut (09-04-2017)
#7
Melting Slicks


thank you for this. i have blown 2 fuses in a row (second one popped key off engine off just by attempting to install it)
i guess something wrong with the module since not much else to the system.
i guess something wrong with the module since not much else to the system.
#8
Tech Contributor
Thread Starter
Member Since: Jan 2006
Location: Saint Louis MO
Posts: 4,761
Likes: 0
Received 219 Likes
on
110 Posts
St. Jude Donor '14-'15
Sounds like the module went bad, or you have a short to ground on power wire 1492 or 742.
.
Last edited by Theta; 04-28-2015 at 07:10 PM.
#9
Melting Slicks


thanks!
if im reading correctly the red/light green power wire goes from the fuse all the way back to the module
and the yellow 12v arm is same from switch all the way to module as well.
the switch did feel a little sticky but it could just be in my head
first i will do is verify ground at the fuse block pin.
i don't suppose you know where connectors x311 and x313 are on the car?
i was surprised to not find a relay in the wiring?
#10
Melting Slicks


i have ground at beginning of 742 at the fusebox terminal and i have ground at the plug at the module. so perhaps the module is ok but why is my red/lt green grounded and where..
#11
Tech Contributor
Thread Starter
Member Since: Jan 2006
Location: Saint Louis MO
Posts: 4,761
Likes: 0
Received 219 Likes
on
110 Posts
St. Jude Donor '14-'15
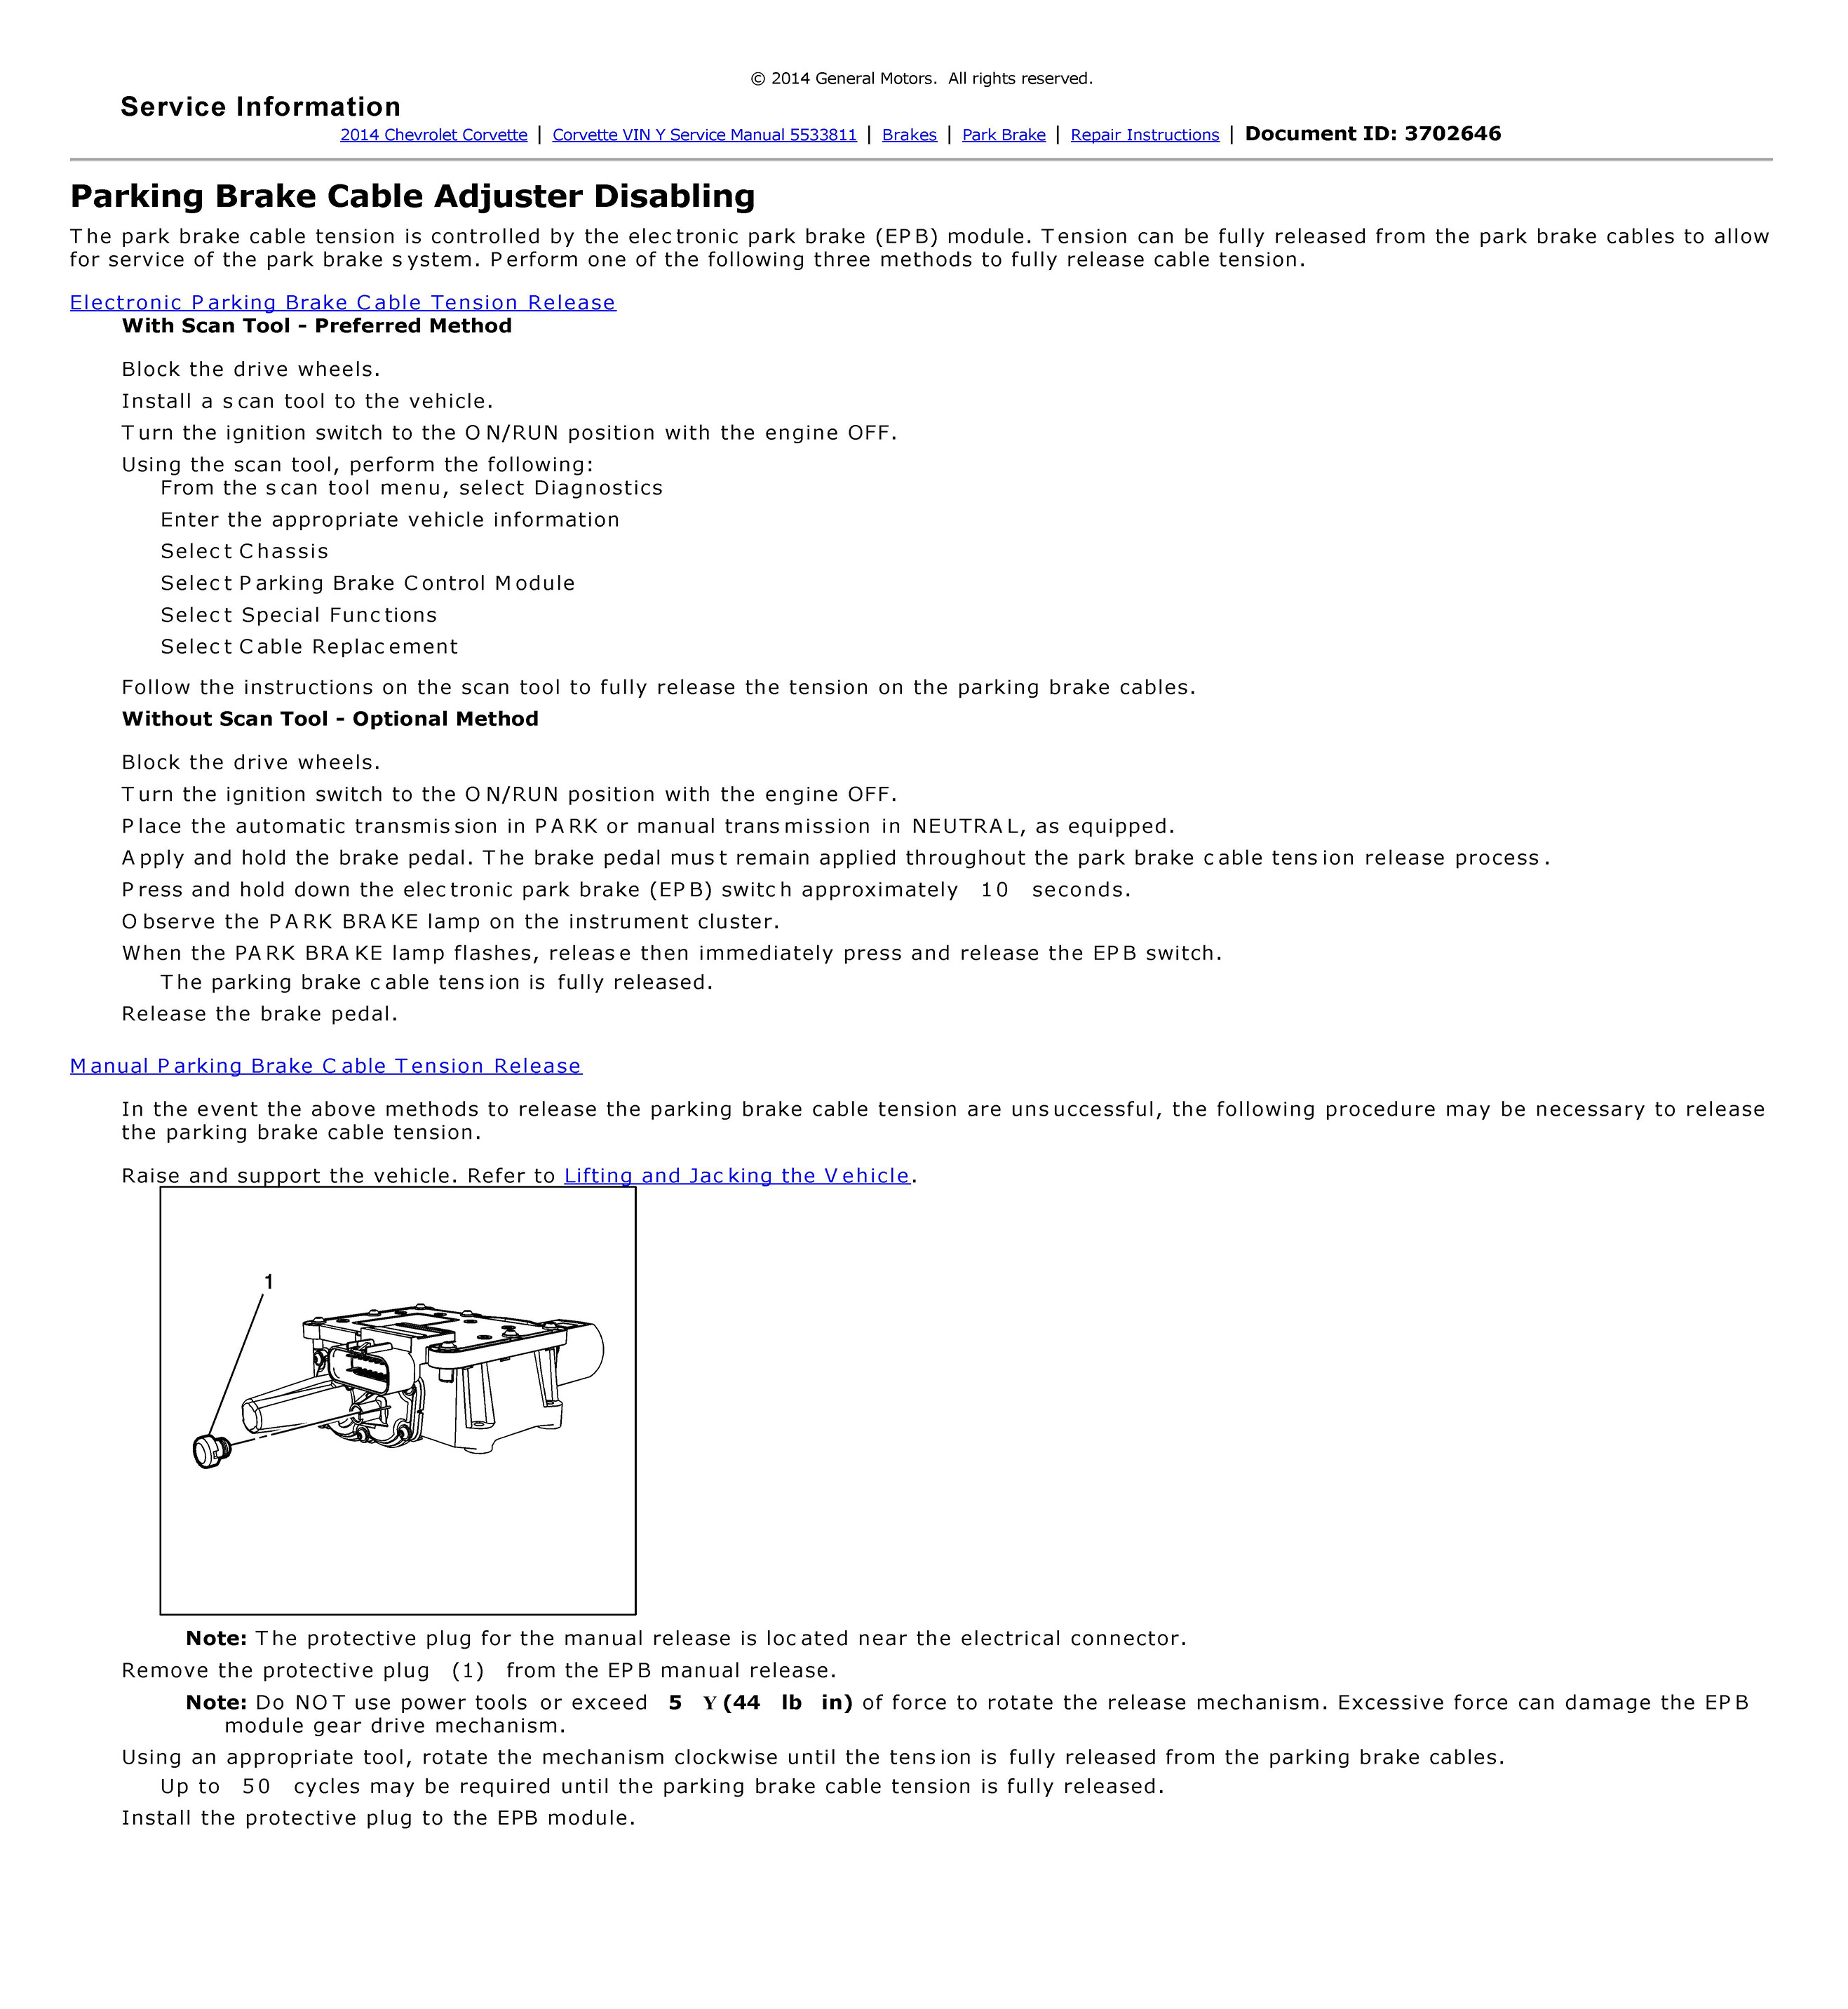
You can check the K83 (Park Brake Control Module) pins to see if the module has internally grounded itself due to a fault.
Pin A - RD/L-GN - Circuit 742 - Battery Positive Voltage
Pin H - BK - Circuit 2050 - Ground
While the cable is disconnected, you can also check at the wiring connector. You'll know which one is at fault after doing this (the wiring or the module).
Pin A - RD/L-GN - Circuit 742 - Battery Positive Voltage
Pin H - BK - Circuit 2050 - Ground
While the cable is disconnected, you can also check at the wiring connector. You'll know which one is at fault after doing this (the wiring or the module).

#12
Melting Slicks


well after unluckily starting from the rear i worked my way to the front and found good old red/light green shorted to the header.
be advised this bundle was not tucked away well and i missed it during header install a month or so ago
be advised this bundle was not tucked away well and i missed it during header install a month or so ago
#13
Tech Contributor
Thread Starter
Member Since: Jan 2006
Location: Saint Louis MO
Posts: 4,761
Likes: 0
Received 219 Likes
on
110 Posts
St. Jude Donor '14-'15
The good part about testing from the module is knowing which one to start checking. Although, I see your point - you went from the back to the front.
I'm glad you found the issue, at least! Far better than having to replace a module.
I'm glad you found the issue, at least! Far better than having to replace a module.


