

 03-06-2015, 01:16 PM
Last edit by: IB Advertising
See related guides and technical advice from our community experts:
Browse all: Engine and Powertrain
- How to Install Cold Air Intake
Step by step instructions for do-it-yourselfers.
Browse all: Engine and Powertrain

AFE Cold Air Intake-Initial Review on Installation, Start Up, Driving Impressions
05-22-2014, 10:17 PM
#1
Racer

Thread Starter
Member Since: Sep 2013
Location: RVA
Posts: 263
Likes: 0
Received 0 Likes
on
0 Posts
I received my intake from the group sale thread that AFE posted about a week and a half ago. I will take a little time to post my initial thoughts, from the packaging, installation, and the result(s). Unfortunately, bad weather that came during the installation did not allow me to take it out for a spin, but I will follow up tomorrow with an update to this thread and share my thoughts. Here it goes:
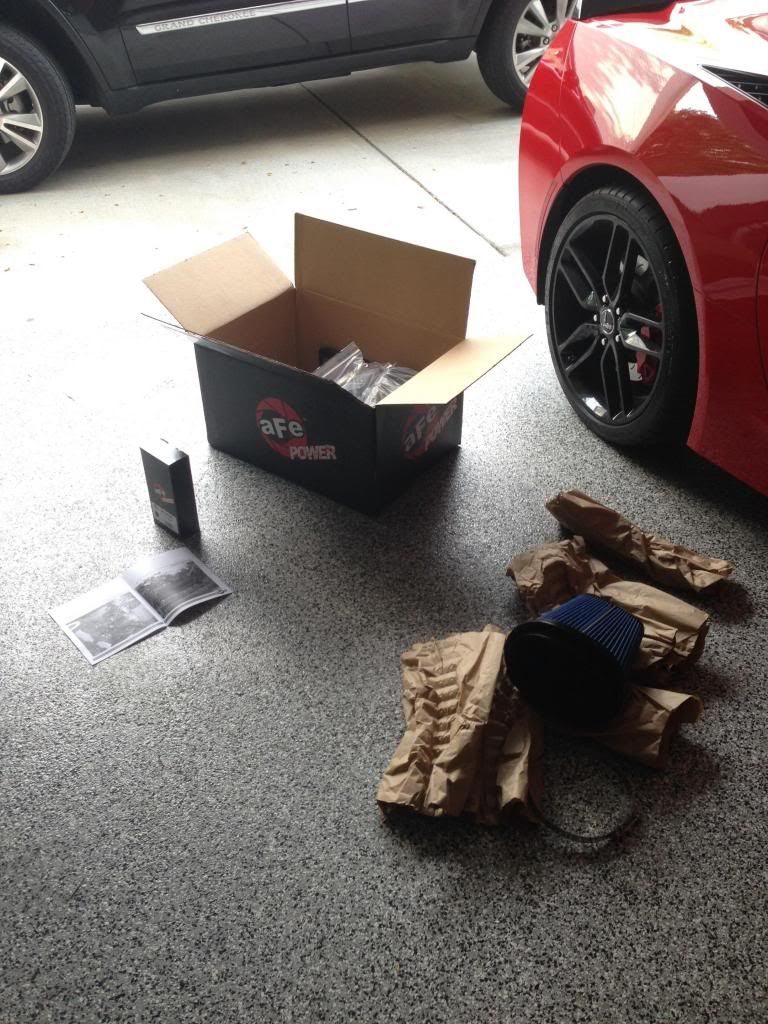
Receipt/Unboxing:
Very nice box, black cardboard with an almost reflective yet matted look to it. Small sticker on both sides of the box that shows a picture of the intake that the box contains. Box was perfect with no creases or damage whatsoever. Upon opening, I see a lot of cardboard paper and the usual, but everything in the package was placed where it was to not be disturbed while in transit. The filter was packaged in a separate bag in a separate box within the whole package--which I thought was a nice touch. The cleaning kit was also included, and that had its own box too. All in all, very professionally packaged, and there is a sticker inside the flap of the box that tells me that it was quality inspected on 5/16/14--the day it was shipped out, too!
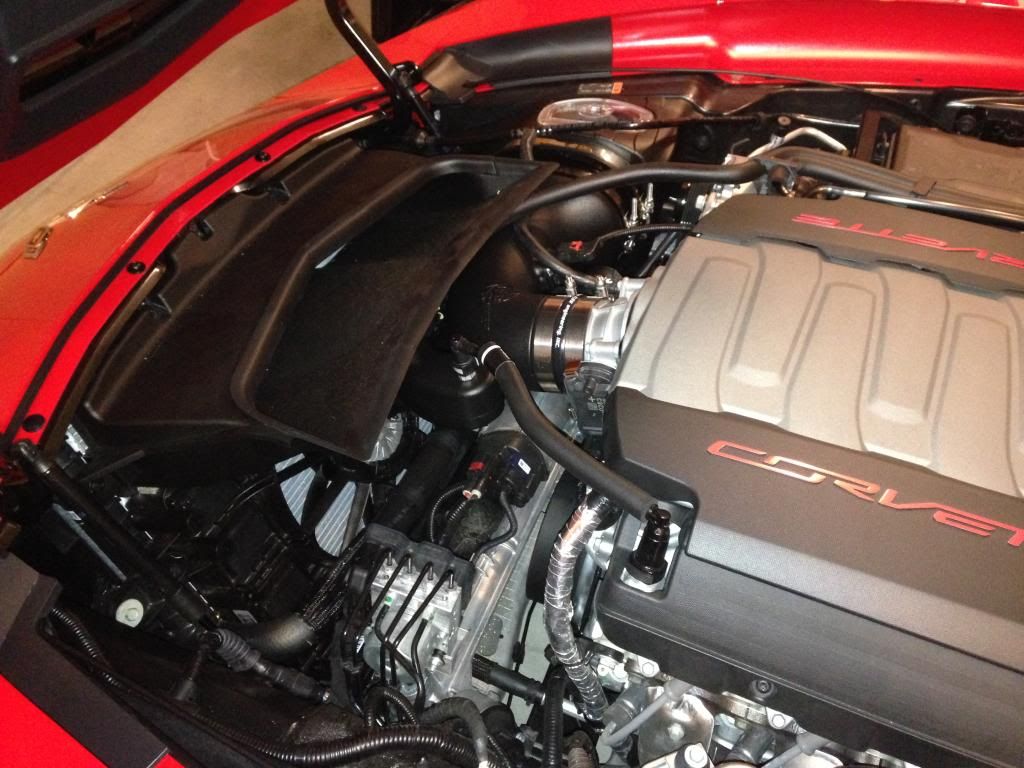
Removal of OEM air box, filter, installation,etc:
I found it fairly easy to remove the OEM Filter housing and intake tube. The instructions that it came with were very detailed and went into detail on how to remove everything. The one thing I found slightly difficult was that the last screw holding the radiator heat extractor closest to the passenger side was kind of hard to get to because there was a hose/coil that was in the way of getting to that bolt. I didn't want to move the coil too much as it appeared to feel like it wouldn't budge. I had to use a long and thin ratchet to get to it. Once I got to it, the whole assembly literally comes right out. Once I removed the OEM t clamps, removing the stock intake tube (after taking off the intake tubes and the MAF sensor) was very easy and straightforward.
You are to re-use the OEM rubber grommets and transfer them to the AFE filter housing. The AFE housing had the inserts to where the OEM grommets would go and this made it all super easy and seamless (nice touch). The filter itself is fairly large, larger than the OEM, but you can immediately notice how much more free-flowing it is than the OEM paper filter, which looks so restrictive compared to the AFE filter. Following the instructions, I made to sure install everything as smoothly as I could and not attempt to force anything. The AFE kit comes with the replacement intake tube bolts that you screw into the resonator piece on the intake tube. I used the supplied lock-tite to further tighten the bolt. Again, nice little touch that eliminates any need to go out and get anything that is needed to complete installation.
I carefully transferred the MAF sensor onto the new AFE tube and they supplied the new M4 screws to tighten these down. I don't think they were needed but the screws are flat head as opposed to phillips and they seemed to be way better quality than OEM. I used the AFE M4 screws just cause I figured "why not, they look better anyways."
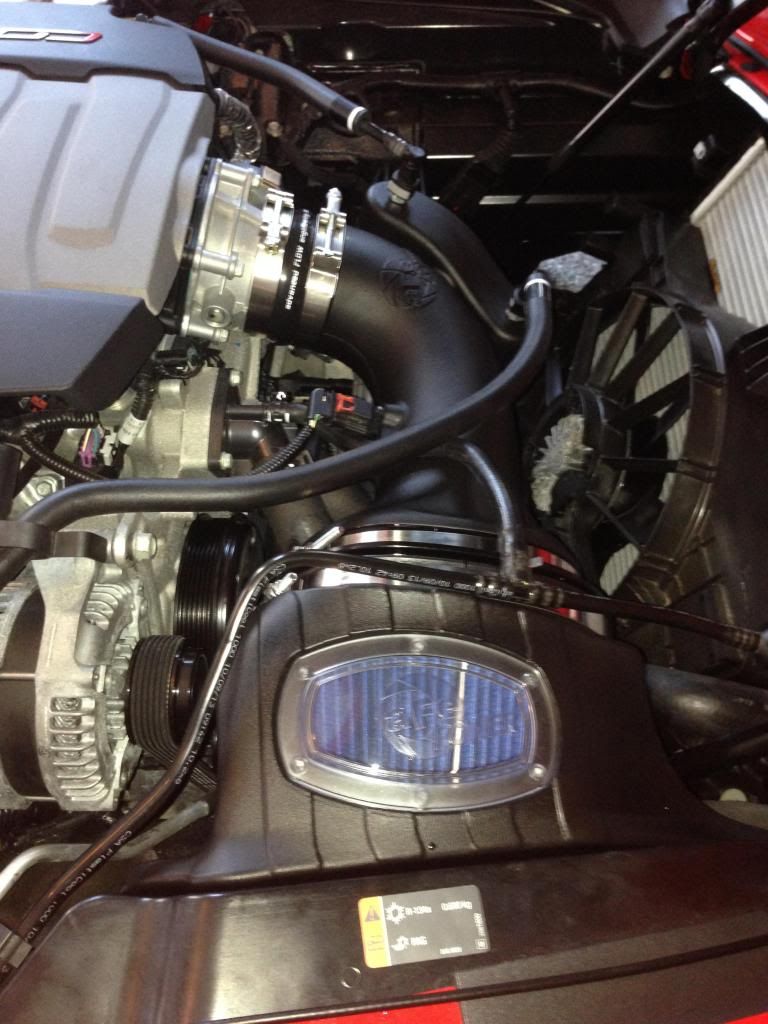
Installation of the intake tube into the filter housing and throttle body was a little tight and tricky. There is virtually very little to no flex in the tube compared to the OEM one, so don't feel tempted to bend it to make it fit. Just coax it in. I found that undoing the t clamps entirely so they can be opened and then wrapped around the throttle body connector/rubber hose made it easier and eliminated any crimping that would make it difficult to slide onto the throttle body. What concerns me a little bit is that there is an ever so slight gap between the male and female connector from the intake tube into the new filter housing. I made sure to tighten the large t clamps over each opening, but the gap is still there (pic below). However, I don't think any air will escape and I think a little play is okay for when the motor is flexing a bit under load. When I was done with installation, I did not hear or feel any air escaping the intake area or filter housing. I think its pretty tight internally with all the overlapping rubber.
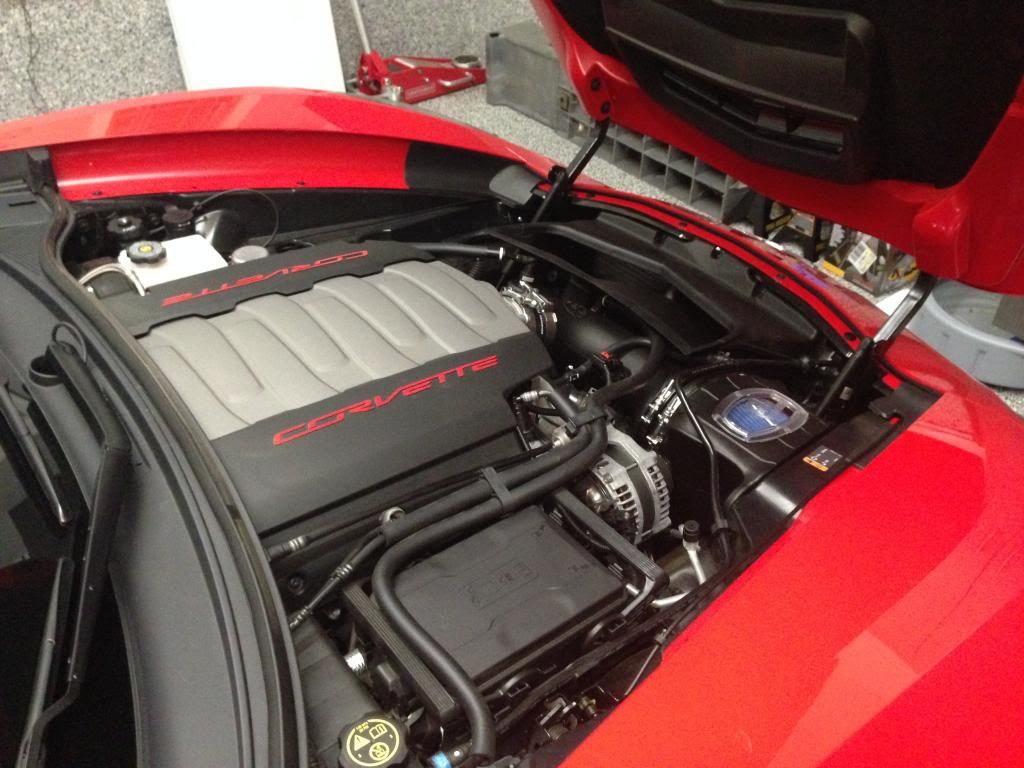
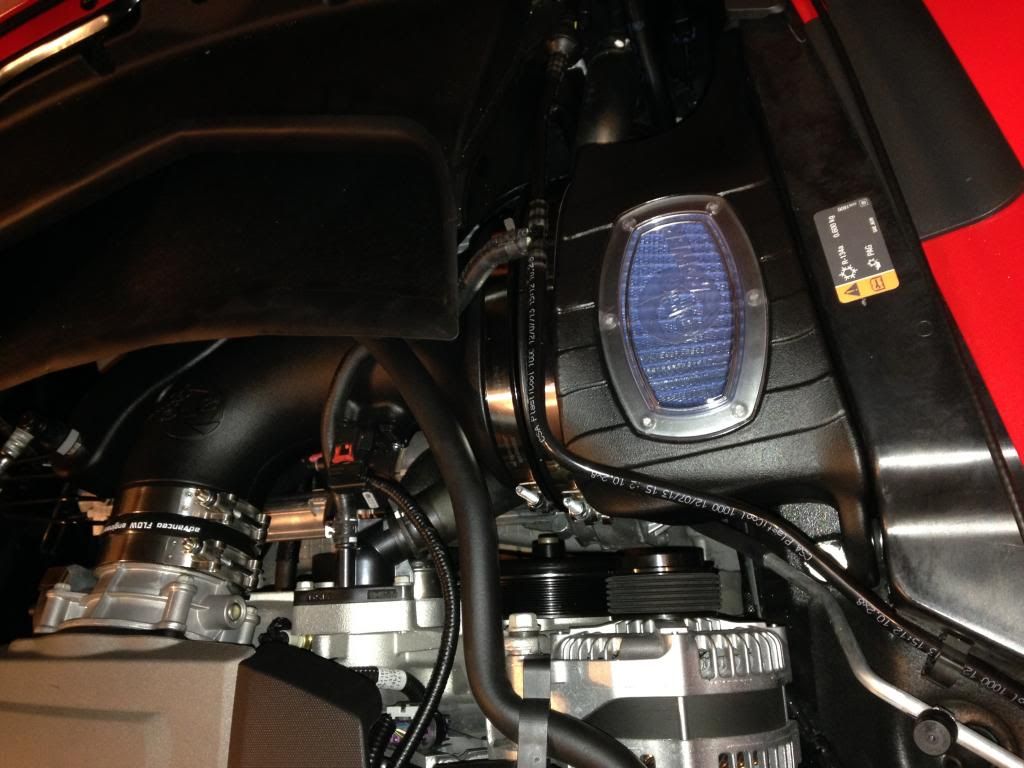
After re-connecting the resonator hoses onto the new bolts and connecting the MAF sensor, I made sure to tighten down all the t bolt clamps (and admire the see through window of the filter housing!) as best as I could, checked my work, and started the car. No check engine light, nothing weird.
But I noticed something different immediately upon start up, which sounded like a deeper rumble from the engine. It just sounds a little throatier to me and just had a more pronounced sound. Due to the pouring rain, I didn't drive it, but I revved it up quite a bit and there is a noticeable "sucking" sound and it just sounds more free-flowing than before. Sounds promising! All in all, the installation took me about 45 minutes (10 of which was spent trying to get off the last bolt from the radiator extractor piece), and I stopped to get a drink since it was muggy in my garage. It looks great and looks a hell of a lot better than the OEM filter and intake. Definitely saved about 5 pounds or so of weight from the front of the car too! I loved how AFE packaged it, the ease of the instructions and the window for checking the filter is a really cool touch and will be a conversation piece, that's for sure!
Driving Impressions: UPDATED
This morning was a cool 67 degrees here in Central Virginia and with a 20ish mile drive to work, I was looking forward to seeing any changes that I could feel right away (although I know it will take a couple hundred miles for the computer to adjust, my car is also Diablo tuned, as well). Pulling out of my neighborhood (the RPM guage was still showing the yellow and red warning lines, so the car didn't warm up until I got to the main road about 10 minutes after leaving my house). Getting onto the entrance ramp to the highway, I decided to put it in 3rd gear and I was going about 45 around the ramp, and gradually increasing to about 55 to the point where I could just punch it as I am getting onto the highway. A lot of people are off today so the highway was empty, so I punched it in 3rd from about 60 and the very first thing was the AWESOME sucking and throatier sound. It was immediately noticeable to me. It just sounded FREE. At this point I had done about 7 miles from leaving my house to the highway, and while I know it takes some time, I noticed that 3rd gear (I have MN7) felt a little more happier on the top end, since I was doing about 70 after merging on the highway (speed limit is 70 in Central VA), and it just felt like it got there smoother and quicker than it did before but I don't want to deny the placebo effect. I put it in 6th gear soon after and cruised the next 10 miles to my office. Very quiet, but when I put it into 5th to give it a little more go, it has a throatier sound at the low end when you give it a slight push of the accelerator. Very sweet sound, to be honest.
Pulling into my corporate complex, it's like a long wavy road, and when I turn into the complex, I like to put it in 1st gear as I'm rolling in, then punch it for giggles. I would always chirp the tires a bit when I mash it around 15 mph and then the tires would stick (having only driven the car since early spring, my tires have always been warmed up after driving about 20 miles in 70-80+ degree temperature.) However, when I did it this morning, with the temp nearly 73 when I got to work, I decided to punch it from about 17 mph and the tires were spinning/hopping like crazy with the TC kicking in and this did NOT occur before (2900 miles and tires are virtually brand new). The engine sounded like it had a different tone--almost a deeper roar to it. It definitely raised my eyebrows a little bit, that's for sure. Sounds promising. I will update more when I have hit about 100/200/300 miles after installing, which I think will occur sometime around early next week.
People who are getting this won't be disappointed at all. Thanks AFE for making a wonderful product!
Receipt/Unboxing:
Very nice box, black cardboard with an almost reflective yet matted look to it. Small sticker on both sides of the box that shows a picture of the intake that the box contains. Box was perfect with no creases or damage whatsoever. Upon opening, I see a lot of cardboard paper and the usual, but everything in the package was placed where it was to not be disturbed while in transit. The filter was packaged in a separate bag in a separate box within the whole package--which I thought was a nice touch. The cleaning kit was also included, and that had its own box too. All in all, very professionally packaged, and there is a sticker inside the flap of the box that tells me that it was quality inspected on 5/16/14--the day it was shipped out, too!
Removal of OEM air box, filter, installation,etc:
I found it fairly easy to remove the OEM Filter housing and intake tube. The instructions that it came with were very detailed and went into detail on how to remove everything. The one thing I found slightly difficult was that the last screw holding the radiator heat extractor closest to the passenger side was kind of hard to get to because there was a hose/coil that was in the way of getting to that bolt. I didn't want to move the coil too much as it appeared to feel like it wouldn't budge. I had to use a long and thin ratchet to get to it. Once I got to it, the whole assembly literally comes right out. Once I removed the OEM t clamps, removing the stock intake tube (after taking off the intake tubes and the MAF sensor) was very easy and straightforward.
You are to re-use the OEM rubber grommets and transfer them to the AFE filter housing. The AFE housing had the inserts to where the OEM grommets would go and this made it all super easy and seamless (nice touch). The filter itself is fairly large, larger than the OEM, but you can immediately notice how much more free-flowing it is than the OEM paper filter, which looks so restrictive compared to the AFE filter. Following the instructions, I made to sure install everything as smoothly as I could and not attempt to force anything. The AFE kit comes with the replacement intake tube bolts that you screw into the resonator piece on the intake tube. I used the supplied lock-tite to further tighten the bolt. Again, nice little touch that eliminates any need to go out and get anything that is needed to complete installation.
I carefully transferred the MAF sensor onto the new AFE tube and they supplied the new M4 screws to tighten these down. I don't think they were needed but the screws are flat head as opposed to phillips and they seemed to be way better quality than OEM. I used the AFE M4 screws just cause I figured "why not, they look better anyways."
Installation of the intake tube into the filter housing and throttle body was a little tight and tricky. There is virtually very little to no flex in the tube compared to the OEM one, so don't feel tempted to bend it to make it fit. Just coax it in. I found that undoing the t clamps entirely so they can be opened and then wrapped around the throttle body connector/rubber hose made it easier and eliminated any crimping that would make it difficult to slide onto the throttle body. What concerns me a little bit is that there is an ever so slight gap between the male and female connector from the intake tube into the new filter housing. I made sure to tighten the large t clamps over each opening, but the gap is still there (pic below). However, I don't think any air will escape and I think a little play is okay for when the motor is flexing a bit under load. When I was done with installation, I did not hear or feel any air escaping the intake area or filter housing. I think its pretty tight internally with all the overlapping rubber.
After re-connecting the resonator hoses onto the new bolts and connecting the MAF sensor, I made sure to tighten down all the t bolt clamps (and admire the see through window of the filter housing!) as best as I could, checked my work, and started the car. No check engine light, nothing weird.
But I noticed something different immediately upon start up, which sounded like a deeper rumble from the engine. It just sounds a little throatier to me and just had a more pronounced sound. Due to the pouring rain, I didn't drive it, but I revved it up quite a bit and there is a noticeable "sucking" sound and it just sounds more free-flowing than before. Sounds promising! All in all, the installation took me about 45 minutes (10 of which was spent trying to get off the last bolt from the radiator extractor piece), and I stopped to get a drink since it was muggy in my garage. It looks great and looks a hell of a lot better than the OEM filter and intake. Definitely saved about 5 pounds or so of weight from the front of the car too!
I loved how AFE packaged it, the ease of the instructions and the window for checking the filter is a really cool touch and will be a conversation piece, that's for sure!Driving Impressions: UPDATED
This morning was a cool 67 degrees here in Central Virginia and with a 20ish mile drive to work, I was looking forward to seeing any changes that I could feel right away (although I know it will take a couple hundred miles for the computer to adjust, my car is also Diablo tuned, as well). Pulling out of my neighborhood (the RPM guage was still showing the yellow and red warning lines, so the car didn't warm up until I got to the main road about 10 minutes after leaving my house). Getting onto the entrance ramp to the highway, I decided to put it in 3rd gear and I was going about 45 around the ramp, and gradually increasing to about 55 to the point where I could just punch it as I am getting onto the highway. A lot of people are off today so the highway was empty, so I punched it in 3rd from about 60 and the very first thing was the AWESOME sucking and throatier sound. It was immediately noticeable to me. It just sounded FREE. At this point I had done about 7 miles from leaving my house to the highway, and while I know it takes some time, I noticed that 3rd gear (I have MN7) felt a little more happier on the top end, since I was doing about 70 after merging on the highway (speed limit is 70 in Central VA), and it just felt like it got there smoother and quicker than it did before but I don't want to deny the placebo effect. I put it in 6th gear soon after and cruised the next 10 miles to my office. Very quiet, but when I put it into 5th to give it a little more go, it has a throatier sound at the low end when you give it a slight push of the accelerator. Very sweet sound, to be honest.
Pulling into my corporate complex, it's like a long wavy road, and when I turn into the complex, I like to put it in 1st gear as I'm rolling in, then punch it for giggles. I would always chirp the tires a bit when I mash it around 15 mph and then the tires would stick (having only driven the car since early spring, my tires have always been warmed up after driving about 20 miles in 70-80+ degree temperature.) However, when I did it this morning, with the temp nearly 73 when I got to work, I decided to punch it from about 17 mph and the tires were spinning/hopping like crazy with the TC kicking in and this did NOT occur before (2900 miles and tires are virtually brand new). The engine sounded like it had a different tone--almost a deeper roar to it. It definitely raised my eyebrows a little bit, that's for sure. Sounds promising. I will update more when I have hit about 100/200/300 miles after installing, which I think will occur sometime around early next week.
People who are getting this won't be disappointed at all. Thanks AFE for making a wonderful product!
Last edited by VAmikeC7; 05-23-2014 at 08:04 AM.
 05-22-2014, 10:42 PM
#2
Drifting


Installed mine tonight too. Spot on observations of the installation. Great pix too.
I found the same slight difficulties you did with needing to open the throttle body T-clamps to get them on as well as the "forceful coaxing" to get it all in place. I too had the slight misalignment from the filter outer seal to the new air box. The filter itself is completely secure to the intake tube, so there's no danger of unfiltered air getting in. I didn't fire it up, but am looking forward to it tomorrow!
I also noticed the MAF location crowds the hose passing by, needing to bend it by. No biggie.
I got to the one extractor housing screw by using a magnetic tip screwdriver with a 1/4" socket adapter and 7mm socket. It's just the right overall length. I have actually had the extractor in and out a number of times as I've swapped throttle bodies a couple times.
Last edited by xp800; 05-22-2014 at 10:47 PM.
05-22-2014, 10:52 PM
#3
Racer
Thread Starter
Member Since: Sep 2013
Location: RVA
Posts: 263
Likes: 0
Received 0 Likes
on
0 Posts
Installed mine tonight too. Spot on observations of the installation. Great pix too.
I found the same slight difficulties you did with needing to open the throttle body T-clamps to get them on as well as the "forceful coaxing" to get it all in place. I too had the slight misalignment from the filter outer seal to the new air box. The filter itself is completely secure to the intake tube, so there's no danger of unfiltered air getting in. I didn't fire it up, but am looking forward to it tomorrow!
I also noticed the MAF location crowds the hose passing by, needing to bend it by. No biggie.
I got to the one extractor housing screw by using a magnetic tip screwdriver with a 1/4" socket adapter and 7mm socket. It's just the right overall length. I have actually had the extractor in and out a number of times as I've swapped throttle bodies a couple times.
I found the same slight difficulties you did with needing to open the throttle body T-clamps to get them on as well as the "forceful coaxing" to get it all in place. I too had the slight misalignment from the filter outer seal to the new air box. The filter itself is completely secure to the intake tube, so there's no danger of unfiltered air getting in. I didn't fire it up, but am looking forward to it tomorrow!
I also noticed the MAF location crowds the hose passing by, needing to bend it by. No biggie.
I got to the one extractor housing screw by using a magnetic tip screwdriver with a 1/4" socket adapter and 7mm socket. It's just the right overall length. I have actually had the extractor in and out a number of times as I've swapped throttle bodies a couple times.
I should have used a magnetic tip driver but unfortunately did not have one. Definitely would have made it easier!
05-22-2014, 11:36 PM
#4
Drifting
My pix of the install. Like your choice of color VAmike!:
Hose resting on MAF plug. May wrap it with something to prevent chaffing:
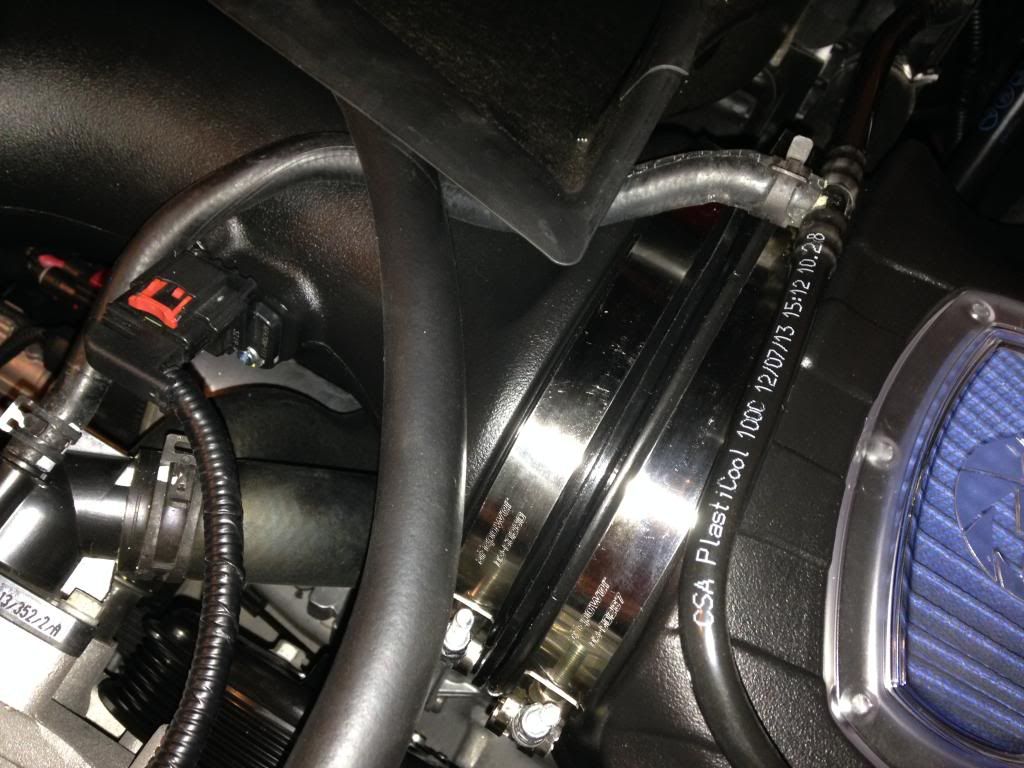
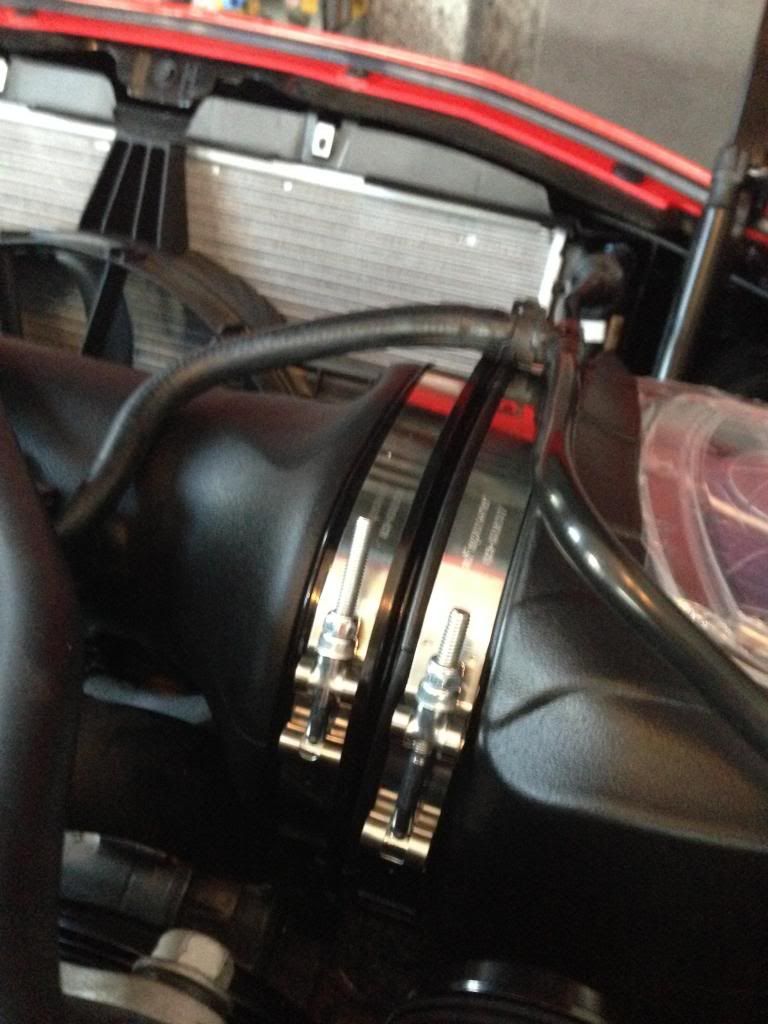
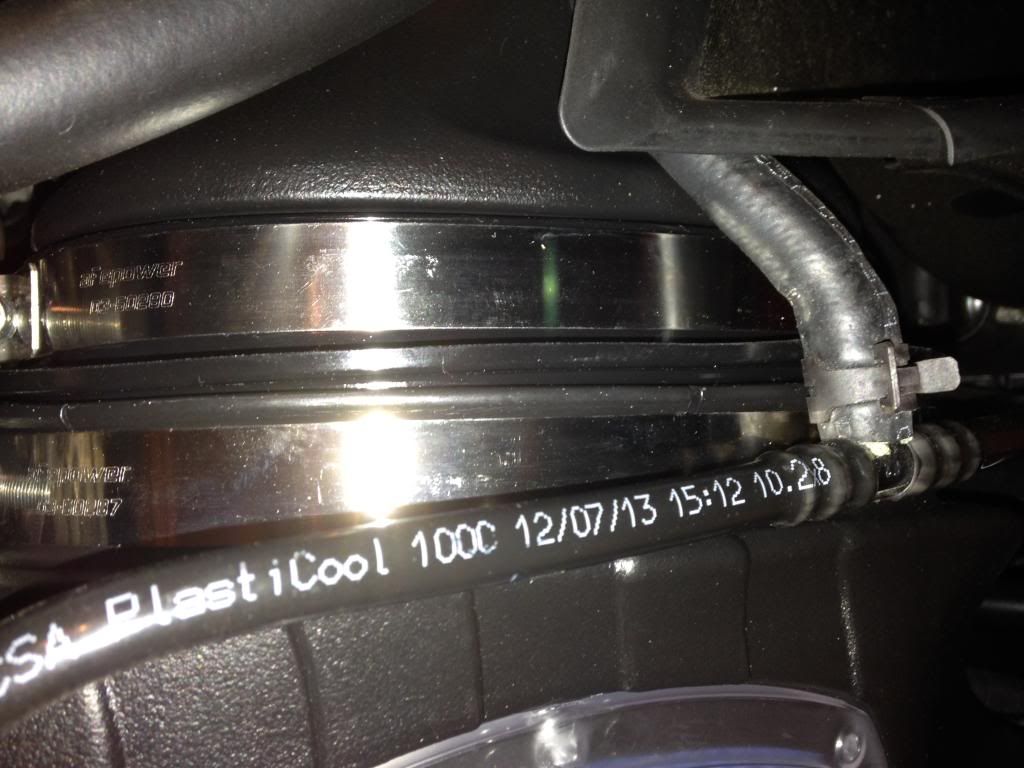
Closeup of uneven gap between filter outer seal and airbox. I could hold it in correct position, but no amount of tightneing would prevent it slipping back to this position since silicone rubber was so slippery. Not worried though... :


Hose resting on MAF plug. May wrap it with something to prevent chaffing:

Closeup of uneven gap between filter outer seal and airbox. I could hold it in correct position, but no amount of tightneing would prevent it slipping back to this position since silicone rubber was so slippery. Not worried though... :

Last edited by xp800; 05-22-2014 at 11:49 PM.
05-23-2014, 07:49 AM
#5
Racer
Thread Starter
Member Since: Sep 2013
Location: RVA
Posts: 263
Likes: 0
Received 0 Likes
on
0 Posts
My pix of the install. Like your choice of color VAmike!:
Hose resting on MAF plug. May wrap it with something to prevent chaffing:
Closeup of uneven gap between filter outer seal and airbox. I could hold it in correct position, but no amount of tightneing would prevent it slipping back to this position since silicone rubber was so slippery. Not worried though... :
05-23-2014, 09:11 AM
#7
Racer
Thread Starter
Member Since: Sep 2013
Location: RVA
Posts: 263
Likes: 0
Received 0 Likes
on
0 Posts
05-23-2014, 10:59 AM
#9
Instructor
Member Since: Mar 2014
Location: Plano TEXAS
Posts: 248
Likes: 0
Received 0 Likes
on
0 Posts

thanks for the write-up and heads-up on the install quirks! mine's sitting in the box until i get my weapon-x TB and a baseline in a week or so. i like to know what i'm putting down every step of the way and tend to spend a lot on dynos. heh. 
i'll be supplying a baseline and a plot for the AFE/W-X TB pair as well in the next few weeks.
i'll be supplying a baseline and a plot for the AFE/W-X TB pair as well in the next few weeks.
05-23-2014, 11:14 AM
#10
Racer
Thread Starter
Member Since: Sep 2013
Location: RVA
Posts: 263
Likes: 0
Received 0 Likes
on
0 Posts
thanks for the write-up and heads-up on the install quirks! mine's sitting in the box until i get my weapon-x TB and a baseline in a week or so. i like to know what i'm putting down every step of the way and tend to spend a lot on dynos. heh.
i'll be supplying a baseline and a plot for the AFE/W-X TB pair as well in the next few weeks.
i'll be supplying a baseline and a plot for the AFE/W-X TB pair as well in the next few weeks.
05-23-2014, 11:37 AM
#11
Le Mans Master

Looks like most people are opting for the oiled filter! I'm excited for my box to arrive
 05-23-2014, 01:31 PM
#12
Instructor
 05-23-2014, 01:35 PM
#13
Instructor
thanks for the write-up and heads-up on the install quirks! mine's sitting in the box until i get my weapon-x TB and a baseline in a week or so. i like to know what i'm putting down every step of the way and tend to spend a lot on dynos. heh.
i'll be supplying a baseline and a plot for the AFE/W-X TB pair as well in the next few weeks.
i'll be supplying a baseline and a plot for the AFE/W-X TB pair as well in the next few weeks.
Dont know if the Diablo tune is worth it yet, unless they can tune it specifically for these mods.
05-23-2014, 04:31 PM
#14
Melting Slicks

 05-23-2014, 04:58 PM
#15
Melting Slicks
 05-23-2014, 05:02 PM
#16
Instructor

Member Since: Mar 2014
Location: RI
Posts: 178
Likes: 0
Received 0 Likes
on
0 Posts
 Mine just arrived via UPS.
 05-24-2014, 07:17 AM
#18

Can't wait for mine to show up... 
05-24-2014, 08:51 AM
#19

I installed mine this week, I also have the diablo trinity and I'm running the 93 tune. HUGE difference. Car pulls much harder, deeper growl - and I'm still waiting for the TB to come in 
I'm not sure the average person is going to want much more than a tune, CAI and TB...... I've spent alot of time in 1/4 mile cars, and I can tell you this is a solid 11.80 car as it sits on street tires. If a can figure out how to launch the car (stick) this car has 11.5-6 in it
I'm not sure the average person is going to want much more than a tune, CAI and TB...... I've spent alot of time in 1/4 mile cars, and I can tell you this is a solid 11.80 car as it sits on street tires. If a can figure out how to launch the car (stick) this car has 11.5-6 in it

