
How to: GT seats to Competition seats conversion
 04-15-2014, 12:58 AM
#1
Pro

Thread Starter
In this this How to: I am converting the tops of my Gt seats to Competition seats. I can now positively say that the foam is stiffer in the Comp seats so by only switching the top half of the seats, you will get the look and holding power of the Comp seats without the stiffer bottom foam base. You will also save almost 1000.00 in parts by only switching the tops. The parts list will only include part numbers on the parts that are not interior color biased. EDIT AS OF 11-18-15. I paid about 2100.00 for all the parts, but prices have gone up and the airbags no longer need to be swapped. So doing this conversion is actually cheaper to do now. Each kit will vary due color and suede options.
The Comp seats were not available when I ordered my car so this was my next best option.
This will take me a couple of nights to fully write up, so please be patient for the full write up.
22892502 Carbon fiber bezels (2 needed)
22978675 upper seat heaters (2 needed)
YOU WILL REUSE THE ORIGINAL left airbag
YOU WILL REUSE THE ORIGINAL right airbag
22994465 painted rear seat back
23148495 painted rear seat back
23203966 left airbag cover half
23203967 left airbag cover half
22997084 right airbag cover half
22997085 right airbag cover half
22895943 left airbag mounting bracket
22895946 right airbag mounting bracket
22892452 upper seat foam
22892450 upper seat foam
******** left upper seat cover (color and material specific to your car)
******** right upper seat cover (color and material specific to your car)
(8) 23145346 black torx head screws to screw the air bag covers together.
Special tools needed.
Torx head screwdrivers or bits
Plastic pry tool set (Harbor Freight)
A truck to actually haul all this stuff home from the dealer

Last edited by 48supertruck; 11-19-2015 at 12:32 AM.

The following 8 users liked this post by 48supertruck:
17 Z06/Z07 (04-28-2022),
Bischof (11-10-2015),
C7 x 2 (02-28-2016),
FYREANT (04-01-2018),
Molly815 (05-05-2022),
and 3 others liked this post.
04-15-2014, 01:19 AM
#2
Pro
Thread Starter
Remove the plastic covers that cover the front floor nuts by sliding them towards the front of the car. Remove the front nuts, then adjust the seat all the way forward to access the rear nuts. Remove those. Adjust the seat all the way back.
Unhook the positive and negative battery cable.
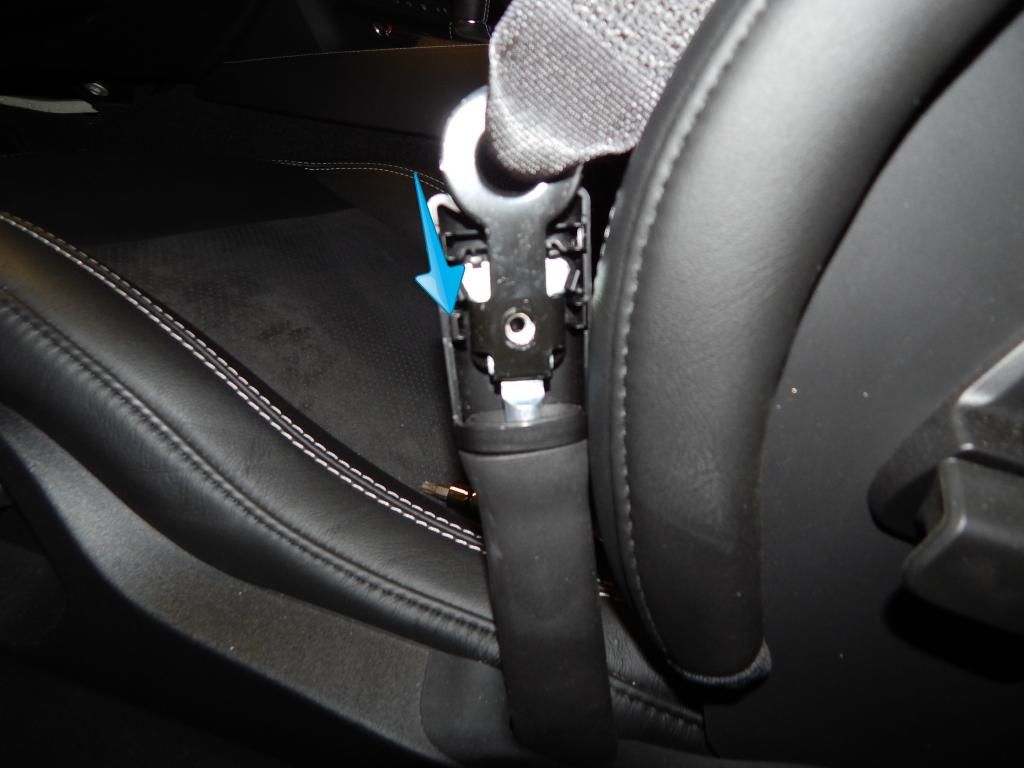
Now unplug the plug at the front of the seat and using a trim tool, pry out the one wiring plug retainer off off the seat frame.
Pry off plastic cover that the seat belt goes in to and you will find one single torx screw, remove this and then slide the seat belt down to unhook it from this.
Vist this thread for the official GM bulletins on these procedures.
http://forums.corvetteforum.com/c7-t...ease-read.html
Lift up on the recline lever and stick a small screwdriver in the slot and pry on it slightly, the **** will slide off.
Unhook the positive and negative battery cable.
Now unplug the plug at the front of the seat and using a trim tool, pry out the one wiring plug retainer off off the seat frame.
Pry off plastic cover that the seat belt goes in to and you will find one single torx screw, remove this and then slide the seat belt down to unhook it from this.
Vist this thread for the official GM bulletins on these procedures.
http://forums.corvetteforum.com/c7-t...ease-read.html


Lift up on the recline lever and stick a small screwdriver in the slot and pry on it slightly, the **** will slide off.

Last edited by 48supertruck; 04-18-2014 at 10:51 PM.
04-15-2014, 01:22 AM
#3
Tech Contributor
Member Since: Jan 2006
Location: Saint Louis MO
Posts: 4,761
Likes: 0
Received 218 Likes
on
110 Posts
St. Jude Donor '14-'15
Looking forward to this!
If you'd like, I'll post a numbered exploded view of the seat components - it may help aid you in explaining specific parts, etc. Don't want to steal your thunder - I've been looking forward to one of these threads!
If you'd like, I'll post a numbered exploded view of the seat components - it may help aid you in explaining specific parts, etc. Don't want to steal your thunder - I've been looking forward to one of these threads!
The following users liked this post:
SebastianZo6 (03-02-2024)
04-15-2014, 01:51 AM
#4
Pro
Thread Starter
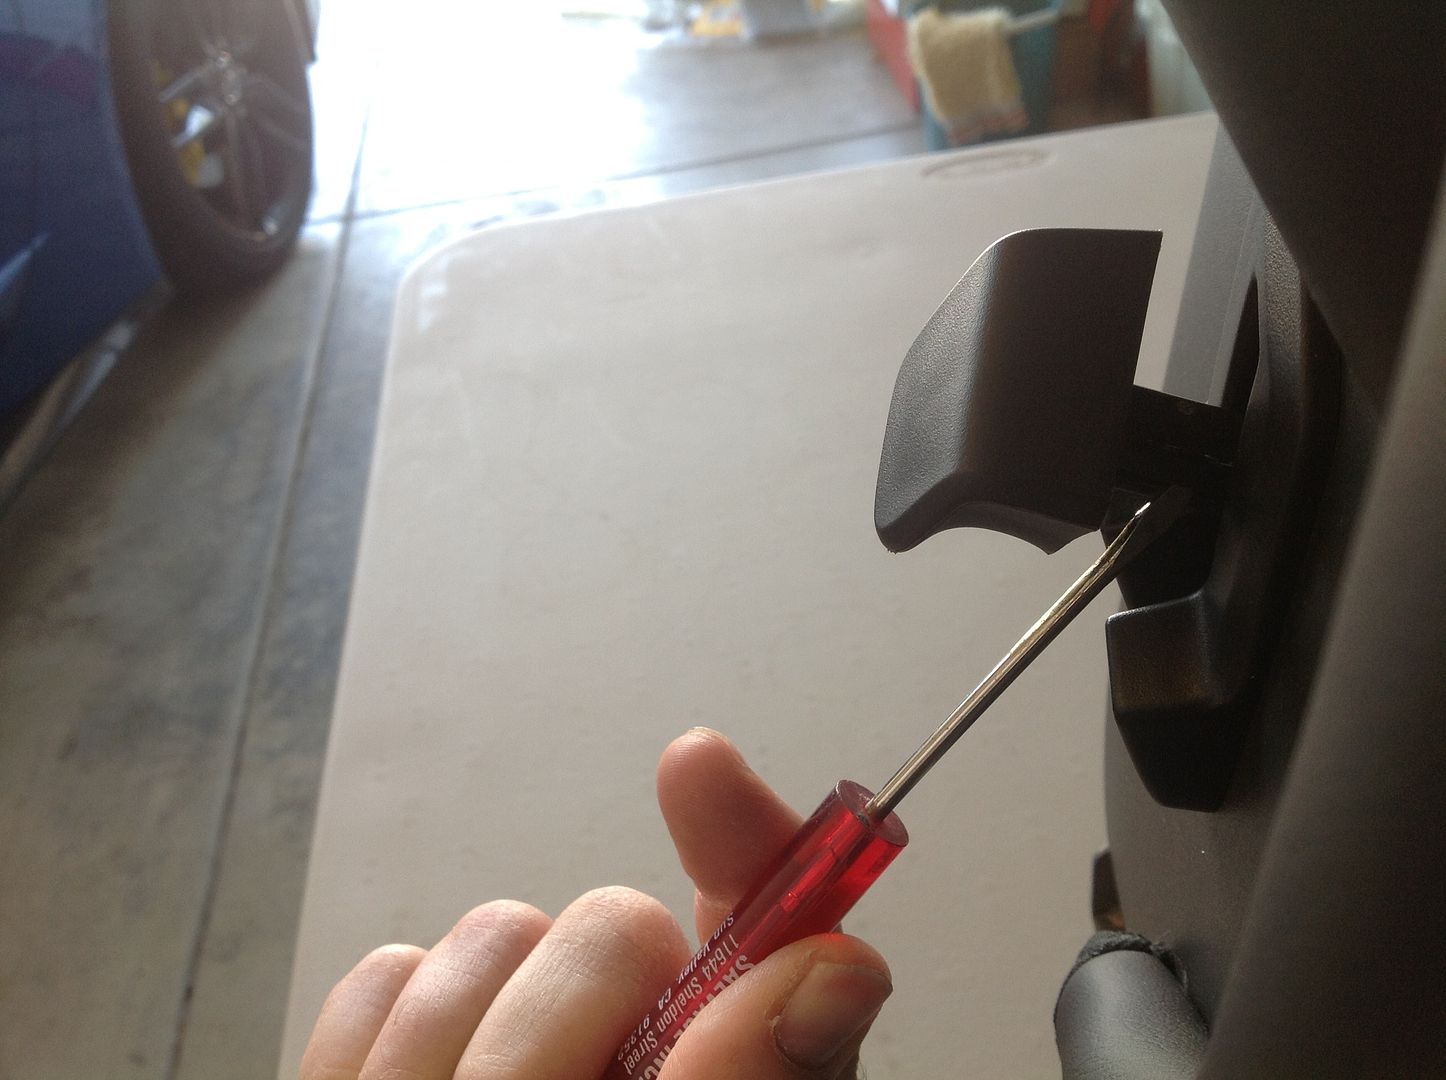
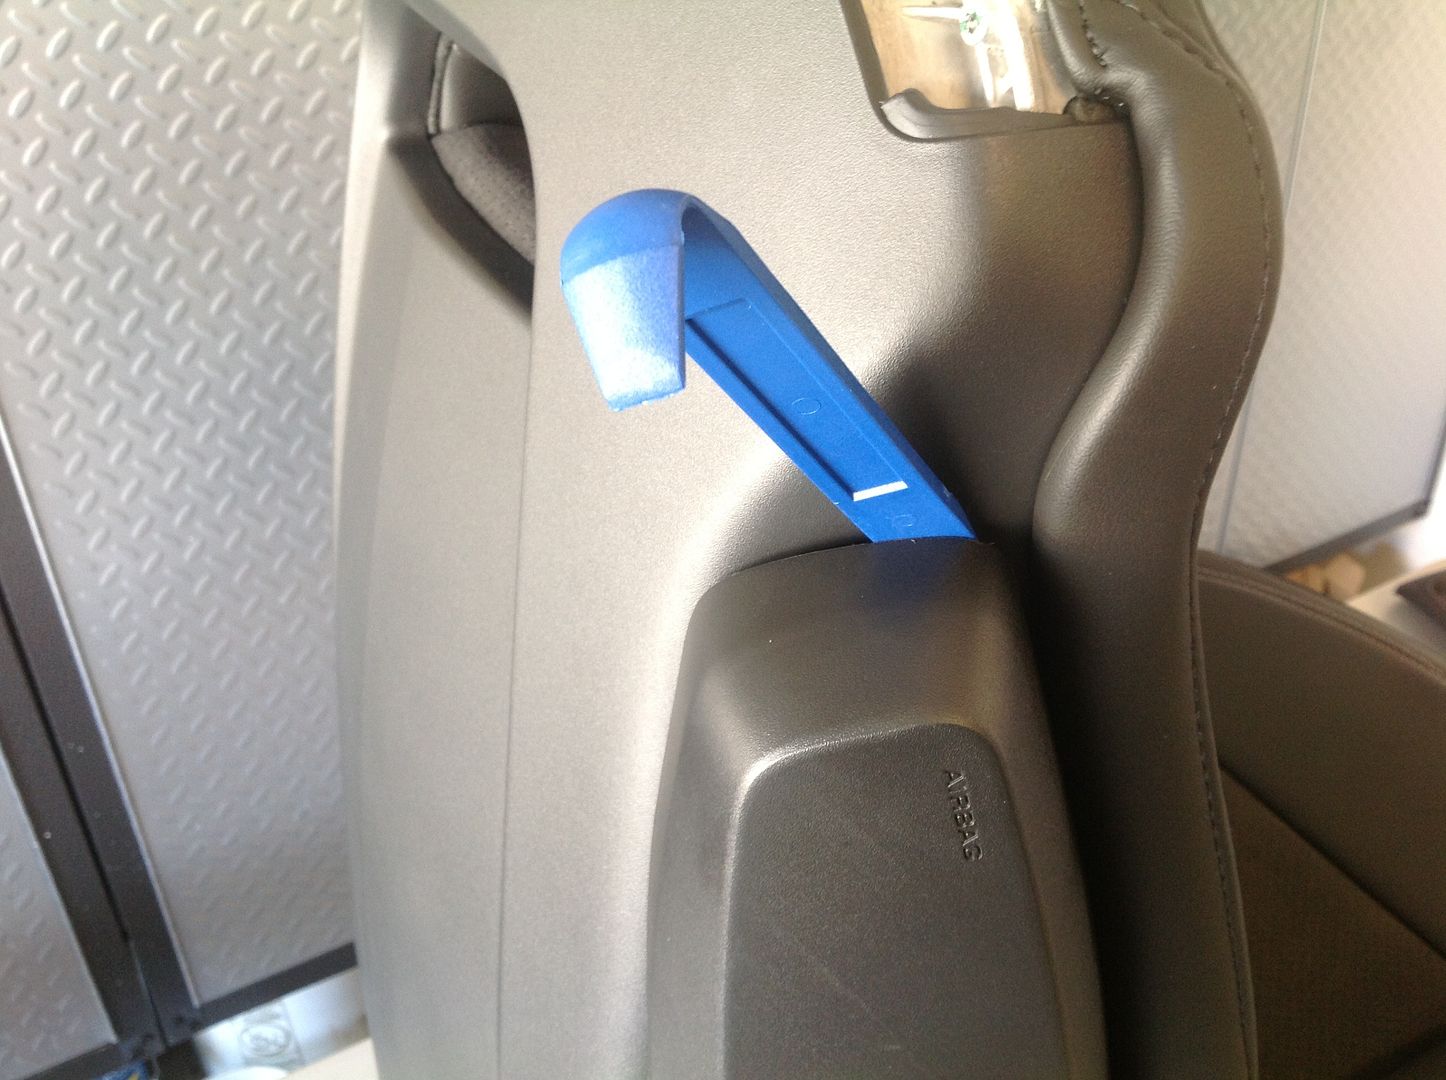
Remove the small cover on the seat belt guide to reveal 2 torx screws, remove those and then pry up from the backside to release the seat belt guide.
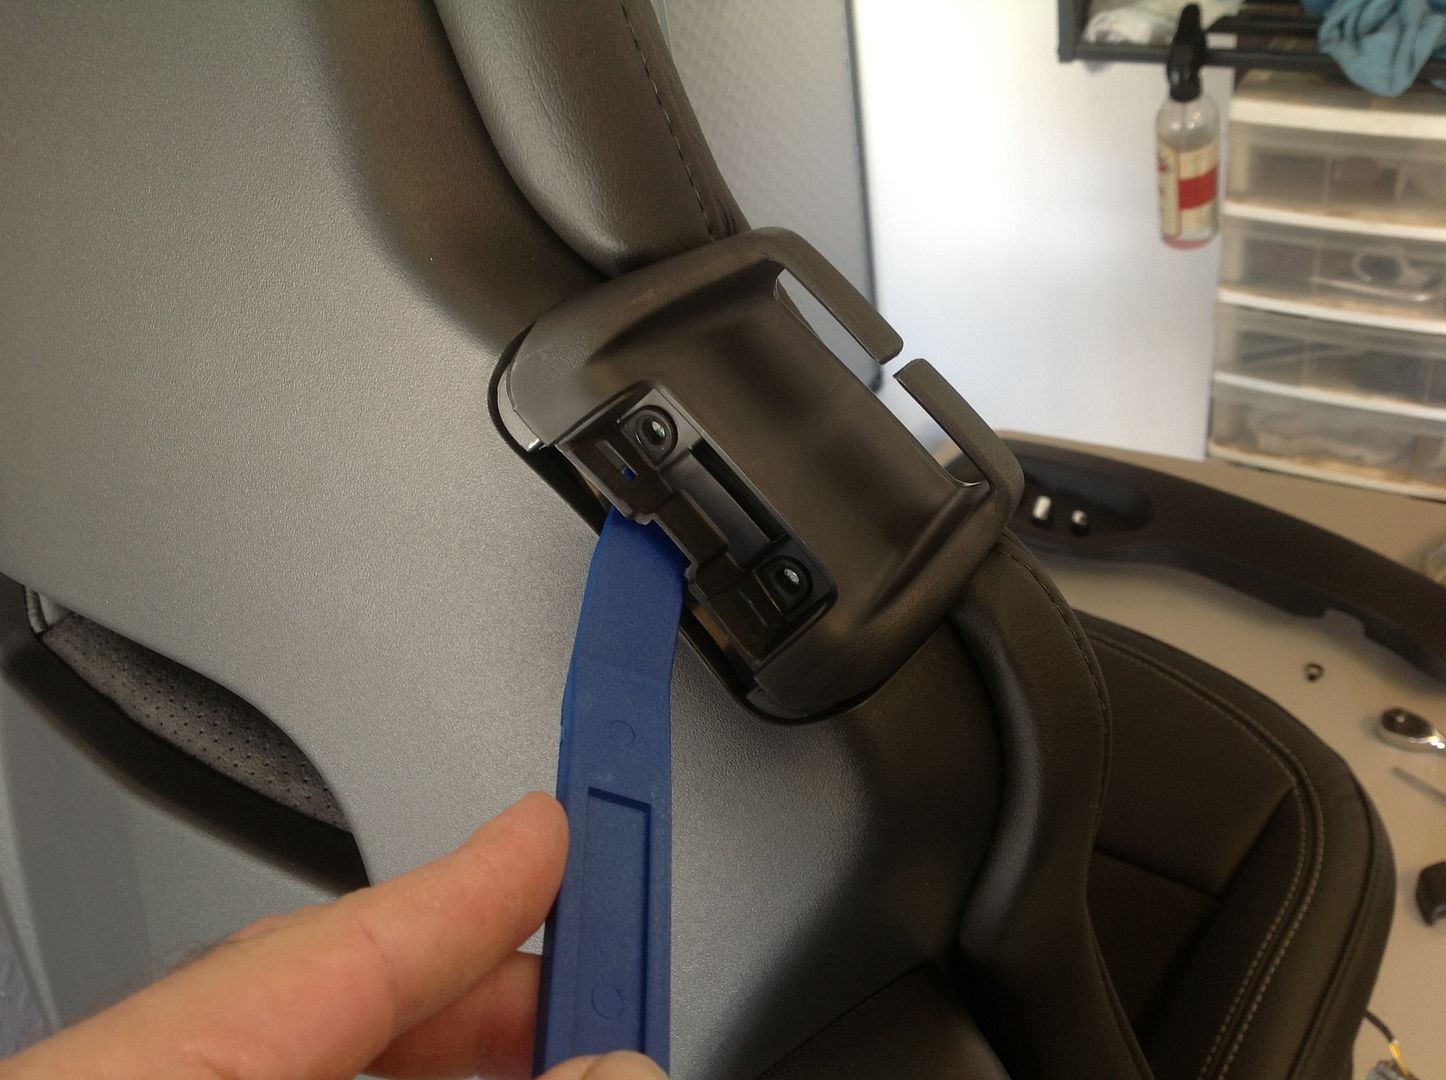
Next I attempted to remove the side cover with the switches by following the GM procedure and I found this.
WTF! A zip tie, REALLY? Now I now why cars were held in Nashville . Fat guys were probably pushing the side cover off when they slide in and out of the cars and the side cover was falling off. This was definitely an after thought, the zip tie hole was drilled, not molded in the plastic.
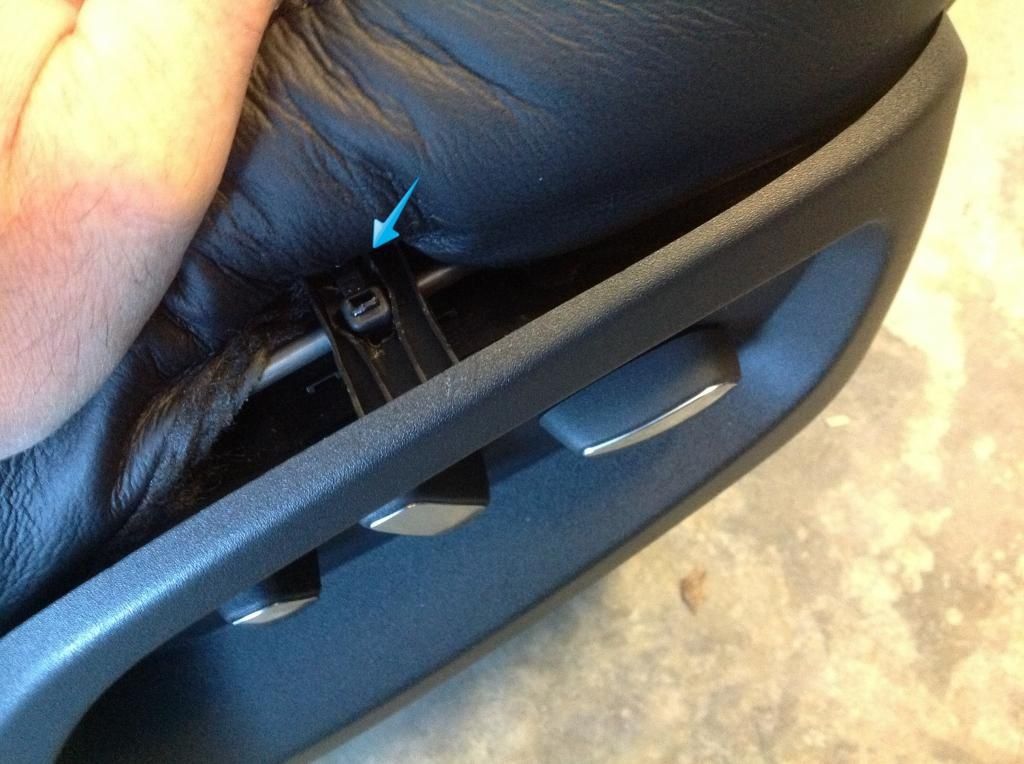
Anyways, cut the zip tie and remove the cover by pulling it up at the rear and the push the the area above the switches toward the seat to unhook the clip and slide the whole cover up. Unplug the 2 electrical plugs at the front.
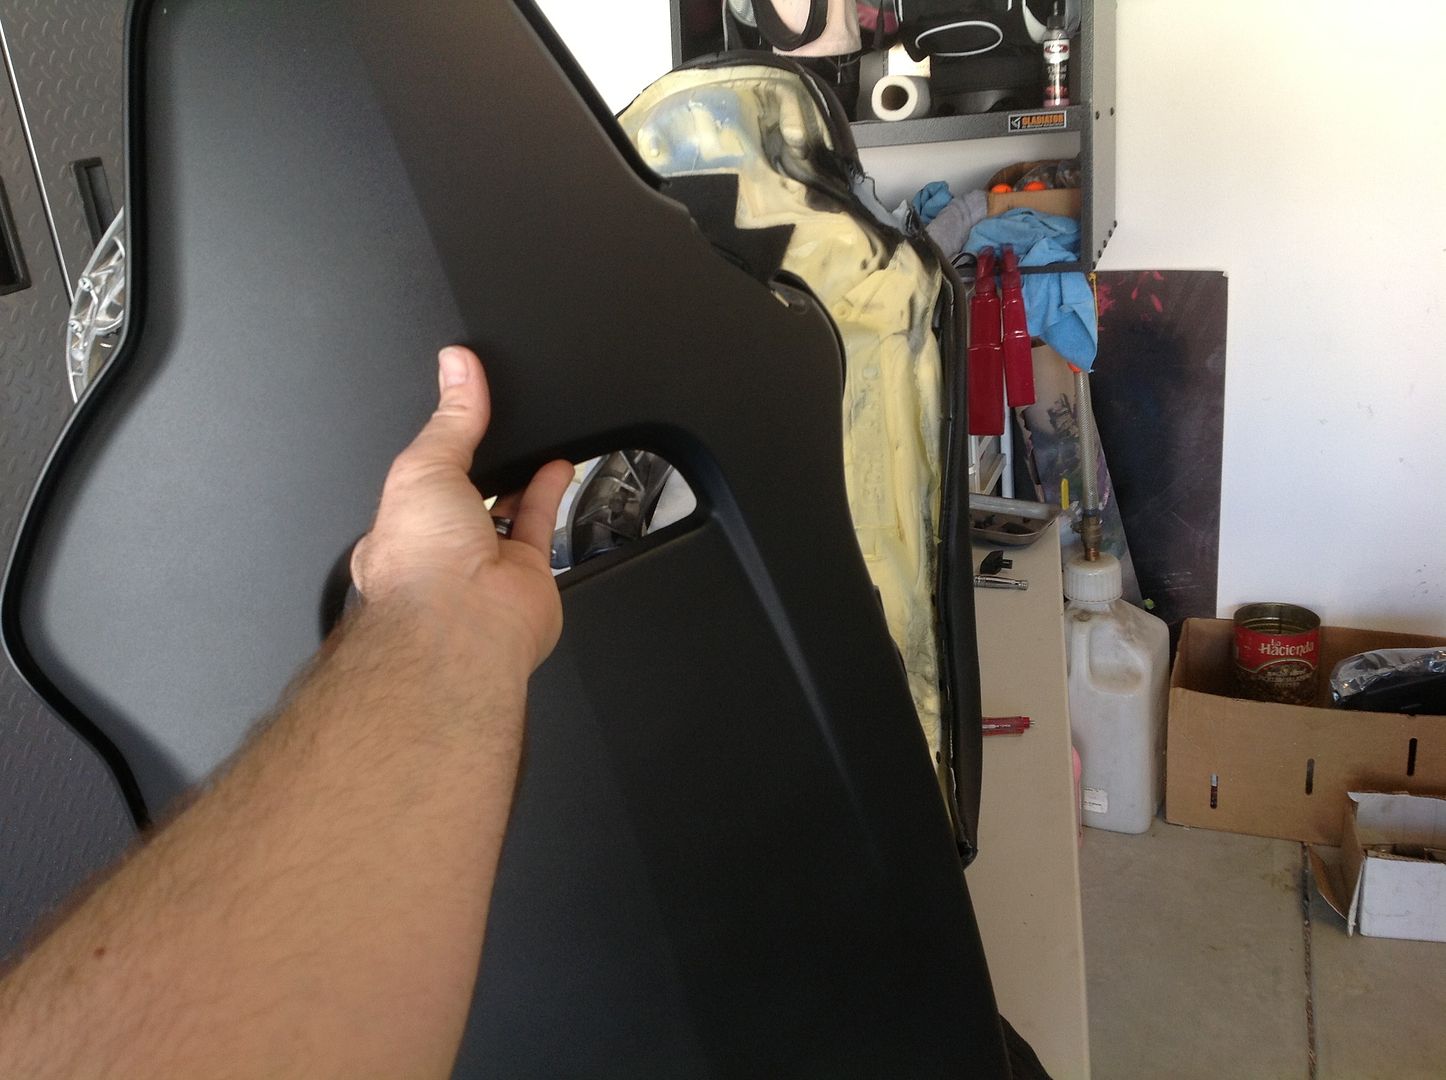
Next, pry the plastic air bag cover off, start at the top and work your way down the the backside.
Lay a towel or blanket down and flip seat on its side. What do I find? more zip ties. Cut these zip ties only and unhook the white plastic hooks.

Next I attempted to remove the side cover with the switches by following the GM procedure and I found this.

WTF! A zip tie, REALLY? Now I now why cars were held in Nashville
. Fat guys were probably pushing the side cover off when they slide in and out of the cars and the side cover was falling off. This was definitely an after thought, the zip tie hole was drilled, not molded in the plastic.Anyways, cut the zip tie and remove the cover by pulling it up at the rear and the push the the area above the switches toward the seat to unhook the clip and slide the whole cover up. Unplug the 2 electrical plugs at the front.
Next, pry the plastic air bag cover off, start at the top and work your way down the the backside.


Lay a towel or blanket down and flip seat on its side. What do I find? more zip ties. Cut these zip ties only and unhook the white plastic hooks.

Last edited by 48supertruck; 04-15-2014 at 02:06 AM.
The following users liked this post:
UAE C8 (09-18-2021)
04-15-2014, 01:58 AM
#5
Pro
Thread Starter
04-15-2014, 02:24 AM
#6
Tech Contributor
Member Since: Jan 2006
Location: Saint Louis MO
Posts: 4,761
Likes: 0
Received 218 Likes
on
110 Posts
St. Jude Donor '14-'15

How early was this one built? I have a whole bunch of weird "oops" stuff in my car - #486 off the line.
I won't re-post those, but I'll send you a couple of these other parts ones in case they help.
 04-15-2014, 03:00 AM
#7
Pro
Thread Starter
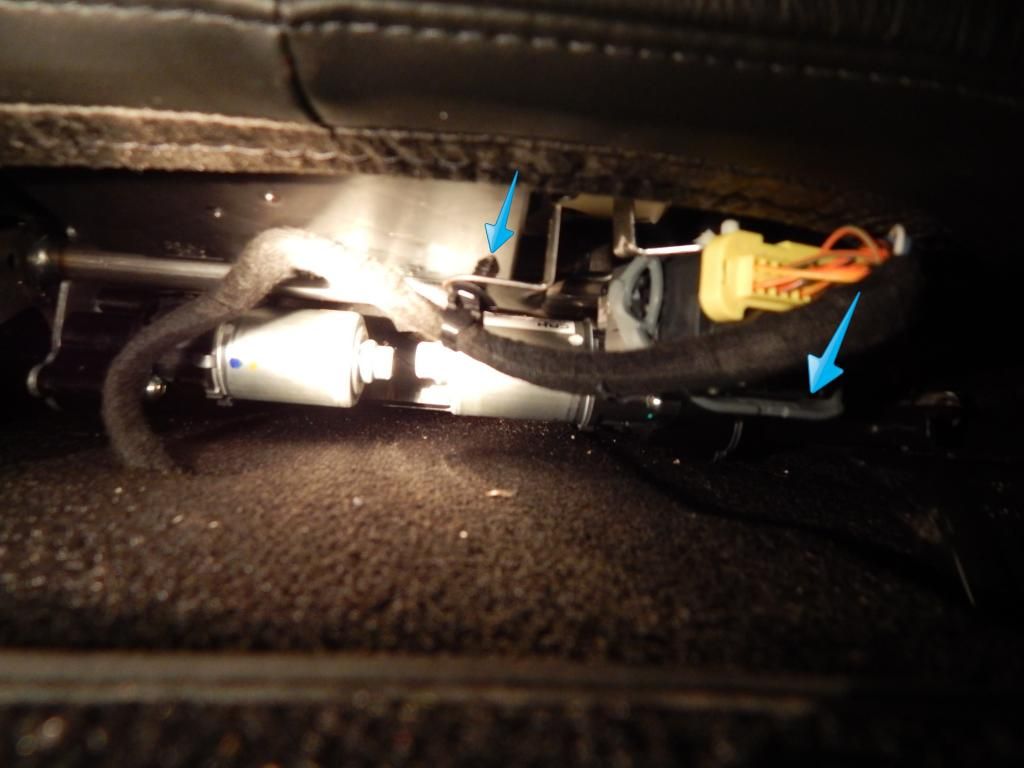
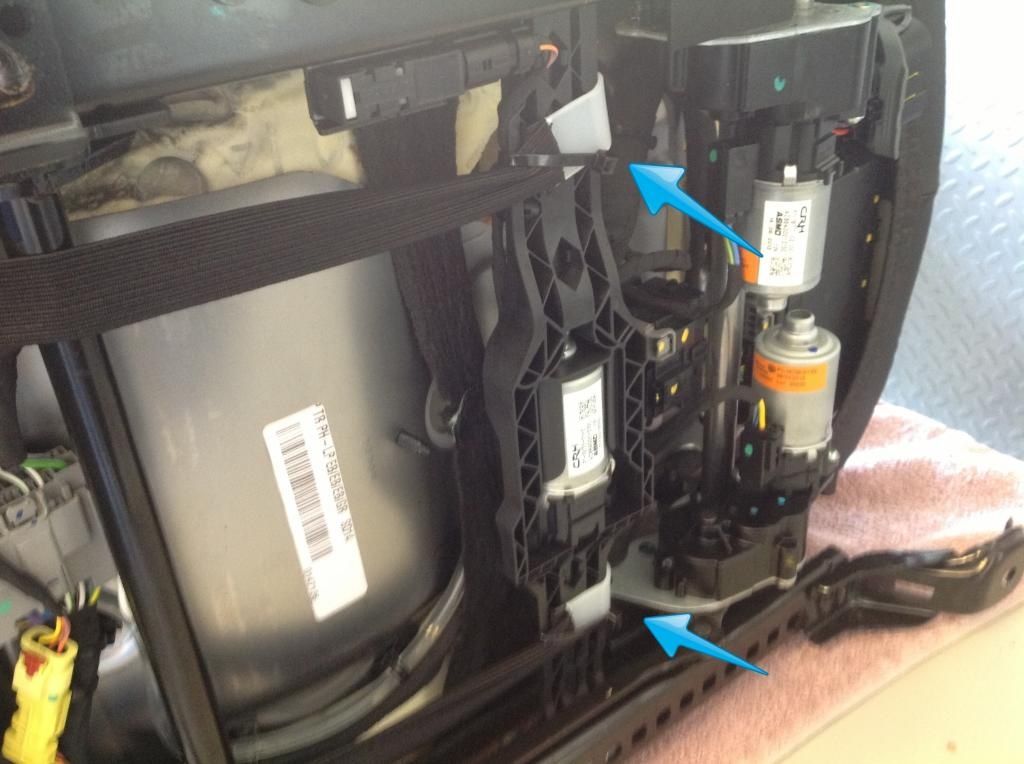
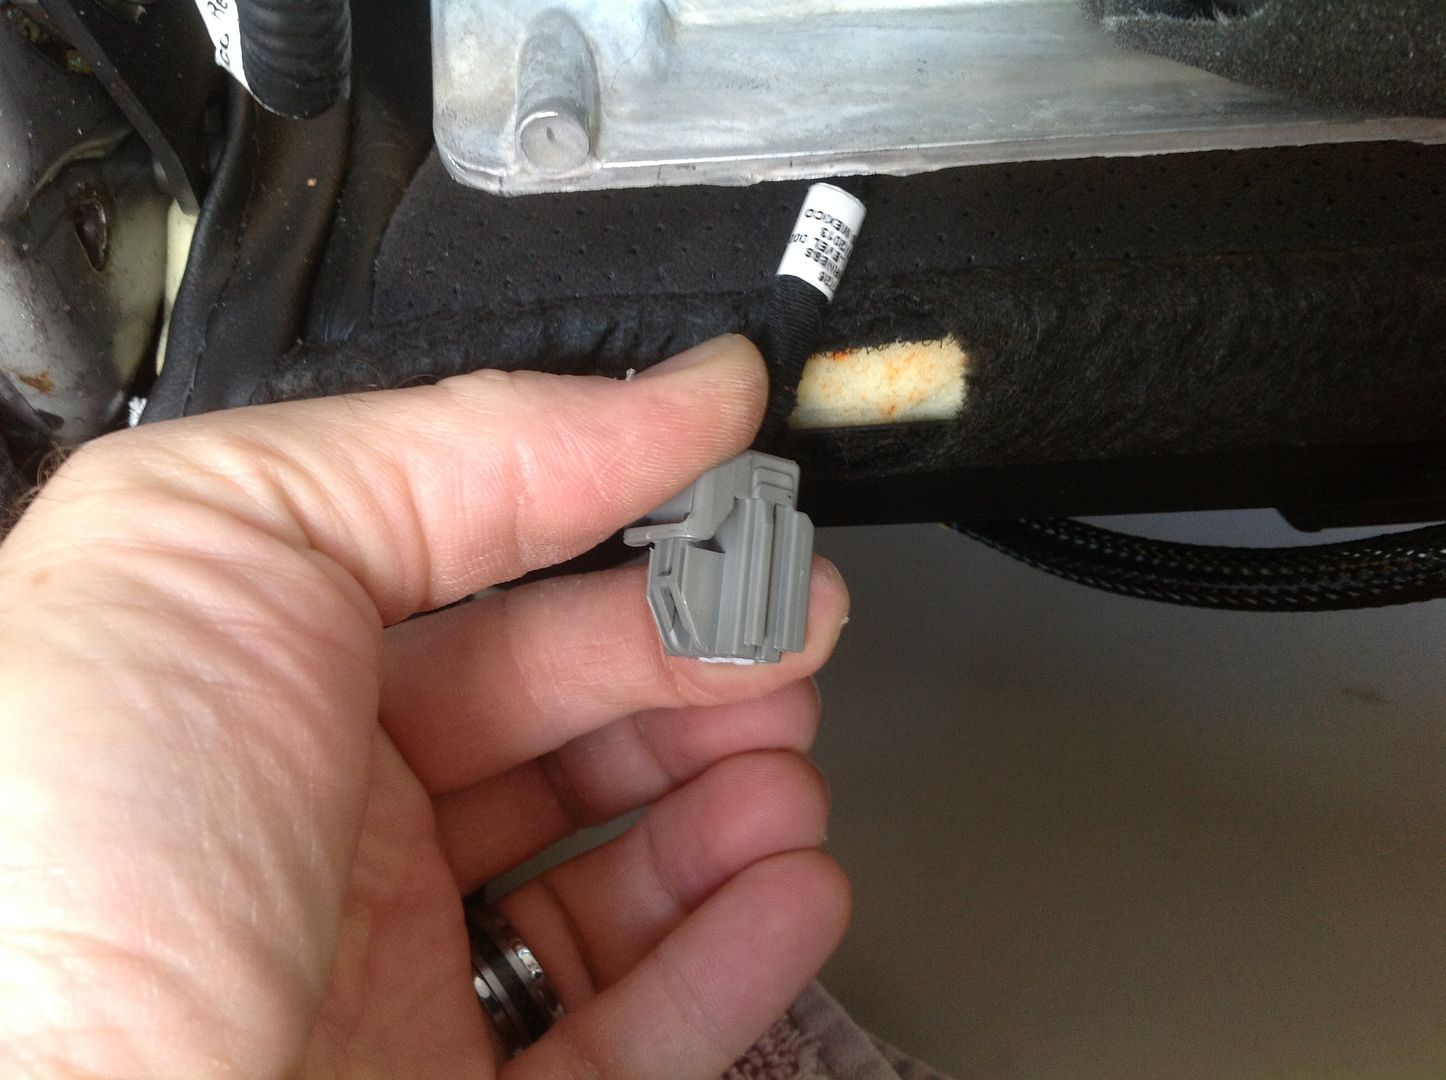
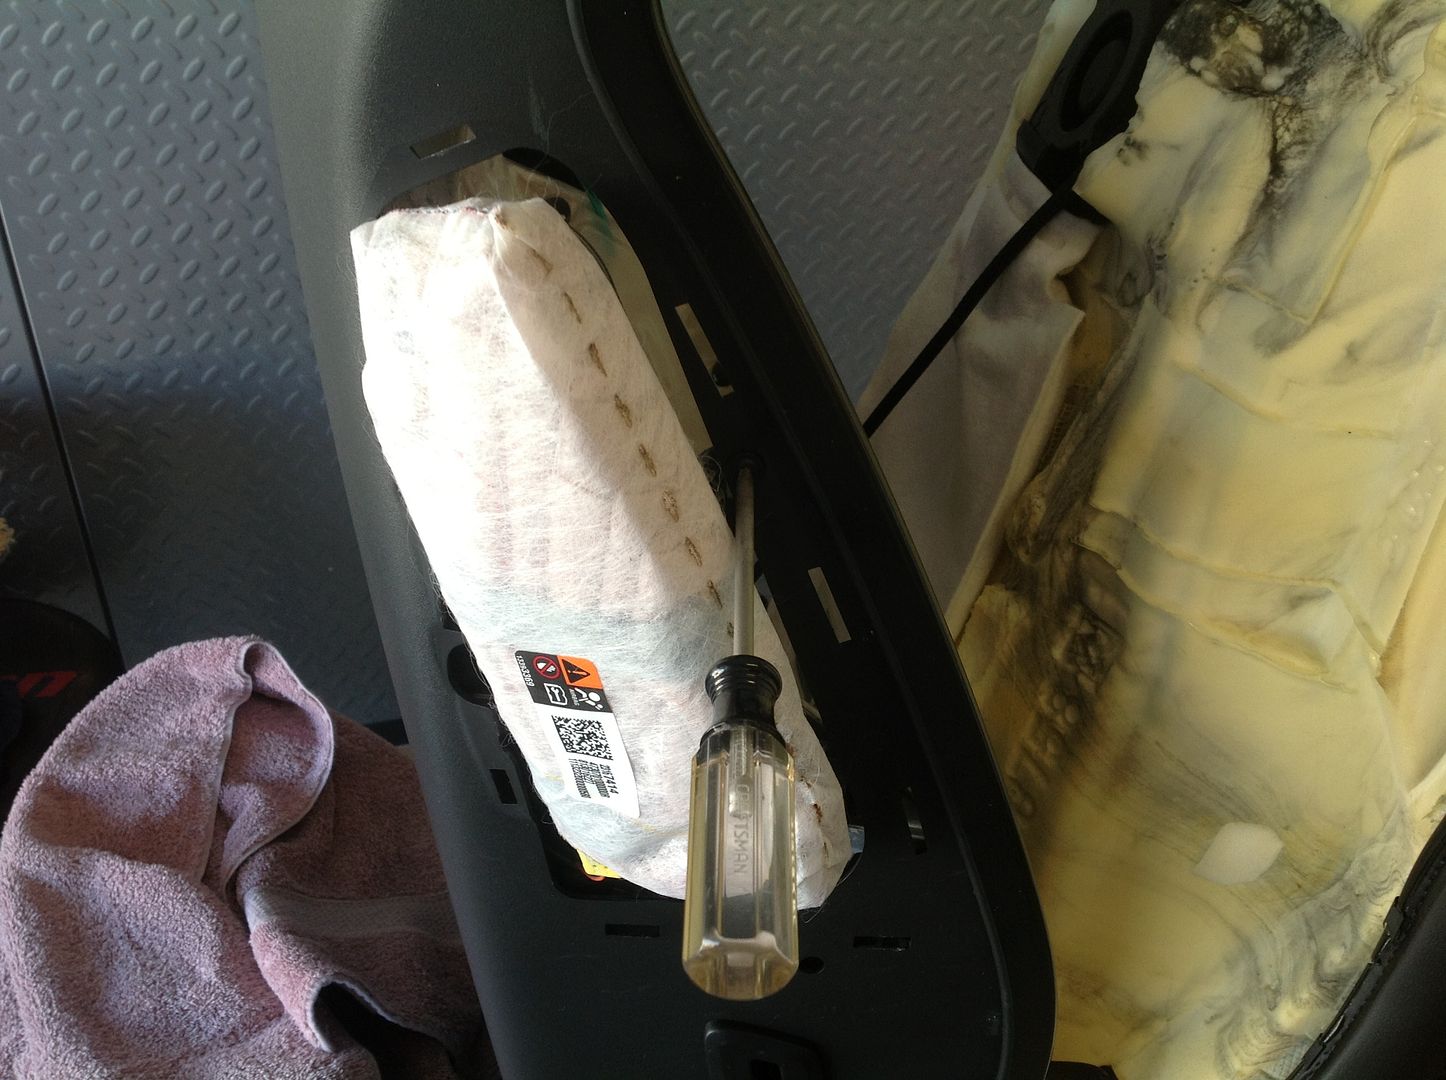
Lift up the cloth flap in the back, unplug the seat heater plug and the cooling fan plug. They are the two small grey plugs, one on each side.
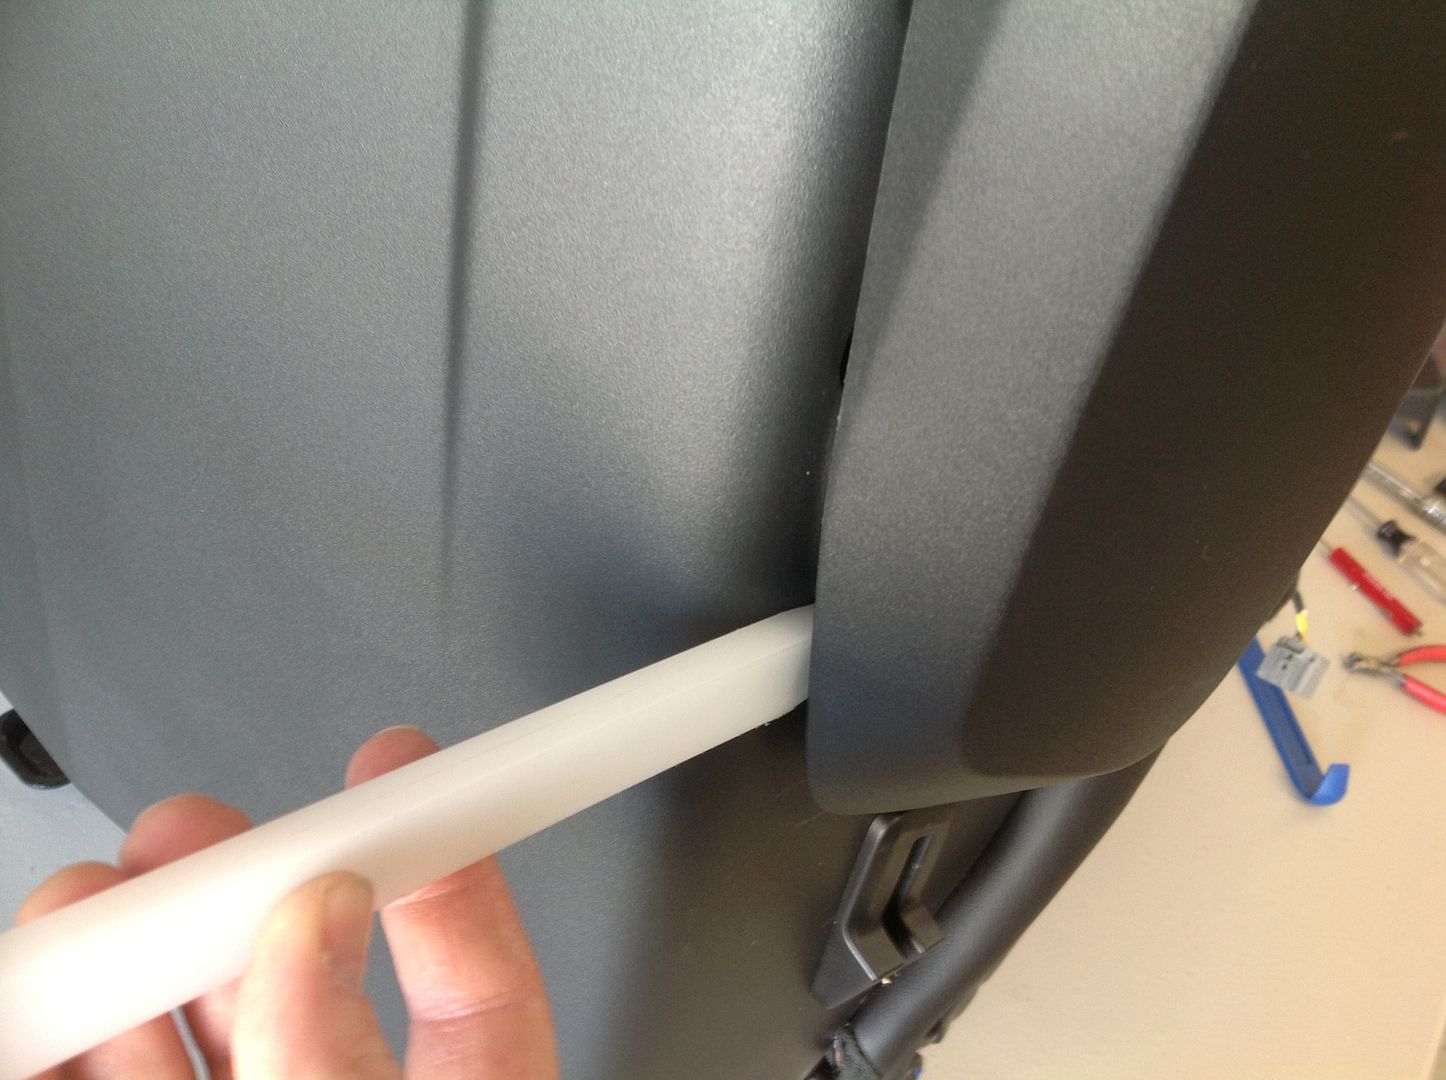
Now you will start to release the upper seat cover and foam from the back panel and frame. First pry these 2 clips off.
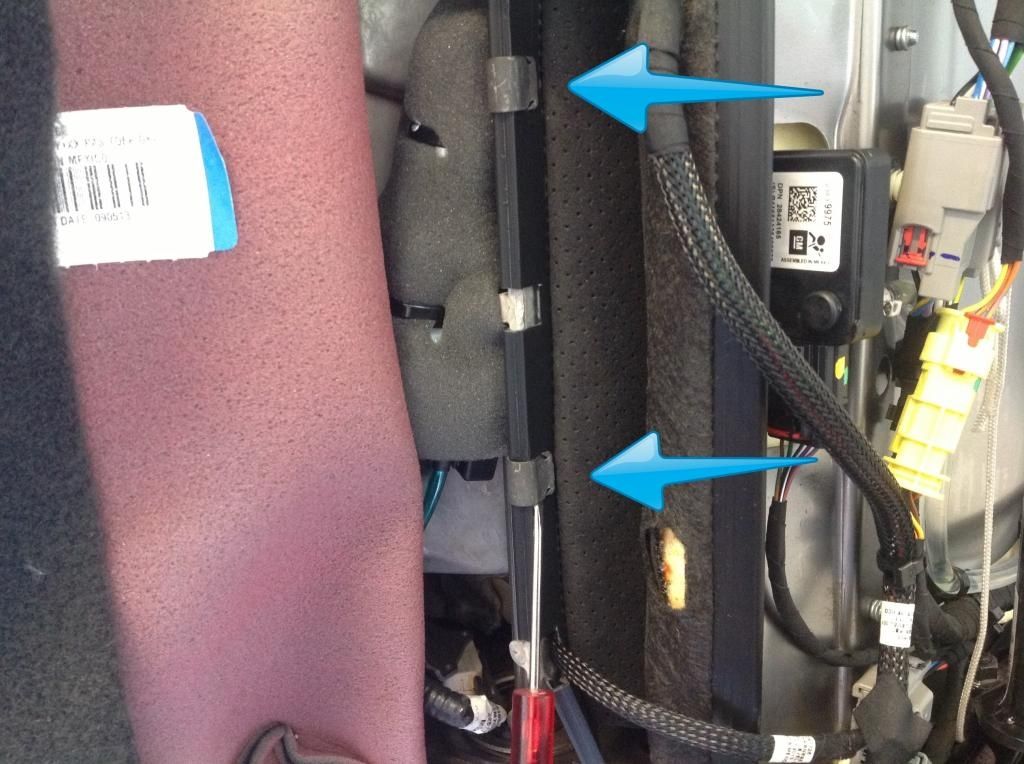
Then pull the plastic rails off of the seat frame.
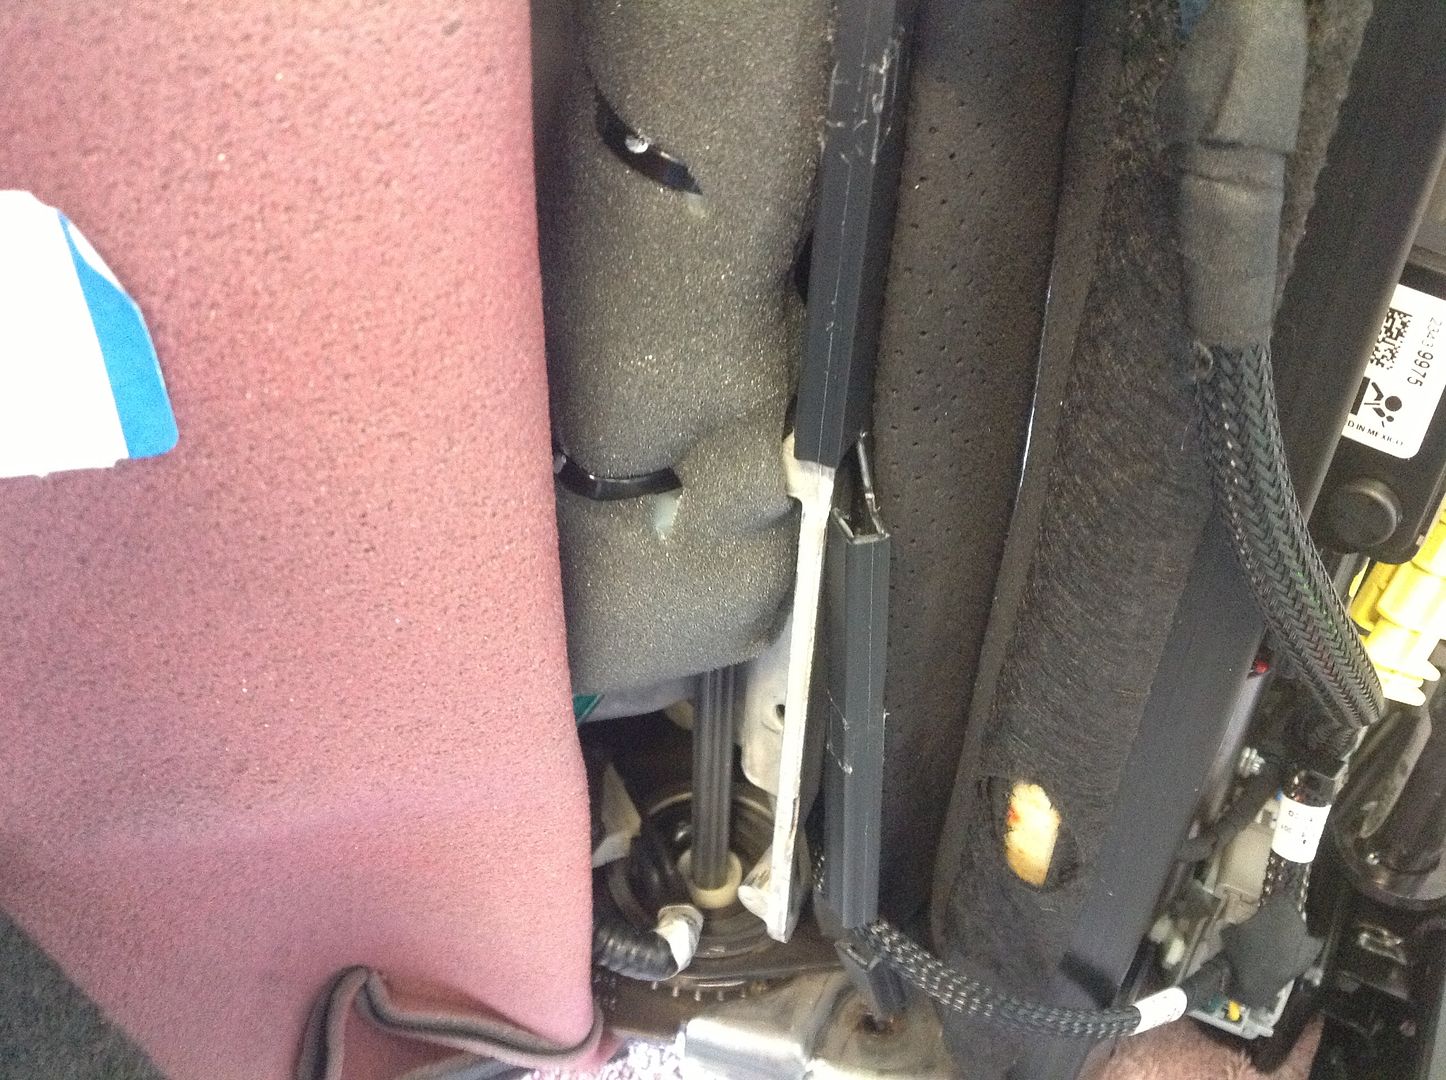
Using a small tool, stick it in this lower section shown. Great description, I know
You are prying out this this clip and there was three of them on my seat, they were only on the air bag side.

EDIT: When I was converting the left side seat, all the clips stayed inside the groove when I pulled the seat cover out and you may have to dig them out.
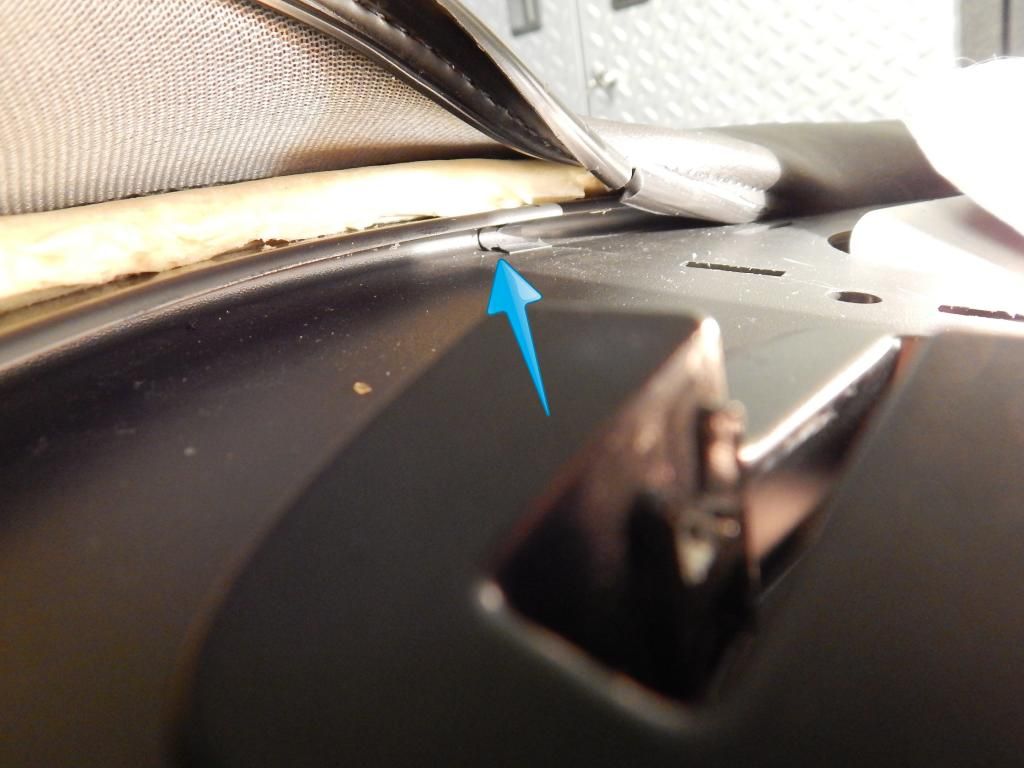
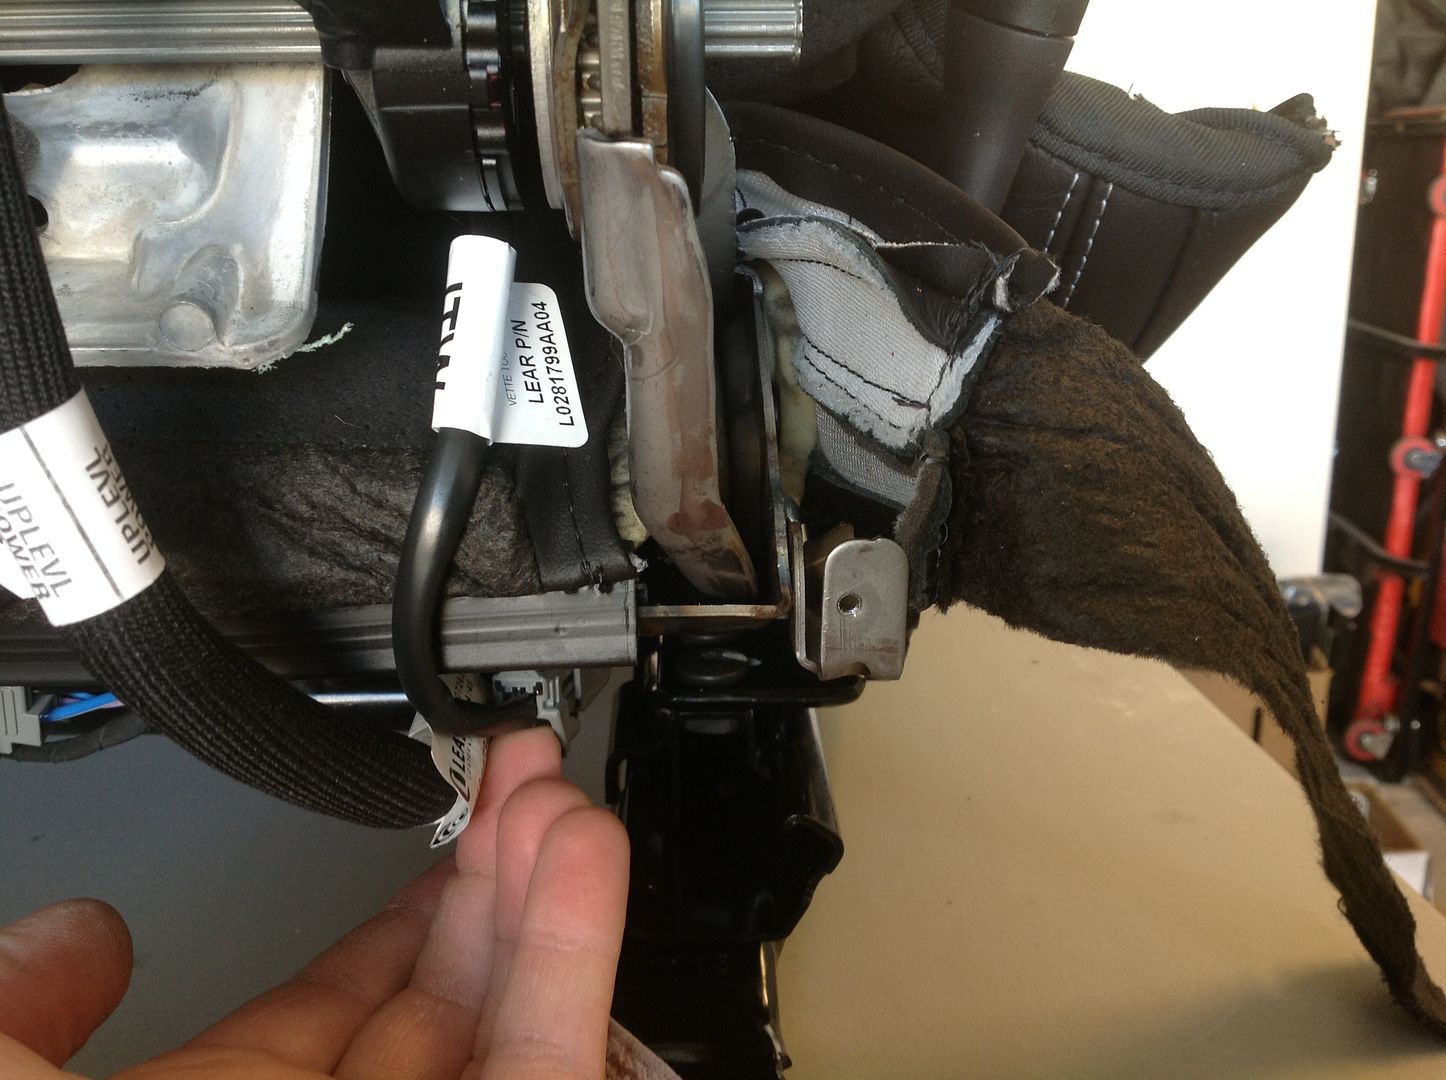
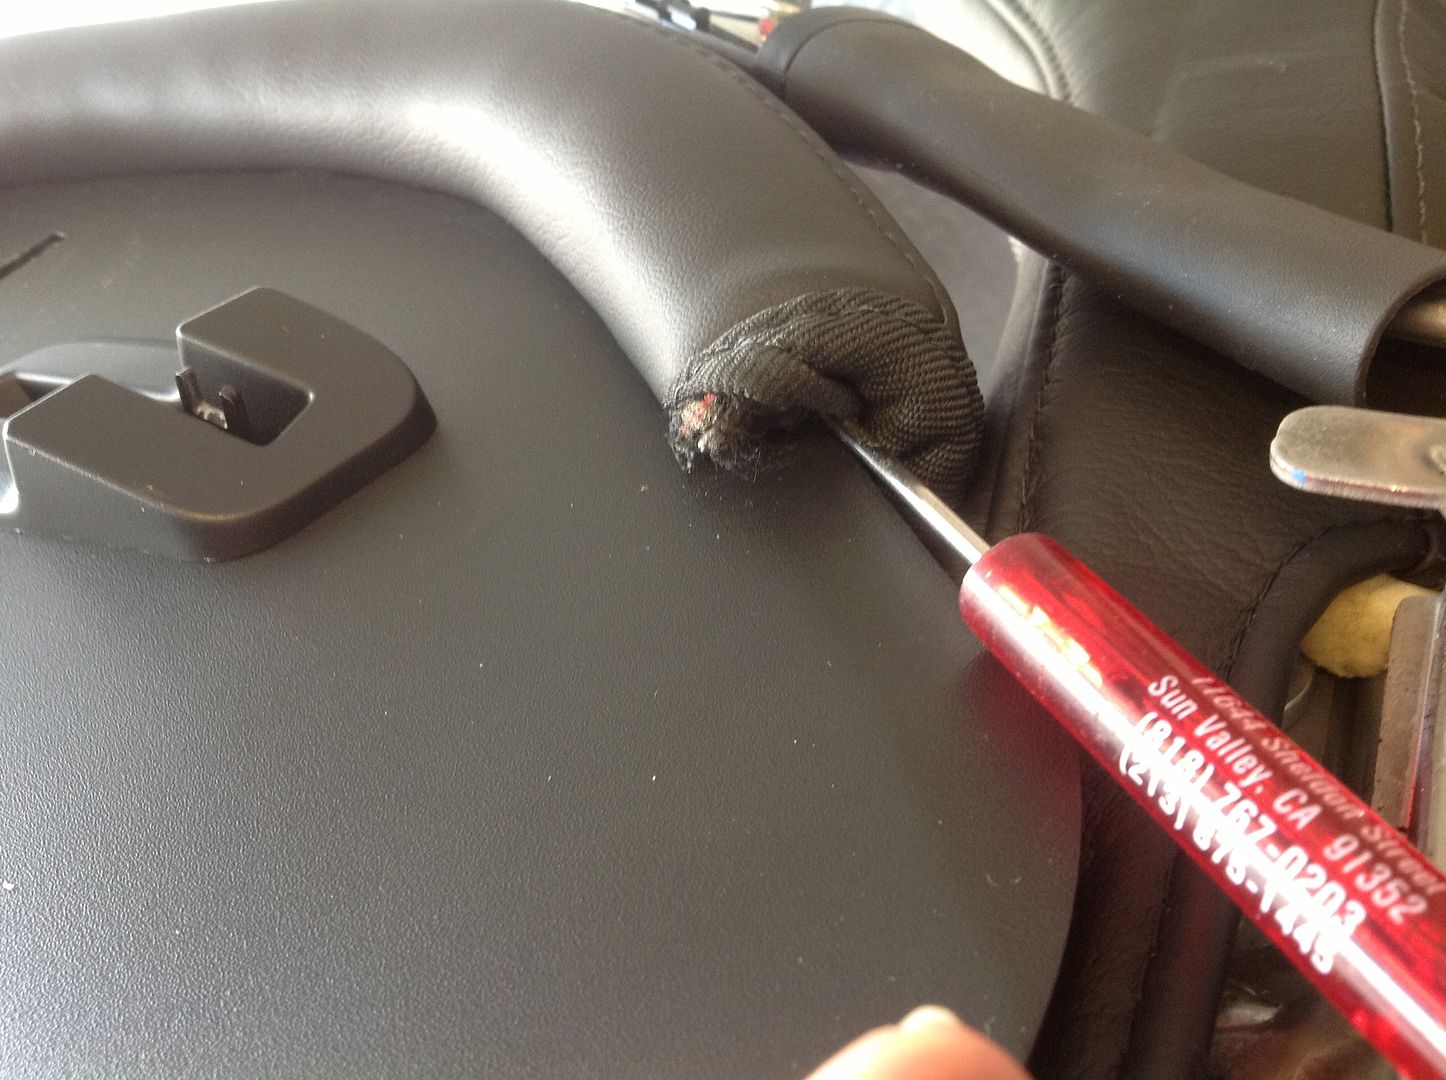
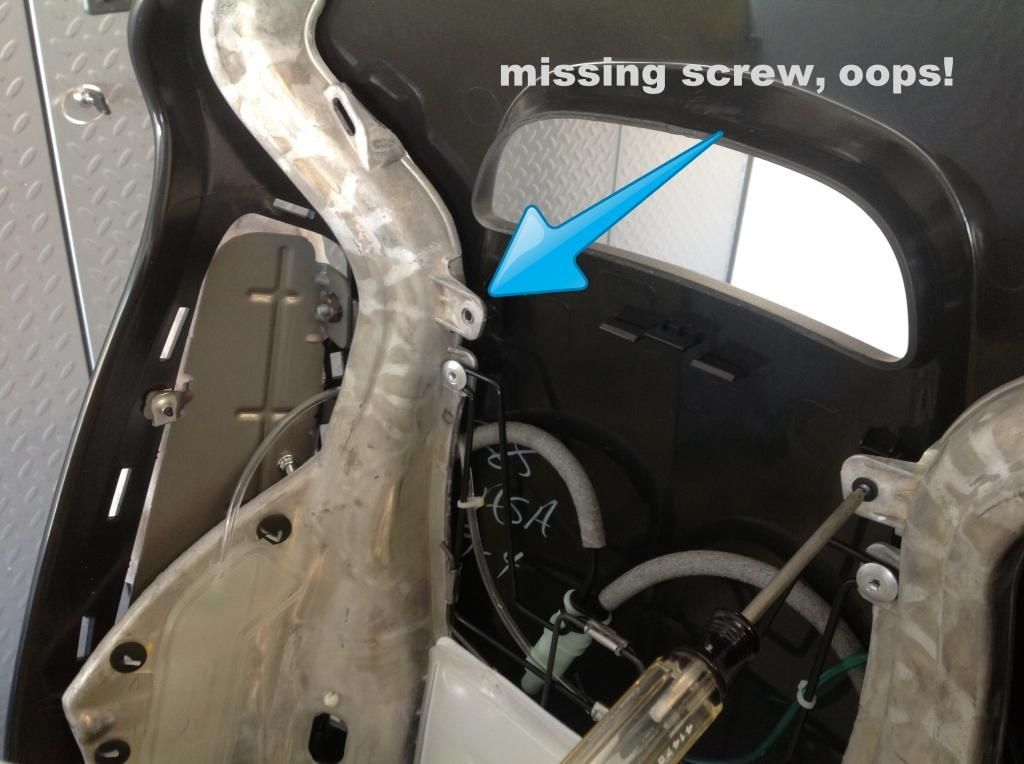
Now work the welting out all the way around the seat cover until it is released. The whole upper cover and foam will come off now. Now, it is time to remove the back plastic seat back. Remove the 2 torx screws on each side.
There are supposed to be 2 screws in the middle of the frame also, mine was missing one, this is is the third missing screw I have found on my car. Gotta cut costs somewhere. Right?
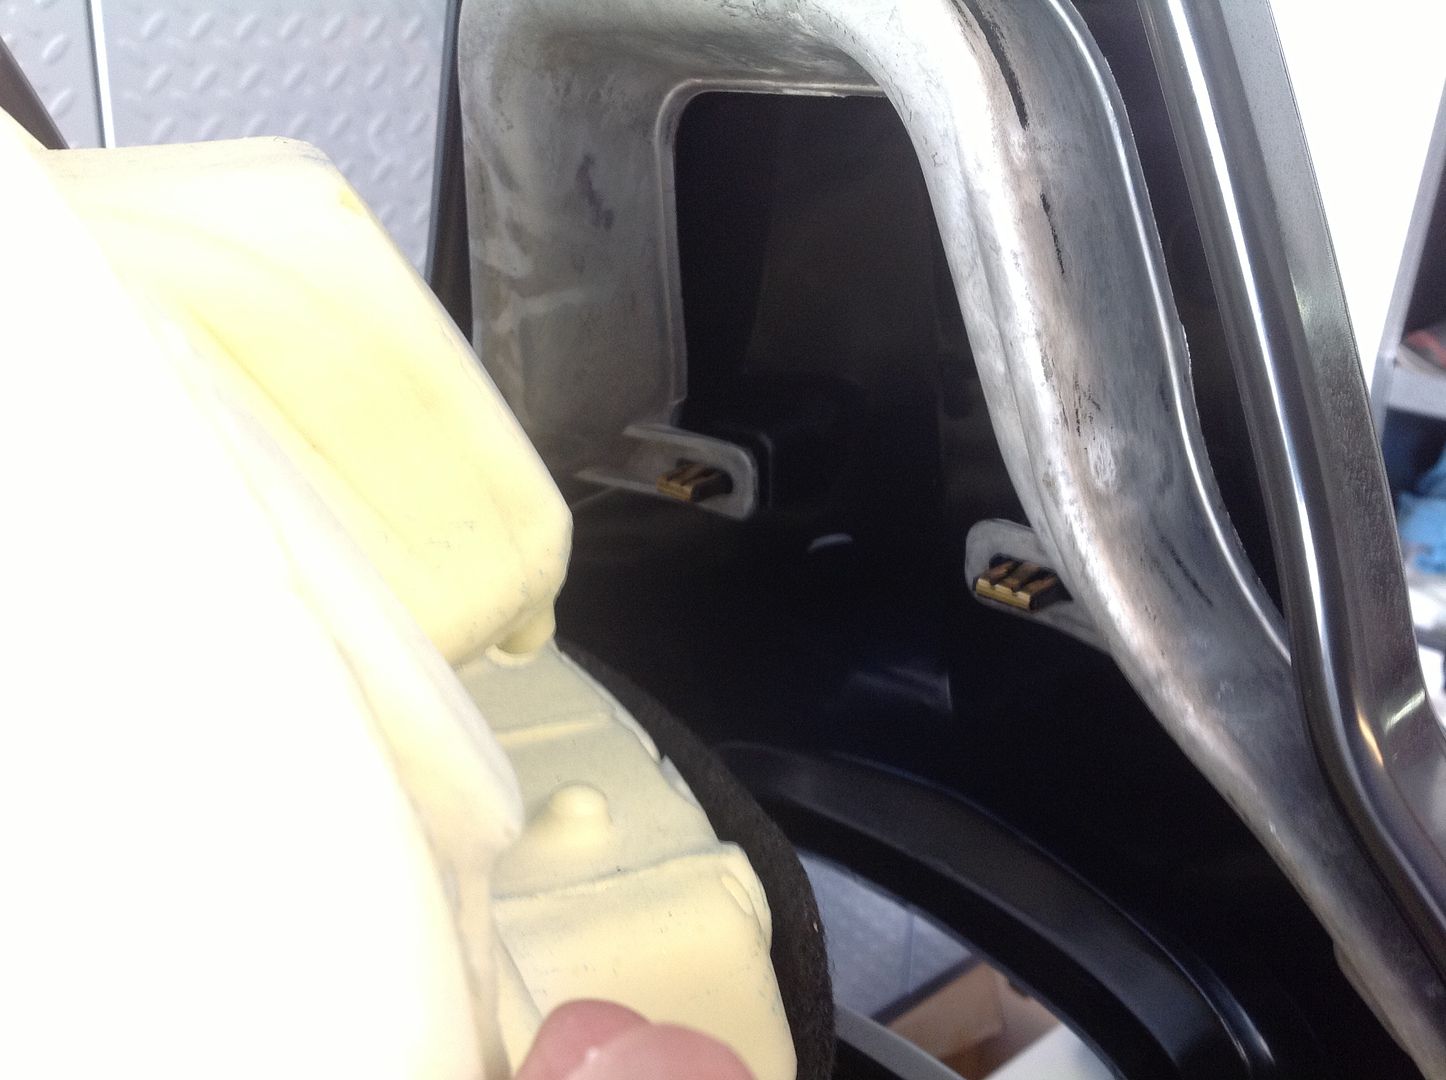
There are 2 snap clips at the top and two snap clips under the lumbar support bag, squeeze these with some needle nose pliers.
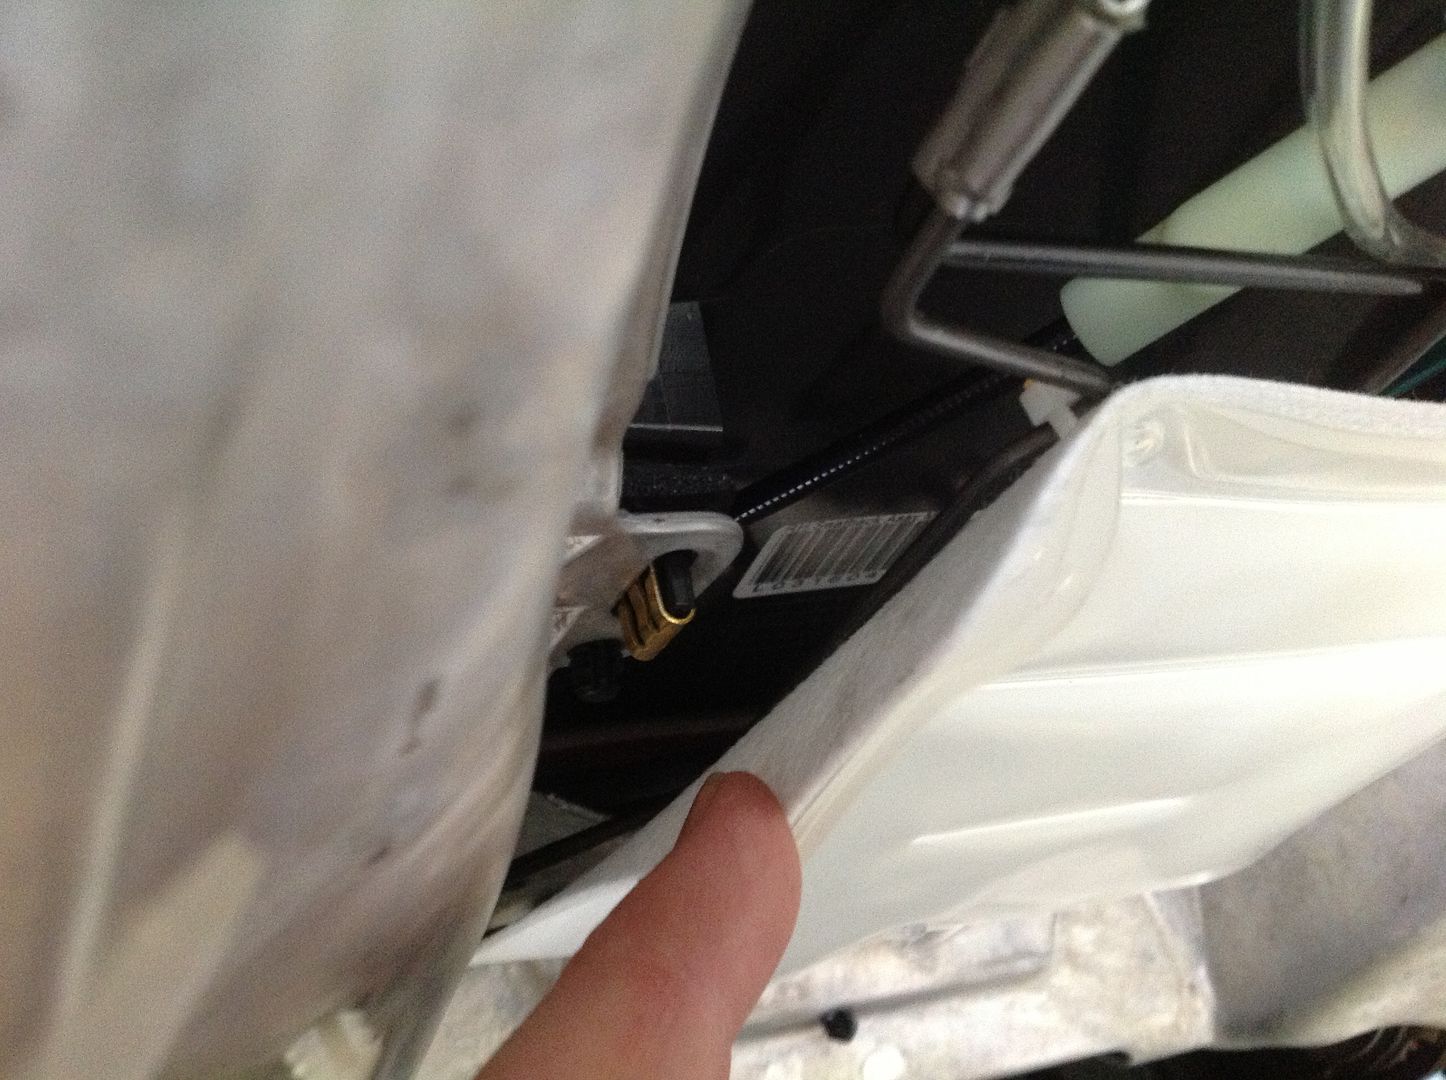
One last torx head screw over by the airbag and then you can carefully rotate the back cover over the airbag, being very careful not to damage the fragile air bag cloth sleeve.


Now you will start to release the upper seat cover and foam from the back panel and frame. First pry these 2 clips off.

Then pull the plastic rails off of the seat frame.

Using a small tool, stick it in this lower section shown. Great description, I know

You are prying out this this clip and there was three of them on my seat, they were only on the air bag side.

EDIT: When I was converting the left side seat, all the clips stayed inside the groove when I pulled the seat cover out and you may have to dig them out.


Now work the welting out all the way around the seat cover until it is released. The whole upper cover and foam will come off now. Now, it is time to remove the back plastic seat back. Remove the 2 torx screws on each side.

There are supposed to be 2 screws in the middle of the frame also, mine was missing one, this is is the third missing screw I have found on my car. Gotta cut costs somewhere. Right?

There are 2 snap clips at the top and two snap clips under the lumbar support bag, squeeze these with some needle nose pliers.


One last torx head screw over by the airbag and then you can carefully rotate the back cover over the airbag, being very careful not to damage the fragile air bag cloth sleeve.


Last edited by 48supertruck; 04-18-2014 at 10:56 PM.
The following users liked this post:
Torque Obsessed (06-08-2023)
04-15-2014, 03:04 AM
#9
Team Owner


The following users liked this post:
RHEACERDAVE (08-30-2019)
04-15-2014, 03:48 AM
#11
Tech Contributor
Member Since: Jan 2006
Location: Saint Louis MO
Posts: 4,761
Likes: 0
Received 218 Likes
on
110 Posts
St. Jude Donor '14-'15
Pictorial walkthroughs are just awesome to have for reference vs. black-and-white service printouts.

 04-15-2014, 01:02 PM
#13

You are THE MAN!!!!!
This is one of the most useful threads EVER... for me anyway as this will be a June project.
Thank you SO very much for doing this!!
This is one of the most useful threads EVER... for me anyway as this will be a June project.
Thank you SO very much for doing this!!
04-15-2014, 03:48 PM
#14
Pro
Thread Starter
Lay the new foam side by side with the old foam so you can transfer the cooling fans. They just unsnap from a metal rod that is molded in the foam. A small screwdriver helped in releasing the clips. The new foam has the rod molded in it. It is a different shape rod but the fan still clips in it fine. The white bag is stuck to the foam with some weird mesh type double stick tape. The bag will come off the tape if you pull it slowly. I took my time with it and did not tear or damage it. I hate to admit this one, but I duct taped the edges of the bag to the foam. Once the foam is reinstalled, the bag really has no place to go.
EDIT: I used some 3M 90 spray adhesive when I converted the left side and it worked better then the tape and a light coating will not prohibit air flow of the cooling fans.
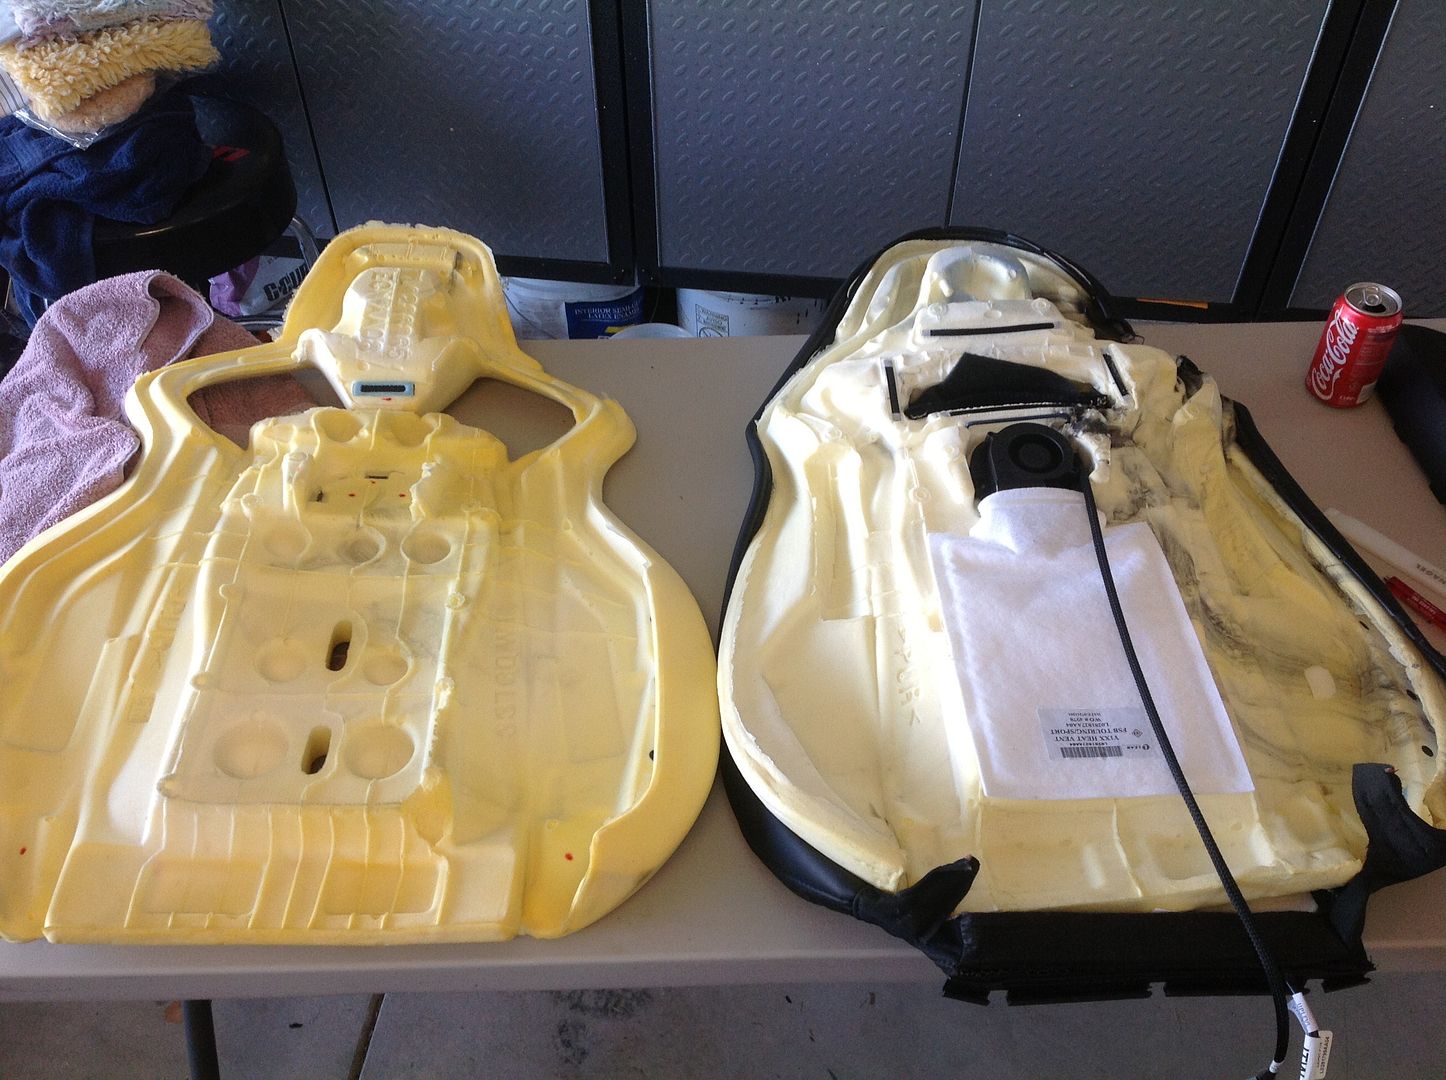

EDIT: I used some 3M 90 spray adhesive when I converted the left side and it worked better then the tape and a light coating will not prohibit air flow of the cooling fans.


Last edited by 48supertruck; 04-18-2014 at 10:59 PM.
04-15-2014, 04:11 PM
#15
Pro
Thread Starter
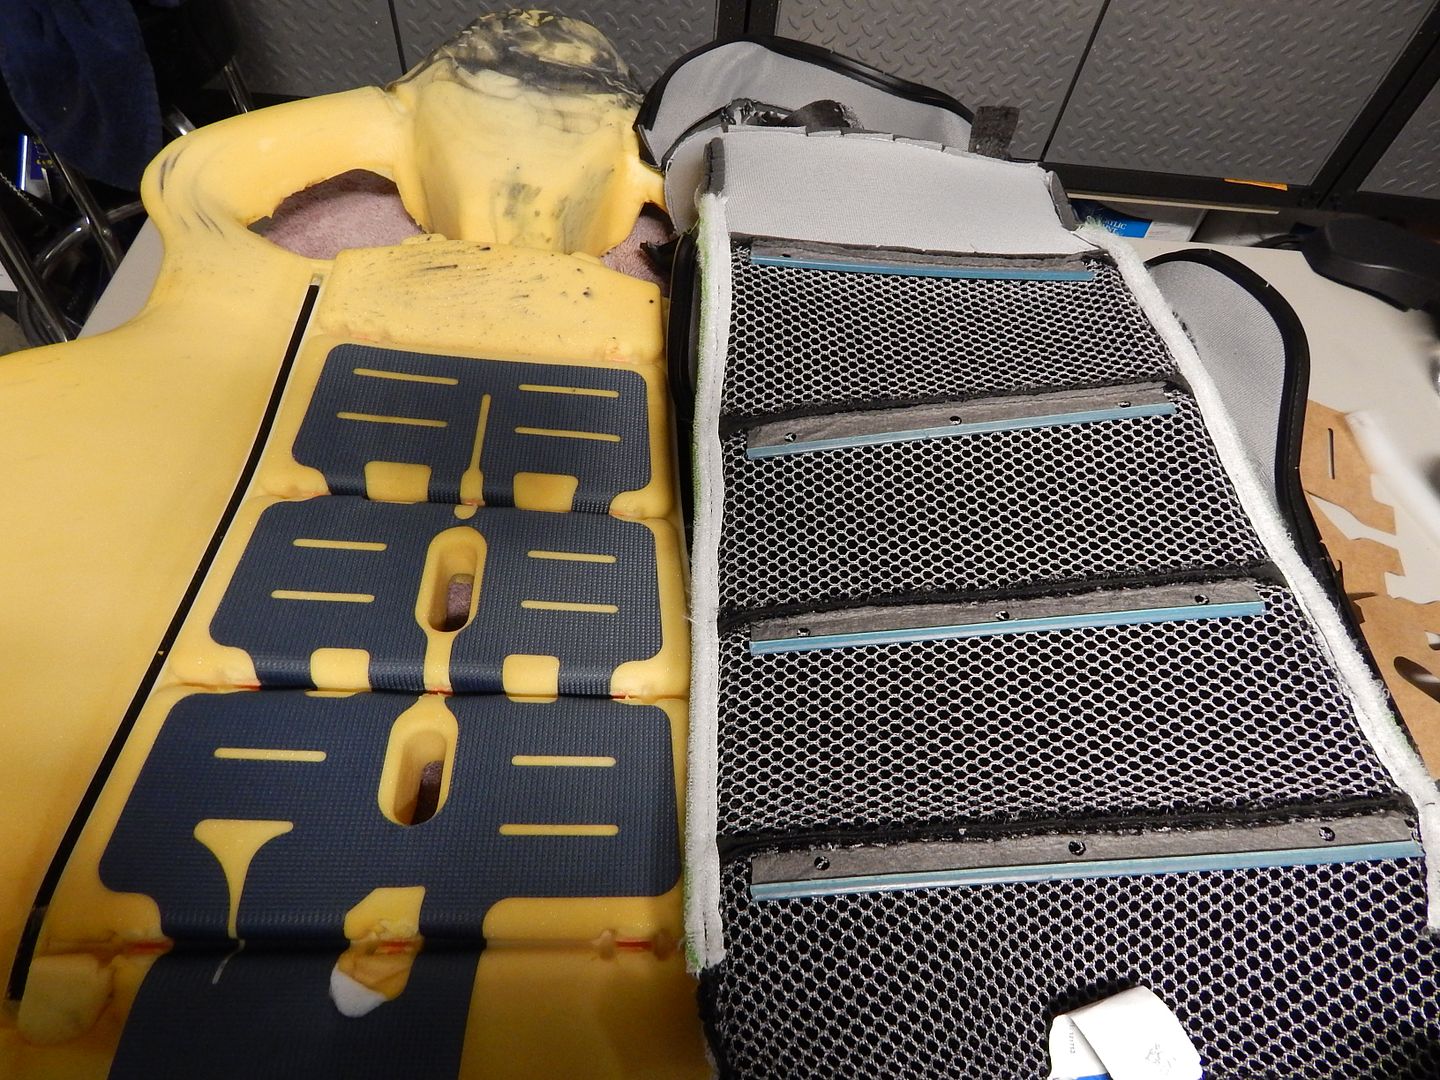
We are now finished with old foam and seat cover. Heater time! 
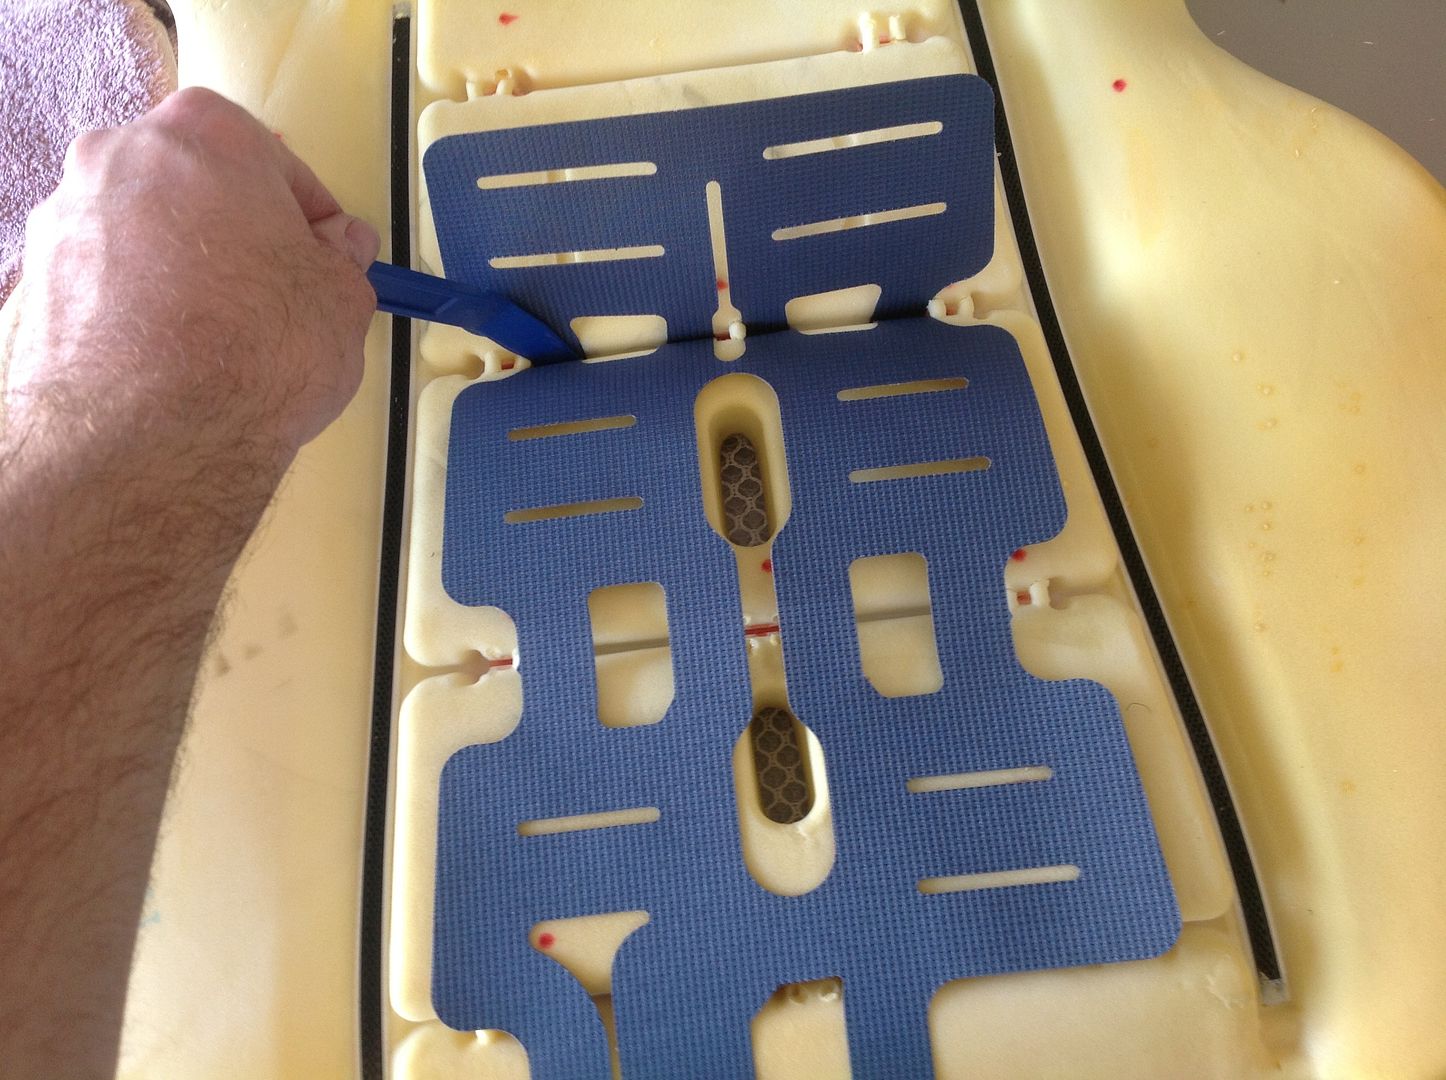
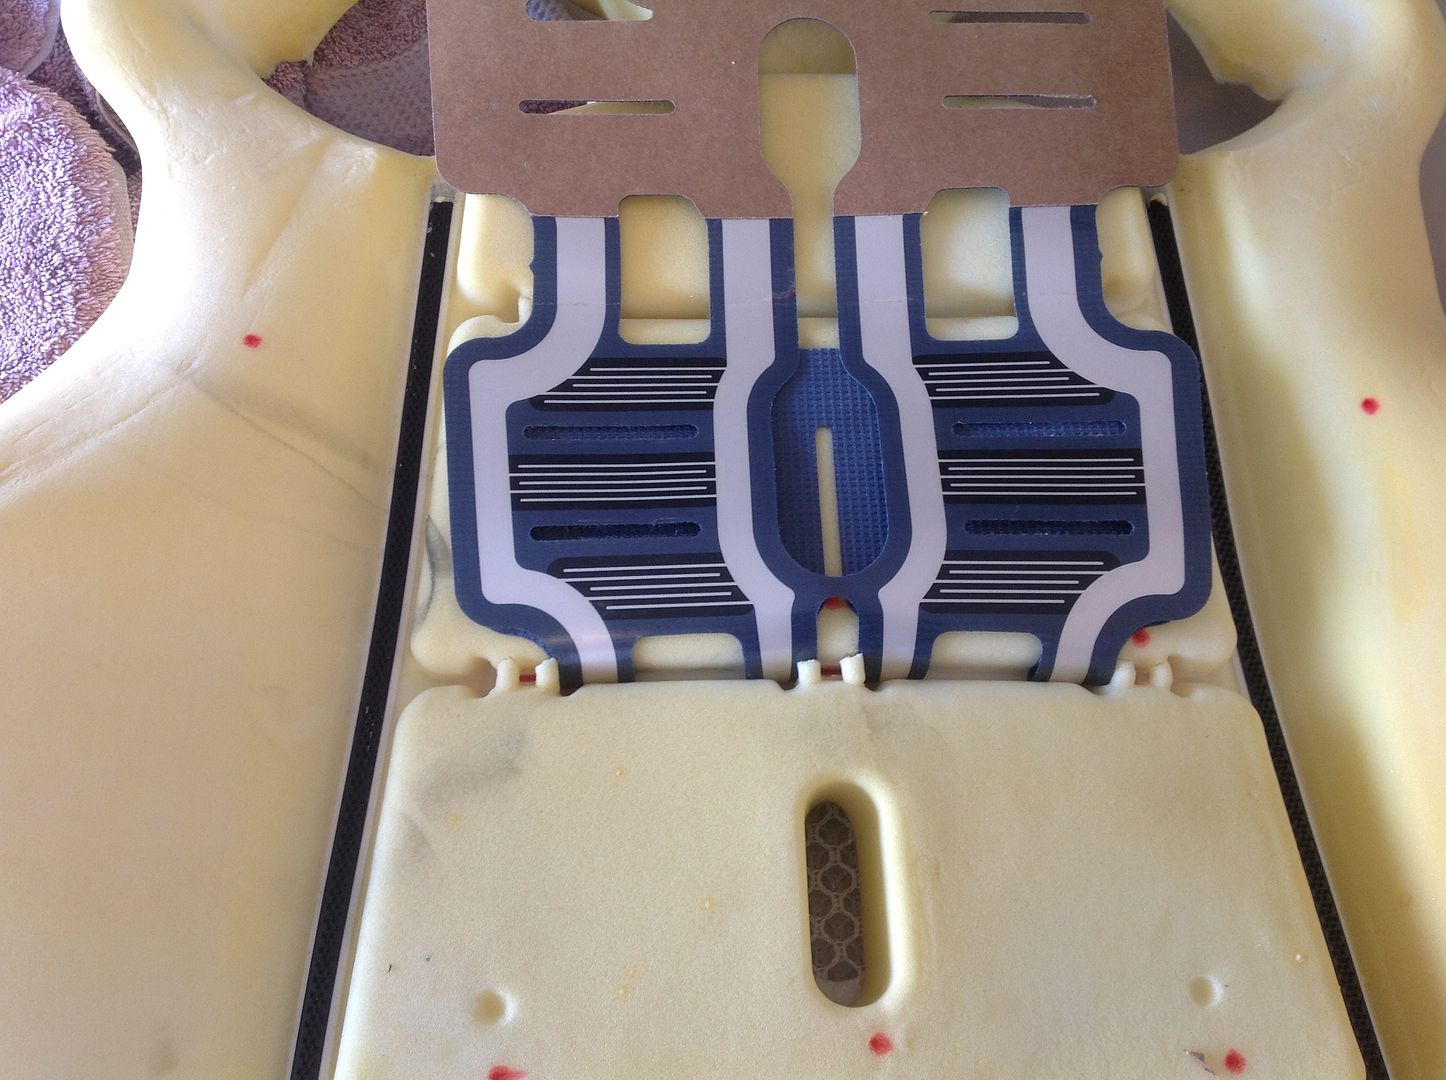
The foams are marked P.S. for passengers side and D.S for drivers side. The heater element is the same part number for both sides. One thing I did not do till I was done was cut all the little foam tabs off of the creases. They are not needed and are in the way of the heater and the seat cover when we install that later. Don't remove the hard orange plastic clips, just the soft foam.
Do not take the sticky back off of the heater yet. Center the heater over the top oval hole and using a plastic tool, gently push the heater down in the top crease avoiding the orange plastic clips that are molded in the foam. These clips are for the seat cover to snap in to. Once the heater is down into the top crease and you are sure the heater will not get pinched in the clips, pull the top section of double stick backing off of the top section only and stick it down.
The same procedure goes for all the other creases.
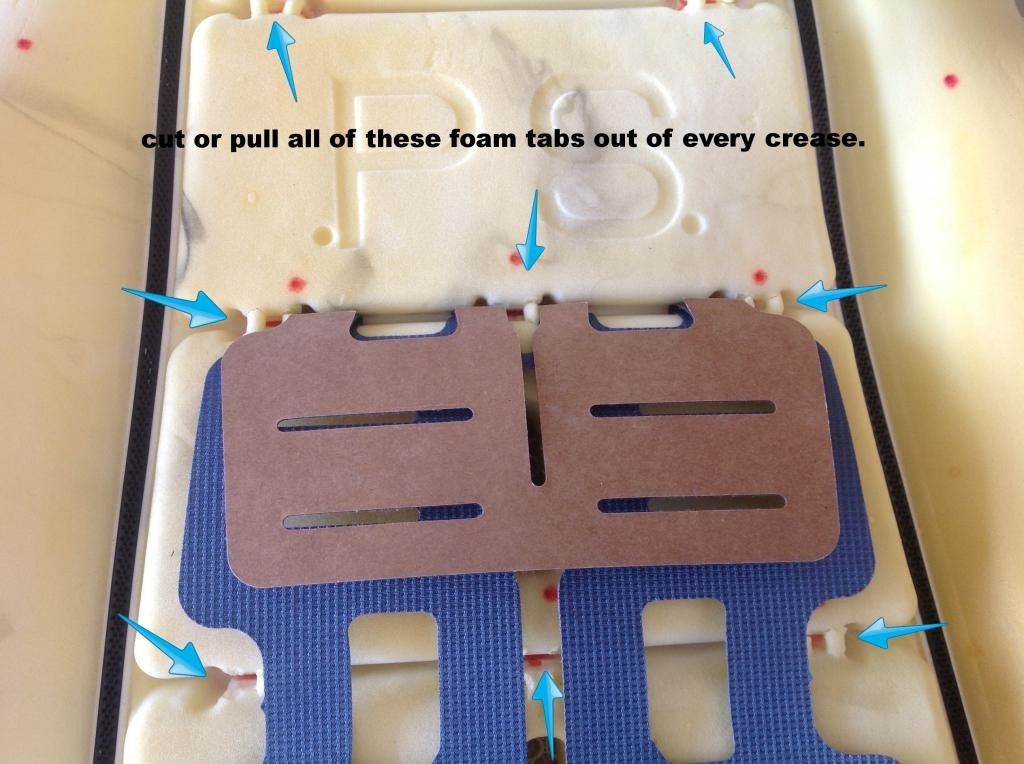


 04-15-2014, 09:28 PM
#17
Pro
Thread Starter
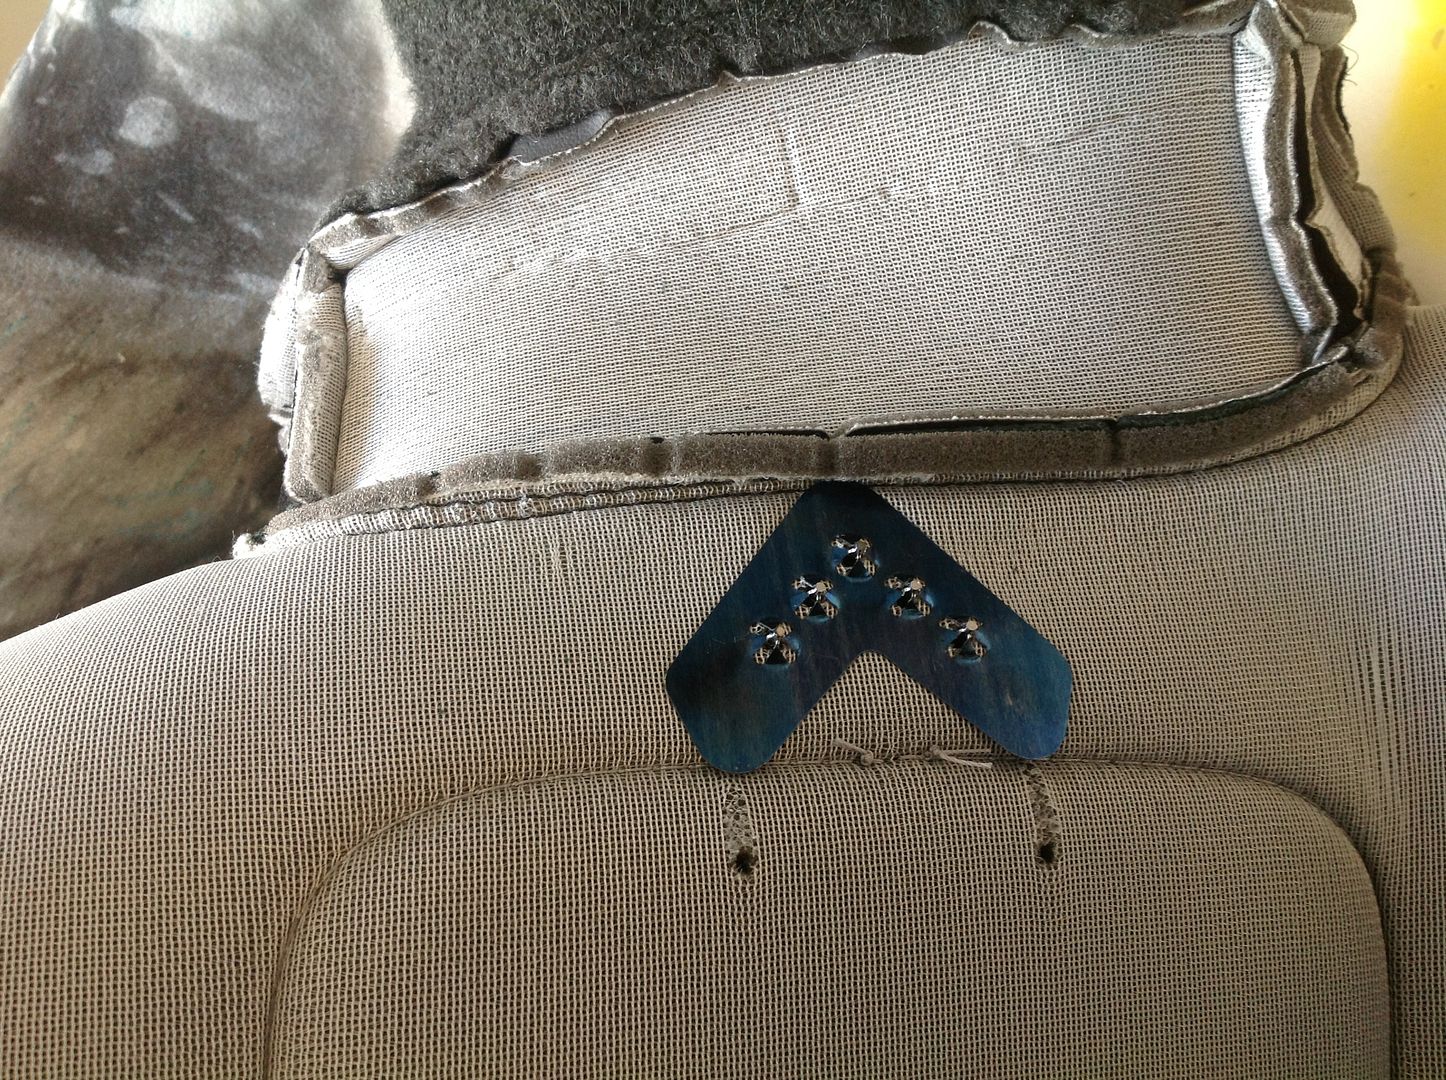
Here is a gratuitous photo of how the corvette flag is held in the stock Gt seat cover for those that have to replace there broken flags. You ain't fixing a broken flag without some serious labor.


 04-15-2014, 09:41 PM
#19
Pro
Thread Starter
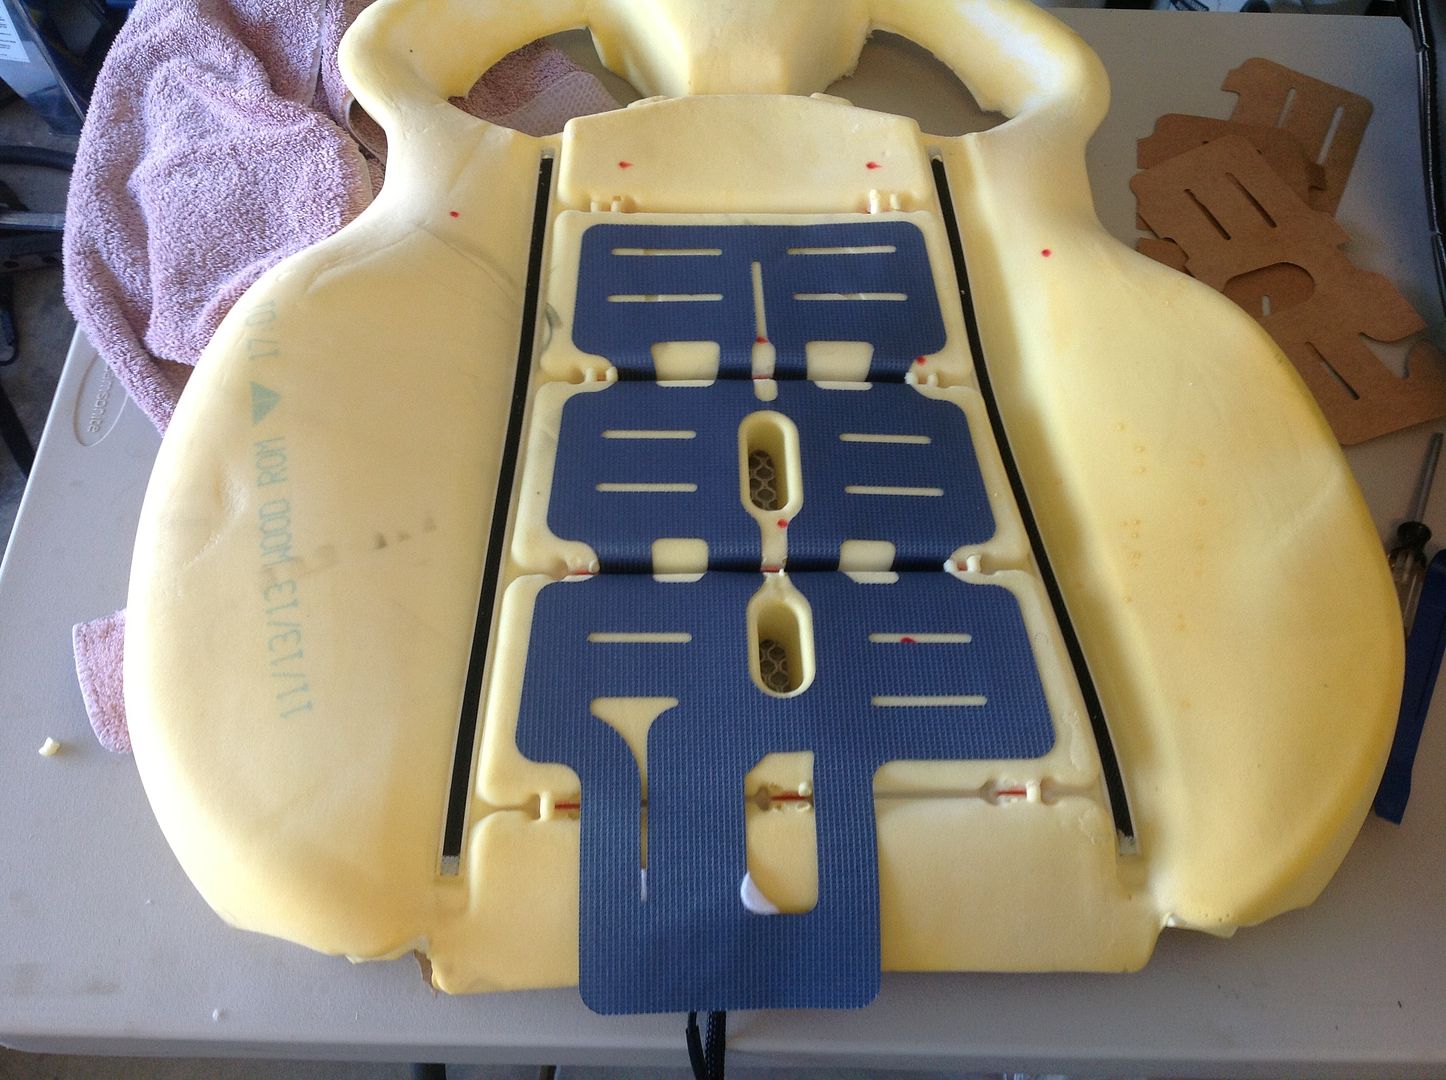
This next step is very self explanatory, lay the new seat cover over the foam and snap the blue plastic rails into every crease. The plastic rail will snap into each orange clip. You will need to push up on the orange clips from the bottom side. Make sure it is centered before sticking it down to the black Velcro rails that run the length of the foam.
Don't make the mistake like I did. Make side you grab the correct seat cover, the best way to identify them is the the seat belt guide notch in the material.
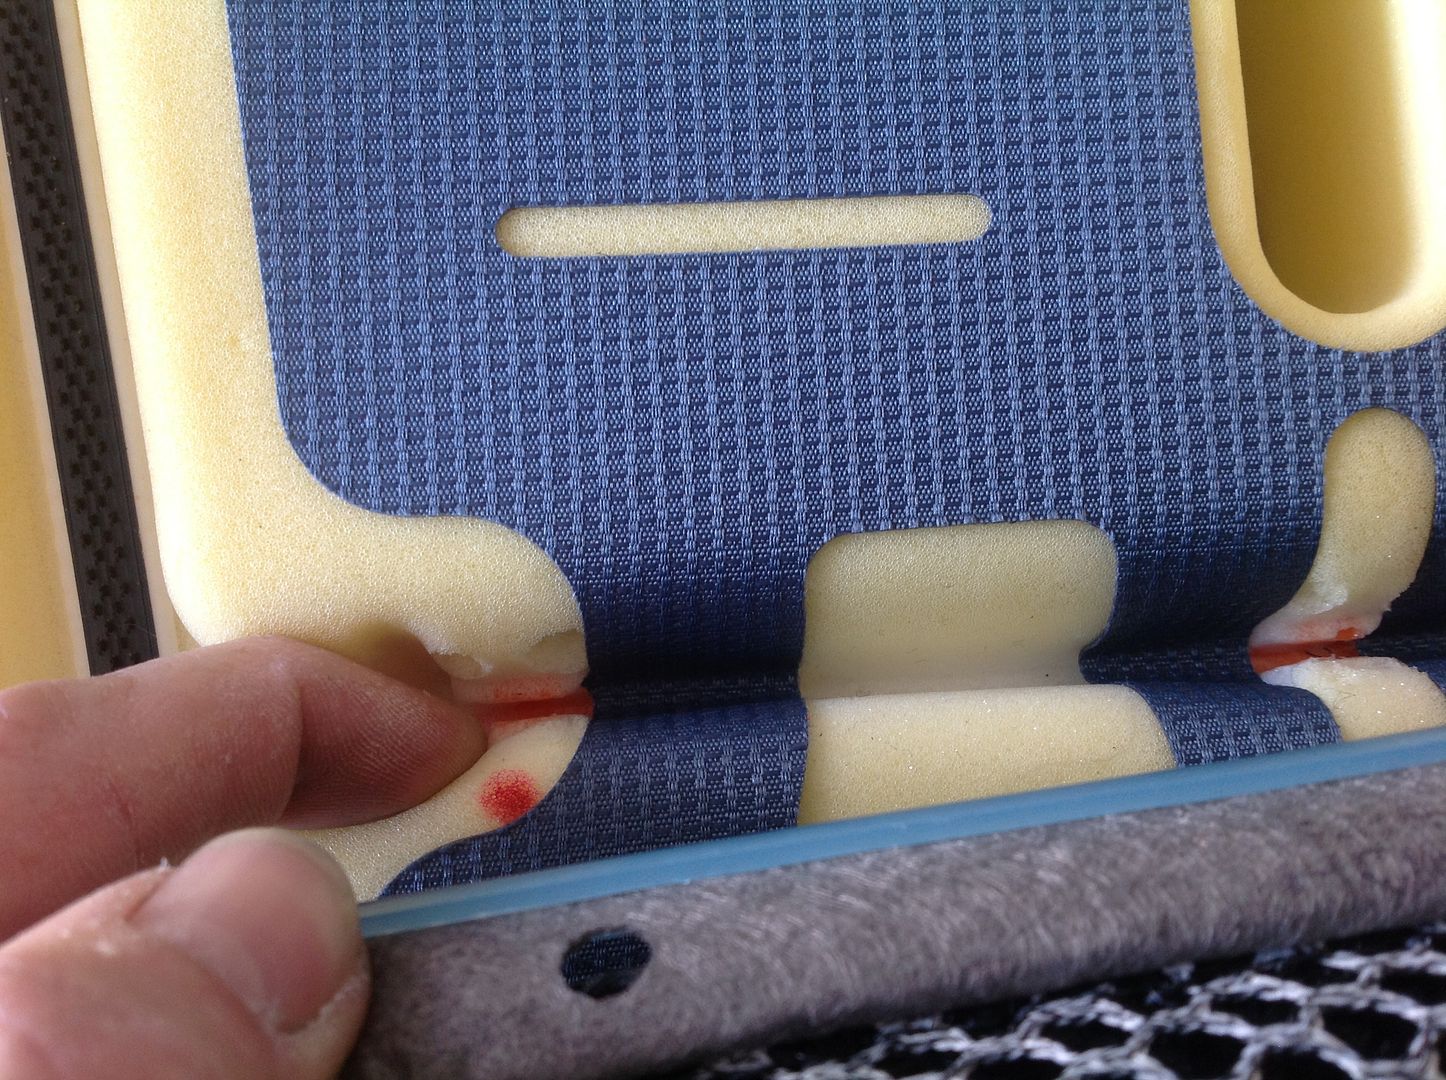
Don't make the mistake like I did. Make side you grab the correct seat cover, the best way to identify them is the the seat belt guide notch in the material.


Last edited by 48supertruck; 04-18-2014 at 11:00 PM.
04-15-2014, 09:59 PM
#20
Pro
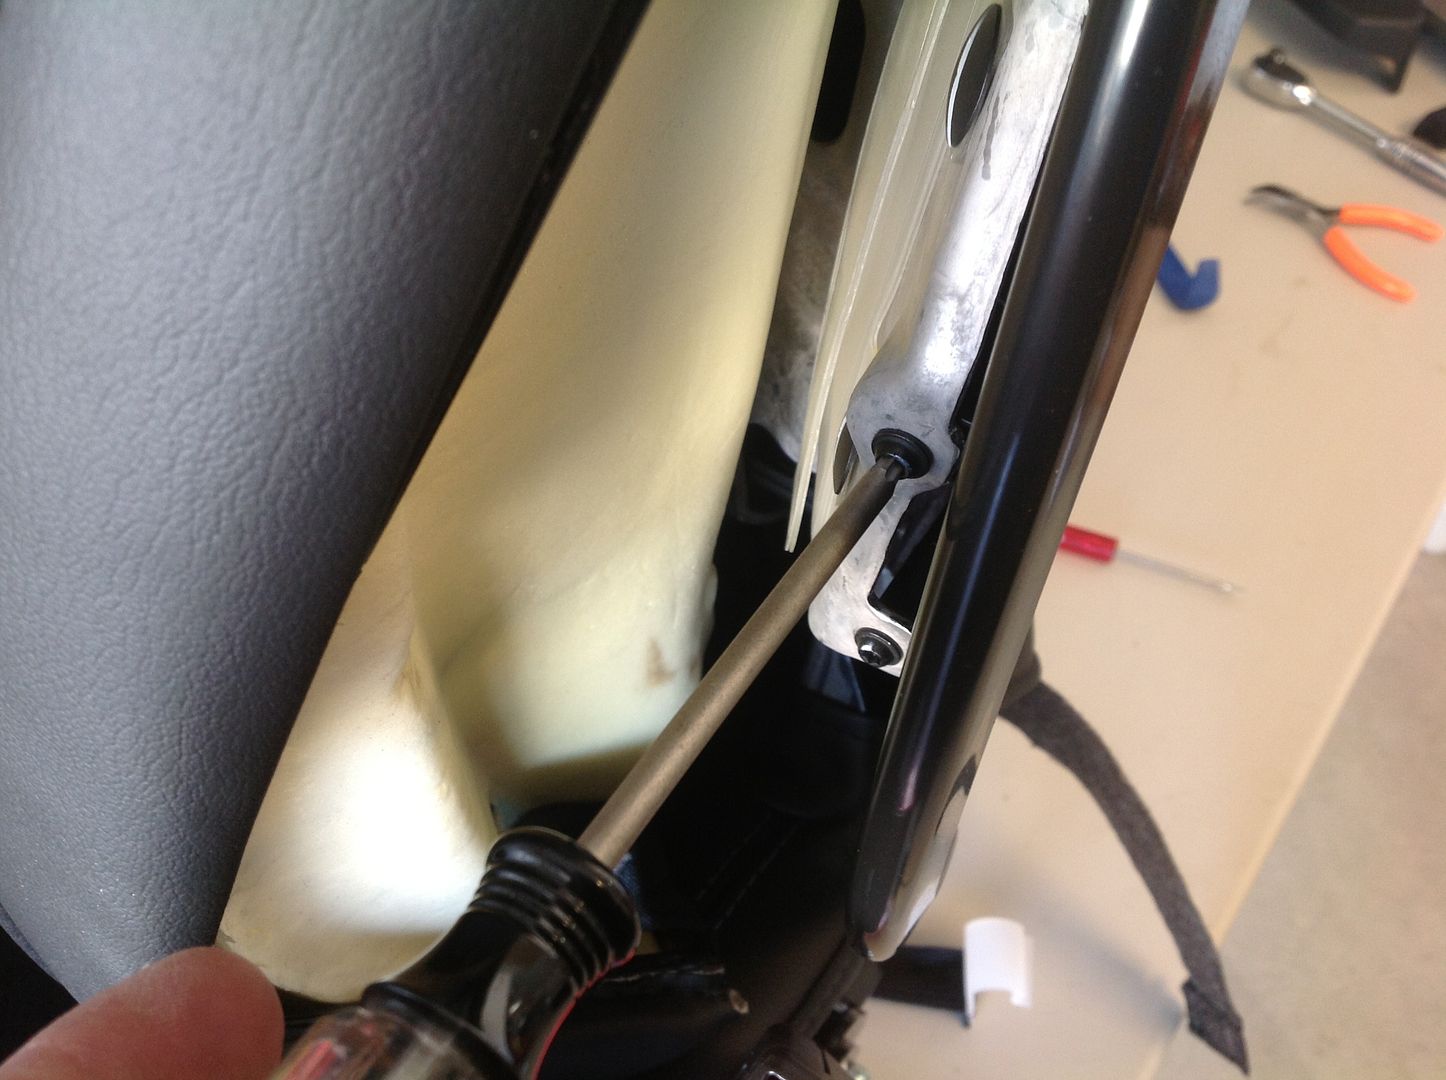
Thread Starter
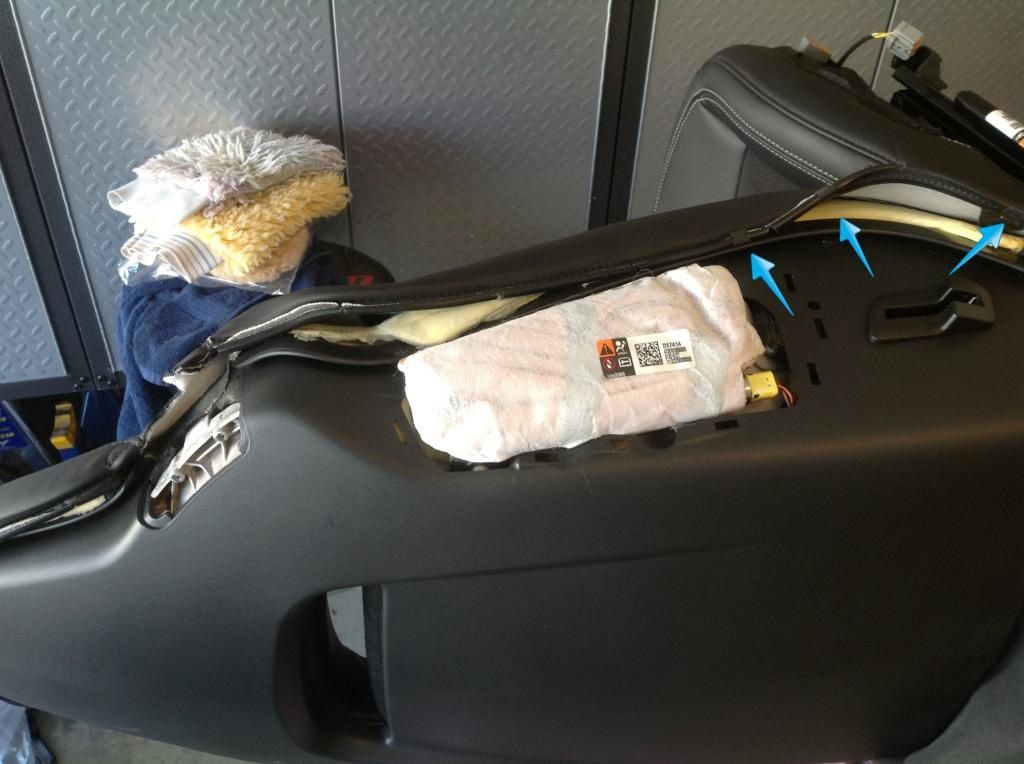
Here is a pic that show that the air bag mounting brackets are different. The Comp seat air bag bracket angles the air bag toward the door more to clear the longer wider side seat bolsters.
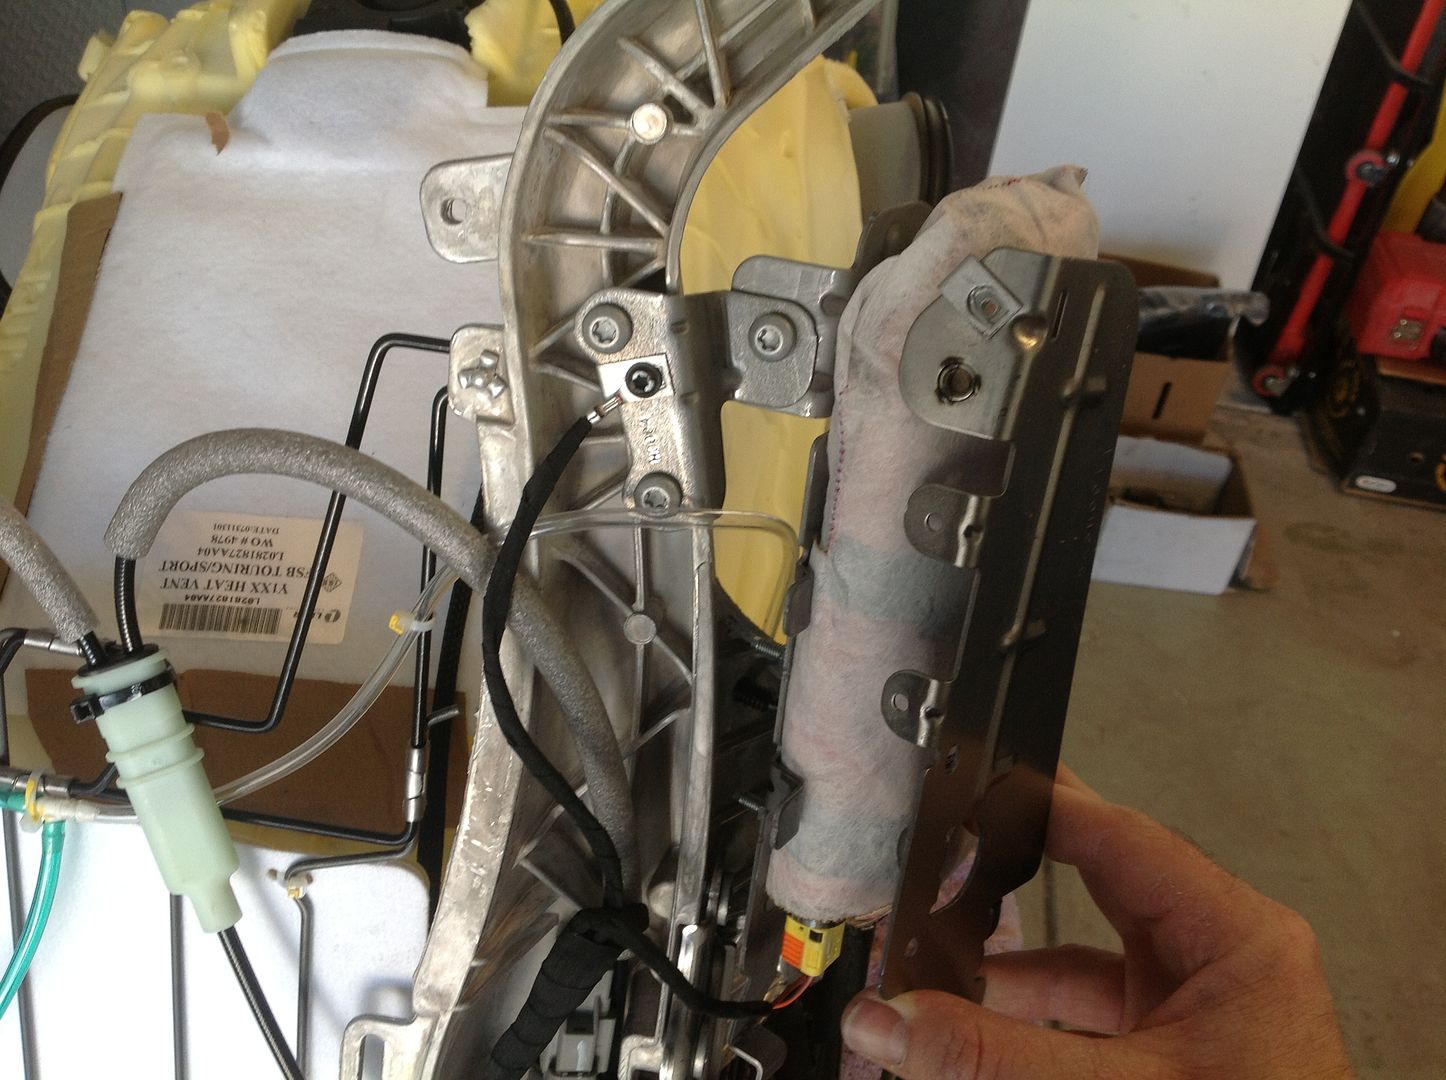
EDIT AS OF 11-18-15
The air bags were a different part number when I did this conversion in 2014, so I swapped them. Now GM says both the GT Seat and the Comp seats use the same air bags, but the mounting brackets are still different. You will re-use your original airbags and just swap the brackets. Thanks to forum sponsor Subchev for providing this money saving info.
Last edited by 48supertruck; 11-19-2015 at 12:42 AM.

