
How to: GT seats to Competition seats conversion
 04-15-2014, 10:27 PM
#21
Pro

Thread Starter
You need to remove the air bag and bracket. Pull down on the orange plug to unlock the air bag wiring plug, then you can unplug the wiring from the air bag.
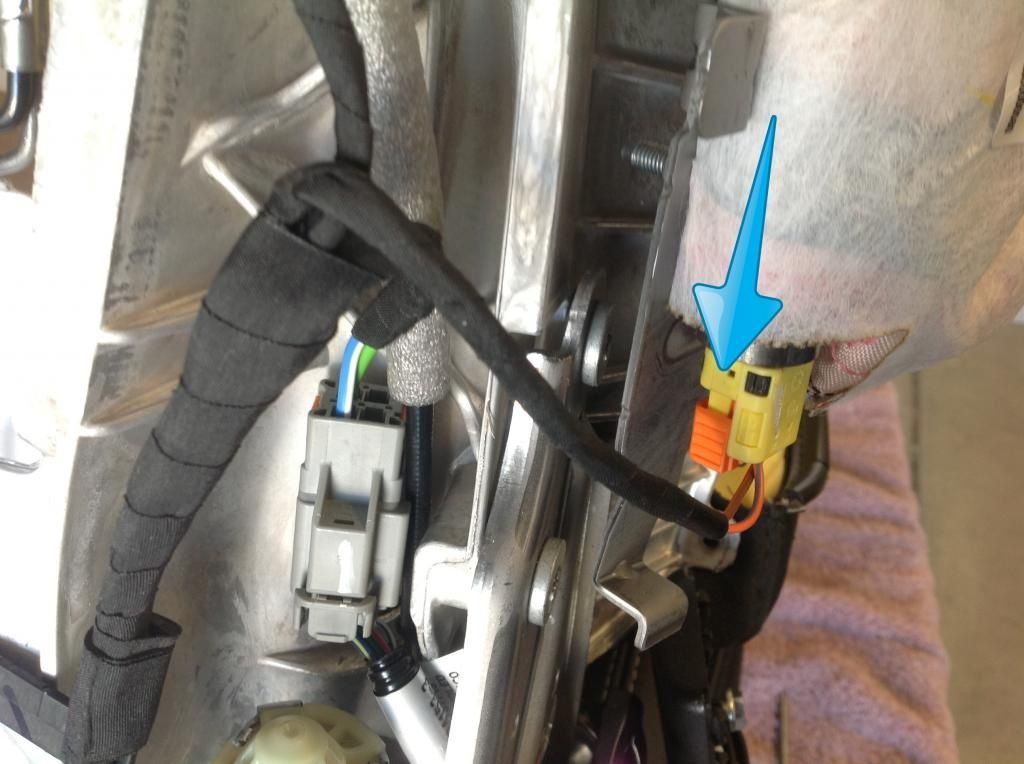
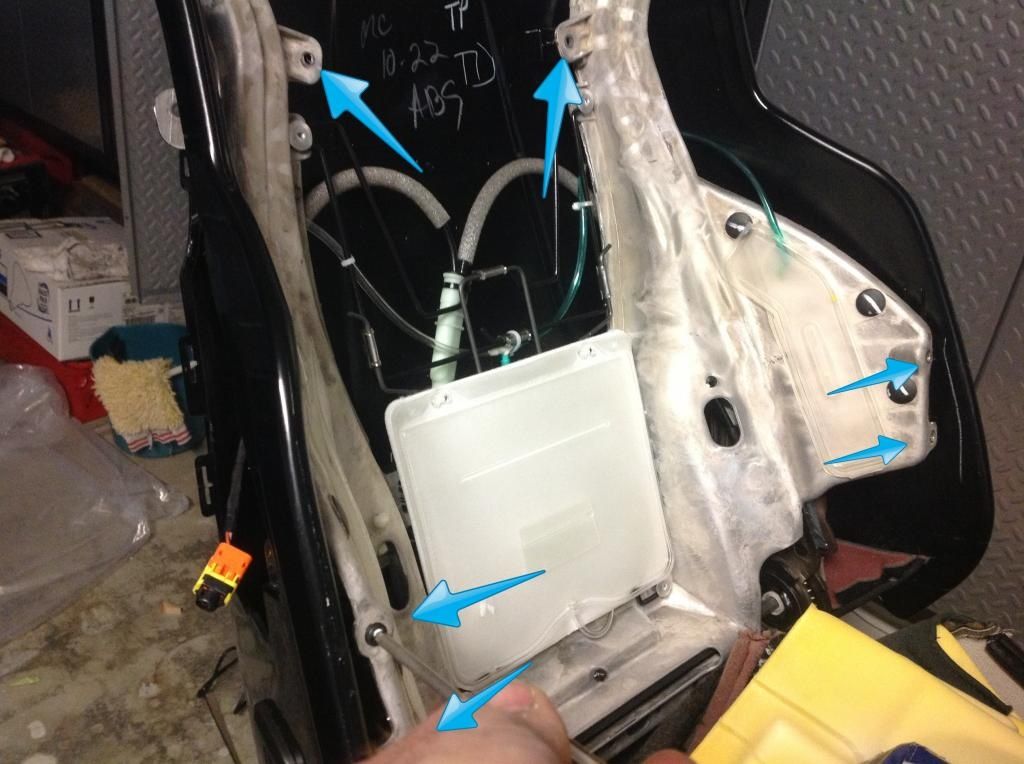
Next unbolt the 2 large torx screws and then remove the air bag and bracket as one unit. Remove the 2 nuts that hold air bag to the bracket because you need these for the new one. Do not mount the new air bag or bracket yet, it does not go back on till the very end.

Next unbolt the 2 large torx screws and then remove the air bag and bracket as one unit. Remove the 2 nuts that hold air bag to the bracket because you need these for the new one. Do not mount the new air bag or bracket yet, it does not go back on till the very end.
Last edited by 48supertruck; 04-15-2014 at 10:31 PM.
 04-15-2014, 11:13 PM
#22
Pro
Thread Starter
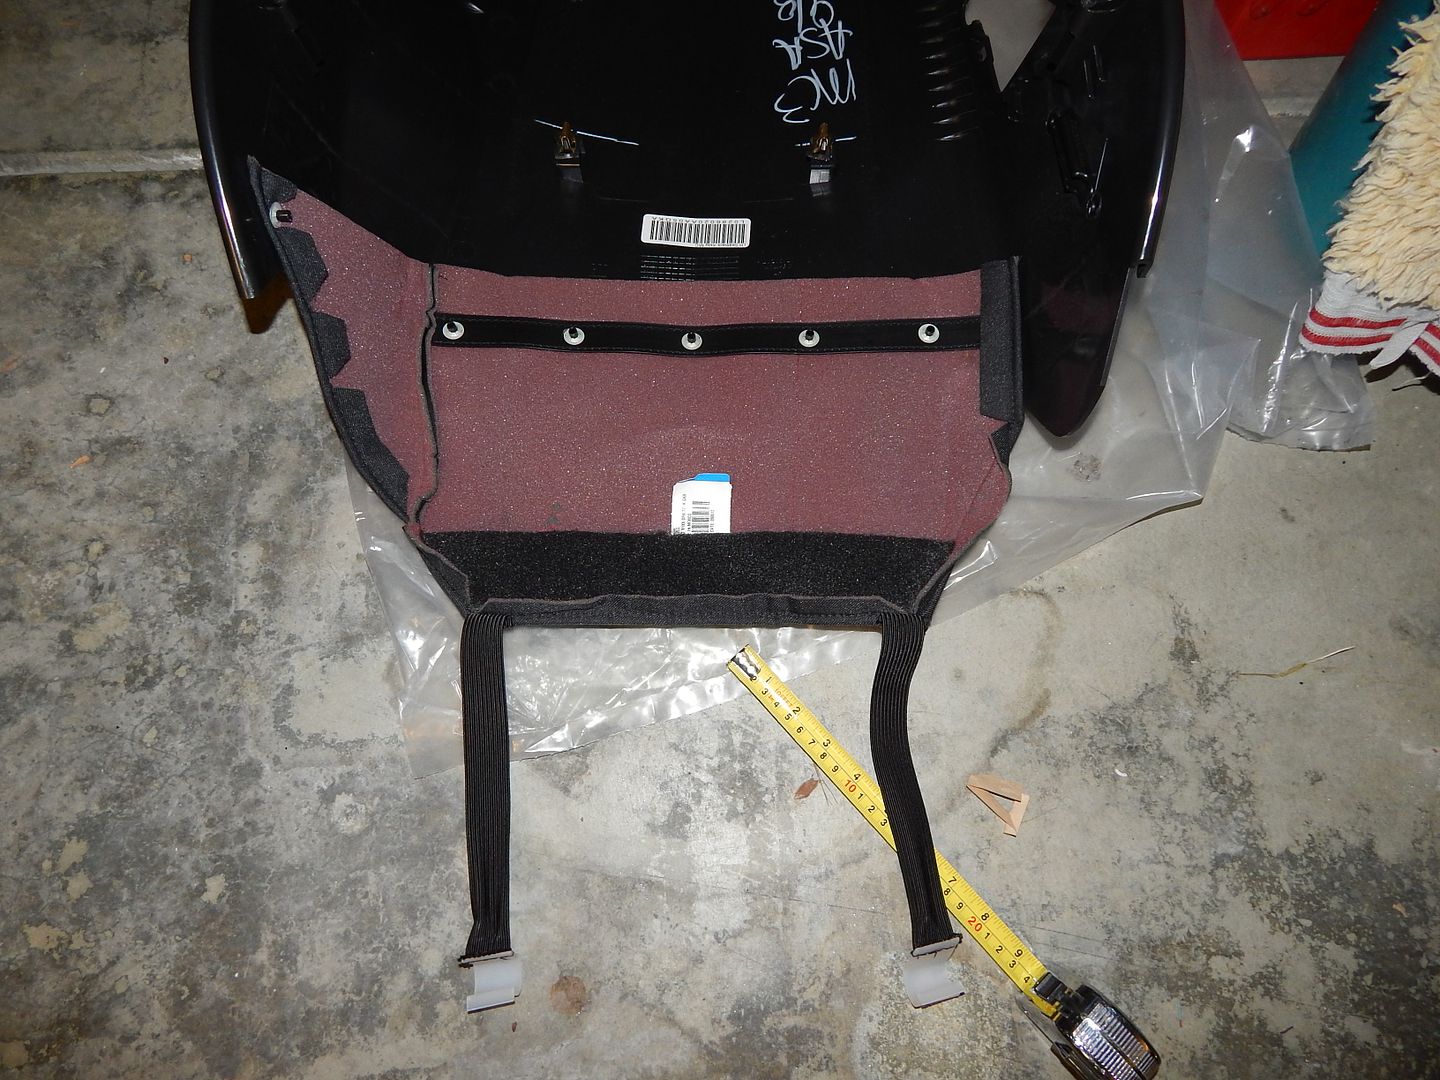
You will need to remove the lower fabric flap from the old plastic seat back. They have those one time use push on clips, I twisted them off with some vise grips and then flattened them back out and was able to re-use them. Transfer the flap to the new seat back and snap the new Competition seat back on the frame and install all 6 torx screws.


Last edited by 48supertruck; 04-18-2014 at 11:02 PM.
04-16-2014, 12:04 AM
#23
Pro
Thread Starter
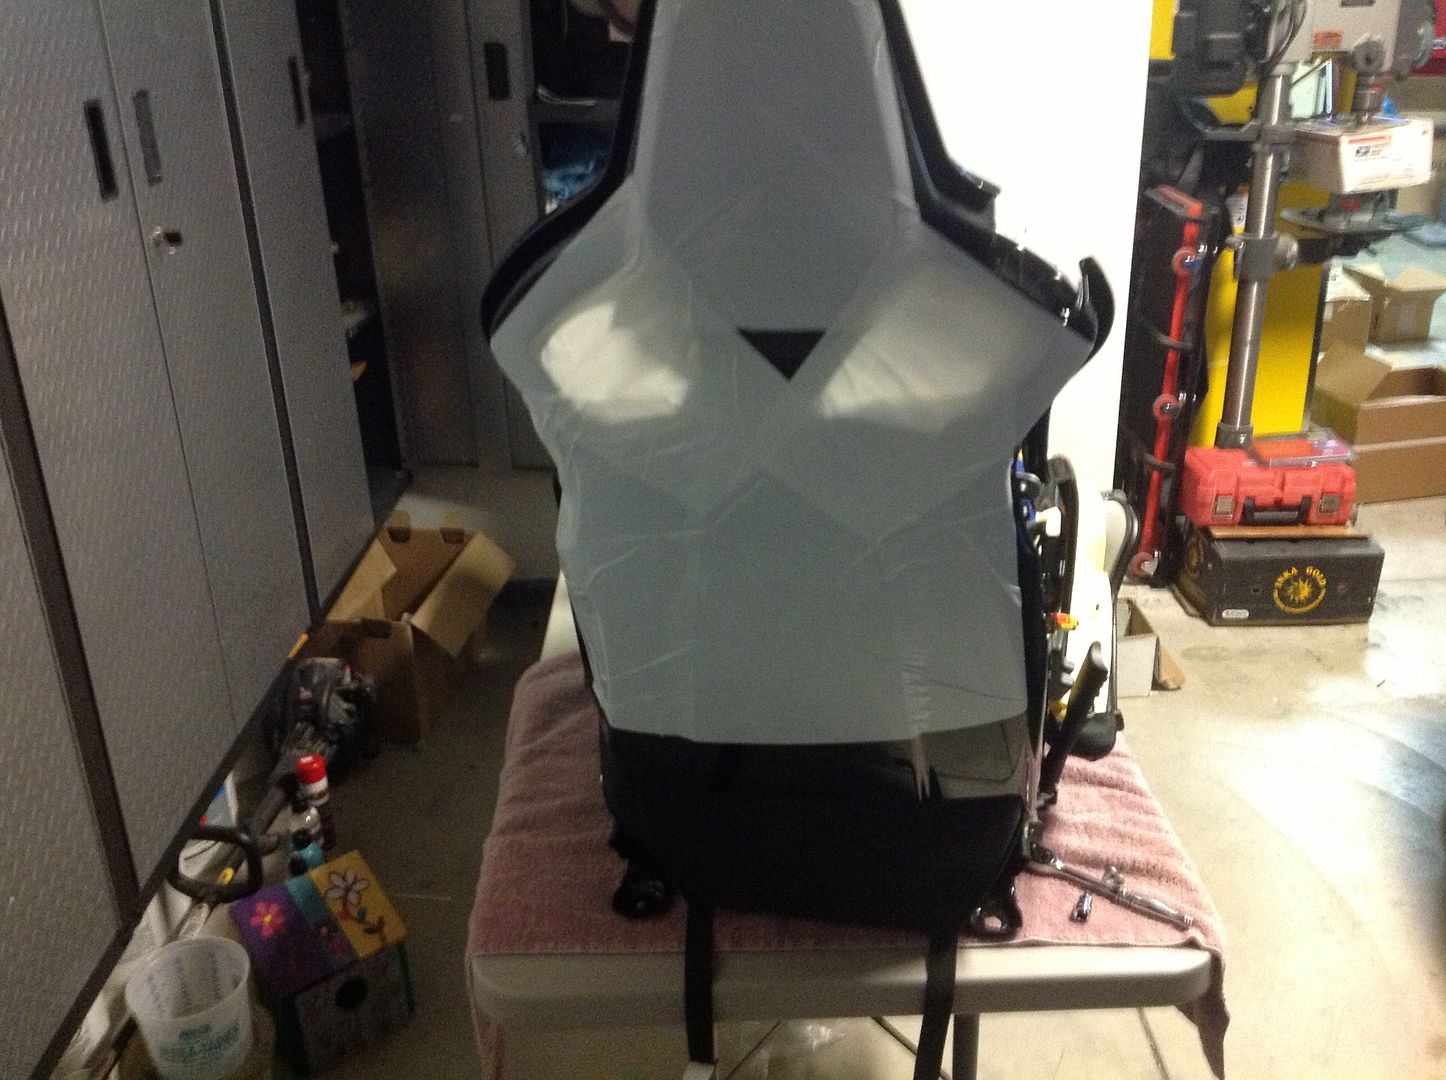
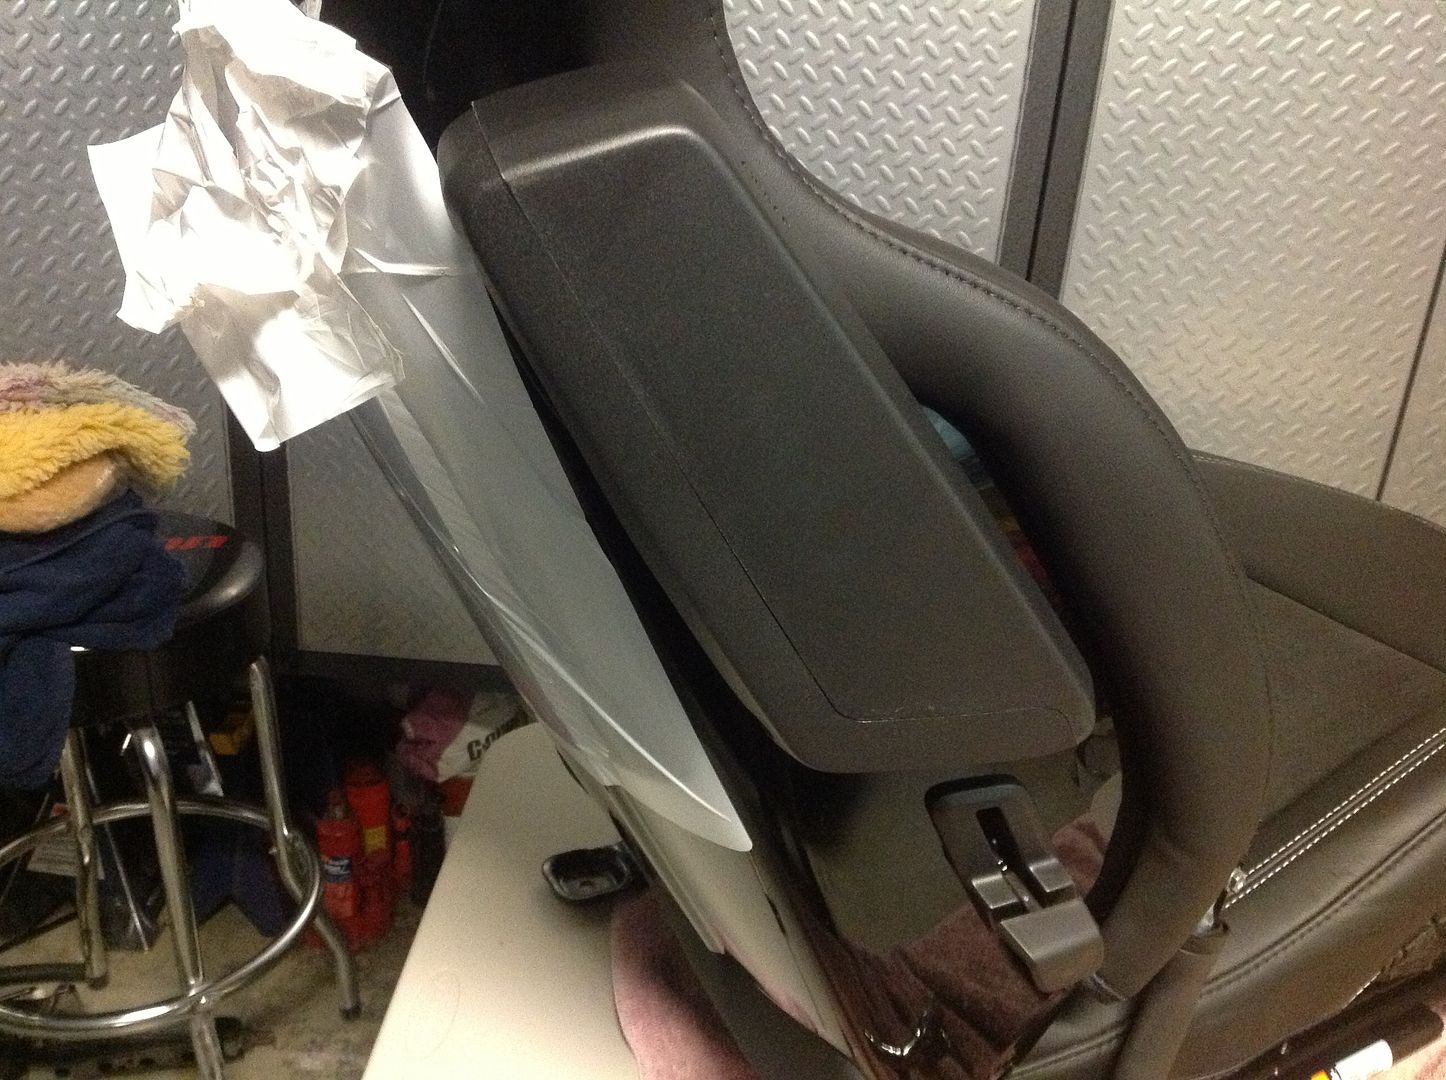
Now this next part was the hardest. It is time to finally put the foam and seat cover on. Put the three metal clips on the rubber welting that is on the edge of the seat cover and cover the whole perimeter of the painted seat with some type of tape. (Red line in pic). The plastic tools will scratch the painted seat back, I used electrical tape, but masking tape should work also.
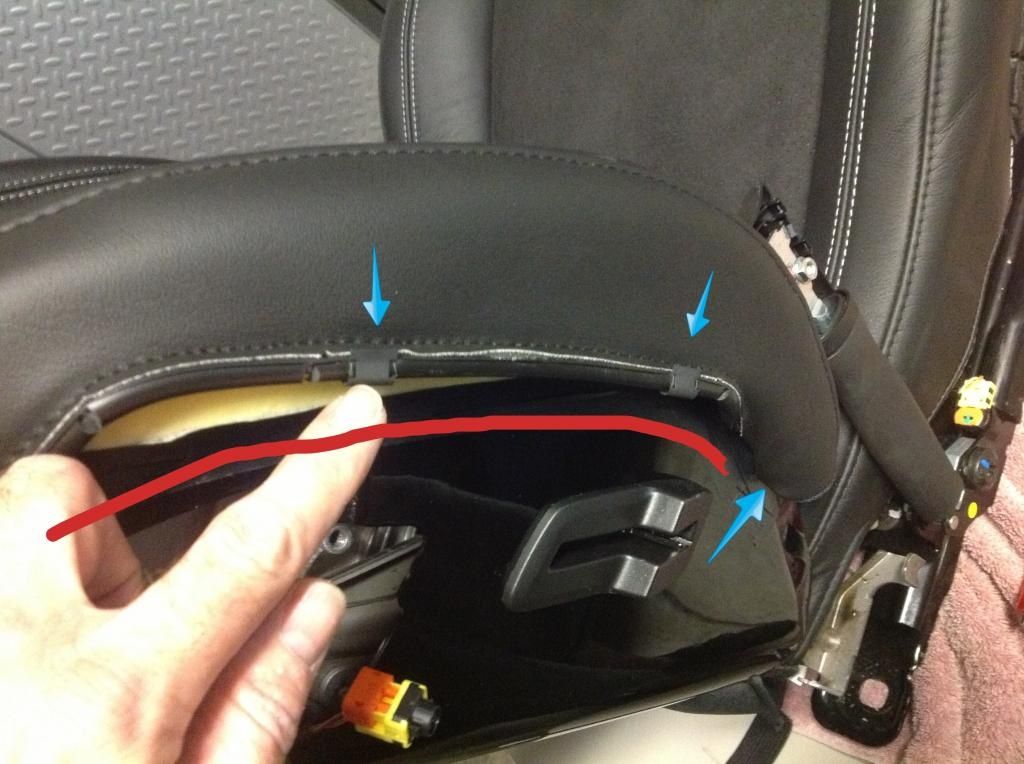
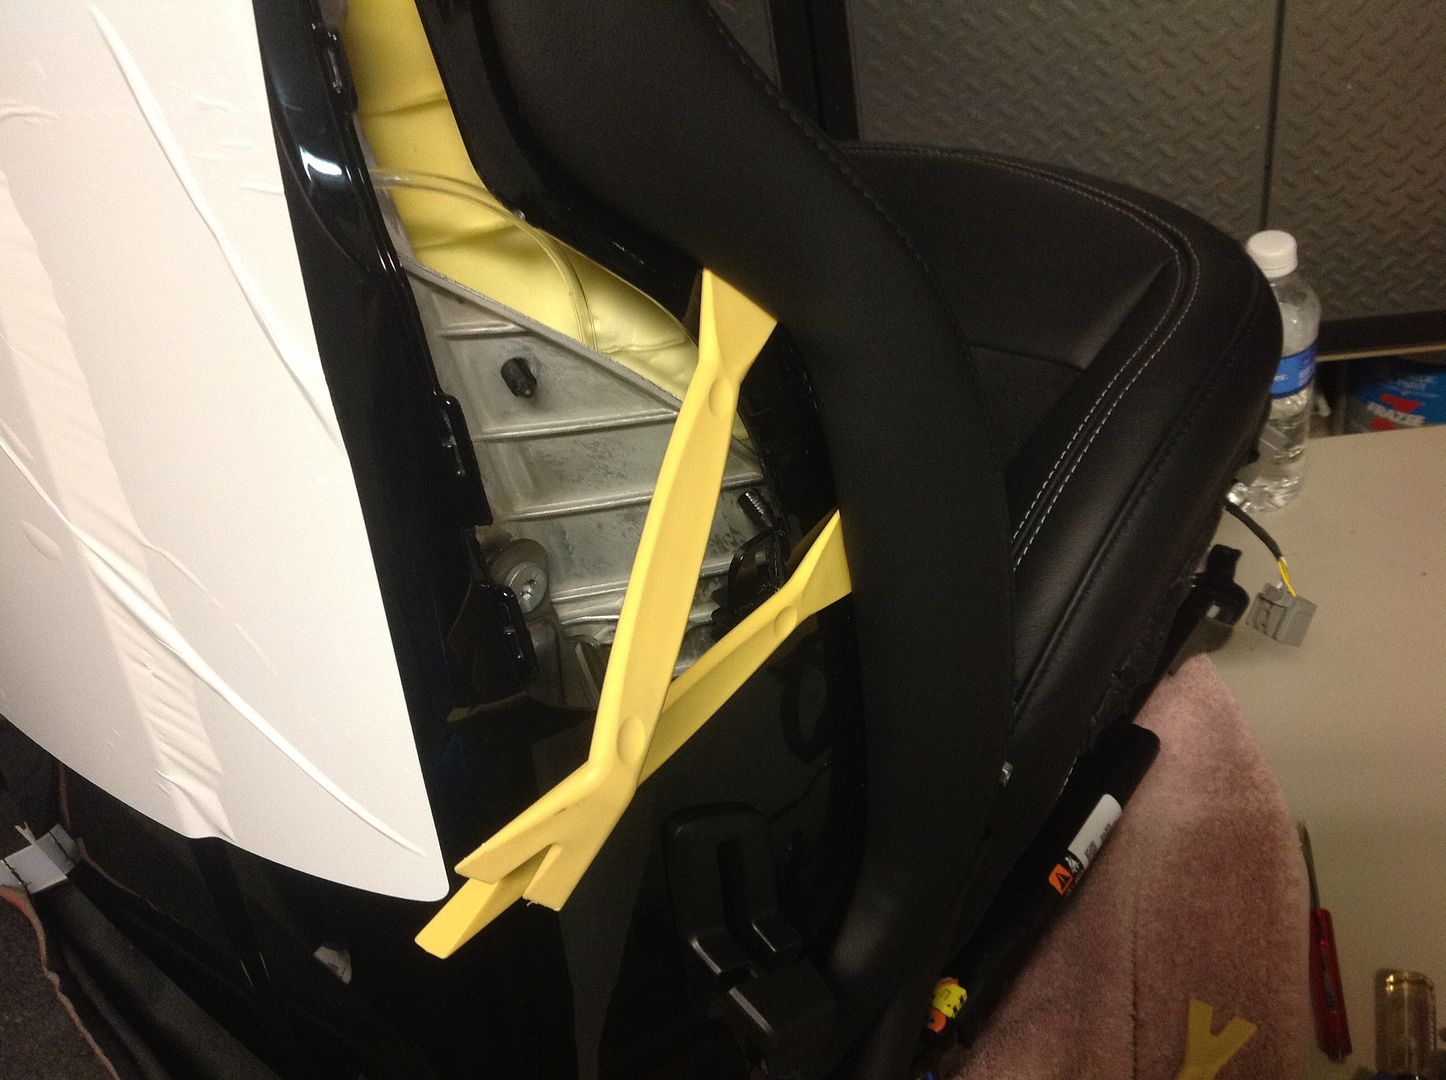
Fold the seat cover over the edge and insert the rubber end first. Take your plastic tools and shove the rubber down in the seat back groove. Use you fingers, thumbs and flat plastic pry tools, just keep pushing it down in the groove and eventually it will stay. Keep doing this all the way around until you have created a smooth edge with no wrinkles. My hands still hurt from this and I did this 2 days ago.
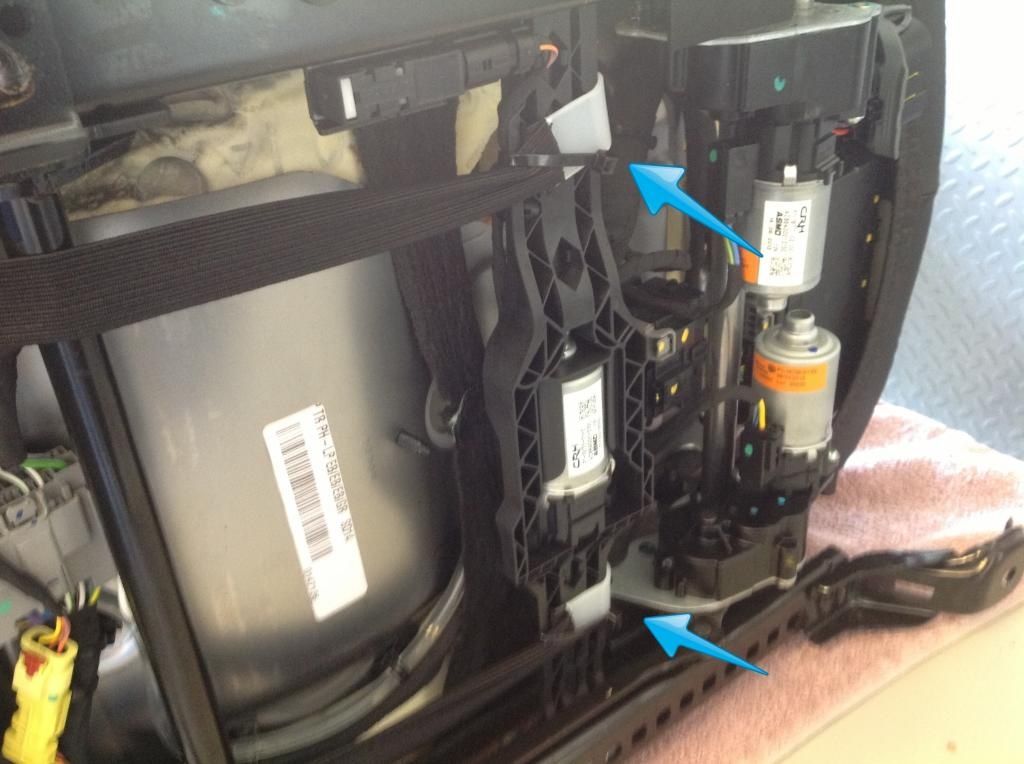
Push the bottom on the seat cover through the bottom and hook the flat plastic over the frame and install the 2 metal pinch clips. Make sure the cooling fan and the heater wiring are coming though on each corner. Plug both plugs in at this time.
Flip seat on its side and re-hook the elastic straps on the bottom side. I decided to re- zip tie these back on also.
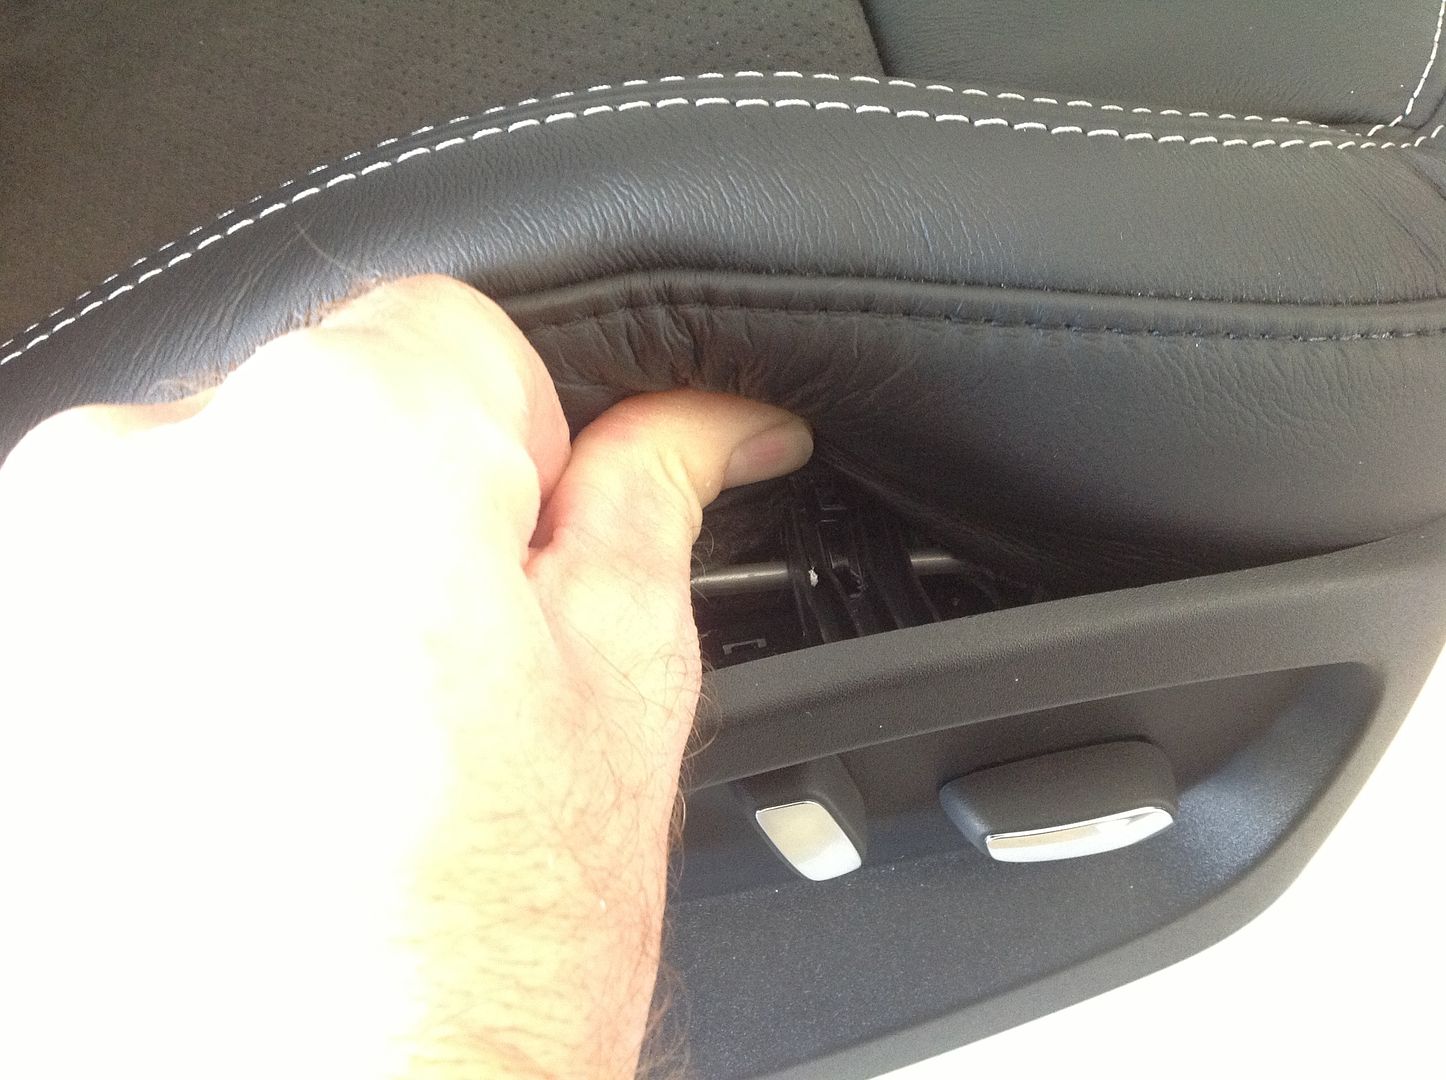
You can put the carbon fiber bezel on. They just snap in but they were extremely hard to get them to snap in on every clip because of the new seat foam. These are carbon fiber overlayed pieces, you can see the clips and the carbon over plastic layers in the photo.
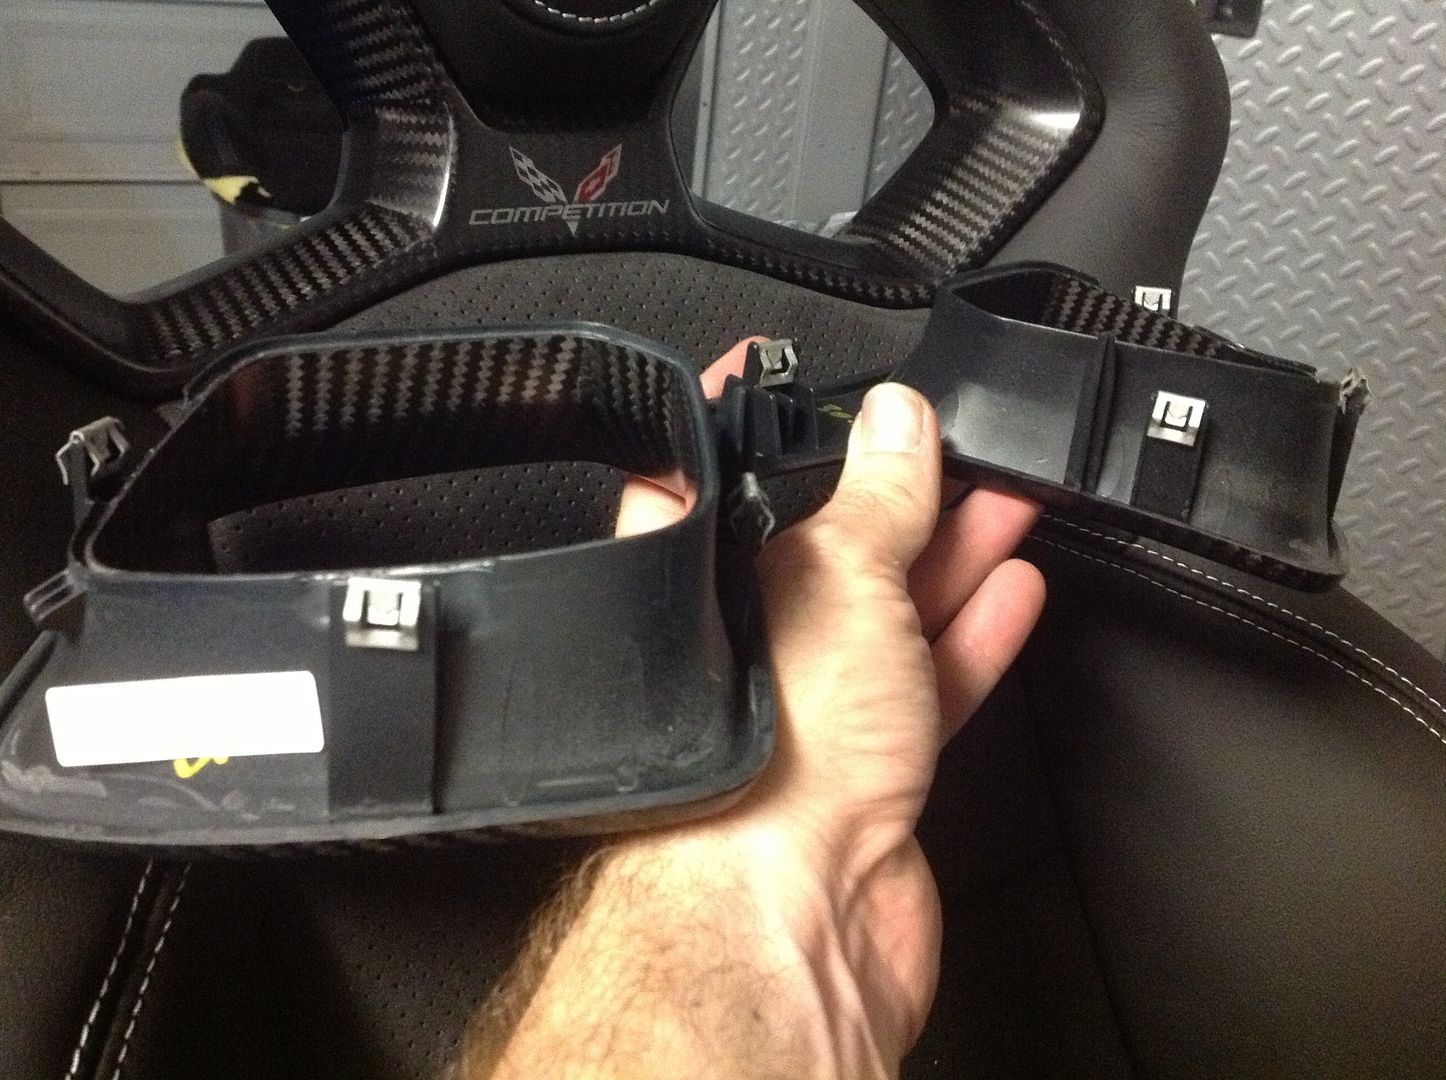
Reinstall the seat belt guide from the GT Seat with the 2 torx screws.

Fold the seat cover over the edge and insert the rubber end first. Take your plastic tools and shove the rubber down in the seat back groove. Use you fingers, thumbs and flat plastic pry tools, just keep pushing it down in the groove and eventually it will stay. Keep doing this all the way around until you have created a smooth edge with no wrinkles. My hands still hurt from this and I did this 2 days ago.

Push the bottom on the seat cover through the bottom and hook the flat plastic over the frame and install the 2 metal pinch clips. Make sure the cooling fan and the heater wiring are coming though on each corner. Plug both plugs in at this time.

Flip seat on its side and re-hook the elastic straps on the bottom side. I decided to re- zip tie these back on also.

You can put the carbon fiber bezel on. They just snap in but they were extremely hard to get them to snap in on every clip because of the new seat foam. These are carbon fiber overlayed pieces, you can see the clips and the carbon over plastic layers in the photo.

Reinstall the seat belt guide from the GT Seat with the 2 torx screws.
 04-16-2014, 01:02 AM
#26
Pro
Thread Starter
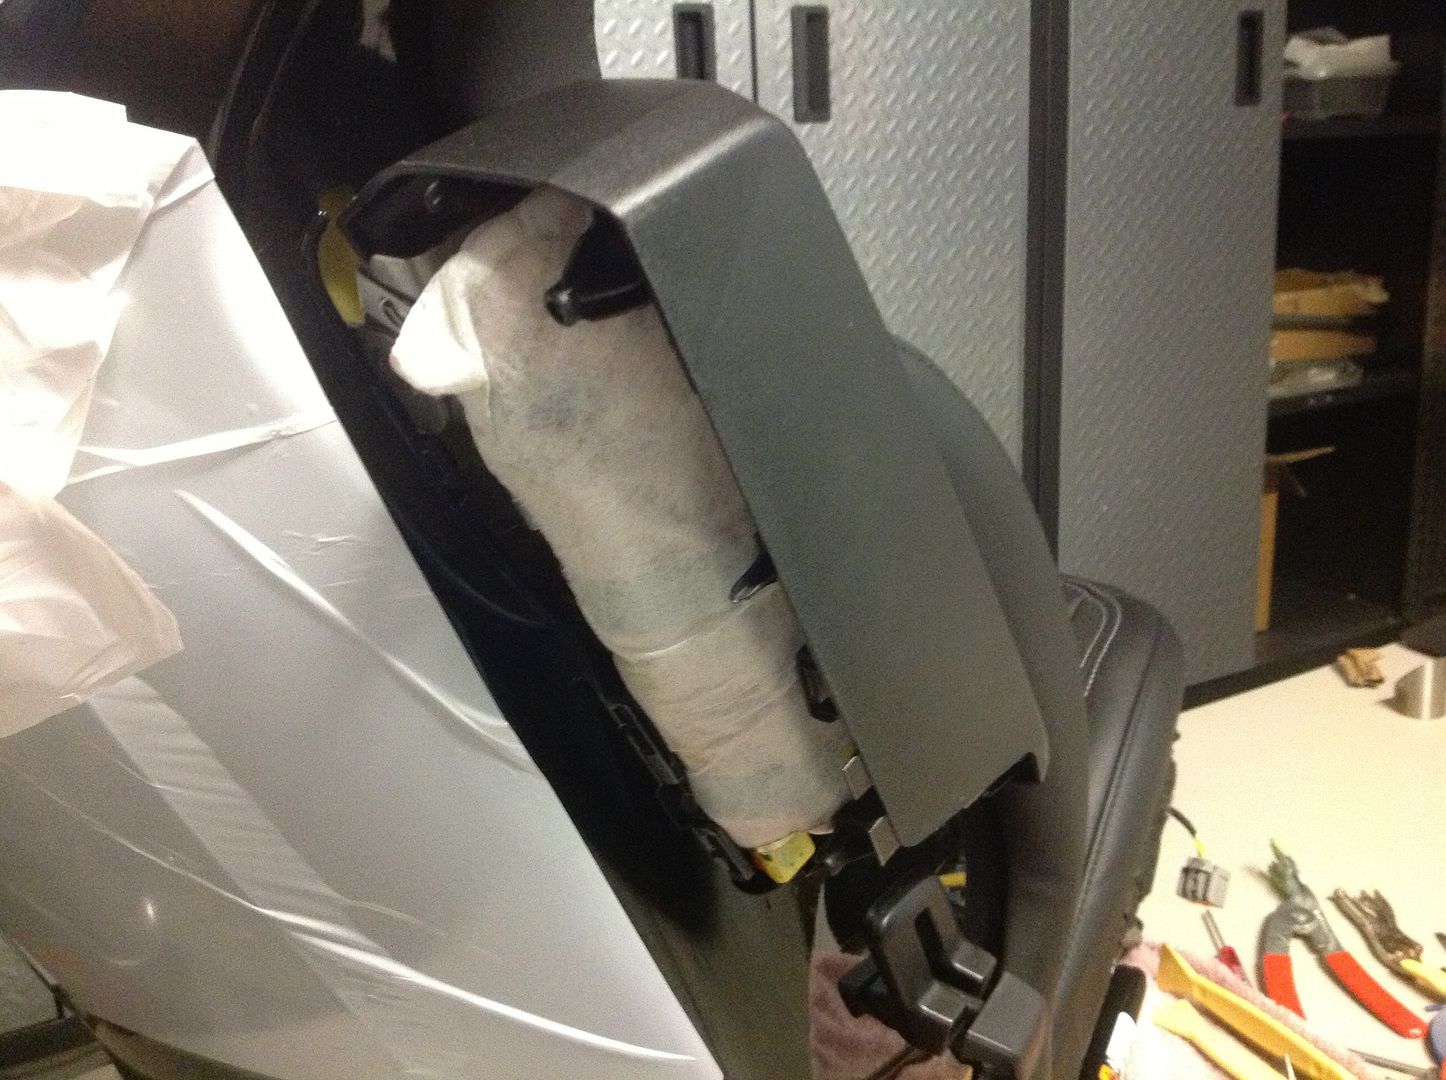
The last major component is the air bag and covers. Bolt the air bag to the air bag bracket using the 2 nuts that were removed from the GT seat air bag and then plug the yellow electrical plug into the base of the air bag. Don't forget to push the orange part back it to lock the plug in place. Just let in dangle there on the side of the seat. Take the front half of the air bag cover and snap it on the seat. It only has one clip that holds it in place.
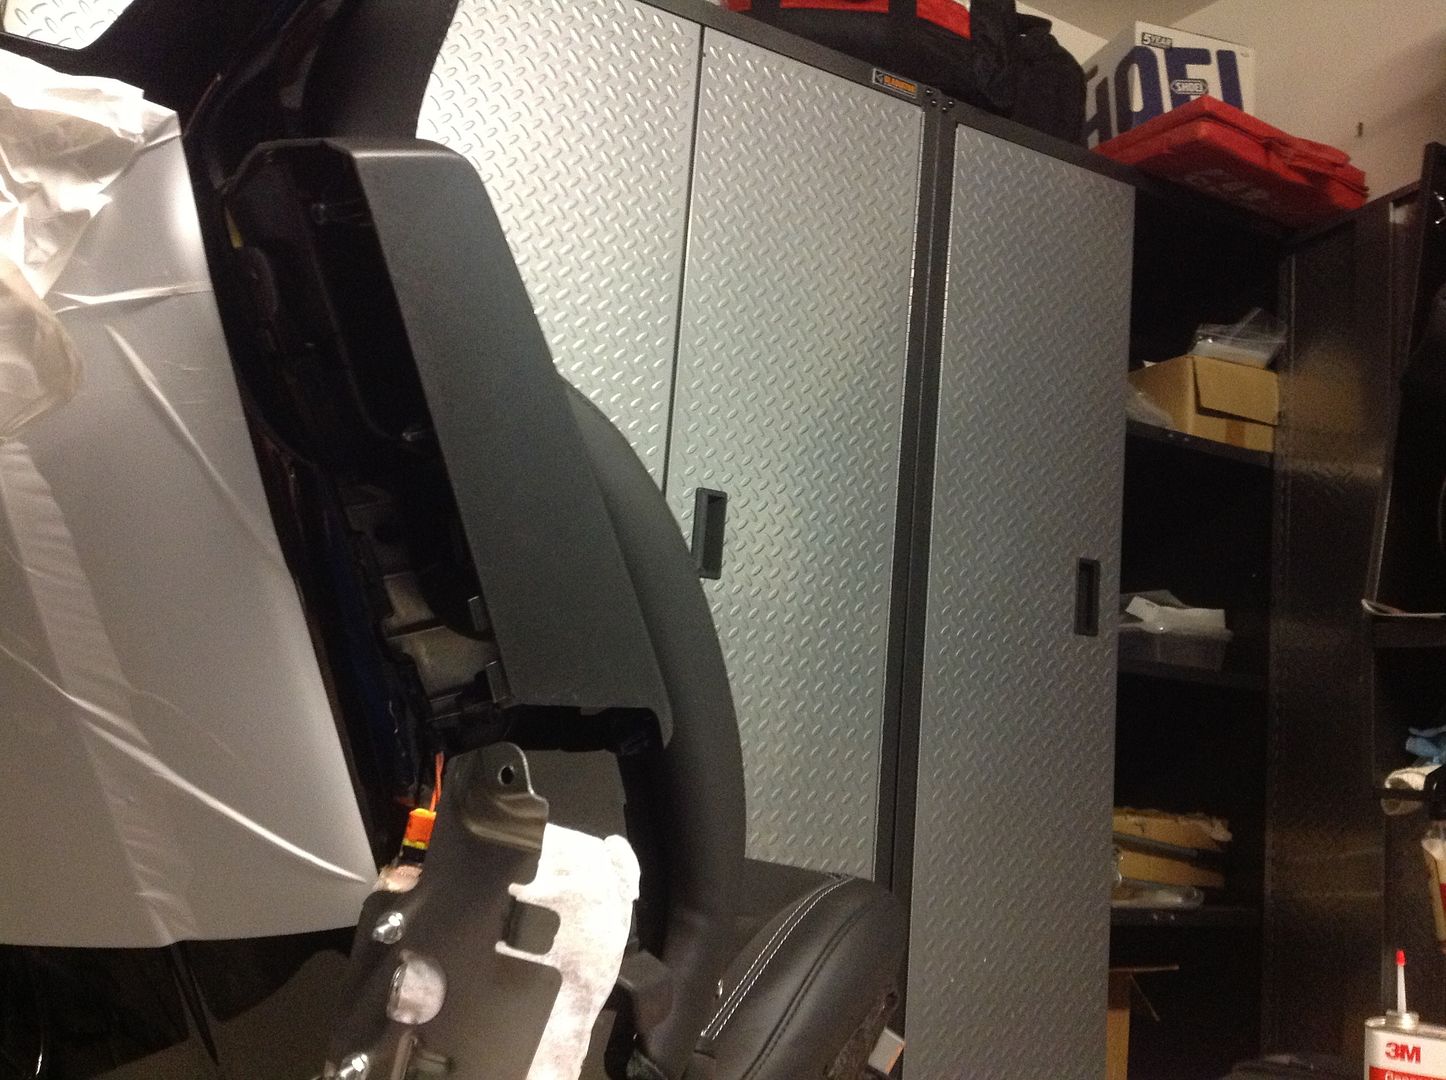
Now carefully rotate the air bag inside the cover being extremely careful not to damage the outer cloth layer. Now you can install the 2 torx bolts that hold the air bag bracket to the frame.
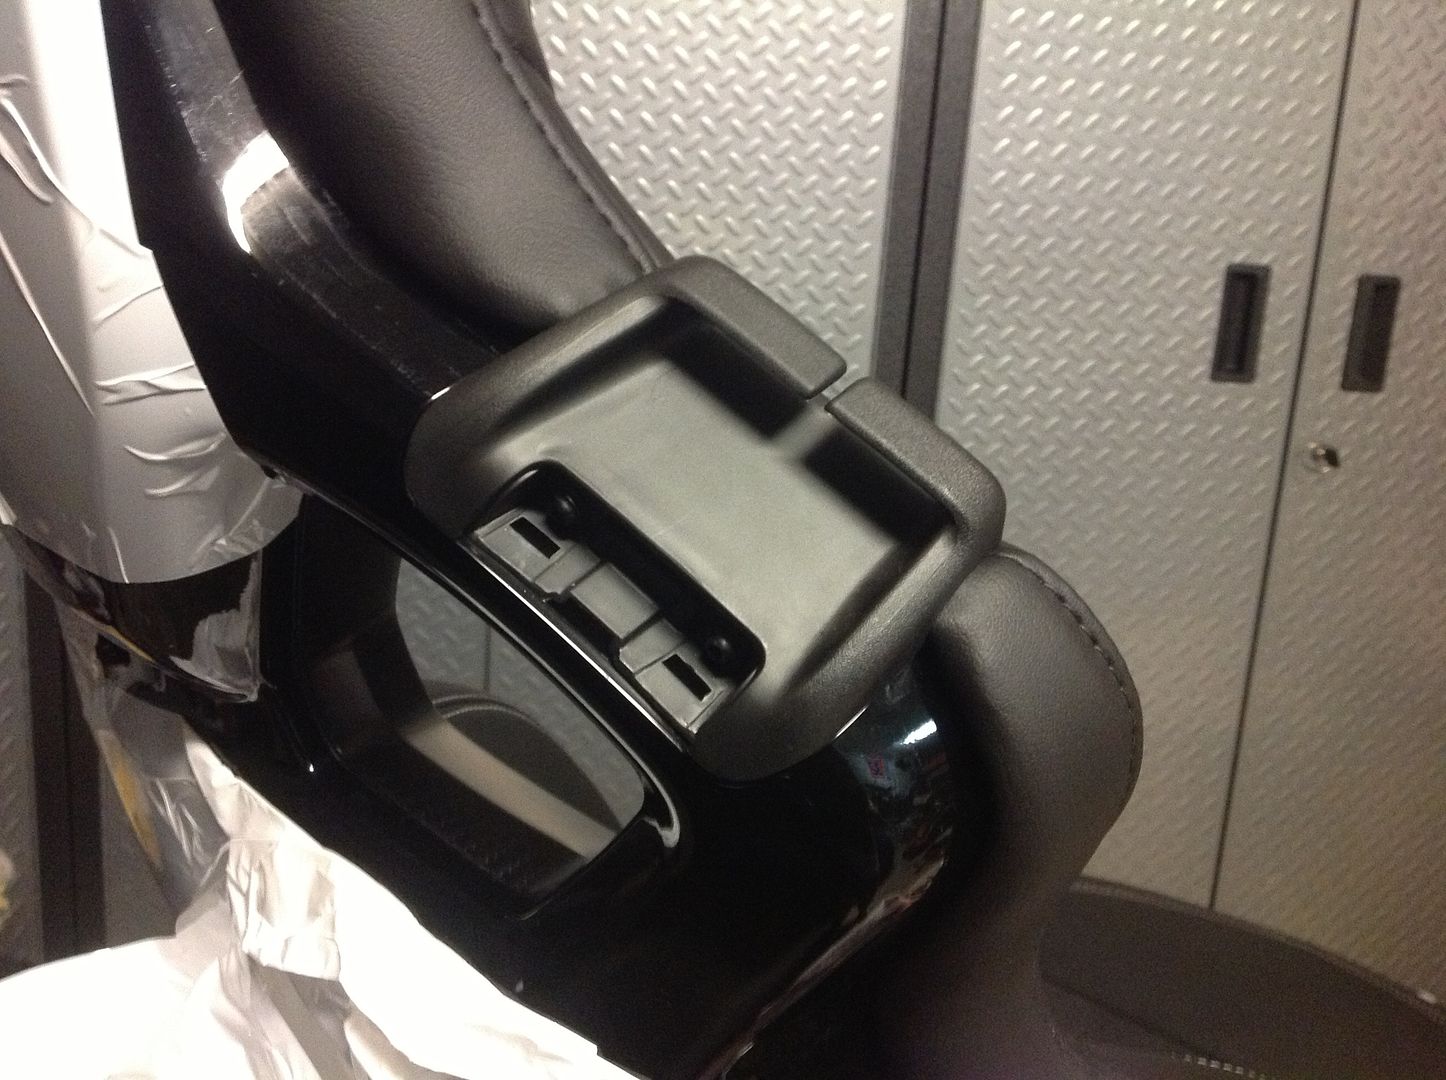
Slide the rear half of the air bag cover from the backside and using the one odd torx screw that was removed from the old side air bag bracket, I installed that in the upper screw hole to hold the covers together. The comp seats need 4 screws per side to hold these covers together, I used black Phillips screws in the remaining holes at the time but have ordered the correct screws from the dealer. I will update the parts list when I get the part number.
Now install the side plastic switch panel and plug in the 2 electrical plugs. You should have one machine torx headed screw left for this panel.
Yes, I put the zip tie back on cause like Theta said "I want it to look factory"
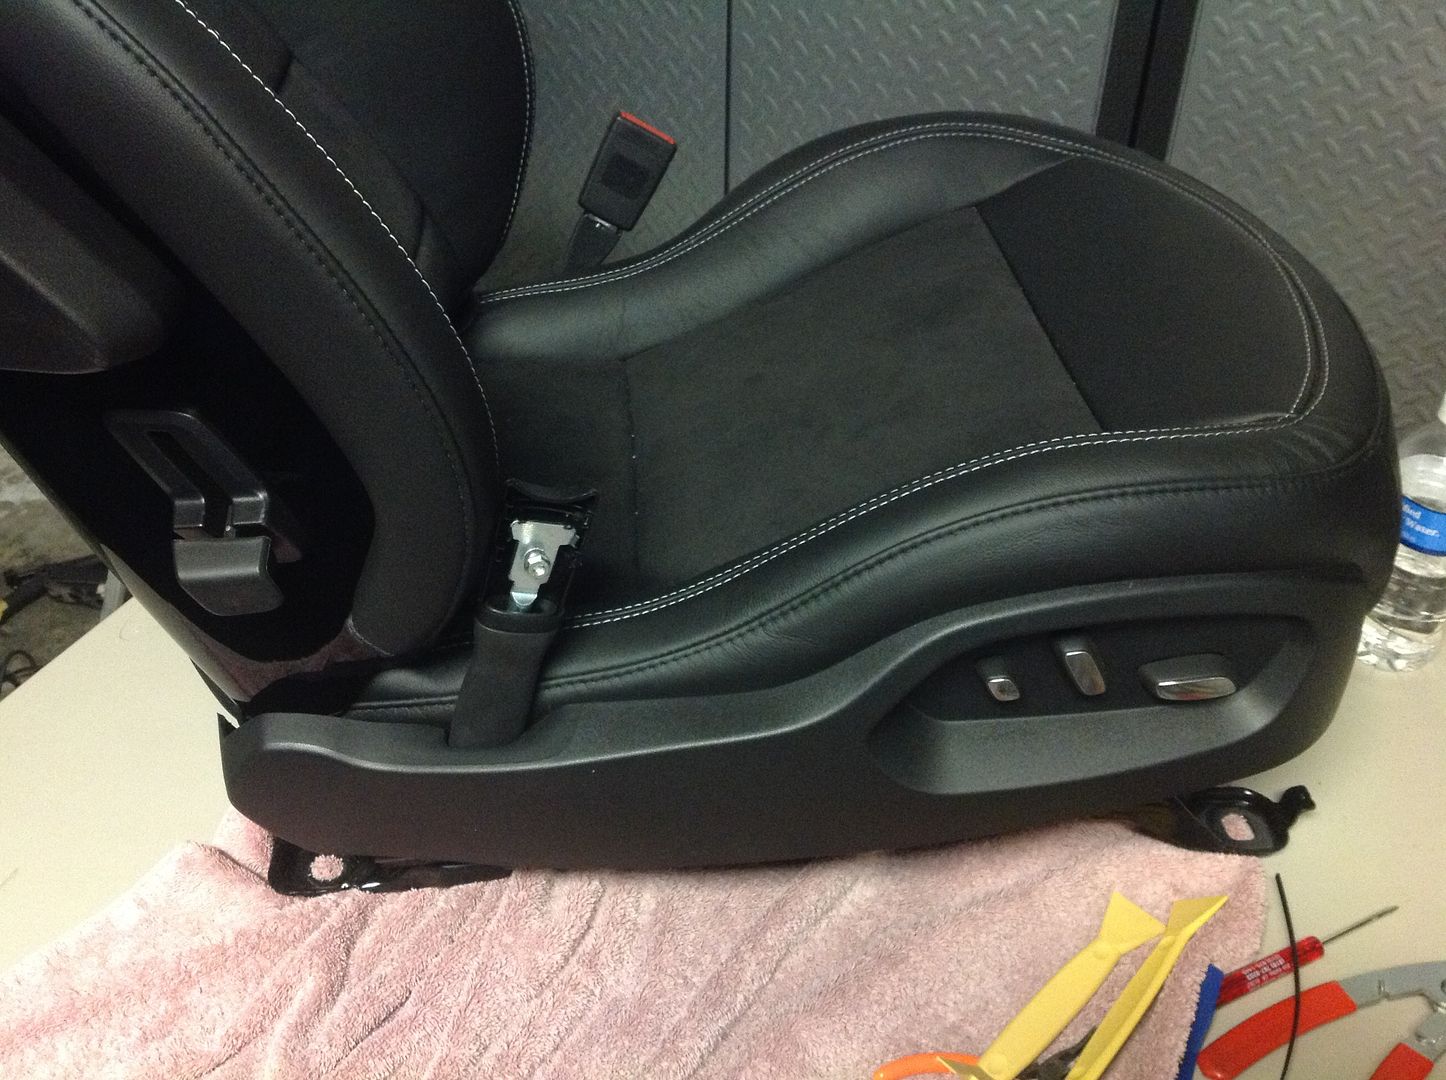
The seat is finished. I have not done the left seat yet due to time restraints, so if there are any questions or other photos you might want, let me know and I will do my best to add them if possible.
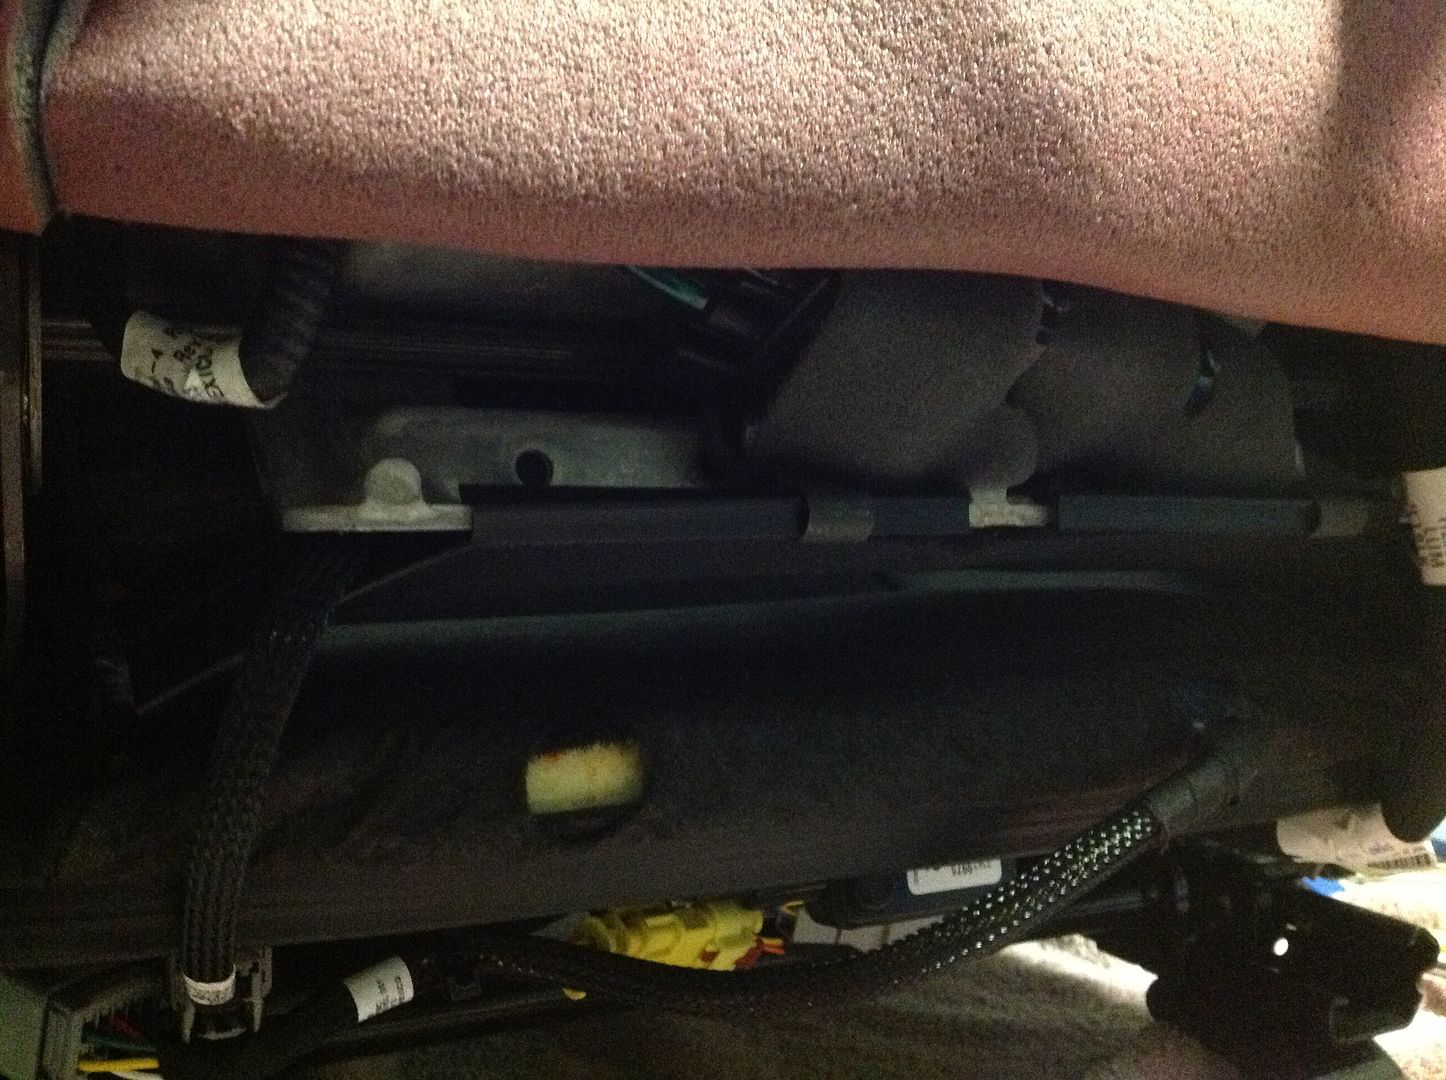
Drop the seat back in the car and plug the main harness back in under the front of the seat, now you can hook the battery back up to put all the nuts and seat track covers back on. It would be a good time to unbolt the other seat if you did not take them both out at once.

Now carefully rotate the air bag inside the cover being extremely careful not to damage the outer cloth layer. Now you can install the 2 torx bolts that hold the air bag bracket to the frame.

Slide the rear half of the air bag cover from the backside and using the one odd torx screw that was removed from the old side air bag bracket, I installed that in the upper screw hole to hold the covers together. The comp seats need 4 screws per side to hold these covers together, I used black Phillips screws in the remaining holes at the time but have ordered the correct screws from the dealer. I will update the parts list when I get the part number.

Now install the side plastic switch panel and plug in the 2 electrical plugs. You should have one machine torx headed screw left for this panel.
Yes, I put the zip tie back on cause like Theta said "I want it to look factory"


The seat is finished. I have not done the left seat yet due to time restraints, so if there are any questions or other photos you might want, let me know and I will do my best to add them if possible.
Drop the seat back in the car and plug the main harness back in under the front of the seat, now you can hook the battery back up to put all the nuts and seat track covers back on. It would be a good time to unbolt the other seat if you did not take them both out at once.


The following 2 users liked this post by 48supertruck:
LagunaSecaZ06 (01-05-2023),
Torque Obsessed (06-08-2023)


 04-16-2014, 07:59 AM
#30

48supertruck,
Beautifully done and nice writeup. For us boneheads who didn't order these seats, $2100 is a small price to pay for correcting our "mistakes".
Looks like you have the black seat/white stitching/Ultrasuede inserts. If so, do you have the part numbers for these? I'm making my list and checking it twice
Thanks.

 04-16-2014, 11:24 AM
#32
Pro
Thread Starter
48supertruck,
Beautifully done and nice writeup. For us boneheads who didn't order these seats, $2100 is a small price to pay for correcting our "mistakes".
Looks like you have the black seat/white stitching/Ultrasuede inserts. If so, do you have the part numbers for these? I'm making my list and checking it twice
Thanks.
Beautifully done and nice writeup. For us boneheads who didn't order these seats, $2100 is a small price to pay for correcting our "mistakes".
Looks like you have the black seat/white stitching/Ultrasuede inserts. If so, do you have the part numbers for these? I'm making my list and checking it twice
Thanks.
http://www.gmfleetorderguide.com/NAS...page=9&butID=3
If that is your trim code also. The gm part numbers for the seat covers are
22996687
22997274
If this is not your trim code, don't use these part numbers or you will get the wrong seat covers and most dealers are going to say these are special order and not returnable.
04-16-2014, 11:37 AM
#33
My car is a 2LT with a trim code of 194. That is a 2LT black interior with micro fiber inserts. You can find your trim code at this link to the factory order guide.
http://www.gmfleetorderguide.com/NAS...page=9&butID=3
If that is your trim code also. The gm part numbers for the seat covers are
22996687
22997274
If this is not your trim code, don't use these part numbers or you will get the wrong seat covers and most dealers are going to say these are special order and not returnable.
 04-17-2014, 03:11 PM
#35
Moderator


Added link to this thread to the sticky "DIY, FAQ's and TIPS" thread.
04-18-2014, 11:09 PM
#36
Pro
Thread Starter
Finished the left side seat last night. It only took about 2 hours from seat removal to reinstall and that is with my 5 year daughter dropping the tray of hardware... Twice! She also insisted that she needs to be the one that hands me the tools. This did not make the project go quicker if you wondering
04-18-2014, 11:26 PM
#37
Tech Contributor
Member Since: Jan 2006
Location: Saint Louis MO
Posts: 4,761
Likes: 0
Received 218 Likes
on
110 Posts
St. Jude Donor '14-'15
Finished the left side seat last night. It only took about 2 hours from seat removal to reinstall and that is with my 5 year daughter dropping the tray of hardware... Twice! She also insisted that she needs to be the one that hands me the tools. This did not make the project go quicker if you wondering

 04-19-2014, 10:23 AM
#39
5th Gear


Member Since: Mar 2013
Posts: 5
Likes: 0
Received 0 Likes
on
0 Posts
Finished the left side seat last night. It only took about 2 hours from seat removal to reinstall and that is with my 5 year daughter dropping the tray of hardware... Twice! She also insisted that she needs to be the one that hands me the tools. This did not make the project go quicker if you wondering
04-19-2014, 04:01 PM
#40
Racer
Would it be too weird to just do the driver's seat? How often is a passenger going to be with you when you're tracking the car?
Great ''how it'' write-up, btw.
Great ''how it'' write-up, btw.
Last edited by louloumax; 04-19-2014 at 04:30 PM.