
DIY Valentine One Install
 02-11-2014, 09:07 PM
#1
Instructor

Thread Starter
Member Since: Jan 2014
Location: Orlando FL
Posts: 175
Likes: 0
Received 0 Likes
on
0 Posts
Just wanted to share some pics/install tips from my V1 radar detector install. This is meant to help out the regular guys that want a cleaner look, but don't want to spend a fortune on a complete stealth unit. Feel free to comment/critique and share tips for doing it better than I did.
First I bought a tap a fuse from here:
http://www.ebay.com/itm/171067830031...84.m1497.l2649
Add 16ga wire to it (enough to reach the passenger foot well
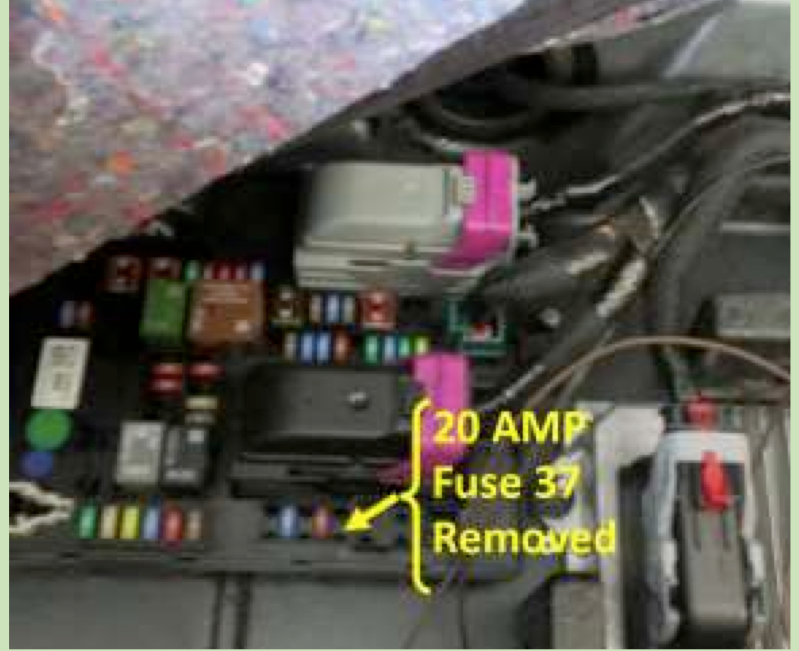
Start by pulling the rear wheel cover panel back a little to allow the carpet to come up a little. Start in the back right corner and pull the carpet up. In the middle, you'll see the rear fuse panel

Using the guide from the netwelding.com website, remove fuse 37 (20A) and buy another 20A and add to the tap a fuse, and insert back into spot 37
Run the wire under the panels on the passenger side. This is very easy to do, and did not require any tools. It tucked under there very easily. I ran it all the way to the right corner of the passenger footwell.
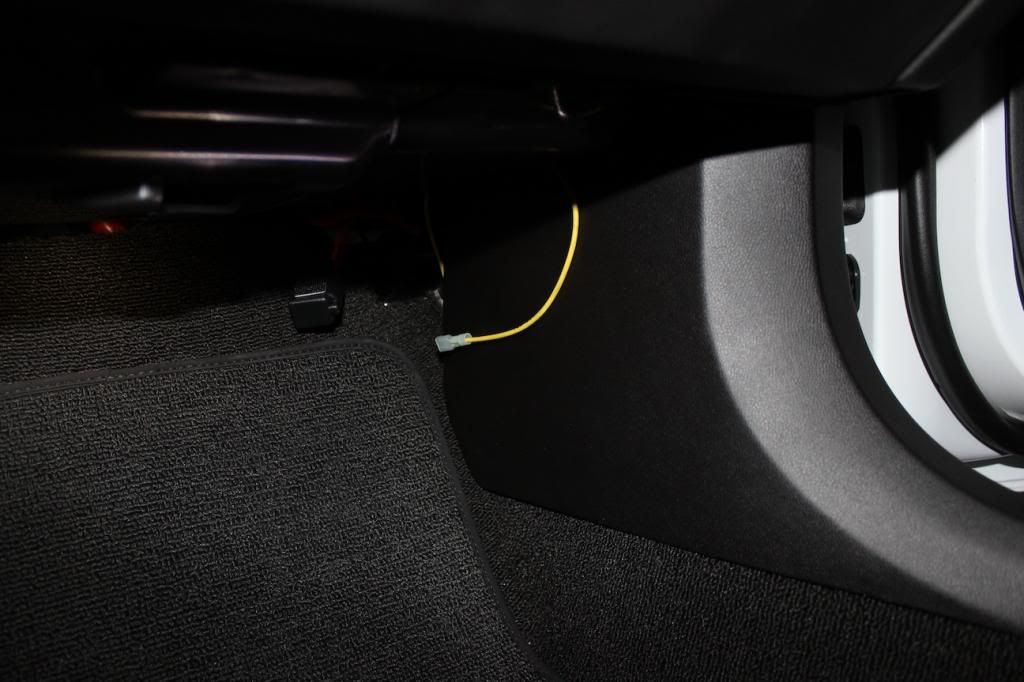
Using the V1 hardwire kit, connect this wire to the 12v (red) wire. I took more wire and connected to a bolt on the opposite corner of the passenger footwell. This is the ground wire, which I fed through the plastic paneling under the footwell area and connected to the ground wire.
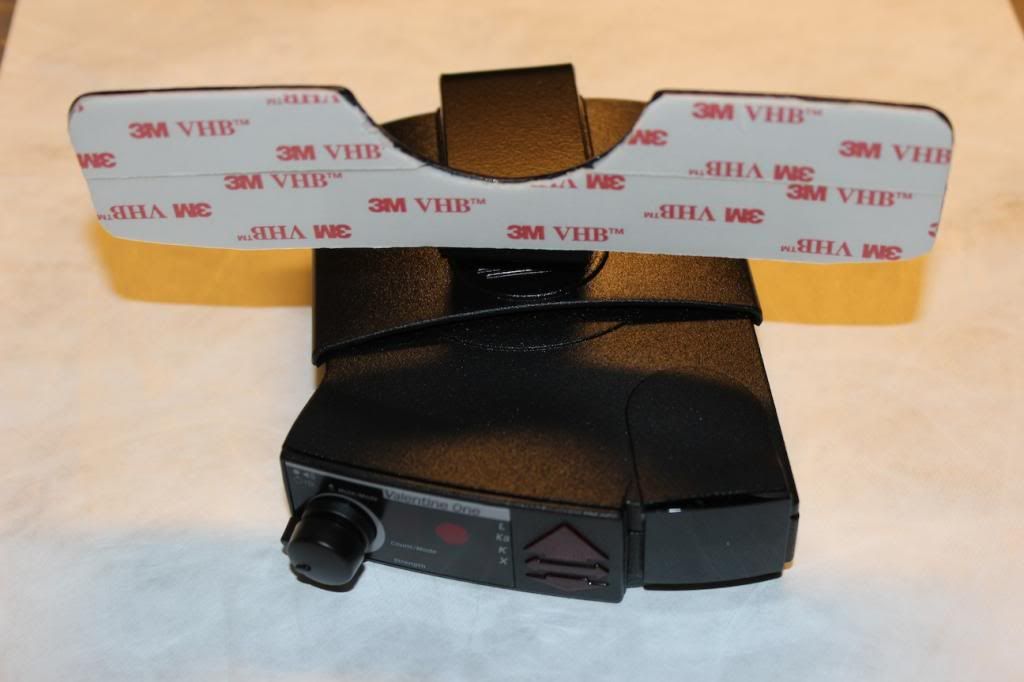
Then I bought a rear view mirror mount from here
http://www.ebay.com/itm/131114903745...84.m1558.l2649
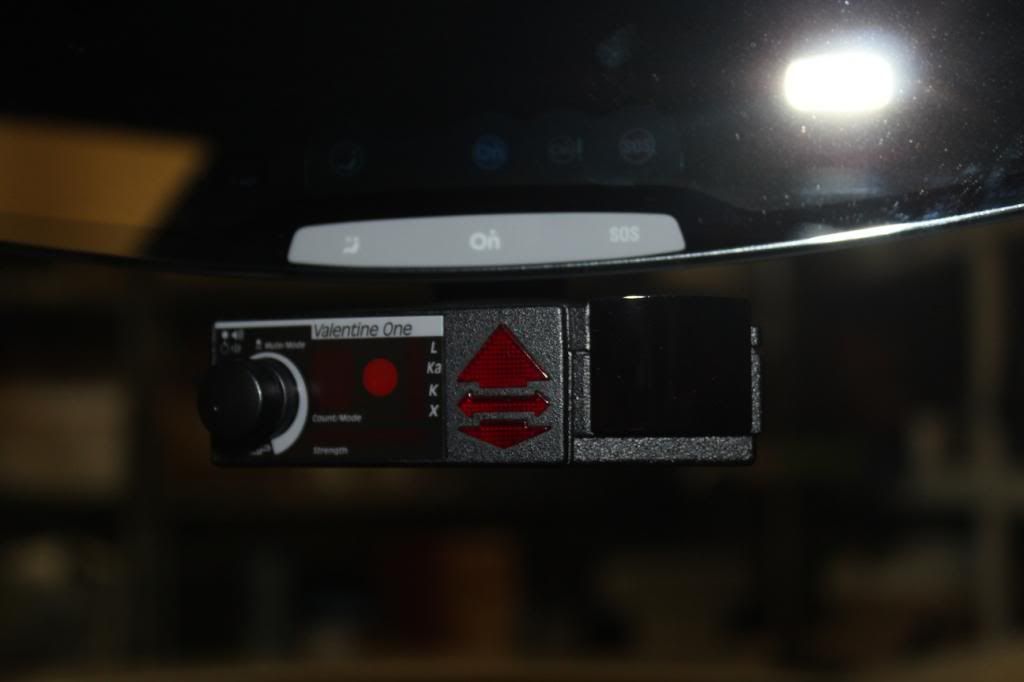
This uses the V1 visor mount bracket and mounts the V1 under the rearview mirror
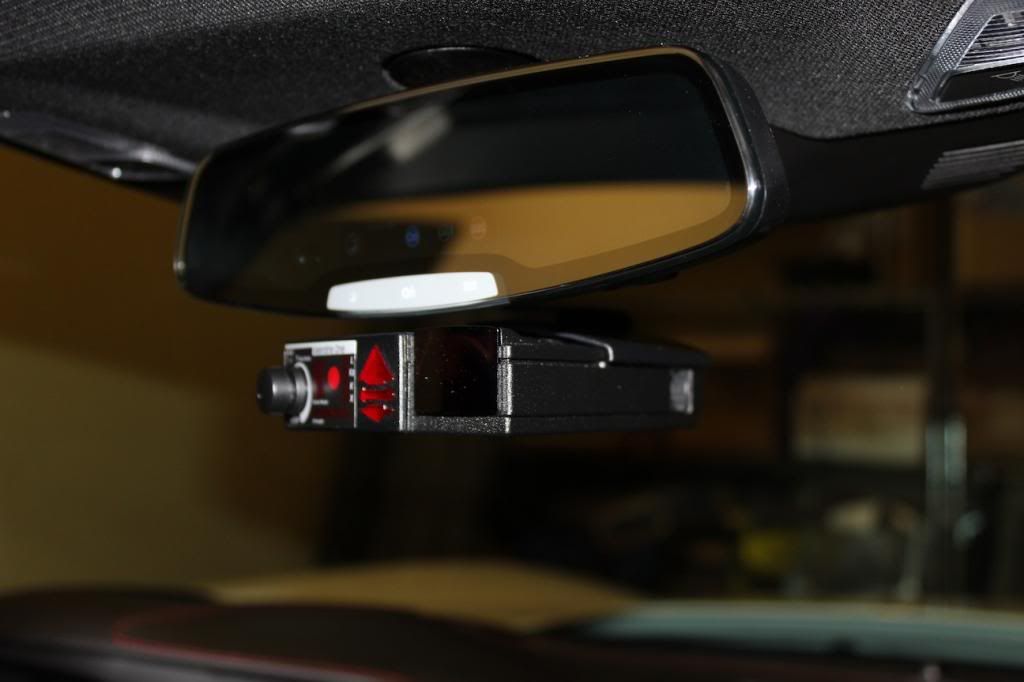
Then, I ran the wire along the windshield glass and tucked under the headliner. A spudger tool helped with this.
I know some people ran it along the glass down the A pillar, but I didn't see how to get it from the front of the glass down to the footwell. Instead, I tucked it under the headliner near the visor
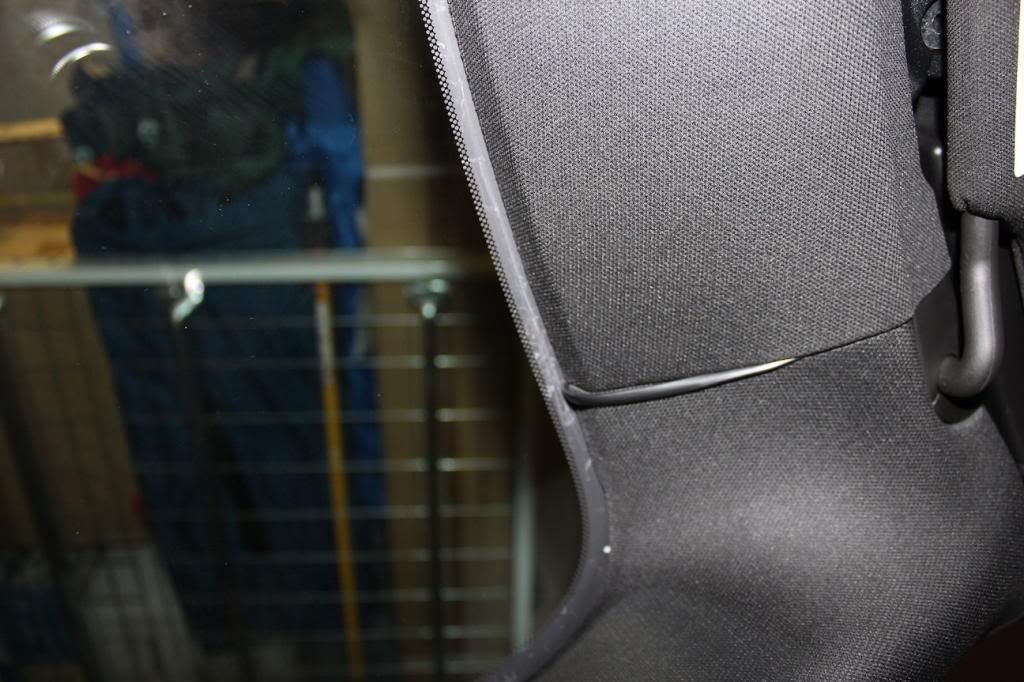
I then tucked it under the paneling and it allowed me access to the outside edge of the A pillar, which seemed much easier access to the footwell
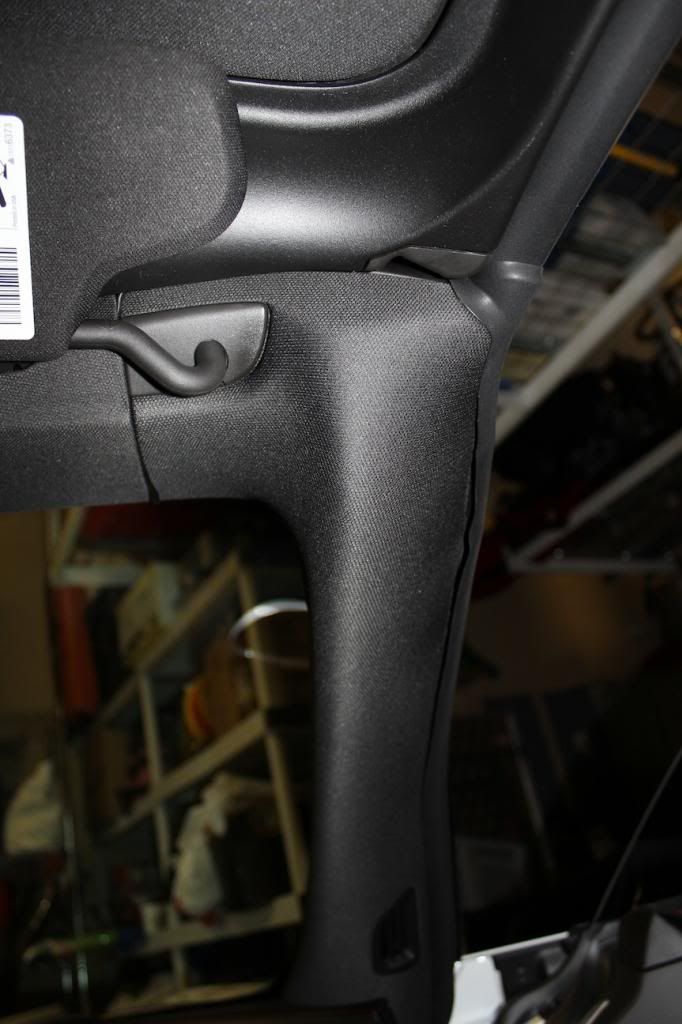
I used the spudger to tuck it behind the trim and rubber seal, then down and across, under the plastic paneling to the corner of the passenger footwell. Plug into the hardwire kit, and you're done.
First I bought a tap a fuse from here:
http://www.ebay.com/itm/171067830031...84.m1497.l2649
Add 16ga wire to it (enough to reach the passenger foot well
Start by pulling the rear wheel cover panel back a little to allow the carpet to come up a little. Start in the back right corner and pull the carpet up. In the middle, you'll see the rear fuse panel

Using the guide from the netwelding.com website, remove fuse 37 (20A) and buy another 20A and add to the tap a fuse, and insert back into spot 37

Run the wire under the panels on the passenger side. This is very easy to do, and did not require any tools. It tucked under there very easily. I ran it all the way to the right corner of the passenger footwell.

Using the V1 hardwire kit, connect this wire to the 12v (red) wire. I took more wire and connected to a bolt on the opposite corner of the passenger footwell. This is the ground wire, which I fed through the plastic paneling under the footwell area and connected to the ground wire.
Then I bought a rear view mirror mount from here
http://www.ebay.com/itm/131114903745...84.m1558.l2649
This uses the V1 visor mount bracket and mounts the V1 under the rearview mirror


Then, I ran the wire along the windshield glass and tucked under the headliner. A spudger tool helped with this.
I know some people ran it along the glass down the A pillar, but I didn't see how to get it from the front of the glass down to the footwell. Instead, I tucked it under the headliner near the visor

I then tucked it under the paneling and it allowed me access to the outside edge of the A pillar, which seemed much easier access to the footwell

I used the spudger to tuck it behind the trim and rubber seal, then down and across, under the plastic paneling to the corner of the passenger footwell. Plug into the hardwire kit, and you're done.


 02-20-2014, 11:02 AM
#5
Melting Slicks

Member Since: Mar 1999
Location: Apex NC
Posts: 2,838
Received 690 Likes
on
276 Posts
Cruise-In II Veteran
Cruise-In III Veteran

The link to the mirror mount takes you to the fuse, can you please supply the correct link? THANK YOU, the link is the same in both spots (accident) I am sure 
02-20-2014, 06:34 PM
#6
Instructor
Thread Starter
Member Since: Jan 2014
Location: Orlando FL
Posts: 175
Likes: 0
Received 0 Likes
on
0 Posts
http://www.ebay.com/itm/131114903745...84.m1558.l2649
02-20-2014, 07:58 PM
#7
Instructor
Great post. I used a metal bracket from my C5 and got the same look and position (right under the mirror). Honestly, I forget where I bought this bracelet/kit but it was made specifically for the Valentine & the C5. I'll dig thru my files and see if I can find the vendor and P/N. Had to change the angle of the bend but, once I got it right, it worked like a champ. I mounted the bracket to the "clamshell" cover behind the RV mirror with a single screw/locknut/washer. This cover is held in place via 5 spring posts and easily pops off.
Now I need to fish the wire to the rear fusebox and I'm done. The fusebox under the hood is, in fact, accessible BUT has ONLY micro fuses and there appears to be NO source for "add-a-circuits" for micro 2-pin ATR fuses, thus the "journey" to the rear fusebox. When I get 'er done will post pics etc for all.
Now I need to fish the wire to the rear fusebox and I'm done. The fusebox under the hood is, in fact, accessible BUT has ONLY micro fuses and there appears to be NO source for "add-a-circuits" for micro 2-pin ATR fuses, thus the "journey" to the rear fusebox. When I get 'er done will post pics etc for all.
02-20-2014, 09:30 PM
#8
Le Mans Master


Looks really good. I was going to mount to the left lower windshield using a perm glass mount, but I might do what you did instead... Nice & clean..!
02-21-2014, 02:14 AM
#10
Instructor
Thread Starter
Member Since: Jan 2014
Location: Orlando FL
Posts: 175
Likes: 0
Received 0 Likes
on
0 Posts
http://www.ifixit.com/Store/Tools/Spudger/IF145-002
I used the flat end to push the wire under the trim, or pry the trim back in some spots
I used the flat end to push the wire under the trim, or pry the trim back in some spots
02-21-2014, 08:40 AM
#11
Burning Brakes

Looks good. I just bought a passport max. I am going to do a hard wire install in the near future. How does the rear view mirror mount/detector affect your vision?
02-21-2014, 01:41 PM
#12
Instructor
Can't speak for the rest but I had my Valentine under the RV mirror on my C5 for nearly 8 years and did not once have my field of vision blocked or affected. Hope to get my wiring run this afternoon. Once everything is in and functioning properly I'll post pics and and comments as needed.
02-21-2014, 01:59 PM
#13
Burning Brakes
On the Driver's side of the RV mirror their appears to be some type of
impression.. maybe for a sensor..Did you drill a hole in your bracket to allow for it?
impression.. maybe for a sensor..Did you drill a hole in your bracket to allow for it?

 02-21-2014, 06:27 PM
#16
Instructor
Thread Starter
Member Since: Jan 2014
Location: Orlando FL
Posts: 175
Likes: 0
Received 0 Likes
on
0 Posts
02-21-2014, 06:28 PM
#17
Instructor
Thread Starter
Member Since: Jan 2014
Location: Orlando FL
Posts: 175
Likes: 0
Received 0 Likes
on
0 Posts
02-22-2014, 12:02 AM
#18
After reading this thread I ordered the V1 mount above and installed it. It does not reach the sensor hole because the grove in the center will not allow it to go that far to the drivers side.
 03-09-2014, 01:25 PM
#20
Team Owner


Member Since: Aug 2007
Location: I live my life by 2 rules. 1) Never share everything you know. 2)
Posts: 136,148
Received 2,402 Likes
on
1,366 Posts
St. Jude Donor '11-'12-'13, '16-'17-'18

Decided I don't like the thought of my Escort hanging down underneath the mirror. Unfortunately I found this out after buying the mount the OP spec'd.
So, if anyone would like it for $25, PM me...
Uninstalled and unused - only held it up on the mirror to check fit.
So, if anyone would like it for $25, PM me...
Uninstalled and unused - only held it up on the mirror to check fit.