
Carbon Fiber Dash Install - Step by Step
 01-17-2014, 06:04 PM
#1
Racer

Thread Starter
Things Needed:
Stealth Carbon Plate (Dash) – Part #22826760 - $580 tax included at local dealer
Trim Pry Bar Kit – Item #69668 - $6.99 at Harbor Freight
33 Piece Security Bit Set – Item #68459 - $5.99 Harbor Freight
Torx Screwdriver T25
Torx Screwdriver T10
Socket or Nut Driver – 7mm
Small Flat Head Screwdriver
Time to Complete: 3 to 4 hours
I will start by saying that this was much more involved than I originally expected but there isn’t anything that is that difficult just requires patience. You need to take your time so you don’t scratch anything or lose any of the many screws and clips. I will do my best to explain it in detail but if there are any questions please ask.
Step 1
The first step was figuring out where to start…
The first thing you need to do is remove the out portion on the passenger handle. There is a seam on the underside of it and you need to use your pry tool and pop it off. Then you need to remove the (2) Torx screws which will release the other side.
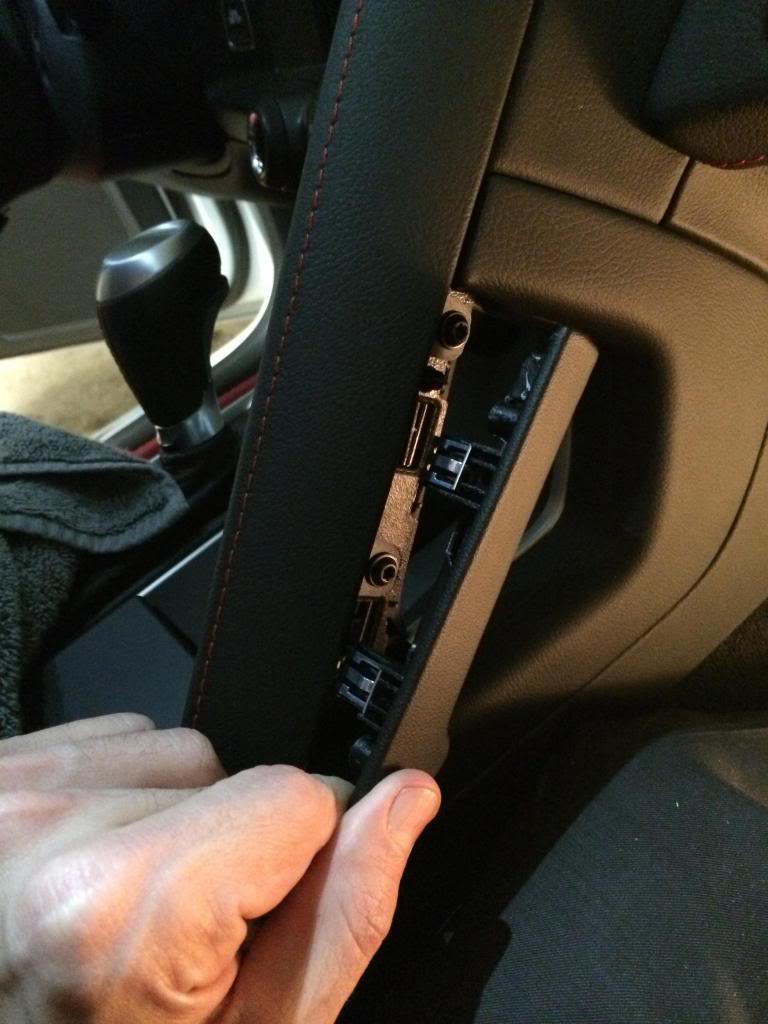
Then the lower piece just pops off.
Step 2
The next thing that needs to come out is the leather trim piece that starts on the passenger handle and wraps up and around the dash. This is held in place with clips that you need to pop out and (2) Torx screws. Don’t be rough with it but don’t be scared either. It will require a little force when you get to the part above the gauge cluster but get the one in the left corner before you hit the area above the gauges. It allows you to get a better grip.
Right Side
Left Side
Use the Pry bar on this area and they are angled a little bit so when you pull it out pull it towards you.
Center being pryed
Here is a picture showing where the clips are located.
Step 3
Remove the arm rest. There are (3) Torx T10 screws.
Step 4
Remove leather trim piece. There are clips that hold this on and a piece of plastic that hooks in the tunnel. Start at the end closest to the back of the car and use your pry tool to pop it off. When you get to the end closest to the front you will need to slide the hook out. It is easy!
Step 5
Remove plastic triangular piece. Just slide it and it will release.
Step 6
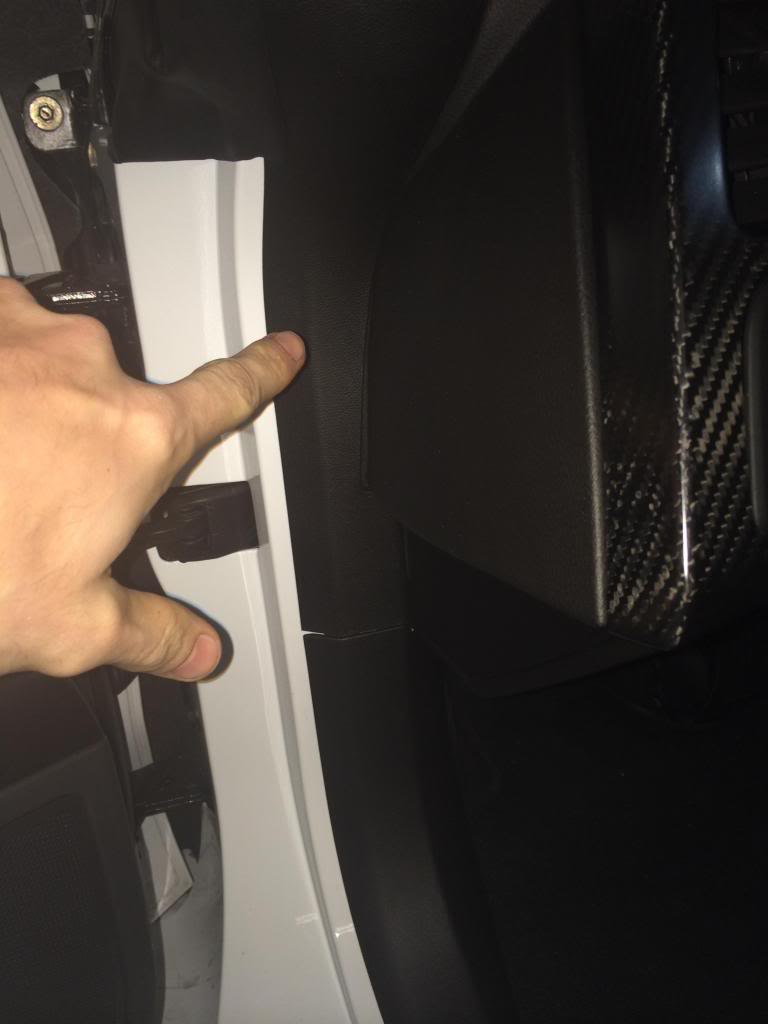
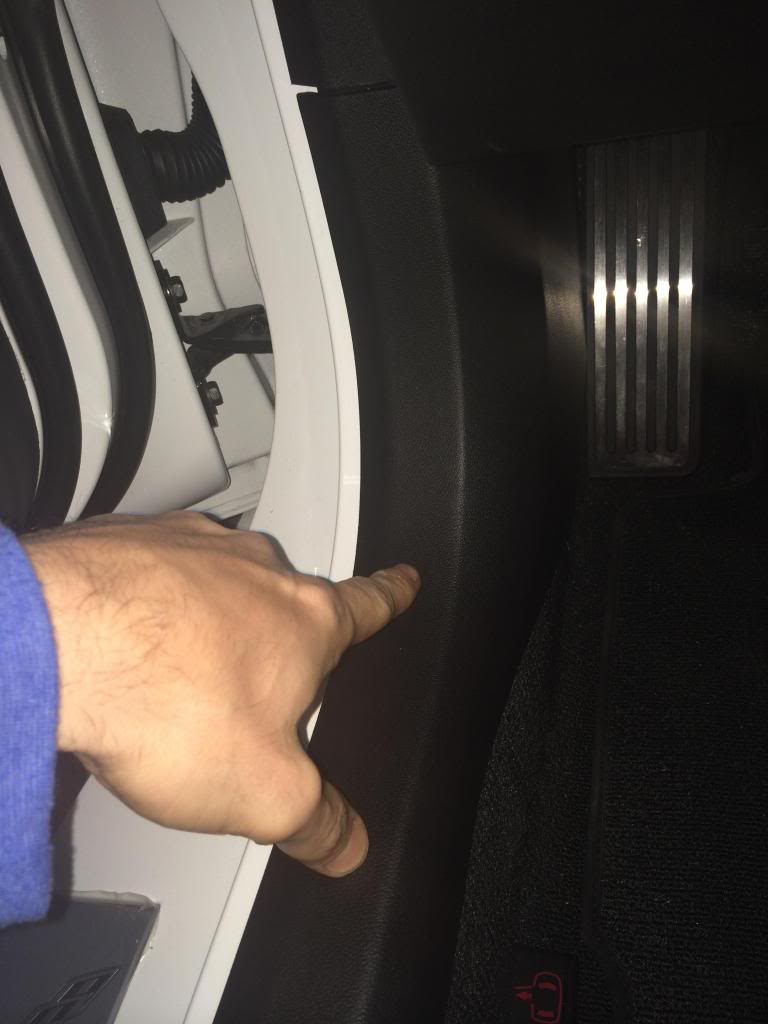
Remove the trim pieces along the sill on the driver’s side. You only need to remove a couple pieces and they pry right off. These are pictures after the fact because I forgot to take them when I was removing them. Pretty easy though.
Step 7
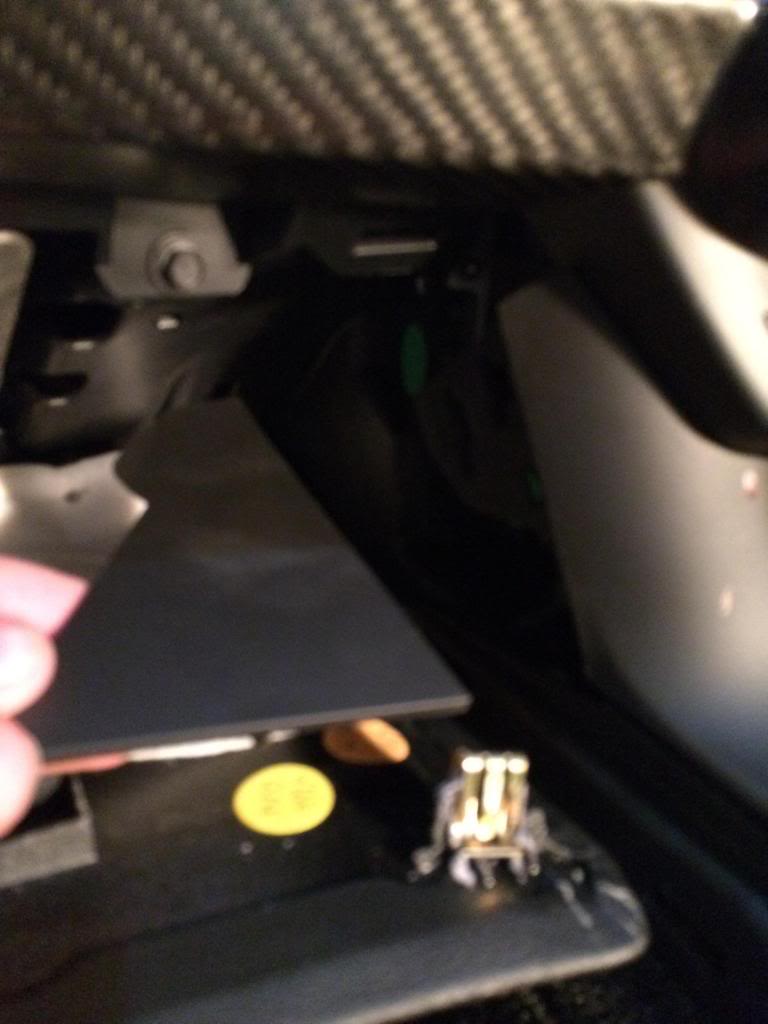
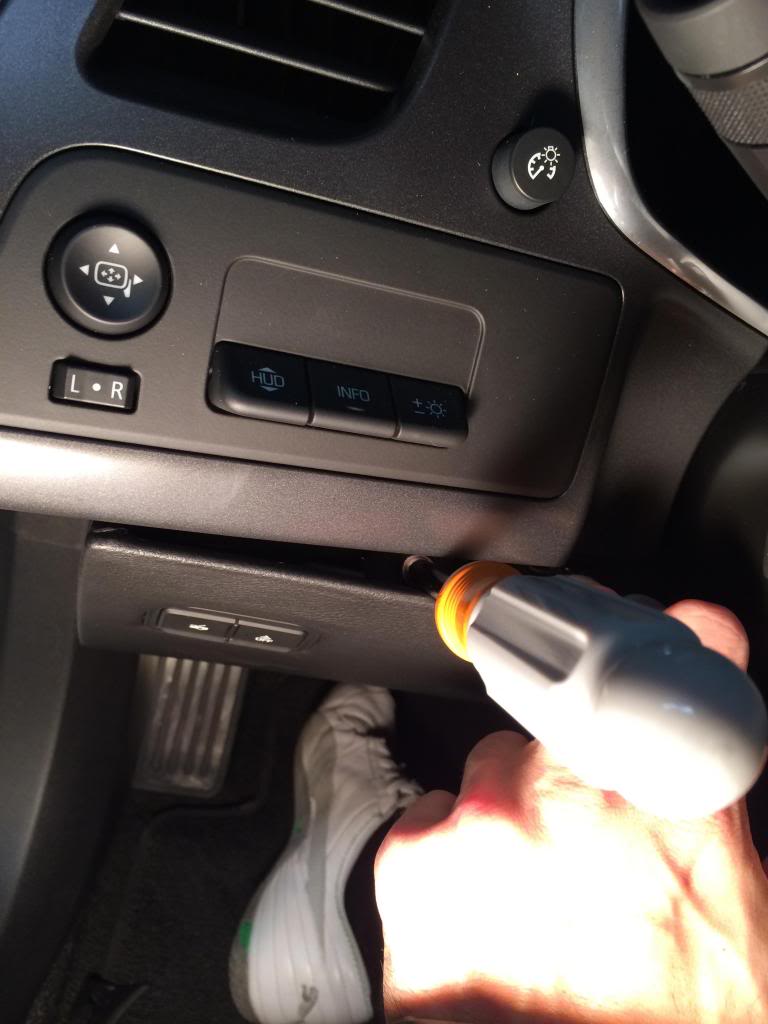
Remove/Drop the piece in the driver’s footwell. There are two screws on the bottom and one that is now exposed in the area that was covered by the door sill trim. There are also (4) clips along the seam right under the steering column that you need to pry/pop out. I did not remove this piece from the car or disconnect the wire harness. It really just need to drop a couple of inches so you can access the screws holding the dash surround.
The large piece beneath the screwdriver is what you need to drop down a couple inches. This picture is before I realized that and was trying to remove the screws with very little room to do so. When you drop it a couple inches it also removes the two clips that also hold the center console in place.
Step 8
Remove the aluminum trim piece that starts at the base of the passenger handle and wraps up around the right side of the dash. I believe there are a total of (4) screws… Two on the top and two on the side. You should be able to slide it out after the screws are removed.
Picture of it being removed
Step 9
Remove aluminum trim on left side. There are two bolts and then it come right out.
This was another picture that I forgot to take initially so I am using one from the re-assembly.
Step 10
Remove all of the screw that are holding the dash piece in place. They are all easily visible if you follow the edge around and I can’t remember how many are left… Sorry.
There are definitely two under the steering column though and two above the gauges.
You do not need to remove the 3 screws closest to you. Only the two closest to the windshield.
Step 11
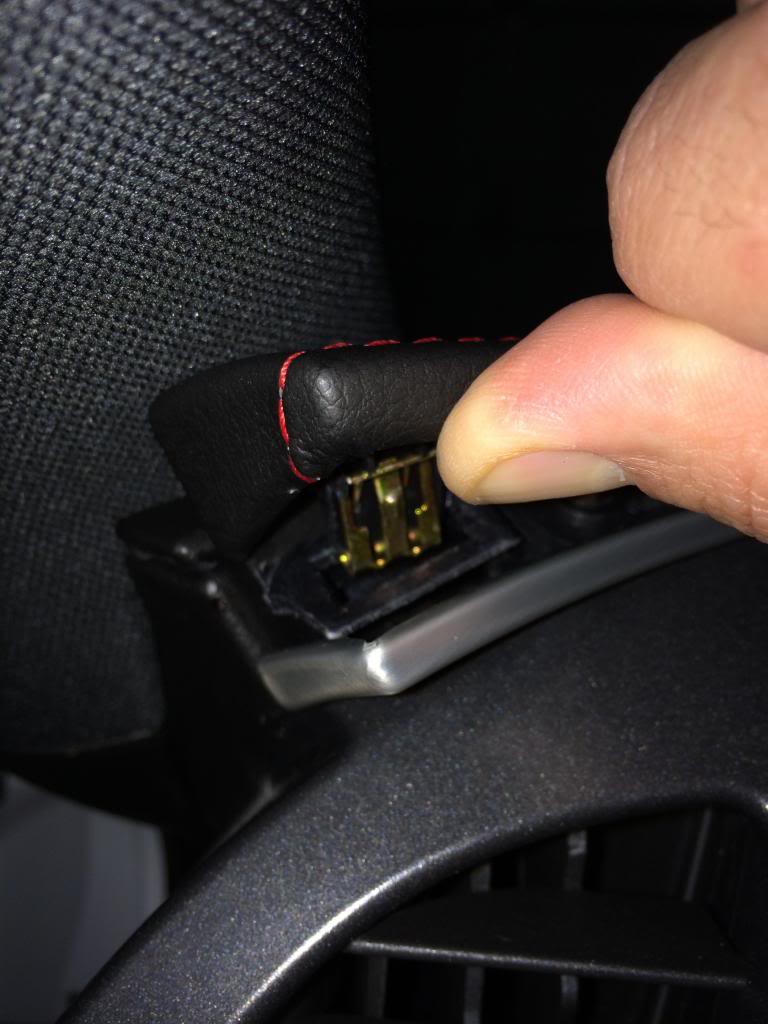
Release (Not remove) the plastic piece that surround the shifter, cup holders, power port and goes to the front edge of the arm rest compartment. This piece is held in place with clips and you need to just pry it out. Pry under the area closest to the driver’s seat that hat the leather trim covering it (the piece that was held in place by the clips and the plastic hook). This piece just need to be pulled back far enough to give you access to two screws holding the dash in place. I had to put the car in gear to allow it enough space to be moved out of the way.
Pry it from underneath near the "Drive Mode ****"
In gear to access screws
Better view of the screw on left side.
Step 12
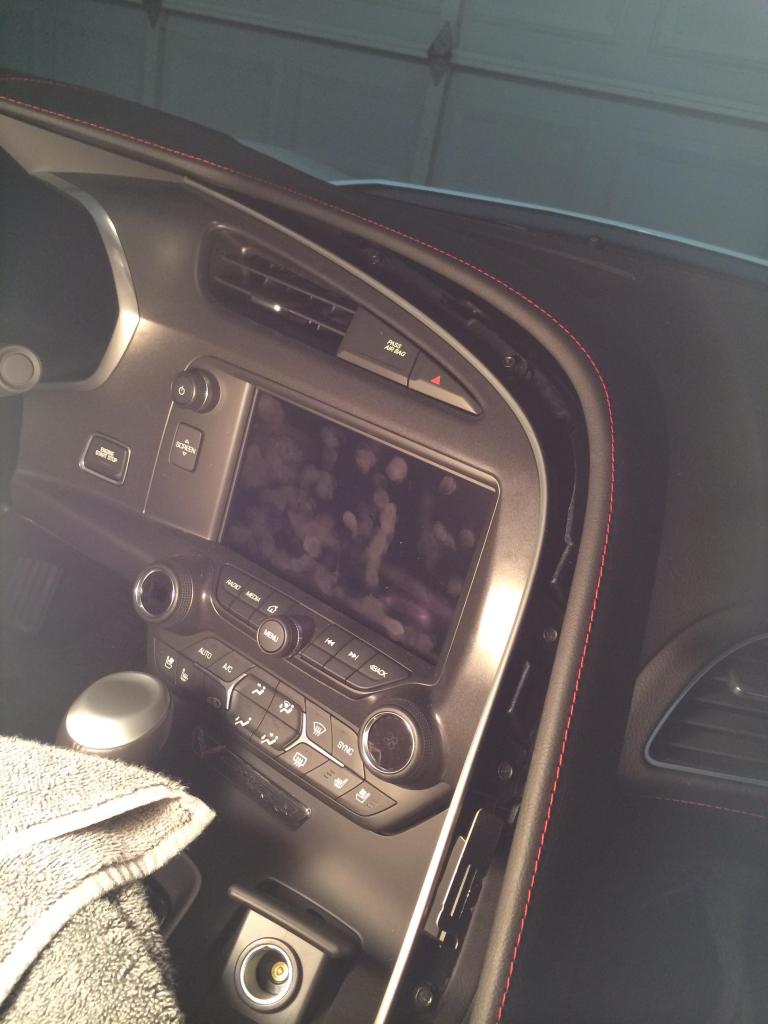
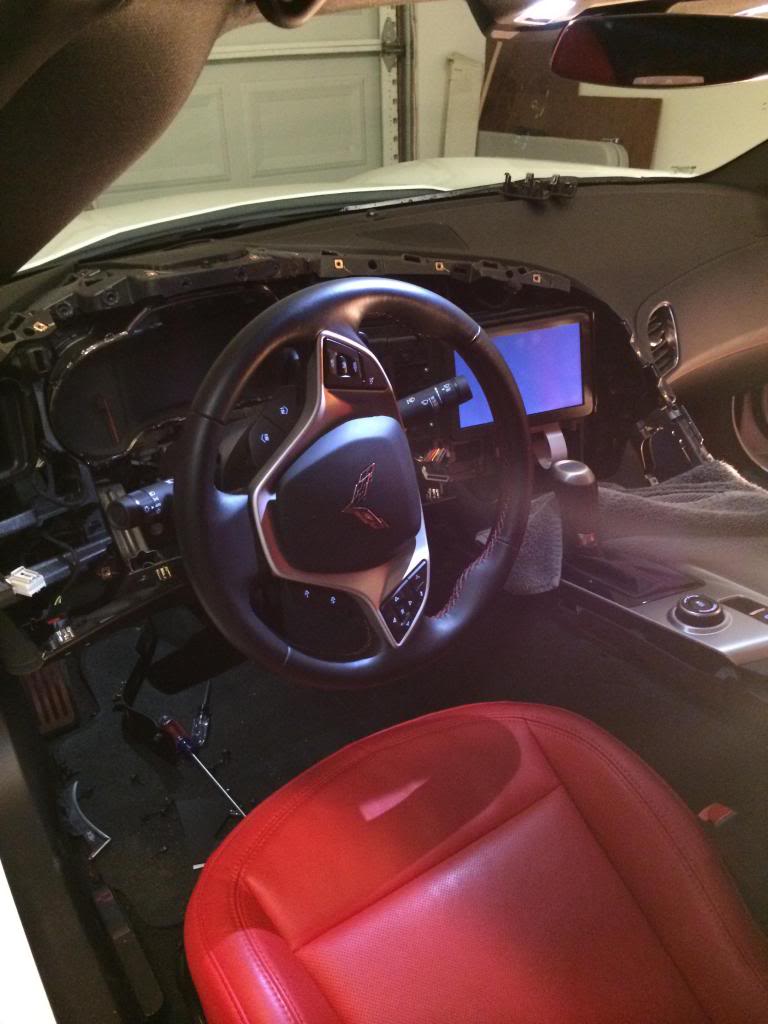
The dash is now free! However, there are 5 wire harnesses that need to be removed (on a 2LT). There are (3) on the left side by the HUD switches, (1) start button and (1) by the infotainment area. The all release fairly easy with a flathead screwdriver. Once that is done gently remove the dash piece.
Picture of car minus the dash
Step 13
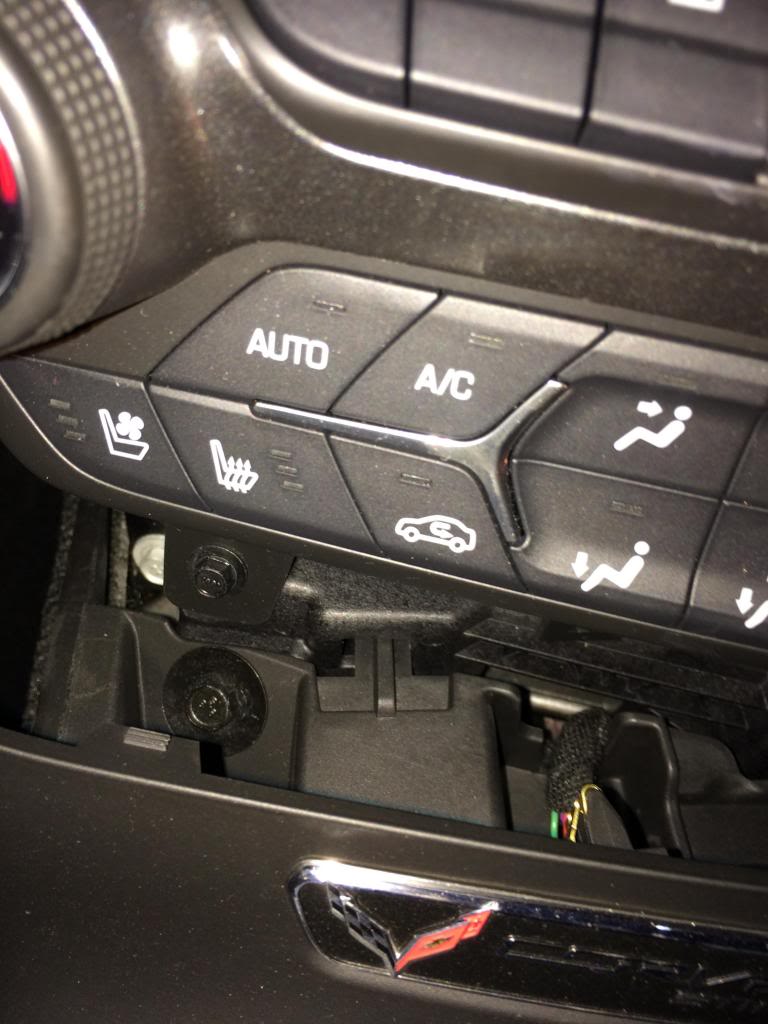
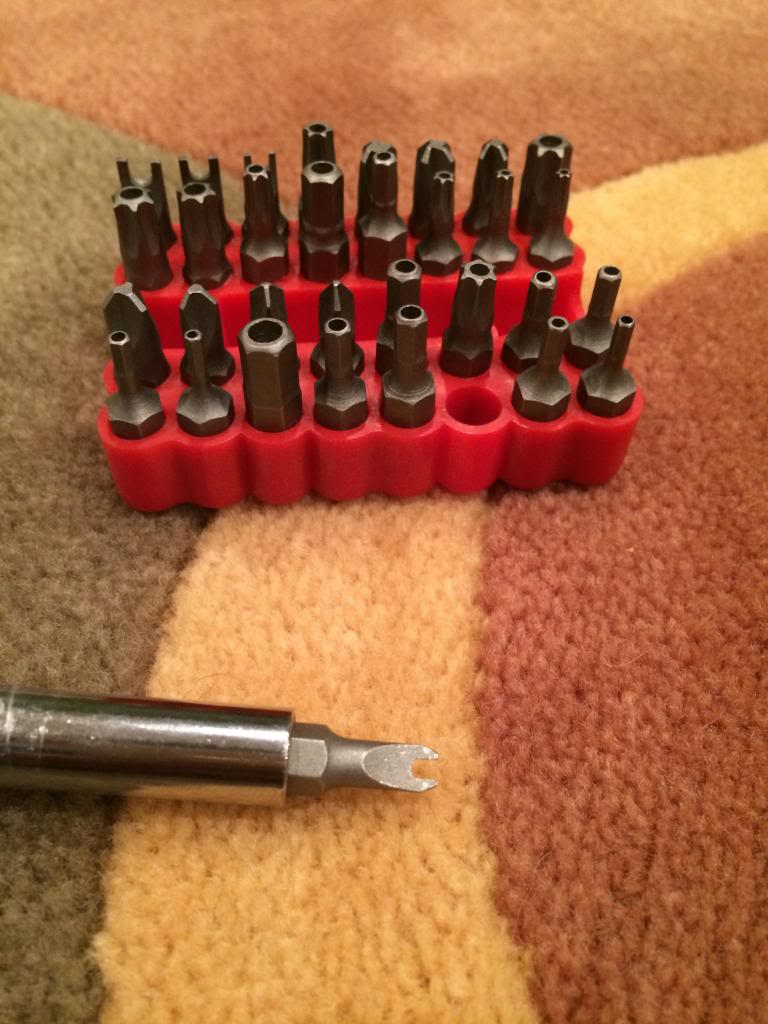
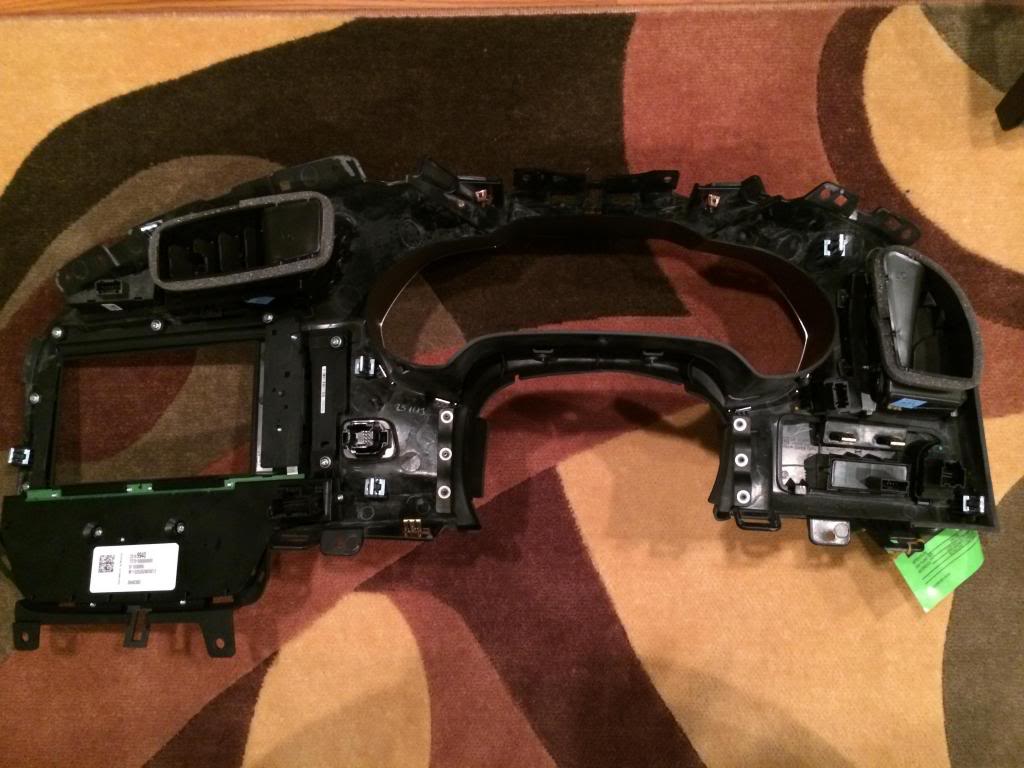
Now that the dash is removed you will see that you need to transfer the A/C controls, start button, hazard button and the HUD controls. I was very frustrated when I seen the security screws that GM had on there. They look like a 5 petal flower with a pin in the middle.
I was able to remove them using this bit from the Harbor Freight set. It worked fine!
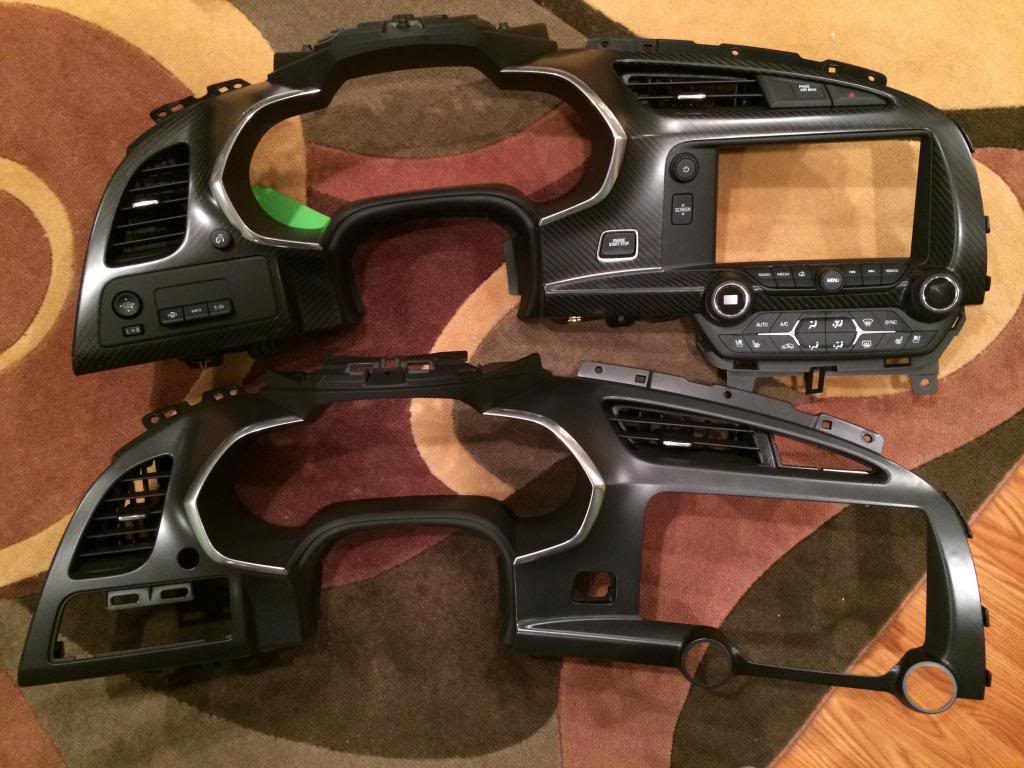
Here is a shot of the things that need to be transplanted
After everything was swapped.
Step 14
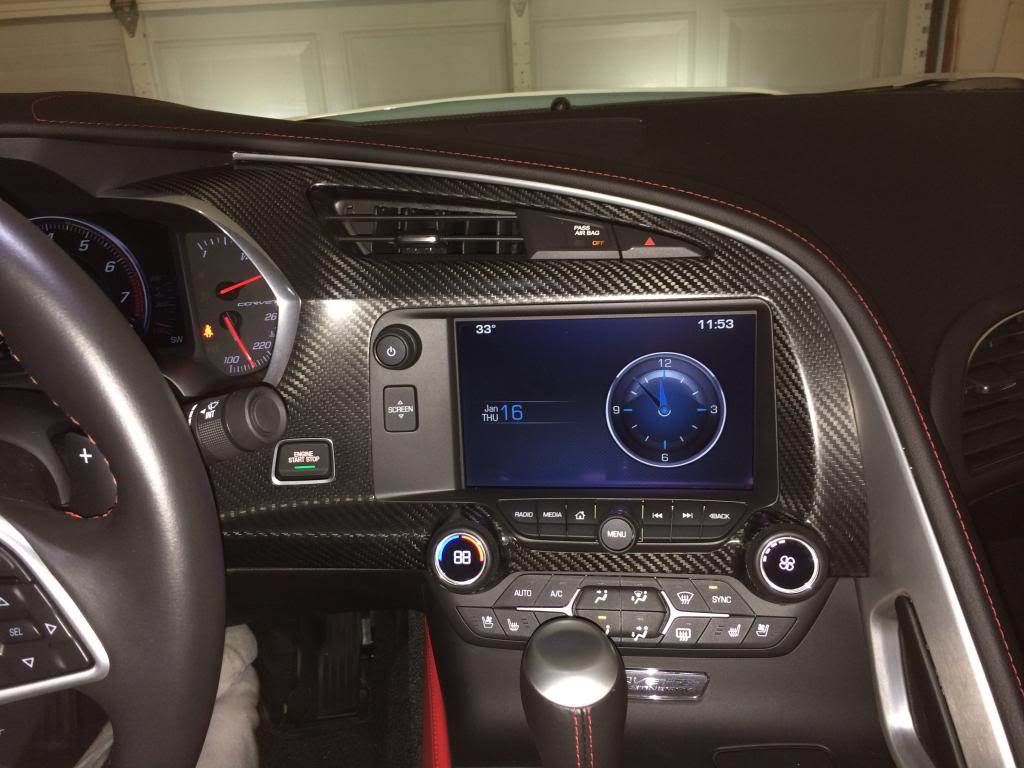
Reverse the process and get everything put back in the car.
Here is a picture that I took when it was complete!
If you have any questions please ask! Just take your time and follow the steps and I promise it won’t be that bad
I hope that this helps some of you out there that would like to take this project on but didn’t know where to start. I appreciate all of the help that other members have given me when I needed it and I hope that my post is returning the favor.
.
Stealth Carbon Plate (Dash) – Part #22826760 - $580 tax included at local dealer
Trim Pry Bar Kit – Item #69668 - $6.99 at Harbor Freight
33 Piece Security Bit Set – Item #68459 - $5.99 Harbor Freight
Torx Screwdriver T25
Torx Screwdriver T10
Socket or Nut Driver – 7mm
Small Flat Head Screwdriver
Time to Complete: 3 to 4 hours
I will start by saying that this was much more involved than I originally expected but there isn’t anything that is that difficult just requires patience. You need to take your time so you don’t scratch anything or lose any of the many screws and clips. I will do my best to explain it in detail but if there are any questions please ask.
Step 1
The first step was figuring out where to start…
The first thing you need to do is remove the out portion on the passenger handle. There is a seam on the underside of it and you need to use your pry tool and pop it off. Then you need to remove the (2) Torx screws which will release the other side.

Then the lower piece just pops off.

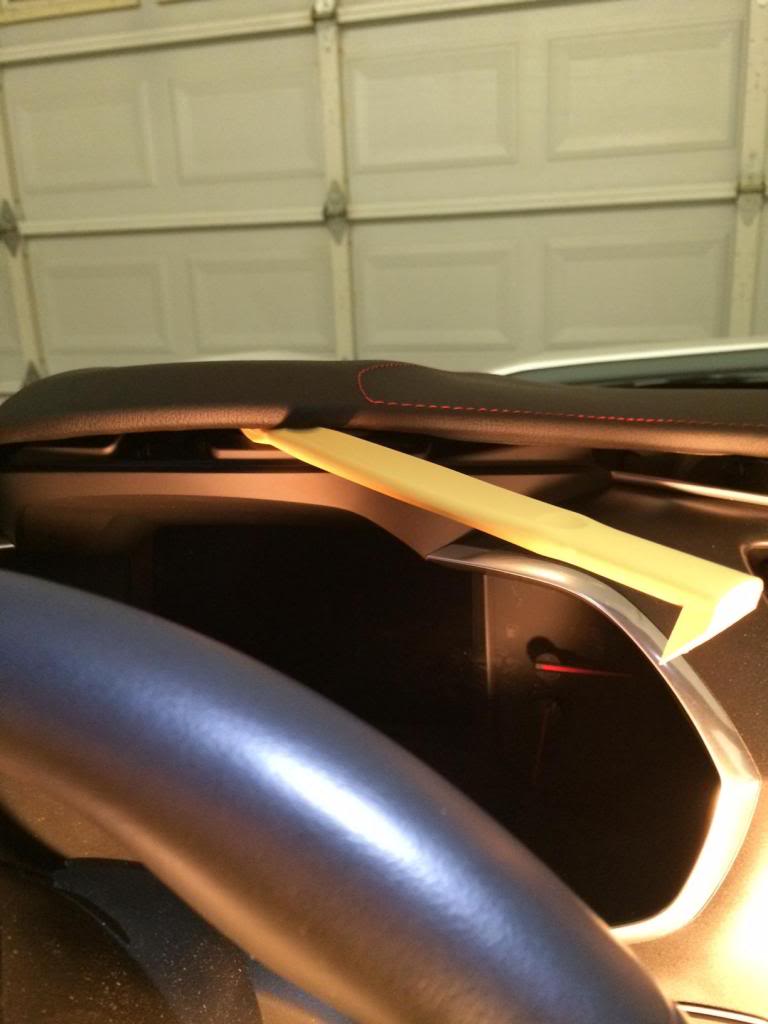
Step 2
The next thing that needs to come out is the leather trim piece that starts on the passenger handle and wraps up and around the dash. This is held in place with clips that you need to pop out and (2) Torx screws. Don’t be rough with it but don’t be scared either. It will require a little force when you get to the part above the gauge cluster but get the one in the left corner before you hit the area above the gauges. It allows you to get a better grip.
Right Side

Left Side

Use the Pry bar on this area and they are angled a little bit so when you pull it out pull it towards you.
Center being pryed

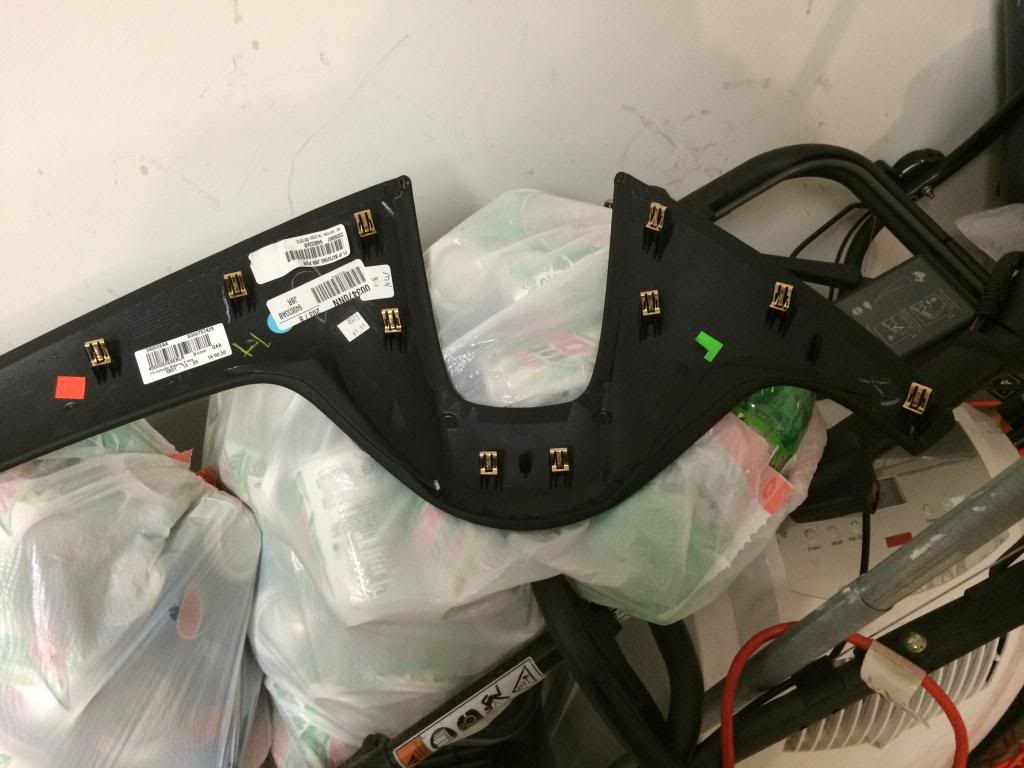
Here is a picture showing where the clips are located.

Step 3
Remove the arm rest. There are (3) Torx T10 screws.

Step 4
Remove leather trim piece. There are clips that hold this on and a piece of plastic that hooks in the tunnel. Start at the end closest to the back of the car and use your pry tool to pop it off. When you get to the end closest to the front you will need to slide the hook out. It is easy!

Step 5
Remove plastic triangular piece. Just slide it and it will release.

Step 6
Remove the trim pieces along the sill on the driver’s side. You only need to remove a couple pieces and they pry right off. These are pictures after the fact because I forgot to take them when I was removing them. Pretty easy though.


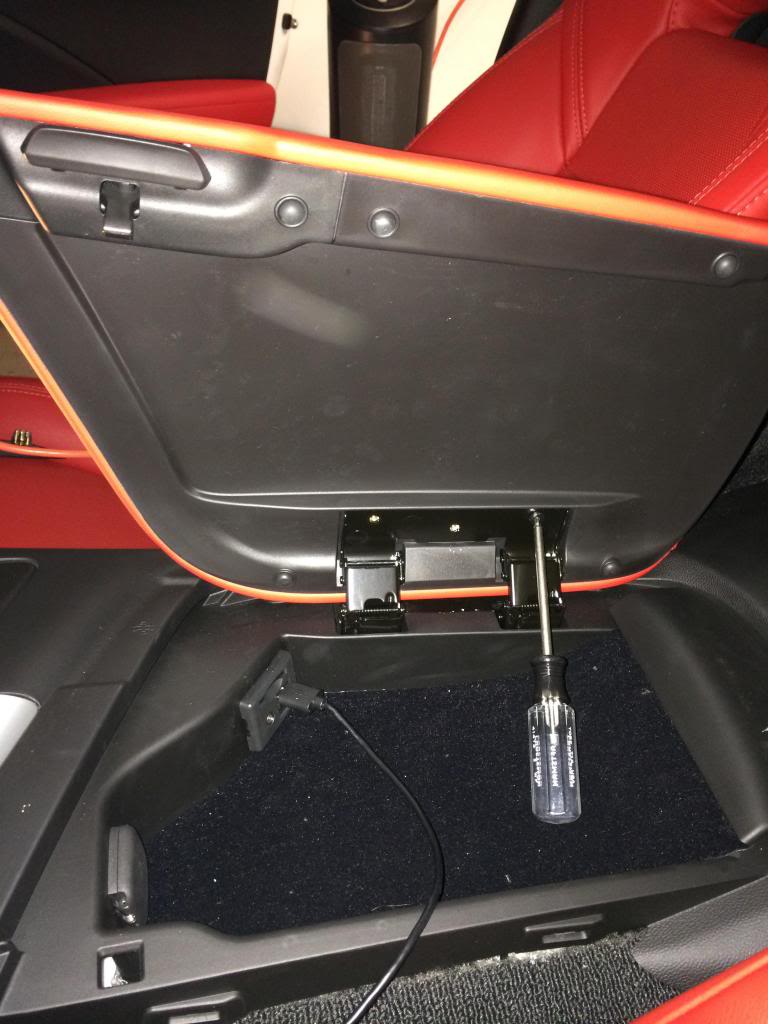
Step 7
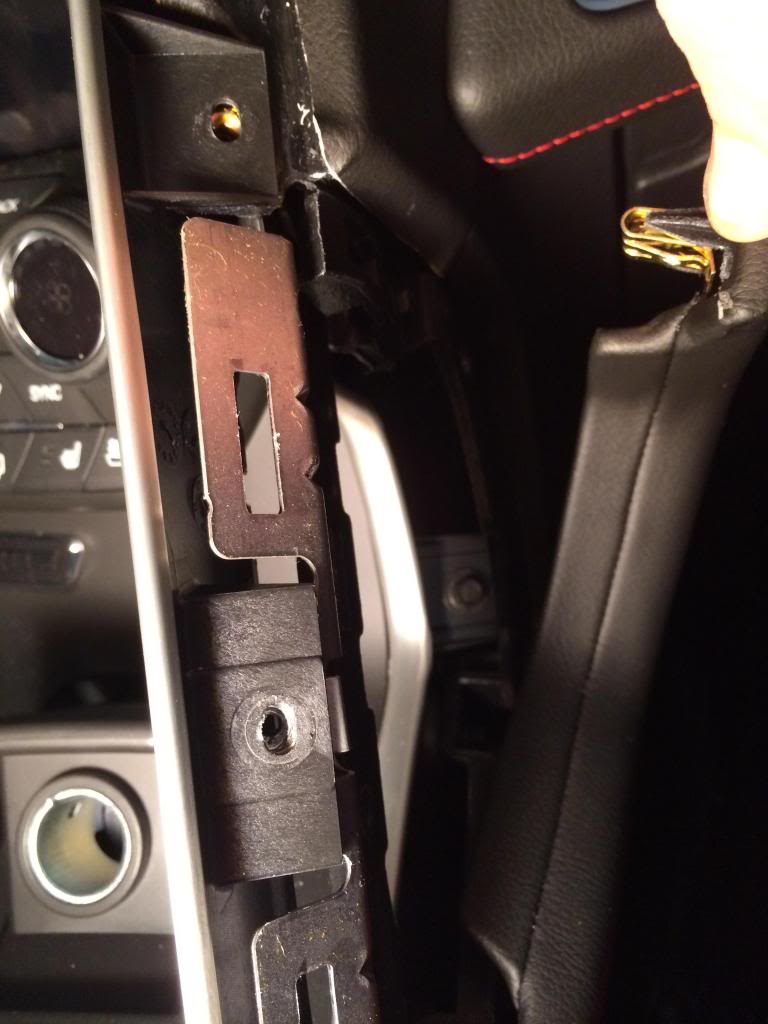
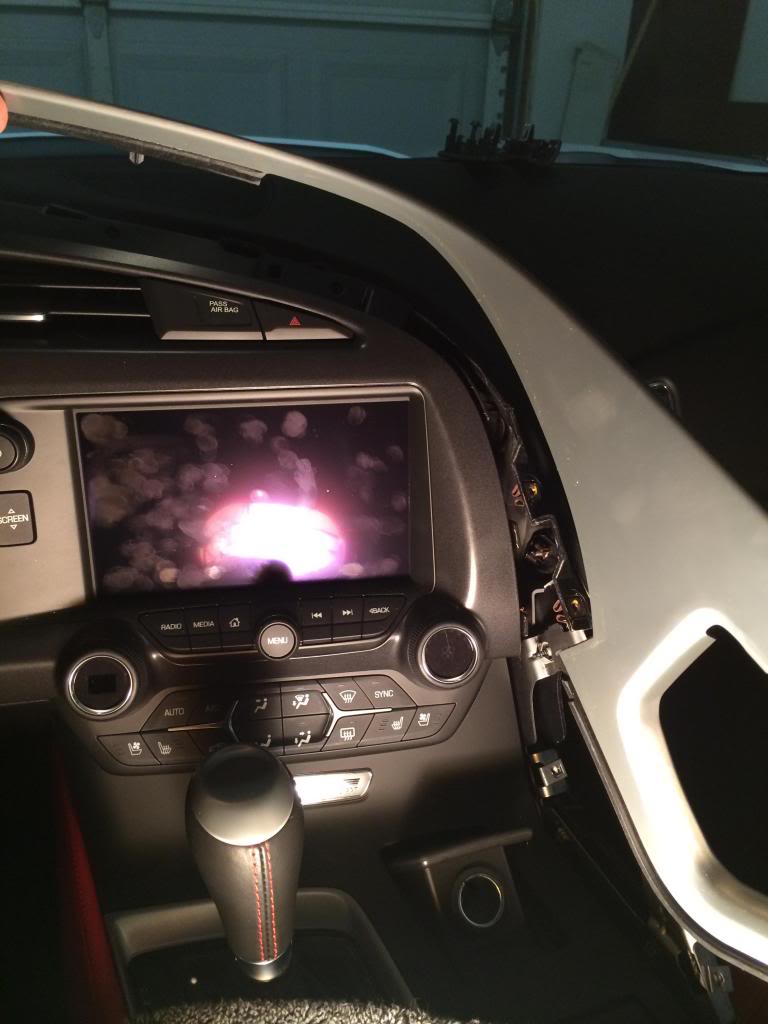
Remove/Drop the piece in the driver’s footwell. There are two screws on the bottom and one that is now exposed in the area that was covered by the door sill trim. There are also (4) clips along the seam right under the steering column that you need to pry/pop out. I did not remove this piece from the car or disconnect the wire harness. It really just need to drop a couple of inches so you can access the screws holding the dash surround.
The large piece beneath the screwdriver is what you need to drop down a couple inches. This picture is before I realized that and was trying to remove the screws with very little room to do so. When you drop it a couple inches it also removes the two clips that also hold the center console in place.

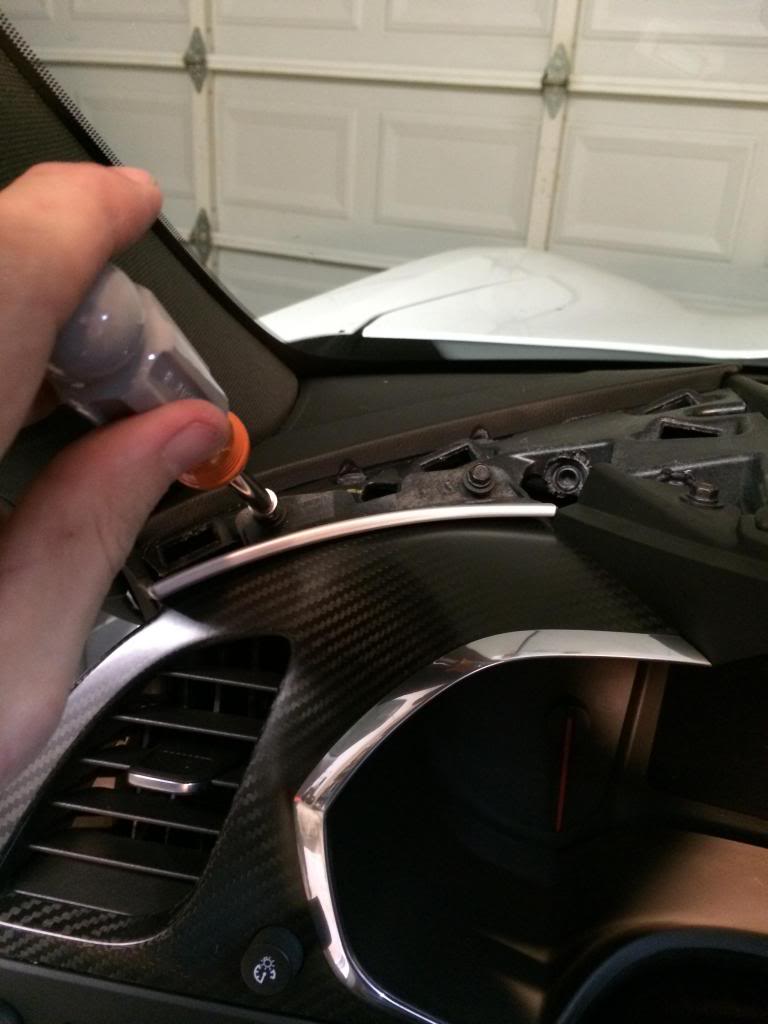
Step 8
Remove the aluminum trim piece that starts at the base of the passenger handle and wraps up around the right side of the dash. I believe there are a total of (4) screws… Two on the top and two on the side. You should be able to slide it out after the screws are removed.
Picture of it being removed

Step 9
Remove aluminum trim on left side. There are two bolts and then it come right out.
This was another picture that I forgot to take initially so I am using one from the re-assembly.

Step 10
Remove all of the screw that are holding the dash piece in place. They are all easily visible if you follow the edge around and I can’t remember how many are left… Sorry.
There are definitely two under the steering column though and two above the gauges.
You do not need to remove the 3 screws closest to you. Only the two closest to the windshield.

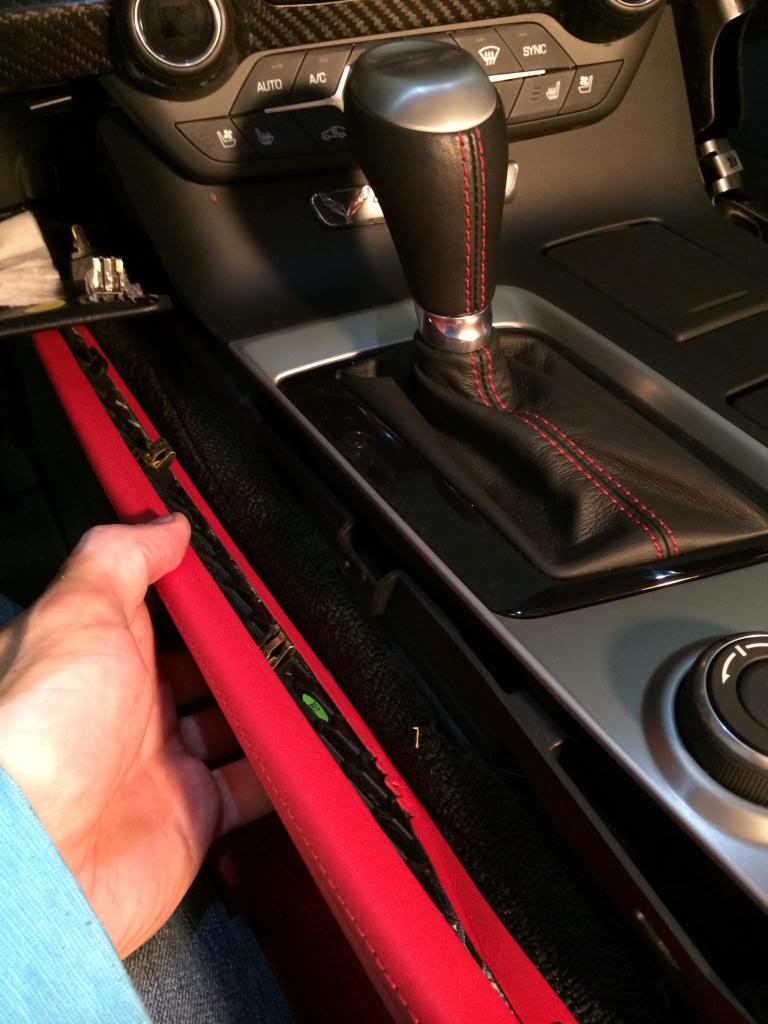
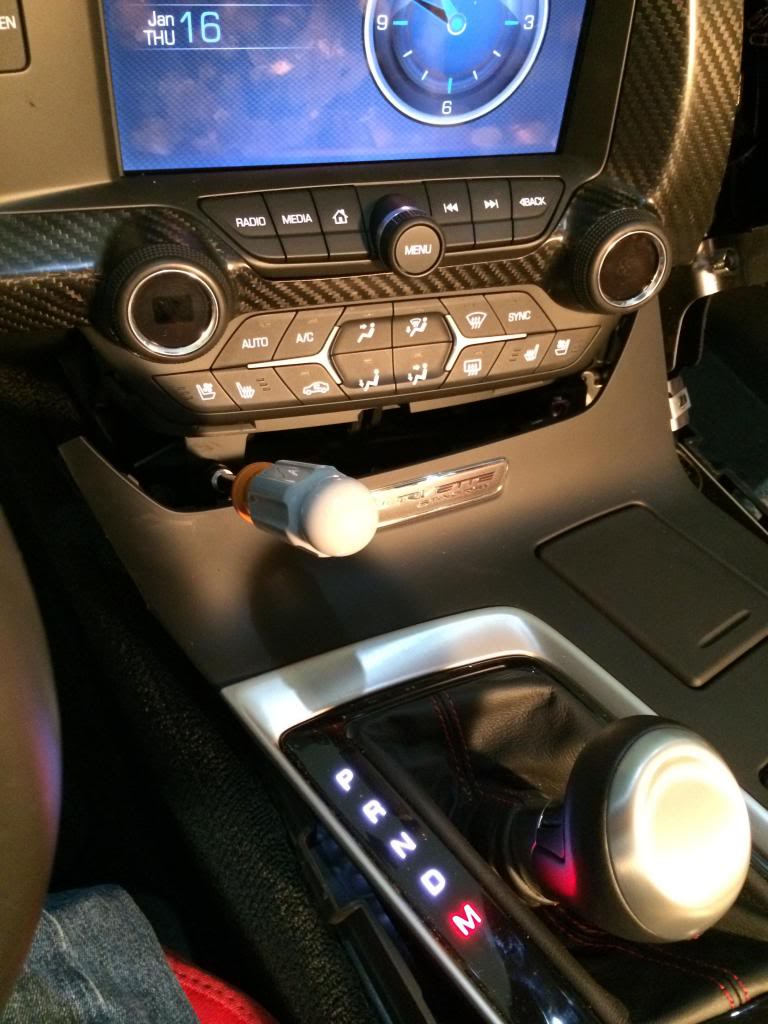
Step 11
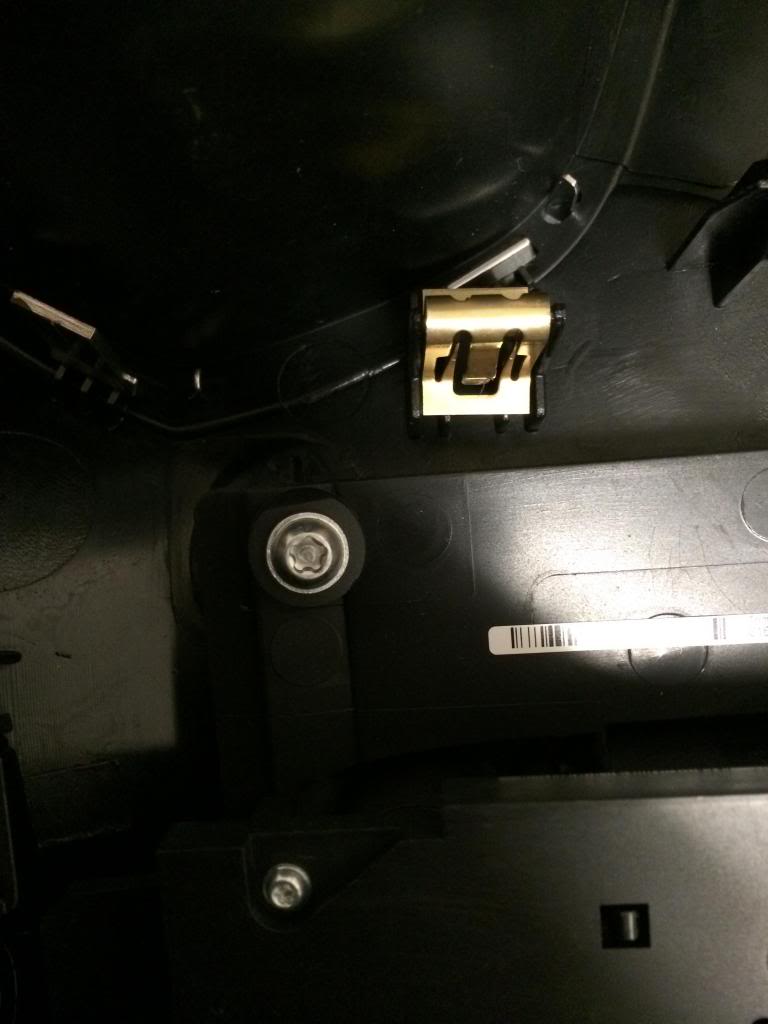
Release (Not remove) the plastic piece that surround the shifter, cup holders, power port and goes to the front edge of the arm rest compartment. This piece is held in place with clips and you need to just pry it out. Pry under the area closest to the driver’s seat that hat the leather trim covering it (the piece that was held in place by the clips and the plastic hook). This piece just need to be pulled back far enough to give you access to two screws holding the dash in place. I had to put the car in gear to allow it enough space to be moved out of the way.
Pry it from underneath near the "Drive Mode ****"
In gear to access screws

Better view of the screw on left side.

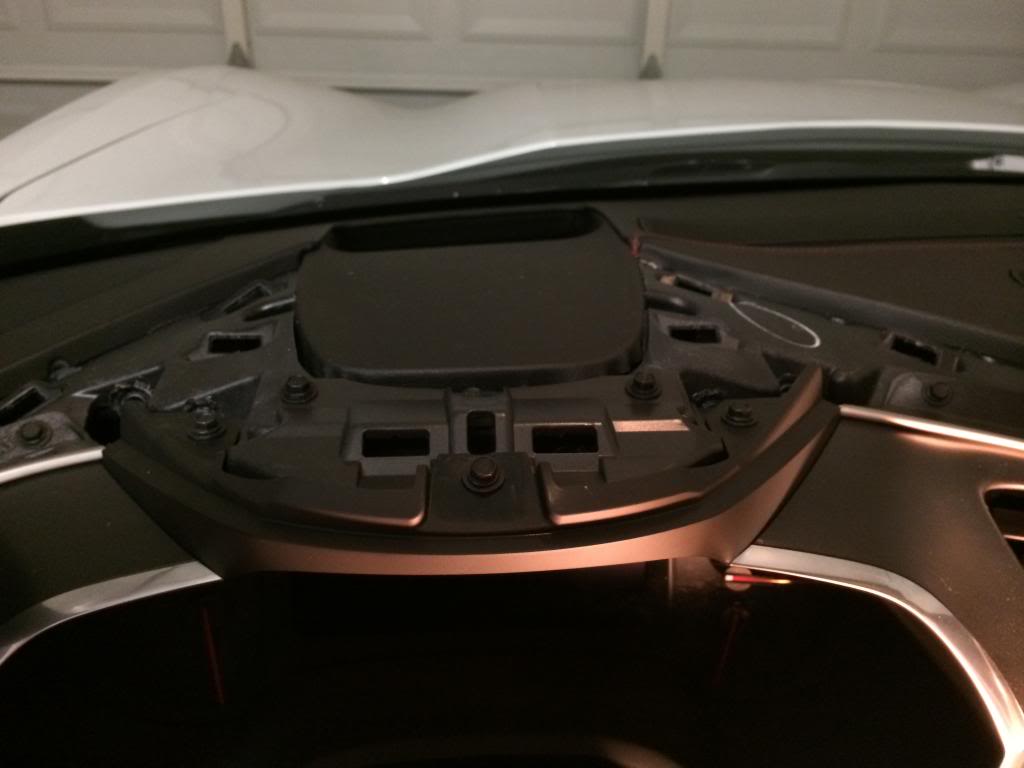
Step 12
The dash is now free! However, there are 5 wire harnesses that need to be removed (on a 2LT). There are (3) on the left side by the HUD switches, (1) start button and (1) by the infotainment area. The all release fairly easy with a flathead screwdriver. Once that is done gently remove the dash piece.
Picture of car minus the dash

Step 13
Now that the dash is removed you will see that you need to transfer the A/C controls, start button, hazard button and the HUD controls. I was very frustrated when I seen the security screws that GM had on there. They look like a 5 petal flower with a pin in the middle.

I was able to remove them using this bit from the Harbor Freight set. It worked fine!

Here is a shot of the things that need to be transplanted

After everything was swapped.

Step 14
Reverse the process and get everything put back in the car.
Here is a picture that I took when it was complete!

If you have any questions please ask! Just take your time and follow the steps and I promise it won’t be that bad
I hope that this helps some of you out there that would like to take this project on but didn’t know where to start. I appreciate all of the help that other members have given me when I needed it and I hope that my post is returning the favor.
.

The following 12 users liked this post by GatMix07C6:
4Gondor (06-27-2019),
AT T 2D (07-30-2018),
Bill17601 (04-02-2016),
Corvetterwb (05-20-2017),
DavidC83 (03-07-2018),
and 7 others liked this post.

 01-17-2014, 06:07 PM
#3
Team Owner


Member Since: May 2000
Location: Plantation Florida USAF(Retired) 1966-1990
Posts: 47,883
Received 4,504 Likes
on
3,589 Posts
U.S. Air Force
St. Jude Donor '05-'06-'07-'08-'09-'10-'11-'12-'13-'14-'15-'16-'17-'18-'19-'20-'21-'22-'23-'24
NCM Sinkhole Donor


 Looks nice!
01-17-2014, 06:10 PM
Looks nice!
01-17-2014, 06:10 PM
#5
Melting Slicks


You are the man!! Thank you for taking the time to detail this! I've got my FAY carbon dash sitting on my desk at my office with my C7 in a truck on it way to me. I should have it next week and this will be one of the first things I do when I get it.
Again, thank you very much! Hopefully the mods will pin this thread or create a how to thread with a link to this!
Again, thank you very much! Hopefully the mods will pin this thread or create a how to thread with a link to this!
The following users liked this post:
4Gondor (06-27-2019)

The following users liked this post:
4Gondor (06-27-2019)

The following users liked this post:
4Gondor (06-27-2019)
01-17-2014, 06:23 PM
#8
Melting Slicks
I just wanted to thank you again!! People like you make CF a great place! Well done sir!
I messaged mod Zmurgy as this post is definitely worthy of the DIY instruction thread.
I messaged mod Zmurgy as this post is definitely worthy of the DIY instruction thread.
Last edited by slief; 01-17-2014 at 06:28 PM.
The following users liked this post:
4Gondor (06-27-2019)
01-17-2014, 06:30 PM
#9
you have got to be kidding  you sir are a better man than I to have even attaempted that. The gift you gave to those that can do this for themselves is priceless it is easier for me to stroke a check .
Anyone get any estimates from the dealer on cost to purchase and have them install?
you sir are a better man than I to have even attaempted that. The gift you gave to those that can do this for themselves is priceless it is easier for me to stroke a check .Anyone get any estimates from the dealer on cost to purchase and have them install?
01-17-2014, 06:33 PM
#10
Race Director

Member Since: Jun 2006
Location: Lawton, OK
Posts: 10,297
Received 9,512 Likes
on
2,317 Posts
C7 & C8 Events Correspondent
Tech Contributor
2020 C8 of the Year Finalist - Unmodified
2020 Corvette of the Year (track prepared)
2020 Corvette of the Year Finalist (appearance mods)
C7 of Year Winner (appearance mods) 2019
2017 C7 of Year Finalist
2015 C7 of the Year
St. Jude Donor '14-'15-'16-'17-'18-'19

Great job and awesome mod! Thanks for taking the time to post photos and details.
Thanks for taking the time to post photos and details.
01-17-2014, 06:34 PM
#11
Moderator
01-17-2014, 06:48 PM
#12
Race Director

Member Since: Sep 2013
Location: Ft Lauderdale
Posts: 10,430
Received 926 Likes
on
484 Posts
Tech Contributor

you have got to be kidding you sir are a better man than I to have even attaempted that. The gift you gave to those that can do this for themselves is priceless it is easier for me to stroke a check .
Anyone get any estimates from the dealer on cost to purchase and have them install?
you sir are a better man than I to have even attaempted that. The gift you gave to those that can do this for themselves is priceless it is easier for me to stroke a check .Anyone get any estimates from the dealer on cost to purchase and have them install?
01-17-2014, 07:08 PM
#13
Team Owner
Member Since: Oct 2013
Location: Kansas City, Missouri
Posts: 25,359
Received 7,752 Likes
on
4,181 Posts
CORVETTE TODAY Host
St. Jude Donor'15
Wow, outstanding work. Thanks for posting.
01-17-2014, 07:25 PM
#15
Racer
Great job, very understandable steps. I may drop FAY from my order and just install one myself now that you have provided such detailed instructions. Thanks!!
01-17-2014, 08:59 PM
#17
Racer
Thread Starter
Thanks for all the kind replies.
I am on the forum daily but usually learning from all of you so I wanted to take the opportunity to hopefully help others that are considering doing this.
If anyone has questions please let me know.
The carbon dash is also readily available. I ordered it on Monday and had it on Thursday.
I am on the forum daily but usually learning from all of you so I wanted to take the opportunity to hopefully help others that are considering doing this.
If anyone has questions please let me know.
The carbon dash is also readily available. I ordered it on Monday and had it on Thursday.
 01-18-2014, 12:49 AM
#19
Racer
Thread Starter
