
[Z06] APSIS Splash Guard Install - Pictures
 04-15-2009, 03:28 PM
#1
Advanced

Thread Starter
My wife was a little apprehensive about putting them on her Z06 first, so I volunteered my new 1LZ Cyber for the the test.
Let me say first that fitting the APSIS splash guards onto the Z06 is more of an art than a science. If you are good with body work and fitment stuff, you will find installation somewhat easy. I had no problems with driver side, but had to play with pass side to get top to fit correctly...and I still may go with 2nd screw upon further scrutiny.
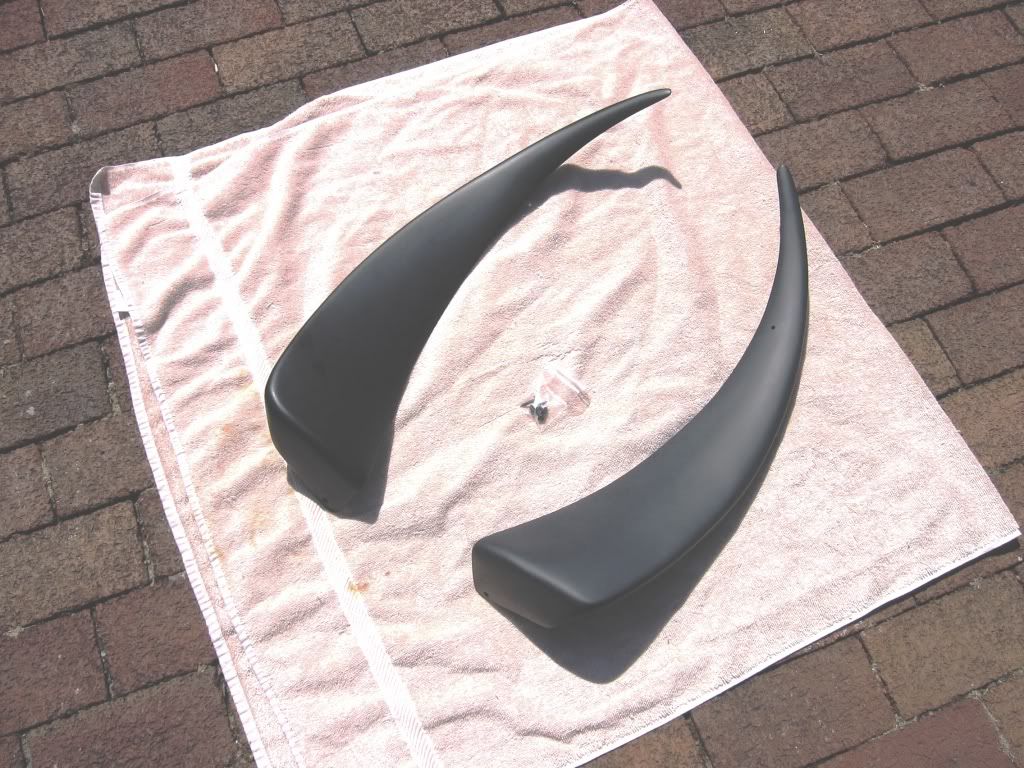
Here's what you get for $311.50 (including s/H):
- Two Splash Guards & Four Screws + Direction Sheet (not pictured)
Be sure to Clean your Z before installing.
No need to remove wheel or jack the vehicle...just turn in the wheel to allow room to work.
Driver Side fit without any problems, however, I did notice that the splash guard was not a perfectionist's dream as far as fit against the body. I did notice VERY slight waves of open areas against the body. These do not concern me as they are not noticeable unless you look VERY VERY closely from above the guard.
I did end up using small rubber washers underneath the screw to prevent any damage or cracking of the guard as I was not able to get the angle of the screw perfect for the head to lay flat against the guard. Again this is an art and I was just not perfect here. With the rubber washer the fitment looks almost stock. I got the angle of the screw better on the passenger side, but still used the washer. I also needed to "adjust" the fitment of the passenger side by using a very small round file to open up the hole in the guard in a certain direction to get the top lip to fit tight against the upper wheel well bodywork.
Overall I am very pleased, but like I said before I may go with 2nd screw to pull top portion of Passenger side in if I'm not happy with fitment in different light.
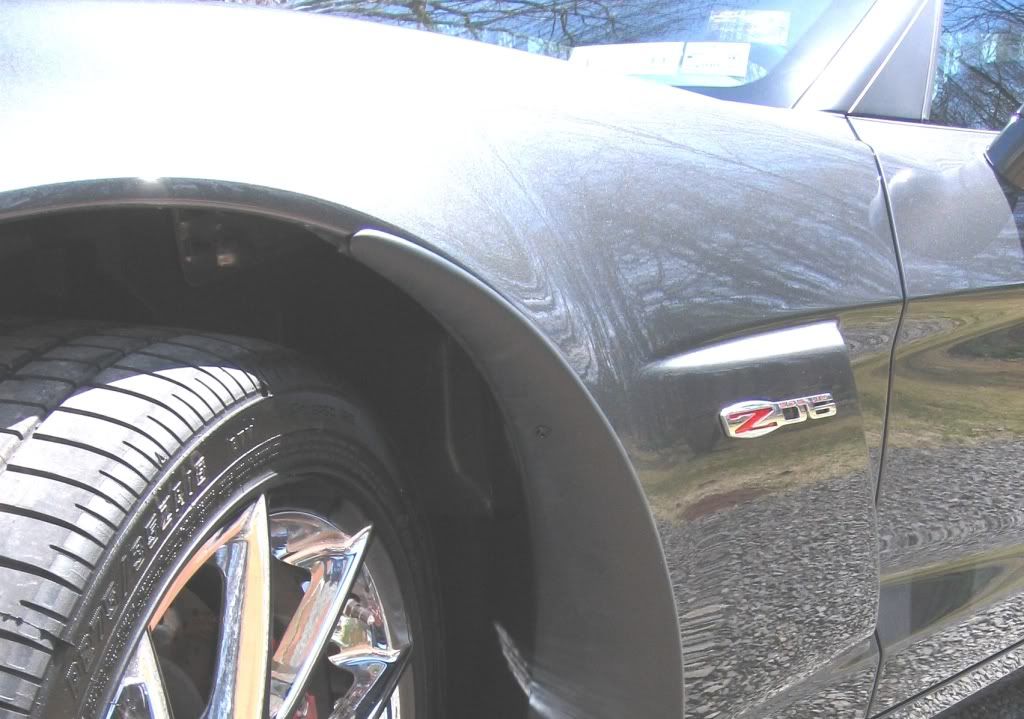
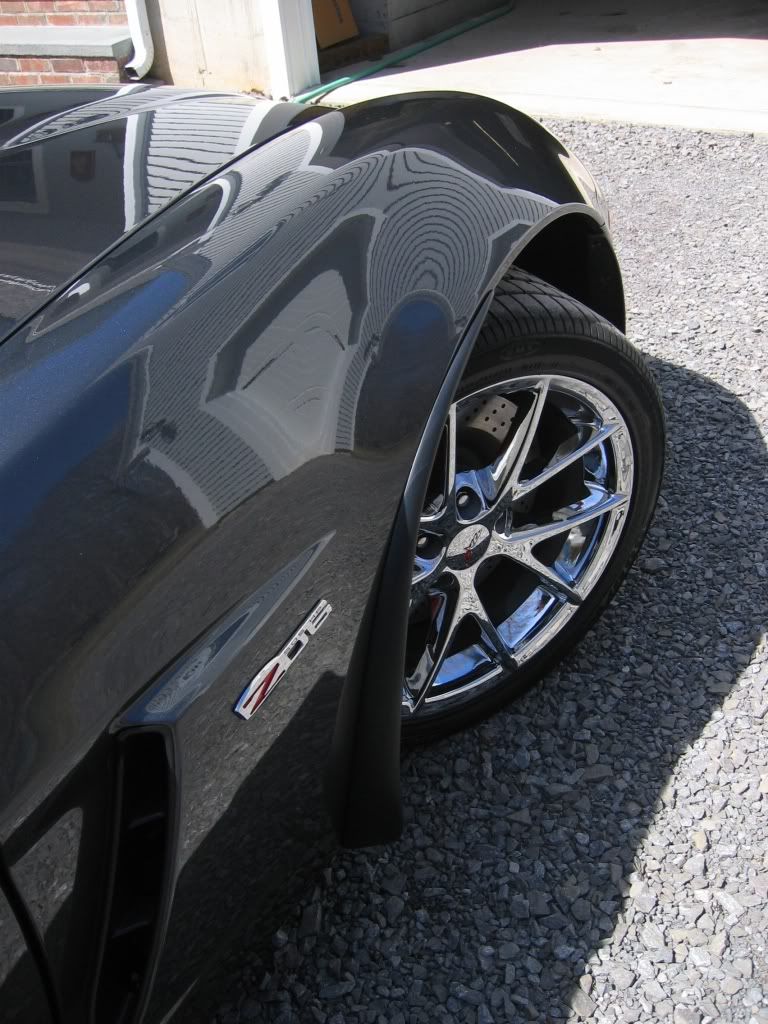
Below is a Picture of the upper gap in the passenger side that I was able to diminish to an acceptable level (for now) by opening up the splash guard screw hole a little with a small round file and adjusting the upper portion of the guard.

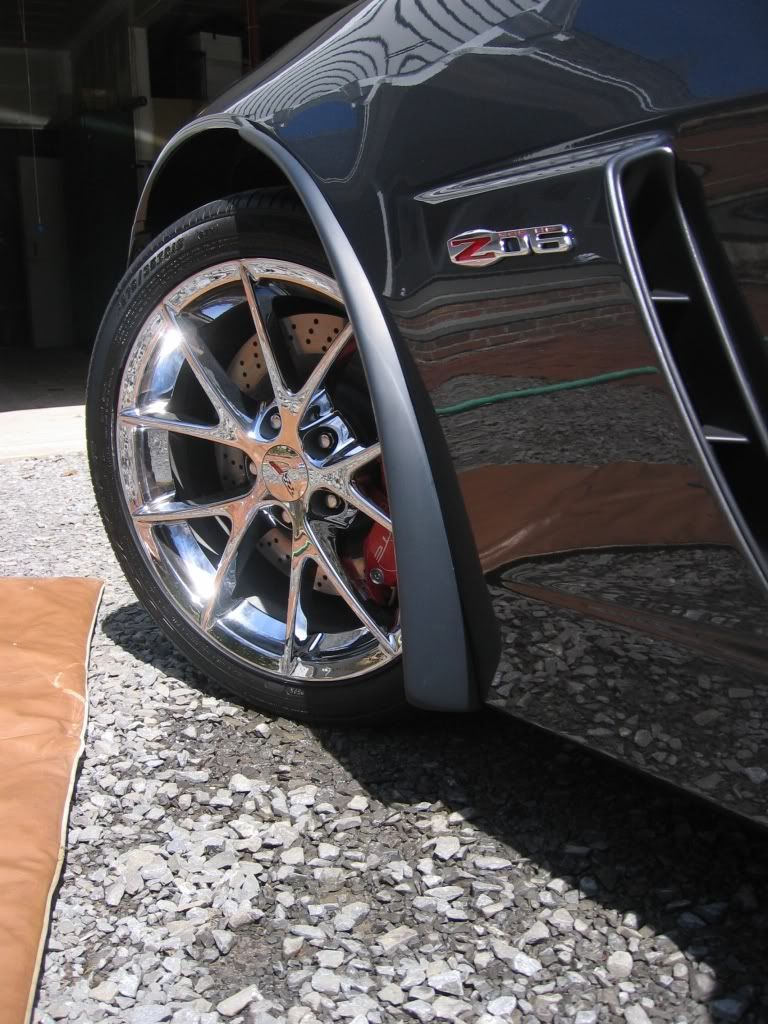
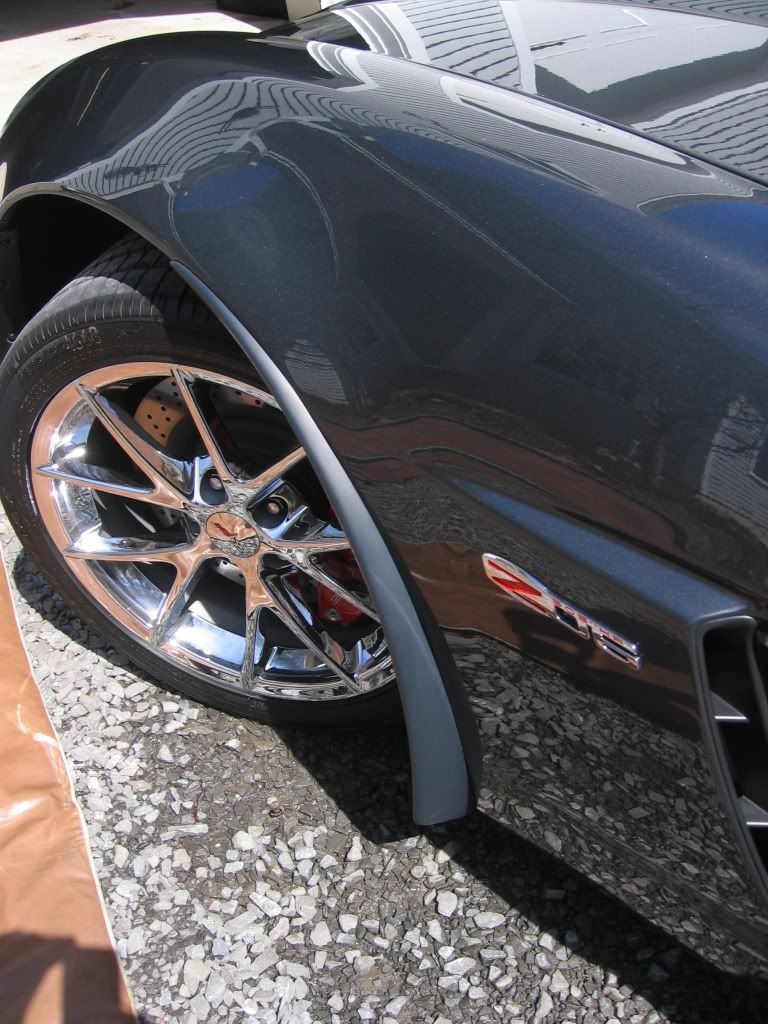
Below are just some more pictures of the results....enjoy.
Let me say first that fitting the APSIS splash guards onto the Z06 is more of an art than a science. If you are good with body work and fitment stuff, you will find installation somewhat easy. I had no problems with driver side, but had to play with pass side to get top to fit correctly...and I still may go with 2nd screw upon further scrutiny.
Here's what you get for $311.50 (including s/H):
- Two Splash Guards & Four Screws + Direction Sheet (not pictured)
Be sure to Clean your Z before installing.
No need to remove wheel or jack the vehicle...just turn in the wheel to allow room to work.
Driver Side fit without any problems, however, I did notice that the splash guard was not a perfectionist's dream as far as fit against the body. I did notice VERY slight waves of open areas against the body. These do not concern me as they are not noticeable unless you look VERY VERY closely from above the guard.
I did end up using small rubber washers underneath the screw to prevent any damage or cracking of the guard as I was not able to get the angle of the screw perfect for the head to lay flat against the guard. Again this is an art and I was just not perfect here. With the rubber washer the fitment looks almost stock. I got the angle of the screw better on the passenger side, but still used the washer. I also needed to "adjust" the fitment of the passenger side by using a very small round file to open up the hole in the guard in a certain direction to get the top lip to fit tight against the upper wheel well bodywork.
Overall I am very pleased, but like I said before I may go with 2nd screw to pull top portion of Passenger side in if I'm not happy with fitment in different light.
Below is a Picture of the upper gap in the passenger side that I was able to diminish to an acceptable level (for now) by opening up the splash guard screw hole a little with a small round file and adjusting the upper portion of the guard.
Below are just some more pictures of the results....enjoy.
 04-15-2009, 03:46 PM
#2
Premium Supporting Vendor


Hi Open Air,
Thanks for posting your experience and pictures to share with forum members.
Now I can "breathe" a little from your "Open Air".
Can you describe more in-depth detail how you do it for the driver side? Because some other customers are having the fitment issue for the driver side, hopefully they can get some hint from you.

Jersey
Thanks for posting your experience and pictures to share with forum members.
Now I can "breathe" a little from your "Open Air".
Can you describe more in-depth detail how you do it for the driver side? Because some other customers are having the fitment issue for the driver side, hopefully they can get some hint from you.
Jersey

 04-15-2009, 04:43 PM
#4
Premium Supporting Vendor
However, if you really don't have it, we have same Installation Instruction posted on our web. Here is the direct link--------
http://www.apsisusa.com/C6%20or%20Z0...ion%20Page.htm
There is another customer originally he says he doesn't have the Installation Instruction but later email me again advising it's buried in the box. I am very positive that we did include the Installation Instruction.
Jersey
04-15-2009, 04:45 PM
#5
Safety Car


My install came out the same as open air's. Driver's side fits great, passenger side is a little off at the top. On my car, it's not going to be fixed by adding a second screw as the guard is pressed in flush with the plastic everywhere, the shape molded into the plastic is just a little off. The guards could be fit a little better, but they are WAY better than the alternative. I've seen that paint damage on every Z with miles on it.
04-15-2009, 05:30 PM
#6
Race Director


But upon closer inspection of the box, found 'em.
There's a flap of cardboard reinforcing inside the box and the box itself.
The instructions are probably tucked between that inner carboard liner and the box, which is where mine were.
04-15-2009, 06:08 PM
#7
Premium Supporting Vendor
My install came out the same as open air's. Driver's side fits great, passenger side is a little off at the top. On my car, it's not going to be fixed by adding a second screw as the guard is pressed in flush with the plastic everywhere, the shape molded into the plastic is just a little off. The guards could be fit a little better, but they are WAY better than the alternative. I've seen that paint damage on every Z with miles on it.
If you check Solaris' thread and redo it or adjust it, you can make it flush on the passenger side. Solaris had more severe problem and he had corrected it.
04-15-2009, 06:25 PM
#9
Instructor

Member Since: Apr 2007
Posts: 102
Likes: 0
Received 0 Likes
on
0 Posts
My wife was a little apprehensive about putting them on her Z06 first, so I volunteered my new 1LZ Cyber for the the test.
Let me say first that fitting the APSIS splash guards onto the Z06 is more of an art than a science. If you are good with body work and fitment stuff, you will find installation somewhat easy. I had no problems with driver side, but had to play with pass side to get top to fit correctly...and I still may go with 2nd screw upon further scrutiny.
Here's what you get for $311.50 (including s/H):
- Two Splash Guards & Four Screws + Direction Sheet (not pictured)
Be sure to Clean your Z before installing.
No need to remove wheel or jack the vehicle...just turn in the wheel to allow room to work.
Driver Side fit without any problems, however, I did notice that the splash guard was not a perfectionist's dream as far as fit against the body. I did notice VERY slight waves of open areas against the body. These do not concern me as they are not noticeable unless you look VERY VERY closely from above the guard.
I did end up using small rubber washers underneath the screw to prevent any damage or cracking of the guard as I was not able to get the angle of the screw perfect for the head to lay flat against the guard. Again this is an art and I was just not perfect here. With the rubber washer the fitment looks almost stock. I got the angle of the screw better on the passenger side, but still used the washer. I also needed to "adjust" the fitment of the passenger side by using a very small round file to open up the hole in the guard in a certain direction to get the top lip to fit tight against the upper wheel well bodywork.
Overall I am very pleased, but like I said before I may go with 2nd screw to pull top portion of Passenger side in if I'm not happy with fitment in different light.
Below is a Picture of the upper gap in the passenger side that I was able to diminish to an acceptable level (for now) by opening up the splash guard screw hole a little with a small round file and adjusting the upper portion of the guard.
Below are just some more pictures of the results....enjoy.
04-15-2009, 08:17 PM
#10
Burning Brakes

I put little pieces of vinyl trim tape along the fender where the guard touches, but not for the entire length of the guard. I figured it couldn't hurt to add a little padding.
04-15-2009, 10:37 PM
#11
Safety Car
I was very well versed on those instructions before I began, but that's not my problem. The plastic just has the wrong shape along the edge where it meets the fender. I'm just going to live with it.
04-16-2009, 08:00 AM
#12
Advanced
Thread Starter
My install came out the same as open air's. Driver's side fits great, passenger side is a little off at the top. On my car, it's not going to be fixed by adding a second screw as the guard is pressed in flush with the plastic everywhere, the shape molded into the plastic is just a little off. The guards could be fit a little better, but they are WAY better than the alternative. I've seen that paint damage on every Z with miles on it.
 with Flareside.
The drivers side at the top conforms correctly to the fender opening, however the passenger side did not have enough curve in the splash guard at the top to conform to the fender angle, thus preventing the splash guard from fitting tightly at the top. IMO a second screw would not help. Jersey should look into this for possible mod to the mold/process.
04-16-2009, 08:25 AM
#13
Advanced
Thread Starter
Hi Open Air,
Thanks for posting your experience and pictures to share with forum members.
Now I can "breathe" a little from your "Open Air".
Can you describe more in-depth detail how you do it for the driver side? Because some other customers are having the fitment issue for the driver side, hopefully they can get some hint from you.
Jersey
Like Flareside said..the driver's side in my case fit without issue (nicely at the top, middle and bottom). I did this by myself, so I used blue painters tape to hold the top of the guard against the fender while I played around with fitment location. Once I had what seemed like the best location I reset the tape, marked through the hole in the guard with a small nail and drilled small hole for screw. I drilled through both the OEM splat and the inner fender housing. As I indicated in my write-up, I did not get the screw angle perfect on the drivers side, so I used a small rubber washer to protect the guard from cracking and to hide the minor gap for a non-level screw head. Because the fitment was good, I did not want to attempt a re-drill, etc. to get the screw head flush with the splash guard.
Here is my constructive criticism of your very good product:
These guards provide excellent (and for me required) protection for the Z06 against rock chips. All the Cleartastic in the world will not stop the rock chips as well as your splash guards. They look very close to OEM, but the following minor improvements should be considered.
1 - Screw hole should be recessed so the 1st screw does not protrude beyond surface of the guard. Just like on the rear OEM guards.
2 - OEM rear unit uses a very small recessed screw at the tip top of the rear guard...you may want to consider this option.
3 - Fitment could be better at top. Specifically, the bend in the guard at the top where it meets the fender should be more concave.
With these critiques aside...I will be calling you later today to order a set for the wife's '07 Velocity Yellow Z.
Hope this helps.
Best wishes to all.
Steve
04-16-2009, 08:38 AM
#14
Advanced
Thread Starter
However, I did notice that the guard will move a little if you put pressure on the bottom rear of the guard pushing towards the front of the car. For this reason, there may be some minor movement in the guard during "aggressive driving" and some paint protection should be considered.
You could always remove the guard, put down some Cleartastic in that area, then re-install if you're worried about it.
I will probably do this as I have no long-term experience with the guards and certainly do not want to hear in a year or two how the guards have damaged the paint.
But this raises the question...should this be considered underneath the rear oem splash guard?
Perhaps this is over-kill.
04-16-2009, 10:56 AM
#15
 with Flareside.
The drivers side at the top conforms correctly to the fender opening, however the passenger side did not have enough curve in the splash guard at the top to conform to the fender angle, thus preventing the splash guard from fitting tightly at the top. IMO a second screw would not help. Jersey should look into this for possible mod to the mold/process.
 Wanna trade?
  04-16-2009, 12:09 PM
#16
Premium Supporting Vendor
Hi Jersey,
Like Flareside said..the driver's side in my case fit without issue (nicely at the top, middle and bottom). I did this by myself, so I used blue painters tape to hold the top of the guard against the fender while I played around with fitment location. Once I had what seemed like the best location I reset the tape, marked through the hole in the guard with a small nail and drilled small hole for screw. I drilled through both the OEM splat and the inner fender housing. As I indicated in my write-up, I did not get the screw angle perfect on the drivers side, so I used a small rubber washer to protect the guard from cracking and to hide the minor gap for a non-level screw head. Because the fitment was good, I did not want to attempt a re-drill, etc. to get the screw head flush with the splash guard.
Here is my constructive criticism of your very good product:
These guards provide excellent (and for me required) protection for the Z06 against rock chips. All the Cleartastic in the world will not stop the rock chips as well as your splash guards. They look very close to OEM, but the following minor improvements should be considered.
1 - Screw hole should be recessed so the 1st screw does not protrude beyond surface of the guard. Just like on the rear OEM guards.
2 - OEM rear unit uses a very small recessed screw at the tip top of the rear guard...you may want to consider this option.
3 - Fitment could be better at top. Specifically, the bend in the guard at the top where it meets the fender should be more concave.
With these critiques aside...I will be calling you later today to order a set for the wife's '07 Velocity Yellow Z.
Hope this helps.
Best wishes to all.
Steve
Thanks for more in-depth write up.
I still think you can adjust your pass side to have perfect flush contact at the tip. Solaris had done it before after he got some hints from other customers. If you let the Guard loose and add the 2nd screw then you will make it flush. Also, check the bottom screw hole first to see if the hole is correctly located. In necessay you can enlarge the hole a little and the washer of the screw will cover it. I have strong suspect that our factory worker might not drill the hole at precise location and it causes all the trouble we have.
When the Guard is at loose, you can focus on the top tip to make sure it's flush against the fender first and then secure it by the 2nd screw. Once you secure it, then you tight the 1st screw. Now the hole that you previously drilled will possibly be slightly off. If this is the case, then you can slightly enlarge the hole on our Guard. So while you add pressure to push in our guard and at the same time you tight the screw. Finally you tight the bottom screw.
In the previous shipment, we had some customers playing with such hint and they adjusted to make it perfect fit. Our Guards have some flexibility and you can adjust it to make it flush.
Do you want us to send you another set for your wife's car? Please confirm so we can hold the allocation for you.
Jersey
04-16-2009, 11:07 PM
#18
Instructor
Member Since: Apr 2007
Posts: 102
Likes: 0
Received 0 Likes
on
0 Posts
Once the guard is installed it should be static (i.e. not moving) and therefore should not damage the paint.
However, I did notice that the guard will move a little if you put pressure on the bottom rear of the guard pushing towards the front of the car. For this reason, there may be some minor movement in the guard during "aggressive driving" and some paint protection should be considered.
You could always remove the guard, put down some Cleartastic in that area, then re-install if you're worried about it.
I will probably do this as I have no long-term experience with the guards and certainly do not want to hear in a year or two how the guards have damaged the paint.
So you mean just @ that particular area, all else ( i.e from tip down vertical fender) sholud be O.K ? Any one whom had guards on for @ few months & did some track time, whom may be kind enough to check & post would be greatly apperciated!
But this raises the question...should this be considered underneath the rear oem splash guard?
Perhaps this is over-kill.
04-17-2009, 01:35 PM
#19
Drifting

I just recently installed my Apsis guard that I bought through a fellow CF member with the knowledge of all of the things I've read through this and other thread concerning these Apsis guard and my findings are pretty much the same as mentioned above. For its intended purpose, the guard is good enough. But the fitting is definitely not perfect. My pics below:
http://www.me.com/gallery/#100035
Please note that my install involves going through the CF fender. Simply screwing them on the stock guard was not good enough for me. So I decided to go all the way to the fender. I figure since the hole will be behind the stock guard anyway, it won't show if in the future I decided to go back to stock and remove these Apsis guard. Let me know what you think. Overall, I could live with the product. I'm a little concern with my wider set up in the front. I'm afraid it might rub if or when I'm full tilt and hit a bump at the same time. We'll see?
Finally, I agree the suggestions to better the product mentioned above; like a recess screw etc....
Last edited by 1stZ; 04-17-2009 at 01:37 PM.
