
'13 grand sport brake dust


 03-04-2014, 07:22 PM
#22
I just bought the Duralast Gold pads also. I figure for $86.00 for the front and rear with the lifetime replacement warranty I couldn't go wrong. I should have them installed sometime this weekend and will report back on the results.
03-05-2014, 09:23 PM
#24
Burning Brakes

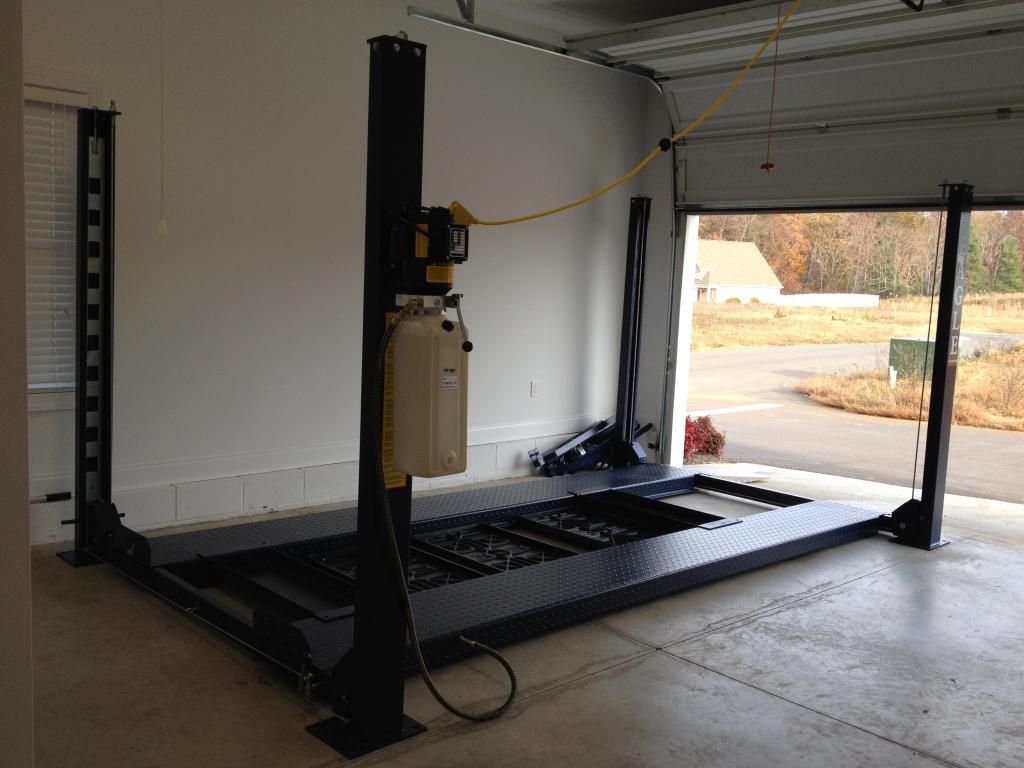
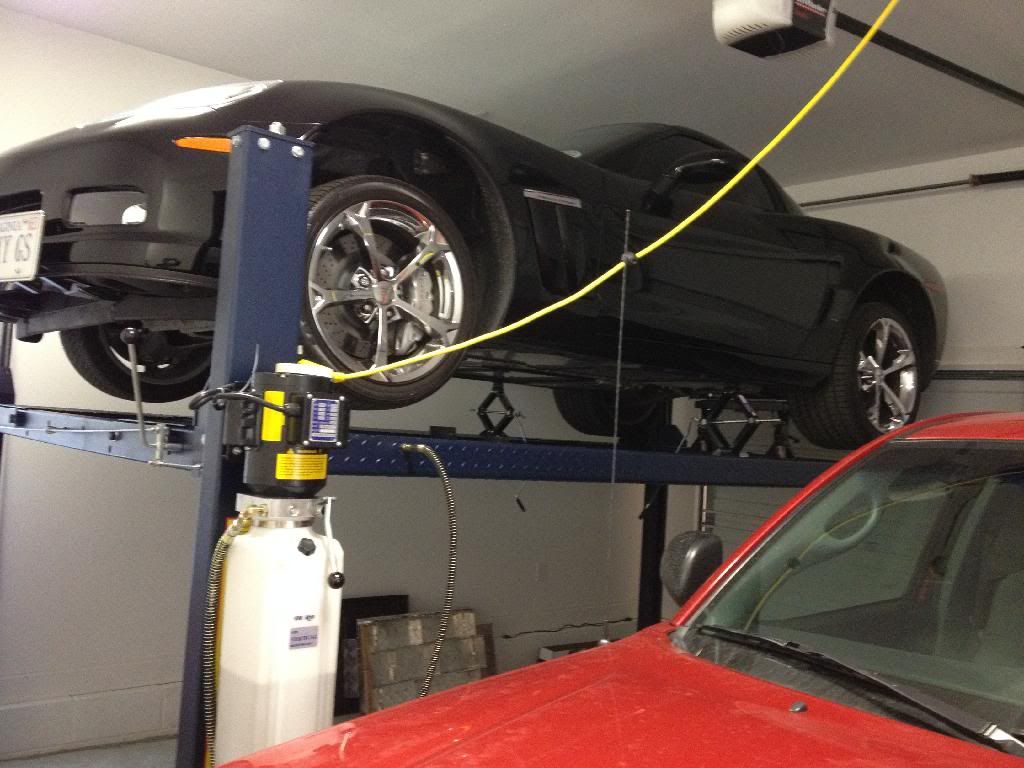
I'm going to either figure out a jacking system to lift the Vette on my four post lift or go the old way and do it on the ground. My ground setup works well, but I would rather do it on the lift. This is my set up for on the ground:
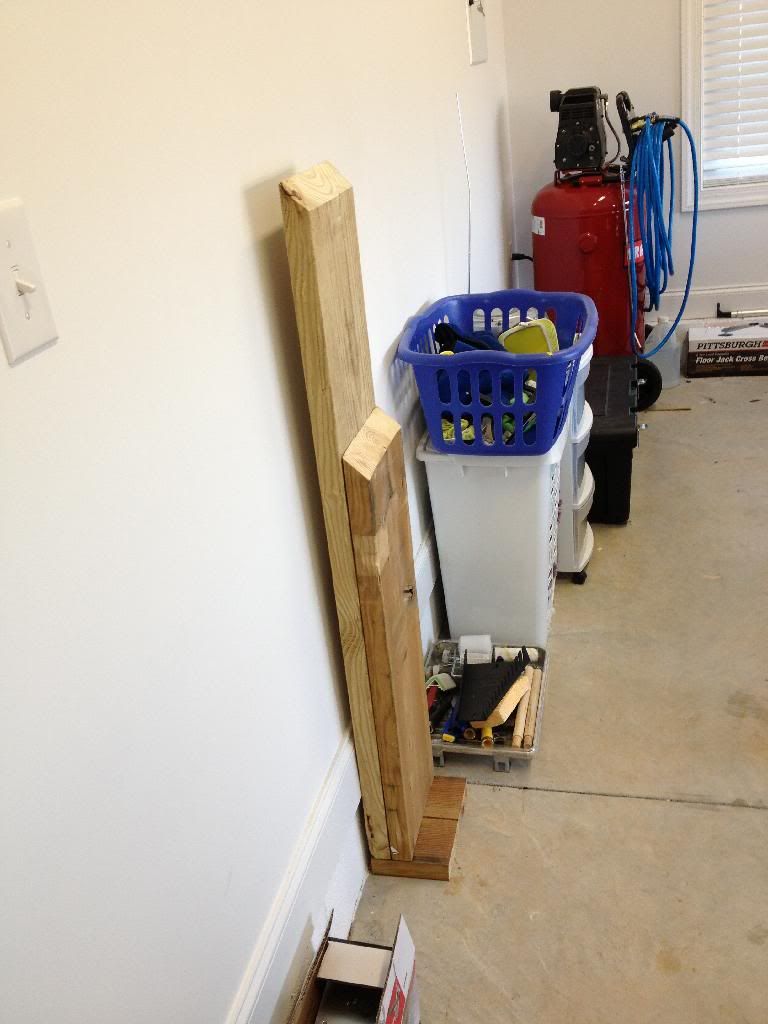
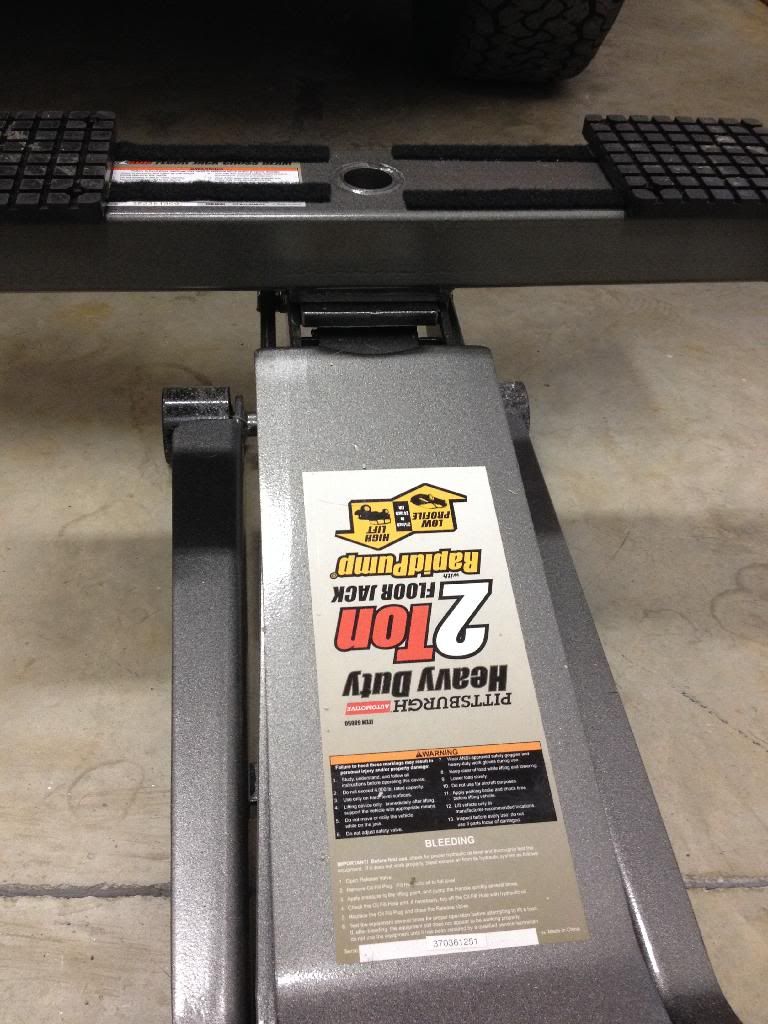
I use a Pittsburgh (Harbor Freight) equipment
Extremely Low Profile Long Reach 2 Ton floor jack:

Jack Crossbeam 1 front (modified) 1 rear:

3 Ton Jack Stands two front two rear:

Current Garage with lift:
I use a Pittsburgh (Harbor Freight) equipment
Extremely Low Profile Long Reach 2 Ton floor jack:
Jack Crossbeam 1 front (modified) 1 rear:
3 Ton Jack Stands two front two rear:
Current Garage with lift:
Last edited by jsucraig; 03-05-2014 at 09:26 PM.
03-06-2014, 08:35 AM
#25
Instructor


[QUOTE=jsucraig;1586332174]I'm going to either figure out a jacking system to lift the Vette on my four post lift or go the old way and do it on the ground. My ground setup works well, but I would rather do it on the lift. This is my set up for on the ground:
Jack Crossbeam 1 front (modified) 1 rear:
That is a Nice set up you have there. I'm probably going to order a set of "Race Ramps" when the tax check shows up..
Is that Jack Cross Beam a Stock unit or did you make it yourself?
Jack Crossbeam 1 front (modified) 1 rear:
That is a Nice set up you have there. I'm probably going to order a set of "Race Ramps" when the tax check shows up..
Is that Jack Cross Beam a Stock unit or did you make it yourself?
03-06-2014, 05:24 PM
#26
Race Director


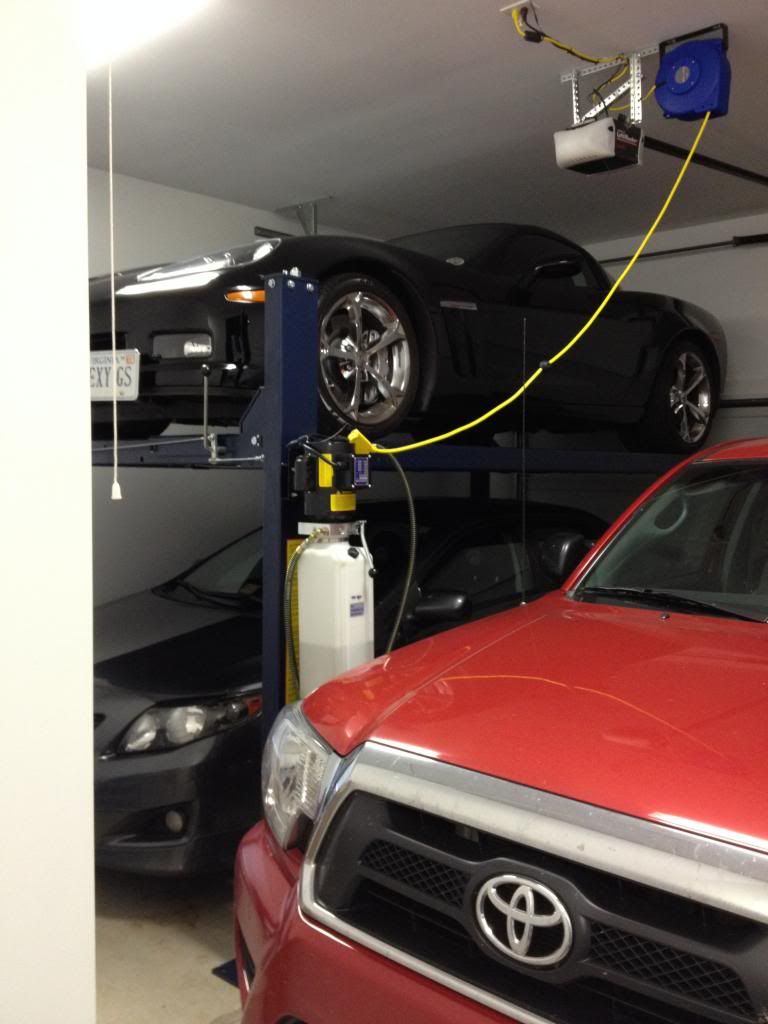
My Duralast Gold Ceramic pads got dropped off today by FedEx from autozone.com. Unfortunately, it is snowing here in Central Virginia so our Tacoma is on one side of the garage dripping slush, the Corvette is on the lift, and the Corolla is sitting under the lift with no place to go out of the elements. Pad install will have to wait until the sun comes out again. Can't wait for Spring/Summer.
03-06-2014, 05:31 PM
#27
Burning Brakes
Front Pads DG1419 12 paddlets $46.99
Rear Pads DG1419A 8 paddlets $37.99
Online only. Don't even go into an Autozone and ask for Corvette Parts, much less Grand Sport/Z06 parts. You will be looked at like you have three eyes and a horn growing out of your forehead.
Rear Pads DG1419A 8 paddlets $37.99
Online only. Don't even go into an Autozone and ask for Corvette Parts, much less Grand Sport/Z06 parts. You will be looked at like you have three eyes and a horn growing out of your forehead.
03-06-2014, 05:34 PM
#28
Burning Brakes
[QUOTE=Big Tom;1586334508]
The Cross Beam is stock and can be used that way on the rear, but for the front it has to be slightly modified. I'll post actual pictures in a little while.
I'm going to either figure out a jacking system to lift the Vette on my four post lift or go the old way and do it on the ground. My ground setup works well, but I would rather do it on the lift. This is my set up for on the ground:
Jack Crossbeam 1 front (modified) 1 rear:
That is a Nice set up you have there. I'm probably going to order a set of "Race Ramps" when the tax check shows up..
Is that Jack Cross Beam a Stock unit or did you make it yourself?
Jack Crossbeam 1 front (modified) 1 rear:
That is a Nice set up you have there. I'm probably going to order a set of "Race Ramps" when the tax check shows up..
Is that Jack Cross Beam a Stock unit or did you make it yourself?
03-06-2014, 05:57 PM
#29
Race Director
Front Pads DG1419 12 paddlets $46.99
Rear Pads DG1419A 8 paddlets $37.99
Online only. Don't even go into an Autozone and ask for Corvette Parts, much less Grand Sport/Z06 parts. You will be looked at like you have three eyes and a horn growing out of your forehead.
Rear Pads DG1419A 8 paddlets $37.99
Online only. Don't even go into an Autozone and ask for Corvette Parts, much less Grand Sport/Z06 parts. You will be looked at like you have three eyes and a horn growing out of your forehead.
03-06-2014, 07:28 PM
#31
Burning Brakes
I took all of the information in this THREAD and applied it to my situation and readily available tools.
Pics:
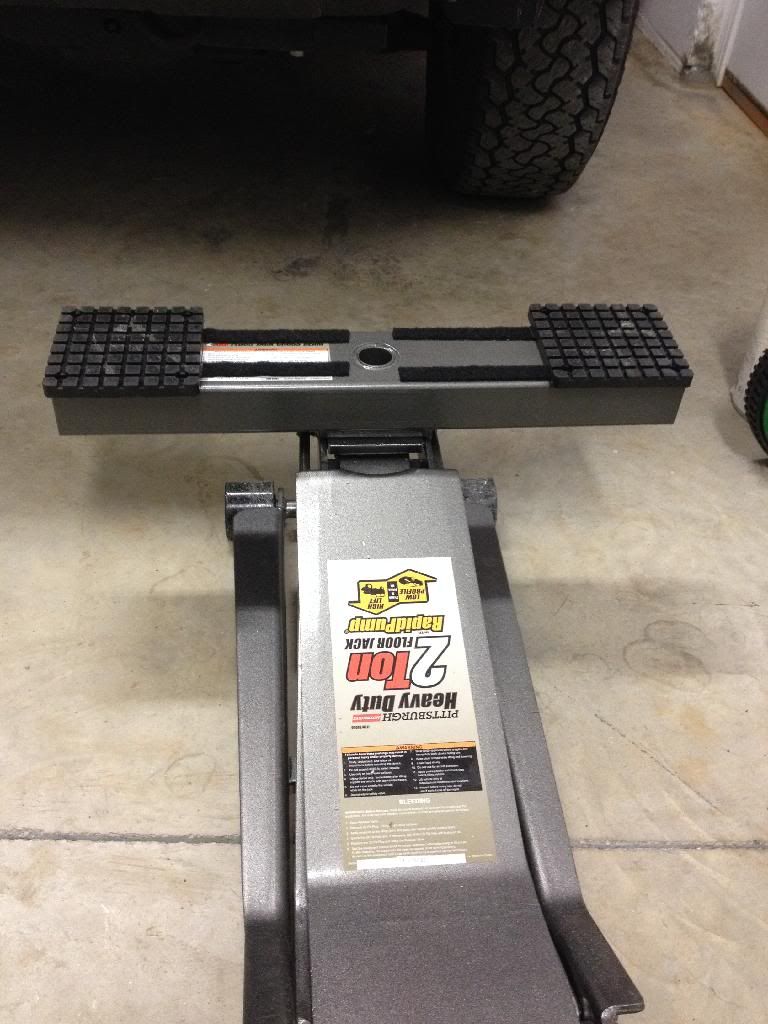
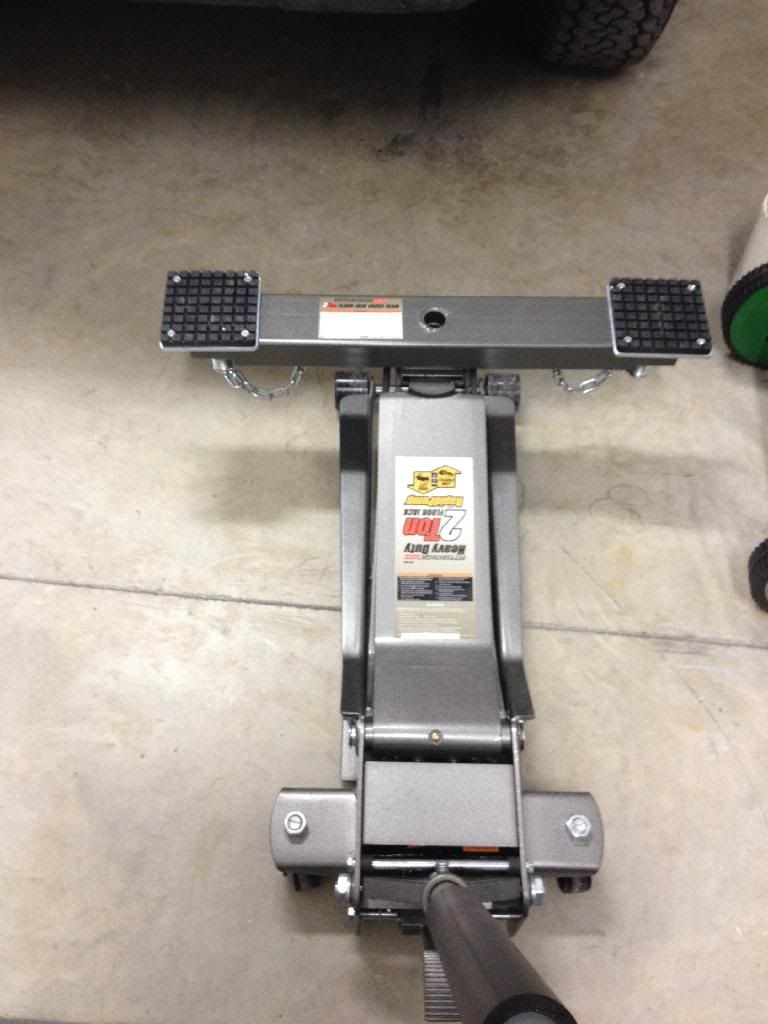
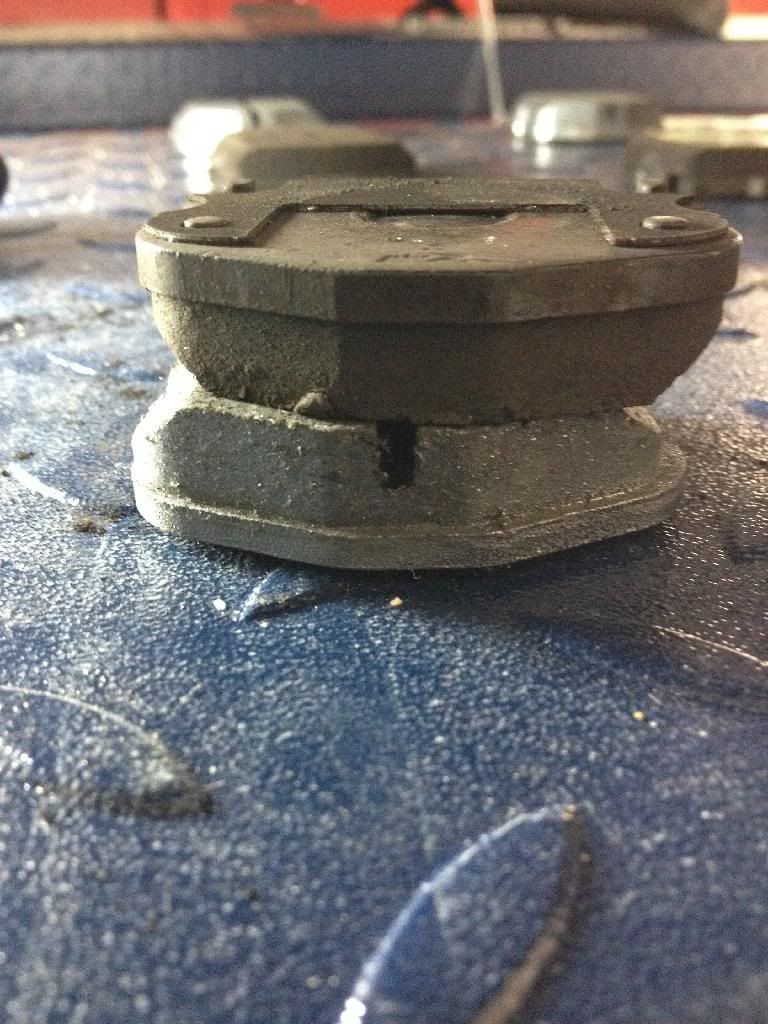
Jack with Lifting Pad removed:
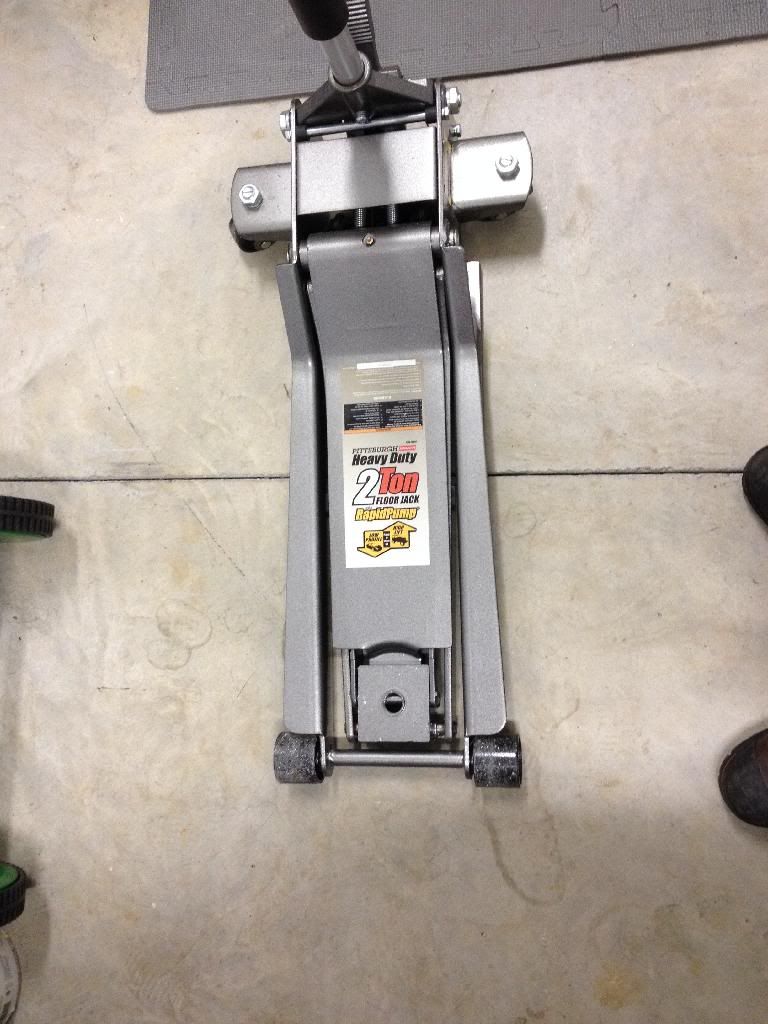
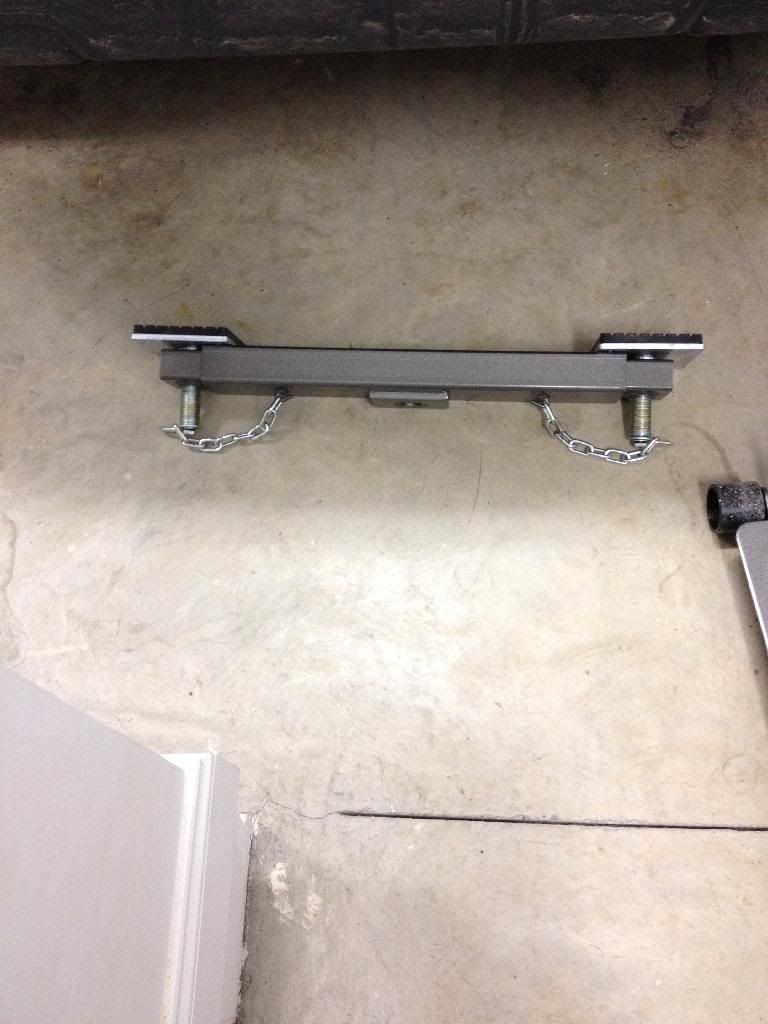
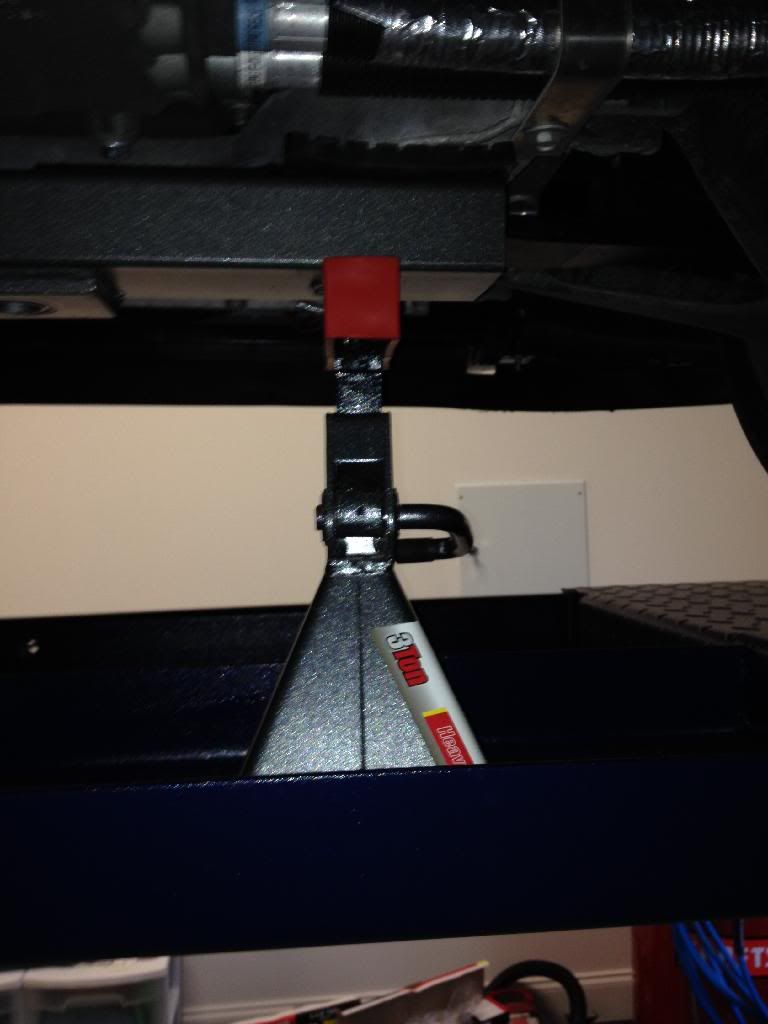
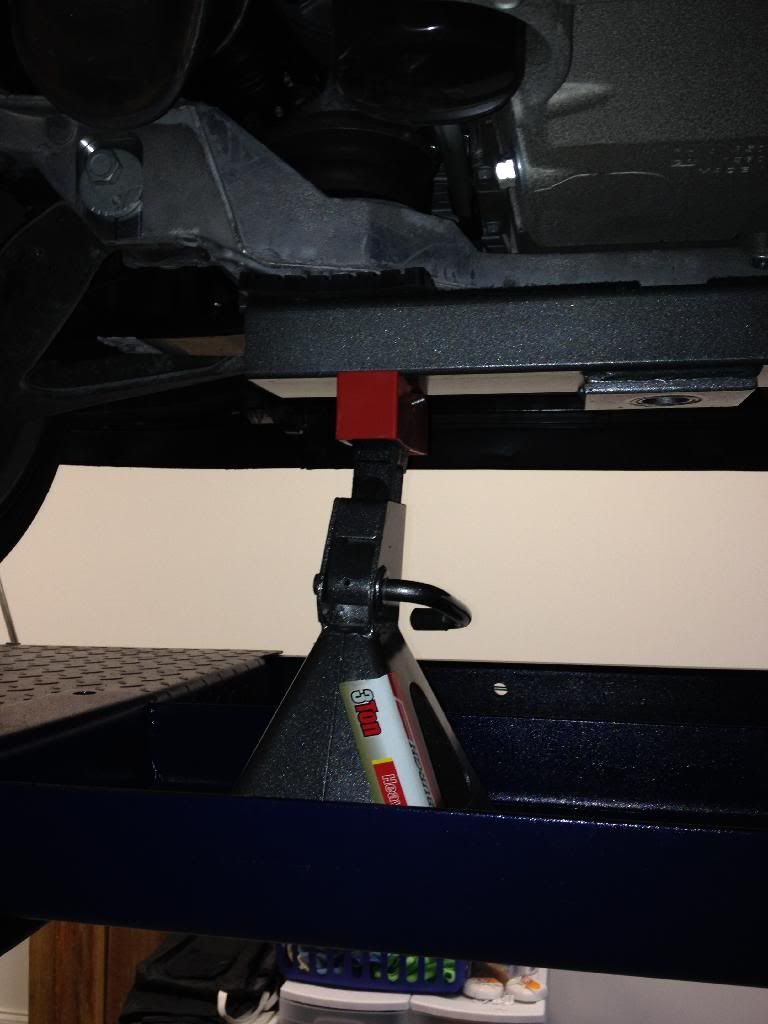
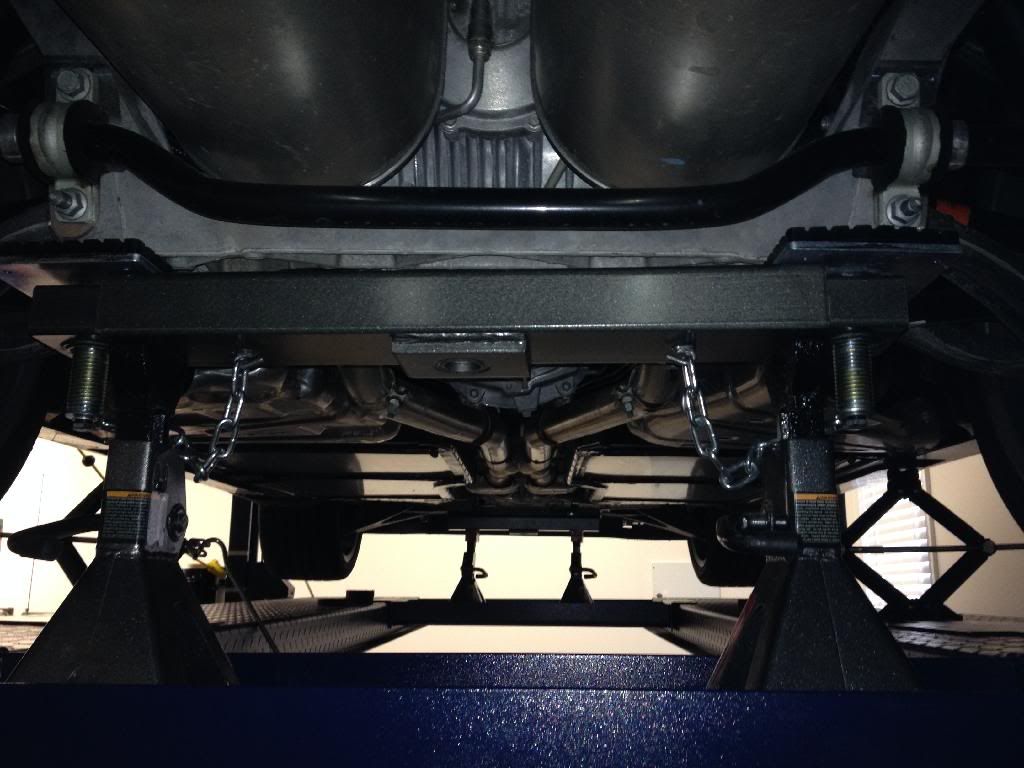
Crossbeam for front lifting. Modified by removing the safety chains, the inner adjustable arms, the pads, and re-attaching the pads to the bare crossbeam with velcro:
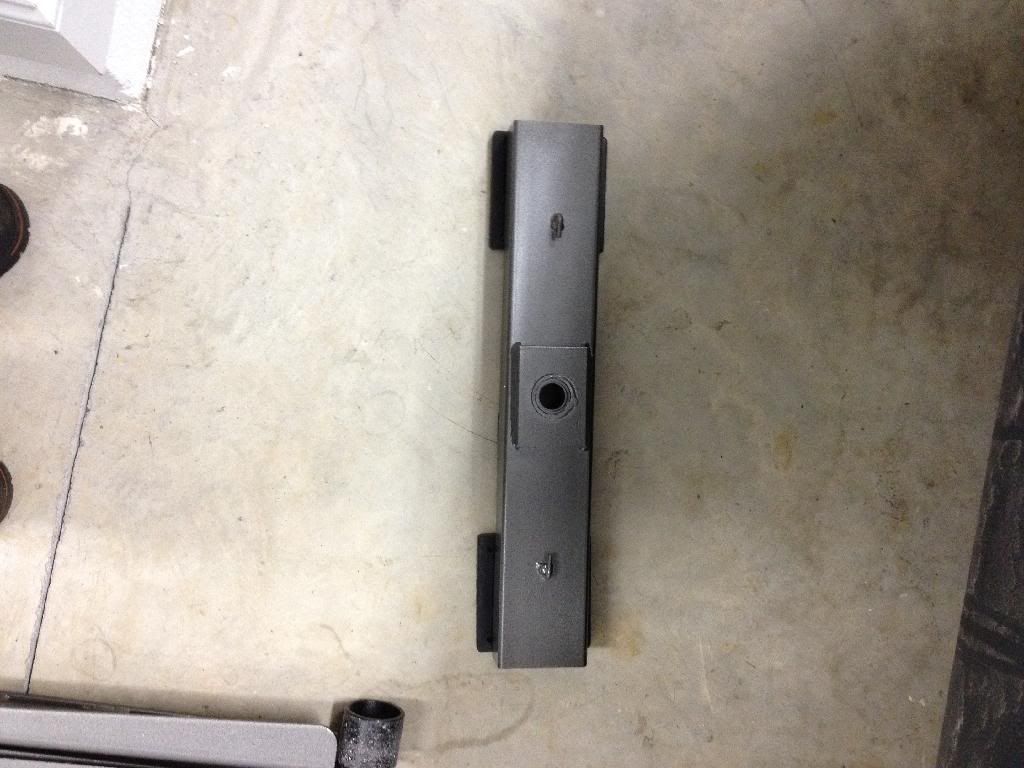
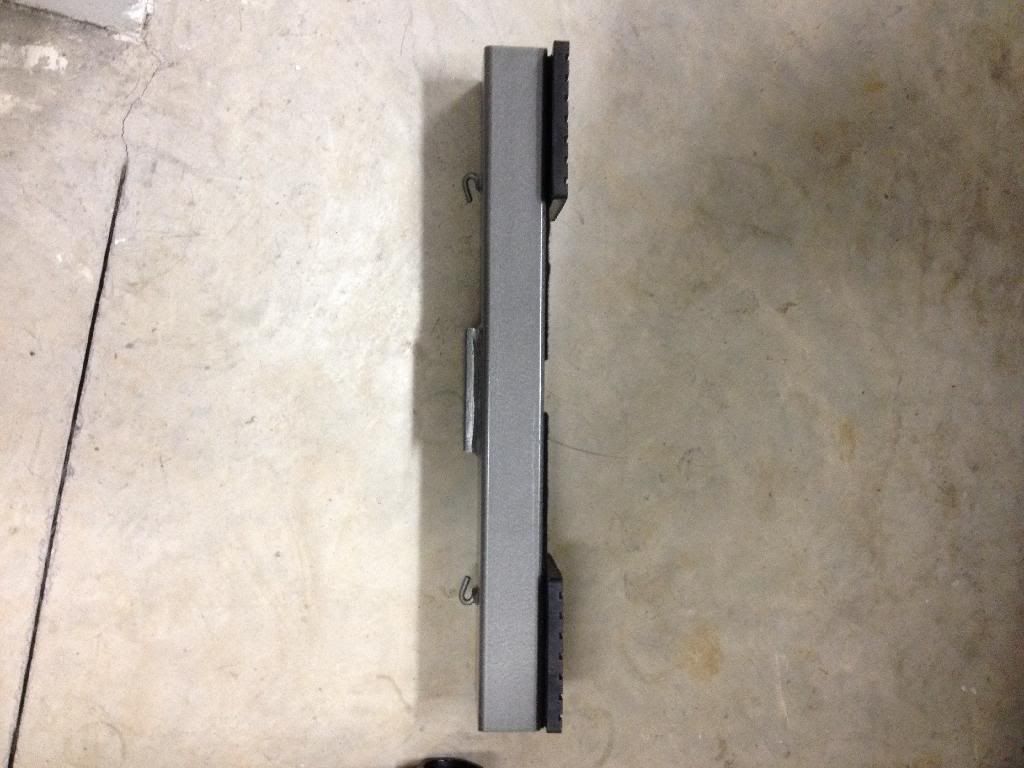
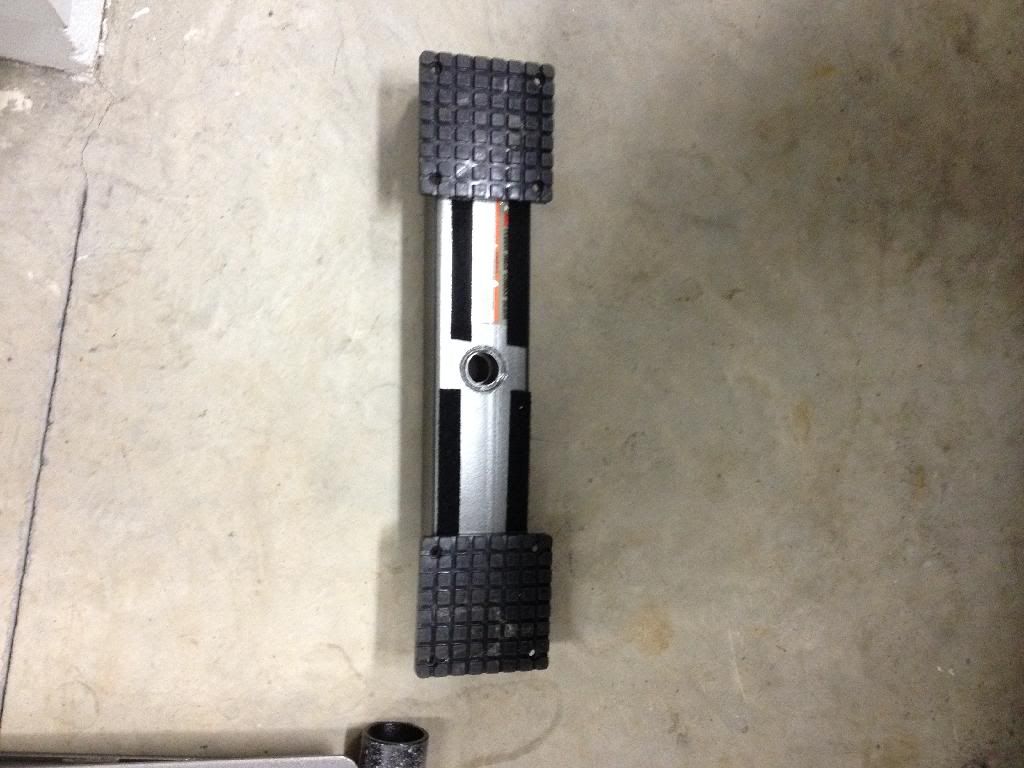
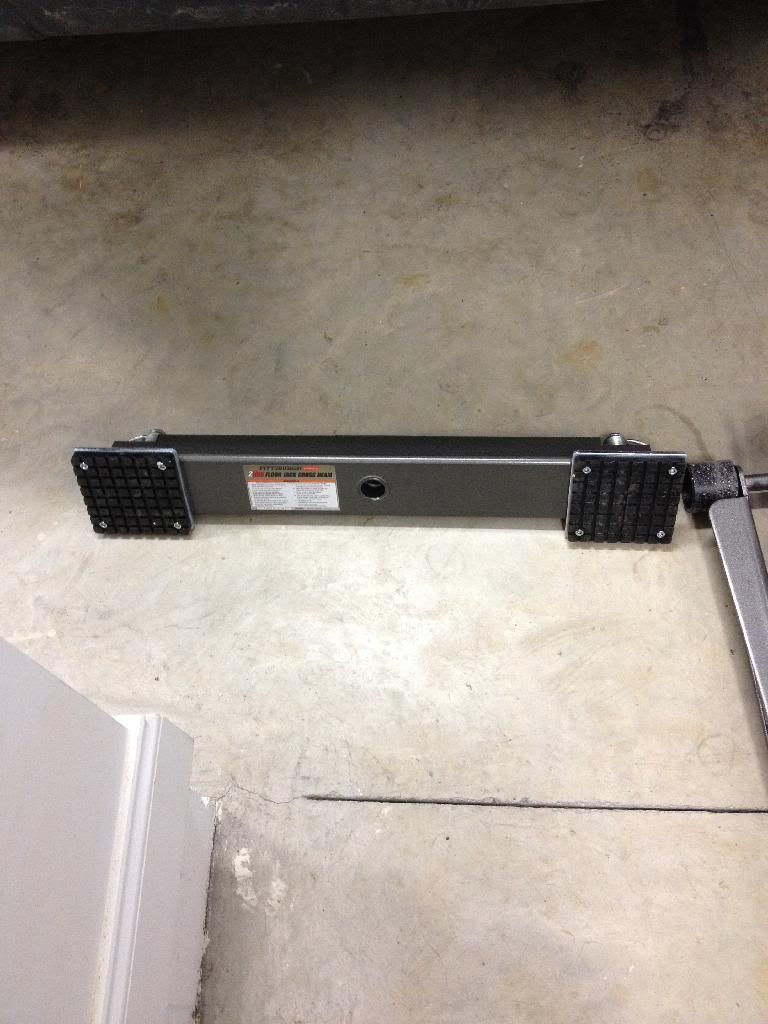
Crossbeam for rear lifting un-modified:
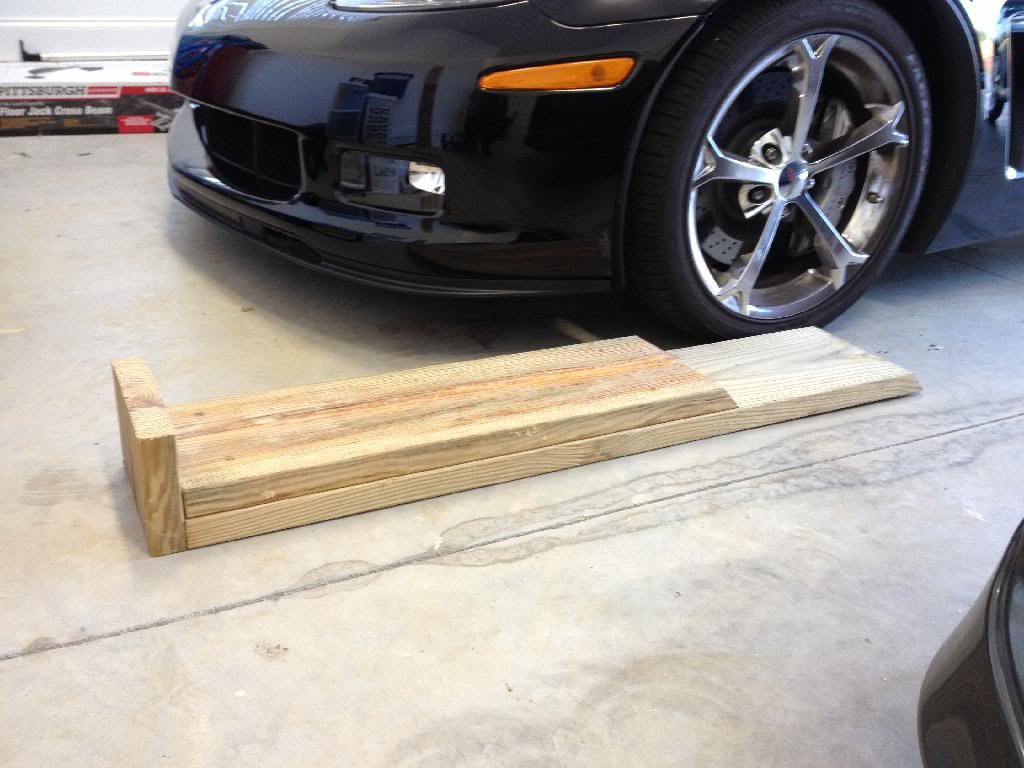
On the ground lifting at the preferred jacking/lifting locations:
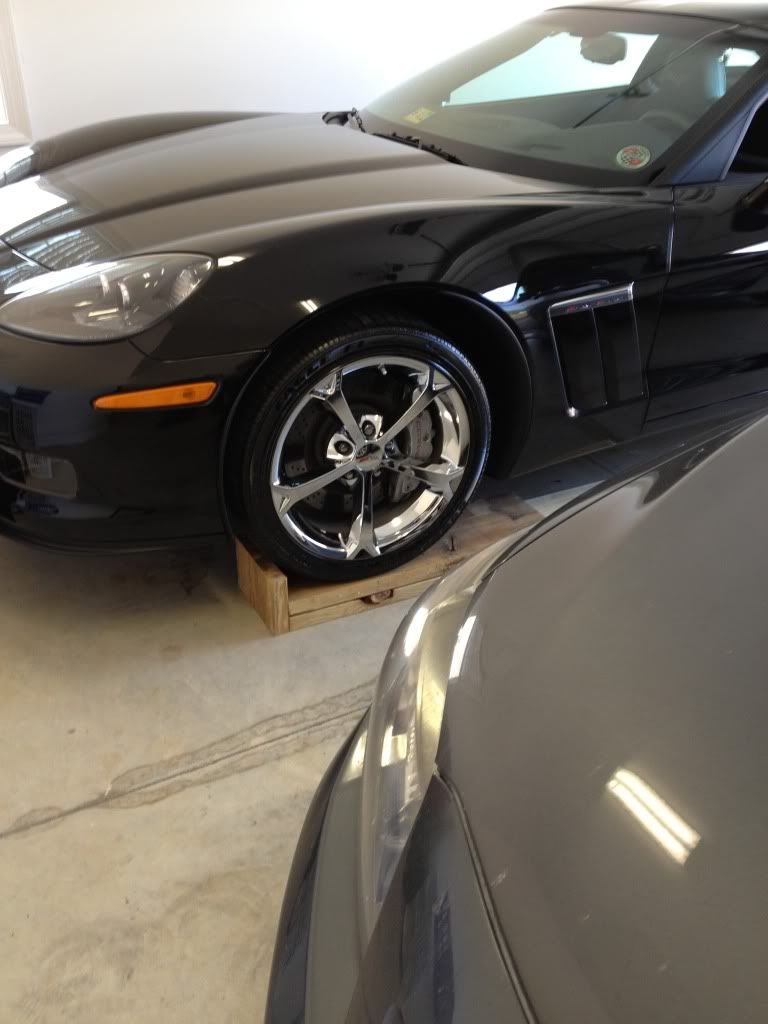
I drive the front wheels up onto the wooden ramps.
Chock the rear wheels.
Release the parking brake.
Place ultra cool MZ6 Close Ratio Short Throw Transmission in Neutral.
Roll the jack with the Crossbeam spigot in the spigot on the jack into position.
Lift the front high enough for the wheels to clear the ground.
Install the jack stands under the Crossbeam.
Lower jack.
Go around to the back.
Roll the jack with the Crossbeam spigot in the spigot on the jack into position.
Lift the rear high enough for the wheels to clear the ground.
Install the jack stands under the un-modified Crossbeam.
Lower jack.
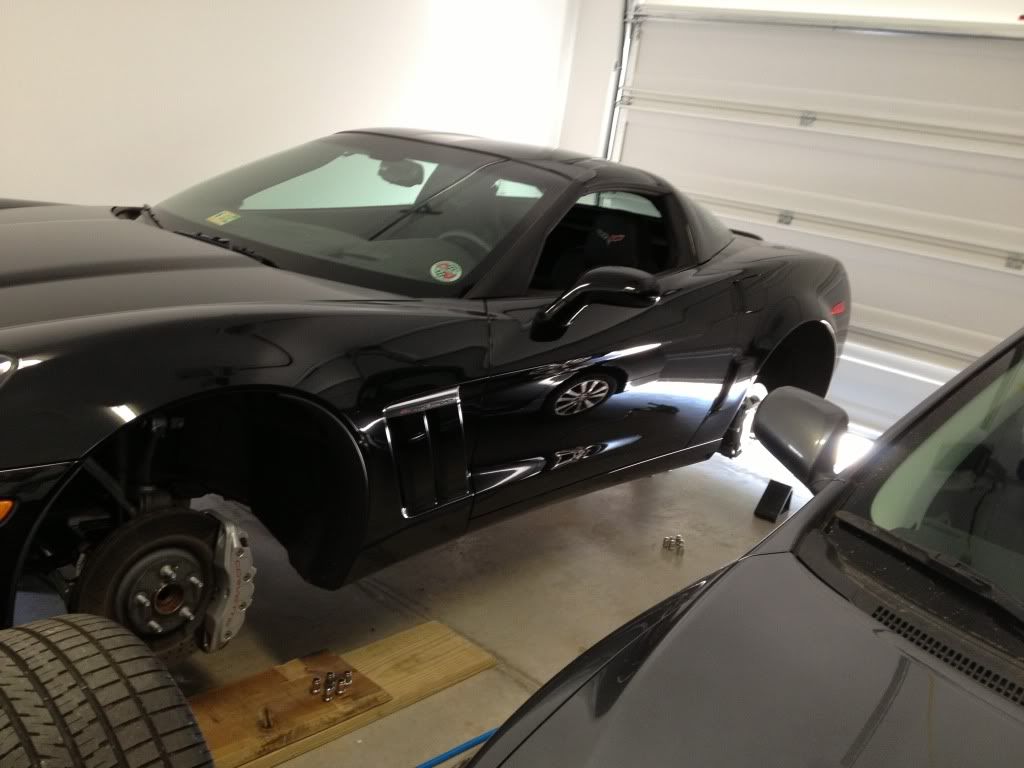
Remove wheels while the vehicle is safe and sturdy. VOILA:
Pics:
Jack with Lifting Pad removed:
Crossbeam for front lifting. Modified by removing the safety chains, the inner adjustable arms, the pads, and re-attaching the pads to the bare crossbeam with velcro:
Crossbeam for rear lifting un-modified:
On the ground lifting at the preferred jacking/lifting locations:
I drive the front wheels up onto the wooden ramps.
Chock the rear wheels.
Release the parking brake.
Place ultra cool MZ6 Close Ratio Short Throw Transmission in Neutral.
Roll the jack with the Crossbeam spigot in the spigot on the jack into position.
Lift the front high enough for the wheels to clear the ground.
Install the jack stands under the Crossbeam.
Lower jack.
Go around to the back.
Roll the jack with the Crossbeam spigot in the spigot on the jack into position.
Lift the rear high enough for the wheels to clear the ground.
Install the jack stands under the un-modified Crossbeam.
Lower jack.
Remove wheels while the vehicle is safe and sturdy. VOILA:
03-07-2014, 07:08 AM
#32
Burning Brakes
I think, for the time being at least, I am going to have to use my wooden ramps on the lift for clearance and use a cheap hydraulic bottle jack and the lift's Jack Tray to lift the front. I will be able to use the same bottle jack on the rear using just the supplied Jack Tray. Plenty of clearance back there, relatively speaking of course.
I will try to document all of this, including the brake replacement, with pictures. It seems I forget and then remember half way through, or just barely have time to get the job done much less do a documentary on it.
I will try to document all of this, including the brake replacement, with pictures. It seems I forget and then remember half way through, or just barely have time to get the job done much less do a documentary on it.
Last edited by jsucraig; 03-07-2014 at 07:13 AM.
03-07-2014, 08:10 AM
#33
Racer
It seems to me that y'all are making this lifting of the car a far more complicated task then it is.
Sunday I stared the install of my ECS 1500 kit

Simply using a low profile jack and some jacking pucks at the factory recommended locations

I was able to get close to 20" of lift


It's simply a Corvette - not a 50 ton Nacelle we're trying to perch a top of some tower sections 300' in the air.
Sunday I stared the install of my ECS 1500 kit
Simply using a low profile jack and some jacking pucks at the factory recommended locations
I was able to get close to 20" of lift
It's simply a Corvette - not a 50 ton Nacelle we're trying to perch a top of some tower sections 300' in the air.
03-09-2014, 09:59 PM
#34
Burning Brakes
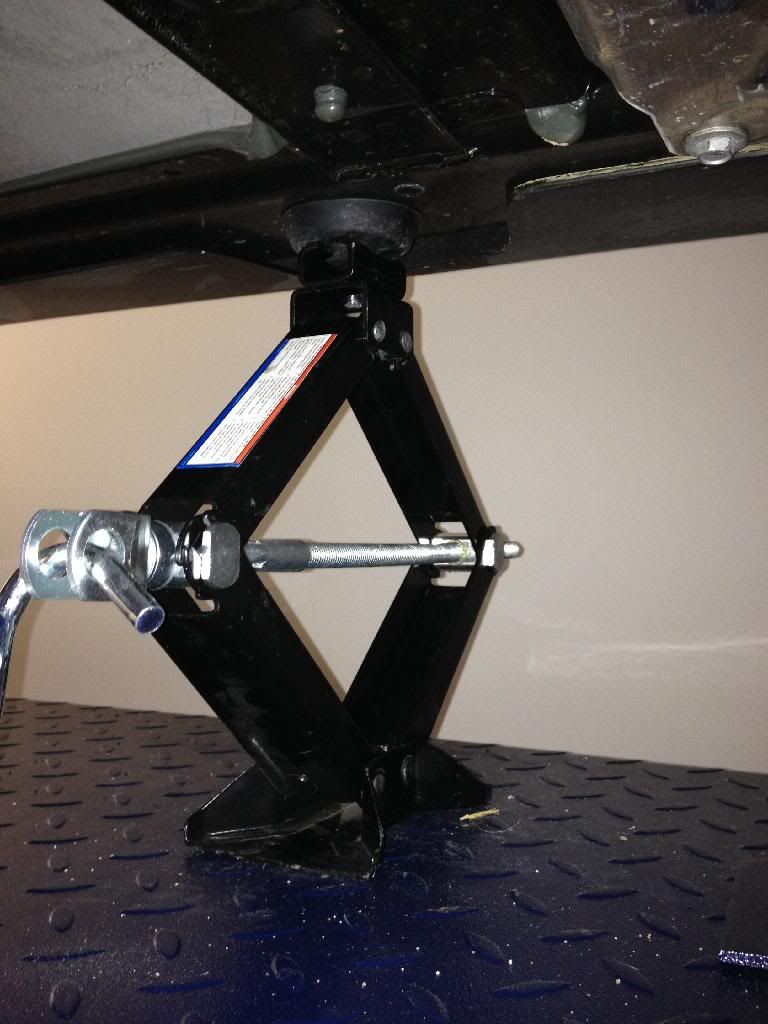
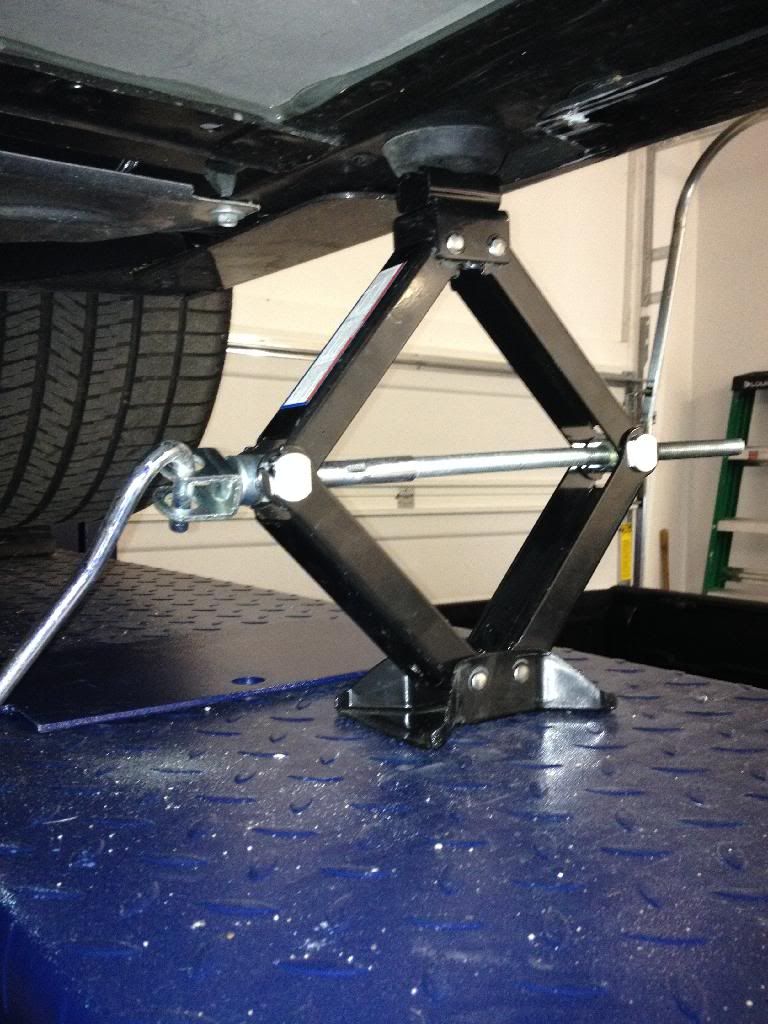
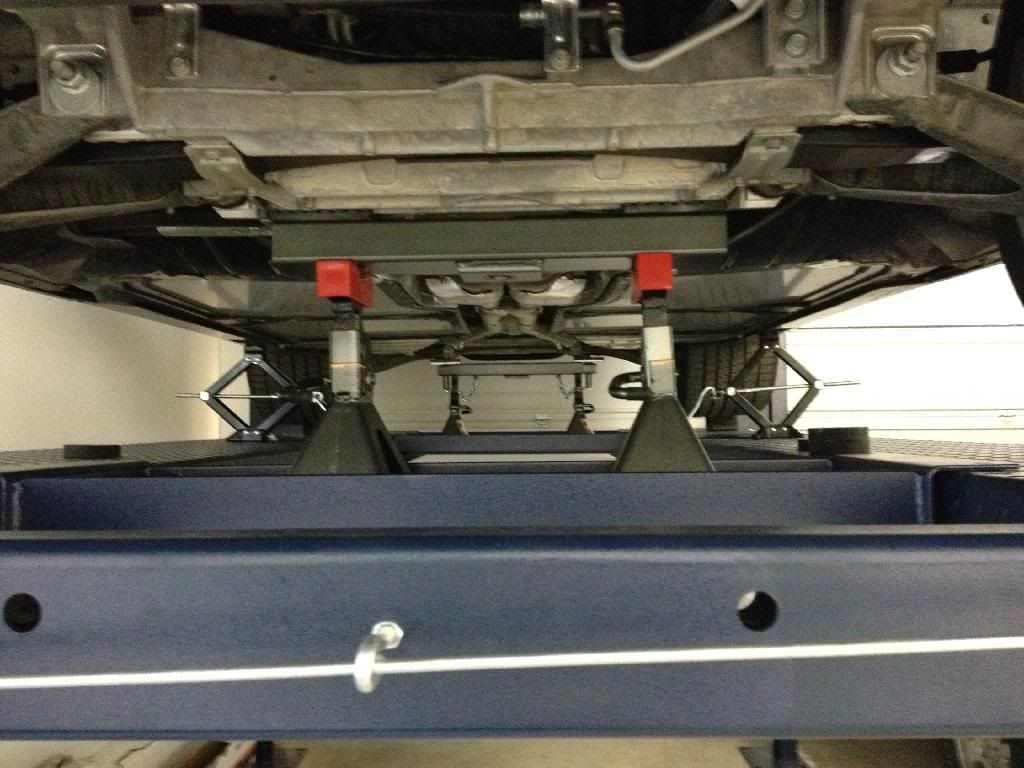
I ended up getting two manual scissor jacks to lift at the front two jacking puck locations, with pucks installed
Then used my modified front crossbeam and jack stands on the lifts jack trays
Lifted the rear with the two manual scissor jacks at the rear two jacking puck locations, with pucks installed
Installed the un-modified rear crossbeam and jack stands
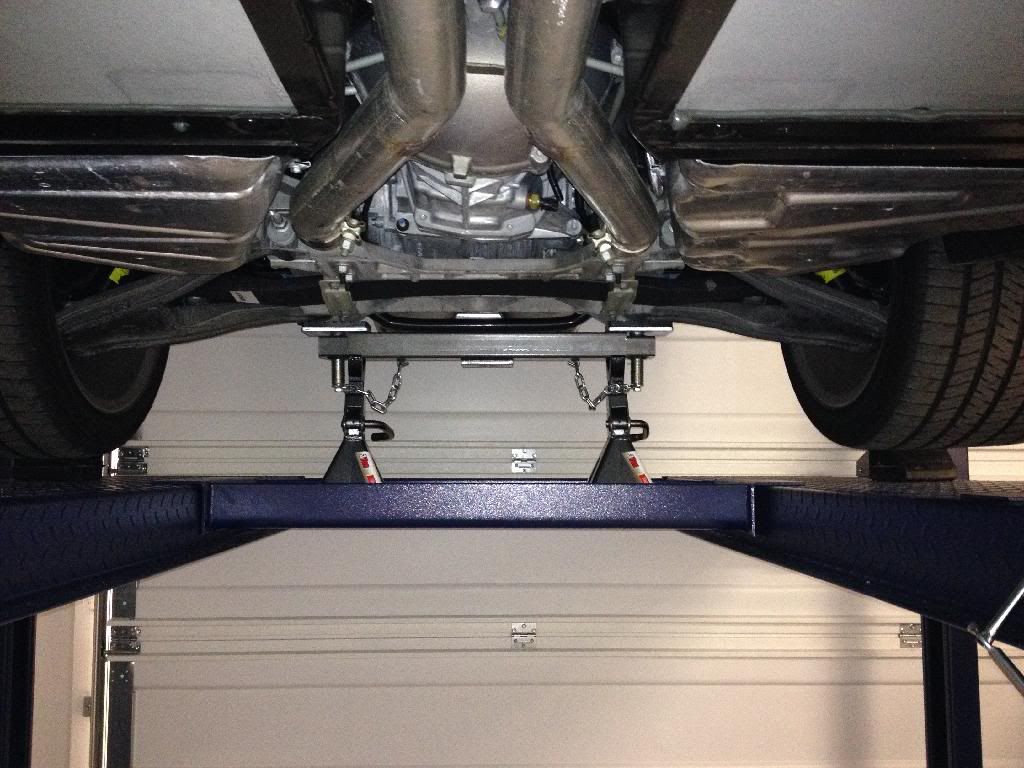
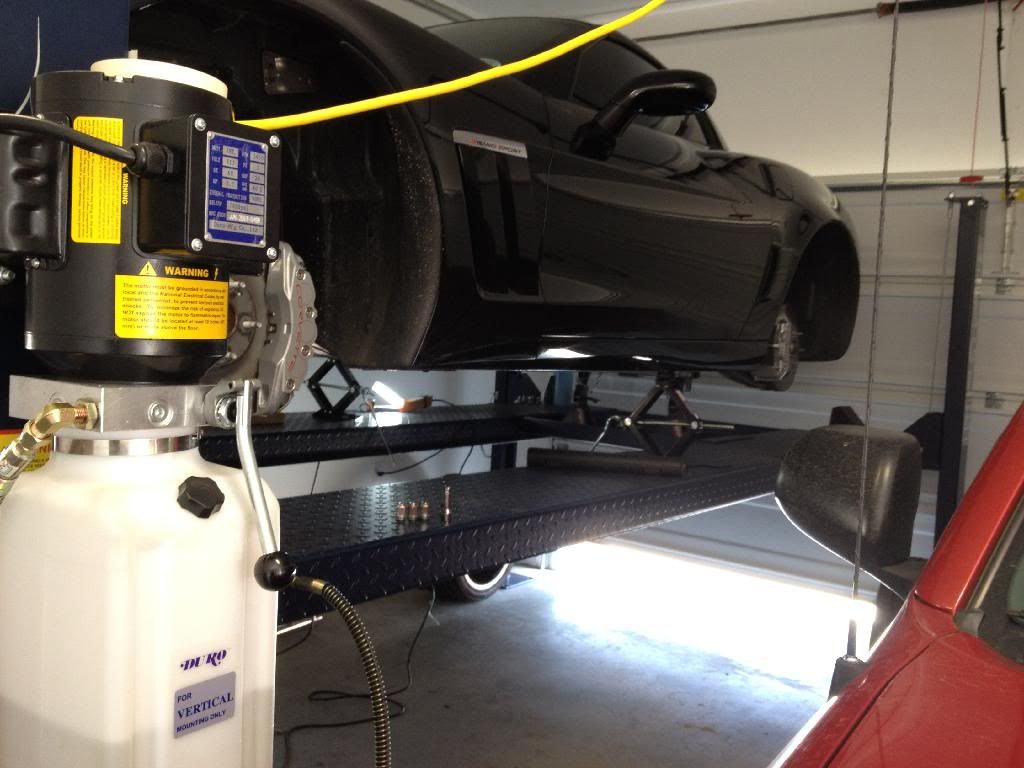
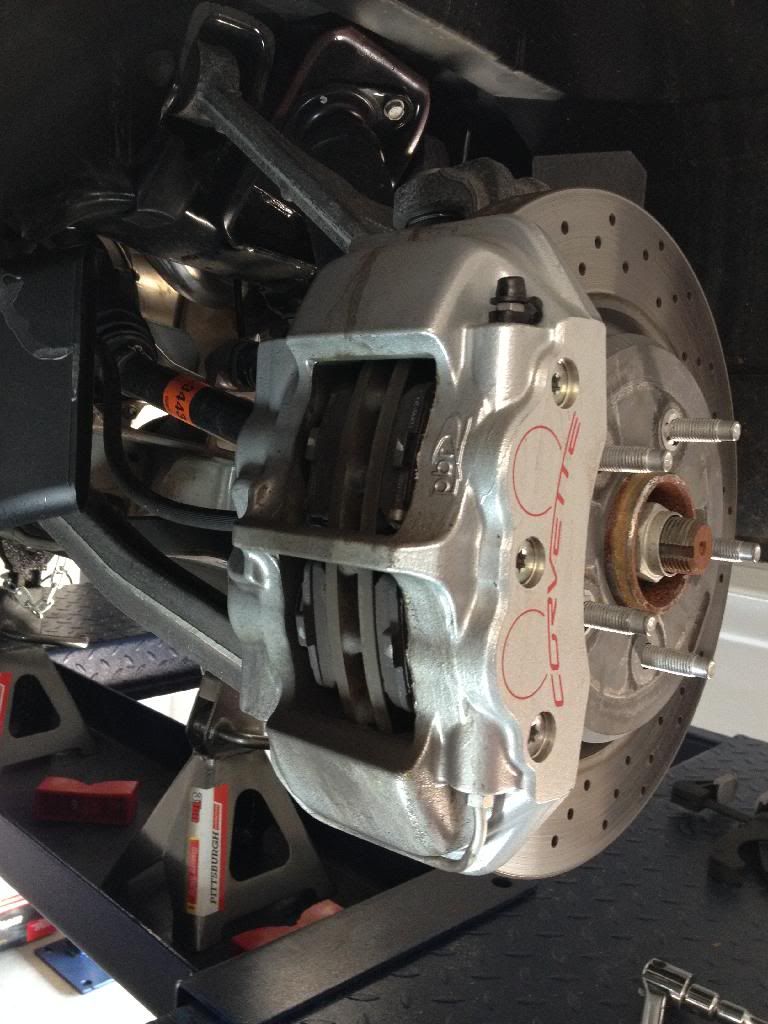
Corvette was successfully lifted on my Eagle GLO-8000 Four-Post Lift. Now I can easily work under and around at my convenience
Off came the wheels
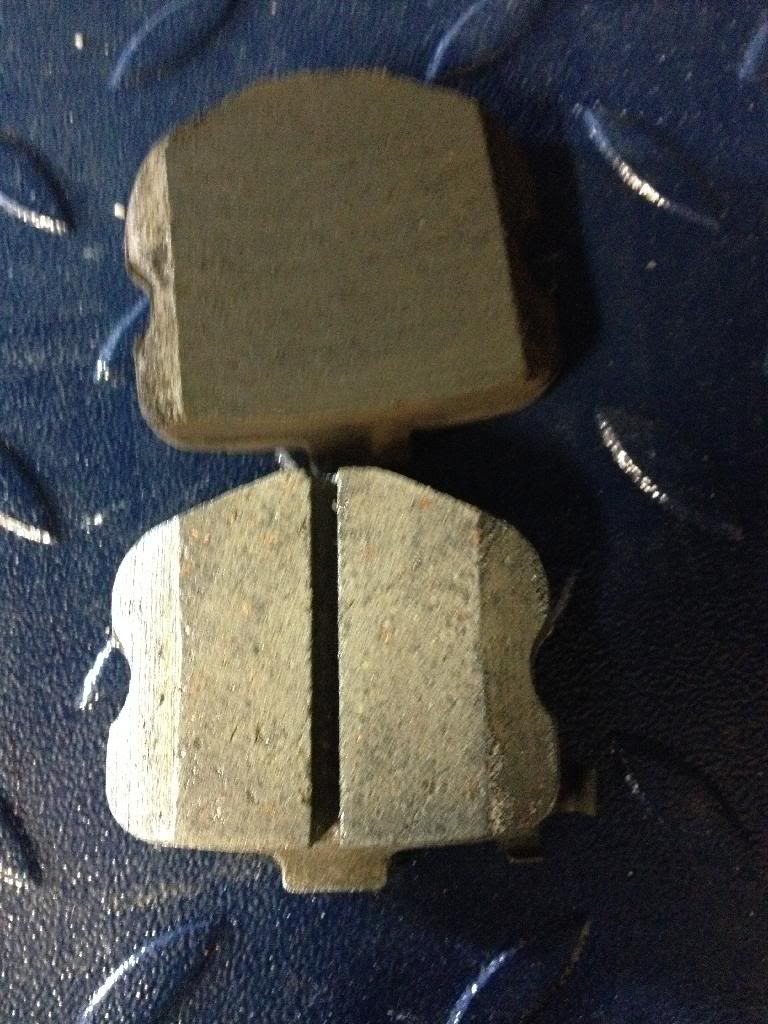
Front pad set. OEM vs Ceramic Duralast Gold
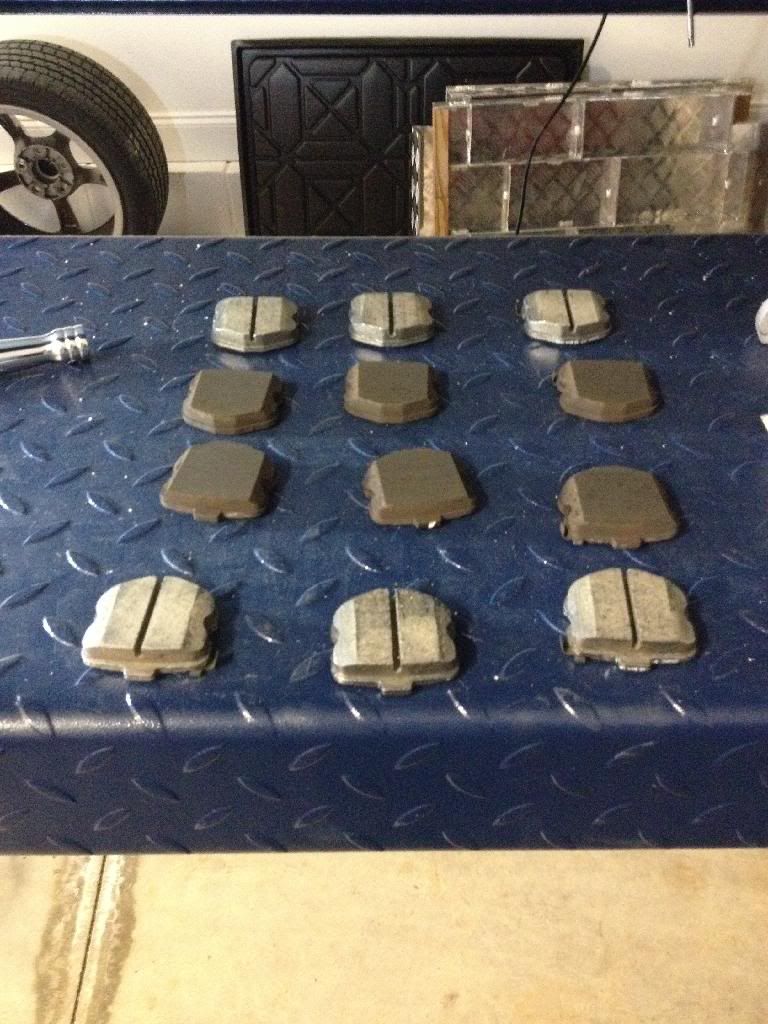
Rear Pad Set. OEM vs Ceramic Duralast Gold
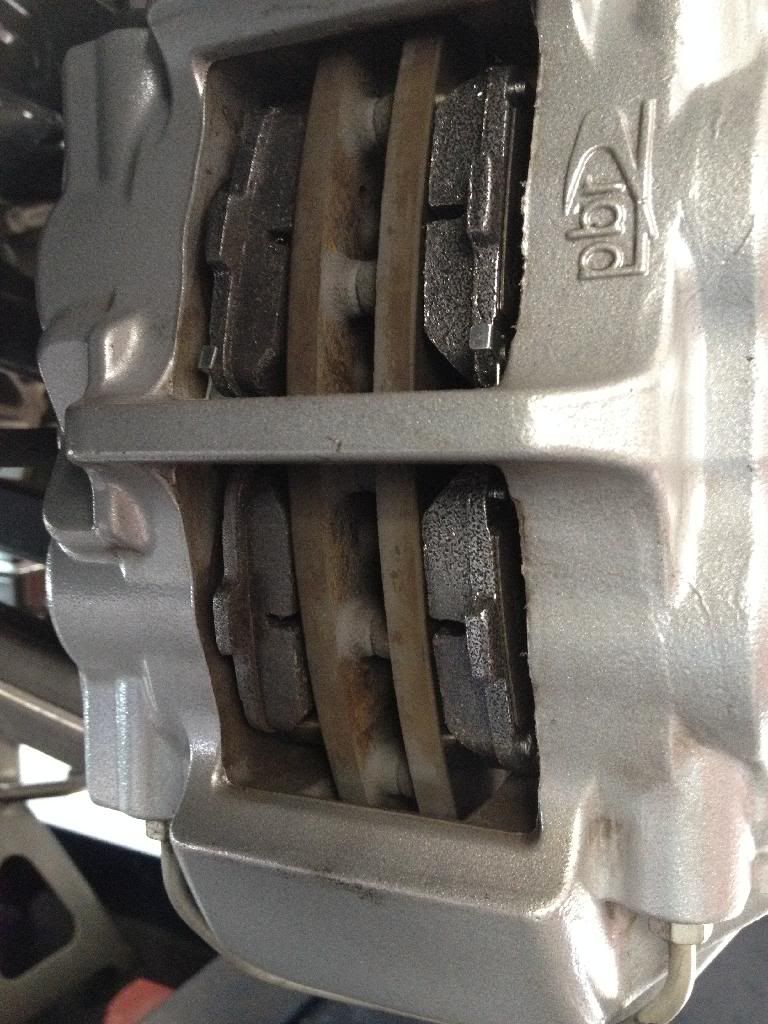
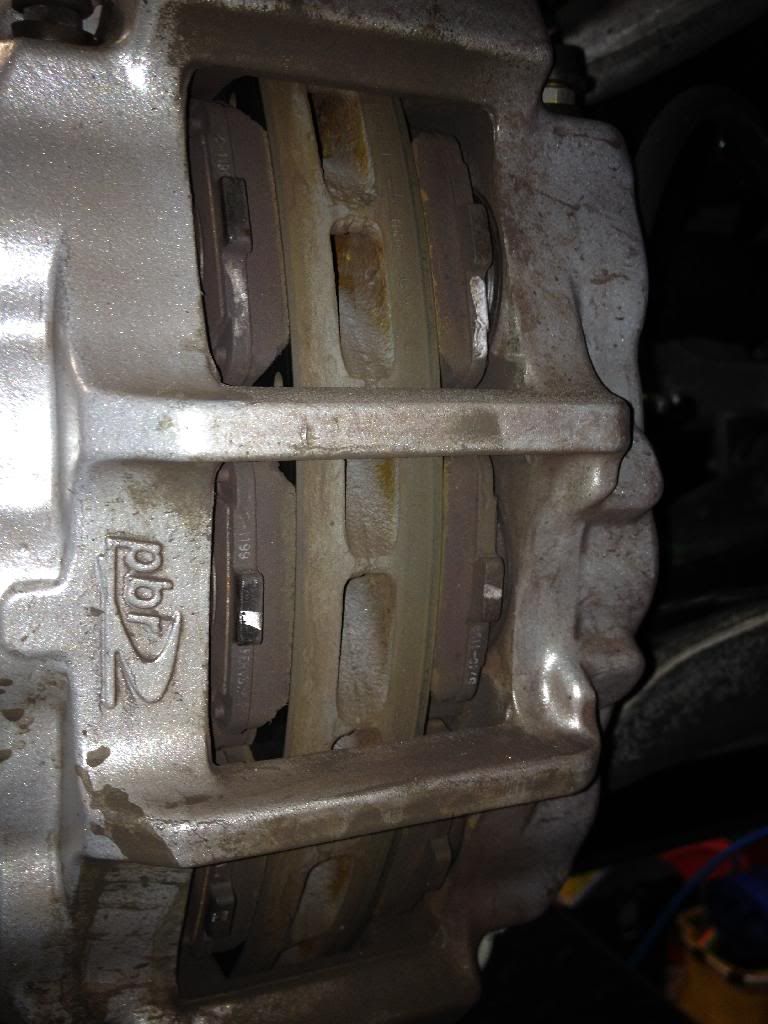
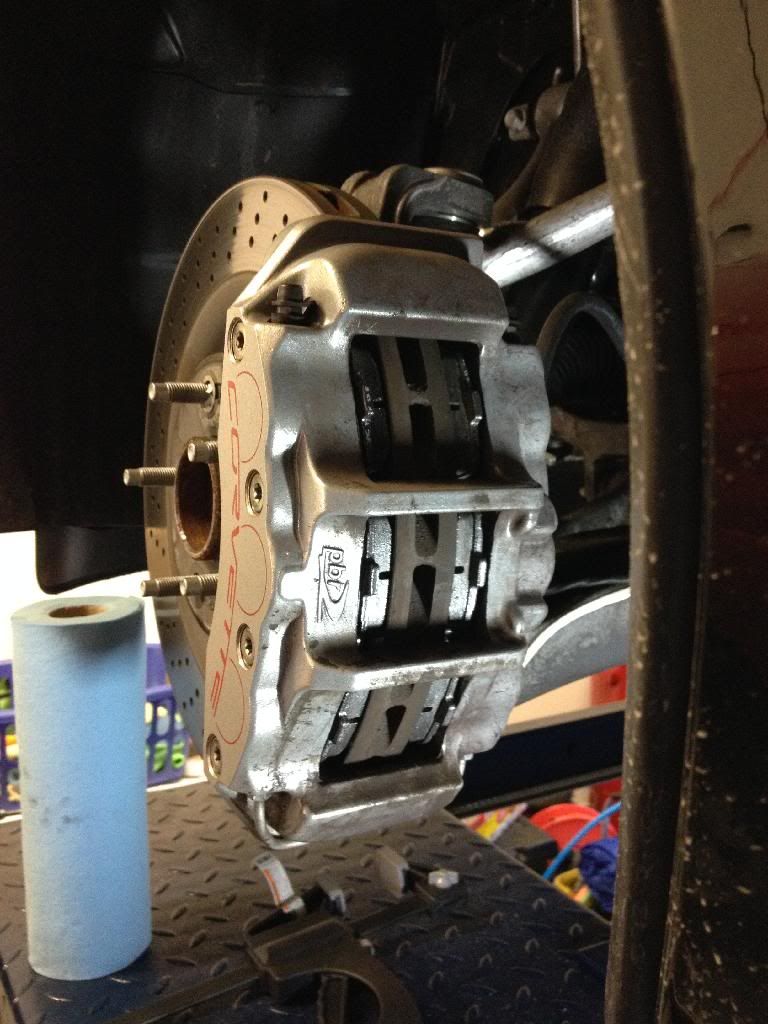
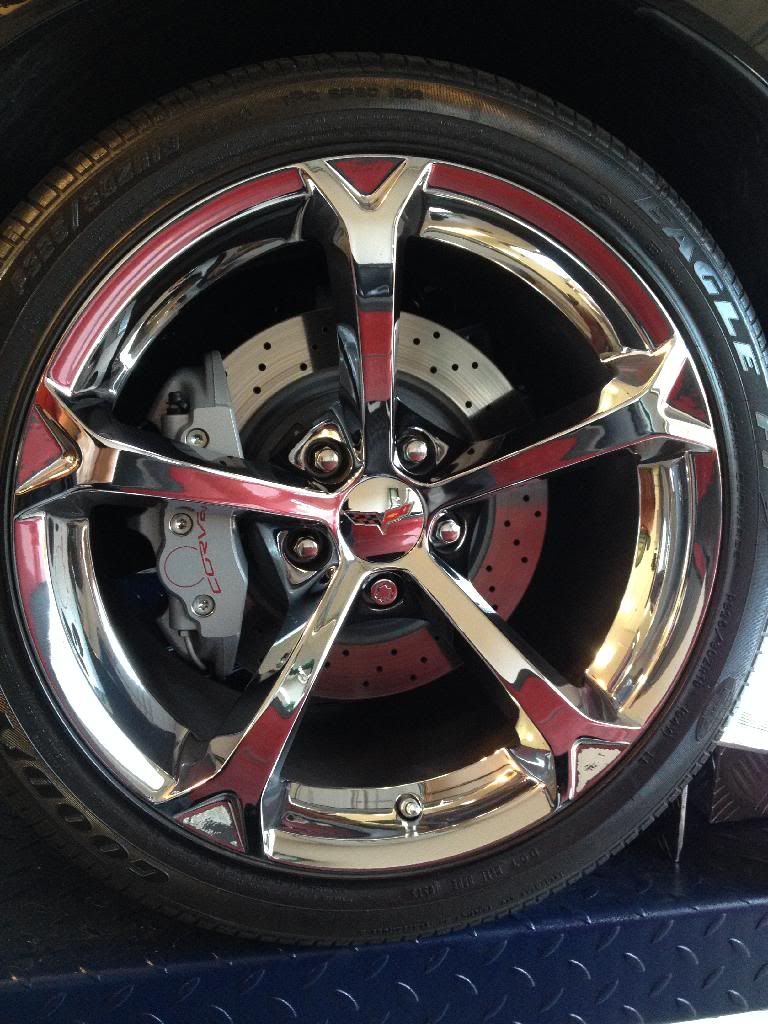
Blew all of the old brake dust out from the rotors and calipers with my compressor. Re-installed the wheels and torqued to 100 ft/lbs. I will re-torque after 100ish miles. I wiped the wheels off with quick detailer and went out to burnish, burn in, or bed the new brakes (whichever terminology you prefer). So far so good. I am driving it to work tomorrow which is 100 miles round trip so I will give you my opinion of braking and wheel condition.
I was originally going to do one caliper by removing the Pad Pin Bolts and the other by removing the Caliper, but it was so easy removing the Pad Pin Bolts that I did all four calipers that way.
Then used my modified front crossbeam and jack stands on the lifts jack trays
Lifted the rear with the two manual scissor jacks at the rear two jacking puck locations, with pucks installed
Installed the un-modified rear crossbeam and jack stands
Corvette was successfully lifted on my Eagle GLO-8000 Four-Post Lift. Now I can easily work under and around at my convenience
Off came the wheels
Front pad set. OEM vs Ceramic Duralast Gold

Rear Pad Set. OEM vs Ceramic Duralast Gold
Blew all of the old brake dust out from the rotors and calipers with my compressor. Re-installed the wheels and torqued to 100 ft/lbs. I will re-torque after 100ish miles. I wiped the wheels off with quick detailer and went out to burnish, burn in, or bed the new brakes (whichever terminology you prefer). So far so good. I am driving it to work tomorrow which is 100 miles round trip so I will give you my opinion of braking and wheel condition.
I was originally going to do one caliper by removing the Pad Pin Bolts and the other by removing the Caliper, but it was so easy removing the Pad Pin Bolts that I did all four calipers that way.
Last edited by jsucraig; 03-09-2014 at 10:34 PM.
03-10-2014, 01:08 PM
#35
Racer


They can also be purchased for under $2K which is cheaper than Maxx Jack to boot.
03-10-2014, 08:49 PM
#36
Burning Brakes
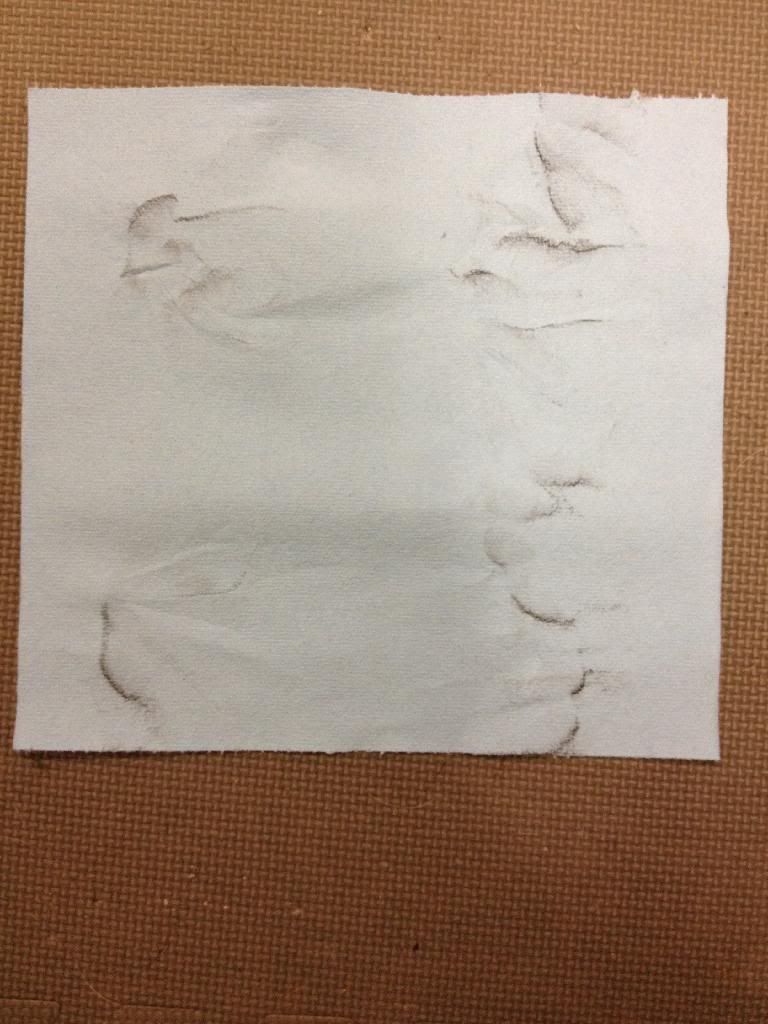
After burnishing the brakes yesterday they squealed a little when coming to a stop. This was probably due to the fact that it was not a dedicated burnishing run. I did it on the way to Target and Walgreen's, so I heated them up and really didn't give them enough time to cool down before driving around town. Today when I drove to work 57 miles one way mostly highway, but ending in city driving there was no squeal at all. The same on the way home, except I drove in the city on both ends of the highway. They brake well and they leave hardly, if any, dust. Pics or it didn't happen:
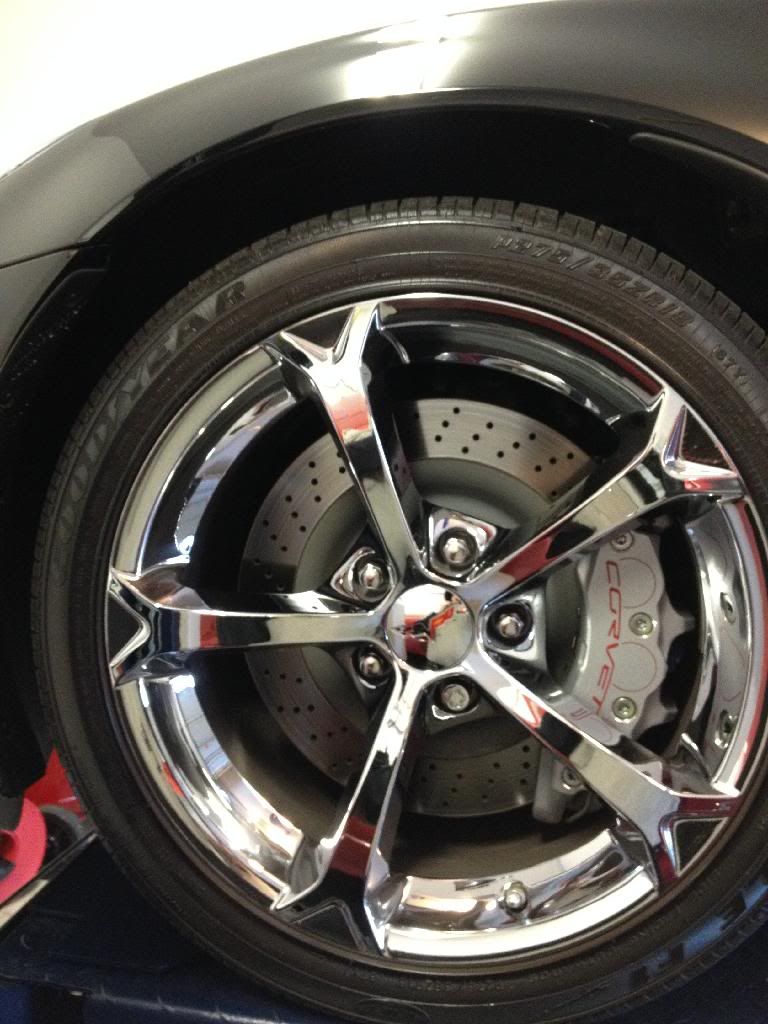
Back one swipe each wheel Front two swipes each wheel
Back one swipe each wheel Front two swipes each wheel
03-10-2014, 08:52 PM
#37
Burning Brakes
 03-10-2014, 09:22 PM
#39
Burning Brakes
I just swapped out the pads. I only have 4400 street miles on her with no track time. The only reason I swapped was to get rid of the dust and the fact that the full set of pads were a fraction of just the rears from Hawk.
03-10-2014, 10:16 PM
#40
Instructor
I have a few more miles now though (about 13k) and I'm trying to decide what to do with the rotors (if anything)