
How to: Wheel stud removal and ride height adjustment
 06-01-2007, 02:30 AM
#1
Burning Brakes

Thread Starter
Member Since: Mar 2006
Location: San Jose CA
Posts: 774
Likes: 0
Received 0 Likes
on
0 Posts
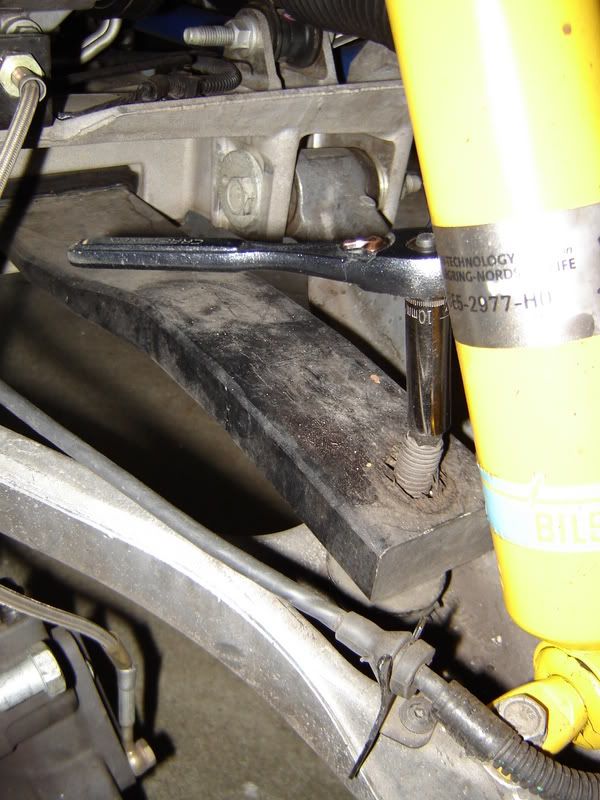
I'll start with a real quick pic of how to adjust the front ride height. The same applies to the rear of the car. Simply attach a 10mm socket or open end wrench onto the bolt behind the shock and rotate in the correct direct to raise/lower the car:
Now to the stud removal and replacement. This procedure is for removal of the stock studs and replacement with 1/2" longer ones. I used 1/2" longer studs from Doug Rippie. They are actually only 1/4" longer; but, they get an extra 1/2" of threads due to the stock studs not being fully threaded. NOTE: THE FRONT HUBS DO NOT NEED TO BE REMOVED! I WILL VERIFY THIS FOR THE REAR HUBS LATER THIS WEEK.
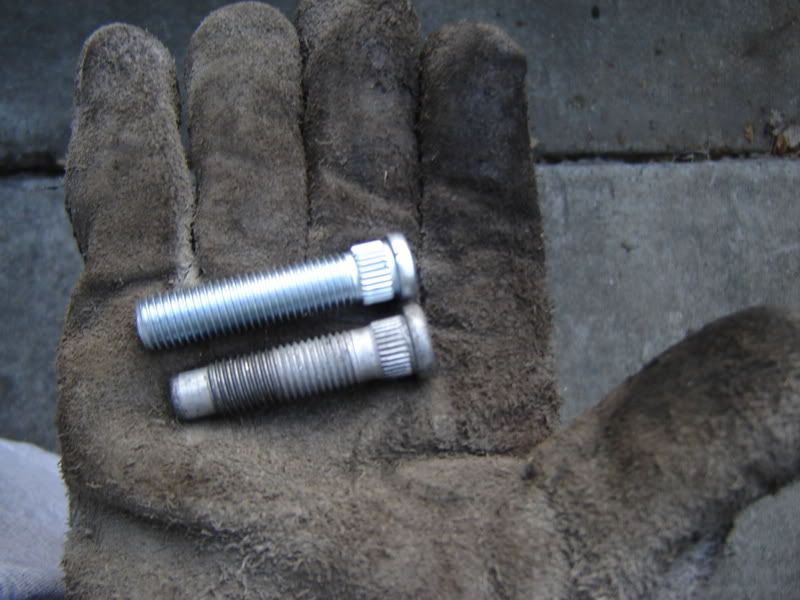
Stock vs. 1/2" longer studs. Although only 1/4" longer, they are fully threaded. Stockers are not:
Remove the two caliper bracket bolts and hang the caliper with bracket off the lower control arm with a zip tie:

Use a 6" clamp on the end of the stud. Put the pivoting end of the clamp on the inside of the hub. There is a solid flat surface to press against on the inside of the hub. A box wrench and/or deep socket with 6" extension are used for leverage on the handle:
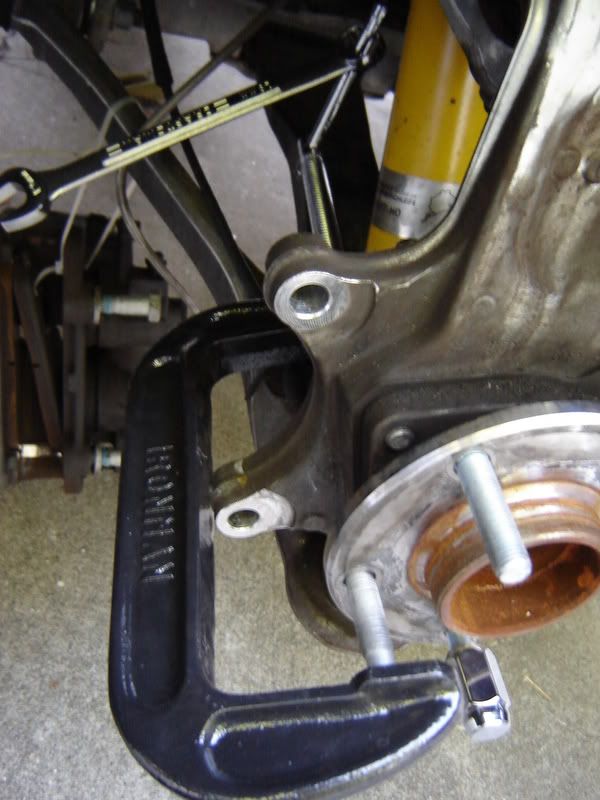
Tighten the clamp to press out the stud. After you press it out 1/8", you can also get it to pop out very quickly by using a rubber mallet on the end of the c-clamp. With the pressure already on the stud, it will pop out with a couple hits. Don't club the sh|t out of it as you don't want to damage the bearing. It doesn't take a lot of force when there is significant pressure on the stud by the clamp. When I hit a rhythm I could do one stud every 2-3 mins.
There is enough room to pop the stud out and put the new one in. Find the right position with the stud positioned toward the rear of the car:
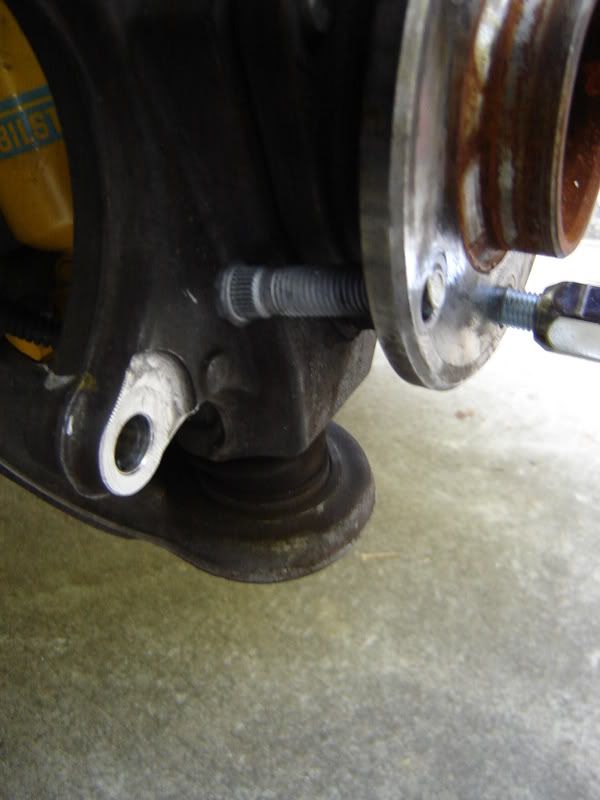
Use a wheel stud draw tool. It threads on to the new stud and seats it within 20 seconds:
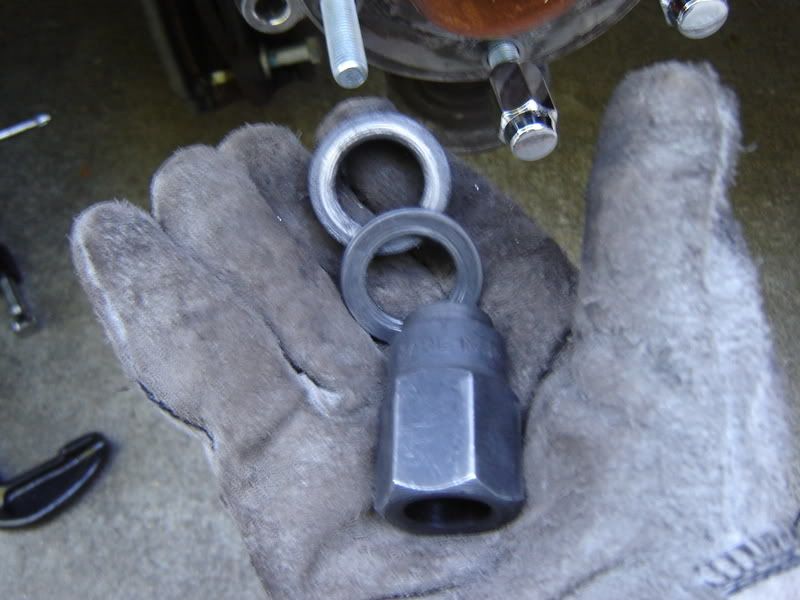
Do NOT remove more than 3 studs at a time!! You will need at least two of them for leverage while drawing the new studs on. Protect the two studs used for leverage with nuts to avoid damaging the threads.
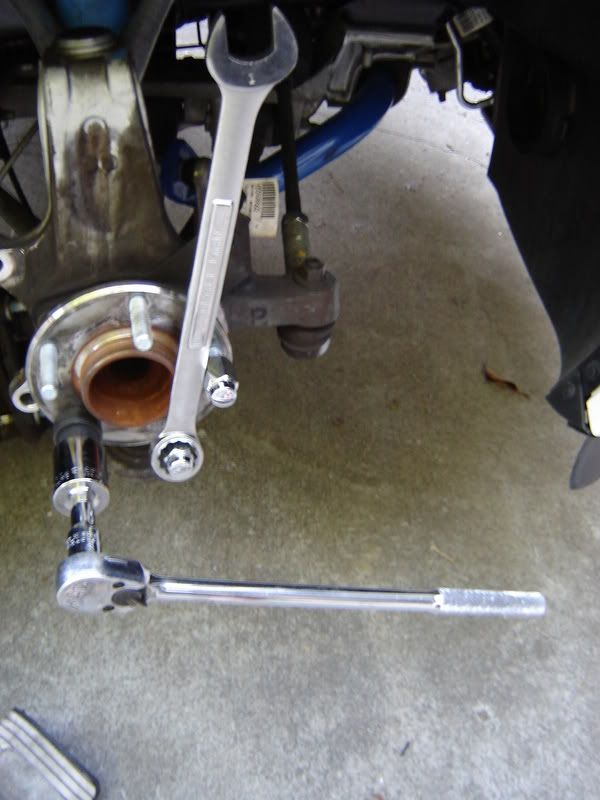
Wheel stud tool being used. Note the box wrench used for leverage to keep the spindle from spinning:
I will edit this if I come across any differences with the studs in the rear.
Now to the stud removal and replacement. This procedure is for removal of the stock studs and replacement with 1/2" longer ones. I used 1/2" longer studs from Doug Rippie. They are actually only 1/4" longer; but, they get an extra 1/2" of threads due to the stock studs not being fully threaded. NOTE: THE FRONT HUBS DO NOT NEED TO BE REMOVED! I WILL VERIFY THIS FOR THE REAR HUBS LATER THIS WEEK.
Stock vs. 1/2" longer studs. Although only 1/4" longer, they are fully threaded. Stockers are not:
Remove the two caliper bracket bolts and hang the caliper with bracket off the lower control arm with a zip tie:
Use a 6" clamp on the end of the stud. Put the pivoting end of the clamp on the inside of the hub. There is a solid flat surface to press against on the inside of the hub. A box wrench and/or deep socket with 6" extension are used for leverage on the handle:
Tighten the clamp to press out the stud. After you press it out 1/8", you can also get it to pop out very quickly by using a rubber mallet on the end of the c-clamp. With the pressure already on the stud, it will pop out with a couple hits. Don't club the sh|t out of it as you don't want to damage the bearing. It doesn't take a lot of force when there is significant pressure on the stud by the clamp. When I hit a rhythm I could do one stud every 2-3 mins.
There is enough room to pop the stud out and put the new one in. Find the right position with the stud positioned toward the rear of the car:
Use a wheel stud draw tool. It threads on to the new stud and seats it within 20 seconds:
Do NOT remove more than 3 studs at a time!! You will need at least two of them for leverage while drawing the new studs on. Protect the two studs used for leverage with nuts to avoid damaging the threads.
Wheel stud tool being used. Note the box wrench used for leverage to keep the spindle from spinning:
I will edit this if I come across any differences with the studs in the rear.
Last edited by codename Bil Doe; 08-14-2007 at 11:15 AM. Reason: change title to DIY
 06-01-2007, 11:47 AM
#2
Melting Slicks


But also remember, when adjusting ride height, place a small jack under the spring itself and raise the spring to remove the pressure on the adjuster. Otherwise the adjuster is extremely hard to turn and you could even damage the rubber on the adjuster.

Turn adjuster clockwise to raise suspension height.
06-01-2007, 05:05 PM
#4
Burning Brakes
Thread Starter
Member Since: Mar 2006
Location: San Jose CA
Posts: 774
Likes: 0
Received 0 Likes
on
0 Posts
The rears you can reach and even cut the bushing without removing the tires. It's so easy when you remove the front wheels and you already have to jack up the car for access that you might as well do it. It only adds another 5 minutes to the job?

 06-03-2007, 10:13 AM
#7
8th Gear

Member Since: Jan 2007
Posts: 8
Likes: 0
Received 0 Likes
on
0 Posts
Hi
I just buy new rims Boyd Coddington JYD but the backspacing are 4,5" and the org. is 4" now my problem is that it cant bee there in front so one of my friend told me about spacers and studs, but how long are the org. studs or how long must the new one be.
Maybe anyone can help me
Thanks
Morten
I just buy new rims Boyd Coddington JYD but the backspacing are 4,5" and the org. is 4" now my problem is that it cant bee there in front so one of my friend told me about spacers and studs, but how long are the org. studs or how long must the new one be.
Maybe anyone can help me
Thanks
Morten


 07-01-2011, 10:40 PM
#14
Cruising

Member Since: Feb 2010
Location: Va Beach VA
Posts: 12
Likes: 0
Received 0 Likes
on
0 Posts
Just posted a plea for some help doing this on my 64 rear. I have 66ish trailing arms with disk brakes now. Obviously I have to get the disk pulled off but once that's off, are the studs accessible without tearing into the whole hub?
Thanks so much,
DW
Thanks so much,
DW
07-02-2011, 12:02 AM
#15
Tech Contributor
Member Since: Oct 1999
Location: Charlotte, NC (formerly Endicott, NY)
Posts: 40,078
Received 8,919 Likes
on
5,328 Posts

To get a stud out I use a BFH. One no more than three good swats on the end of the stud will pop it out of the flange. To pull the stud back through I went to an auto parts store and bought a lug nut that didn't have a flange where the tapered end runs into nut portion. That way all I had to do was put a washer over the stud followed by installing the nut on the stud with the tapered end facing me and then run my 19 mm socket on it with the air wrench. The air wrench turning the nut did a great job of pulling the stud into the flange and seating it. No fuss no muss and only one very cheap special tool. It cost me more in gas money to go the 5 miles to the store and back than the lug nut cost.
Bill
Bill
07-03-2011, 07:48 AM
#17
Tech Contributor
If my memory serves the c5 rear studs are a lot harder, you have to either drill a hole in the backing plate of the parking brake to get the stud out or take the axle and hub off.
Maybe the c6 is different, so OP, please chime in when you get it done!
I used to get a lot of stripped studs until I stopped using my impact wrench on the lugs. I change tires a lot to go racing. The hammering of the impact screws up the threads after a while. Now that I use a breaker bar and a torque wrench, and only use the impact to zing on and off the loose nuts, I haven't screwed up a stud in years.
Good thread.

