
###FS, GM painted 'machine silver' console and cluster surround, (PICS), 2005-2007...
 06-19-2011, 09:09 PM
#21
Instructor

Member Since: Apr 2008
Location: CT & VA & DC
Posts: 101
Likes: 0
Received 0 Likes
on
0 Posts
I used these instructions and it was pretty straight forward to remove my center console to install my PAC and after market stereo.
Here are the instructions to remove center console:
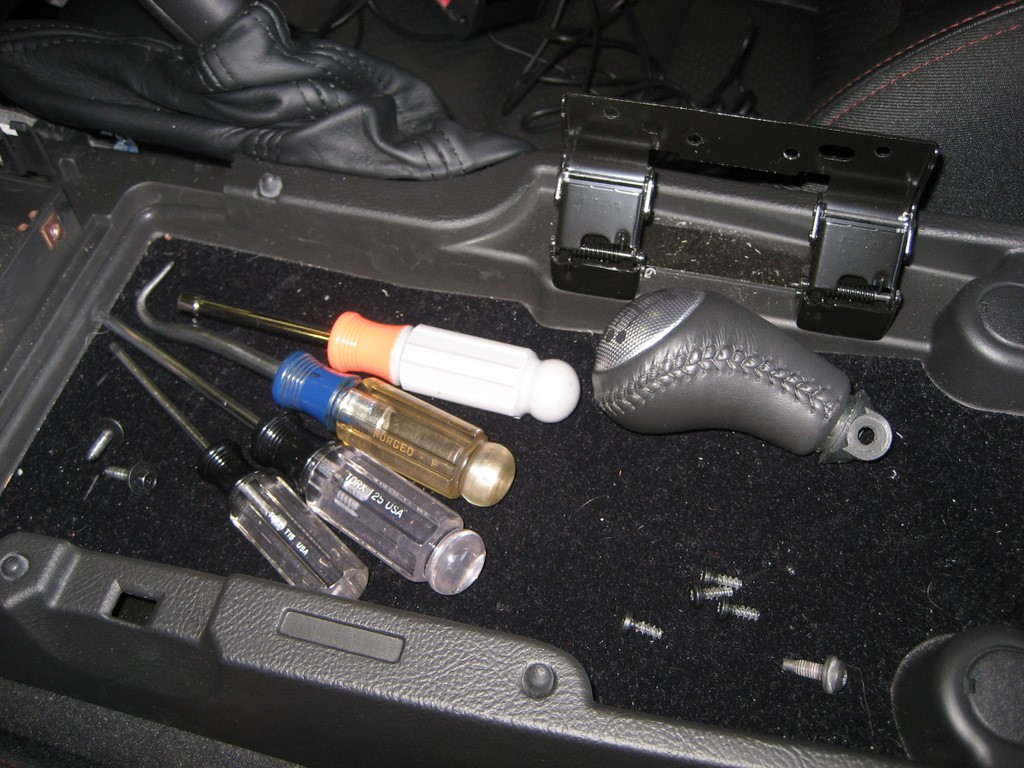
First use the T15 Torx driver to remove the four screws shown above to allow the console lid to be removed. Use the T25 Torx driver to remove the shifter **** (if you have a manual transmission). If you have an A6, you do not need to remove the shift lever, but you must move the shifter out of PARK toward the rear of the car. Press the Ignition Switch to Accessory to move it and you get to listen to the dinging for a while. As a caution, if you are not on level ground, chock the wheels or set the ebrake.
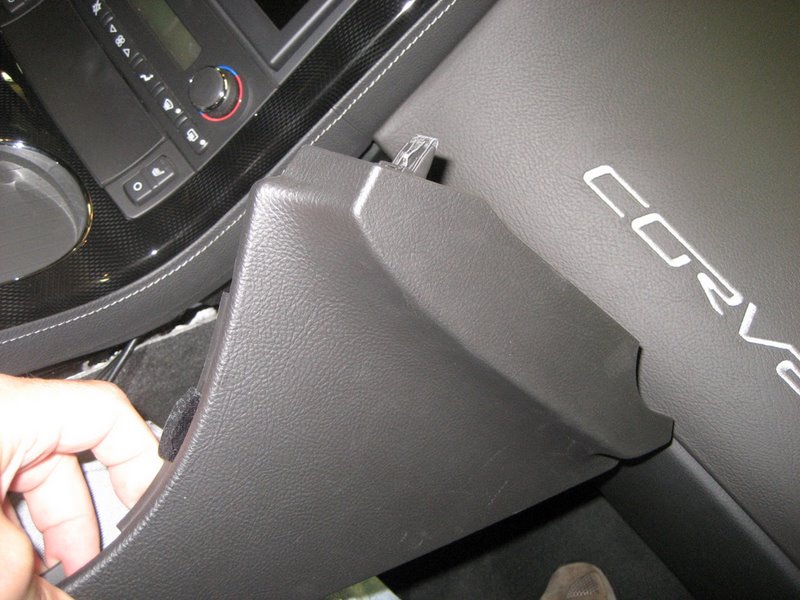
Use the 7mm nut driver to remove the two 7mm screws from the right side of the console - these are accessible by lifting up on the e-brake boot on the right. When you remove these two screws, you can then remove the right console trim plate by pulling down at the rear.
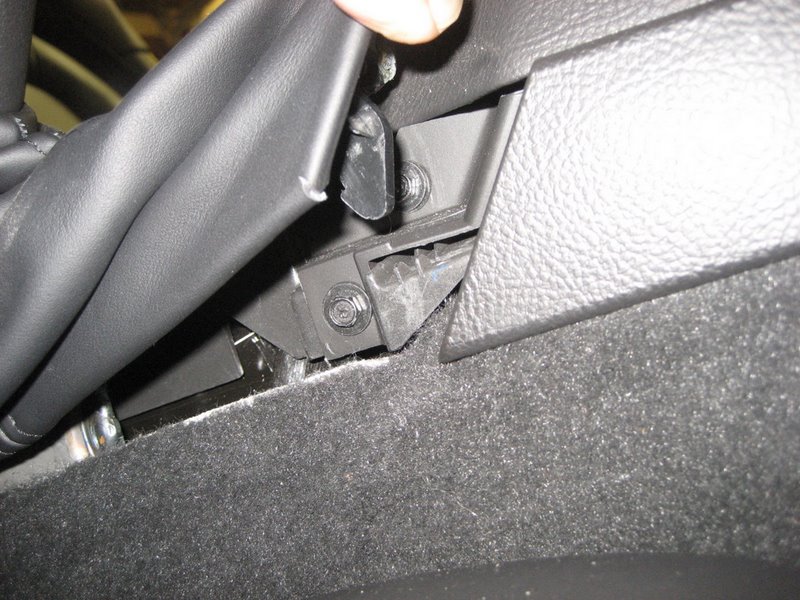
Next remove the two 7mm screws at the rear of the center console.
Lift up on the rear of the center console and it will come loose from the dash. Pull the shift lever back to allow the console to clear the shift lever (manual or automatic). At this point the only thing preventing removal of the console is the wiring. This is the tricky part. First pull the connector at the hazard warning switch near the top. Then pull the seat heater switch connectors (if you have them). Finally, pull the connector at the traction control switch - on this one, you lift a retaining tab rather than push the tab. The hardest connector to pull, if you haven't done it before, is the power plug (cigarette lighter) connectors. On these you must push a tab to release the connector - sometimes the tab is at the top, sometimes at the bottom.
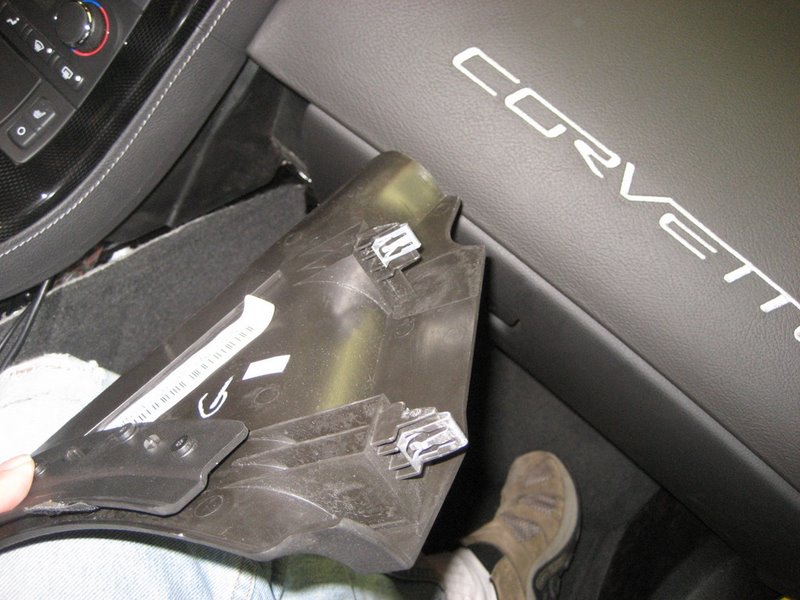
With the console removed, here is what it looks like:
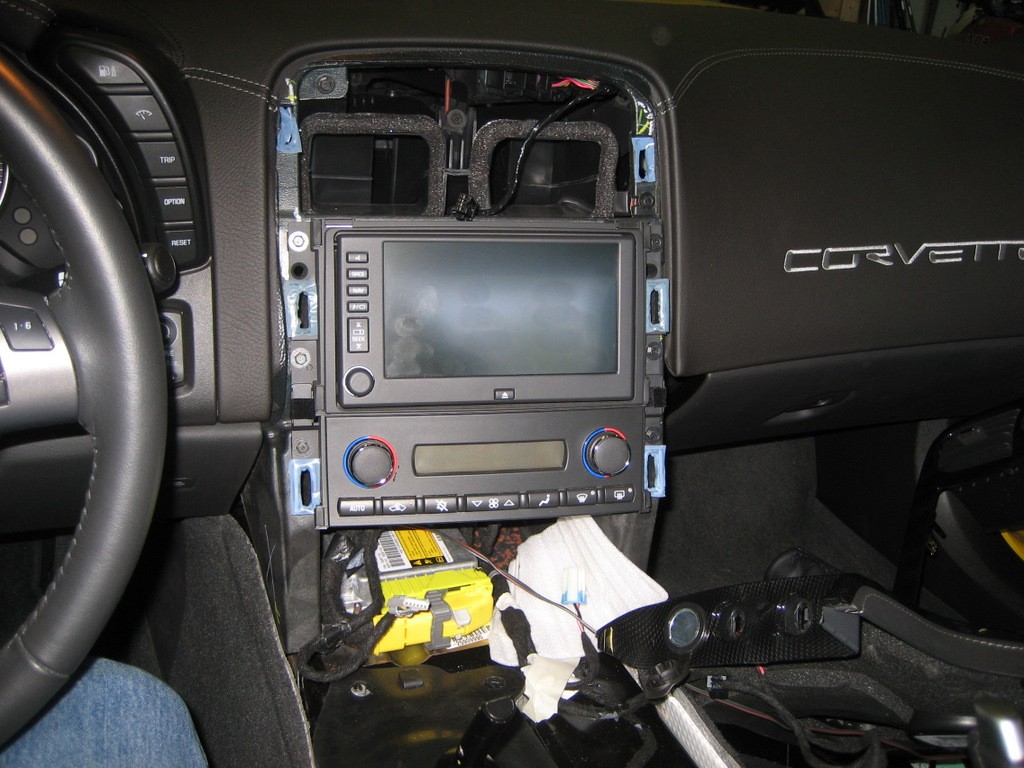
This may look daunting, but it is quite easy to pull the console once the connectors are removed.

for more installation manuals use this link :
http://www.kawal.net/vettemods.htm
Enjoy
Here are the instructions to remove center console:
First use the T15 Torx driver to remove the four screws shown above to allow the console lid to be removed. Use the T25 Torx driver to remove the shifter **** (if you have a manual transmission). If you have an A6, you do not need to remove the shift lever, but you must move the shifter out of PARK toward the rear of the car. Press the Ignition Switch to Accessory to move it and you get to listen to the dinging for a while. As a caution, if you are not on level ground, chock the wheels or set the ebrake.
Use the 7mm nut driver to remove the two 7mm screws from the right side of the console - these are accessible by lifting up on the e-brake boot on the right. When you remove these two screws, you can then remove the right console trim plate by pulling down at the rear.
Next remove the two 7mm screws at the rear of the center console.
Lift up on the rear of the center console and it will come loose from the dash. Pull the shift lever back to allow the console to clear the shift lever (manual or automatic). At this point the only thing preventing removal of the console is the wiring. This is the tricky part. First pull the connector at the hazard warning switch near the top. Then pull the seat heater switch connectors (if you have them). Finally, pull the connector at the traction control switch - on this one, you lift a retaining tab rather than push the tab. The hardest connector to pull, if you haven't done it before, is the power plug (cigarette lighter) connectors. On these you must push a tab to release the connector - sometimes the tab is at the top, sometimes at the bottom.
With the console removed, here is what it looks like:
This may look daunting, but it is quite easy to pull the console once the connectors are removed.
for more installation manuals use this link :
http://www.kawal.net/vettemods.htm
Enjoy
Last edited by RaHeEb; 06-19-2011 at 09:11 PM.
 06-27-2011, 04:23 PM
#22
2nd Gear

Member Since: Jan 2011
Posts: 2
Likes: 0
Received 0 Likes
on
0 Posts


 07-26-2011, 07:21 PM
#26
Drifting

07-27-2011, 12:06 AM
#27
Intermediate
Member Since: Apr 2009
Location: Wellington Florida
Posts: 41
Likes: 0
Received 0 Likes
on
0 Posts
Need to move these out; would like to buy another lift for the shop
They are GM units painted by GM in GM OEM boxes
List on these is over $400, you won't find them for less than 360 anywhere else
Thanks for looking, and of course, please call or pm with any questions
Orlando FL or CT? I'll install for FREE
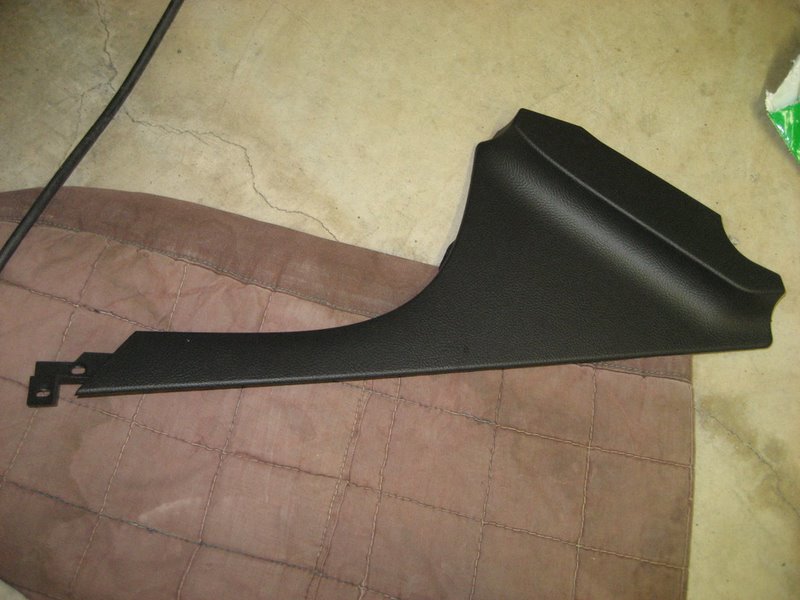
NOTE: F55 or 2006/7 without AIRBAG light? note the teardrop can be removed, you will retain your stock piece
NOTE: Gloss? yes just like the outside of your car, I can send more pics
[B]
PRICING: $220, shipping via Fedex will be about $30
They are GM units painted by GM in GM OEM boxes
List on these is over $400, you won't find them for less than 360 anywhere else
Thanks for looking, and of course, please call or pm with any questions
Orlando FL or CT? I'll install for FREE
NOTE: F55 or 2006/7 without AIRBAG light? note the teardrop can be removed, you will retain your stock piece
NOTE: Gloss? yes just like the outside of your car, I can send more pics
[B]
PRICING: $220, shipping via Fedex will be about $30

 03-09-2012, 11:44 AM
#30
Intermediate

Member Since: Jun 2010
Location: MA
Posts: 40
Likes: 0
Received 0 Likes
on
0 Posts


