
[Z06] LS7 Wiggle Test DIY
 06-22-2014, 01:21 AM
#1
Supporting Vendor
Thread Starter
Member Since: Sep 2013
Location: Harbor City California
Posts: 2,819
Received 1,015 Likes
on
534 Posts

We get several email/pm a month in regards to the procedure for conducting a "wiggle test" on a C6z06 corvette. Bellow is a brief DIY for the "wiggle test".
You will need a few specific tools for the job.
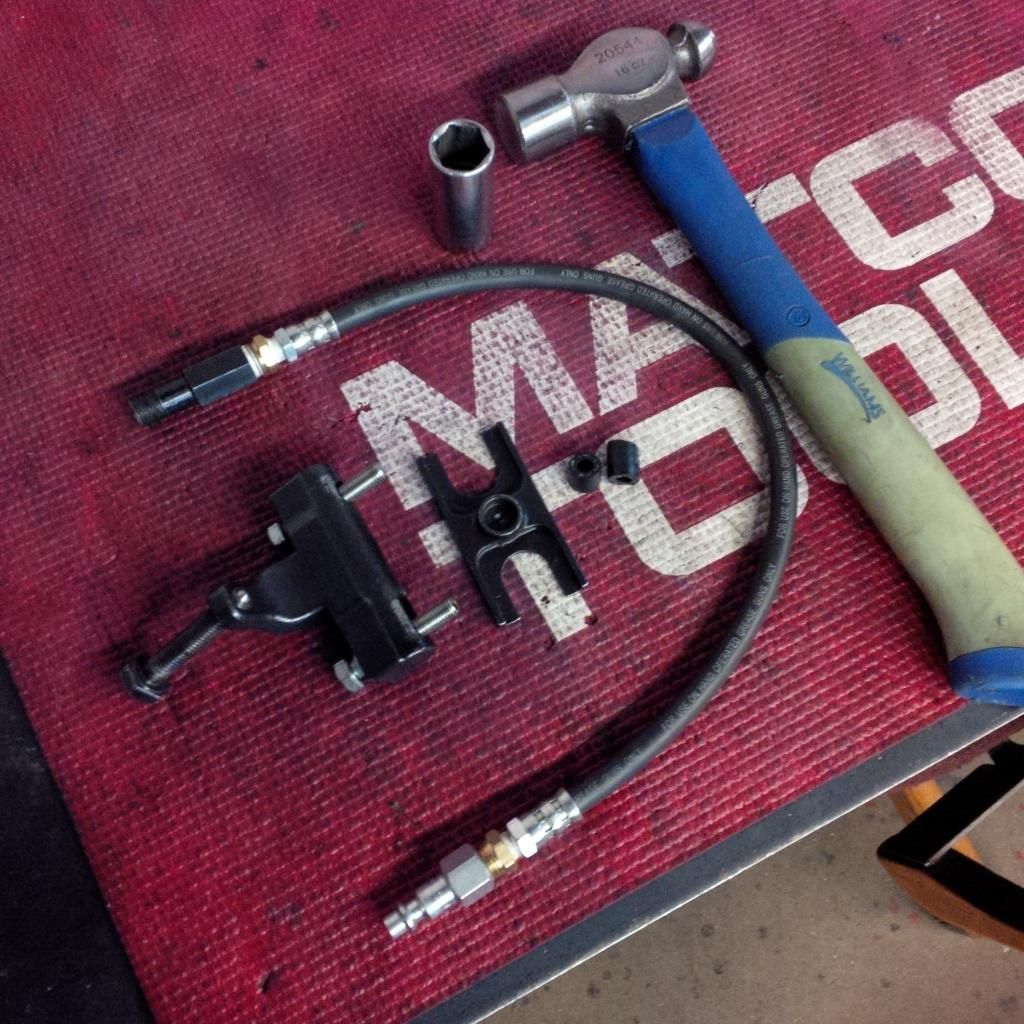
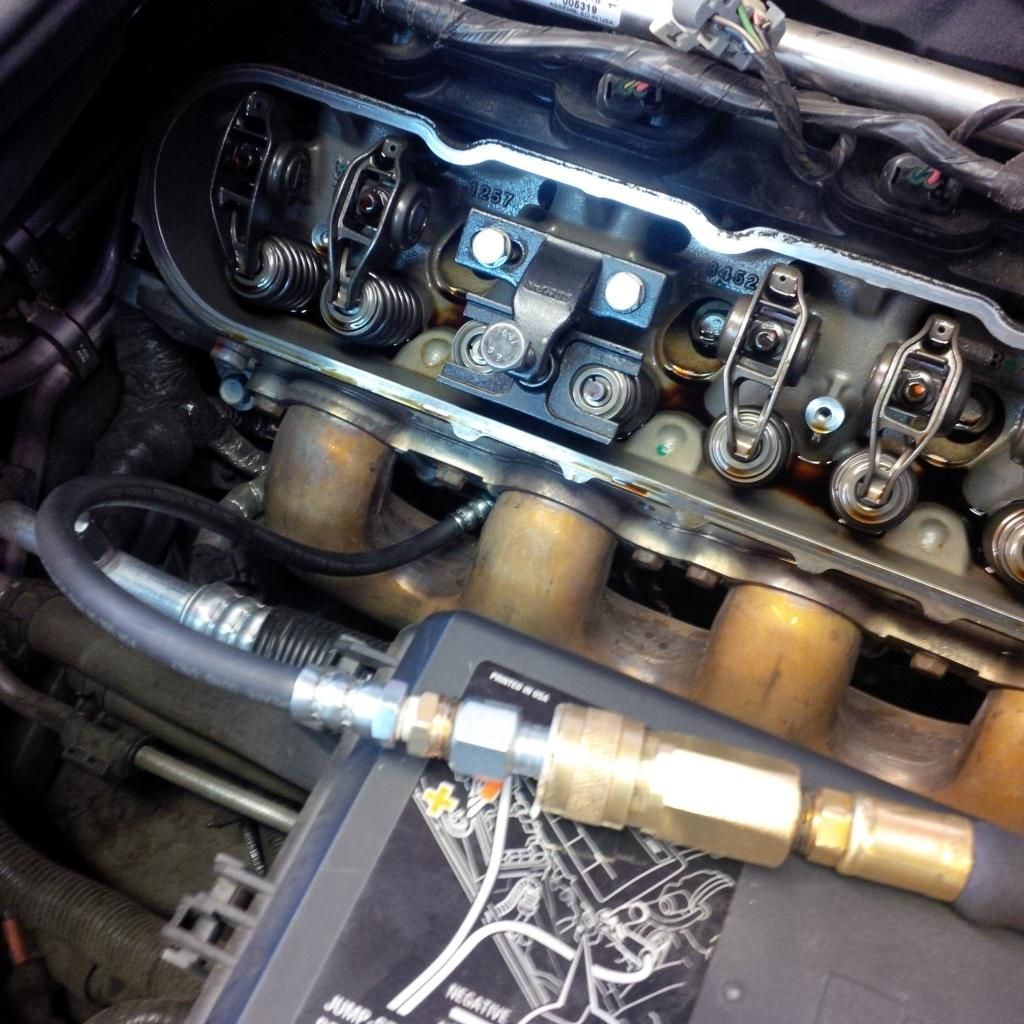
Comp Cams spring tool, air hose for holding that screws into the spark plug holes (available from a sponsor here on the forum), hammer and socket (3/4) works well (for taping the retainers to free up the stuck locks, PIC:
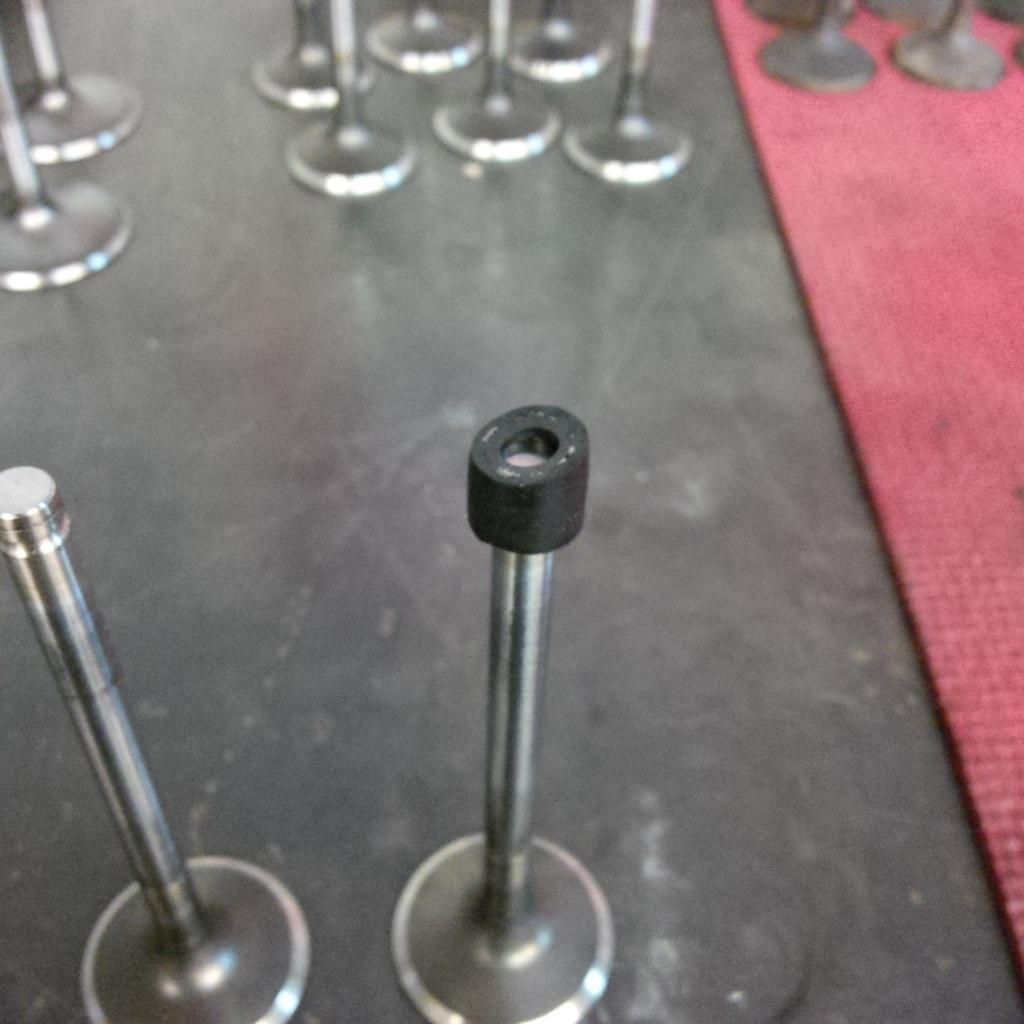
You will also need to cut two small pieces of rubber hose to use as keepers for your valves during the test (this way you can disconnect you air supply and not have the valve fall into the cylinder)
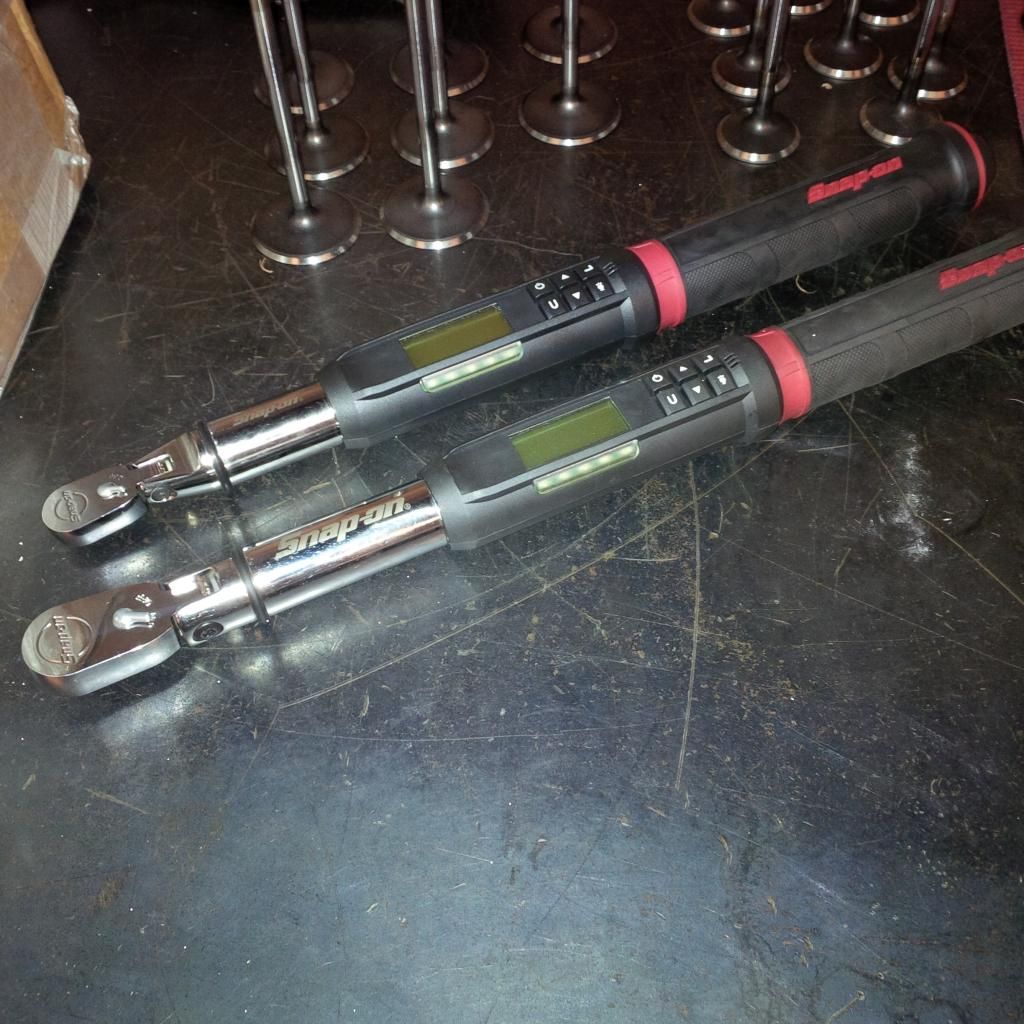
You will also need 2 torque wrenches (one ft lbs tq wrench and one inch lbs tq wrench)
Ok So time to start. First put the vehicle in Neutral then prep your work area, safety first (the vehicle and the paints safety that is)
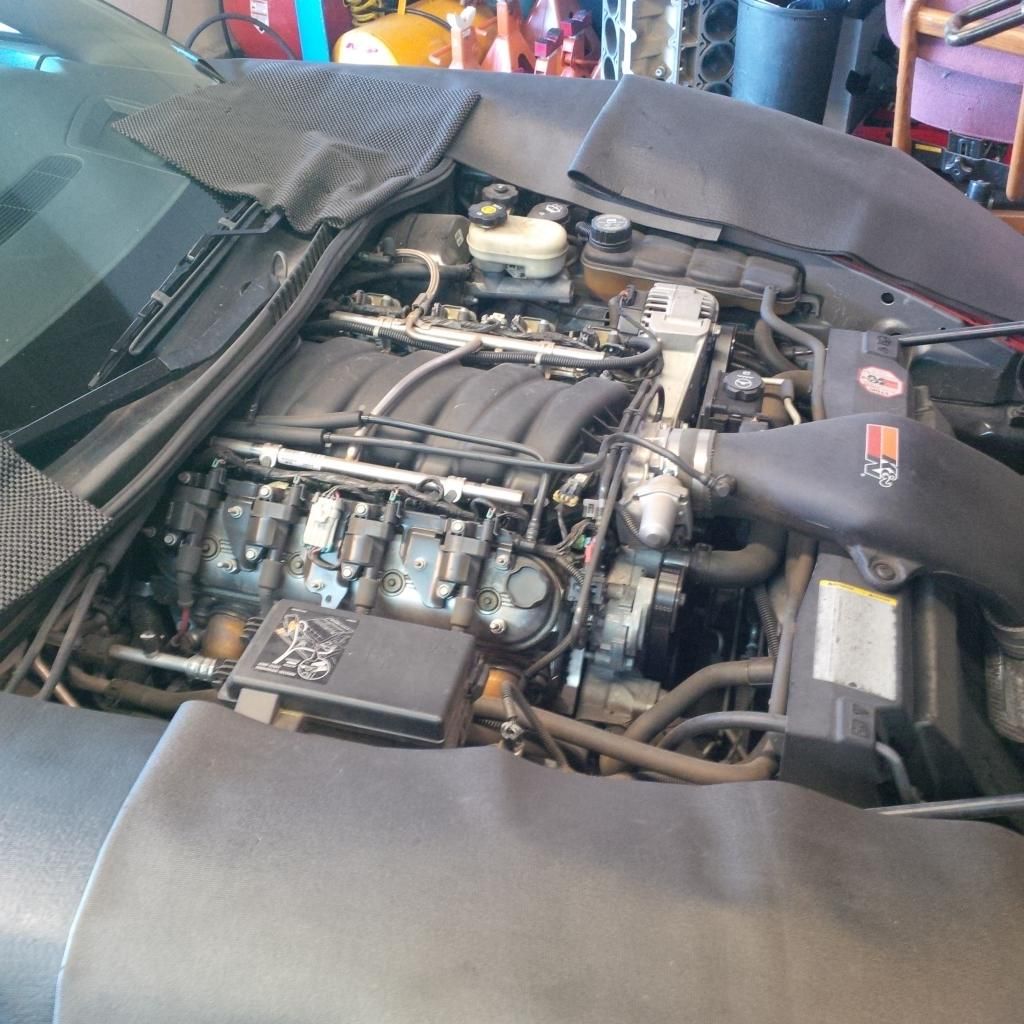
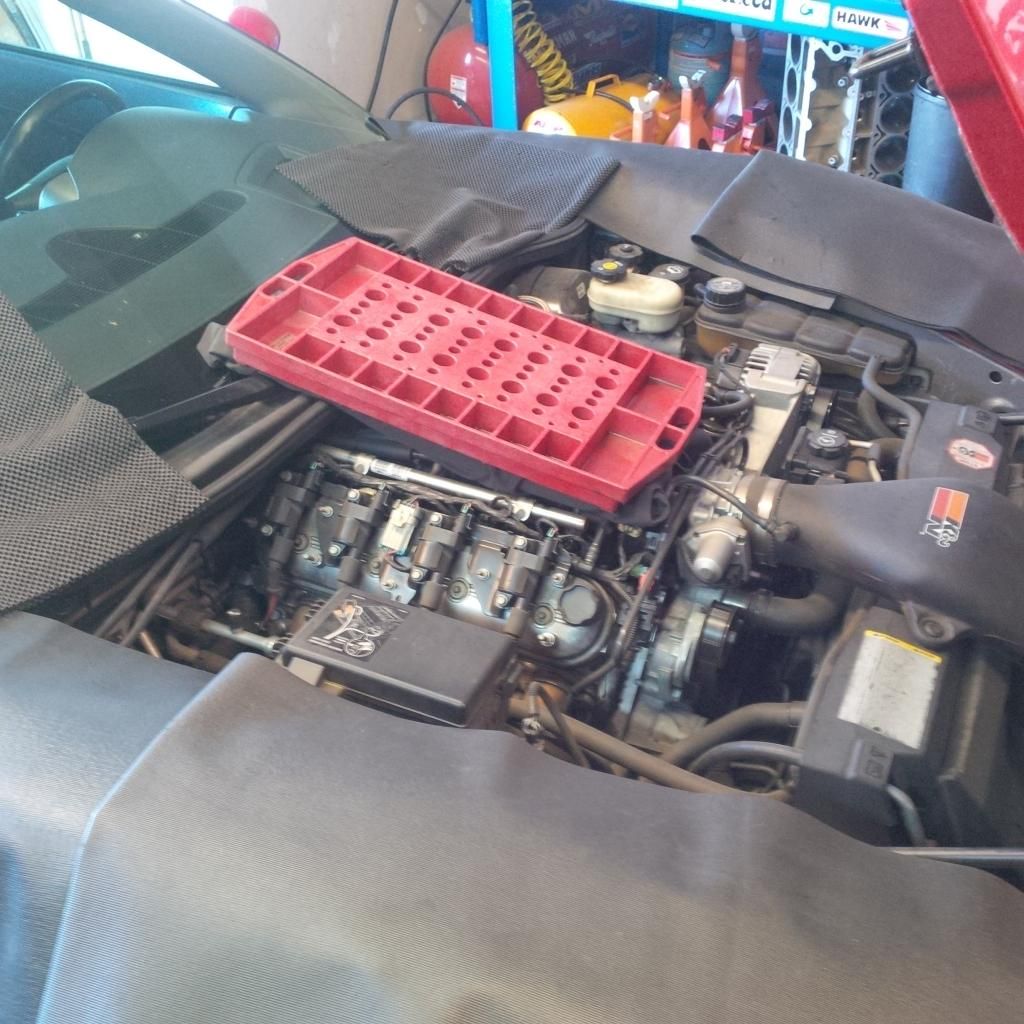
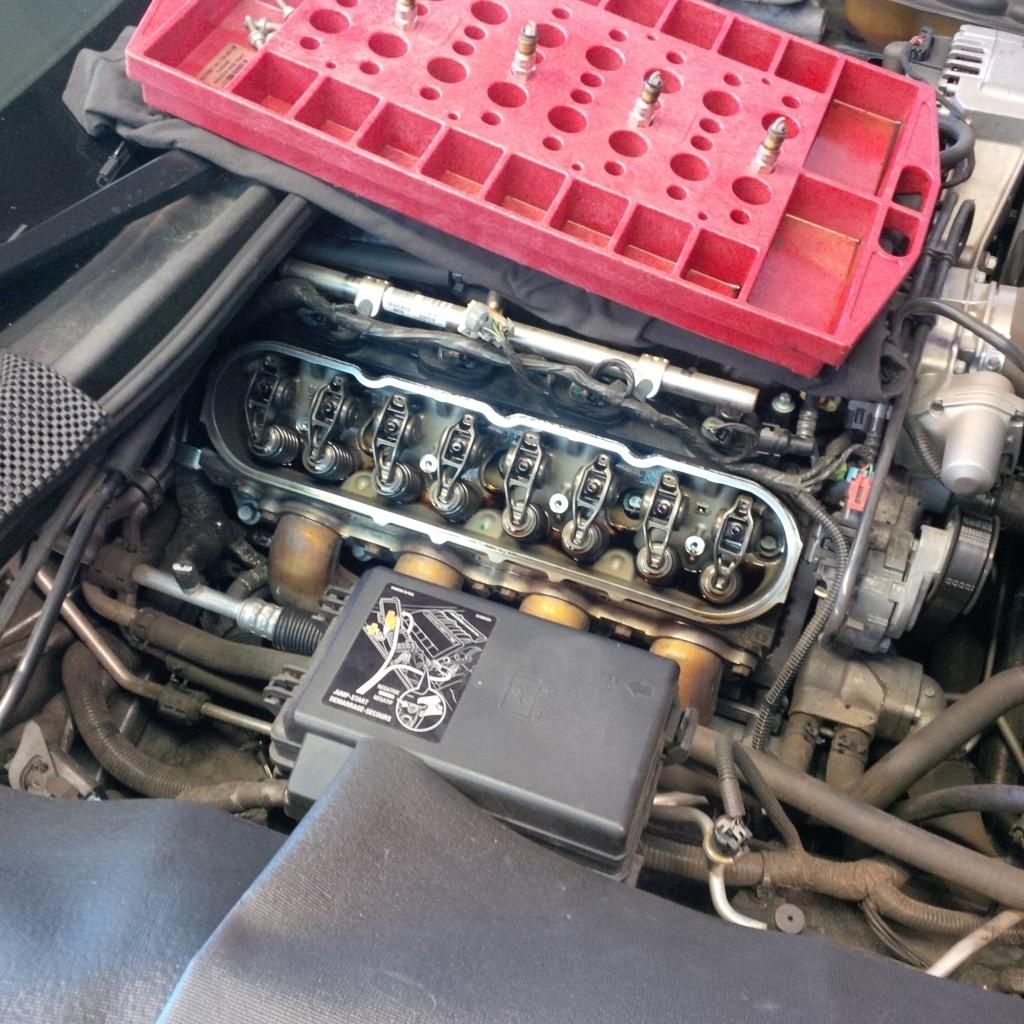
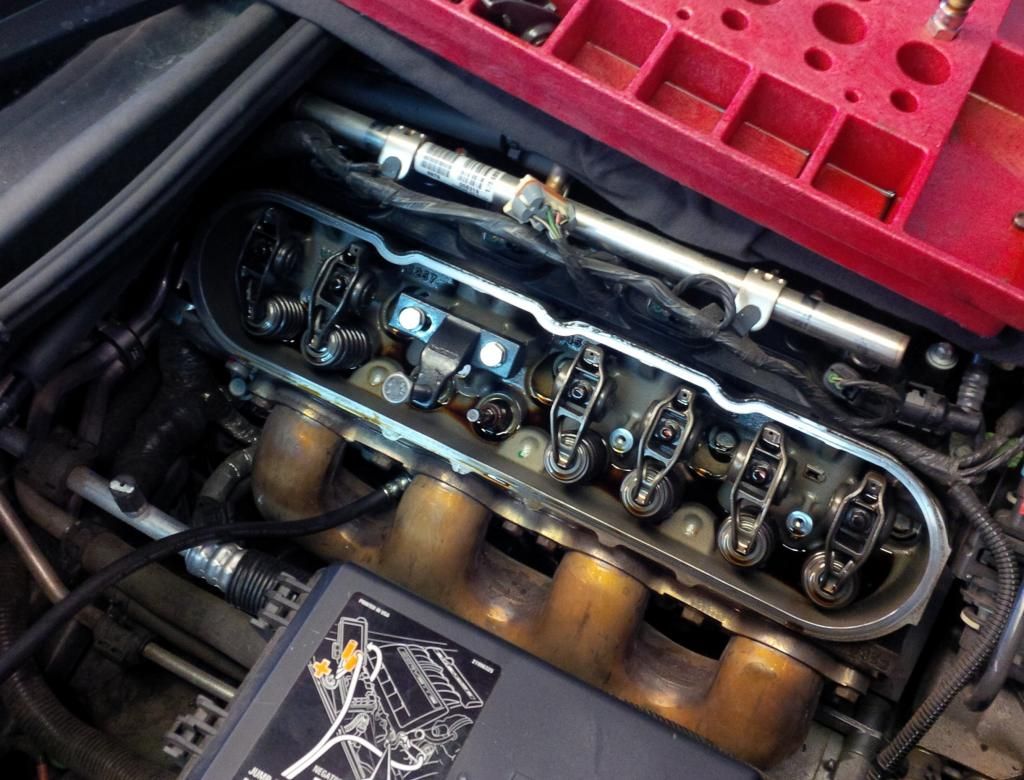
We require the use of a tray to keep everything organized (you can cut up a box if you don't have a valve train organizer)
Start by removing the plastic engine covers then remove the spark plug wires. Slide the wire off the coil first then wiggle the wire off the plug, do not pull on the wire just wiggle and pull slightly on the rubber boot (leave the metal alone). Also disconnect the coil pack from the wiring harness (big cream colored connector on the coil pack rail)
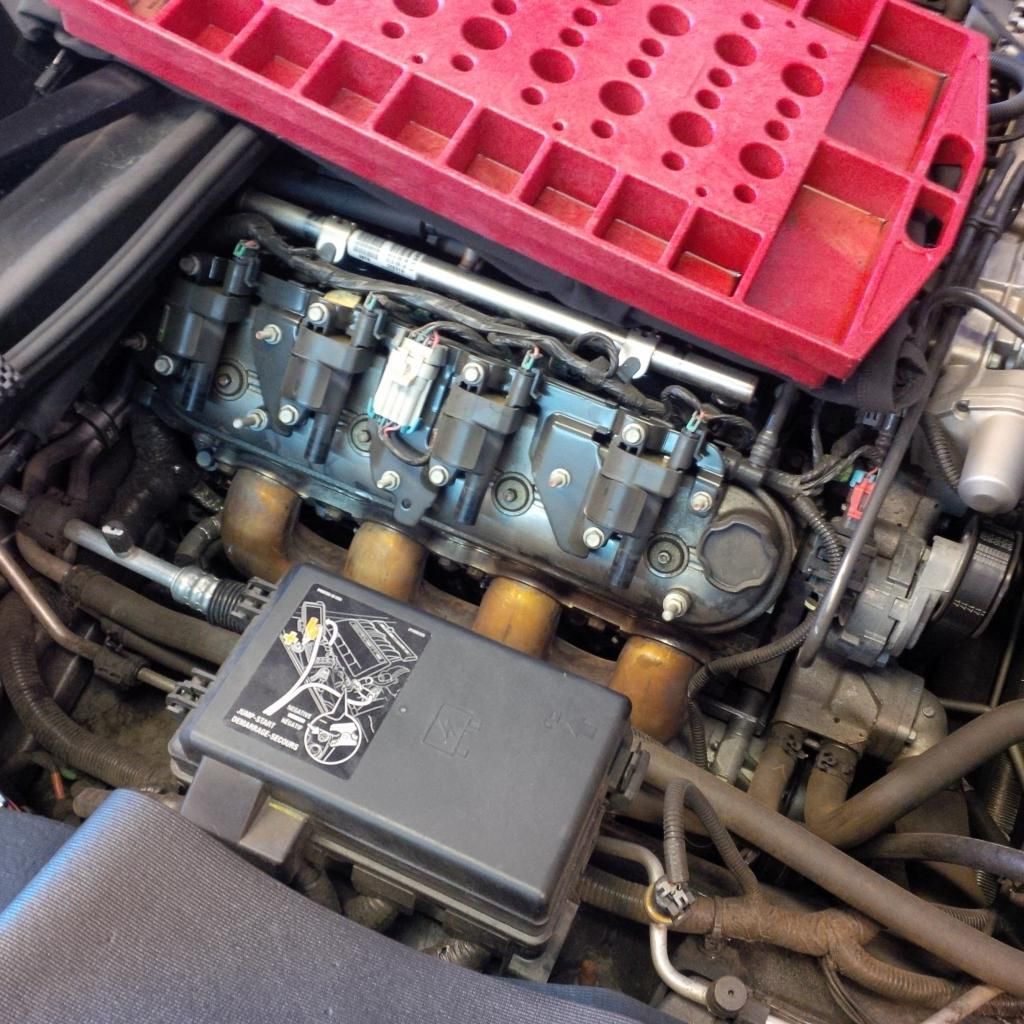
Use a 10mm med or deep socket to remove the 5 bolts holding the coil pack to the valve cover. Once the coil pack is off remove the hose at the front of the valve cover (use a pick tool or small screw driver and slid the secure tab out of the way and gently pull the hose off the valve cover).
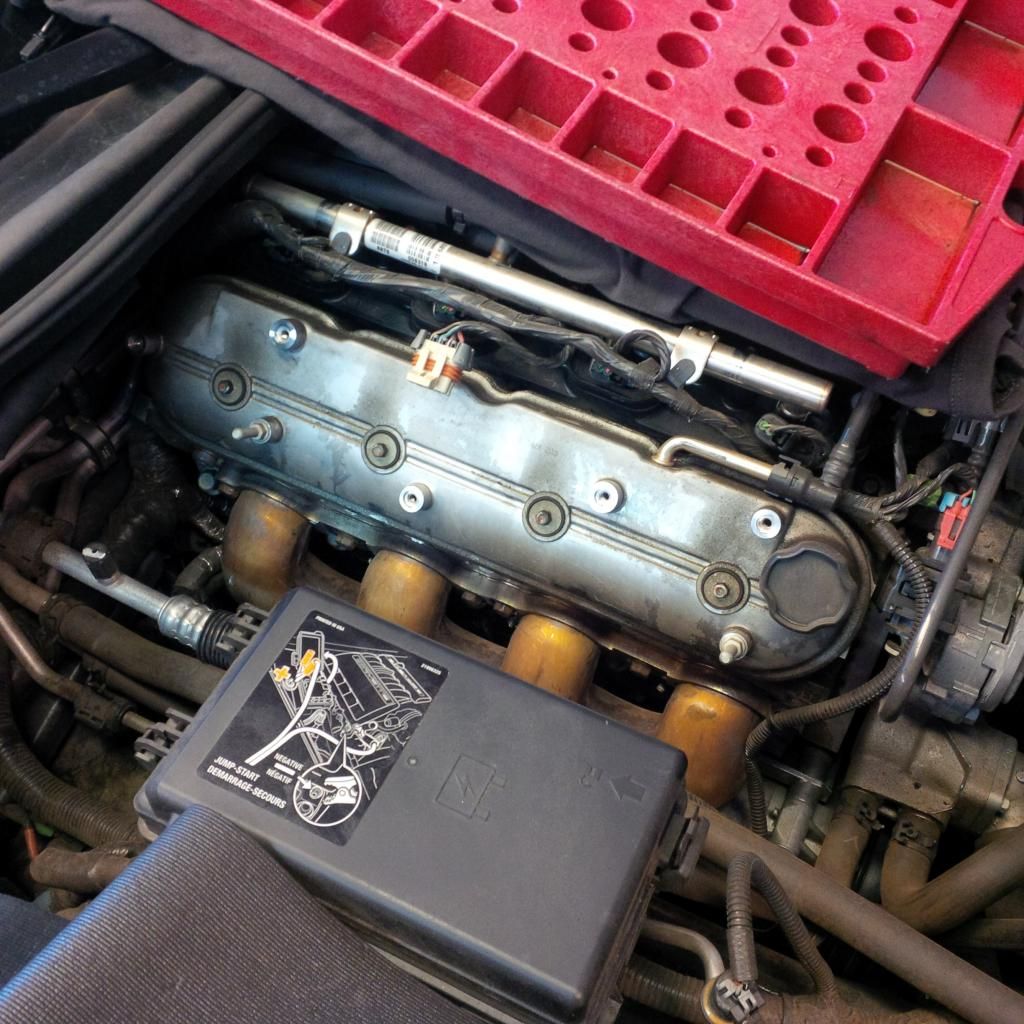
Use a 8mm socket and remove the 4 bolts holding the valve cover to the cylinder head. Also remove the spark plugs at this time.
At this time insert your air hose tool into the spark plug hole of the cylinder you will be testing first. You will connect this hose to the shop air or compressor to keep the valves from depressing into the cylinder while removing the springs
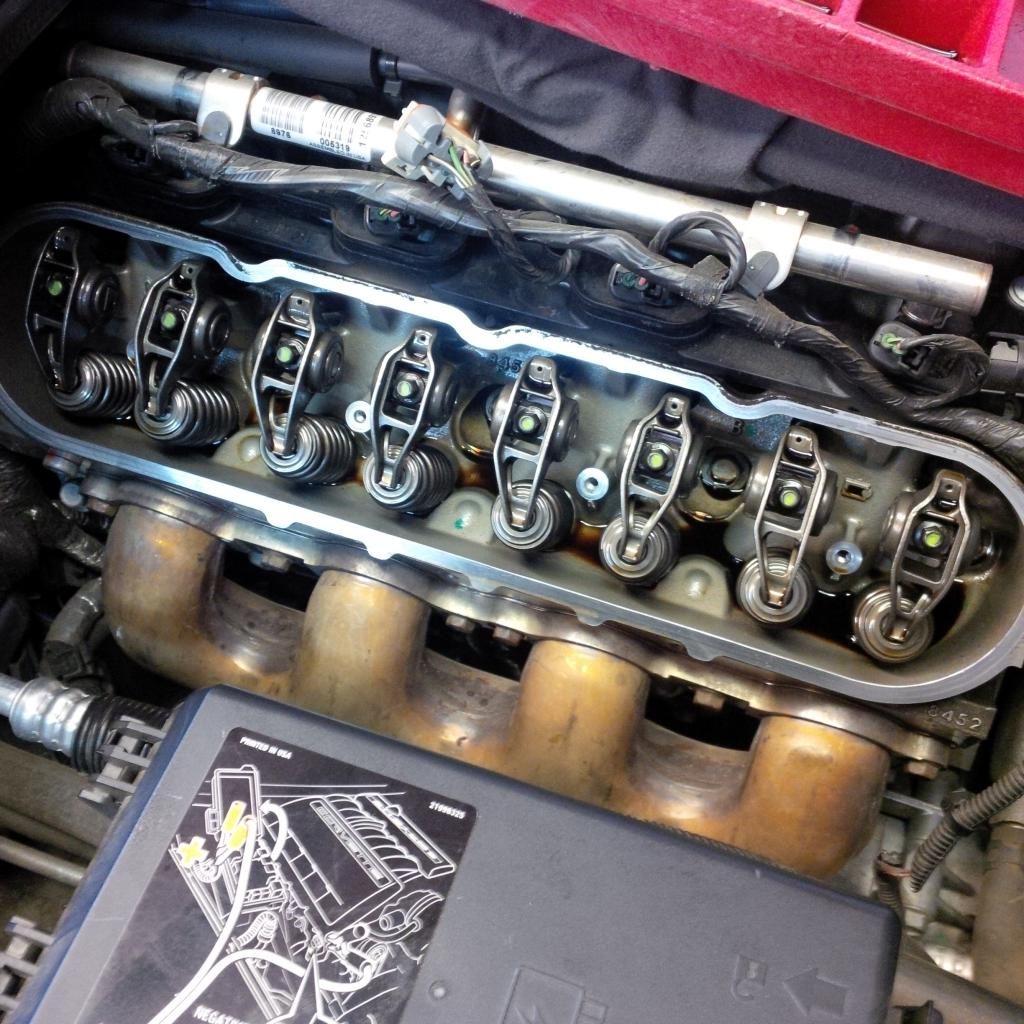
Remove the Rocker arms and pushrods (keep them organized and keep the lifter side to lifter side/rocker side to rocker side)
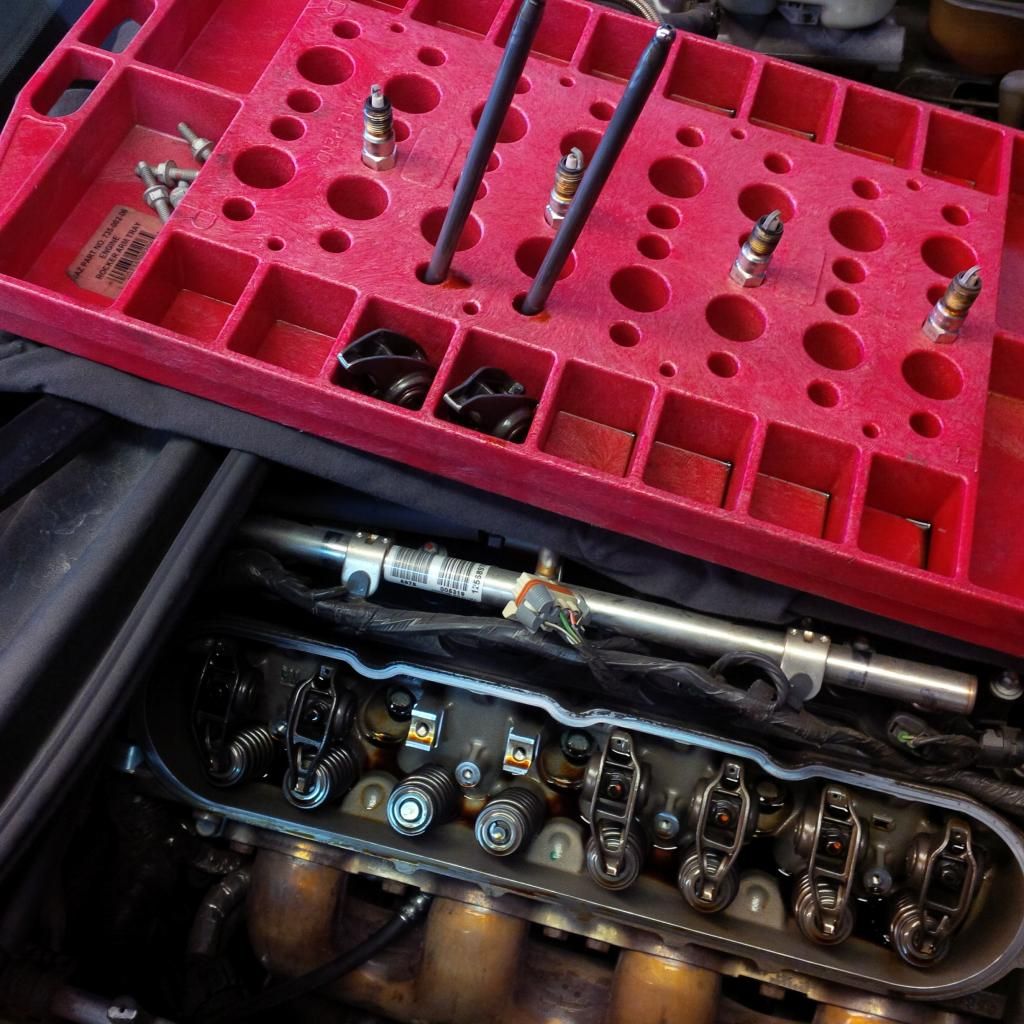
Use a pen magnet to remove the intake valve lash caps (a bigger magnet works best and they just pull strait up and off)
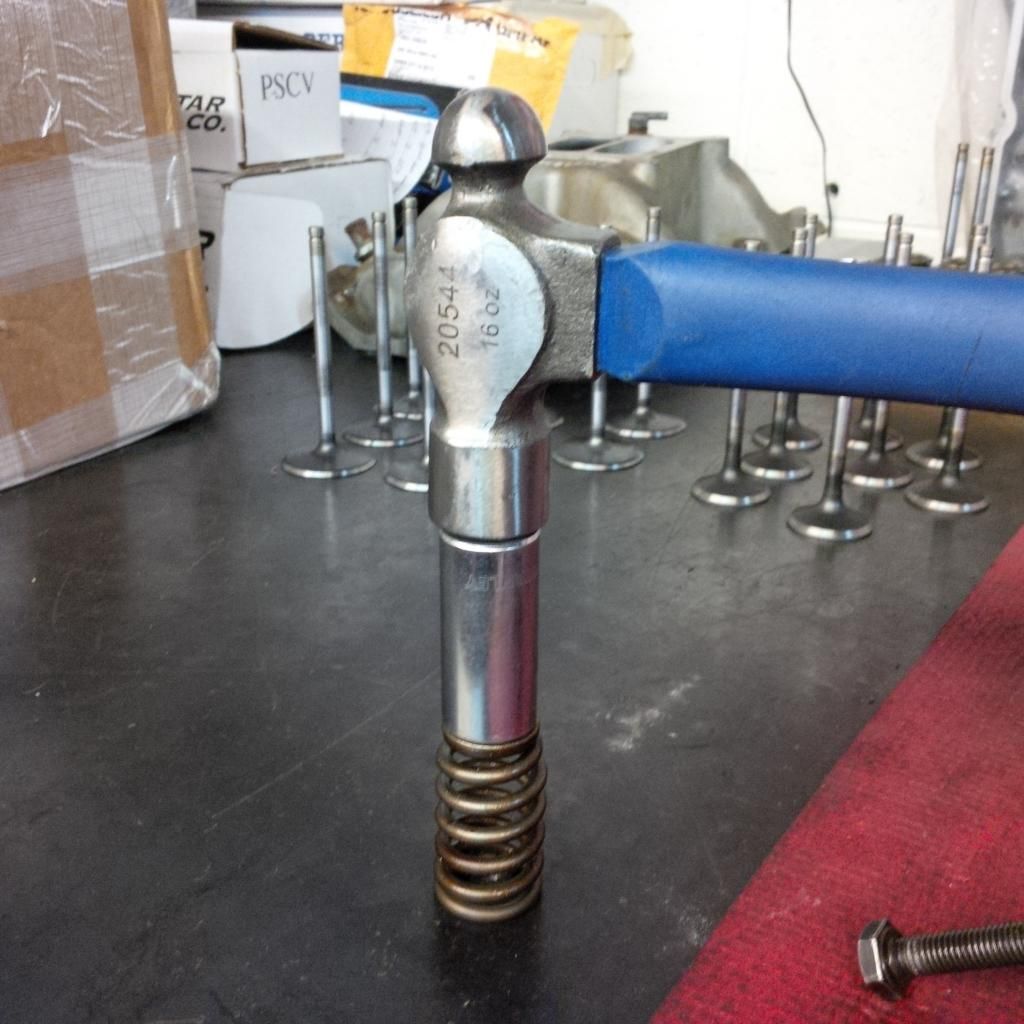
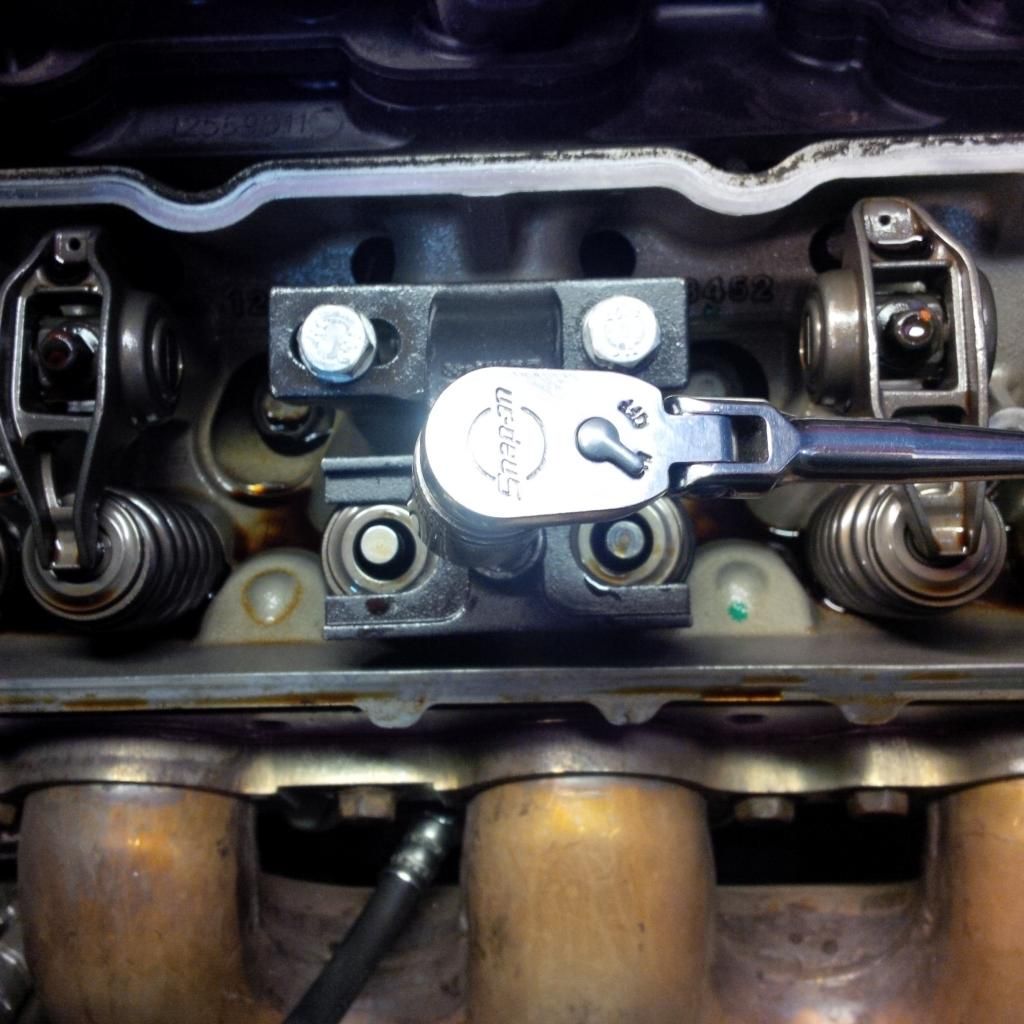
At this point pressurize the chamber with shop air (connect your air hose to your shop air/compressor, 90-100 psi works fine). You will hear the engine push the piston down to the bottom of its stroke. At this point disconnect you shop air (the cylinder will de pressurize). Now take your 3/4 inch socket and hammer and tap each retainer lightly (pic at beginning of thread). This will free the stuck retainers and allow you to compress the springs without the valve opening.
Reconnect your shop air and install your Comp Cams LS7 valve spring removal tool.
Compress the springs till the locks are free from the valve. Be careful not to let the locks pop out of the retainers. Compress the springs just enough to remove the locks with a pen magnet
Once you remove the locks you can turn your Comp Cams spring removal tool counter clockwise to release the spring pressure and remove the springs. Keep the springs organized so they say with the same valve when they go back in.
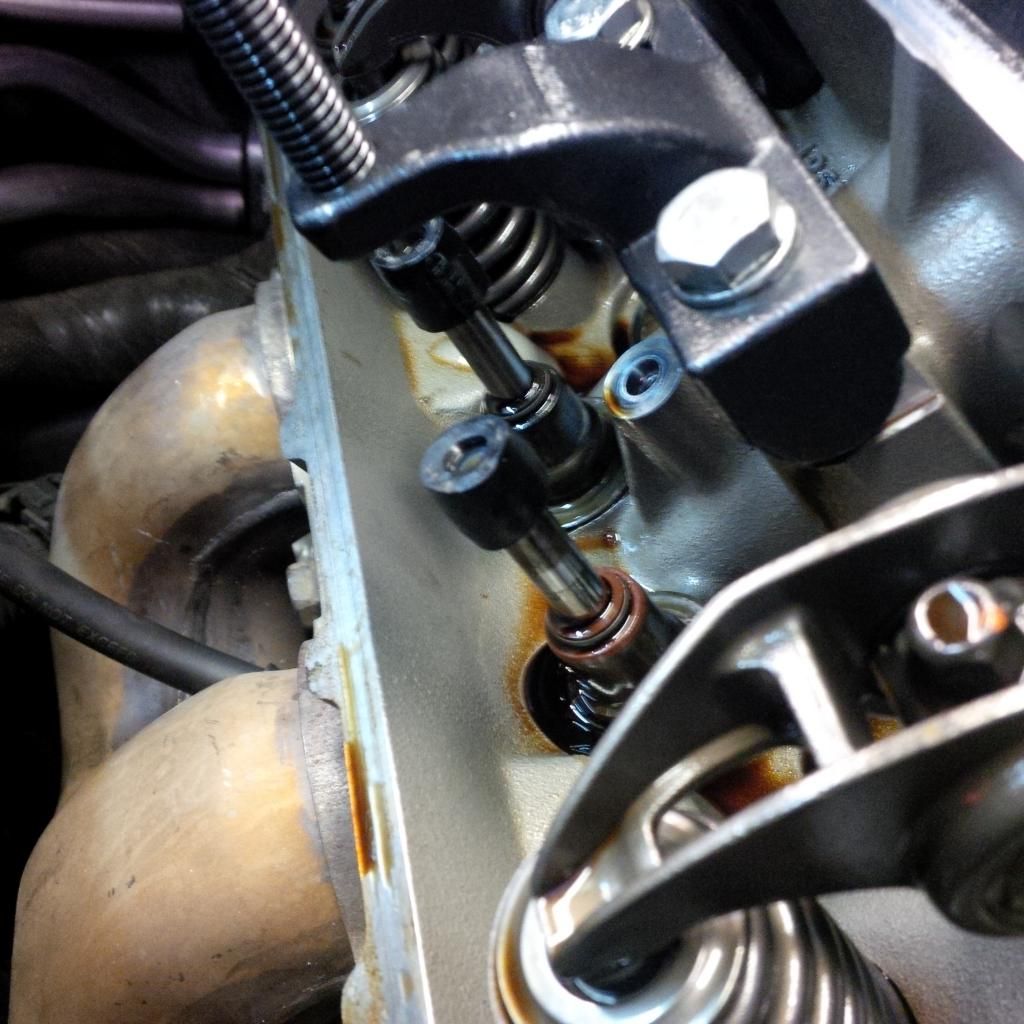
Install your rubber hose valve keepers. Once the rubber hose keepers are installed on each valve you can remove the shop air from your cylinder air hose (the chamber will depressurize).
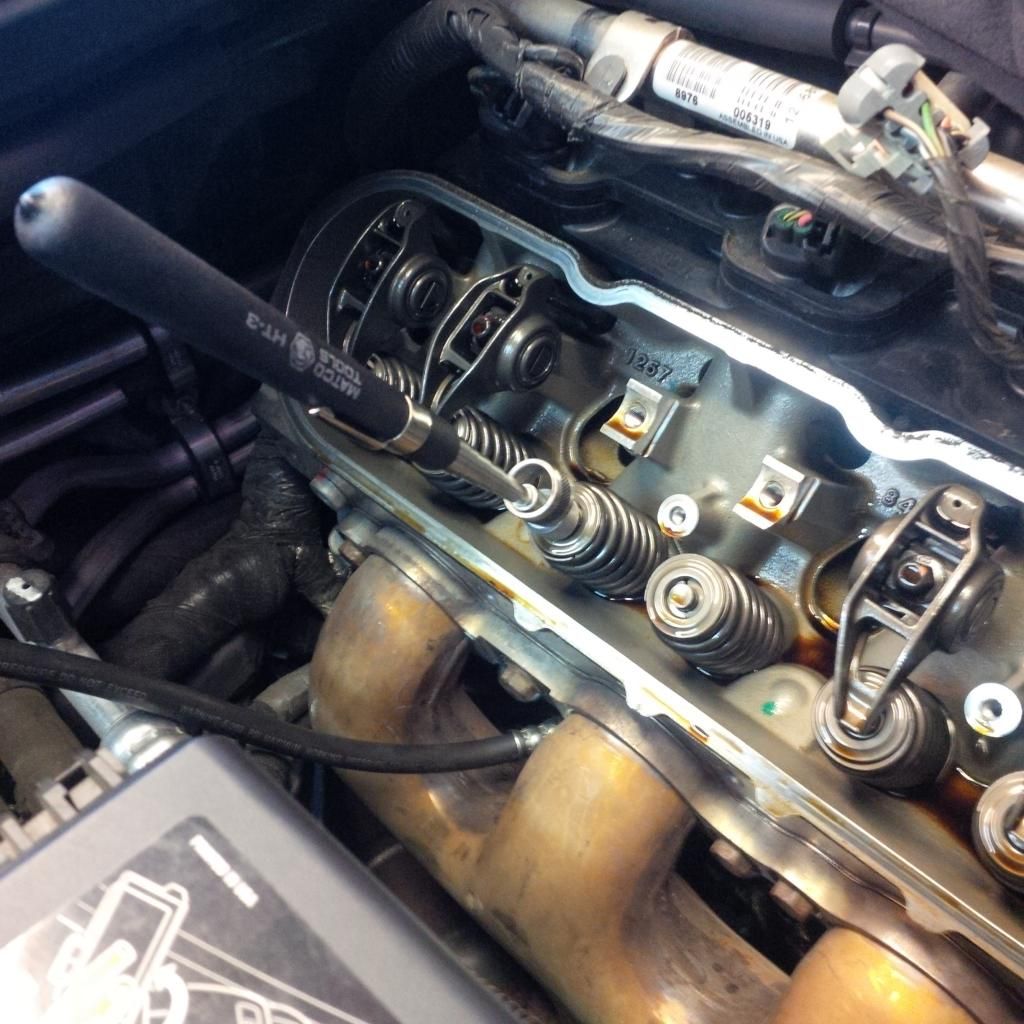
Assemble your dial indicator and stand. You can use regual dial indicator stand but it's challenging. I prefer to use my Matco snake style stand with vice grip base. You can get these from your local Matco or SnapOn Rep. If you don't have one of those around you can order one online, even some of the tool discount stores such as harbor freight have version that will serve you fine for this test.
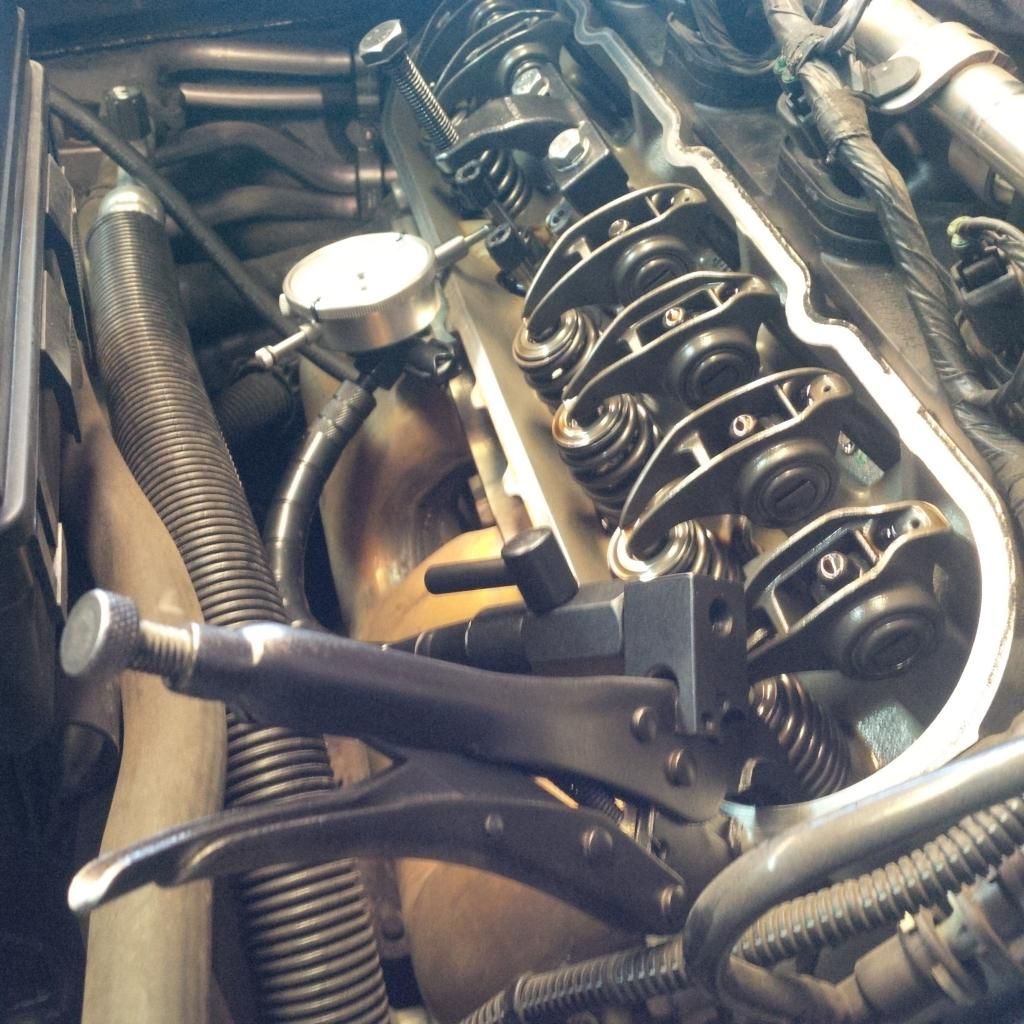
For the test itself you will wiggle the valve from side to side and observe the movement on your dial indicator. I try to position the dial indicator tip so its just above the guide (as low as possible). Then open the valve to your max lift (roughly 1/2 inch) and "wiggle" it around. Observe the readings on the dial indicator and record your findings.
Remove your dial indicator and stand. Close the valves (pull them up so they are resting in the seats. Connect your shop air to your cylinder air hose (pressurizing the cylinder). Remove your rubber hose valve keepers and reinstall your springs.
Disconnect your shop air from your cylinder air hose then remove you cylinder air hose from the spark plug hole. Remove your Comp Cams valve spring tool and reinstall your intake valve lash cap (it just presses on). Lube both ends of your pushrods with 30 weight oil and reinstall into there proper hole. Install your rocker arms finger tight. This is the part where you want to pay attention. If the rocker arm your tightening is not on base circle when you tighten it you run the risk of tightening the rocker arm crooked or off center. To avoid this tighten the rocker finger tight then physically center the rocker tip on the valve as you tighten. Then torque each rocker arm (22ft/lbs if using stock springs or 24 ft/lbs if using aftermarket springs) We like to paint mark our rocker arm bolts after torqueing (visual confirmation of torqueing)
At this time I like to squirt a little oil all over the rocker arms and valve springs.
Clean the valve cover matting surface and reinstall the valve covers (torque to 106 inch/lbs in 2 steps working from the center out).
Reinstall your hose to the front of the valve cover (it just clicks in).
Before you put on the coil packs reinstall your spark plugs and torque to (10-14 ft/lbs if using new plugs or 7 ft/lbs if reusing your plugs). Also install the spark plug wires onto the spark plugs at this time.
Next install your coil packs. Press your spark plug wires into the coils (you will hear the clicking/crunching that says there in there). Plug in your coil pack wiring harness connector and reinstall your engine cover/s.
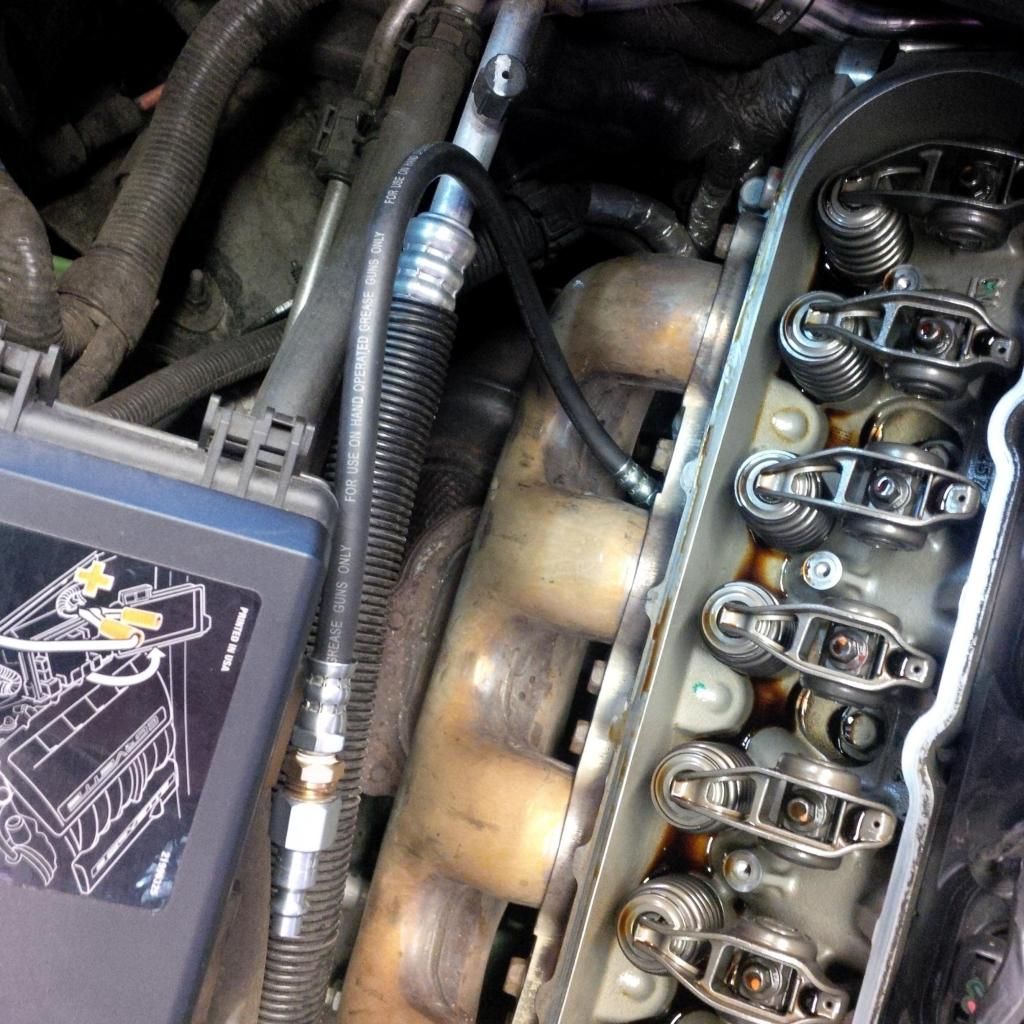
The Driver side is the same except, you will have to work around the alternator and fuel line. If you find it easier you can remove the alternator and fuel line to conduct the testing on the driver side. We usually work around the alternator and fuel line. Disconnect the battery before removing the power wire form the back of the alternator.
If you have any questions please feel free to PM us or shoot us an email via our website and don't forget to share your results here on the forum in either the "in spec" or "out of spec" valve guide registry's.
http://www.americanheritageperformance.com/Contact.html
310-326-2399
Thank You,
American Heritage Performance

You will need a few specific tools for the job.

Comp Cams spring tool, air hose for holding that screws into the spark plug holes (available from a sponsor here on the forum), hammer and socket (3/4) works well (for taping the retainers to free up the stuck locks, PIC:

You will also need to cut two small pieces of rubber hose to use as keepers for your valves during the test (this way you can disconnect you air supply and not have the valve fall into the cylinder)

You will also need 2 torque wrenches (one ft lbs tq wrench and one inch lbs tq wrench)

Ok So time to start. First put the vehicle in Neutral then prep your work area, safety first (the vehicle and the paints safety that is)

We require the use of a tray to keep everything organized (you can cut up a box if you don't have a valve train organizer)

Start by removing the plastic engine covers then remove the spark plug wires. Slide the wire off the coil first then wiggle the wire off the plug, do not pull on the wire just wiggle and pull slightly on the rubber boot (leave the metal alone). Also disconnect the coil pack from the wiring harness (big cream colored connector on the coil pack rail)

Use a 10mm med or deep socket to remove the 5 bolts holding the coil pack to the valve cover. Once the coil pack is off remove the hose at the front of the valve cover (use a pick tool or small screw driver and slid the secure tab out of the way and gently pull the hose off the valve cover).

Use a 8mm socket and remove the 4 bolts holding the valve cover to the cylinder head. Also remove the spark plugs at this time.

At this time insert your air hose tool into the spark plug hole of the cylinder you will be testing first. You will connect this hose to the shop air or compressor to keep the valves from depressing into the cylinder while removing the springs

Remove the Rocker arms and pushrods (keep them organized and keep the lifter side to lifter side/rocker side to rocker side)

Use a pen magnet to remove the intake valve lash caps (a bigger magnet works best and they just pull strait up and off)

At this point pressurize the chamber with shop air (connect your air hose to your shop air/compressor, 90-100 psi works fine). You will hear the engine push the piston down to the bottom of its stroke. At this point disconnect you shop air (the cylinder will de pressurize). Now take your 3/4 inch socket and hammer and tap each retainer lightly (pic at beginning of thread). This will free the stuck retainers and allow you to compress the springs without the valve opening.
Reconnect your shop air and install your Comp Cams LS7 valve spring removal tool.

Compress the springs till the locks are free from the valve. Be careful not to let the locks pop out of the retainers. Compress the springs just enough to remove the locks with a pen magnet

Once you remove the locks you can turn your Comp Cams spring removal tool counter clockwise to release the spring pressure and remove the springs. Keep the springs organized so they say with the same valve when they go back in.

Install your rubber hose valve keepers. Once the rubber hose keepers are installed on each valve you can remove the shop air from your cylinder air hose (the chamber will depressurize).

Assemble your dial indicator and stand. You can use regual dial indicator stand but it's challenging. I prefer to use my Matco snake style stand with vice grip base. You can get these from your local Matco or SnapOn Rep. If you don't have one of those around you can order one online, even some of the tool discount stores such as harbor freight have version that will serve you fine for this test.

For the test itself you will wiggle the valve from side to side and observe the movement on your dial indicator. I try to position the dial indicator tip so its just above the guide (as low as possible). Then open the valve to your max lift (roughly 1/2 inch) and "wiggle" it around. Observe the readings on the dial indicator and record your findings.
Remove your dial indicator and stand. Close the valves (pull them up so they are resting in the seats. Connect your shop air to your cylinder air hose (pressurizing the cylinder). Remove your rubber hose valve keepers and reinstall your springs.
Disconnect your shop air from your cylinder air hose then remove you cylinder air hose from the spark plug hole. Remove your Comp Cams valve spring tool and reinstall your intake valve lash cap (it just presses on). Lube both ends of your pushrods with 30 weight oil and reinstall into there proper hole. Install your rocker arms finger tight. This is the part where you want to pay attention. If the rocker arm your tightening is not on base circle when you tighten it you run the risk of tightening the rocker arm crooked or off center. To avoid this tighten the rocker finger tight then physically center the rocker tip on the valve as you tighten. Then torque each rocker arm (22ft/lbs if using stock springs or 24 ft/lbs if using aftermarket springs) We like to paint mark our rocker arm bolts after torqueing (visual confirmation of torqueing)

At this time I like to squirt a little oil all over the rocker arms and valve springs.
Clean the valve cover matting surface and reinstall the valve covers (torque to 106 inch/lbs in 2 steps working from the center out).
Reinstall your hose to the front of the valve cover (it just clicks in).
Before you put on the coil packs reinstall your spark plugs and torque to (10-14 ft/lbs if using new plugs or 7 ft/lbs if reusing your plugs). Also install the spark plug wires onto the spark plugs at this time.
Next install your coil packs. Press your spark plug wires into the coils (you will hear the clicking/crunching that says there in there). Plug in your coil pack wiring harness connector and reinstall your engine cover/s.
The Driver side is the same except, you will have to work around the alternator and fuel line. If you find it easier you can remove the alternator and fuel line to conduct the testing on the driver side. We usually work around the alternator and fuel line. Disconnect the battery before removing the power wire form the back of the alternator.
If you have any questions please feel free to PM us or shoot us an email via our website and don't forget to share your results here on the forum in either the "in spec" or "out of spec" valve guide registry's.
http://www.americanheritageperformance.com/Contact.html
310-326-2399
Thank You,
American Heritage Performance

Last edited by American Heritage; 06-22-2014 at 01:44 AM.

The following 5 users liked this post by American Heritage:
2k Cobra (12-28-2016),
63Corvette (03-06-2017),
ambitin (01-03-2019),
stevesvette (01-16-2022),
tommyc6z06 (10-25-2022)
06-22-2014, 01:50 AM
#2
Team Owner


Good write up and thank you! 

 06-22-2014, 07:42 AM
#5
Melting Slicks


Member Since: Apr 2009
Location: Virginia Beach VA
Posts: 2,476
Received 574 Likes
on
321 Posts
C2 of the Year Finalist - Modified 2020
C2 of Year Finalist (performance mods) 2019

Thanks for the comprehensive DIY. This should be a Sticky. Question, what percent of guides are out of spec on the cars you have checked? Thanks again.
06-22-2014, 08:41 AM
#6
Is a really well done write up. I get the idea ,if you dont have the stuff to begin with to do it right, bring it in and have it done and you woun't have to worrie about anything . Including the actual movment and determining if the "wiggle "amount is OK or not.
So typically whats it cost to have done? And should I just wait till my 5 year warranty is almost off?
So typically whats it cost to have done? And should I just wait till my 5 year warranty is almost off?
06-22-2014, 10:13 AM
#7
Melting Slicks
Nicely done!
 06-22-2014, 10:51 AM
#9
Safety Car


Member Since: Dec 1999
Location: Virginia Beach, VA & Port Charlotte, FL (snowbird)
Posts: 4,417
Received 1,107 Likes
on
585 Posts

Just a suggestion;
Instead of a piece of hose being used to stop the valve from falling into the cylinder I used very small wire ties (1/8" x 3"). They're narrow enough to rest in the valve's groove (where the valve keeper locks reside). The benefits are that they leave the end/tip of the valve uncovered for the dial indicator to touch and they provide a much more positive stop than the piece of hose.
Instead of a piece of hose being used to stop the valve from falling into the cylinder I used very small wire ties (1/8" x 3"). They're narrow enough to rest in the valve's groove (where the valve keeper locks reside). The benefits are that they leave the end/tip of the valve uncovered for the dial indicator to touch and they provide a much more positive stop than the piece of hose.
06-22-2014, 11:18 AM
#10
Burning Brakes


Nice write up. When you say "wiggle" it around, assume you saying that this would be the axis with the worse reading? Also, what to do with the readings?
Several posters have offered what they recommend on how to interpret the readings to actual guide wear (1.) wiggle/2 - 0.0005, (2) multiply by .62. What have you found to be the most accurate based on actual guide measurements?
Thanks
Several posters have offered what they recommend on how to interpret the readings to actual guide wear (1.) wiggle/2 - 0.0005, (2) multiply by .62. What have you found to be the most accurate based on actual guide measurements?
Thanks
Last edited by Vette @ 71; 06-22-2014 at 03:36 PM. Reason: clarification
06-22-2014, 01:22 PM
#11
Small O-rings work well to hold the valves too. I'd also suggest using a leak down tester to pressurize the cylinder. And while your at the task of checking valve stem movement, you can run the leak down test. OTC has a kit that works well, and pretty cheap.
Good right up Kohle. Glad to see that you support your local Snap-On dealer...
Good right up Kohle. Glad to see that you support your local Snap-On dealer...
06-22-2014, 05:40 PM
#14

 06-24-2014, 11:21 PM
#15
Melting Slicks

For sure and this is why AH deserves the support of this forum instead of that 'other' shop which I will NOT name....you know, the one which not only doesn't sponsor this forum but also wouldn't spend 2 seconds of their time actually helping anyone on the forum but yet continually gets free advertising from a few supporters who seem to be on their payroll 
Cheers, Paul.
Cheers, Paul.
06-24-2014, 11:49 PM
#16
Burning Brakes
Member Since: Jul 2008
Location: Houston TX
Posts: 782
Likes: 0
Received 0 Likes
on
0 Posts
Great post! It's about time someone took the time to do this.
Question about the air pressure, why do you first pressurize then release, then pressurize again before taking the springs off?
Question about the air pressure, why do you first pressurize then release, then pressurize again before taking the springs off?
06-24-2014, 11:49 PM
#17
Burning Brakes

For sure and this is why AH deserves the support of this forum instead of that 'other' shop which I will NOT name....you know, the one which not only doesn't sponsor this forum but also wouldn't spend 2 seconds of their time actually helping anyone on the forum but yet continually gets free advertising from a few supporters who seem to be on their payroll
Cheers, Paul.
Cheers, Paul.
 07-02-2014, 11:53 PM
#18
Team Owner
For sure and this is why AH deserves the support of this forum instead of that 'other' shop which I will NOT name....you know, the one which not only doesn't sponsor this forum but also wouldn't spend 2 seconds of their time actually helping anyone on the forum but yet continually gets free advertising from a few supporters who seem to be on their payroll
Cheers, Paul.
Cheers, Paul.
Mark where is your fact checking tonight ??
I am positive there are tons of members who have spoken to Richard and recieved lots of help, advise and wisdom. Just go back and read their testimonials yourself, I'm sure you can find them

I have watched the Wiggle Test done with the proper gear by a professional several times. My advise is the average owner should have a professional or qualified shop like AH actually do the test or results may be suspect.
Good right up AH

DH
07-03-2014, 02:20 AM
#19
Burning Brakes

Just wanted to add a useful fact to those with GMPP:
Kohle is unique among even the best shops in that he accepts GMPP, i.e. if you pay him to do the wiggle test and you fail the wiggle test, then he'll have the GMPP people come out to confirm and they will pay for the "fix" at no cost from you. Assuming all you have done is the "Fix" and no performance mods, then your GMPP should remain intact. Fast forward a couple years to when your GMPP is about up. Take it back to him for another wiggle test and - if out of spec - get another Fix under GMPP. That was my understanding from talking to him, at least. When I heard this, I thought to myself that if I was located halfway across the country and had GMPP, this would be reason enough to take a long road trip to have him do the wiggle test because if you are out of spec, would you want a dealer service dept to fix it or would you want Kohle to do it. No brainer.
Kohle is unique among even the best shops in that he accepts GMPP, i.e. if you pay him to do the wiggle test and you fail the wiggle test, then he'll have the GMPP people come out to confirm and they will pay for the "fix" at no cost from you. Assuming all you have done is the "Fix" and no performance mods, then your GMPP should remain intact. Fast forward a couple years to when your GMPP is about up. Take it back to him for another wiggle test and - if out of spec - get another Fix under GMPP. That was my understanding from talking to him, at least. When I heard this, I thought to myself that if I was located halfway across the country and had GMPP, this would be reason enough to take a long road trip to have him do the wiggle test because if you are out of spec, would you want a dealer service dept to fix it or would you want Kohle to do it. No brainer.
07-03-2014, 11:49 PM
#20
Supporting Vendor
Thread Starter
Member Since: Sep 2013
Location: Harbor City California
Posts: 2,819
Received 1,015 Likes
on
534 Posts
I first pressurize to move the piston down into the bottom of its bore. That way when I next remove the air pressure and hit the retainers with a socket and hammer the valves are assured to not contact the piston (as they do move down a little bit when you tap them with the socket/hammer. I do not tap the retainers with the air pressurizing the cylinder, this Is why I remove then reconnect the shop air.