
RPI side skirts installed pics
 02-17-2014, 04:07 PM
#1
Race Director

Thread Starter
MORE PICTURES AT POST #16
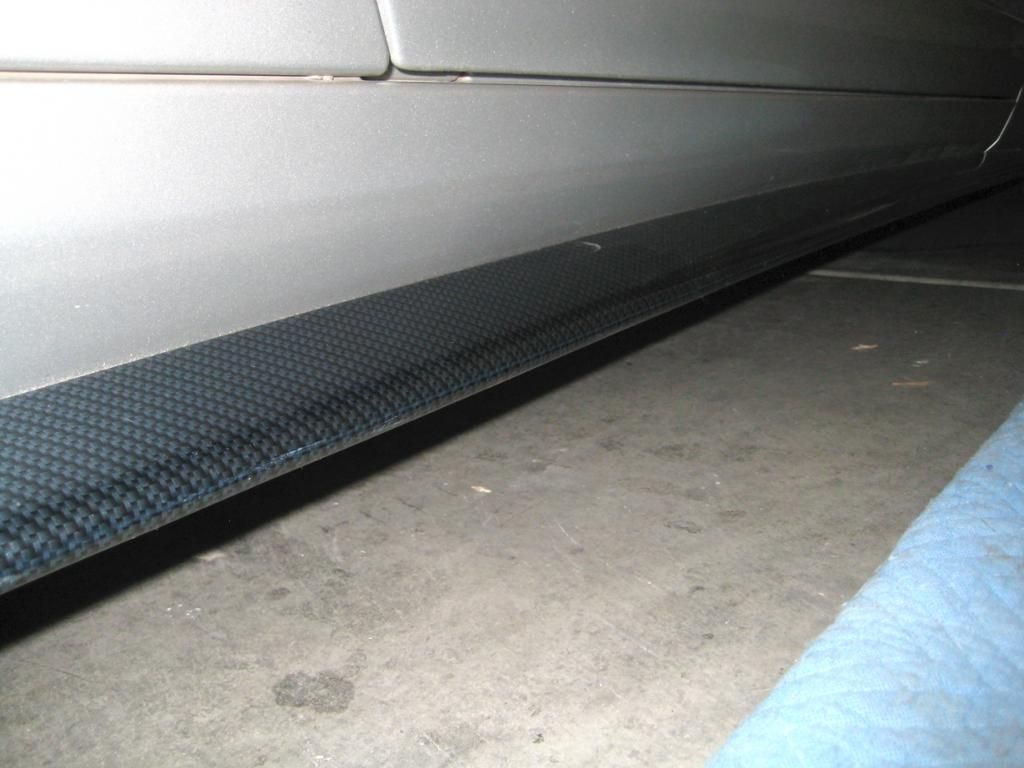
These are the fiberglass ones and are a perfect fit and finish. Took about an hour and a half to install both sides. I think they look great. I'm waiting for the ZRAL-1 splitter to complete the look.

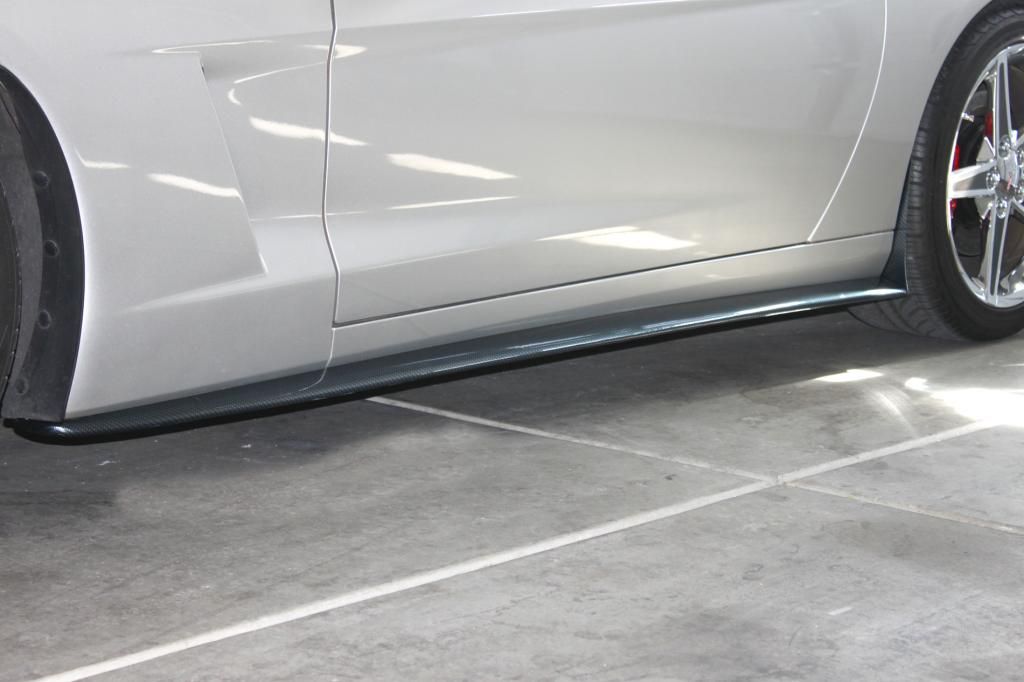
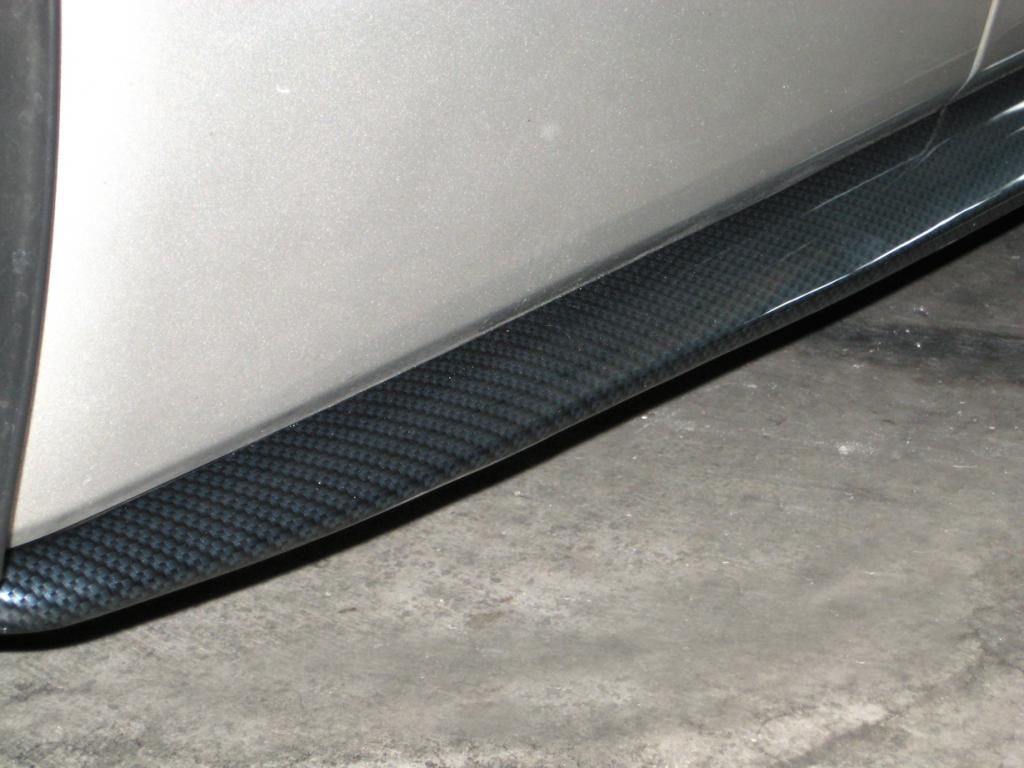
These are the fiberglass ones and are a perfect fit and finish. Took about an hour and a half to install both sides. I think they look great. I'm waiting for the ZRAL-1 splitter to complete the look.
Last edited by EVRose; 02-18-2014 at 07:36 PM. Reason: Added more pictures
 02-17-2014, 05:13 PM
#2
Drifting

Member Since: Aug 2012
Location: Clermont fl
Posts: 1,290
Received 121 Likes
on
88 Posts
St. Jude Donor '13

They look nice!! I have the c7 carbon, carbon fiber side skirts/ front splitter sitting on my bench ready to be installed ! any " tip" on mounting the side skirts I should know about before I start ? amd are you going to add the front splitter also ?
02-17-2014, 06:16 PM
#3
Race Director
Thread Starter
The skirts were pretty simple to install. I raised the car from the center of the frame rail and put a jack stand under the front and rear jack points. I mounted the rear to the little mud flap first then used an existing screw in the front to secure the front and started drilling 1/8" holes from front to rear making sure to hold the skirt tight up against the body of the car before drilling. I used a nut driver with extension to put the screws in.
02-17-2014, 08:34 PM
#4
Team Owner


They look good.


 Thanks for sharing
  02-18-2014, 12:54 PM
#7
Racer


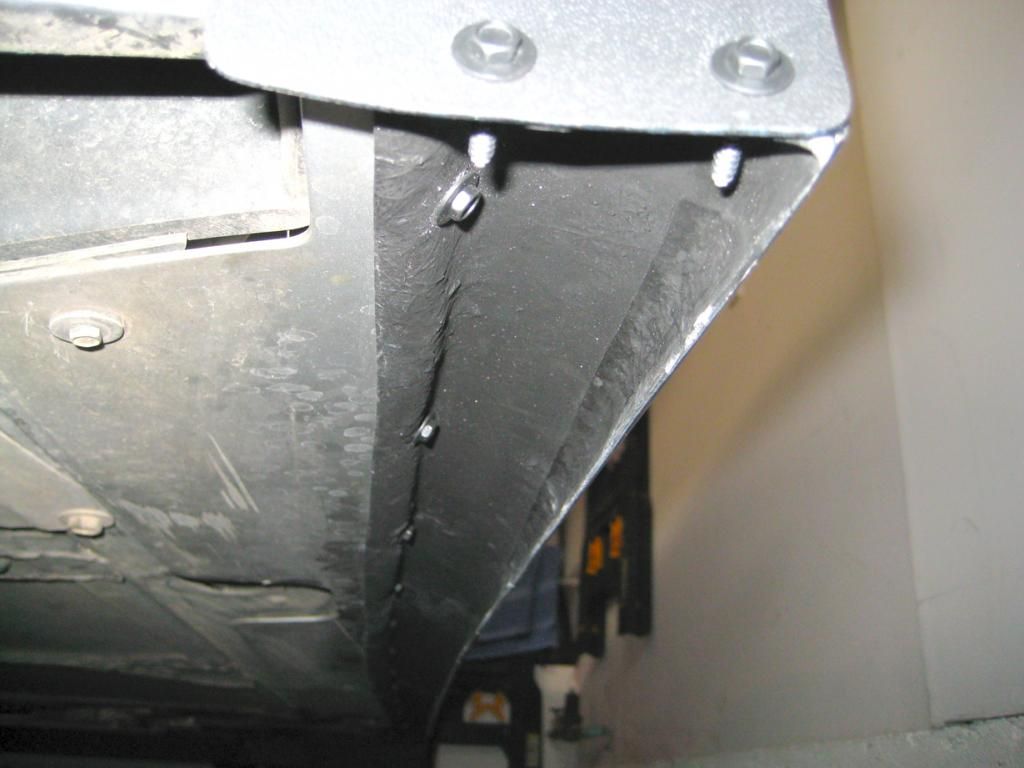
Is there anyway you can get a picture of what they look like on the under side near the rear wheel well? I am curious if they are flat on the bottom, rounded, curved or any indentations.
Looks great man! I am ordering mine as well for my C6.
Ken
Looks great man! I am ordering mine as well for my C6.
Ken
02-18-2014, 12:58 PM
#8
Race Director
Thread Starter
I'll take some better pictures today and try to get some from underneith.
02-18-2014, 01:35 PM
#10
Racer
 02-18-2014, 03:19 PM
#12
Race Director
Thread Starter
02-18-2014, 05:11 PM
#14
Drifting
Member Since: Aug 2012
Location: Clermont fl
Posts: 1,290
Received 121 Likes
on
88 Posts
St. Jude Donor '13
Yeah I've got my splitter/ side skirts sitting on my bench waiting to put them on, sort of test fit the splitter the other day, seems like its going to be a pain to get lined up to mark the holes, anyone thats put om a front splitter have any tips ???? would be greatly appreciated !!!!
02-18-2014, 05:24 PM
#15
Race Director
Thread Starter
Yeah I've got my splitter/ side skirts sitting on my bench waiting to put them on, sort of test fit the splitter the other day, seems like its going to be a pain to get lined up to mark the holes, anyone thats put om a front splitter have any tips ???? would be greatly appreciated !!!!
02-18-2014, 07:38 PM
#16
Race Director
Thread Starter
Pefect fit to the body. No gaps at all.
 02-18-2014, 07:41 PM
#17
Team Owner


Member Since: Mar 2012
Location: Anger Island
Posts: 45,940
Received 3,288 Likes
on
1,399 Posts
St. Jude Donor '12-'13-'14-'15-'16-'17
How thick are the end pieces/flaps at the back? I have their black skirts and those end pieces have both cracked and broken, which is very disappointing.
02-18-2014, 07:51 PM
#18
Race Director
Thread Starter
02-18-2014, 08:10 PM
#19
Team Owner
Member Since: Mar 2012
Location: Anger Island
Posts: 45,940
Received 3,288 Likes
on
1,399 Posts
St. Jude Donor '12-'13-'14-'15-'16-'17
Here's what was left of one after a round trip from here to southern TX and back. Not pretty.

Last edited by Steve_R; 02-18-2014 at 08:12 PM.