
Caliper Painting/Z51 Brake Conversion
 04-21-2013, 05:43 PM
#1
It's 5 o'clock Somewhere

Thread Starter
Member Since: Jan 2013
Location: HOUSTON TEXAS
Posts: 1,996
Likes: 0
Received 21 Likes
on
7 Posts
St Jude Donor '13-'14-'15
I accomplished two things with this project. The first was to make the silver calipers compliment my car and not look like an eye sore. For this I used the basic G2 red caliper paint kit. The second was too upgrade from the base brakes to the Z51 setup. For this step you will need GM Z51 caliper brackets and Z51 rotors. The GM Z51 caliper bracket part #'s are 88964167 & 88964166. The rotors are available from several of the forum vendors or GM has them as well. I finished the project today and I could not ask for better results. I will try and give a complete layout with several pictures and all the tools you will need to do this project yourself.
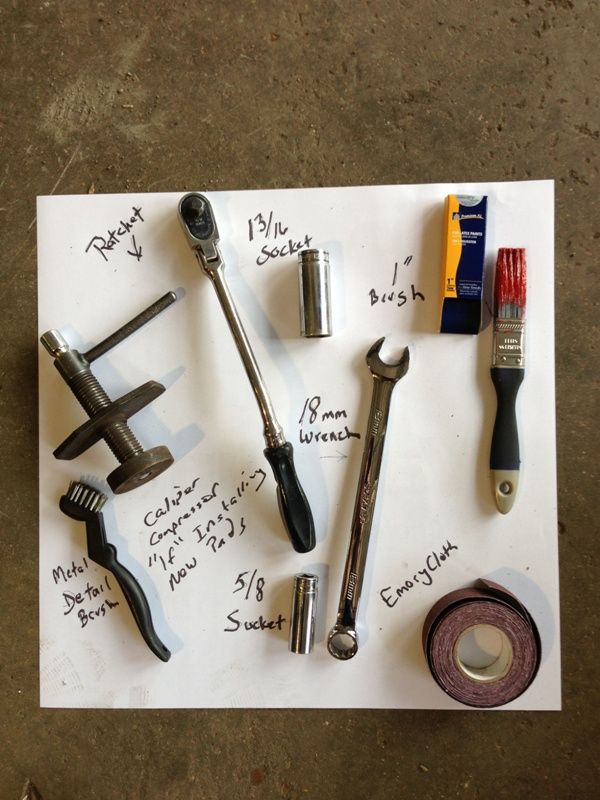
First the tools I used. Everything is shown below that you will need except for the obvious, a jack and lug wrench.
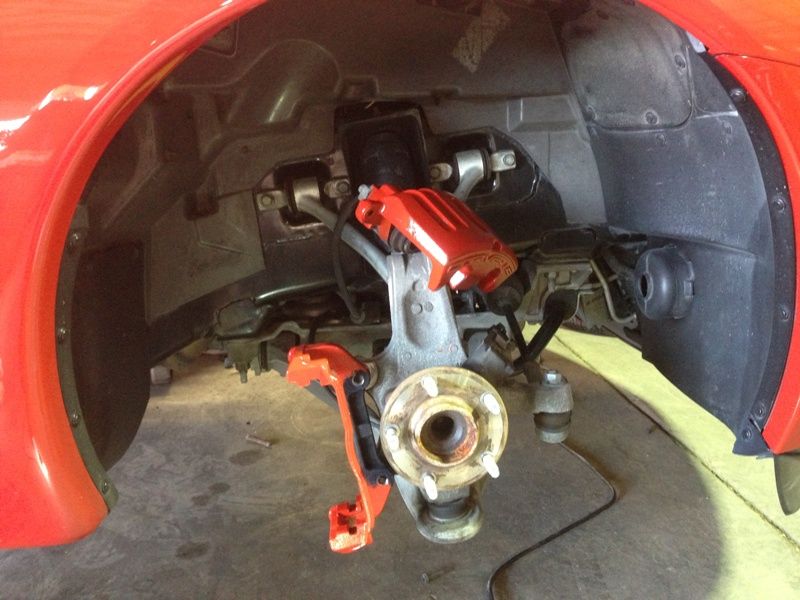
Lets take a look at what I started with.
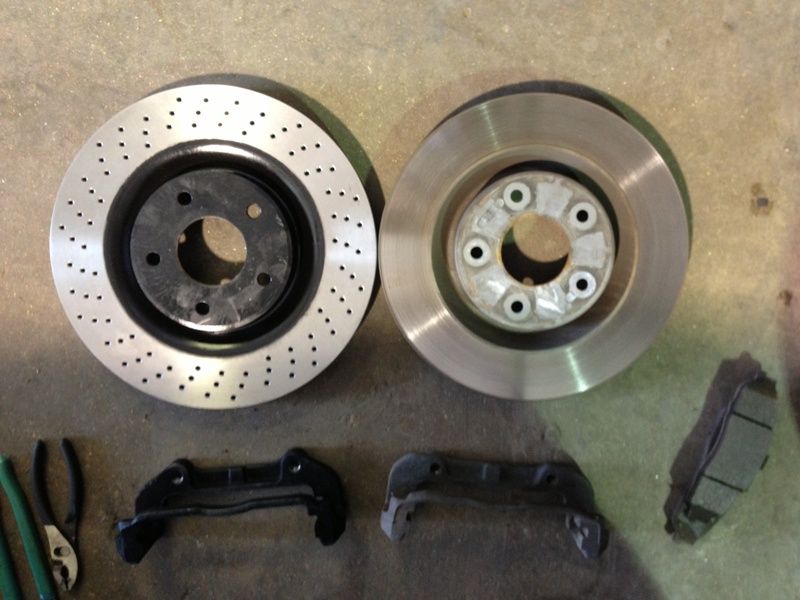
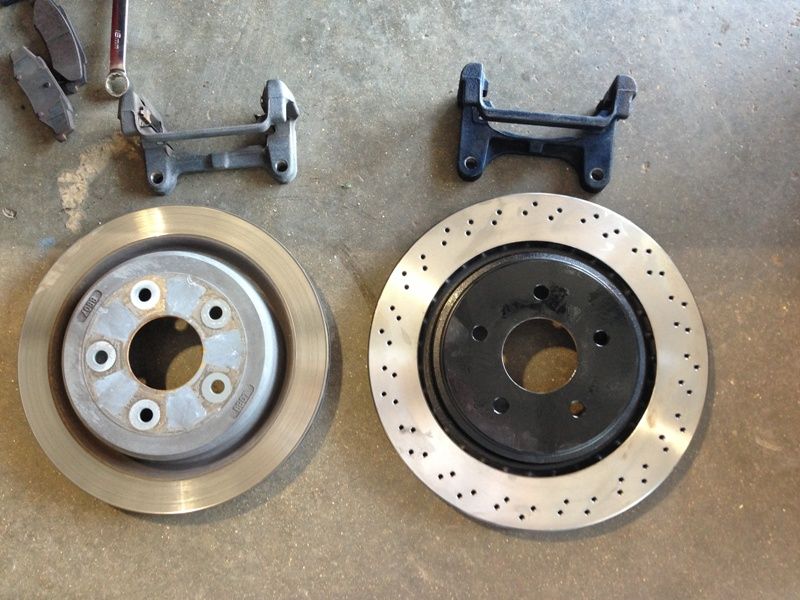
Here are my new brackets and rotors side by side so you can really see the difference.
Front:
Rear:
Follow the direction in the paint kit. I did not use the brush that came with the G2 kit. Instead I went to Sherwin Williams and picked up a good quality 1" brush. First remove the brake caliper. Next the bracket. Then the rotor. Next step is to clean all the dirt and grease from everything you intend to paint. Next, as you can see in the following pictures I held the caliper bracket and painted it first. Dont get to heavy or the paint will run. It will not look like its covering all that well with the first coat, but the second coat will look great. If you do get a run, use your brush dry and just work it out. I held the calipers in my hand starting with it upside down then rested it on the top of my spindle to finish the top side. After painting the bracket I used the top bolt to hold it to dry. Start with one coat and move to the next wheel doing the same thing. Work your way around the car and by the time you get all 4 done, it will be time to start the second coat. You will find the second coat covers much better, but again dont go too thick. You can always come around for a third "touch up" coat. After painting it needs to cure for 24 hours.
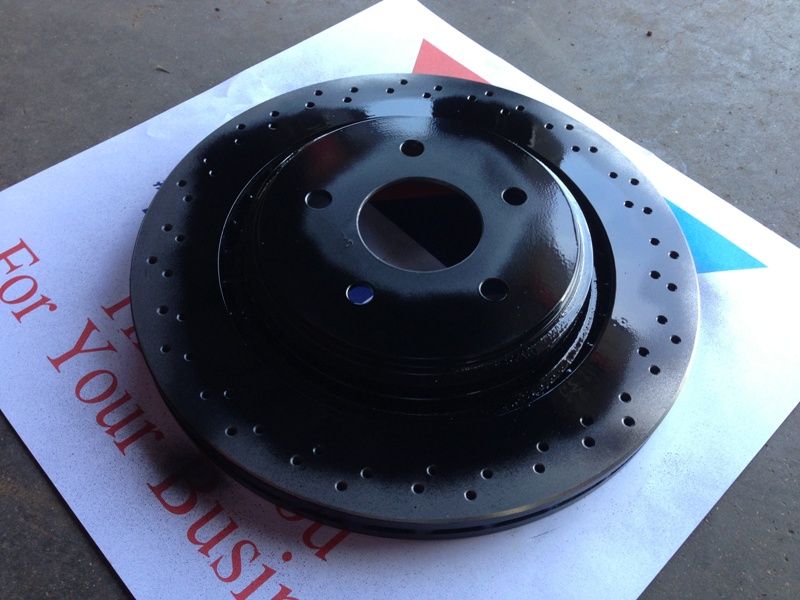
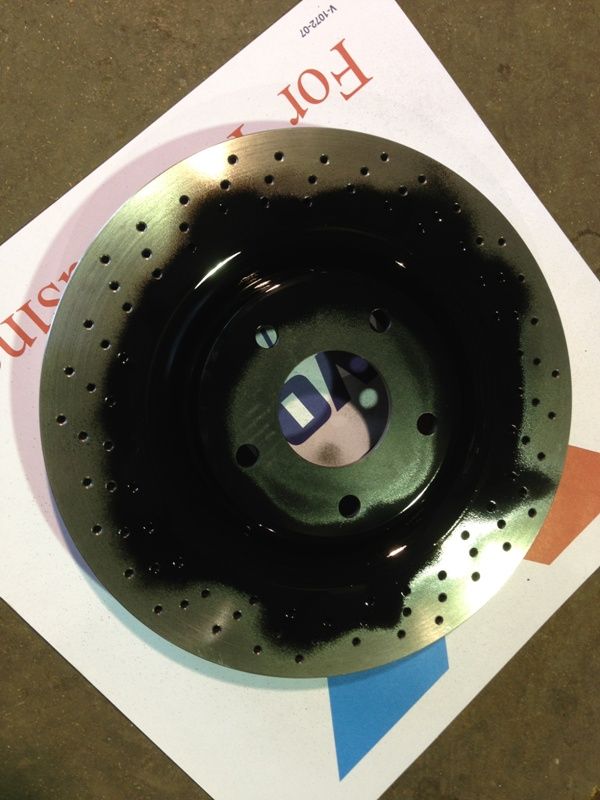
If you are doing the Z51 swap, you now need to clean and paint your rotors. For this I used two cans of brake clean for the four rotors. You have got to get the packing out of the fins or they will smoke and smell like crap the first time they get hot. Spray and clean them real well. Next I used basic black spray bomb caliper paint on the rotors. It is ok to get some on the face, in fact the back ones will need to painted or they will rust in the area the pads dont touch. Mine looked like this when I got done.
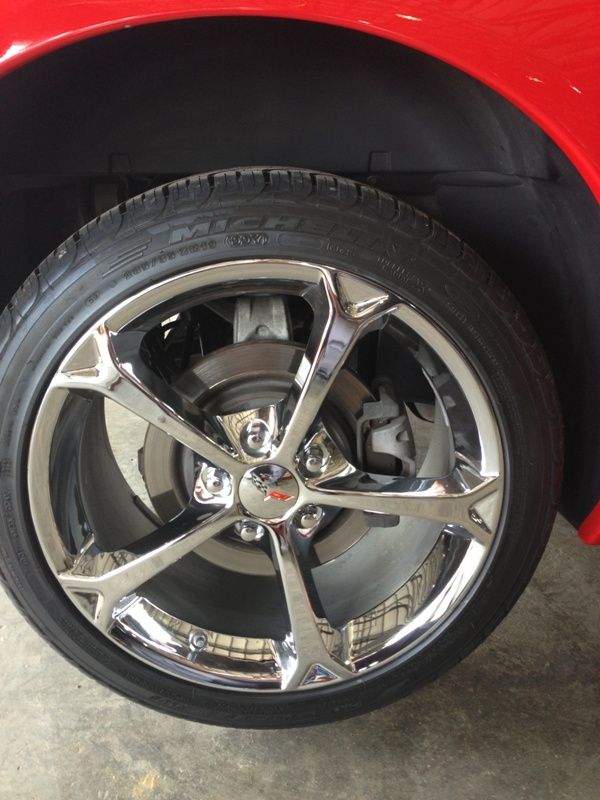
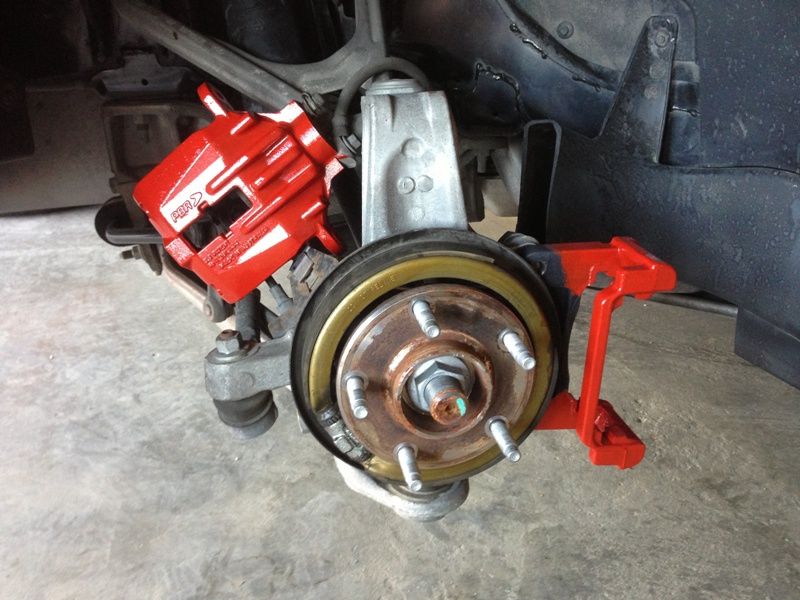
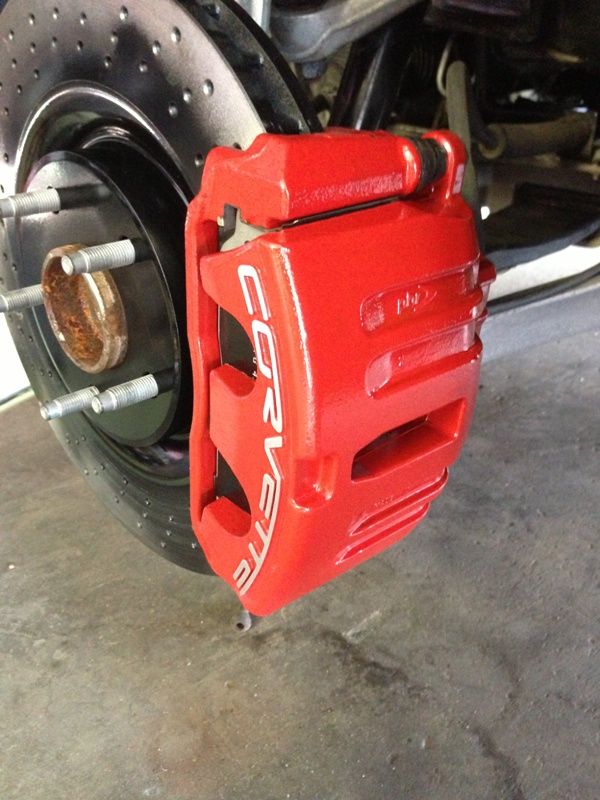
Now your done for day one. 24 hours later its time to reinstall everything. A thin coat of grease on your cailper slide pins is a good idea. Install everything the oposite of how you took it apart. Once you have all the brakes together, pump the pedal till it firms up. I was told to keep the paint off my letters i needed to use chapstick, but I chose not to because I was worried I would get too much on and create bad spaots around the lettering. Instead after I pumped the brake up, I took emory cloth to the letters being carefull to only rub the lettering. Here is the result.
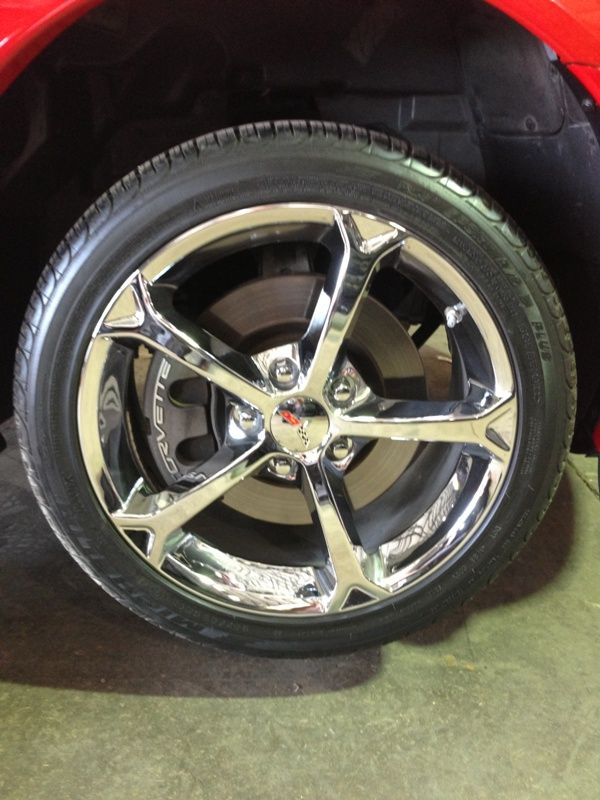
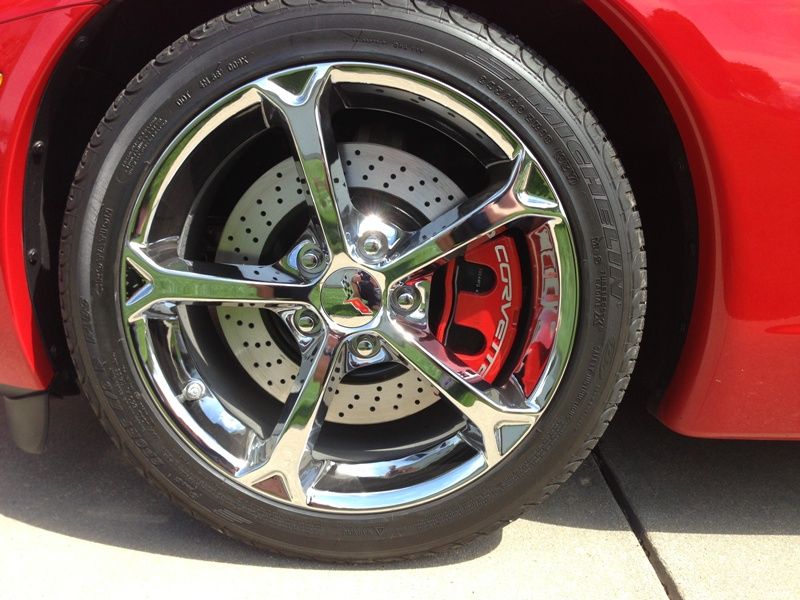
This is how mine turned out after driving it home.
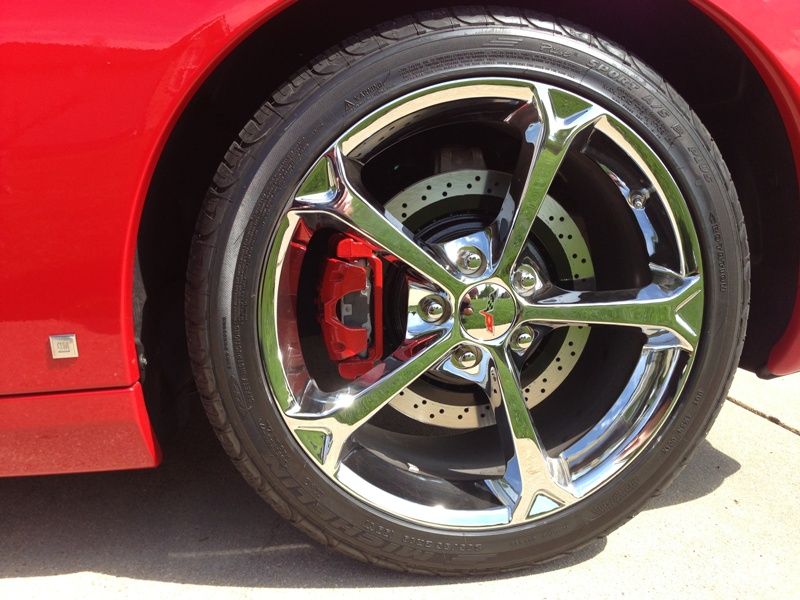
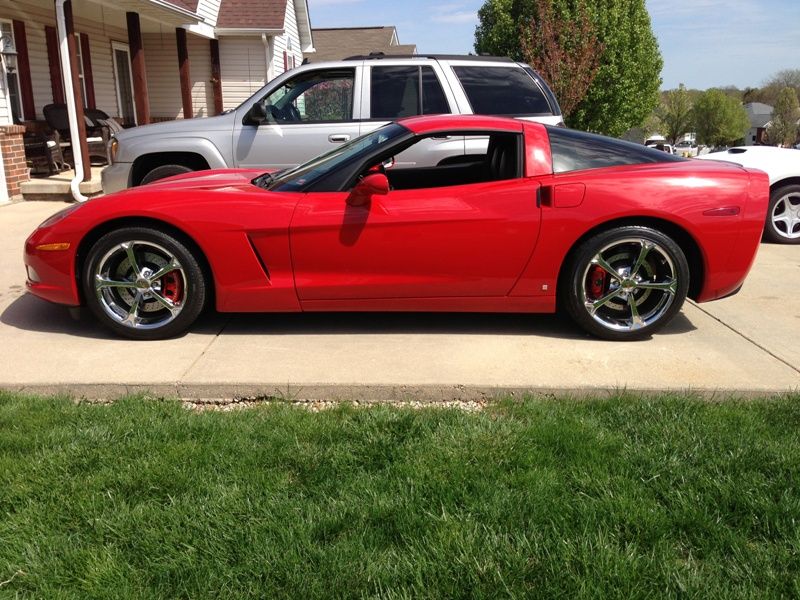
Overall I would say it made a huge difference and I could not be happier with how everything turned out.
First the tools I used. Everything is shown below that you will need except for the obvious, a jack and lug wrench.

Lets take a look at what I started with.


Here are my new brackets and rotors side by side so you can really see the difference.
Front:

Rear:

Follow the direction in the paint kit. I did not use the brush that came with the G2 kit. Instead I went to Sherwin Williams and picked up a good quality 1" brush. First remove the brake caliper. Next the bracket. Then the rotor. Next step is to clean all the dirt and grease from everything you intend to paint. Next, as you can see in the following pictures I held the caliper bracket and painted it first. Dont get to heavy or the paint will run. It will not look like its covering all that well with the first coat, but the second coat will look great. If you do get a run, use your brush dry and just work it out. I held the calipers in my hand starting with it upside down then rested it on the top of my spindle to finish the top side. After painting the bracket I used the top bolt to hold it to dry. Start with one coat and move to the next wheel doing the same thing. Work your way around the car and by the time you get all 4 done, it will be time to start the second coat. You will find the second coat covers much better, but again dont go too thick. You can always come around for a third "touch up" coat. After painting it needs to cure for 24 hours.


If you are doing the Z51 swap, you now need to clean and paint your rotors. For this I used two cans of brake clean for the four rotors. You have got to get the packing out of the fins or they will smoke and smell like crap the first time they get hot. Spray and clean them real well. Next I used basic black spray bomb caliper paint on the rotors. It is ok to get some on the face, in fact the back ones will need to painted or they will rust in the area the pads dont touch. Mine looked like this when I got done.


Now your done for day one. 24 hours later its time to reinstall everything. A thin coat of grease on your cailper slide pins is a good idea. Install everything the oposite of how you took it apart. Once you have all the brakes together, pump the pedal till it firms up. I was told to keep the paint off my letters i needed to use chapstick, but I chose not to because I was worried I would get too much on and create bad spaots around the lettering. Instead after I pumped the brake up, I took emory cloth to the letters being carefull to only rub the lettering. Here is the result.

This is how mine turned out after driving it home.


Overall I would say it made a huge difference and I could not be happier with how everything turned out.


 04-21-2013, 06:10 PM
#4
Race Director

Very nice job and looks 1st class.  Tks for posting.
Tks for posting.

 04-21-2013, 07:26 PM
#8
It's 5 o'clock Somewhere
Thread Starter
Member Since: Jan 2013
Location: HOUSTON TEXAS
Posts: 1,996
Likes: 0
Received 21 Likes
on
7 Posts
St Jude Donor '13-'14-'15
I was told to keep the paint off my letters i needed to use chapstick, but I chose not to because I was worried I would get too much on and create bad spots around the lettering. Instead after I pumped the brake up, I took emory cloth to the letters being carefull to only rub the lettering.

 They look very nice.....
 04-22-2013, 09:10 PM
#15
Drifting


I was told to keep the paint off my letters i needed to use chapstick, but I chose not to because I was worried I would get too much on and create bad spots around the lettering. Instead after I pumped the brake up, I took emory cloth to the letters being carefull to only rub the lettering.
04-26-2013, 01:16 AM
#17
Le Mans Master

Good work I did the same with the help of of buddy a while back. So nice to get your hands dirty instead of paying someone to powder coat them. Looks the same and you save a pretty penny.
 05-09-2013, 02:38 AM
#19
Advanced

Fantastic job...excellent pictures & tutorial...thanks for posting!
Just wondering...will eventually be looking for floor jack, stands and/or ramp set-up for my C6...any recommendations?
Just wondering...will eventually be looking for floor jack, stands and/or ramp set-up for my C6...any recommendations?
05-09-2013, 03:37 AM
#20
Advanced
I was told to keep the paint off my letters i needed to use chapstick, but I chose not to because I was worried I would get too much on and create bad spots around the lettering. Instead after I pumped the brake up, I took emory cloth to the letters being carefull to only rub the lettering.
