
Finished leather interior upgrades
 10-27-2012, 09:45 AM
#1
Racer

Thread Starter
Just finished my leather seats last weekend. It was pretty easy, the only thing you might want to consider if doing this upgrade is new seat foam. I was really surprised when I pulled the factory leathers off. the bottom and seat back foam were both cut through from the seat frame. So I went ahead and ordered the upgraded 69$ foam Seat bottoms and New GM foam backs.[IMG]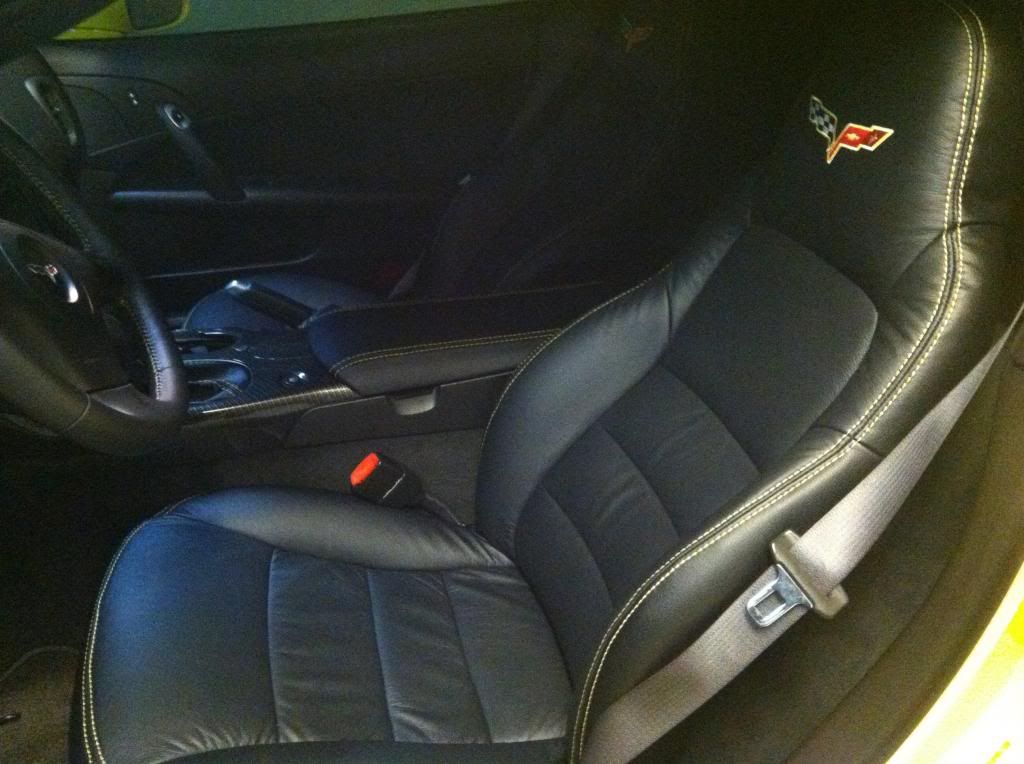 [/IMG]
[/IMG]
Last edited by doubledsyellow; 10-27-2012 at 09:50 AM.
 10-27-2012, 11:49 AM
#2
Safety Car


Member Since: Mar 2009
Location: Northeast MA & Mad Beach FL
Posts: 4,101
Received 716 Likes
on
436 Posts

Your seats look great 
I also got the $69.00 foam Seat bottom a few days ago for my Driver seat.
My left side bottom bolster was low when I bought the car but never gave it much thought.
It finally collapsed a few days ago so I order the new foam.
Problem with mine was the foam was not sitting on the seat rail and had fallen into the middle of the seat.
I was also shocked how cheap and bad the Factory foam was once I took the seat apart.
One thing I haven't seen anyone mention when doing their seats over is the Aluminum side rails.
They are stamped out and leaves Razor Sharp edges the length of the rails.
I rounded them off with a file before putting the new foam in.
The $69.00 seat foam is the way to go though
Much more solid foam with twice the support compared to the Factory soft and mushy foam
I also got the $69.00 foam Seat bottom a few days ago for my Driver seat.
My left side bottom bolster was low when I bought the car but never gave it much thought.
It finally collapsed a few days ago so I order the new foam.
Problem with mine was the foam was not sitting on the seat rail and had fallen into the middle of the seat.
I was also shocked how cheap and bad the Factory foam was once I took the seat apart.
One thing I haven't seen anyone mention when doing their seats over is the Aluminum side rails.
They are stamped out and leaves Razor Sharp edges
the length of the rails.I rounded them off with a file before putting the new foam in.
The $69.00 seat foam is the way to go though
Much more solid foam with twice the support compared to the Factory soft and mushy foam
Last edited by Dif; 11-06-2012 at 04:03 PM.

 10-27-2012, 01:12 PM
#5
Racer
Thread Starter
Got the upgraded bottoms fromhttp://www.shop.djmotorsportaccessories.com/
Got the GM replacements from parts taxi.
One thing I did to protect the new foam is wrapped the corners with 2inch velcro ( the fuzzy side ) to give it softer contact.
Got the GM replacements from parts taxi.
One thing I did to protect the new foam is wrapped the corners with 2inch velcro ( the fuzzy side ) to give it softer contact.


 Looks great!!
10-27-2012, 03:49 PM
Looks great!!
10-27-2012, 03:49 PM
#12
Team Owner

looks good, nice job.

 10-27-2012, 06:38 PM
#14
Safety Car

Member Since: Jan 2009
Location: Mooresville (Race City USA) NC
Posts: 4,681
Likes: 0
Received 2 Likes
on
2 Posts
10-27-2012, 06:54 PM
#15
Safety Car
Member Since: Jan 2009
Location: Mooresville (Race City USA) NC
Posts: 4,681
Likes: 0
Received 2 Likes
on
2 Posts
Your seats look great
I also got the $69.00 foam Seat bottom a few days ago for my Diver seat.
My left side bottom bolster was low when I bought the car but never gave it much thought.
It finally collapsed a few days ago so I order the new foam.
Problem with mine was the foam was not sitting on the seat rail and had fallen into the middle of the seat.
I was also shocked how cheap and bad the Factory foam was once I took the seat apart.
One thing I haven't seen anyone mention when doing their seats over is the Aluminum side rails.
They are stamped out and leaves Razor Sharp edges the length of the rails.
I rounded them off with a file before putting the new foam in.
The $69.00 seat foam is the way to go though
Much more solid foam with twice the support compared to the Factory soft and mushy foam
I also got the $69.00 foam Seat bottom a few days ago for my Diver seat.
My left side bottom bolster was low when I bought the car but never gave it much thought.
It finally collapsed a few days ago so I order the new foam.
Problem with mine was the foam was not sitting on the seat rail and had fallen into the middle of the seat.
I was also shocked how cheap and bad the Factory foam was once I took the seat apart.
One thing I haven't seen anyone mention when doing their seats over is the Aluminum side rails.
They are stamped out and leaves Razor Sharp edges
the length of the rails.I rounded them off with a file before putting the new foam in.
The $69.00 seat foam is the way to go though
Much more solid foam with twice the support compared to the Factory soft and mushy foam

 10-27-2012, 09:41 PM
#17
Racer
Thread Starter
When I was talking about the wraping the corners with Velcro I meant that any where in the seat frame that had sharp corners I wrapped that piece before reinstalling new foam. That way it wouldn't cut Into the foam as bad
10-28-2012, 10:04 AM
#20
Safety Car
Member Since: Mar 2009
Location: Northeast MA & Mad Beach FL
Posts: 4,101
Received 716 Likes
on
436 Posts
Is your picture of the original foam before replacement? Does the replacement foam improve both the appearance and the comfort of your covered seats, or just the comfort? Did you reuse your original seat cover? Is this as job most anyone can do? How long from beginning to end did it take to do the drivers seat?
Yes, that's what it looked like when the seat skin was removed.
Yes, it improves the comfort and the look.
Yes I used the Original seat cover.
One thing to mention though with the $69.00 foam replacement:
The foam is Noticeably Firmer and you'll be sitting slightly Higher in the seat with this Foam.
As I mentioned, I realized my seat foam was not sitting on the rail as it should be after reading and seeing pictures of the many posts from others on this subject.
Especially after it totally collapsed down into the middle of the seat and completely off the rail.
I wish I took more before pictures when removing/replacing the foam, but got preoccupied working on it instead of taking pictures.
Being the first time doing this, it took me longer, but the actual work if I did it again would be about 3 hours starting with taking out seat, Remove/Replace foam/skins etc and putting seat back in the car.
A lot depends on how well it goes as some of it can't be rushed and just simply time consuming.
I would say anyone that has worked on things and is handy can do it, but there's things like the Heated seats with the cloth looking thing ... which is the Heating element ... and that is Glued onto the Foam.
So it needs to be peeled off and then Glued onto the New Foam with Spray Adhesive and set in place correctly.
All the Hog rings need to be cut when removing the skins and I used Tie Wraps in place of hog rings when putting the skins back on.
----------
I found 90% of the instructions etc in this thread:
http://forums.corvetteforum.com/c6-c...at-covers.html
Specifically in Post #4 which had a lot of links to other instructions and pictures.
Last edited by Dif; 10-28-2012 at 10:06 AM.

