
Installed HID Fog Lights Pics and How to.
 04-08-2012, 11:26 PM
#1
Melting Slicks


Thread Starter

Installed HID Fog lights I purchased from Corvette Mods here on CF and installed them today. Below are the DIY instructions and pics.
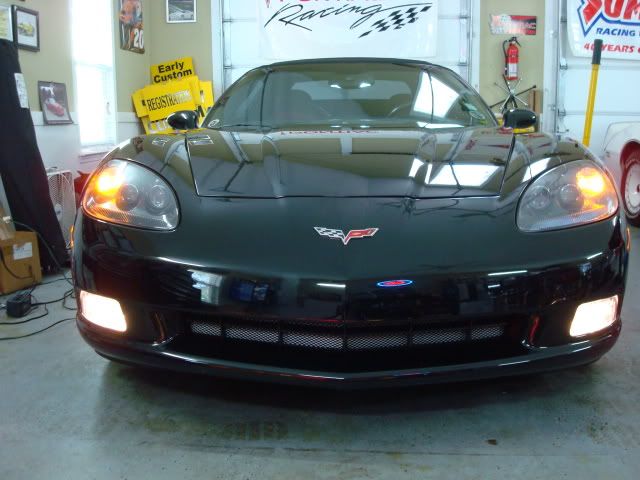
Before
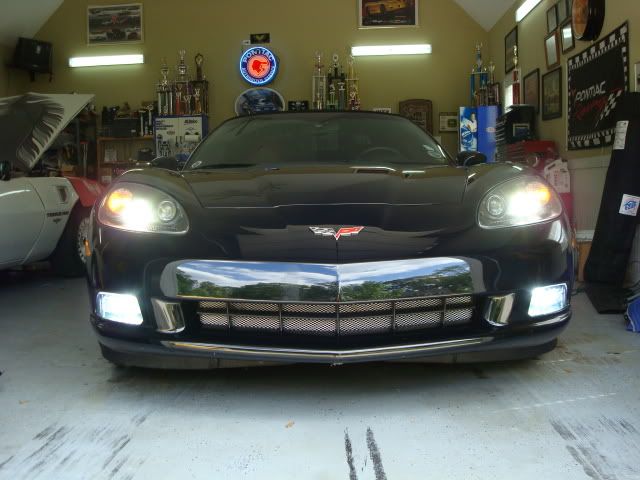
After
Tools needed for the install:
-Small flat tip to help pull the pins from the plastic plugs
-T-20 Torque screw driver
-Rubbing Alcohol and Goof Gone (or Goo Off) to clean and prep the mounting location for the ballast
-Sissors to cut mounting tape and snip zip ties
-3M outdoor rated double sided tape (Kit comes with double sided tape, but I like the super sticky and durable 3M outdoor tape.
-Zip Ties (Kit comes with some but I ended up using a few more.

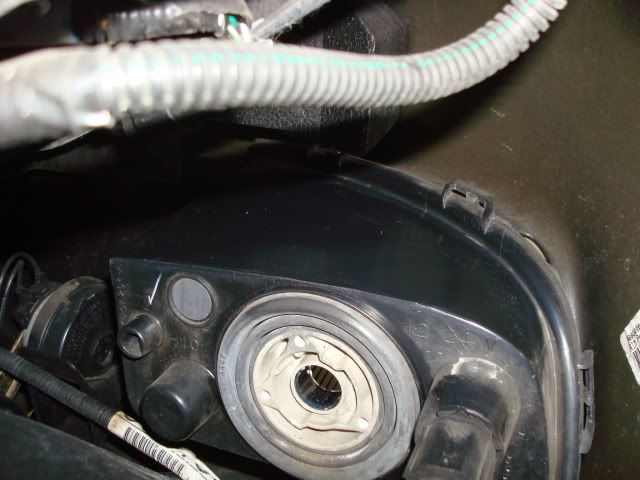
Step 1: Remove the front tire. Some opt not to do this, but for me it was easier just to take it off.
Step 2: Remove the fender liner plastic plugs that run near the wheel well and across the top of the fender liner.
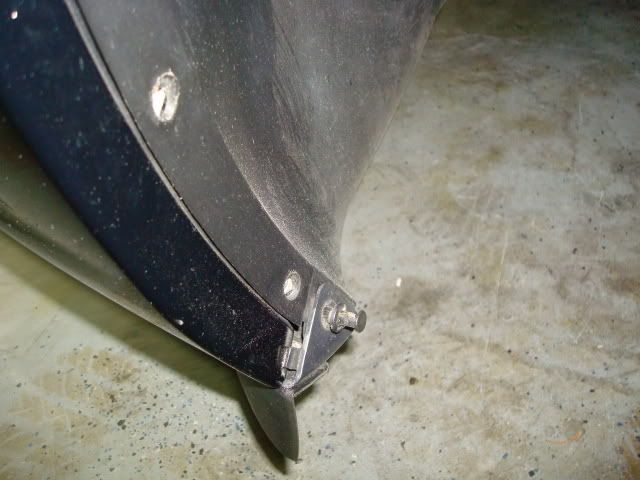
Step 3: Pull the fender liner back enough to access the fog light housing.
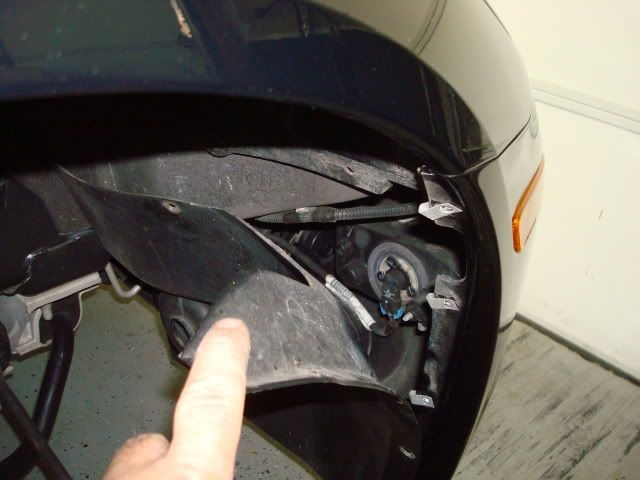
Step 4:
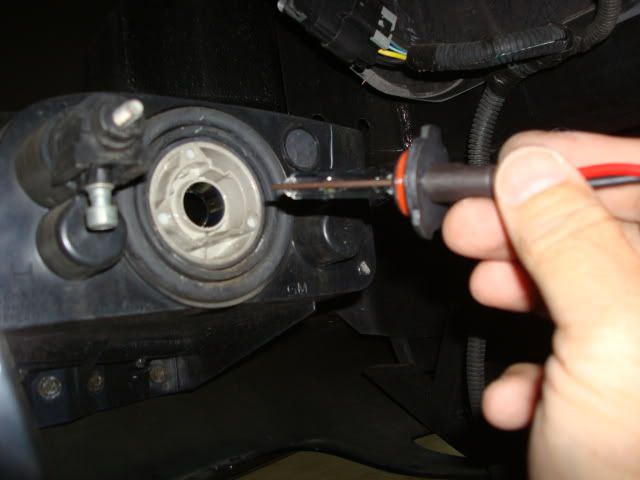
Using your T-20 screwdriver remove the for screws holding the fog light bulb in place
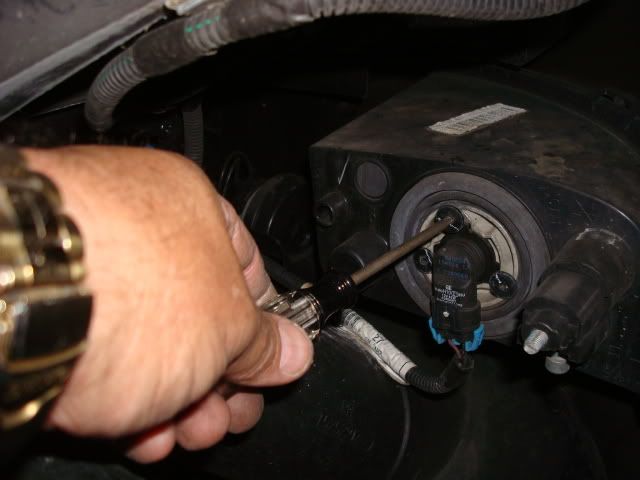
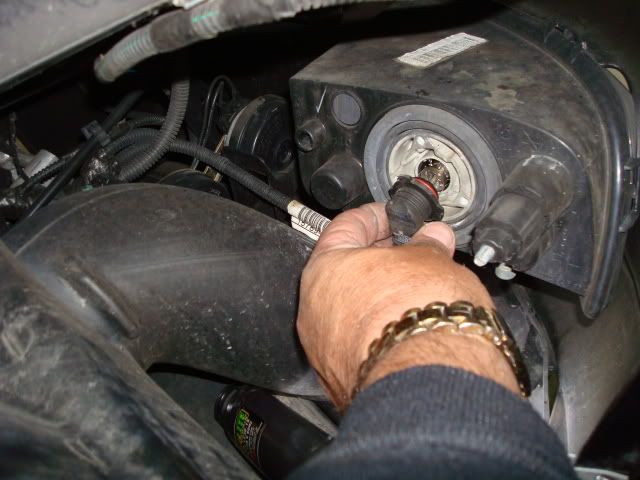
Step 5:
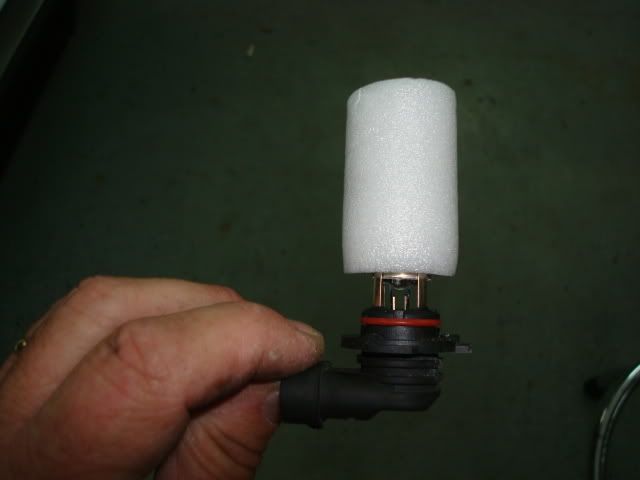
Remove the OEM fog light, use care not to touch the bulb. I reused the foam shipping covers from the HIDs Kit to store my OEM's for a raining day.
Step 6:
Prep the ballast mounting location. The area it's mounted needs to be clean so the double sided tape will stick good. You don't want to ballast to come loose or it could cause your HID's to not work. This is an easy task, but an important one. Use Goo Gone (Goof Off) to remove the label on top of the housing followed by Rubbing Alchol to clean the top and remove any left over Goo Gone/ Goof Off.
Before Prep:
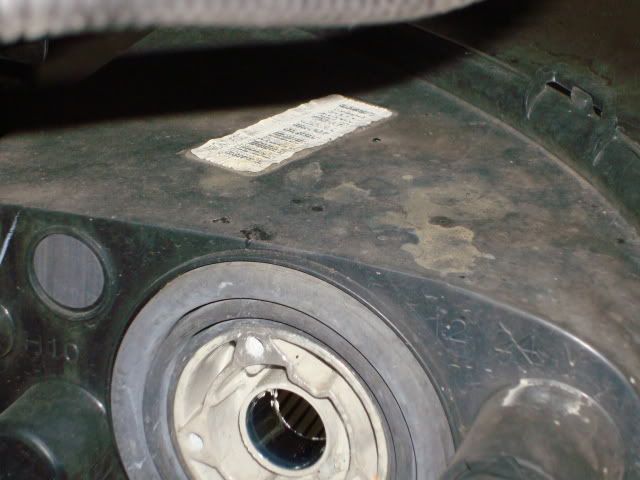
After Prep:
Step 7:
Install HID bulb. Use care not to touch the bulb. Place the blub into the fog light housing. Note the alignment of the "dog ears" on the bulb so they will align properly allowing the heads of the T-20 screws to secure them to the fog light housing.
Step 8:
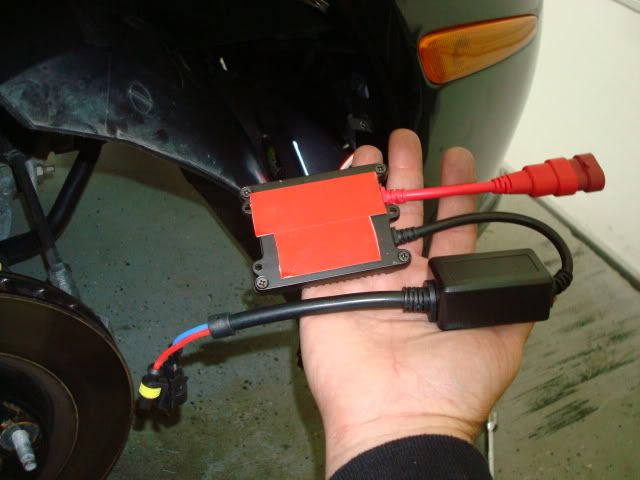
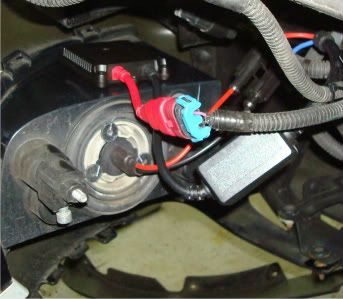
Mount the ballast. Place your double sided tape on the underside of the ballast. Use a sharp object like an exacto knife to pre-lift a corner of the tape backing.
Picture of Ballast with red tape backing in place:
Backing removed (tape is gray)
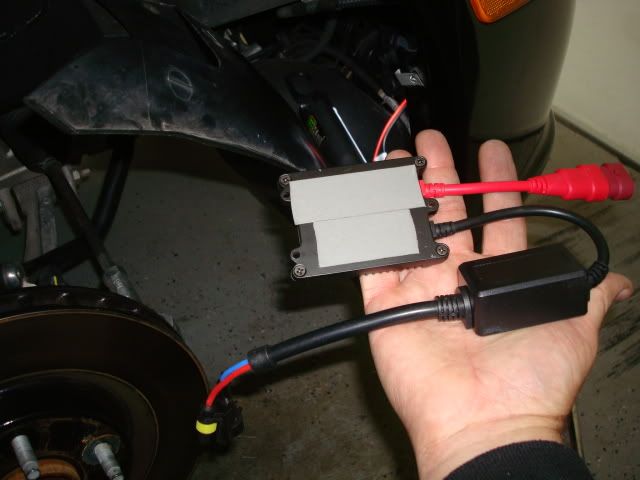
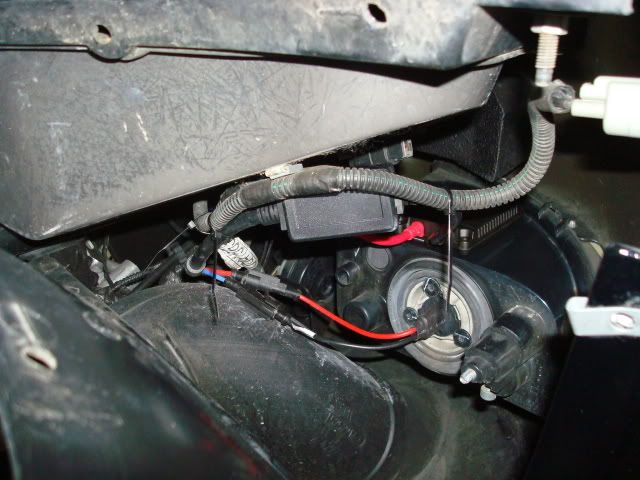
Ballast installed on top of the fog light housing. Using the 3M tape and doing good prep work this unit feels like it is bonded forever to the fog light housing.
Step 9:
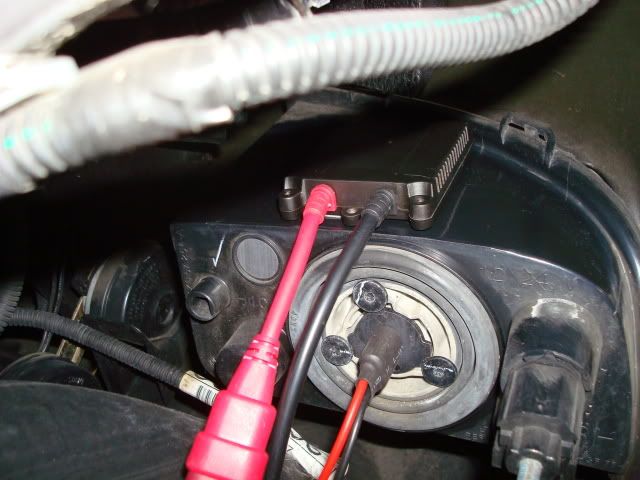
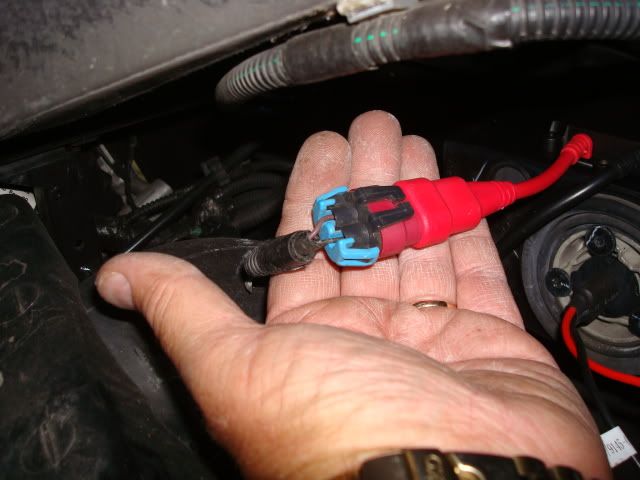
Connect HID's and Power to Ballast unit.
Here is the connection from the Ballast unit to the HID bulb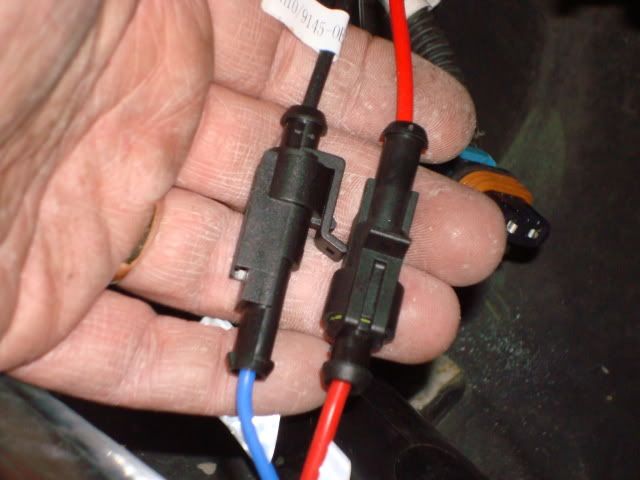
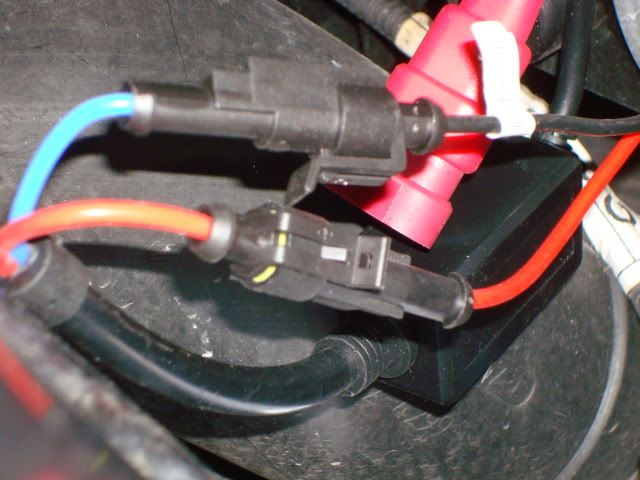
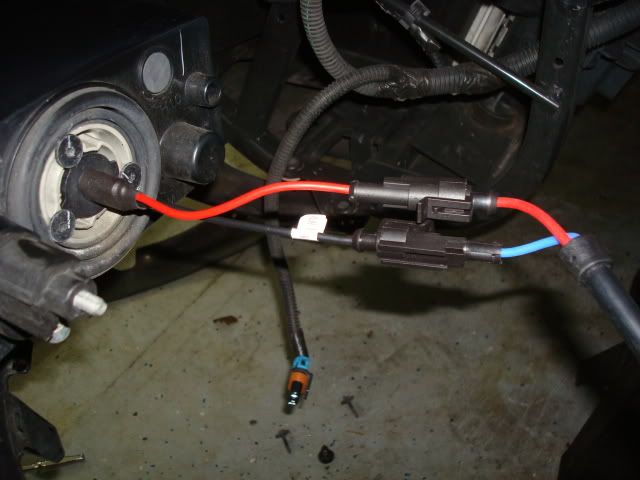
Here is the connection from the Ballast to the OEM power plug
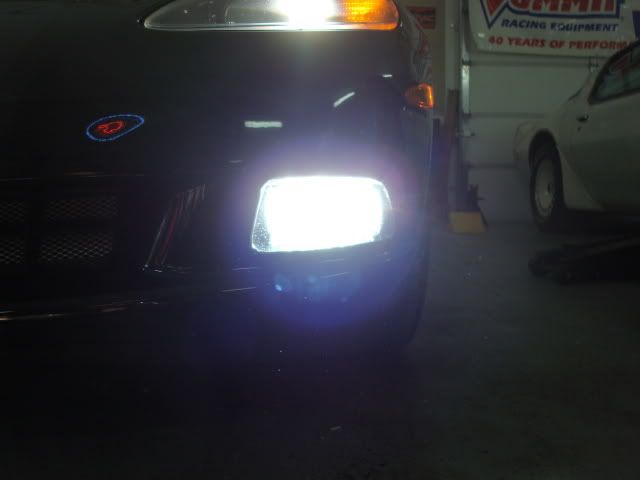
Step 10: Test the lights. If they don't work, just unplug the OEM power to Ballast connection (see just above in step 9) and flip the OEM connection over and reconnect (I had to do this)
Step 11
Zip tie, reinstall the fender liner push pins and tire.
Hope you find this useful!
Before
After
Tools needed for the install:
-Small flat tip to help pull the pins from the plastic plugs
-T-20 Torque screw driver
-Rubbing Alcohol and Goof Gone (or Goo Off) to clean and prep the mounting location for the ballast
-Sissors to cut mounting tape and snip zip ties
-3M outdoor rated double sided tape (Kit comes with double sided tape, but I like the super sticky and durable 3M outdoor tape.
-Zip Ties (Kit comes with some but I ended up using a few more.
Step 1: Remove the front tire. Some opt not to do this, but for me it was easier just to take it off.
Step 2: Remove the fender liner plastic plugs that run near the wheel well and across the top of the fender liner.
Step 3: Pull the fender liner back enough to access the fog light housing.
Step 4:
Using your T-20 screwdriver remove the for screws holding the fog light bulb in place
Step 5:
Remove the OEM fog light, use care not to touch the bulb. I reused the foam shipping covers from the HIDs Kit to store my OEM's for a raining day.
Step 6:
Prep the ballast mounting location. The area it's mounted needs to be clean so the double sided tape will stick good. You don't want to ballast to come loose or it could cause your HID's to not work. This is an easy task, but an important one. Use Goo Gone (Goof Off) to remove the label on top of the housing followed by Rubbing Alchol to clean the top and remove any left over Goo Gone/ Goof Off.
Before Prep:
After Prep:
Step 7:
Install HID bulb. Use care not to touch the bulb. Place the blub into the fog light housing. Note the alignment of the "dog ears" on the bulb so they will align properly allowing the heads of the T-20 screws to secure them to the fog light housing.
Step 8:
Mount the ballast. Place your double sided tape on the underside of the ballast. Use a sharp object like an exacto knife to pre-lift a corner of the tape backing.
Picture of Ballast with red tape backing in place:
Backing removed (tape is gray)
Ballast installed on top of the fog light housing. Using the 3M tape and doing good prep work this unit feels like it is bonded forever to the fog light housing.
Step 9:
Connect HID's and Power to Ballast unit.
Here is the connection from the Ballast unit to the HID bulb
Here is the connection from the Ballast to the OEM power plug
Step 10: Test the lights. If they don't work, just unplug the OEM power to Ballast connection (see just above in step 9) and flip the OEM connection over and reconnect (I had to do this)
Step 11
Zip tie, reinstall the fender liner push pins and tire.
Hope you find this useful!
Last edited by JKbride; 04-09-2012 at 10:56 PM.

The following users liked this post:
NoProxyFound (06-20-2017)
04-08-2012, 11:33 PM
#2
Team Owner


Looks good. Nice write-up.


 04-09-2012, 12:05 AM
#5
Former Vendor

Member Since: Dec 2007
Location: Ft Worth TX
Posts: 22,135
Likes: 0
Received 2 Likes
on
2 Posts
St. Jude Donor '12-'13
Great write up! Thanks for sharing!
On SALE NOW!
http://www.corvettemods.com/Corvette...it_p_5532.html
On SALE NOW!
http://www.corvettemods.com/Corvette...it_p_5532.html
Last edited by corvettemods1; 04-09-2012 at 10:41 PM.

 04-09-2012, 01:24 AM
#7
Race Director

Nice write up. One tip though. You dont need to remove the 3 screws holding the bulb. Just loosen and turn the bulb till the tabs are free from the screws. Turn the new bulb into place and tighten screws.

 04-09-2012, 08:59 PM
#9
Melting Slicks
Thread Starter
04-09-2012, 09:01 PM
#10
Melting Slicks
Thread Starter

 04-09-2012, 10:40 PM
#14
Former Vendor
Member Since: Dec 2007
Location: Ft Worth TX
Posts: 22,135
Likes: 0
Received 2 Likes
on
2 Posts
St. Jude Donor '12-'13
Thanks for the orders guys! These are currently on promo for the forum
http://www.corvettemods.com/Corvette...it_p_5532.html
http://www.corvettemods.com/Corvette...it_p_5532.html

 Nicely done
 04-09-2012, 10:54 PM
#17
Drifting

Damn those are a hell of a lot easier than the hack job I had to do on my Stang.
Might be ordering myself some in a few days. Got any other pics I want to see what they look like from a distance. I usually drove with headlights and fog lights on in my Mustang before... definitely easier to see the road and sidewalks.
Might grab some brighter reverse lights as well. My dad tinted the lenses which looks sick but the brighter light might help out a little. Good writeup too!
04-09-2012, 11:49 PM
#18
Team Owner
Thanks for the write up and the pics
Are those fog lights 35watt or 55 watt?

The only problem would be is jacking up corvette and removing wheel.

Last edited by LS WON; 04-10-2012 at 12:09 AM.
04-10-2012, 09:22 AM
#20
Drifting
Has anyone had a problem with mounting the ballasts on top of the housings? I seem to recall when researching it that it was considered a bad idea due to heat and the weight of the ballast causing the assembly to jiggle.
Going to install all my kit and 6000k lows in the next few days and want to do it right the first time.
Going to install all my kit and 6000k lows in the next few days and want to do it right the first time.
Last edited by Polar Jet; 04-10-2012 at 09:50 AM.