
Repainted my GS badges (and a little how-to)
 03-27-2012, 11:27 PM
#1
Drifting

Thread Starter
Ok here goes - a bit of instruction on changing out and painting your badges. Please note that anything shown/said here is to be done at your own risk!  Also, I apologize for the lack of pictures I was running out of daylight and just snapped a few. This is something even the most average shade tree mechanic can pull off, you just need to know where everything goes.
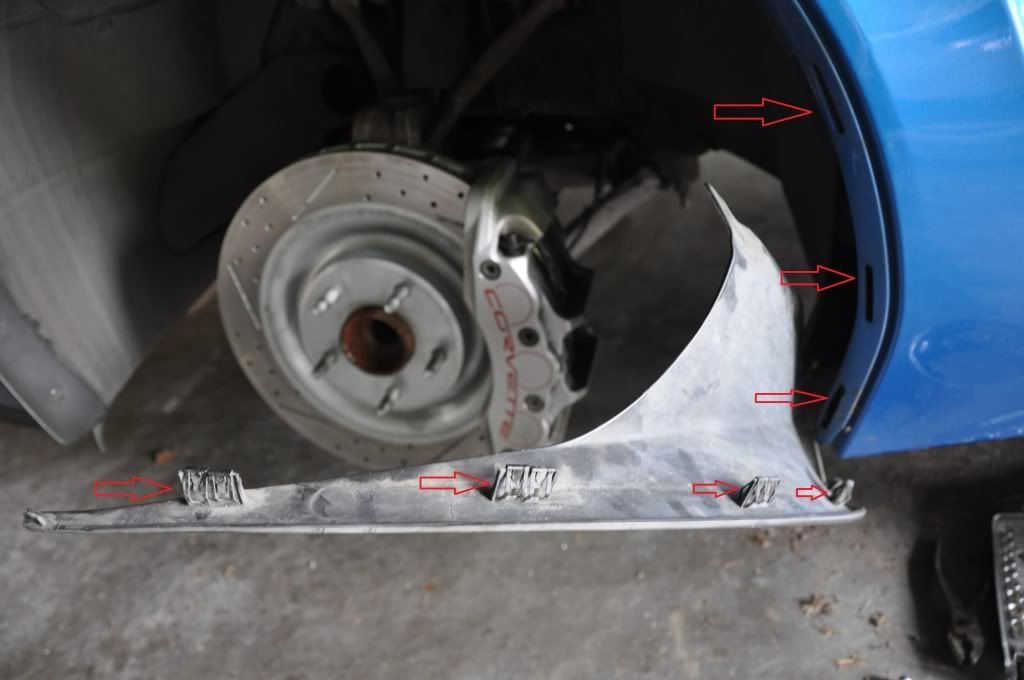
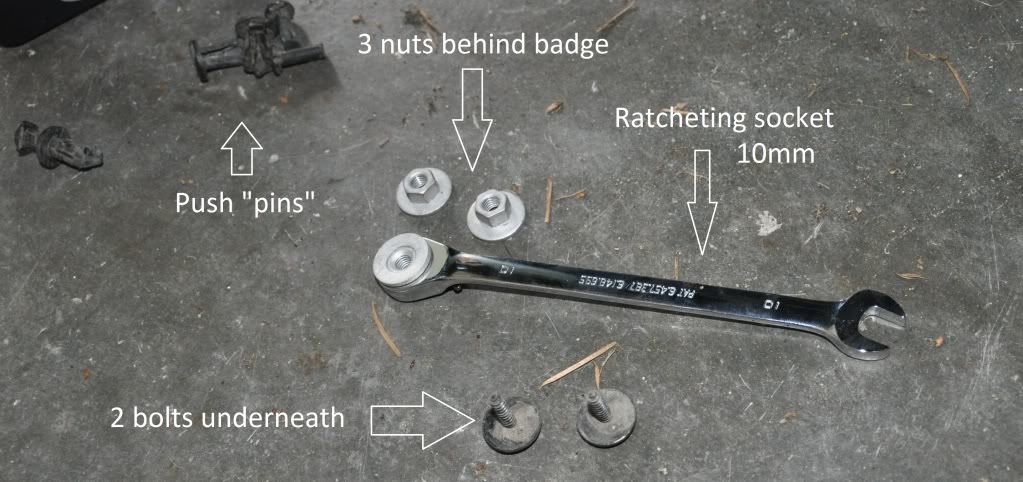
First you need to remove the splash guard inner fender portion. There are 3 push-lock plastic holders the achieve this function on the inside, you need to either use the special tool or a small flathead and pliers to pull out the center piece, then pull out the whole assembly.
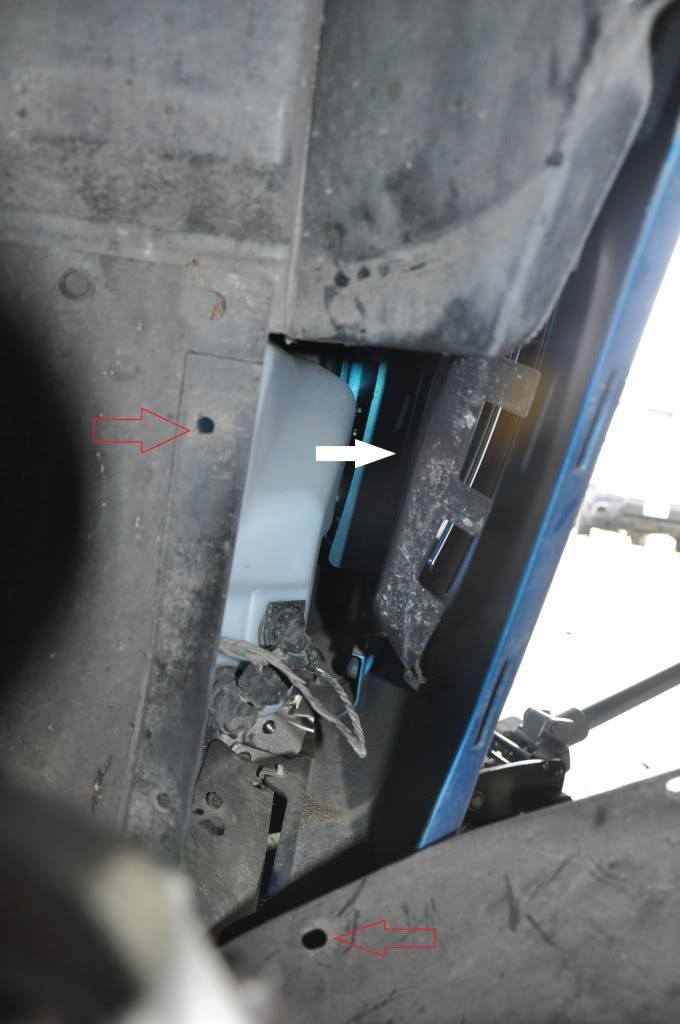
The bottom also has 2 small bolts that can be removed quickly with a ratchet. The last piece (which I do not have a picture of) is a small piece of plastic that bridges the underside of the car with the fender piece. I did not remove this on the driver side, but I found it necessary to do so on the passenger side to flex out the bodywork due to the dry sump.
Last but not least, the plastic is held to the fender with 2 metal clips per tab that should pull through the openings. Be careful here as I found some of them needed to be manually compressed to slip through as they were flexing the fiberglass.
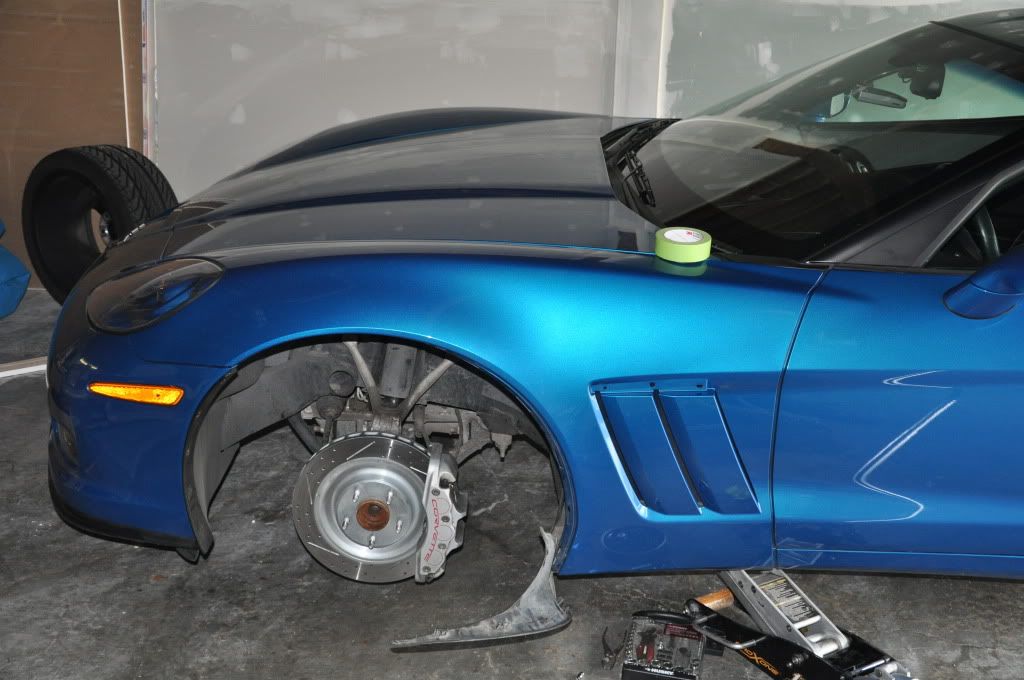
Here is the drivers side fender piece popped down:
Next you need to remove the nuts from the bolts attached to the back of the badges. If you have not invested in a set of ratcheting socket wrenches now is a great time!
I was worried after hearing everyone talk about how their hands didnt fit well - and I have awful big hands. I found mechanics gloves work great for protecting your hands here. You need to pop your hand behind the gill cover with your wrench and loosen/remove each of the nuts. In my case I found the wrench only needed to move the nuts about a quarter turn and they could be spun off easily with my fingers.
When reaching behind the gill covers it's a bit easier to use both hands to separate the cover a bit from the bodywork and allow your hand to slide through initially. It will save you some pain. Here are the gill covers on either side:

Note that on the dry sump side (only applicable to MN6 cars) because there was so little space it helped to completely remove the fender piece allowing the bodywork to flex out a couple inches - that freed up plenty of space for my big hands without damaging anything.
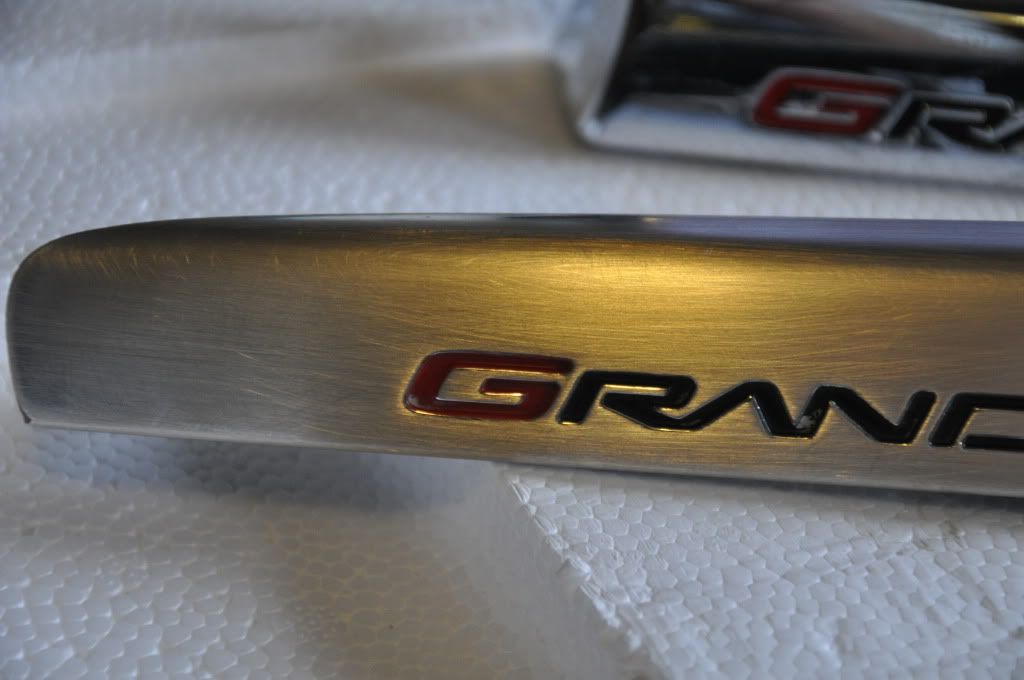
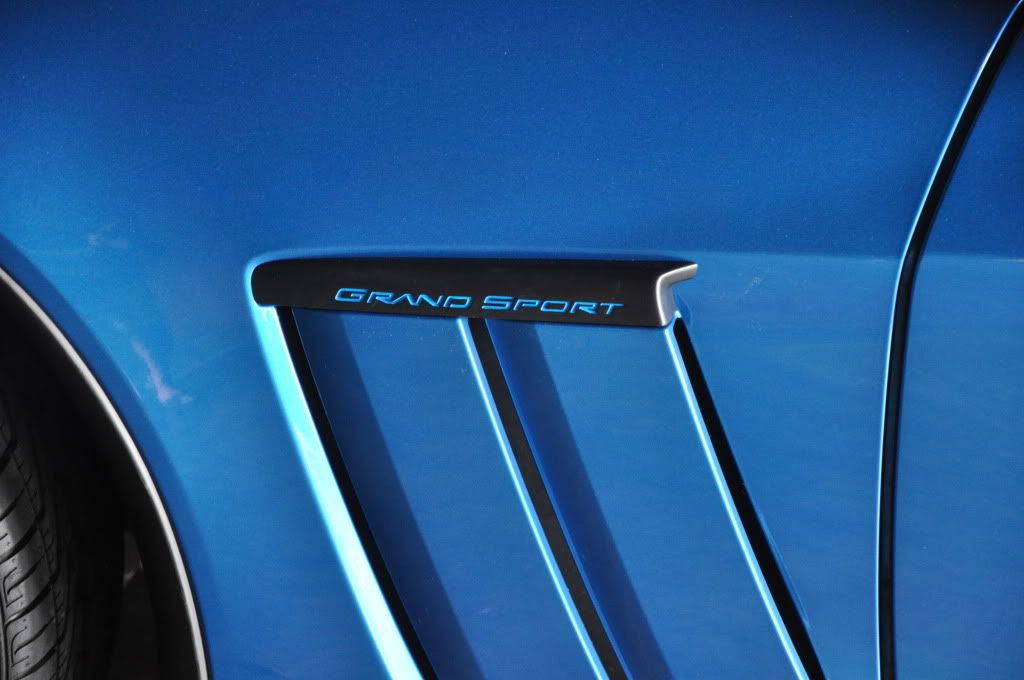
In case any of you were wondering what the car looked like without badges....
At this point you have the option to replace or repaint - I opted to repaint. One big note is that when repainting chrome I strongly suggest you either sand down to the plastic underneath, really scuff it well, or simply order some new black (non-chrome) badges and start with those. I started by scuffing thoroughly with 120 grit sandpaper:
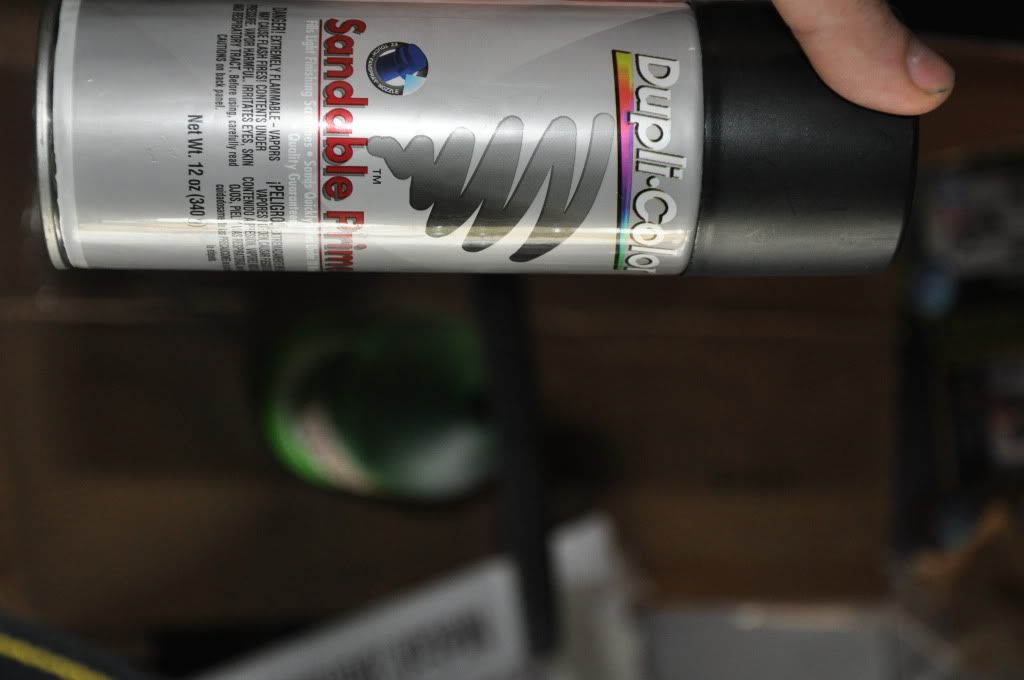
In hindsight, this probably was not enough as I had some issues with adhesion later. I sprayed over with one of my all-time favorite paints - Duplicolor sandable primer. It creates one of the nicest starting surfaces I've ever worked with from a can:
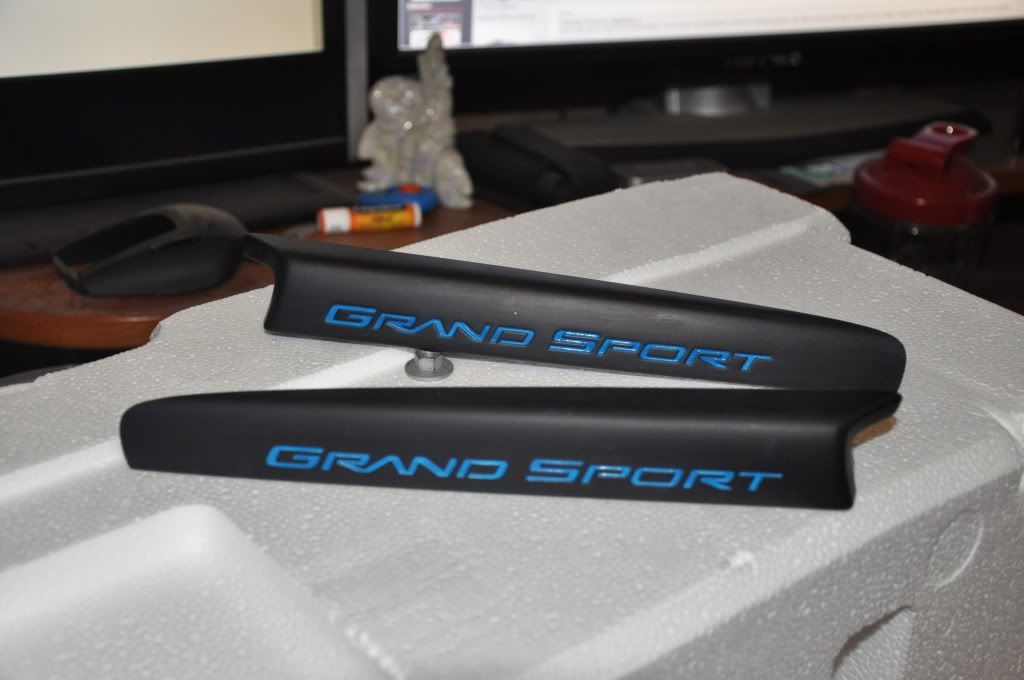
At this point should all go well, you have a whole variety of options. Some may opt to brush in, my preference was to airbrush in the letters in white, then airbrush a custom color combo using some candy inks and semi-opaque blues. The match turned out to be pretty close (without the metallic flake.)
This is the first iteration (then I had problems with the paint lifting with some tape messing up the rear badge.) The second attempt worked out better. After they were painted up I wanted to keep the matte/satin look so I finished with a satin polyurethane. We will see how it holds up to the elements, you can obviously choose whatever paint/finish floats your boat.
Putting them back on simply consists of buttoning back up in reverse order that you took everything off, pretty simple. Make sure if you painted the threads are clean (enough) on the badge bolts. On the car:
Also, I apologize for the lack of pictures I was running out of daylight and just snapped a few. This is something even the most average shade tree mechanic can pull off, you just need to know where everything goes.First you need to remove the splash guard inner fender portion. There are 3 push-lock plastic holders the achieve this function on the inside, you need to either use the special tool or a small flathead and pliers to pull out the center piece, then pull out the whole assembly.
The bottom also has 2 small bolts that can be removed quickly with a ratchet. The last piece (which I do not have a picture of) is a small piece of plastic that bridges the underside of the car with the fender piece. I did not remove this on the driver side, but I found it necessary to do so on the passenger side to flex out the bodywork due to the dry sump.
Last but not least, the plastic is held to the fender with 2 metal clips per tab that should pull through the openings. Be careful here as I found some of them needed to be manually compressed to slip through as they were flexing the fiberglass.
Here is the drivers side fender piece popped down:
Next you need to remove the nuts from the bolts attached to the back of the badges. If you have not invested in a set of ratcheting socket wrenches now is a great time!
I was worried after hearing everyone talk about how their hands didnt fit well - and I have awful big hands. I found mechanics gloves work great for protecting your hands here. You need to pop your hand behind the gill cover with your wrench and loosen/remove each of the nuts. In my case I found the wrench only needed to move the nuts about a quarter turn and they could be spun off easily with my fingers.
When reaching behind the gill covers it's a bit easier to use both hands to separate the cover a bit from the bodywork and allow your hand to slide through initially. It will save you some pain. Here are the gill covers on either side:
Note that on the dry sump side (only applicable to MN6 cars) because there was so little space it helped to completely remove the fender piece allowing the bodywork to flex out a couple inches - that freed up plenty of space for my big hands without damaging anything.
In case any of you were wondering what the car looked like without badges....
At this point you have the option to replace or repaint - I opted to repaint. One big note is that when repainting chrome I strongly suggest you either sand down to the plastic underneath, really scuff it well, or simply order some new black (non-chrome) badges and start with those. I started by scuffing thoroughly with 120 grit sandpaper:
In hindsight, this probably was not enough as I had some issues with adhesion later. I sprayed over with one of my all-time favorite paints - Duplicolor sandable primer. It creates one of the nicest starting surfaces I've ever worked with from a can:
At this point should all go well, you have a whole variety of options. Some may opt to brush in, my preference was to airbrush in the letters in white, then airbrush a custom color combo using some candy inks and semi-opaque blues. The match turned out to be pretty close (without the metallic flake.)
This is the first iteration (then I had problems with the paint lifting with some tape messing up the rear badge.) The second attempt worked out better. After they were painted up I wanted to keep the matte/satin look so I finished with a satin polyurethane. We will see how it holds up to the elements, you can obviously choose whatever paint/finish floats your boat.
Putting them back on simply consists of buttoning back up in reverse order that you took everything off, pretty simple. Make sure if you painted the threads are clean (enough) on the badge bolts. On the car:
Last edited by bluedevil99; 04-02-2012 at 02:05 AM. Reason: Updated how-to


 03-27-2012, 11:44 PM
#4
Drifting
Thread Starter
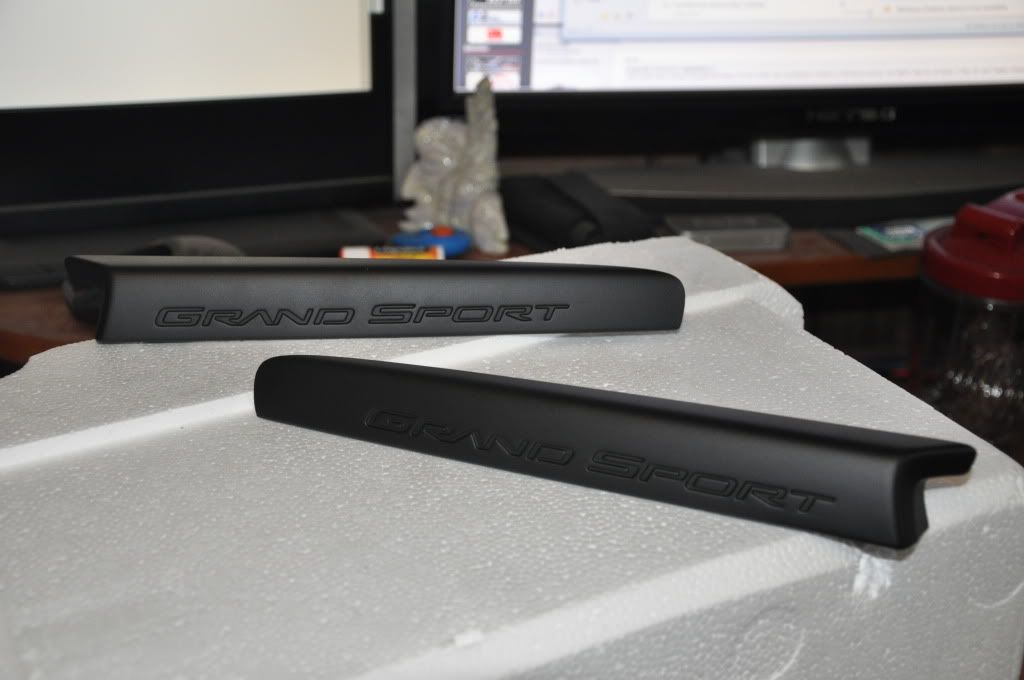
I'm actually coating them with a satin polyurethane, I wanted to keep the matte black look to match my wheels. In case anyone was wondering what it would look like sans coloring... (and I strongly considered putting them on like this..)
Also I discovered if 'brushed aluminum' is your thing, that can pretty easily be accomplished with a little sandpaper on the chrome - you can see the untouched chrome badge in the rear.
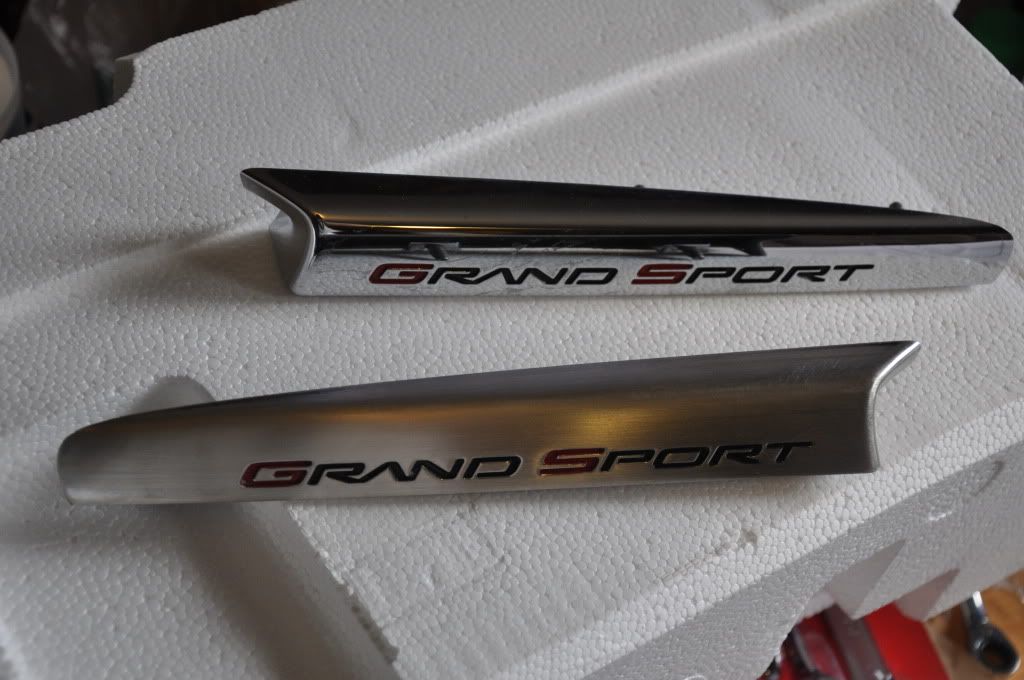
Up close and personal you can see the "brushed" effect (which I did inadvertantly, if I was being careful it would look better.)
Also I discovered if 'brushed aluminum' is your thing, that can pretty easily be accomplished with a little sandpaper on the chrome - you can see the untouched chrome badge in the rear.
Up close and personal you can see the "brushed" effect (which I did inadvertantly, if I was being careful it would look better.)


 I like what. You are doing, be nice to see them on your Vett
  03-28-2012, 12:49 AM
#8
Drifting
Thread Starter
To get the blue I just mixed some semi-opaque and candy ink blues and repeated the same process. It's not without its drawbacks, but is FAR easier than most options.


 03-28-2012, 08:57 AM
#12
Team Owner

Looking Good.
 03-28-2012, 12:56 PM
#14
Drifting
Thread Starter
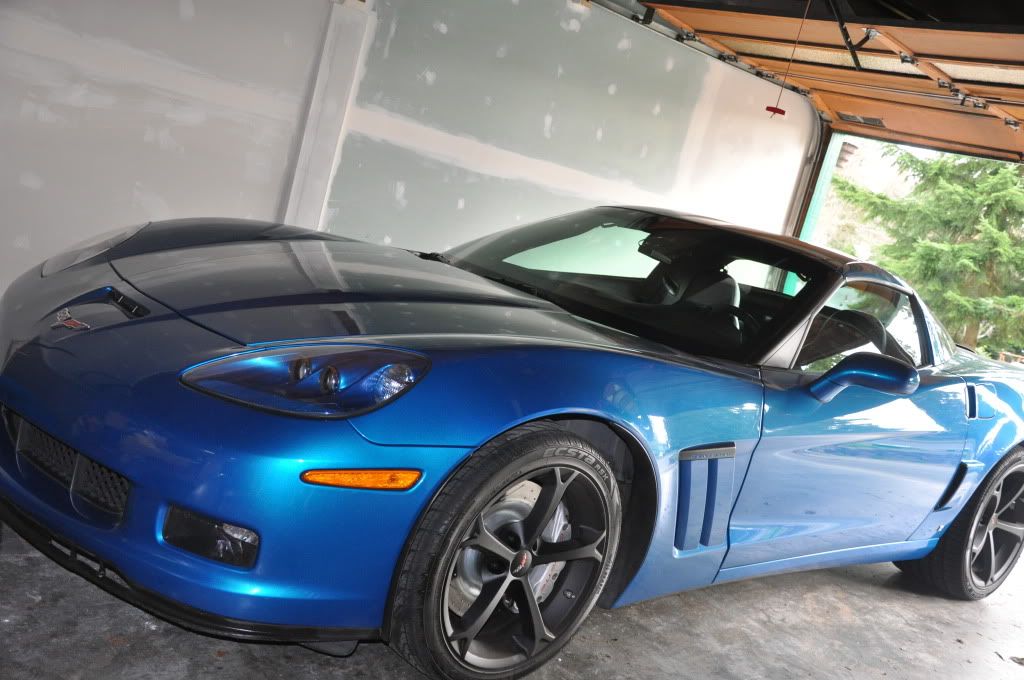
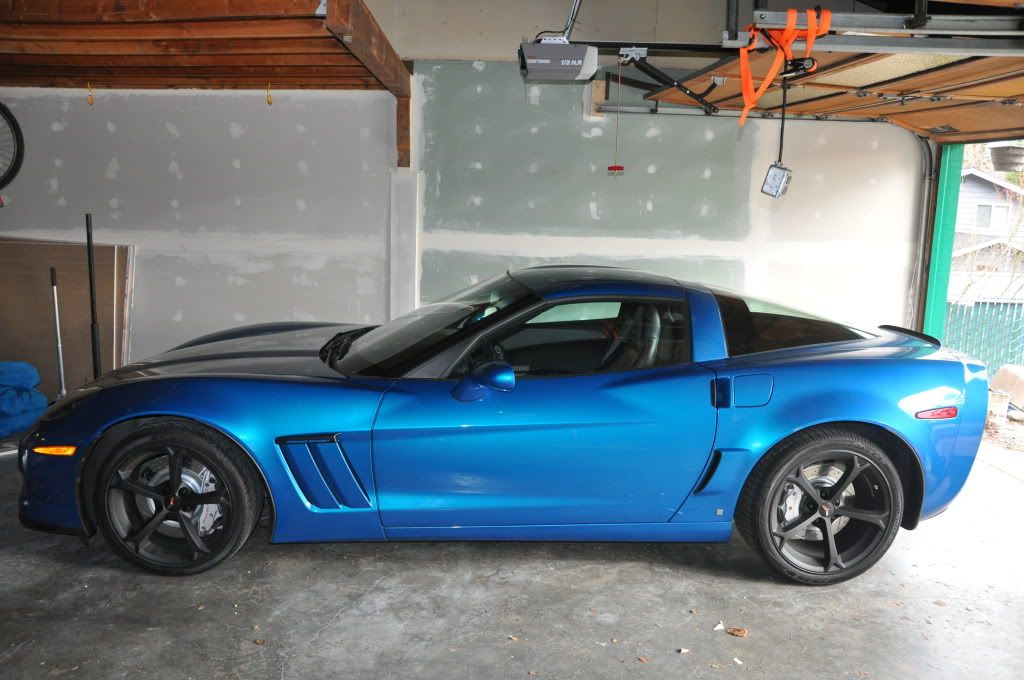
With the lighting I had and the lettering so small it was hard to capture an accurate picture of how they look, but it turned out pretty well! Couple shots of the car with them on:
Last edited by bluedevil99; 03-28-2012 at 12:59 PM.
03-28-2012, 01:04 PM
#15
Safety Car

Excellent job!!! Those are Beautiful 
 03-28-2012, 01:09 PM
#17
Drifting
Thread Starter
Only thing left to do is paint the chiclets

Last edited by bluedevil99; 03-28-2012 at 01:11 PM.


 03-28-2012, 01:42 PM
#20
Team Owner

Member Since: Aug 2007
Location: I live my life by 2 rules. 1) Never share everything you know. 2)
Posts: 136,148
Received 2,402 Likes
on
1,366 Posts
St. Jude Donor '11-'12-'13, '16-'17-'18

How'd you remove 'em and replace 'em without pulling the fenders and the inner "gill cover"?