
New!! Two-Tone Leather Console Covers **$109.99**


 11-04-2010, 06:49 AM
#23
Melting Slicks


How long does shipping usually take? I am in Indiana and ordered on 10/23. I assume it didn't ship out until Mon 10/25 but am wondering if I should be worried that several business days have gone by?
11-07-2010, 11:42 AM
#25
Melting Slicks
Update on this cover.
Ordered and was shipped promptly. It came in a box that would fit a pair of FRC's so the cover was superbly protected during shipping.
Went to ACE hardware and bought the #15 Torx driver ($6.99) and it took me more time to take off the car cover than it did to remove the console cover. Takes less than two minutes to remove.
Removed the 7 Torx screws that hold the existing console "pad" in less than 3 minutes.
Cleaned the edges with alcohol and let dry (takes about two minutes as well).
Cut the supplied two sided tape and add to the necessary areas. Less than 4 minutes.
Stretch and align the new padded cover over the console cover. Remove the other side of the two sided tape and press the padded cover to the tape.
Reinstall the inside panel and put back in the 7 torx screws.
Done deal!
I am telling you it took all of maybe 20 minutes to do this job. I'm going to leave the finished product indoors for a few days to keep it warm.
Pictures to follow.
Last edited by ALD_Z06; 11-07-2010 at 11:50 AM.
11-07-2010, 12:57 PM
#26
Former Vendor
Thread Starter

Member Since: Dec 2007
Location: Ft Worth TX
Posts: 22,135
Likes: 0
Received 2 Likes
on
2 Posts
St. Jude Donor '12-'13
Update on this cover.
Ordered and was shipped promptly. It came in a box that would fit a pair of FRC's so the cover was superbly protected during shipping.
Went to ACE hardware and bought the #15 Torx driver ($6.99) and it took me more time to take off the car cover than it did to remove the console cover. Takes less than two minutes to remove.
Removed the 7 Torx screws that hold the existing console "pad" in less than 3 minutes.
Cleaned the edges with alcohol and let dry (takes about two minutes as well).
Cut the supplied two sided tape and add to the necessary areas. Less than 4 minutes.
Stretch and align the new padded cover over the console cover. Remove the other side of the two sided tape and press the padded cover to the tape.
Reinstall the inside panel and put back in the 7 torx screws.
Done deal!
I am telling you it took all of maybe 20 minutes to do this job. I'm going to leave the finished product indoors for a few days to keep it warm.
Pictures to follow.

 11-09-2010, 08:52 PM
#29
Instructor

Member Since: Aug 2010
Location: Norcal
Posts: 109
Likes: 0
Received 0 Likes
on
0 Posts
ALD_Z06, great pics and writeup- I really appreciate it! Any pics of it in the car? And What color is that, ebony and titanium? I like the contrast stitching, and it seems to have *just* enough padding. I'm about to pull the trigger on a console cover or lid and this is one of my top choices...
And What color is that, ebony and titanium? I like the contrast stitching, and it seems to have *just* enough padding. I'm about to pull the trigger on a console cover or lid and this is one of my top choices...
11-10-2010, 10:12 AM
#30
Melting Slicks
ALD_Z06, great pics and writeup- I really appreciate it! Any pics of it in the car? And What color is that, ebony and titanium? I like the contrast stitching, and it seems to have *just* enough padding. I'm about to pull the trigger on a console cover or lid and this is one of my top choices...
And What color is that, ebony and titanium? I like the contrast stitching, and it seems to have *just* enough padding. I'm about to pull the trigger on a console cover or lid and this is one of my top choices...Ebony and titanium.
11-10-2010, 01:48 PM
#31
Racer
Member Since: Sep 2006
Location: Southern New Jersey
Posts: 486
Likes: 0
Received 7 Likes
on
6 Posts

I woke up at 3 am this morning and couldn't sleep, so I put on my cashemere and ebony armrest cover that just came yesterday.
Originally:
Here's what mine ended up looking like.
It has a good deal of cushioning power, but it's firm enough to feel like it's not just mushy like a pillow. I've only had my elbow on it for 30 minutes, but it was very comfortable and immediately noticable.
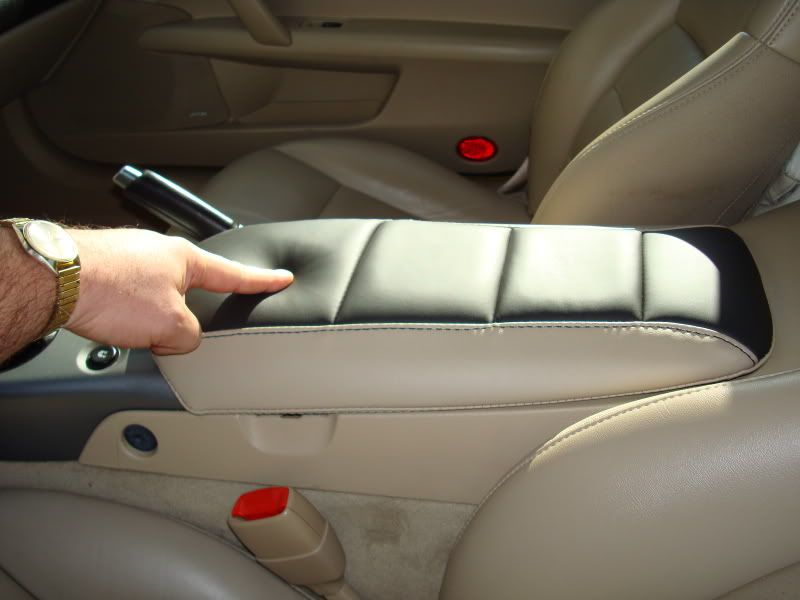
As you can see by the wavy stitching below, I didn't get it installed perfectly straight, but it looks right from the top side.
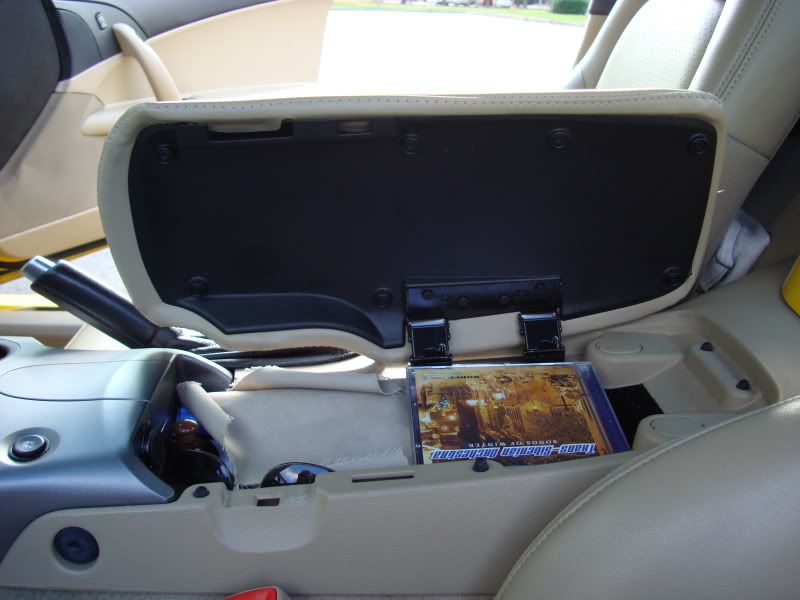
I don't use the latch since the catch part broke last year. I just decided to take it off altogether. If anyone has a link to purchase just the latch part though, I'd put one back on. The padding tends to want to push the armrest up just a bit instead of staying completely closed.
As far as the installation goes, it wasn't too hard and was mostly logical. The only rub was that there wasn't enough of the sticky-tape to go all the way around. After cutting an inch off for the middle of the latch area, I ended up being 2 inches short by the time I got it wrapped completely around, and since you lay the tape clockwise, it ended up being up front where it could be very noticable.
I robbed a piece from the back to close it up, and with a small piece of medical tape, was able to get it positioned in place just fine. I think a little more tape should be included in the kit, though. Better to throw away a few inches of the stuff than to have people duct-taping the thing on because there isn't enough tape included. Just for the record, I did follow the directions exactly.
Overall, it is a really nice piece of work, it's beautiful to the eye, looks like it belongs in the car, and feels much better than what was originally there. I can't describe the softness of the leather top, but it's very nice and supple to the touch. Hopefully my rough elbows won't scuff a hole right through it!
TomZ
Originally:
Here's what mine ended up looking like.
It has a good deal of cushioning power, but it's firm enough to feel like it's not just mushy like a pillow. I've only had my elbow on it for 30 minutes, but it was very comfortable and immediately noticable.
As you can see by the wavy stitching below, I didn't get it installed perfectly straight, but it looks right from the top side.
I don't use the latch since the catch part broke last year. I just decided to take it off altogether. If anyone has a link to purchase just the latch part though, I'd put one back on. The padding tends to want to push the armrest up just a bit instead of staying completely closed.
As far as the installation goes, it wasn't too hard and was mostly logical. The only rub was that there wasn't enough of the sticky-tape to go all the way around. After cutting an inch off for the middle of the latch area, I ended up being 2 inches short by the time I got it wrapped completely around, and since you lay the tape clockwise, it ended up being up front where it could be very noticable.
I robbed a piece from the back to close it up, and with a small piece of medical tape, was able to get it positioned in place just fine. I think a little more tape should be included in the kit, though. Better to throw away a few inches of the stuff than to have people duct-taping the thing on because there isn't enough tape included. Just for the record, I did follow the directions exactly.
Overall, it is a really nice piece of work, it's beautiful to the eye, looks like it belongs in the car, and feels much better than what was originally there. I can't describe the softness of the leather top, but it's very nice and supple to the touch. Hopefully my rough elbows won't scuff a hole right through it!
TomZ
11-11-2010, 01:13 AM
#32
Instructor
Member Since: Aug 2010
Location: Norcal
Posts: 109
Likes: 0
Received 0 Likes
on
0 Posts
It looks really good. Much better in pictures from you guys than the website suggests. This style of cover is custom looking; unlike the smooth leather style which is more plain looking. I was deciding between this and another look, and will order one. Thanks for the pictures and the write-ups. It really makes this look killer.
Last edited by Derekdo; 11-11-2010 at 01:00 PM. Reason: Grammar
11-12-2010, 12:03 AM
#33
Former Vendor
Thread Starter
Member Since: Dec 2007
Location: Ft Worth TX
Posts: 22,135
Likes: 0
Received 2 Likes
on
2 Posts
St. Jude Donor '12-'13
It looks really good. Much better in pictures from you guys than the website suggests. This style of cover is custom looking; unlike the smooth leather style which is more plain looking. I was deciding between this and another look, and will order one. Thanks for the pictures and the write-ups. It really makes this look killer.

 11-12-2010, 10:39 AM
#37
Melting Slicks
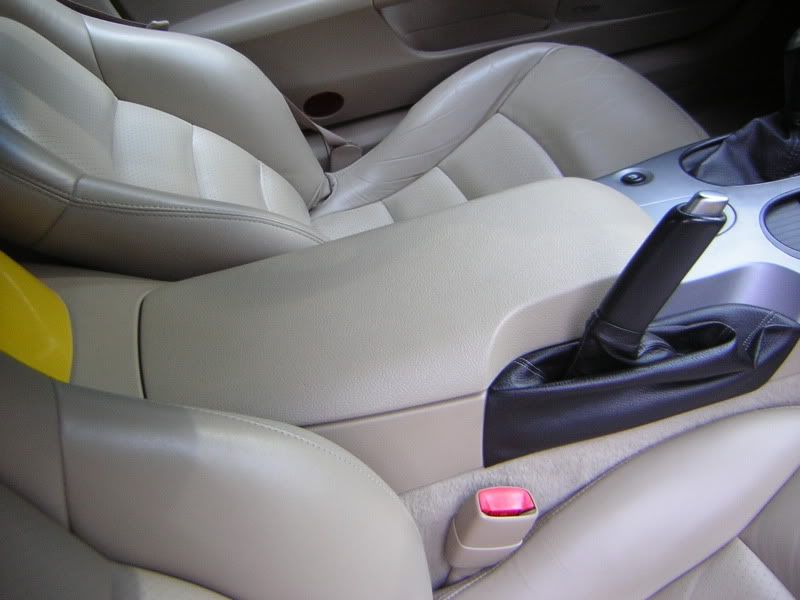
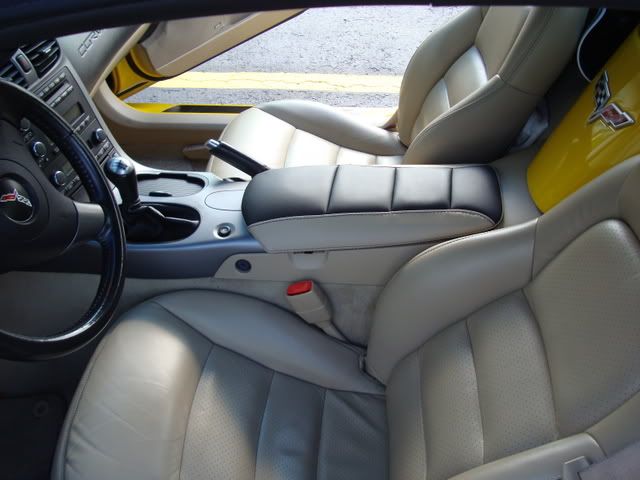
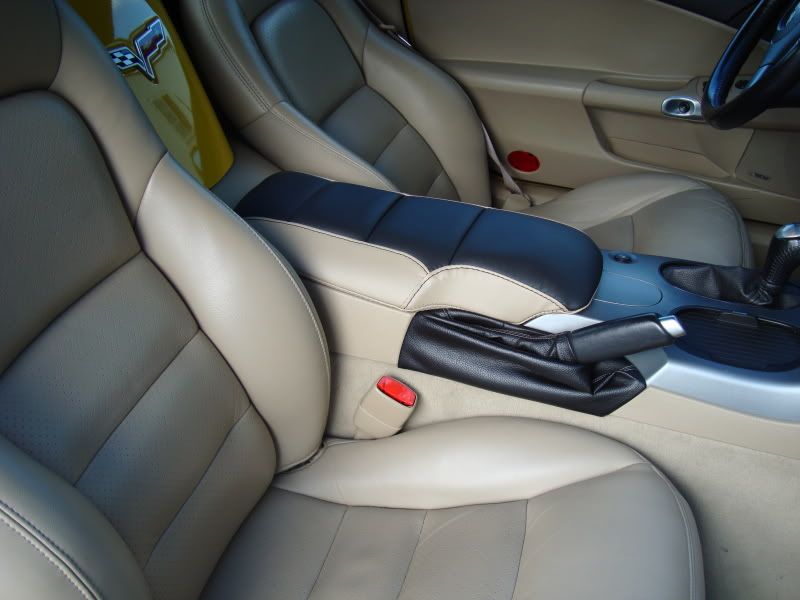
Here's the final install pics.
It is super cushy and I'm glad to say this is one item that really doesn't have a "Corvette Tax".


What's really cool is that the stitching matches the stitching on my two tone seats.
Overall, a big THUMBS UP on this item.
It is super cushy and I'm glad to say this is one item that really doesn't have a "Corvette Tax".
What's really cool is that the stitching matches the stitching on my two tone seats.
Overall, a big THUMBS UP on this item.
11-12-2010, 10:47 AM
#38
Melting Slicks
As a side note to the install, I found a couple of tips.
1) After the initial install, leave it indoors for a few days to let the cover stretch. Then, remove the inside cover and readjust or restretch for a better fit. The tape isn't permanent so if you do it one side at a time it works well.
2) If the install will be permanent, you can use epoxy on the edges after you restretch it and it will be good indefinitely.
That's all for now.