
DIY - Changing out the interior door switch
 10-15-2010, 04:41 PM
#1
Team Owner


Thread Starter
I see posts from time to time about the paint or finish chipping on the door switch buttons. These are a simple and inexpensive do it yourself repair. The switch cost $16.00 from Partstaxi.com or any of our Corvette forum parts vendors. The whole operation can be completed in about five minutes once you get comfortable with the process.
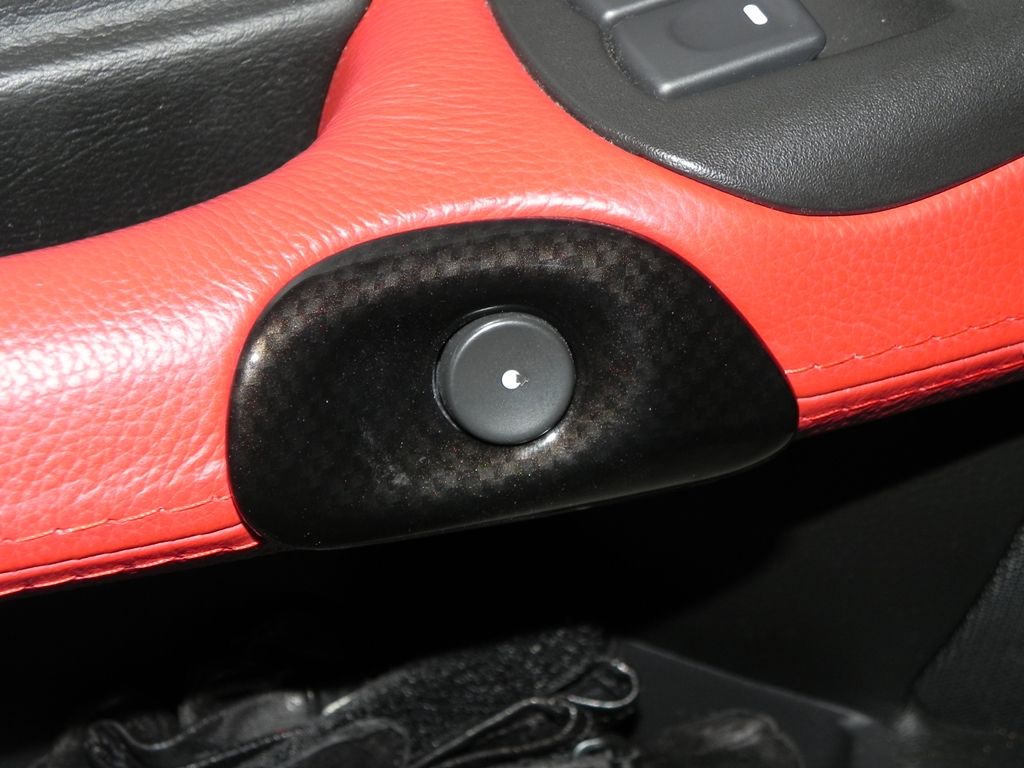
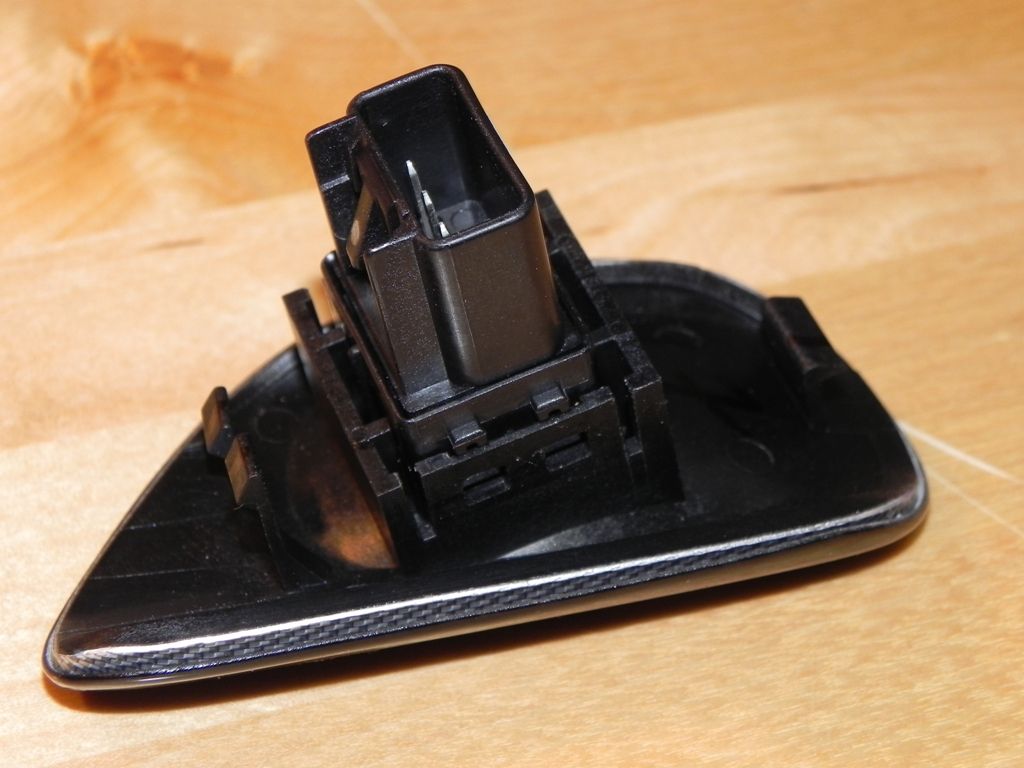
Pictured below is the drivers side but changing the passenger side is just as easy and the steps are exactly the same. The bezel is simply snapped in to the door pull and can be removed with a flat blade screw driver.
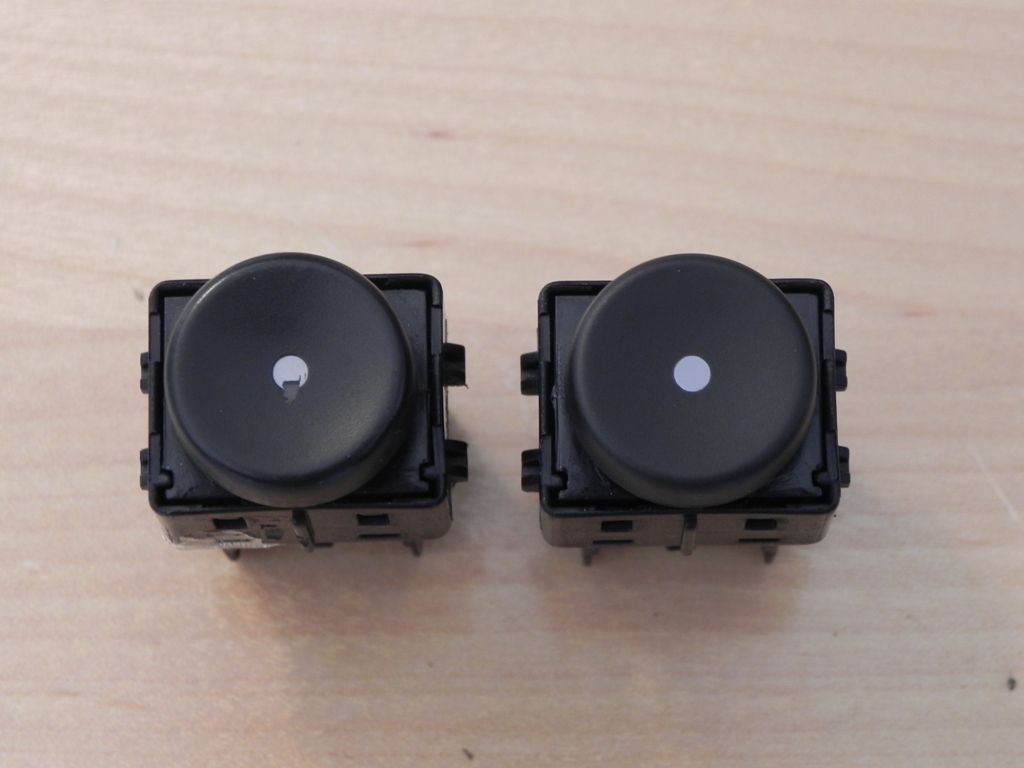
Here's an example of what happens, notice the white dot in the center of the switch. Over time the coating on the interior of the buttom will become worn off from contact with the bulb on repeated button presses.
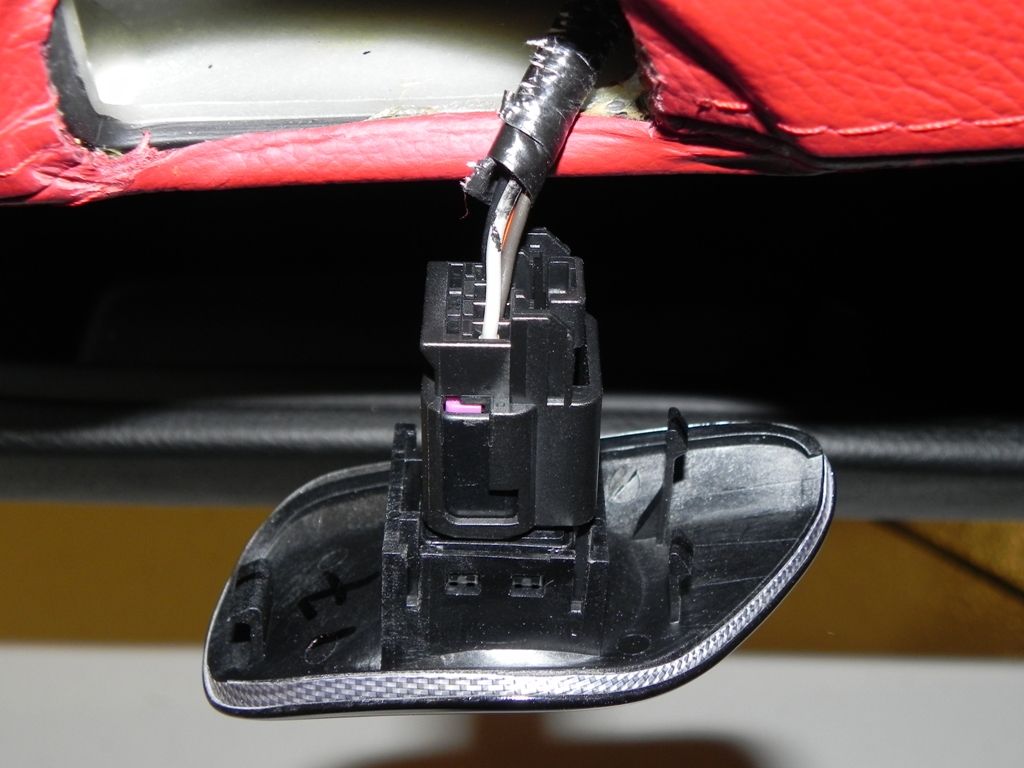
To replace you need to pry the switch bezel from the door pull handle. You can do this with a small flat blade screwdriver and a rag.
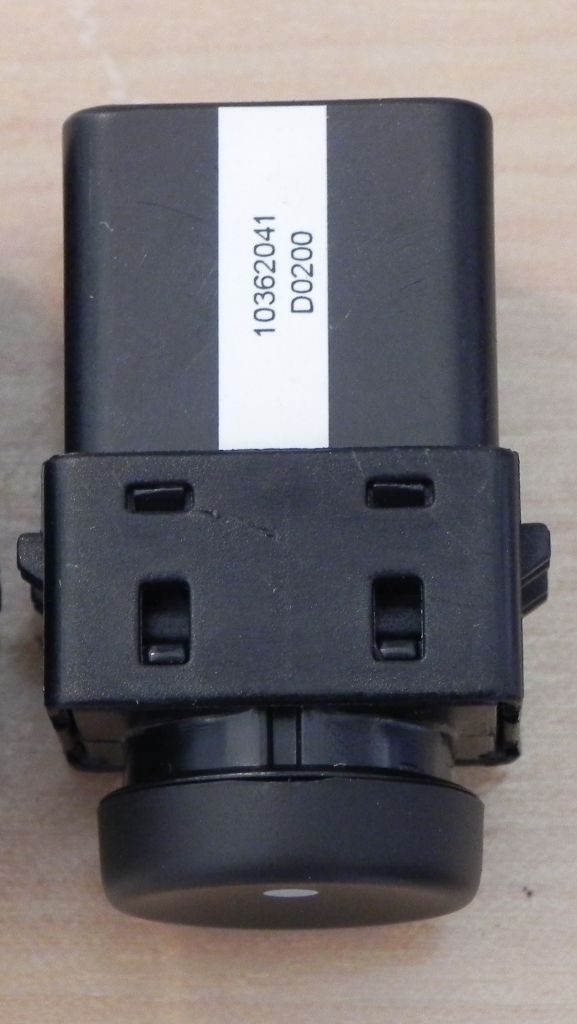
The switch assembly is part number 10362041.

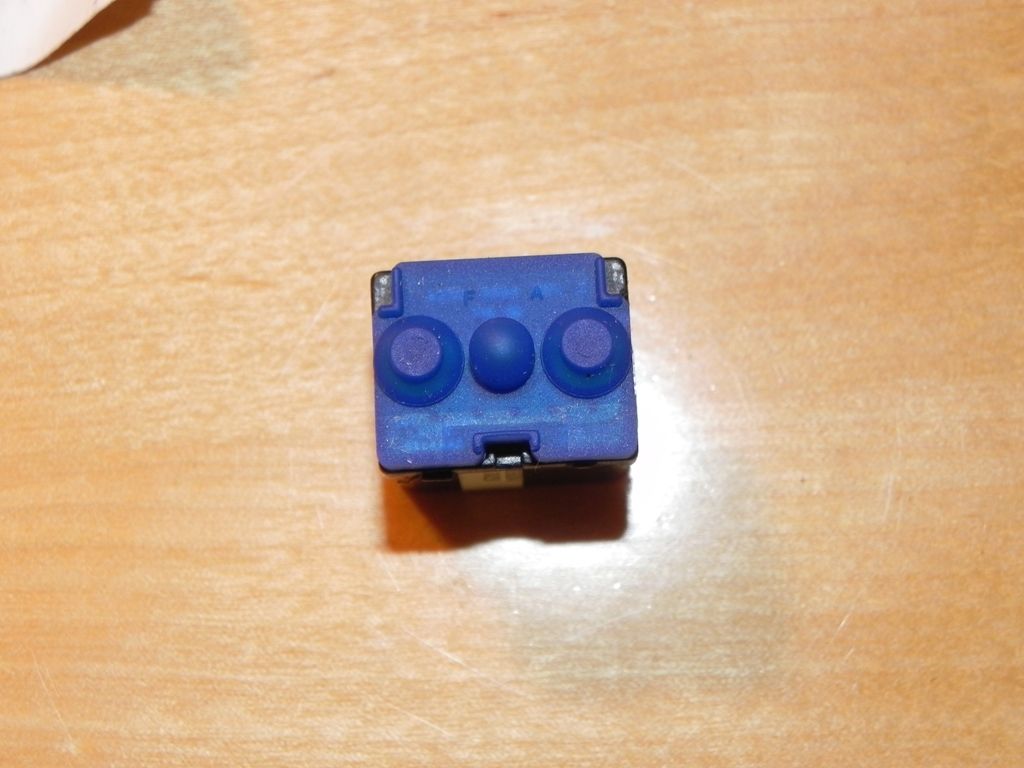
The switch assembly is held in place inside the bezel with four small detents. The switch looks like this:
The bezel that it snaps in to looks like this.

To remove the old switch you need to use the small flat blade screwdriver to pry back the side of the bezel to free the two detents, repeat on the other side while hold the switch base to prevent it from snapping back in to place. Once the other side is free the switch will simply slide out of the bezel.
Snap in the new switch until it locks in place on the four detents, reconnect the connector, press the bezel and switch assembly back in the door pull and you are good to go.

Pictured below is the drivers side but changing the passenger side is just as easy and the steps are exactly the same. The bezel is simply snapped in to the door pull and can be removed with a flat blade screw driver.
Here's an example of what happens, notice the white dot in the center of the switch. Over time the coating on the interior of the buttom will become worn off from contact with the bulb on repeated button presses.
To replace you need to pry the switch bezel from the door pull handle. You can do this with a small flat blade screwdriver and a rag.
The switch assembly is part number 10362041.
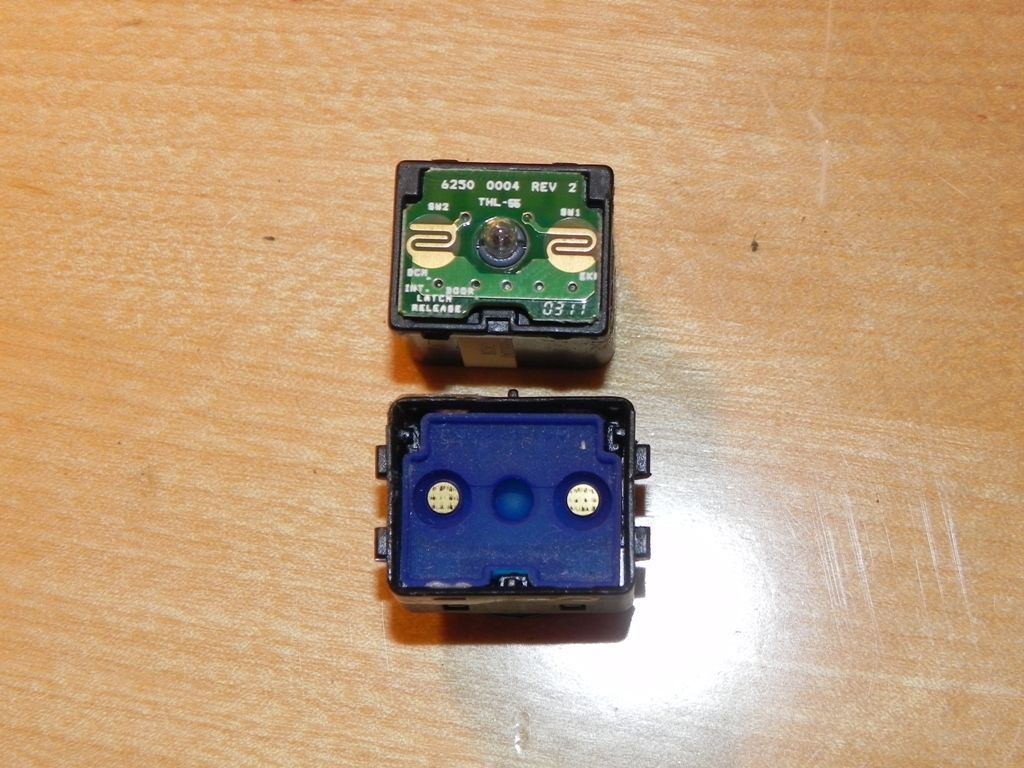
The switch assembly is held in place inside the bezel with four small detents. The switch looks like this:
The bezel that it snaps in to looks like this.
To remove the old switch you need to use the small flat blade screwdriver to pry back the side of the bezel to free the two detents, repeat on the other side while hold the switch base to prevent it from snapping back in to place. Once the other side is free the switch will simply slide out of the bezel.
Snap in the new switch until it locks in place on the four detents, reconnect the connector, press the bezel and switch assembly back in the door pull and you are good to go.
Last edited by talon90; 10-15-2010 at 04:56 PM.

The following users liked this post:
thehaggis (12-22-2015)
10-15-2010, 04:49 PM
#2
Drifting

Thanks for the informative post.
Can the passenger side be changed that simply?
I'm looking to get carbon trim plates for both door switches, and I don't really want to remove the door panels to do the upgrade.
Thanks,
M...
Can the passenger side be changed that simply?
I'm looking to get carbon trim plates for both door switches, and I don't really want to remove the door panels to do the upgrade.
Thanks,
M...
10-15-2010, 04:50 PM
#3
Team Owner
Thread Starter
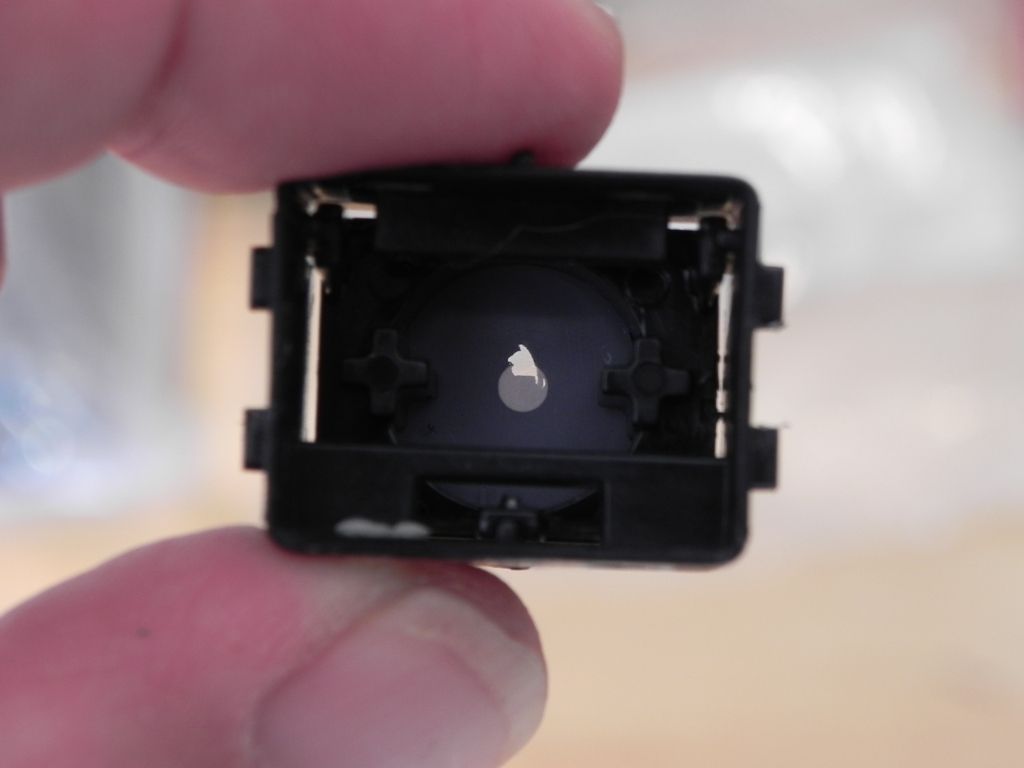
In case anyone was wondering what's inside the little switch:
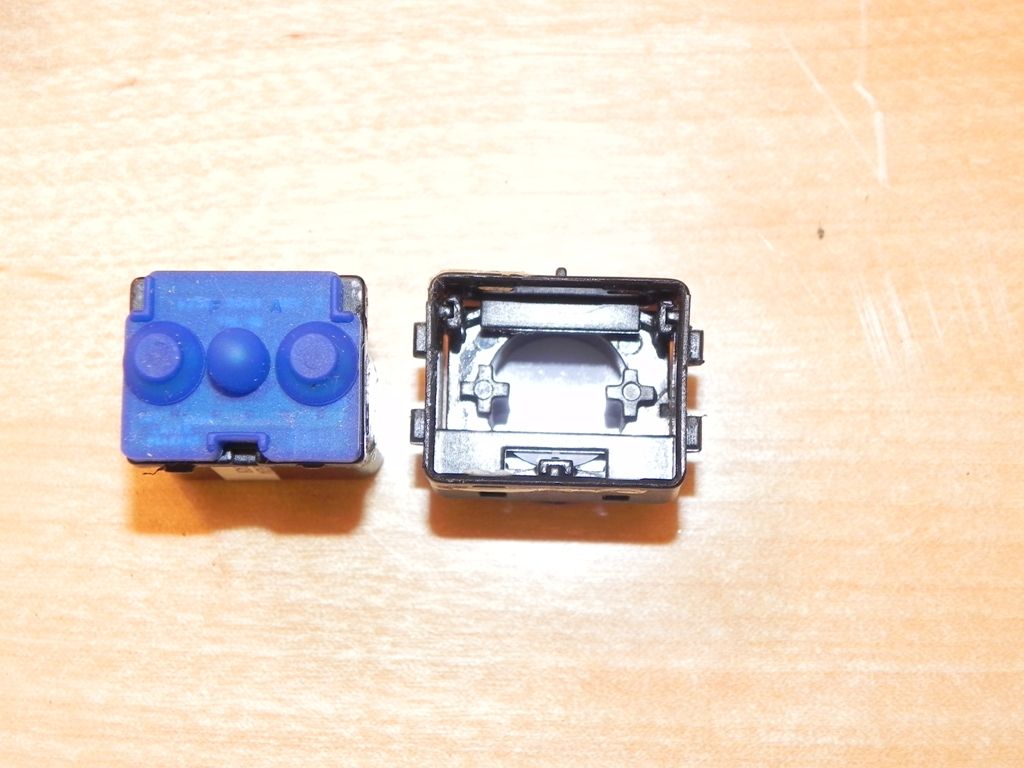
It's the rubber cover on the switch assembly that rubs agains the back of the button when pressed. The button as a little side to side play and which ever side you favor when you press your door switch you'll see the button tip and cause it to come in to contact with the gasket and wear away the finish on the inside.
It's the rubber cover on the switch assembly that rubs agains the back of the button when pressed. The button as a little side to side play and which ever side you favor when you press your door switch you'll see the button tip and cause it to come in to contact with the gasket and wear away the finish on the inside.
Last edited by talon90; 10-15-2010 at 06:29 PM.
10-15-2010, 04:52 PM
#4
Team Owner
Thread Starter
Yes it can. I should have mentioned that in my first post. Pictured is the procedure for the drivers door but the passenger switch is identical once you get the bezel off the door pull. The bezel's are side specific but the rest of the operation is interchangeable.


 10-15-2010, 06:06 PM
#7
Drifting
Great write up and excellent pictures Paul. 


 10-15-2010, 11:07 PM
#12
Team Owner
Member Since: Jun 2005
Location: Northern, VA
Posts: 46,100
Received 2,478 Likes
on
1,941 Posts
St. Jude Donor '15
"In honor of jpee"

not only good info, I don't think my camera even takes pics clearly that closeup.
05-01-2014, 08:32 PM
#13
Burning Brakes

I see posts from time to time about the paint or finish chipping on the door switch buttons. These are a simple and inexpensive do it yourself repair. The switch cost $16.00 from Partstaxi.com or any of our Corvette forum parts vendors. The whole operation can be completed in about five minutes once you get comfortable with the process.
Pictured below is the drivers side but changing the passenger side is just as easy and the steps are exactly the same. The bezel is simply snapped in to the door pull and can be removed with a flat blade screw driver.
Here's an example of what happens, notice the white dot in the center of the switch. Over time the coating on the interior of the buttom will become worn off from contact with the bulb on repeated button presses.
To replace you need to pry the switch bezel from the door pull handle. You can do this with a small flat blade screwdriver and a rag.
The switch assembly is part number 10362041.
The switch assembly is held in place inside the bezel with four small detents. The switch looks like this:
The bezel that it snaps in to looks like this.
To remove the old switch you need to use the small flat blade screwdriver to pry back the side of the bezel to free the two detents, repeat on the other side while hold the switch base to prevent it from snapping back in to place. Once the other side is free the switch will simply slide out of the bezel.
Snap in the new switch until it locks in place on the four detents, reconnect the connector, press the bezel and switch assembly back in the door pull and you are good to go.
08-27-2016, 05:16 AM
#15

The diy was right on. The pictures give the exact detail of how to replace the button. However, I could not find any web page for Partstaxi. I did find a good deal on ebay.
08-27-2016, 07:42 AM
#16

Kind of a lost cause with replacing the button, since the paint on the new button ends up flaking off again in a year or two.
So I attack the problem a little differently.
We start with the button pulled apart to clean it,

The mating contact areas that you need to clean,

The button gets taped up,

We break out the plastic dip coat to give it a few light coats,

And just as the paint is about to dry, beak out a small drill bit to pin drill the center of the button to remove a small circle of paint so the bulb can shine through at night.


Hence between the two buttons and the starter button, that's a C note to replace ever year or two when the paint starts to flake off them, and with them just repainted isntead, less that a buck of paint and cleaner isntead.
So I attack the problem a little differently.
We start with the button pulled apart to clean it,
The mating contact areas that you need to clean,
The button gets taped up,
We break out the plastic dip coat to give it a few light coats,
And just as the paint is about to dry, beak out a small drill bit to pin drill the center of the button to remove a small circle of paint so the bulb can shine through at night.
Hence between the two buttons and the starter button, that's a C note to replace ever year or two when the paint starts to flake off them, and with them just repainted isntead, less that a buck of paint and cleaner isntead.
Last edited by Dano523; 08-27-2016 at 07:48 AM.
 08-27-2016, 08:37 PM
#18
No worries, and the switch is easy to pull it apart,


And if you have not got around to it, pull door pads should be pulled and cleaned, as well the rear release hatch button as well.
https://www.corvetteforum.com/forums...-pictures.html
And get the button down to this level pulled apart so you can clean the copper contact pieces in the button.

As for the chipped paint starter button, gave up after the second one paint chipping quickly as well, and just stealth painted the rocker once I had the first one pulled apart to clean it isntead.

And if you have not got around to it, pull door pads should be pulled and cleaned, as well the rear release hatch button as well.
https://www.corvetteforum.com/forums...-pictures.html
And get the button down to this level pulled apart so you can clean the copper contact pieces in the button.
As for the chipped paint starter button, gave up after the second one paint chipping quickly as well, and just stealth painted the rocker once I had the first one pulled apart to clean it isntead.
Last edited by Dano523; 08-27-2016 at 08:41 PM.
08-30-2016, 02:41 PM
#19
This is a great idea and a real money saver.
Kind of a lost cause with replacing the button, since the paint on the new button ends up flaking off again in a year or two.
So I attack the problem a little differently.
We start with the button pulled apart to clean it,
The mating contact areas that you need to clean,
The button gets taped up,
We break out the plastic dip coat to give it a few light coats,
And just as the paint is about to dry, beak out a small drill bit to pin drill the center of the button to remove a small circle of paint so the bulb can shine through at night.
Hence between the two buttons and the starter button, that's a C note to replace ever year or two when the paint starts to flake off them, and with them just repainted isntead, less that a buck of paint and cleaner isntead.