
Rotor install DIY....
 05-04-2009, 09:29 PM
#1
Melting Slicks

Thread Starter

******
FRONT:
******
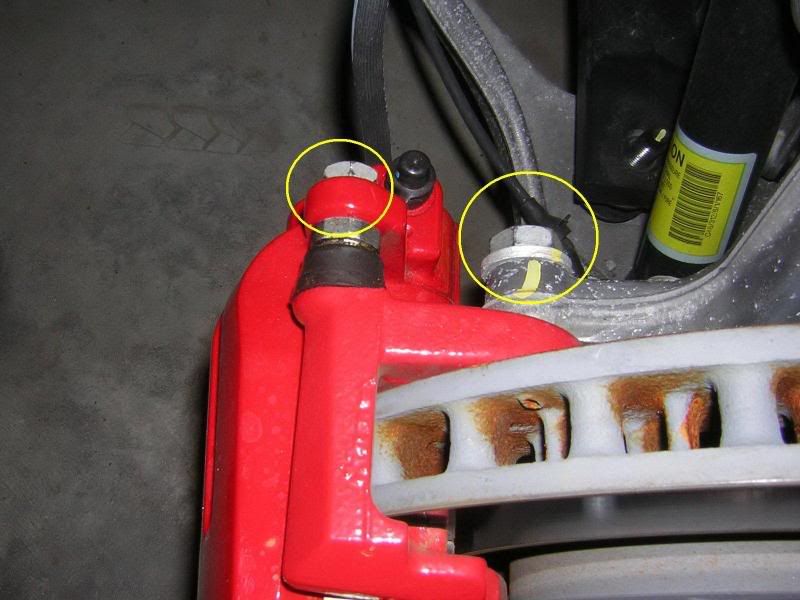
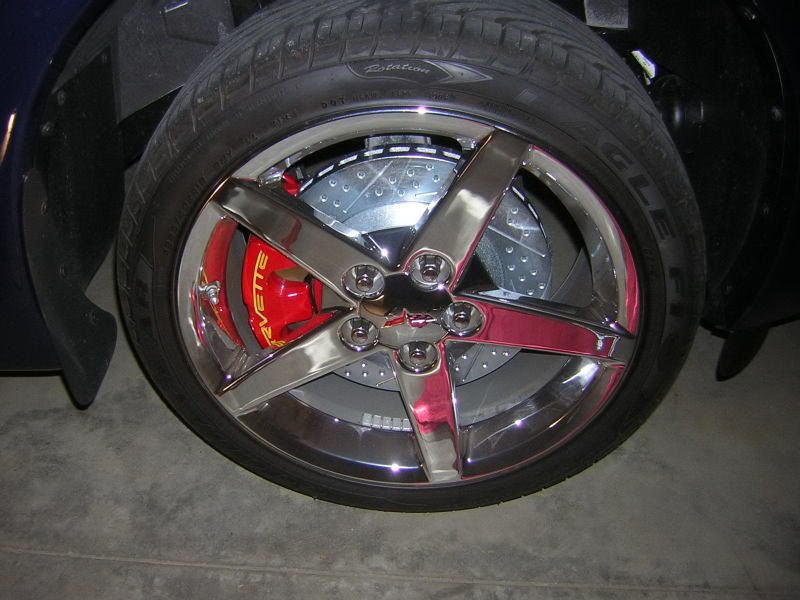
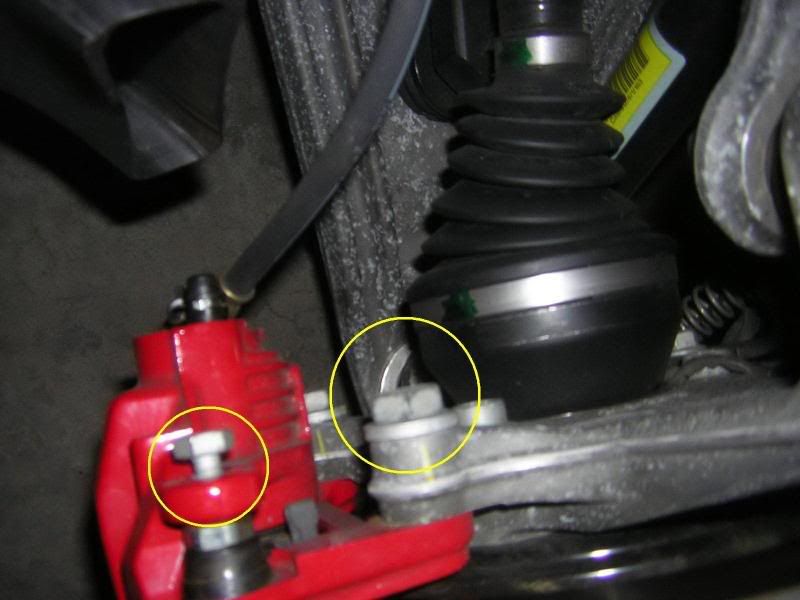
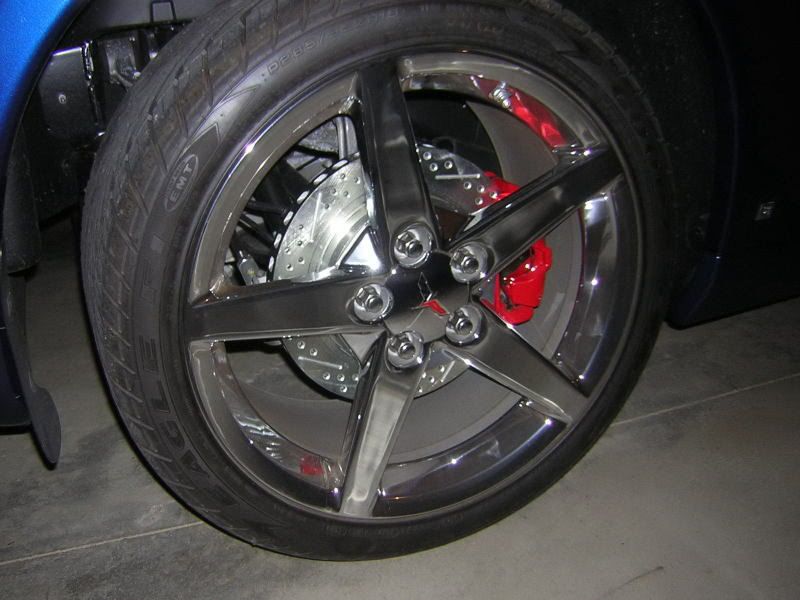
Remove the wheel. To remove the rotor you need to remove the caliper and the bracket. There are 2 bolts for the caliper (top smaller bolt circled on the left), and 2 for the bracket (top larger bolt circled on the right).
HINT - You gain a lot of space to access these bolts if you turn the steering wheel opposite the side you are working on. If you don't do this you are going to have difficulty getting the bolts out (especially the ones holding the bracket) and then torquing them on reassembly - the bracket bolts torque to 125 ft/lbs!
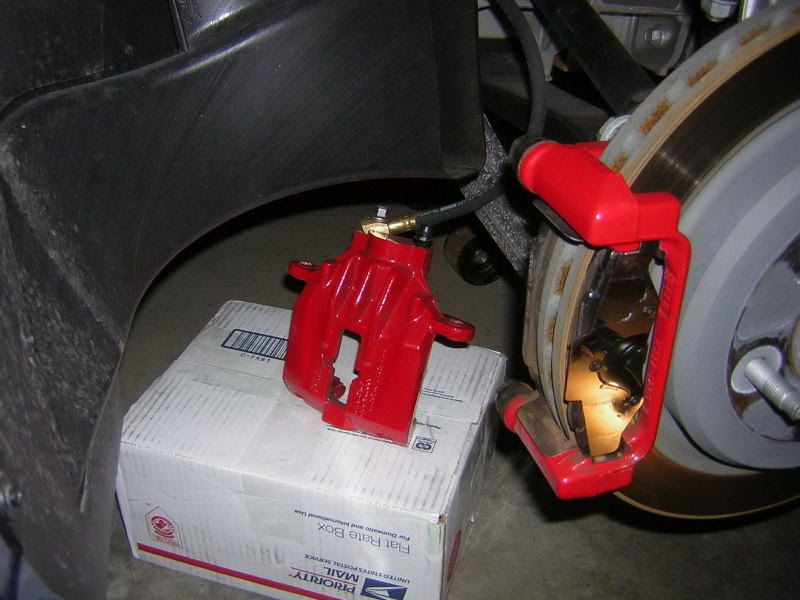
Before you start in on the caliper, find something to rest it on when you remove it from the bracket. It is NOT a good idea to leave it hanging by the brake hose. Some people hang the caliper using wire or a coat hanger, but I always found it easier to just use a small box slid under the wheelwell.
Once the caliper bolts are out, rest the caliper on the box so it's not straining the brake hose.
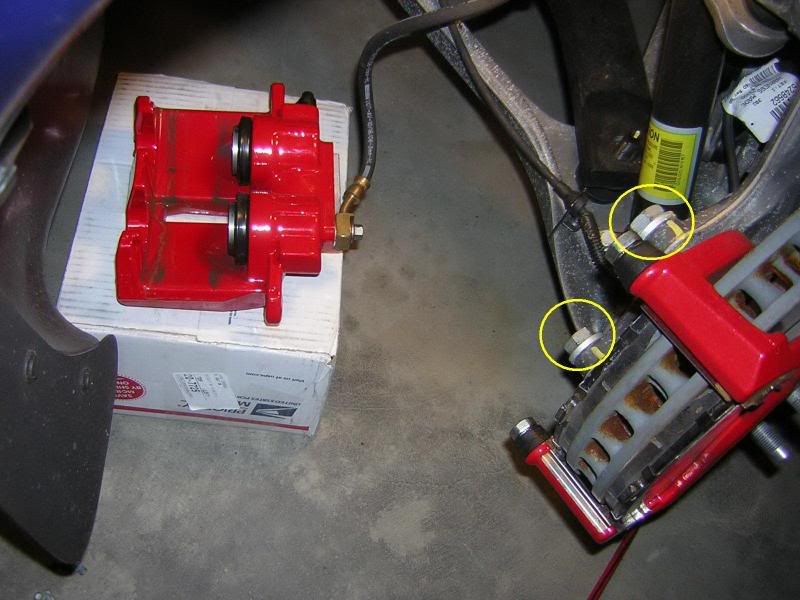
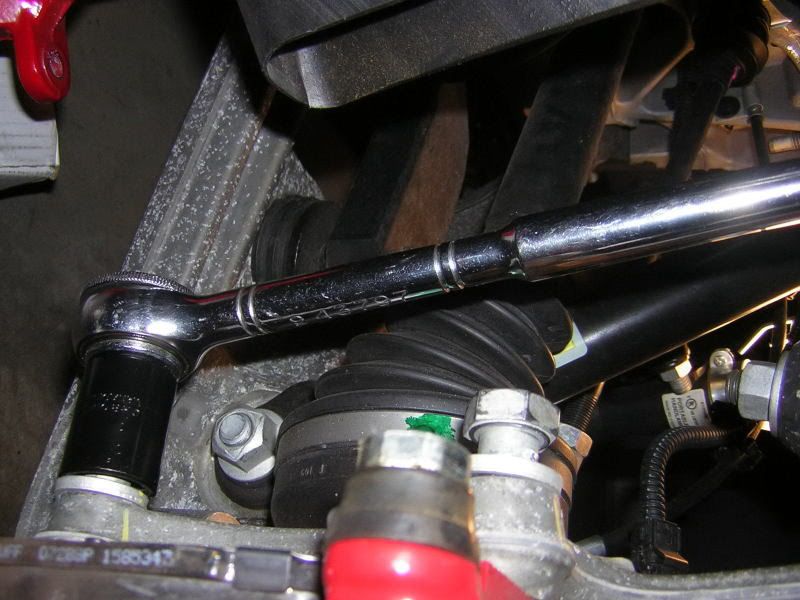
Now remove the 2 bolts holding the bracket (circled above). Notice how much more room you get by turning the wheel - you should be able to get in there with a long ratchet, breaker bar, or impact gun.
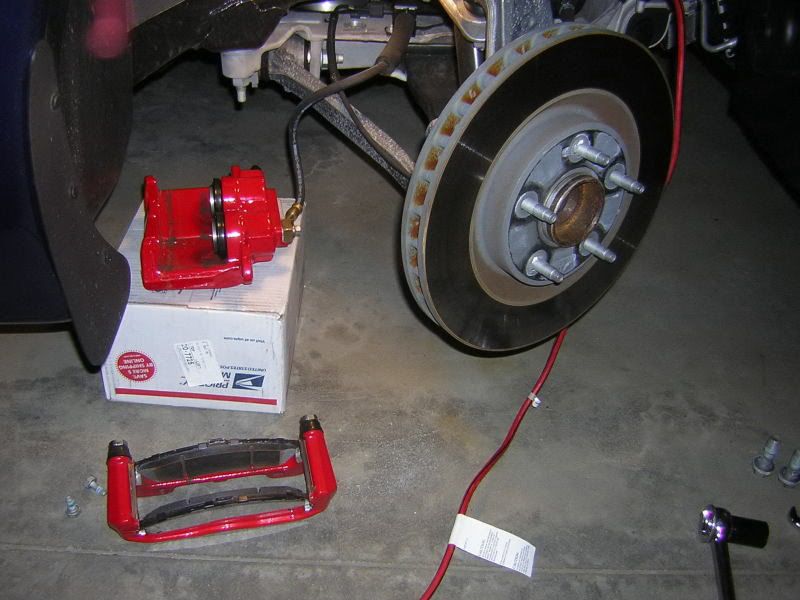
Pads do not have to be removed - they will come out with the bracket. If they fall out just reinstall them on reassembly.
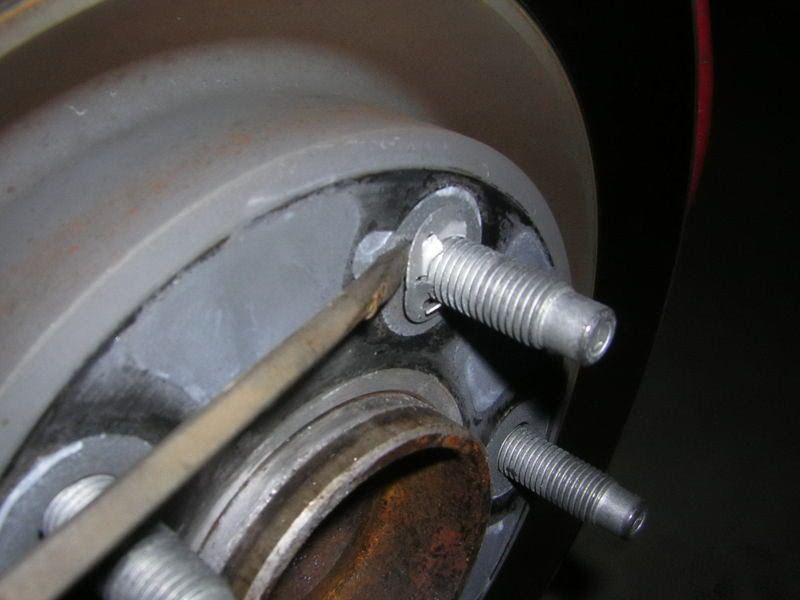
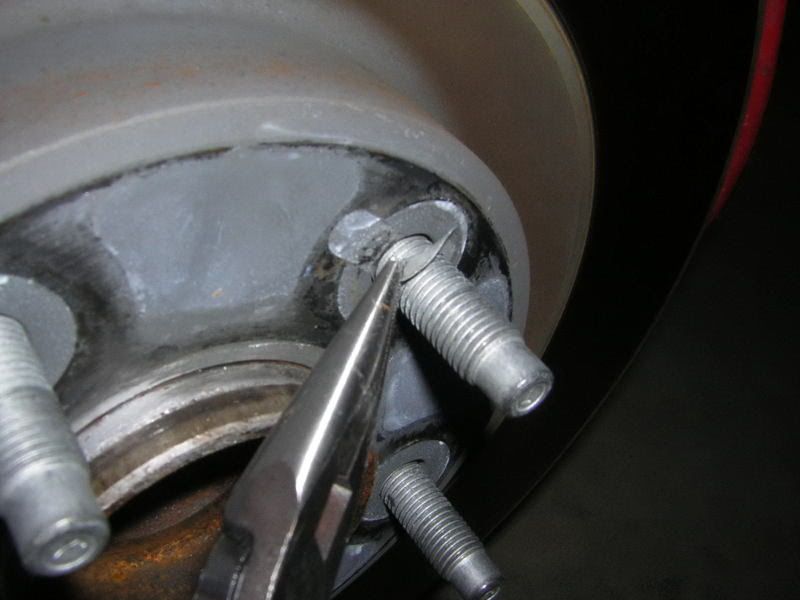
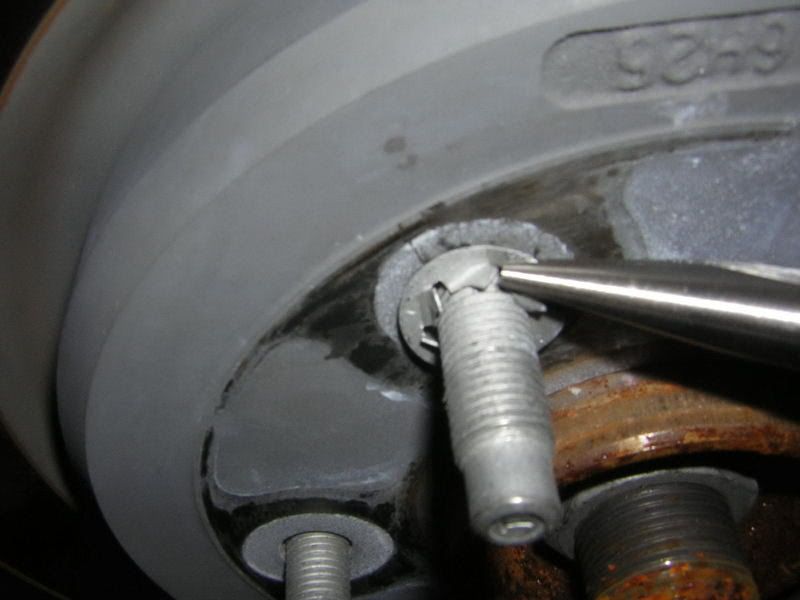
With that out of the way you need to remove the 2 retaining rings that hold the rotor onto the studs. These are used to hold the rotor on during manufacturing, they are not needed now. I just pry up on one end so I can grab it with needlenose pliers and twist it to snap it off.
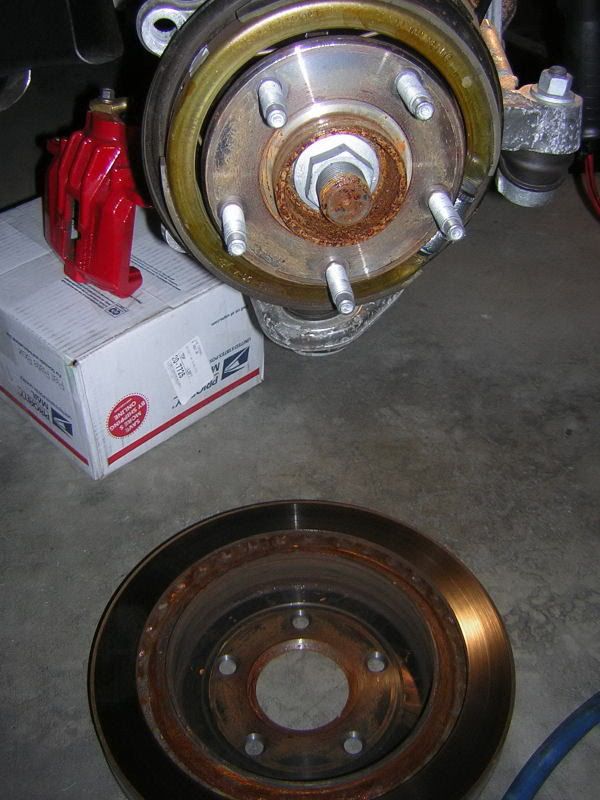
At this point you *should* just be able to pull the rotor right off. If not, try using some penetrating oil between the hub and rotor giving it time to work. Also, there are a few threads you can search for on how to get a stuck rotor off.
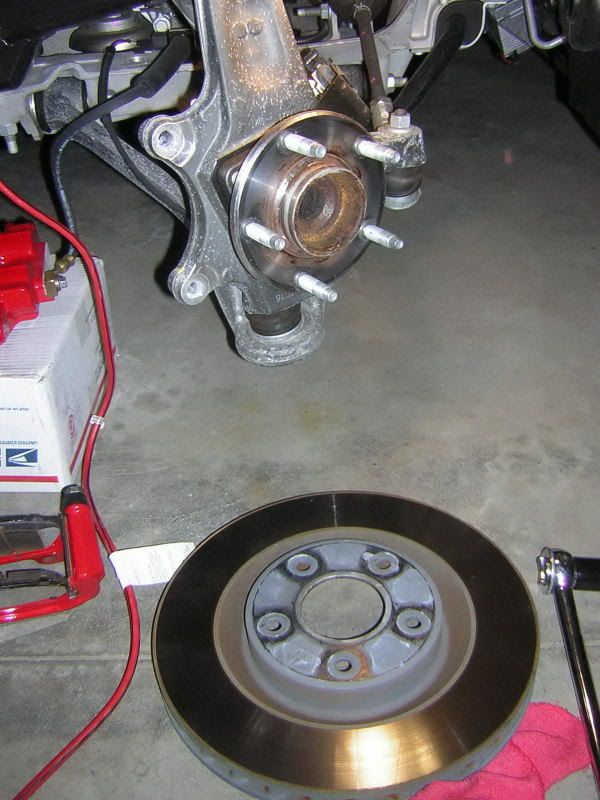
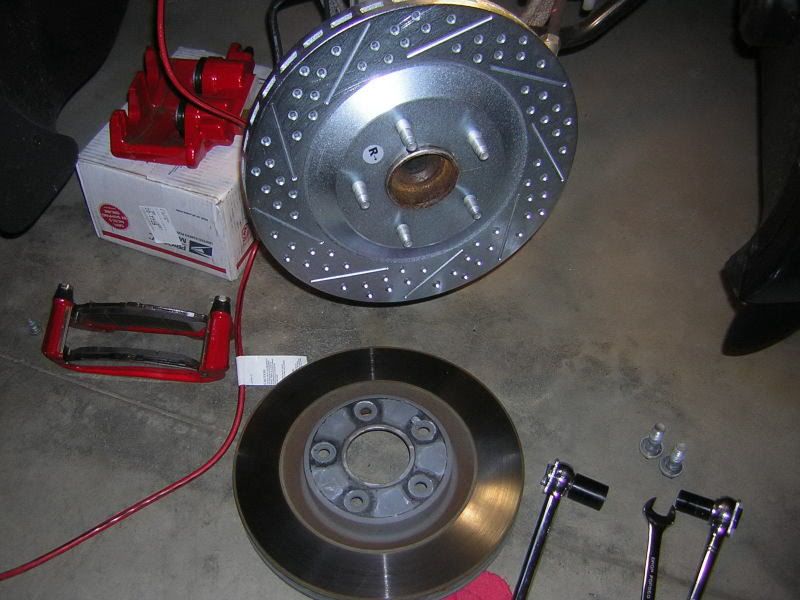
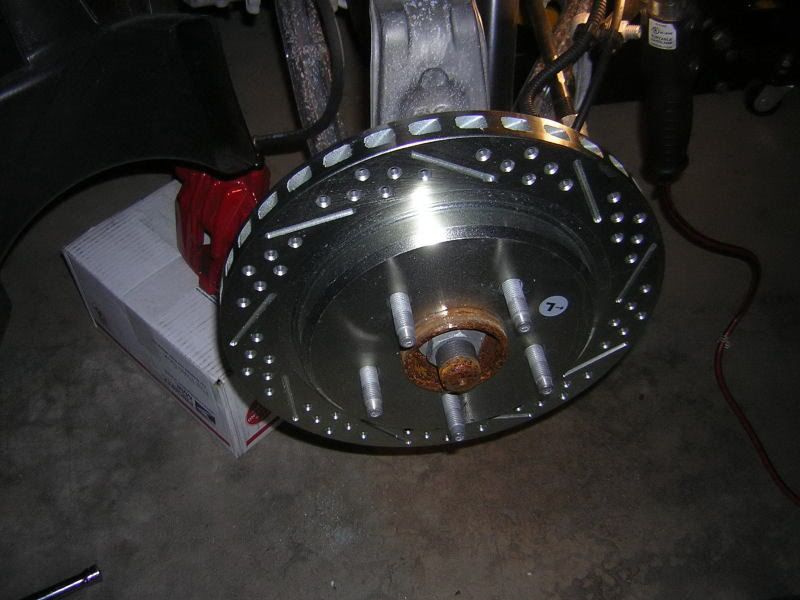
Slide the new one on.
Reassembly is just the reverse process:
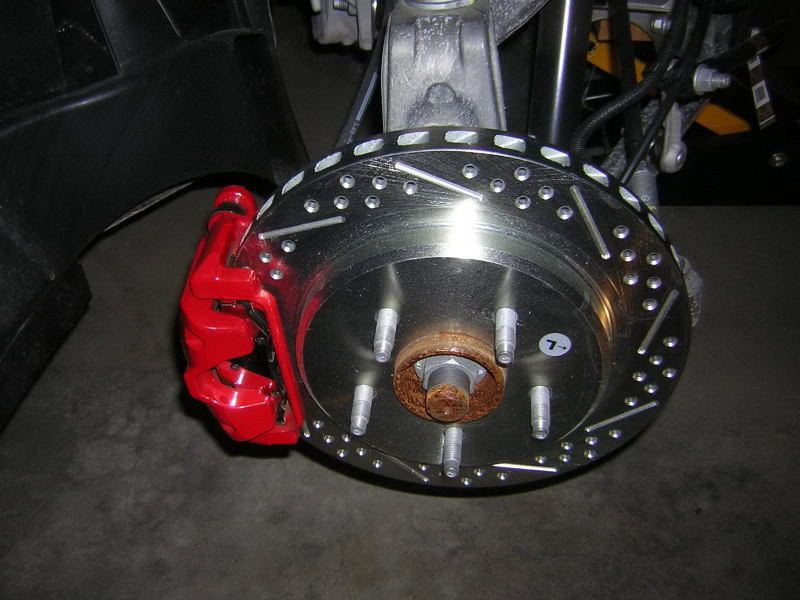
Reinstall the bracket - torque to 125 ft/lbs.
Reinstall the caliper - torque to 23 ft/lbs. You may have to push the pistons in a bit - use a c-clamp or a disk brake piston tool if necessary.
Reinstall the wheel - torque to 100 ft/lbs.
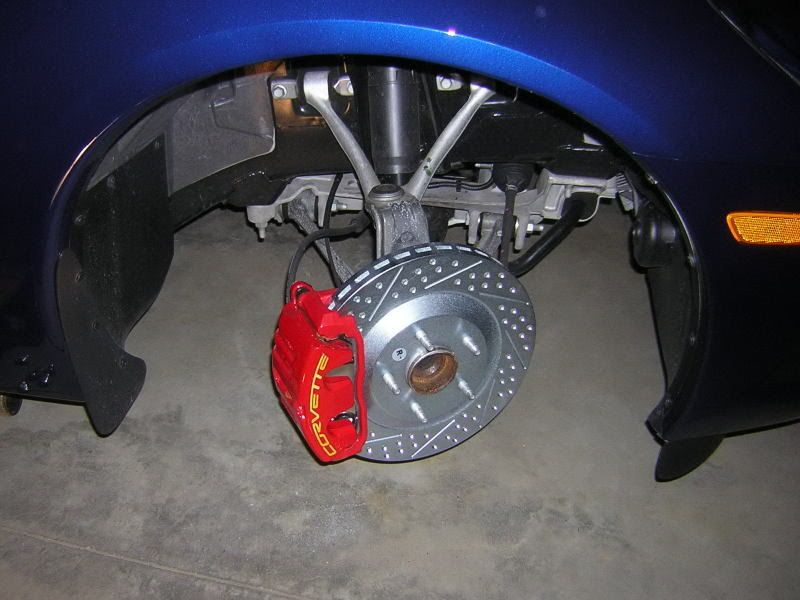
Repeat on the other side and the fronts are done.
******
REAR:
******
It's actually the same process as the front except you don't have the luxury of turning the wheels to allow access. The caliper bolts should be easy, but the brackets can be a challenge. If access with your long ratchet is a problem (as in it will not fit in the wheelwell) raise the rear of the car enough so you can get at these bolts from the bottom. And REMEMBER to use jack stands!
Same set of bolts we did on the front, located here on the rear caliper (I had loosened one already).
Remove the caliper and set it aside.
Remove the bracket bolts.
Remove the retaining clips and discard.
Slide rotor off. Again, it may be stuck - search the threads on this board discussing how to remove stuck rotors.
Slide the new one on.
Reassembly is again just the reverse process:
Reinstall the bracket - torque to 125 ft/lbs.
Reinstall the caliper - torque to 23 ft/lbs. You may have to push the piston in a bit - use a c-clamp or a disk brake piston tool if necessary.
Reinstall the wheel - torque to 100 ft/lbs.
Repeat on the other side and the rears are done.
The whole process took a few hours. I changed pads while I was at it and, since there seemed to be a light oily residue on the rotors, I washed them in some dish detergent before installing. I would have usually just used brake cleaner but Baer recommends no harsh chemicals....and if brake cleaner isn't harsh, I don't know what is.
**********************************
EDIT: Added notes.
1) GM states NOT to reuse the caliper bracket bolts. The new ones will come with "adhesive" already applied.
2) I was changing out pads at the same - if you are not doing so you might want to skip the removal of the caliper to the bracket, may save you a few steps.
FRONT:
******
Remove the wheel. To remove the rotor you need to remove the caliper and the bracket. There are 2 bolts for the caliper (top smaller bolt circled on the left), and 2 for the bracket (top larger bolt circled on the right).
HINT - You gain a lot of space to access these bolts if you turn the steering wheel opposite the side you are working on. If you don't do this you are going to have difficulty getting the bolts out (especially the ones holding the bracket) and then torquing them on reassembly - the bracket bolts torque to 125 ft/lbs!
Before you start in on the caliper, find something to rest it on when you remove it from the bracket. It is NOT a good idea to leave it hanging by the brake hose. Some people hang the caliper using wire or a coat hanger, but I always found it easier to just use a small box slid under the wheelwell.
Once the caliper bolts are out, rest the caliper on the box so it's not straining the brake hose.
Now remove the 2 bolts holding the bracket (circled above). Notice how much more room you get by turning the wheel - you should be able to get in there with a long ratchet, breaker bar, or impact gun.
Pads do not have to be removed - they will come out with the bracket. If they fall out just reinstall them on reassembly.
With that out of the way you need to remove the 2 retaining rings that hold the rotor onto the studs. These are used to hold the rotor on during manufacturing, they are not needed now. I just pry up on one end so I can grab it with needlenose pliers and twist it to snap it off.
At this point you *should* just be able to pull the rotor right off. If not, try using some penetrating oil between the hub and rotor giving it time to work. Also, there are a few threads you can search for on how to get a stuck rotor off.
Slide the new one on.
Reassembly is just the reverse process:
Reinstall the bracket - torque to 125 ft/lbs.
Reinstall the caliper - torque to 23 ft/lbs. You may have to push the pistons in a bit - use a c-clamp or a disk brake piston tool if necessary.
Reinstall the wheel - torque to 100 ft/lbs.
Repeat on the other side and the fronts are done.
******
REAR:
******
It's actually the same process as the front except you don't have the luxury of turning the wheels to allow access. The caliper bolts should be easy, but the brackets can be a challenge. If access with your long ratchet is a problem (as in it will not fit in the wheelwell) raise the rear of the car enough so you can get at these bolts from the bottom. And REMEMBER to use jack stands!
Same set of bolts we did on the front, located here on the rear caliper (I had loosened one already).
Remove the caliper and set it aside.
Remove the bracket bolts.
Remove the retaining clips and discard.
Slide rotor off. Again, it may be stuck - search the threads on this board discussing how to remove stuck rotors.
Slide the new one on.
Reassembly is again just the reverse process:
Reinstall the bracket - torque to 125 ft/lbs.
Reinstall the caliper - torque to 23 ft/lbs. You may have to push the piston in a bit - use a c-clamp or a disk brake piston tool if necessary.
Reinstall the wheel - torque to 100 ft/lbs.
Repeat on the other side and the rears are done.
The whole process took a few hours. I changed pads while I was at it and, since there seemed to be a light oily residue on the rotors, I washed them in some dish detergent before installing. I would have usually just used brake cleaner but Baer recommends no harsh chemicals....and if brake cleaner isn't harsh, I don't know what is.
**********************************
EDIT: Added notes.
1) GM states NOT to reuse the caliper bracket bolts. The new ones will come with "adhesive" already applied.
2) I was changing out pads at the same - if you are not doing so you might want to skip the removal of the caliper to the bracket, may save you a few steps.
Last edited by LMB-C6; 05-04-2009 at 11:05 PM.


 05-04-2009, 10:01 PM
#6
Melting Slicks
Thread Starter
 05-04-2009, 10:02 PM
#7
Moderator


Member Since: Dec 2002
Location: Lakewood Ranch, FL
Posts: 40,070
Received 3,579 Likes
on
1,619 Posts


 05-04-2009, 10:30 PM
#11


 05-04-2009, 10:54 PM
#17
Instructor

Just finished this process about 20 minutes. I started Friday afternoon and painted the calipers and brackets blue to contrast my DSOM. Should have changed pads while I was at it, but I am going to take the wheels off in about 100 miles to check all connections and how everything looks and then put on ceramic pads. Just remember, when installing the front calipers, to make sure the bleeder valve is on the top. Ask me how I know.
05-04-2009, 11:12 PM
#20
Team Owner


Thanks.