
Just installed my yellow gauges (how to many pics)
 03-15-2008, 04:06 PM
#1
Race Director

Thread Starter

Member Since: Jan 2005
Location: Bay Shore, NY 11706 MILD2WILD (M2W)
Posts: 13,656
Likes: 0
Received 7 Likes
on
5 Posts
St. Jude Donor '06-'07
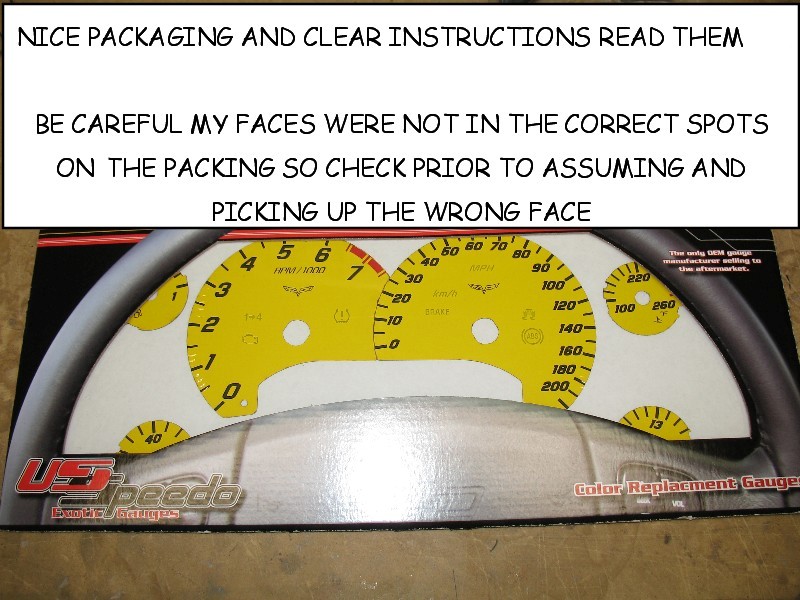
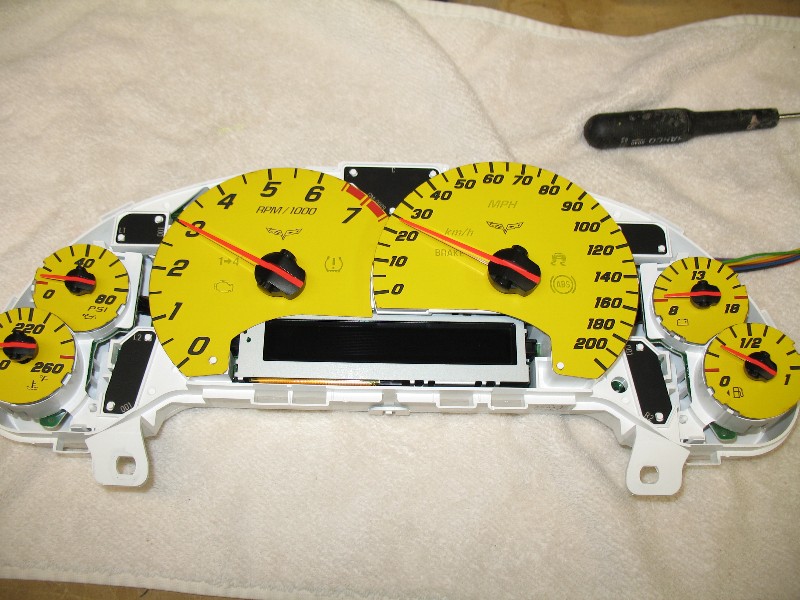
In total it took about 30 minutes, but I have removed the pod surround before so that was simple. I will take some pics on the car later  Extend the wheel all the way out and drop it to give you max space. Looking in the dark garage I had minimal glow but what I did have I liked. These are not cheap vinyl overlays that some have had bad expericances with. They are the same fit and finish as the oem faces.
Before taking on this project you need to understand it requires some abilities and patience, there is always the risk that things can go wrong or damage can occur. In the end if it all works out you will be a happy camper.
The gauge companies instructions are here
LINK
They will also install the faces for only $20 (you pay shipping)
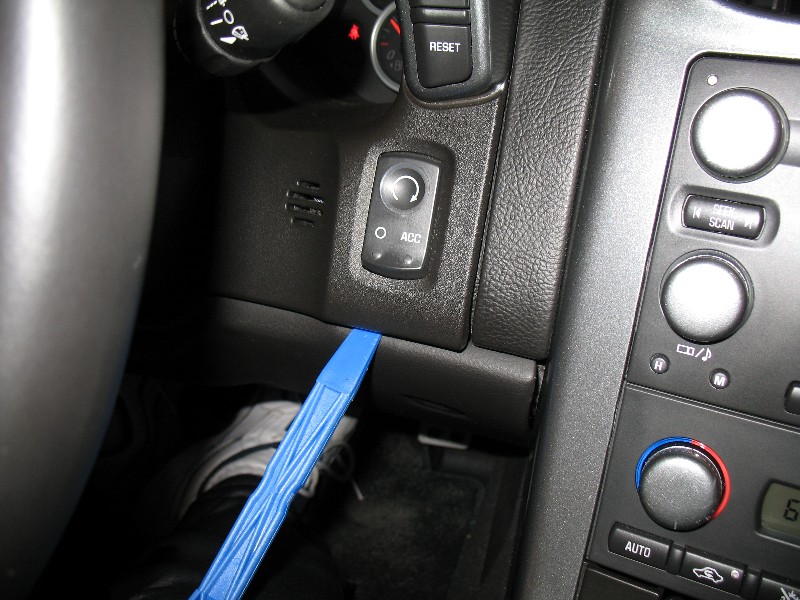
Using a pry tool or a butter knife you need to release the bottom of the pod surround

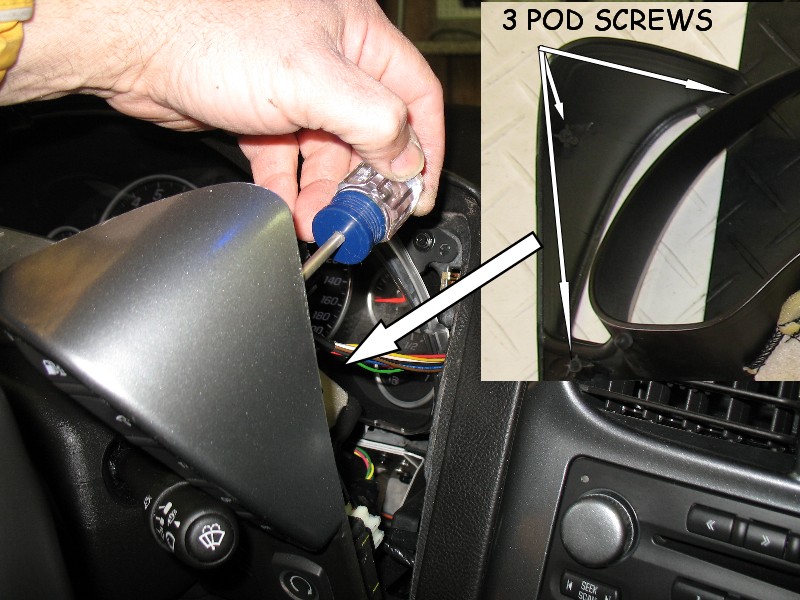
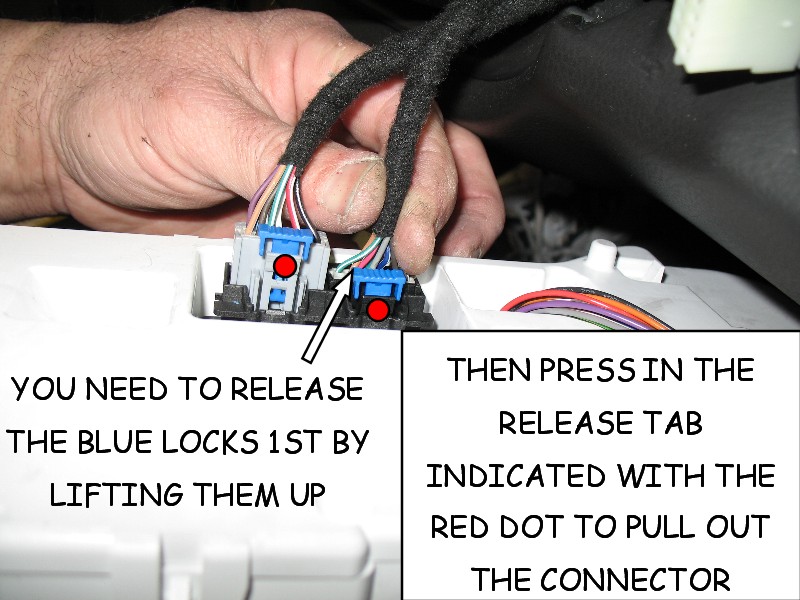
My trick to remove the three screws holding the pod using a stubby Phillips. I think this is much easier than trying to unclip the pod connector (the release is under the connector). Once the pod is in your hand it's simple to unclip the connector. Reinstall the pods in the surround and on reinstall it's simple to plug back in the connectors.
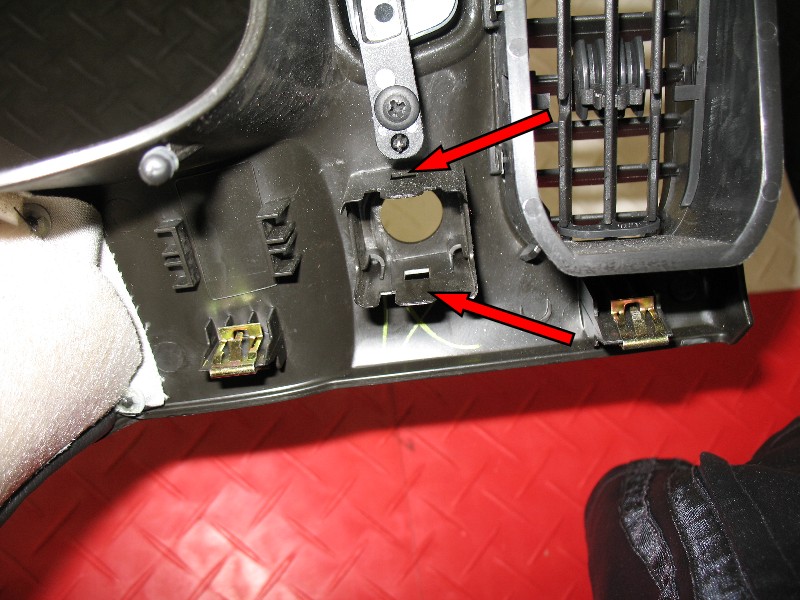
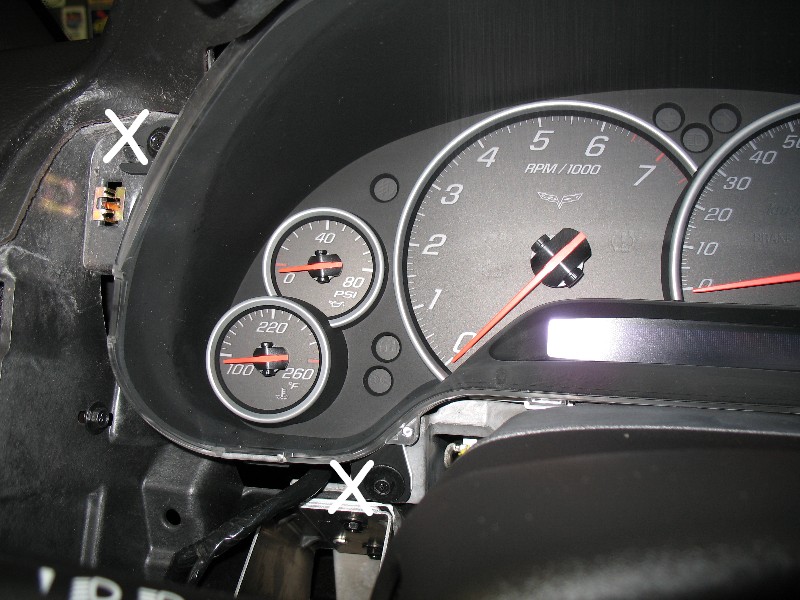
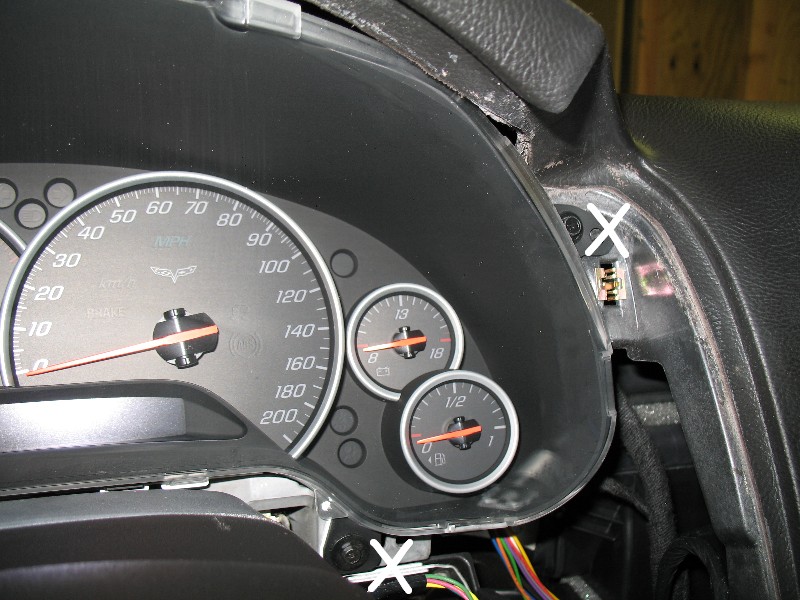
Release the ignition switch either by unplugging it (green arrow) or releasing the side tabs (red arrows)
you will also need to remove the sensor located below it to the left, it just pops off.

You also need to remove or unplug the dimmer control, you can see the release points in this picture.
Once the surround is off you can see all the mounting clips (the right pod has been removed). Make sure they did not get left in the dash, if so reinstall them on the surround.
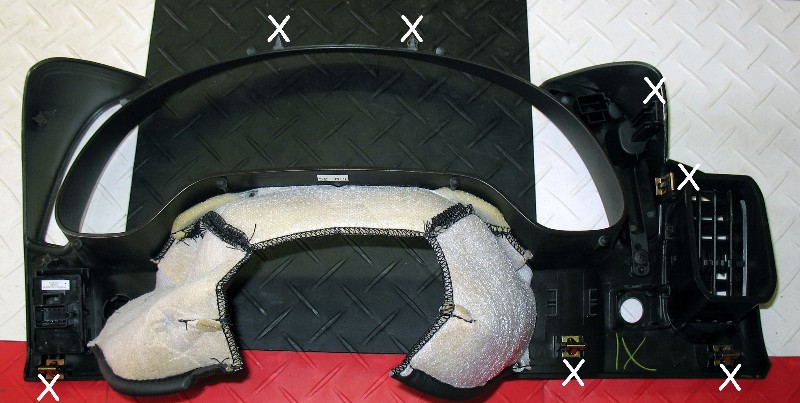
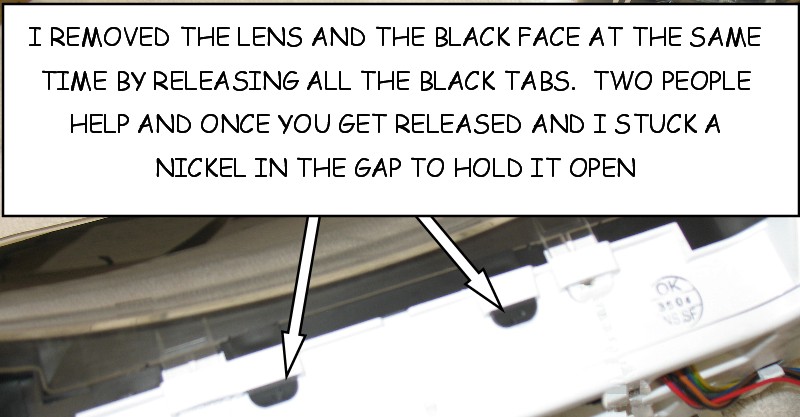
Remove the cluster, the white X marks the 4 screws
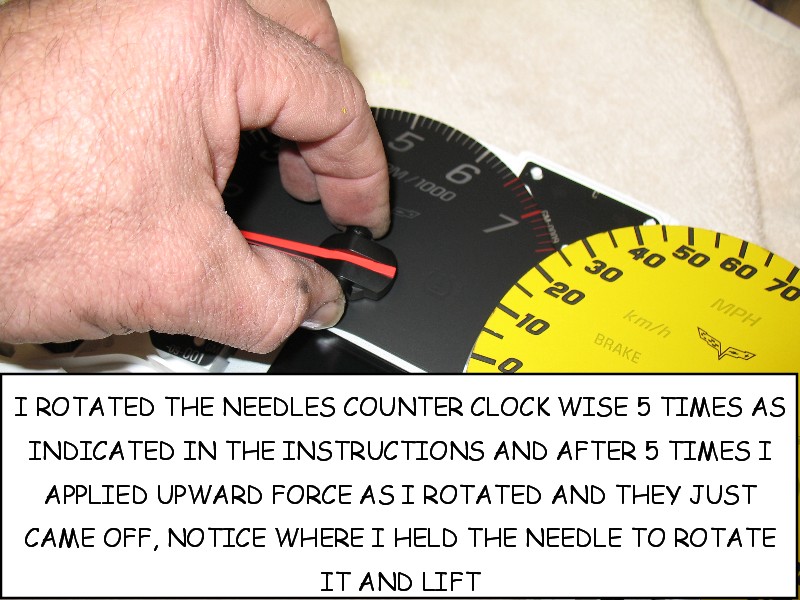
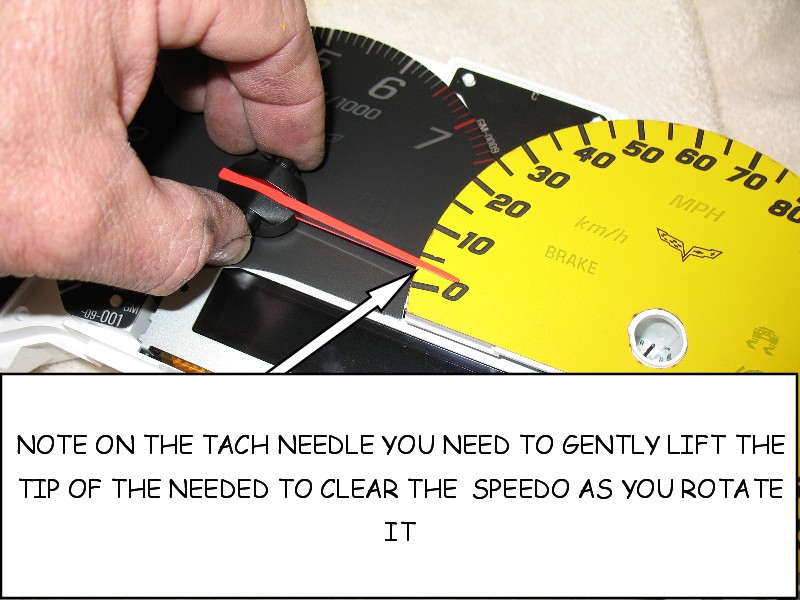
Follow the instruction included on setting the gauges and the final needle height (look at the handle end of the tool, the correct height is the little step)
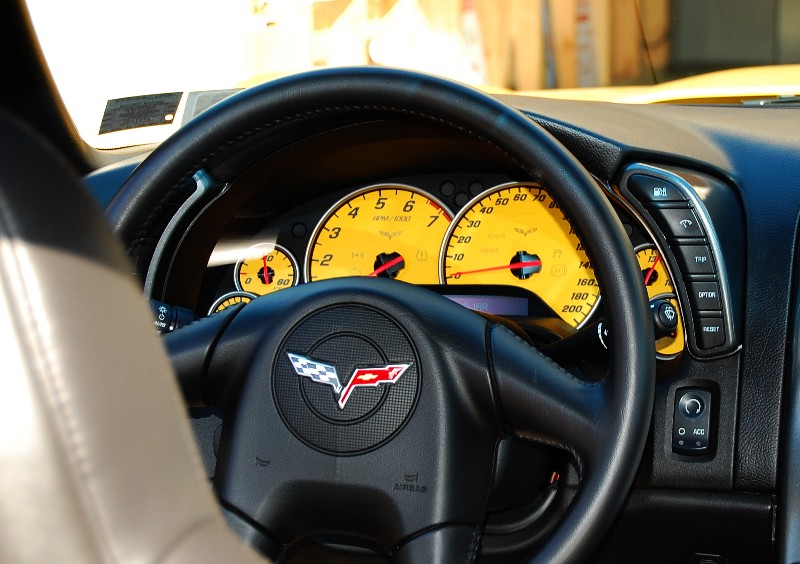
Sweet
Post to all the colors and more on how to order is on www.nakidparts.com
Extend the wheel all the way out and drop it to give you max space. Looking in the dark garage I had minimal glow but what I did have I liked. These are not cheap vinyl overlays that some have had bad expericances with. They are the same fit and finish as the oem faces.Before taking on this project you need to understand it requires some abilities and patience, there is always the risk that things can go wrong or damage can occur. In the end if it all works out you will be a happy camper.
The gauge companies instructions are here
LINK
They will also install the faces for only $20 (you pay shipping)
Using a pry tool or a butter knife you need to release the bottom of the pod surround
My trick to remove the three screws holding the pod using a stubby Phillips. I think this is much easier than trying to unclip the pod connector (the release is under the connector). Once the pod is in your hand it's simple to unclip the connector. Reinstall the pods in the surround and on reinstall it's simple to plug back in the connectors.
Release the ignition switch either by unplugging it (green arrow) or releasing the side tabs (red arrows)
you will also need to remove the sensor located below it to the left, it just pops off.
You also need to remove or unplug the dimmer control, you can see the release points in this picture.
Once the surround is off you can see all the mounting clips (the right pod has been removed). Make sure they did not get left in the dash, if so reinstall them on the surround.
Remove the cluster, the white X marks the 4 screws
Follow the instruction included on setting the gauges and the final needle height (look at the handle end of the tool, the correct height is the little step)
Sweet
Post to all the colors and more on how to order is on www.nakidparts.com
Last edited by Pipedreams; 03-16-2008 at 11:22 AM.
 03-15-2008, 04:15 PM
#2
Team Owner


Damn. Great write-up Ed, awesome How-to. It is sure is easier to get in to the C6 than it was the C5. The gauges look good. Looking forward to the installed pictures.
Paul
Paul


 03-15-2008, 04:40 PM
#11
Le Mans Master


Removing cluster and resetting needle position about 100 times: 4 hours, and counting.
Yes, I followed the directions to the letter. I know for a lot of people, it's a simple A-B-C. But be aware, there are some of us for which the procedure just didn't work that well, despite the directions.
Last edited by Kent1999; 03-15-2008 at 04:53 PM.
03-15-2008, 04:44 PM
#13
Race Director
Thread Starter
Member Since: Jan 2005
Location: Bay Shore, NY 11706 MILD2WILD (M2W)
Posts: 13,656
Likes: 0
Received 7 Likes
on
5 Posts
St. Jude Donor '06-'07
LINK
They will also install the faces for only $20 (you pay shipping)
Ed
Last edited by Pipedreams; 03-15-2008 at 08:55 PM.
03-15-2008, 04:46 PM
#14
Race Director
Thread Starter
Member Since: Jan 2005
Location: Bay Shore, NY 11706 MILD2WILD (M2W)
Posts: 13,656
Likes: 0
Received 7 Likes
on
5 Posts
St. Jude Donor '06-'07
I am kind of thinking that once you install them and they reset themselves, you could just rotate them counter clockwise to get them where you want since the stop has been reset.
 They are 10x's easier than the C5
03-15-2008, 04:53 PM
They are 10x's easier than the C5
03-15-2008, 04:53 PM
#17
Race Director
Thread Starter
Member Since: Jan 2005
Location: Bay Shore, NY 11706 MILD2WILD (M2W)
Posts: 13,656
Likes: 0
Received 7 Likes
on
5 Posts
St. Jude Donor '06-'07
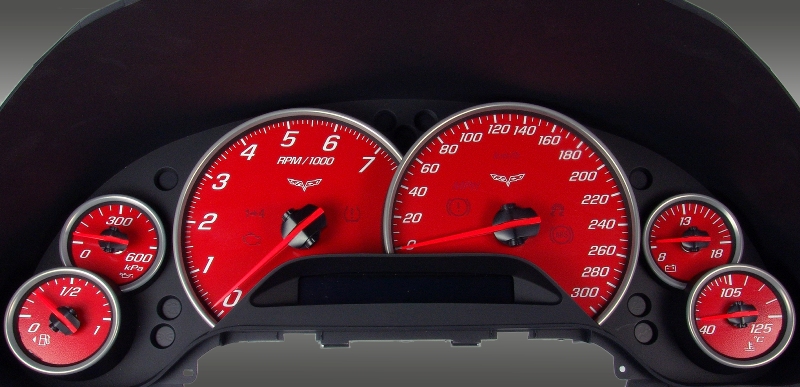
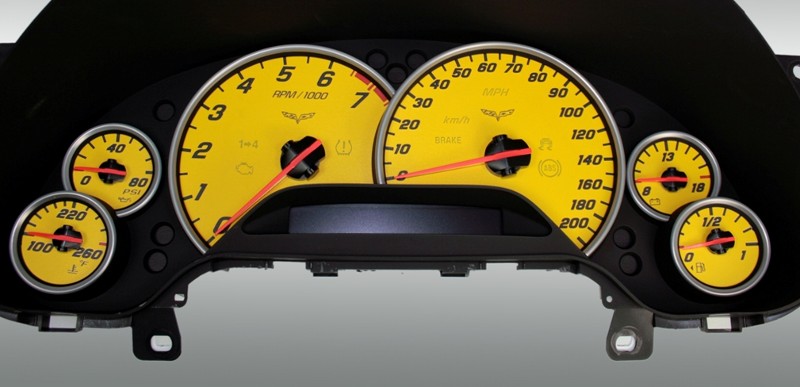
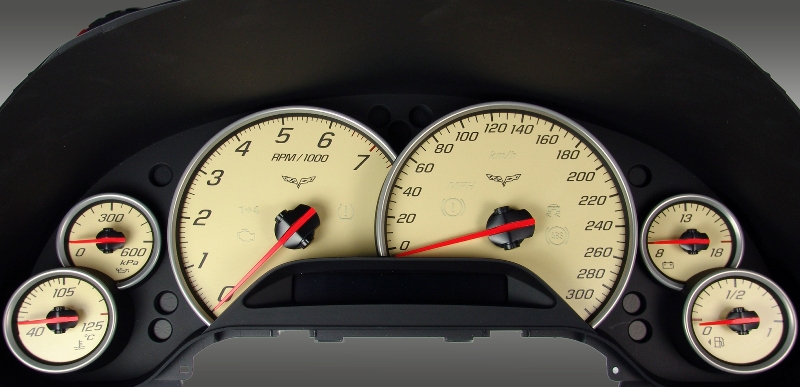
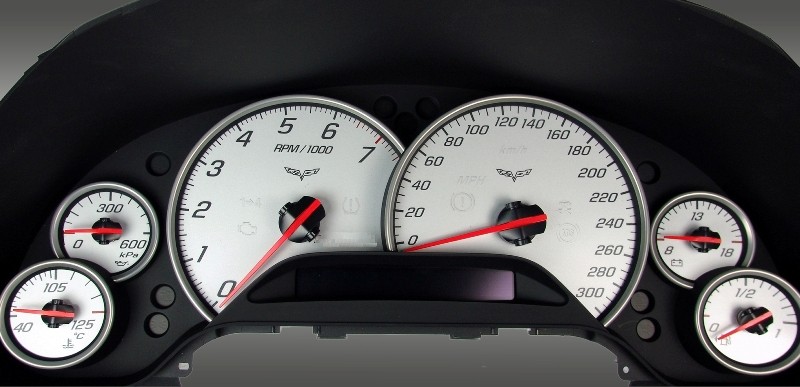
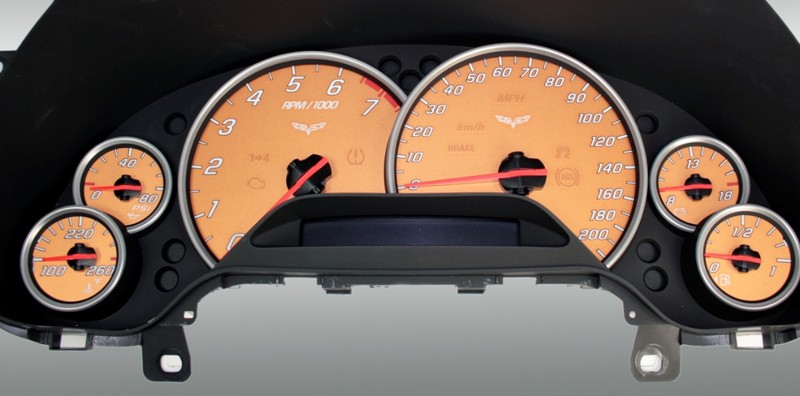
I KNOW Some are in km/h JUST EXAMPLES. The first Z06 were cut today
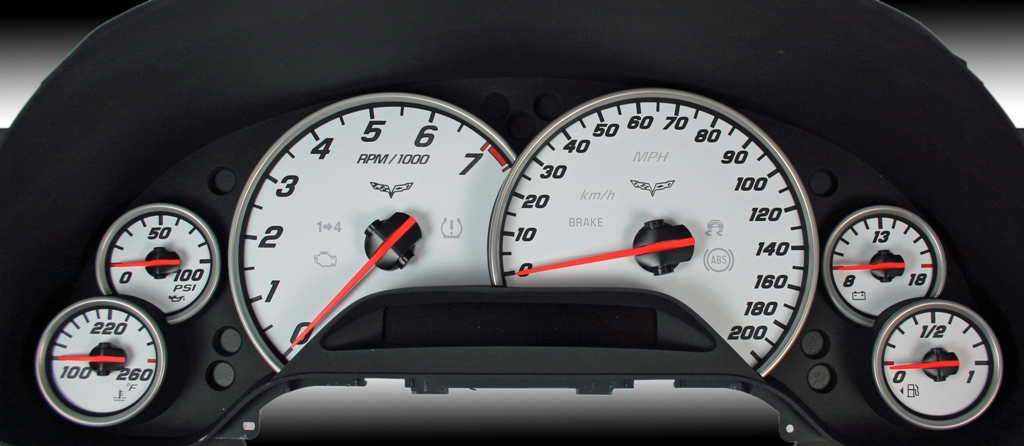
White
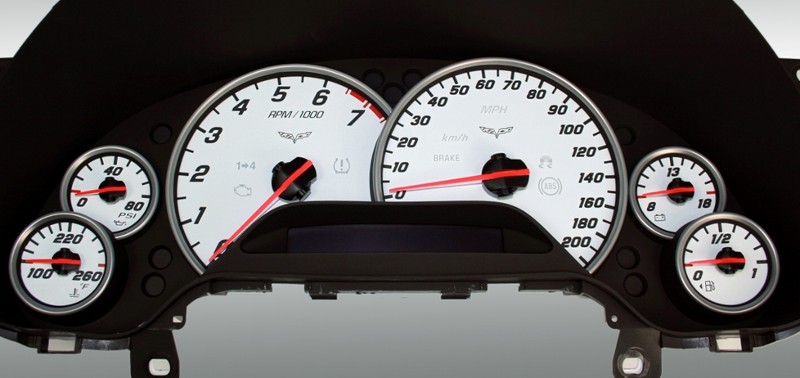
Red
Yellow (YES)
Tan
Silver
Blue
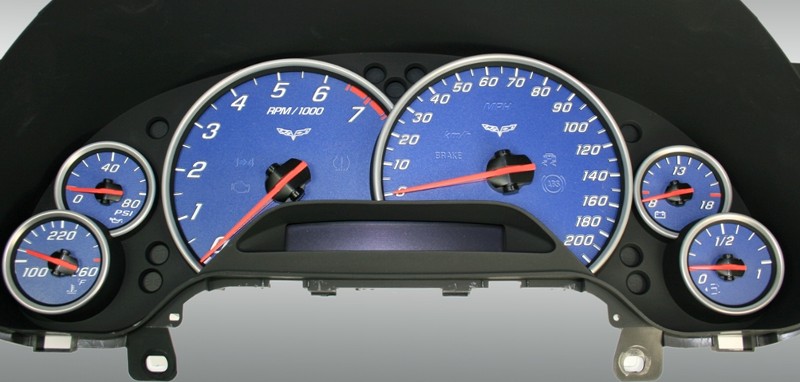
Orange
White
Red
Yellow (YES)
Tan
Silver
Blue
Orange
03-15-2008, 04:58 PM
#18
Le Mans Master
My needles were extremely tight, despite the fact that I rotated them CCW at least 8 rotations each before extraction with the tool (rotating during extraction as well, as the instructions stated). Most of the needles still came out with the pins attached.
I just hope the guages are not permanently damaged.
Last edited by Kent1999; 03-15-2008 at 05:01 PM.
03-15-2008, 05:01 PM
#19
Race Director
Thread Starter
Member Since: Jan 2005
Location: Bay Shore, NY 11706 MILD2WILD (M2W)
Posts: 13,656
Likes: 0
Received 7 Likes
on
5 Posts
St. Jude Donor '06-'07
Thats what I would have thought too, but after literally dozens of reset attempts, they are still flakey. Seem to be ok, and then 2 or 4 power-ons later, they will 'reset' to be 80-120 degrees off.
My needles were extremely tight, despite the fact that I rotated them CCW at least 10x rotations each before extraction with the tool (rotating during extraction as well, as the instructions stated). Most of the needles still came out with the pins attached.
I just hope the guages are not permanently damaged.
03-15-2008, 05:21 PM
#20
Le Mans Master
Thats what I would have thought too, but after literally dozens of reset attempts, they are still flakey. Seem to be ok, and then 2 or 4 power-ons later, they will 'reset' to be 80-120 degrees off.
My needles were extremely tight, despite the fact that I rotated them CCW at least 8 rotations each before extraction with the tool (rotating during extraction as well, as the instructions stated). Most of the needles still came out with the pins attached.
I just hope the guages are not permanently damaged.
I still love the mod, and will probably do it again if I can get this straightened out! Maybe RED this time...
 Thanks for offering this at a great price, Ed.