
C6 Wheel Painting Tutorial (Plenty of Pics)
 10-26-2007, 09:38 PM
#1
Pro

Thread Starter
Alright, so it's raining out. Very bad weather for cruising around town. And obviously the track is closed. So I'm staying in tonight and writing a tutorial on painting the stock C6 Rims, or any rim that is aluminum.
This process cost me about $45.00 in materials and maybe a total of 10 to 12 hours in labor. It actually took me three days because I had school to attend. Also, make sure that this is not done on a windy day or one that is excessively cold. 50 degree weather and up is what you want. Either way, here is a list of materials that can be attained from the local Pepboys or hardware store (Home Depot/ACE/Lowes). Contrary to the many other people, I did not use Duplicolor or any of the sub-brands because they didn't carry the color I wanted in the store. So here we go:
- 2-3 cans of Rust-Oleum Painter's Touch Matte Crystal Clear (clearcoat)
- 2-3 cans of Rust-Oleum Automobile Primer (Dark Gray)
- 2-3 cans of Rust-Oleum Metallic Black Auto Paint
- 2 packs of 100 grit sandpaper (the 3-pack 10x12 ones)
- 1 pack of 600 grit wet sandable sandpaper (3-pack 10x12 ones again)
- 1 pack of 2000 grit wet sandable sandpaper (just get some just in case you make an error of some sort, not a big deal on size)
- 1 pack of 3x5 notecards (the larger size will work too)
- A crapload of old newspapers
- A towel or two.
Now with the clearcoat, Duplicolor would be better, but the stuff that I used worked just fine. Any type of primer would work too. Make sure that the color is as close to the color that you want for your paint as you can get. For example, I wanted a dark dark metallic gray, so my primer color was dark gray. For Competition Gray, I might've used a light gray primer. Obviously, you want to choose your color carefully. The towels are to wipe off any excess crap on the wheels, tires, or buildup on the spray nozzle.
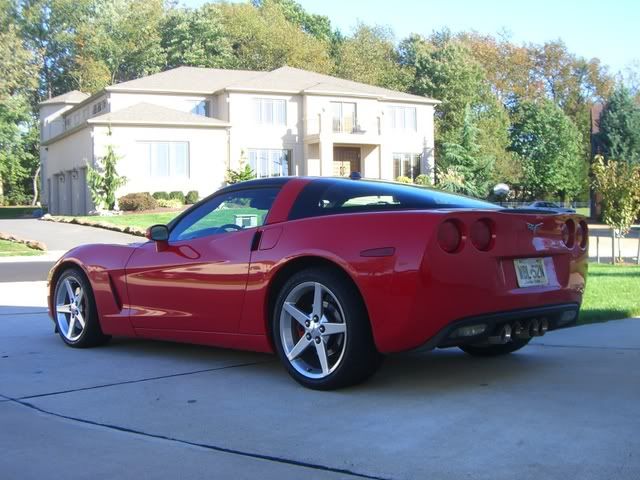
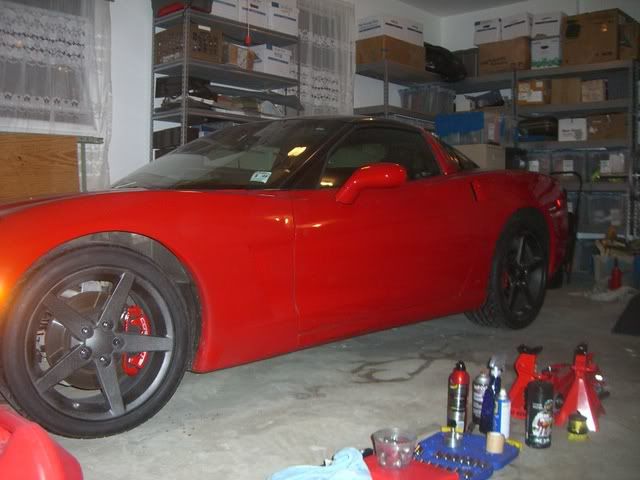
Here is my car before the whole job, some may argue with me, but I am partial to a dark colored rim as opposed to being shiny. I don't know what it is, but I always thought a dark colored rim made the car more aggressive:
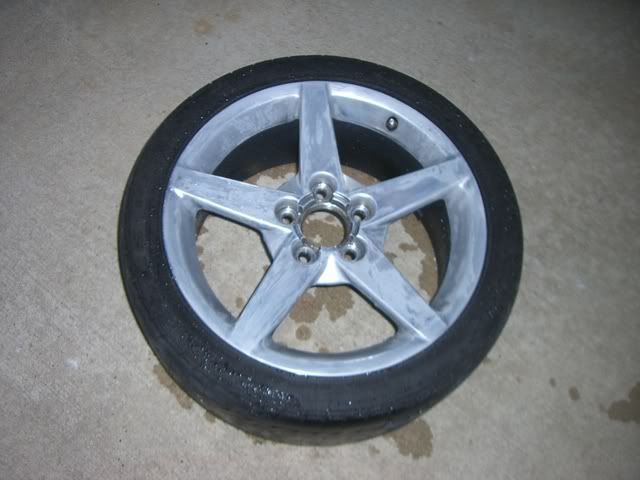
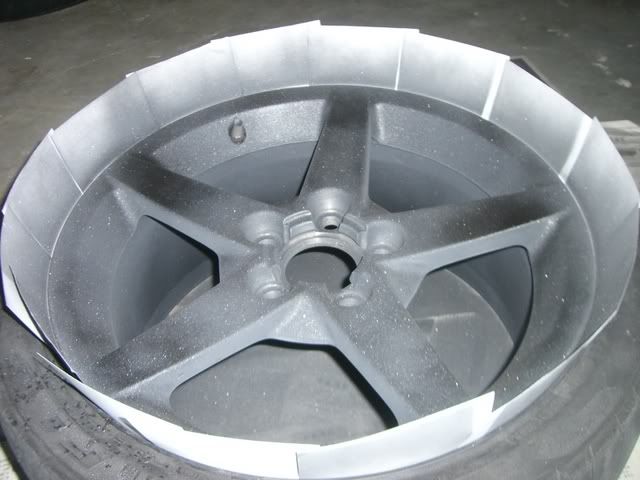
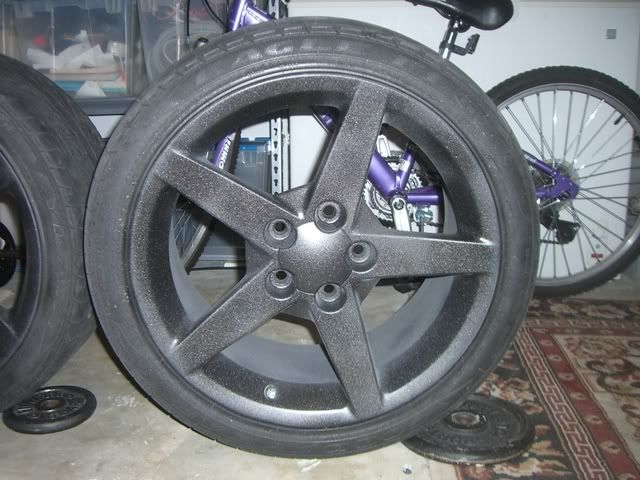
Alright, so put the car on jacks. Remove all the wheels from the car. This a picture of a front wheel with everything on it. Keep in mind that my wheels are polished aluminum (or so I think).
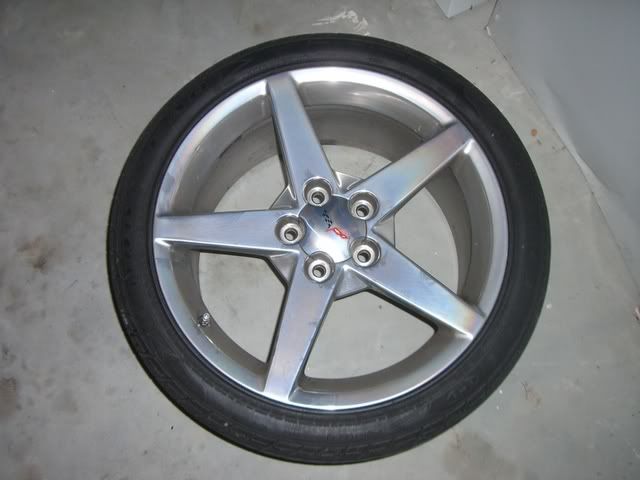
It's important to get all the dust and dirt off the wheels. So thoroughly clean the wheels until they shine and blind you. Clean the entire rim, including the insides(don't know the exact word) of the rim as well.

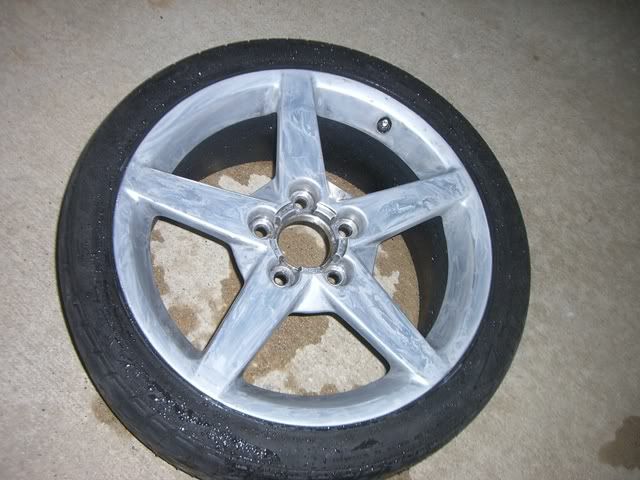
Once everything is clean and shiny, dry everything off with a towel. Here is the back of the rim, before sanding:
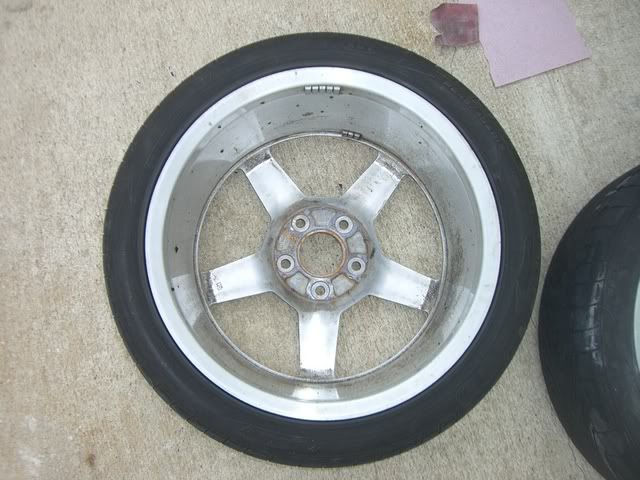
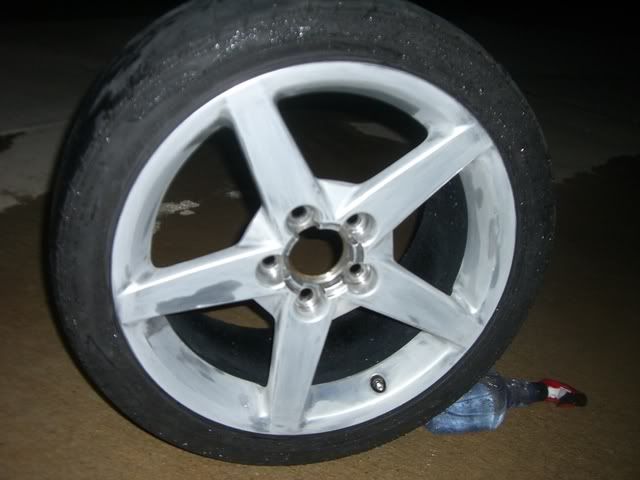
Sand down the back of the rim thoroughly before doing anything else with 100 grit sandpaper. The idea is to remove the clearcoat and scuff up the old junk. Here is a pic of it sanded down, now it doesn't have to be perfect, but it should get every little nook and cranny.

After you are satisfied with your sanding, wash the rim off again to get rid of all the sanded material. Dry it off with a towel again. Then stick the appropriate number of notecards between the tire and rim, unless you want your tire metallic black or whatever color you choose. If you really want to, you can tape them down. I did them on the first rim, then realized it wasn't exactly necessary.
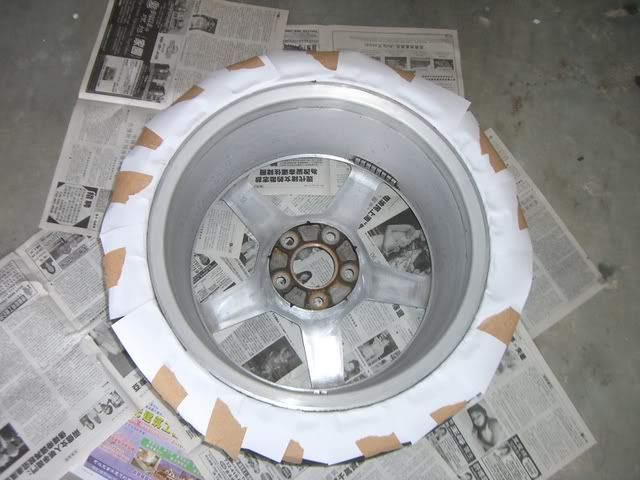
Lay out a bunch of newspaper sheets on the ground and put the rim with the spokes facing the ground. Now put your first coat of primer down. Try to get everything even, although its not too important at this moment. Spray about 12 inches to 16 inches away from the surfaces.
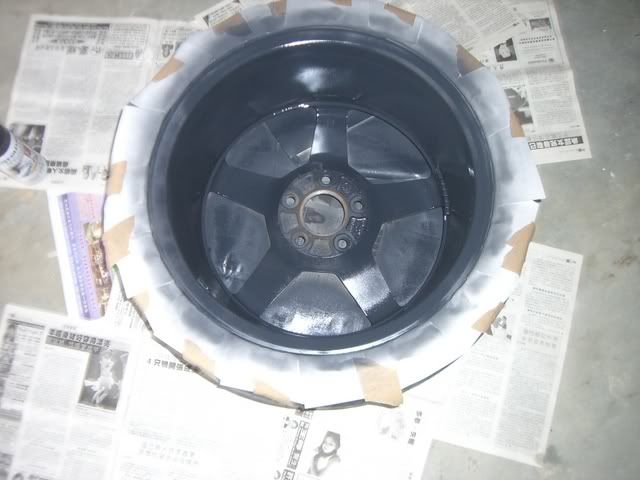
I put 3 coats of primer on the back here. By now, and once it dries, it would look like a flat dark gray, with no real distinctive blots of excessive spray. Make sure you give about 10-15 minutes between each primer coat.
Once the primer dries, you are ready for your first coat of paint. In my opinion, the back of the rim was not too important, therefore, I just applied two layers of the paint that I chose and put one light layer of clearcoat. It holds up decently so far.
Let this dry before continuing, but as you waiting for your rim to dry, continue the same process for another wheel.
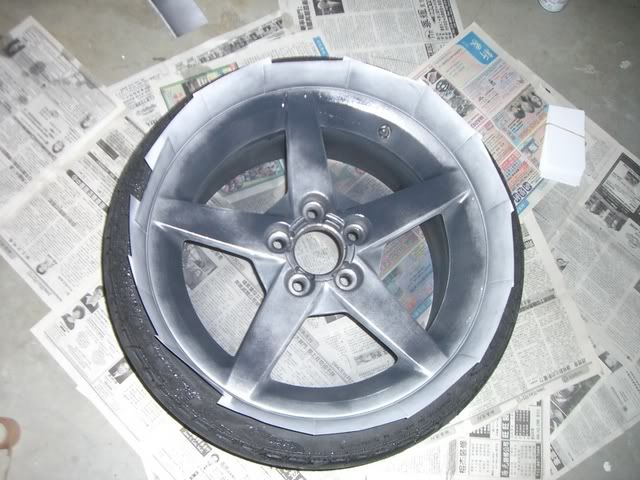
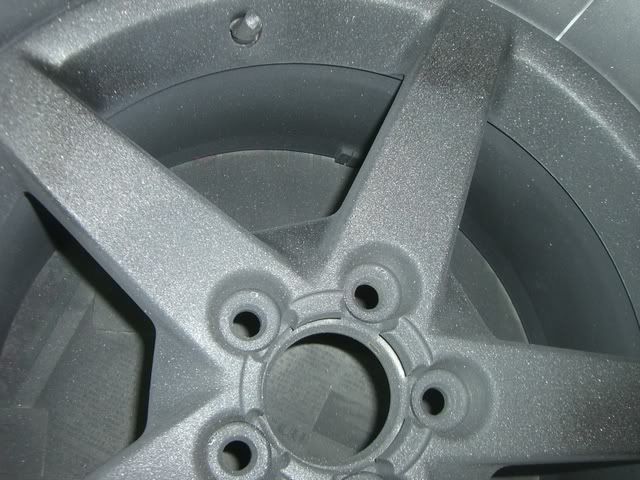
Alright, so once the back of the rim dries, which I gave about 30 minutes outside, prepare to start doing the front. Don't forget to take out the center cap for this, since it is made of a different material. What you want to do is sand the front very thoroughly with 100 grit sandpaper until all the clearcoat and polish is scuffed up. It's important to get all this crap off or else the primer will have trouble sticking. Also make sure you get every little bit of the rim. Don't want paint peeling do ya?
Clean off all the dust and whatnot from sanding by spraying water through it. Don't dry the rim just yet though. Take the 600 grit sandpaper and start wetsanding the rim to smooth out the sanding from the 100 grit paper. It should get very "pasty".
Now after that is done, wash it off and dry the rim down with a towel.
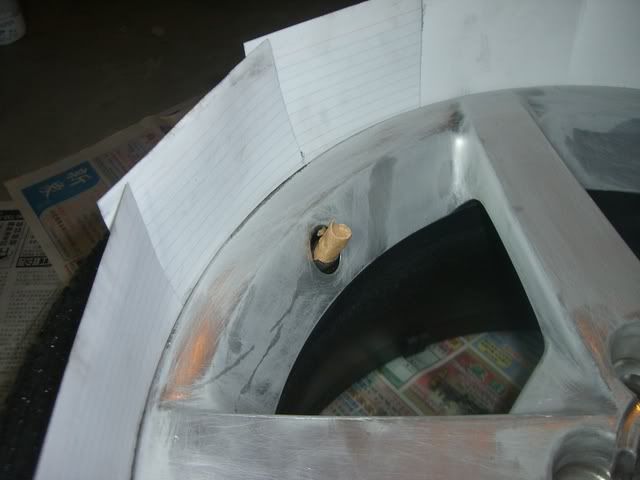
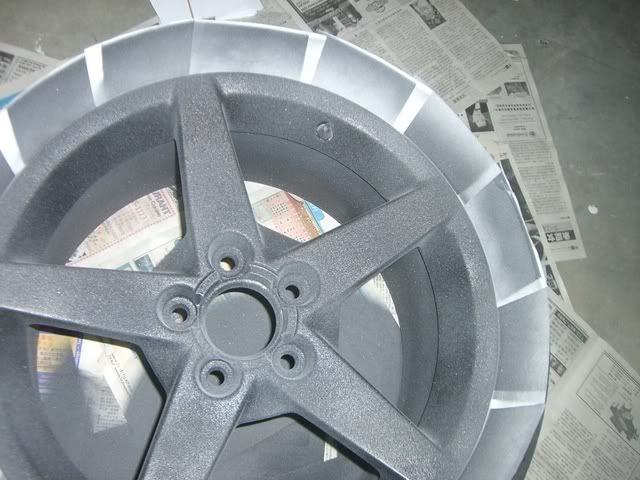
Put the rim on the newspapers and take out the valve cap. Tape it up so you don't paint the threads over.
Insert the notecards between the rim and tire. Now apply the first coat of primer. Again, let it dry for about 10 to 15 minutes before recoating. Remember to spray about 12-16 inches away from the surface of the rim for everything (primer, paint, and clearcoat).
Coat 2
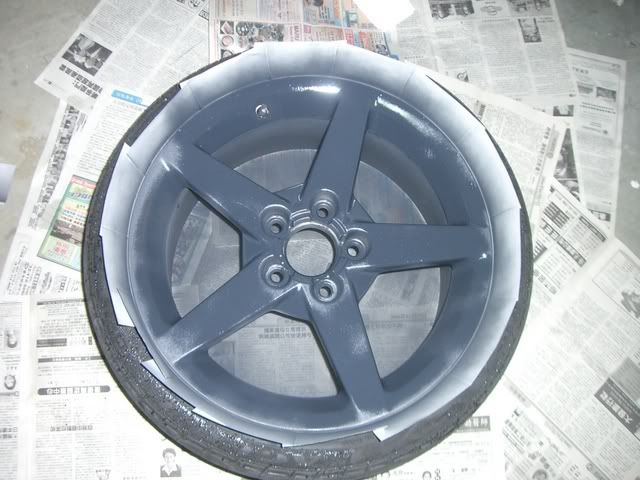
Coat 3
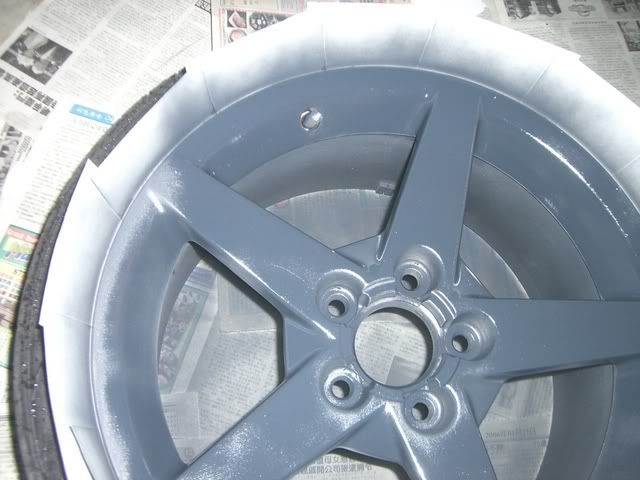
I did 3-4 coats depending on the well they dried and covered the wheel's surface. After the primer dries, apply your first coat of paint. Don't worry if it is not exactly even and some spots are darker than others. Take about 10-15 minutes between recoats.
Second coat of paint
Third coat of paint
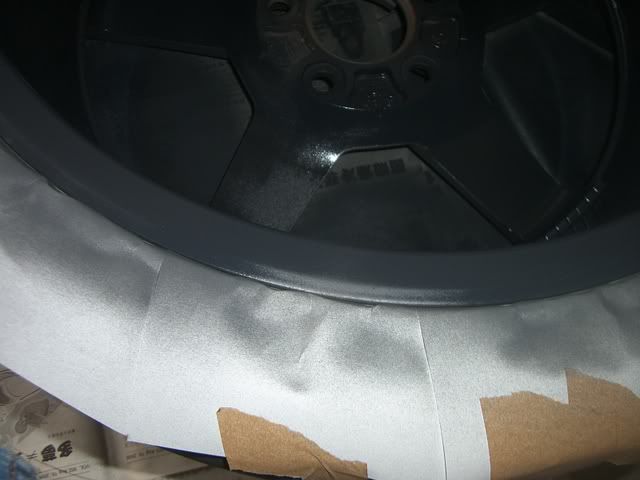
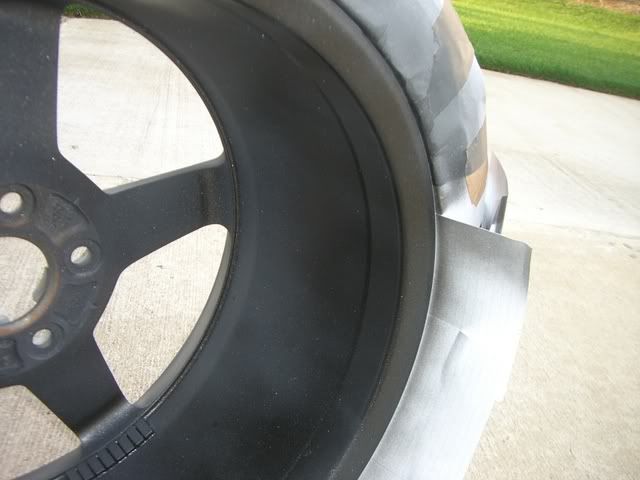
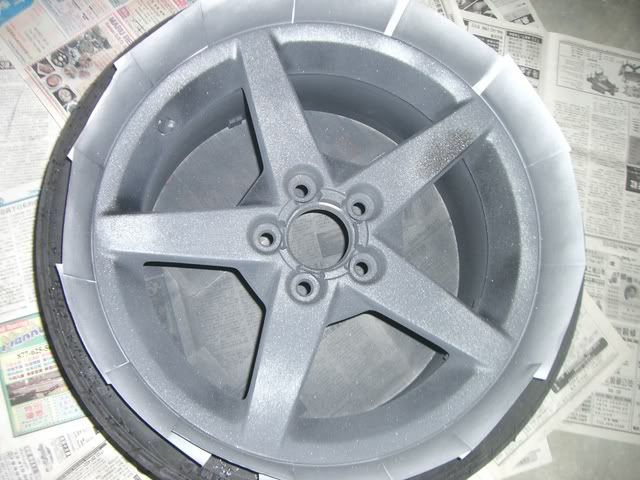
I did 5 coats of paint and made sure that everything looked relatively even after the paint dried. Once the paint dries, I put some clearcoat on. Generally 3-4 good coats should do the job as long as everything was covered. After it dries. it should look very even. Here is the first coat of clearcoat.
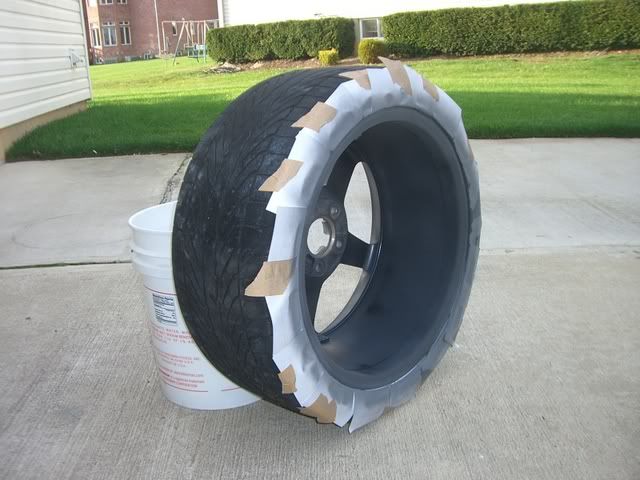
Here's one wheel that's pretty much done
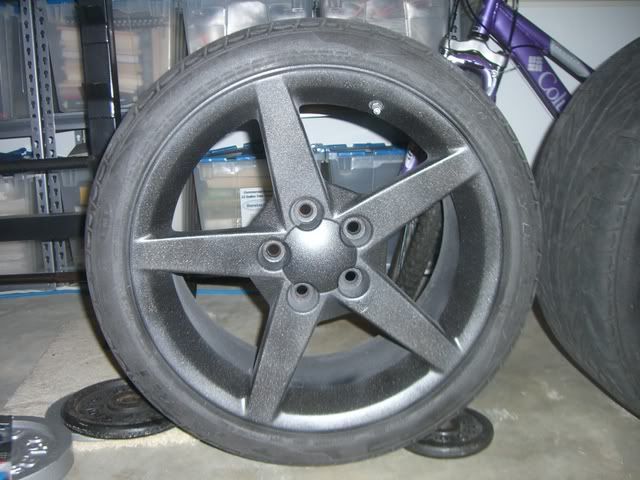
And another.
You want to repeat this process for every rim, duh. .
.
Also, you have to do the center caps. Unfortunately I do not have any pictures of this process, but I will walk you through it. Please note that the Corvette emblem will be painted over. I will just end up having my frined make me 4 decals to replicate them.
1) Clean the center cap
2) Sand down the surface with 100 grit sandpaper
3) Wash it but do not dry the center cap.
4) With the wet surface, wetsand with 600 grit sandpaper to smooth it all out.
5) Lay it down on some newspapers
6) Put 2 coats of primer on
7) After the primer dries, hit it with 2-3 coats of the paint.
8) When that dries, do two coats of clearcoat.
9) Let it dry, then you can mount it all on the wheels.
After everything is done, wait about 2 hours for everything to thoroughly dry before you put them on the car. It's best to let it sit for 24 hours to fully dry, but its not too necessary, I started driving about 2 hours after mounting everything on the car.
Continued in the next post.
This process cost me about $45.00 in materials and maybe a total of 10 to 12 hours in labor. It actually took me three days because I had school to attend. Also, make sure that this is not done on a windy day or one that is excessively cold. 50 degree weather and up is what you want. Either way, here is a list of materials that can be attained from the local Pepboys or hardware store (Home Depot/ACE/Lowes). Contrary to the many other people, I did not use Duplicolor or any of the sub-brands because they didn't carry the color I wanted in the store. So here we go:
- 2-3 cans of Rust-Oleum Painter's Touch Matte Crystal Clear (clearcoat)
- 2-3 cans of Rust-Oleum Automobile Primer (Dark Gray)
- 2-3 cans of Rust-Oleum Metallic Black Auto Paint
- 2 packs of 100 grit sandpaper (the 3-pack 10x12 ones)
- 1 pack of 600 grit wet sandable sandpaper (3-pack 10x12 ones again)
- 1 pack of 2000 grit wet sandable sandpaper (just get some just in case you make an error of some sort, not a big deal on size)
- 1 pack of 3x5 notecards (the larger size will work too)
- A crapload of old newspapers
- A towel or two.
Now with the clearcoat, Duplicolor would be better, but the stuff that I used worked just fine. Any type of primer would work too. Make sure that the color is as close to the color that you want for your paint as you can get. For example, I wanted a dark dark metallic gray, so my primer color was dark gray. For Competition Gray, I might've used a light gray primer. Obviously, you want to choose your color carefully. The towels are to wipe off any excess crap on the wheels, tires, or buildup on the spray nozzle.
Here is my car before the whole job, some may argue with me, but I am partial to a dark colored rim as opposed to being shiny. I don't know what it is, but I always thought a dark colored rim made the car more aggressive:
Alright, so put the car on jacks. Remove all the wheels from the car. This a picture of a front wheel with everything on it. Keep in mind that my wheels are polished aluminum (or so I think).
It's important to get all the dust and dirt off the wheels. So thoroughly clean the wheels until they shine and blind you. Clean the entire rim, including the insides(don't know the exact word) of the rim as well.
Once everything is clean and shiny, dry everything off with a towel. Here is the back of the rim, before sanding:
Sand down the back of the rim thoroughly before doing anything else with 100 grit sandpaper. The idea is to remove the clearcoat and scuff up the old junk. Here is a pic of it sanded down, now it doesn't have to be perfect, but it should get every little nook and cranny.
After you are satisfied with your sanding, wash the rim off again to get rid of all the sanded material. Dry it off with a towel again. Then stick the appropriate number of notecards between the tire and rim, unless you want your tire metallic black or whatever color you choose. If you really want to, you can tape them down. I did them on the first rim, then realized it wasn't exactly necessary.
Lay out a bunch of newspaper sheets on the ground and put the rim with the spokes facing the ground. Now put your first coat of primer down. Try to get everything even, although its not too important at this moment. Spray about 12 inches to 16 inches away from the surfaces.
I put 3 coats of primer on the back here. By now, and once it dries, it would look like a flat dark gray, with no real distinctive blots of excessive spray. Make sure you give about 10-15 minutes between each primer coat.
Once the primer dries, you are ready for your first coat of paint. In my opinion, the back of the rim was not too important, therefore, I just applied two layers of the paint that I chose and put one light layer of clearcoat. It holds up decently so far.
Let this dry before continuing, but as you waiting for your rim to dry, continue the same process for another wheel.
Alright, so once the back of the rim dries, which I gave about 30 minutes outside, prepare to start doing the front. Don't forget to take out the center cap for this, since it is made of a different material. What you want to do is sand the front very thoroughly with 100 grit sandpaper until all the clearcoat and polish is scuffed up. It's important to get all this crap off or else the primer will have trouble sticking. Also make sure you get every little bit of the rim. Don't want paint peeling do ya?
Clean off all the dust and whatnot from sanding by spraying water through it. Don't dry the rim just yet though. Take the 600 grit sandpaper and start wetsanding the rim to smooth out the sanding from the 100 grit paper. It should get very "pasty".
Now after that is done, wash it off and dry the rim down with a towel.
Put the rim on the newspapers and take out the valve cap. Tape it up so you don't paint the threads over.
Insert the notecards between the rim and tire. Now apply the first coat of primer. Again, let it dry for about 10 to 15 minutes before recoating. Remember to spray about 12-16 inches away from the surface of the rim for everything (primer, paint, and clearcoat).
Coat 2
Coat 3
I did 3-4 coats depending on the well they dried and covered the wheel's surface. After the primer dries, apply your first coat of paint. Don't worry if it is not exactly even and some spots are darker than others. Take about 10-15 minutes between recoats.
Second coat of paint
Third coat of paint
I did 5 coats of paint and made sure that everything looked relatively even after the paint dried. Once the paint dries, I put some clearcoat on. Generally 3-4 good coats should do the job as long as everything was covered. After it dries. it should look very even. Here is the first coat of clearcoat.
Here's one wheel that's pretty much done
And another.
You want to repeat this process for every rim, duh.
. Also, you have to do the center caps. Unfortunately I do not have any pictures of this process, but I will walk you through it. Please note that the Corvette emblem will be painted over. I will just end up having my frined make me 4 decals to replicate them.
1) Clean the center cap
2) Sand down the surface with 100 grit sandpaper
3) Wash it but do not dry the center cap.
4) With the wet surface, wetsand with 600 grit sandpaper to smooth it all out.
5) Lay it down on some newspapers
6) Put 2 coats of primer on
7) After the primer dries, hit it with 2-3 coats of the paint.
8) When that dries, do two coats of clearcoat.
9) Let it dry, then you can mount it all on the wheels.
After everything is done, wait about 2 hours for everything to thoroughly dry before you put them on the car. It's best to let it sit for 24 hours to fully dry, but its not too necessary, I started driving about 2 hours after mounting everything on the car.
Continued in the next post.
Last edited by xkilo16x; 10-27-2007 at 06:02 PM.
 10-26-2007, 09:38 PM
#2
Pro
Thread Starter
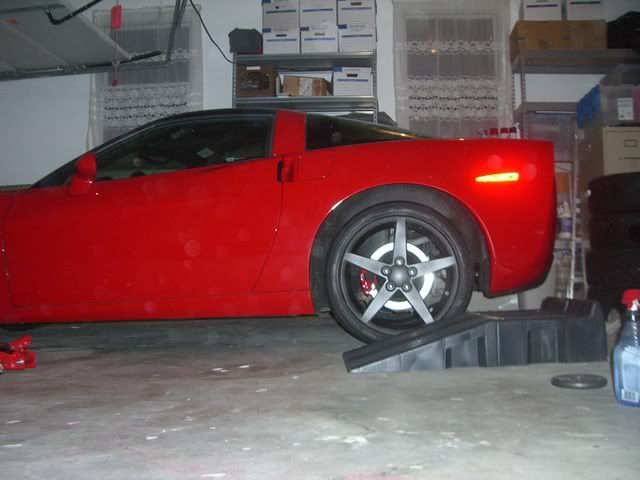
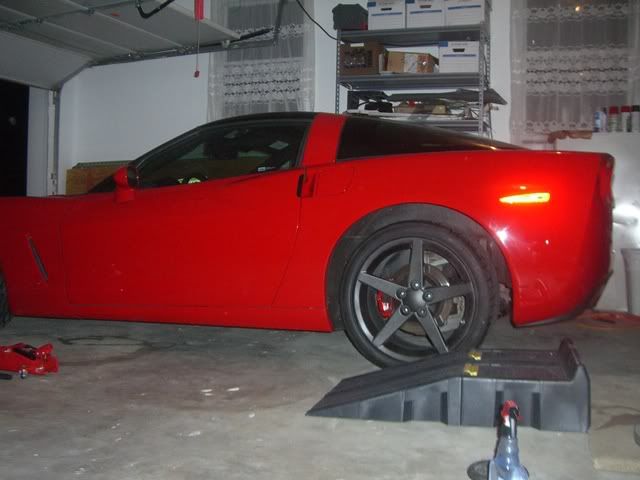
Here's a bit of the stuff on the car, just mounted. Unfortunately, by the time I was done, it was already too dark out. Around 9 PM. I took some pics in the garage, which is poorly lighted. It has also been raining ever since, so I didn't get a chance anyway. The flash is also really strong on my camera, I can't seem to turn it down a notch, and turning it off just results in dark, gloomy images.
I'll put them up in this thread once I get to take some pics on a good day.

That is pretty much it. Any questions, feel free to PM me.
Enjoy!
I'll put them up in this thread once I get to take some pics on a good day.
That is pretty much it. Any questions, feel free to PM me.
Enjoy!
10-26-2007, 09:43 PM
#3
Melting Slicks


Member Since: Mar 2001
Location: El Paso TX
Posts: 2,117
Likes: 0
Received 0 Likes
on
0 Posts

Great write-up! 
Looks like a lot of work to me. I can't even find the time to keep my poor car clean!

I really like the way it turned out. Looking forward to some daytime shots.
Matt
Looks like a lot of work to me. I can't even find the time to keep my poor car clean!
I really like the way it turned out. Looking forward to some daytime shots.
Matt

 10-27-2007, 04:14 AM
#9
Le Mans Master


Member Since: May 2005
Location: Hope, Arkansas - '07 LMB Coupe
Posts: 5,865
Likes: 0
Received 2 Likes
on
2 Posts
Cruise-In VIII Veteran
What about the wheel weights? When you get new tires mounted and balanced, the new wheel weight amounts and locations are going to expose at least part of the unpainted areas.

 10-27-2007, 09:10 AM
#13
Le Mans Master


Member Since: Dec 2004
Location: AZ
Posts: 5,754
Received 536 Likes
on
279 Posts
St. Jude Donor '06-'08-'10-'11-'12-'13 '14-'15-'16-'17-'18-'19

Thank you thank you. I have been wanting to paint the inside drum for a while but have been a little afraid of this. Your write up was great and gives me the confidence to give this a try.
10-27-2007, 09:53 AM
#15
Pro
Thread Starter
As with the balancing, I was changing the tires either way to BFGs. So I painted them and then balanced them. Obviously I forgot that the machine would scratch the edges of the rim. I had to repaint the area, but it came out about the same.
It's amazing how such little weight could affect the balancing of the wheels.
At the moment, I did not have the money to purchase new black wheels as I just purchased new tires (I was leaking in my rear right, and my fronts were basically gone). So this is basically an option for those who don't have the resources to purchase wheels. I will purchase new wheels within six months either way.
Daytime pics coming soon
Thanks guys. I was hoping maybe this could get stickied in the FAQs.
10-27-2007, 09:55 AM
#16
Pro
Thread Starter
If you're only doing the inside drum, you have to cover up the front of the wheel with masking tape or something similar. While you are spraying the back, it will still reach the front and if it isn't covered, there will be traces of primer and paint on the spokes and whatnot.
10-27-2007, 02:28 PM
#17
Team Owner

Member Since: Oct 2004
Location: San Clemente CA
Posts: 27,420
Likes: 0
Received 59 Likes
on
48 Posts

Unfortunately, I don't think painting chrome works. I tried painting the chrome lug nuts red. I sanded them down and did the same process with primer. The paint just flaked off with use.
As with the balancing, I was changing the tires either way to BFGs. So I painted them and then balanced them. Obviously I forgot that the machine would scratch the edges of the rim. I had to repaint the area, but it came out about the same.
It's amazing how such little weight could affect the balancing of the wheels.
At the moment, I did not have the money to purchase new black wheels as I just purchased new tires (I was leaking in my rear right, and my fronts were basically gone). So this is basically an option for those who don't have the resources to purchase wheels. I will purchase new wheels within six months either way.
Daytime pics coming soon
Thanks guys. I was hoping maybe this could get stickied in the FAQs.
Thanks again for your DIY article.
10-27-2007, 04:42 PM
#18
Safety Car

Not to be a glass half empty kinda guy, but did you 1) use a primer specifically designed for aluminum, or 2) used a Metal etch product for good adhesion?
Regular paint and primer isn't a good mix with an aluminum base....
Just a thought.
Regular paint and primer isn't a good mix with an aluminum base....
Just a thought.
10-27-2007, 05:07 PM
#20
Le Mans Master
Member Since: Dec 2004
Location: AZ
Posts: 5,754
Received 536 Likes
on
279 Posts
St. Jude Donor '06-'08-'10-'11-'12-'13 '14-'15-'16-'17-'18-'19
If you're only doing the inside drum, you have to cover up the front of the wheel with masking tape or something similar. While you are spraying the back, it will still reach the front and if it isn't covered, there will be traces of primer and paint on the spokes and whatnot.