
Apsis Overlay Spoke Caps, Color Matching & Carbon Look. *PICS SHOWN*
 10-17-2007, 09:05 PM
#61
Premium Supporting Vendor
Thread Starter

Thanks for the patience. We should start shipping next week except the Monterey Red. Because we couldn't get the touch-up paint from GM for Monterey Red for about two months, it caused the delay. But thanks to the help of one member we have got the Monterey Red from different channel and now we are making the Monterey Red. So it will be available shortly too.
 10-19-2007, 08:31 PM
#62
Melting Slicks

Member Since: Feb 2006
Location: Simi Valley California
Posts: 2,544
Received 123 Likes
on
81 Posts
St. Jude Donor '06-'07-'10, '15. '22-'23

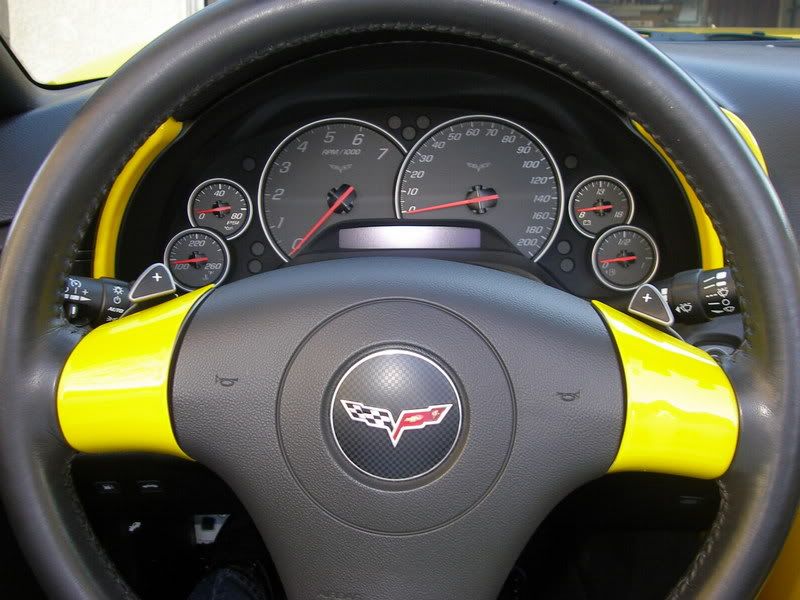
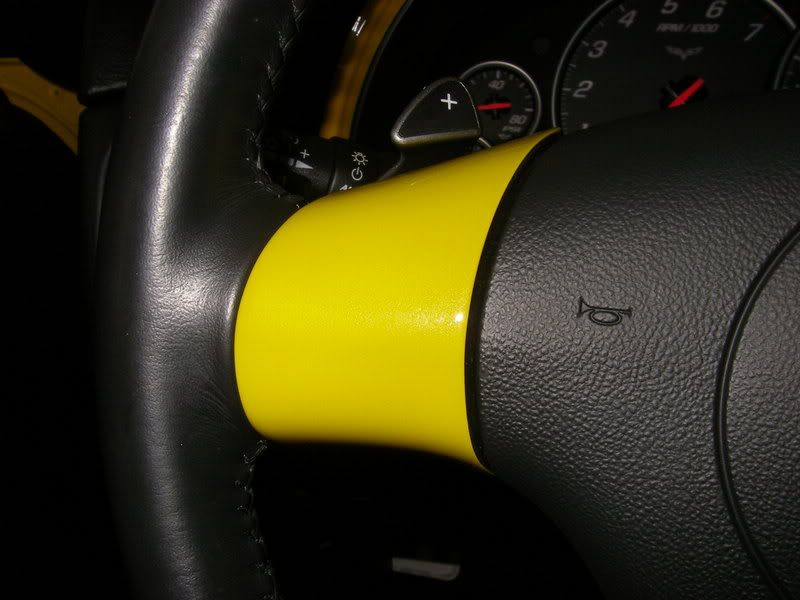
Well I received my spoke overlays and installed them today. Pics are below. My take on them is that they are a little difficult to get installed exactly right. I test fit them to make sure I knew exactly how to fit them before removing the adhesive tape. I got the right one installed and it looks good. The left one was more of a problem. Once that tape starts to stick, you are more or less stuck (pun intended) with the position they are in. The left side is a little off and even though it was not firmly attached yet (it was only gently put in place) it was clear that there was no way to move it short of ripping the tape from the overlay or breaking the overlay itself (they are very thin).
I would have liked it if the tape was pressure sensitive and allowed a little repositioning. Not very happy with the way the left spoke came out but overall I think they look OK. Perhaps an alternative would be to forget the tape altogether and use something like silicone adhesive that would allow repositioning before it dries. If this thing bugs me enough I may try to remove the left one with fishing line (if I can do it without breaking it) and then reattach it that way.
So be very careful when you put them on that the alignment is correct, especially on the top and inside, and hopefully you will get a good result. Here are some pix...


 10-19-2007, 10:23 PM
#65
Le Mans Master


Member Since: Mar 2006
Location: Valencia '32 Ford 3 window with 615 HP!!!!
Posts: 7,838
Likes: 0
Received 1 Like
on
1 Post
St. Jude Donor '06-'09
If Yours came "with" tape,..then I think You should ask Them "why"?
The "ad" says,..to put a little glue on them,,but if You want "We will add double side tape to them"!
Give Them a call!
G
The "ad" says,..to put a little glue on them,,but if You want "We will add double side tape to them"!
Give Them a call!
G

 10-19-2007, 11:56 PM
#69
Premium Supporting Vendor
Thread Starter
Originally we do think to go without double sided tape for the reason that it will allow you some lead time to move the parts and also the concern that the thickness of double sided tape will make a small gap between the our Spoke Cap and factory Spoke Cap.
We find a very thin double sided tape so it solves the concern of thickness issue. We also concern that maybe some members may mess with the glue and leave noticeable spot accidentally. So we change our approach to use the double side tape.
Now you can do two things--------
1. If you don't like to use the double sided tape for installation, then you can remove it and use glue for installation instead. This is a similiar case as our overlay Carbon Speedo Corners. Originally we use the double sided tape and later most customers prefer using glue for installation so it's easier to move the parts and get the perfect fit.
2. If you still like to use the double sided tape for installation. Here is a trick----- first you remove the red lining and put it back as temporary and leave a small section hanging outside the edge of the parts. This way it will prevent you accidentally let the adhesive contact with the factory Spoke Cap. While you are pushing in to have best fit then you peel off the lining at the same time. It will prevent the unexpected adhesive contact and ending up with nicer installation.
We would like to hear more customers' comments if they like us to pre-install the double sided tape or not. If most of customers prefer using glue for installation, then we will not pre-mount the tape any more.
In the transition period of time, if you don't like to use double sided tape for installation, please just simply remove the double sided tape first and then change to use glue for installation.
10-20-2007, 01:26 PM
#70
Melting Slicks
Member Since: Feb 2006
Location: Simi Valley California
Posts: 2,544
Received 123 Likes
on
81 Posts
St. Jude Donor '06-'07-'10, '15. '22-'23
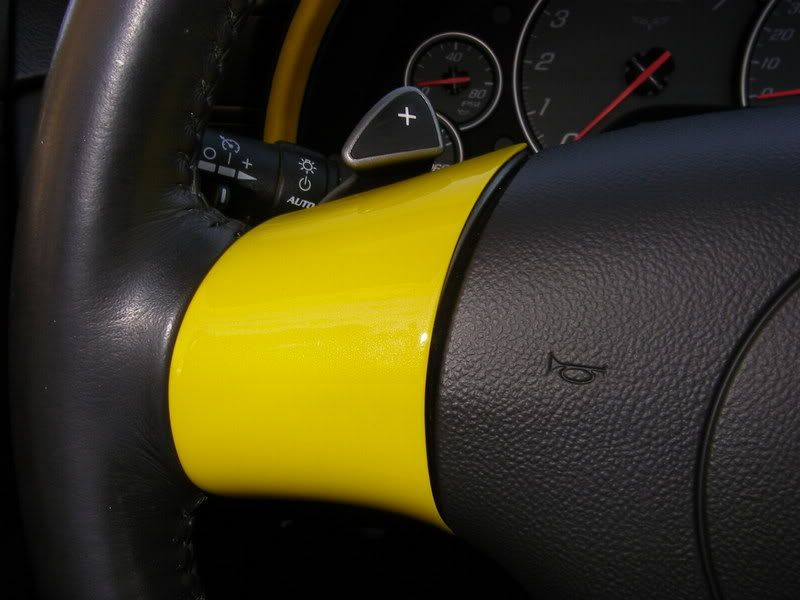
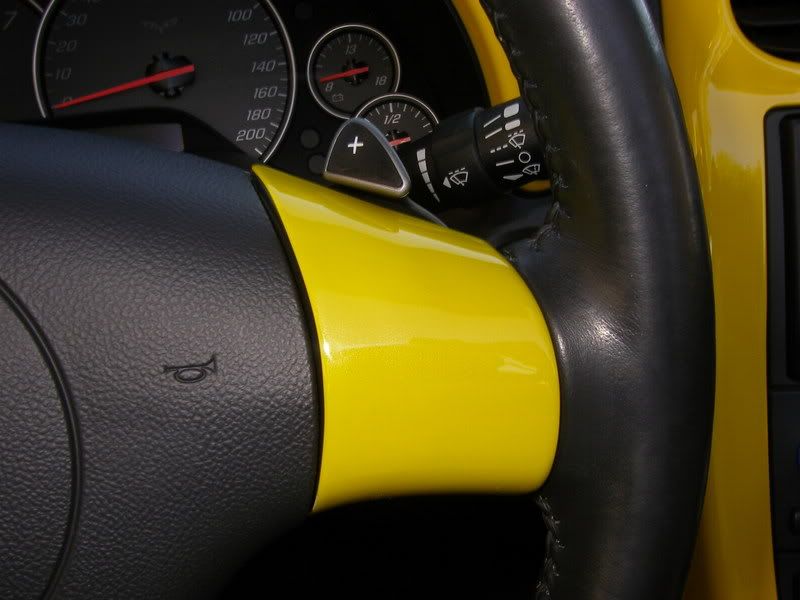
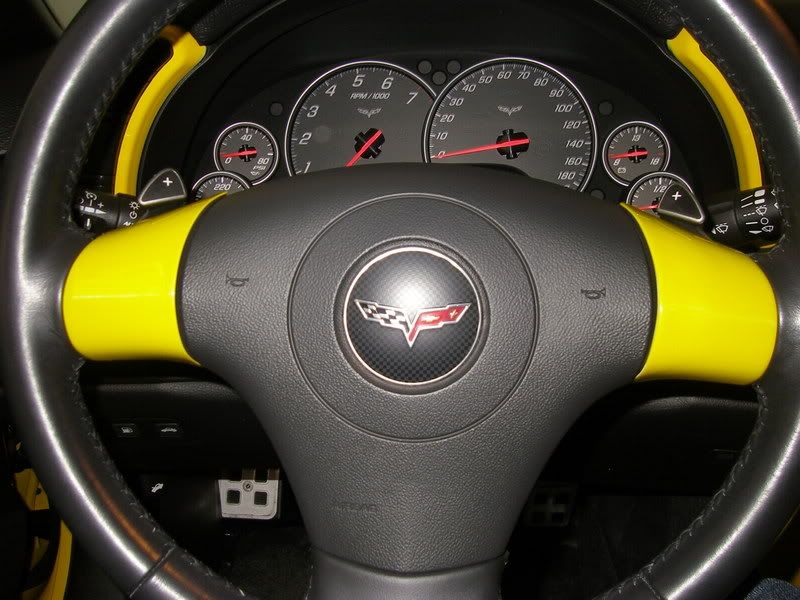
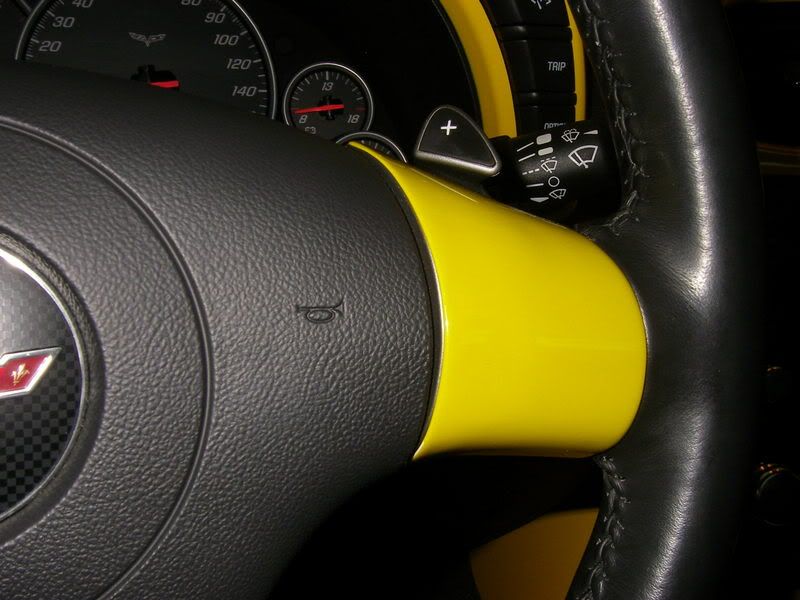
Because I am a freak with OCD I could stand the install for about 10 minutes before redoing it.
So with the aid of some dental floss and a lot of sawing I got them both off and removed the tape from the back. Then I applied a thin layer of silicone adhesive and proceeded to get them exactly where they belong and let them dry overnight.
Now they look SO much better and I can sleep at night!
Here are the results of the do-over...I recommend you guys remove the tape and use adhesive that allows you to position them before they dry.

 10-20-2007, 03:11 PM
#72
Team Owner


Member Since: Sep 2005
Location: Big Bend Country, TX
Posts: 29,114
Received 2,186 Likes
on
1,337 Posts
St. Jude Donor '06-'07-'08-'09-'10-'11-'12-'13-'14-'15- '16-'17-�18-�19-'20-'21
NCM Lifetime Member


 10-20-2007, 03:18 PM
#73
Team Owner
Member Since: Sep 2005
Location: Big Bend Country, TX
Posts: 29,114
Received 2,186 Likes
on
1,337 Posts
St. Jude Donor '06-'07-'08-'09-'10-'11-'12-'13-'14-'15- '16-'17-�18-�19-'20-'21
NCM Lifetime Member
[QUOTE=C6 MoneyPit;1562389391]
So that's what the speedometer looks like at 0
So that's what the speedometer looks like at 0
10-20-2007, 04:39 PM
#74
Supporting Lifetime
Member Since: Sep 2005
Location: Syracuse NY
Posts: 4,017
Received 1,271 Likes
on
509 Posts
2023 C1 of the Year Finalist - Unmodified
2022 Corvette of the Year Finalist -- Unmodified
2021 C1 of the Year Winner - Unmodified
2020 C1 of the Year Finalist - Unmodified
2016 C1 of the Year Finalist
MoneyPit, they can give you all the heat they like . . . in their hearts they know they would have done the same freakin' thing!
Less than perfect = less than acceptable. That's not being unreasonable, that's being a Corvette owner. Glad you fixed it and got it right, the pictures of it "slightly off" were bothering ME , and it ain't even my car!
Less than perfect = less than acceptable. That's not being unreasonable, that's being a Corvette owner. Glad you fixed it and got it right, the pictures of it "slightly off" were bothering ME
, and it ain't even my car!
10-20-2007, 07:19 PM
#75
Premium Supporting Vendor
Thread Starter
Because I am a freak with OCD I could stand the install for about 10 minutes before redoing it.
So with the aid of some dental floss and a lot of sawing I got them both off and removed the tape from the back. Then I applied a thin layer of silicone adhesive and proceeded to get them exactly where they belong and let them dry overnight.
Now they look SO much better and I can sleep at night!
Here are the results of the do-over...I recommend you guys remove the tape and use adhesive that allows you to position them before they dry.
So with the aid of some dental floss and a lot of sawing I got them both off and removed the tape from the back. Then I applied a thin layer of silicone adhesive and proceeded to get them exactly where they belong and let them dry overnight.
Now they look SO much better and I can sleep at night!
Here are the results of the do-over...I recommend you guys remove the tape and use adhesive that allows you to position them before they dry.
10-20-2007, 07:30 PM
#76


Hi Guys,
Thanks for the overwhelming responses to our Overlay Spoke Caps.
We are thinking to develop the following items for the overlay application and like to hear your opinions. If the response is positive, then we will speed up to have the overlay parts ready asap.
Here are the parts-------
Push Button Door Opener Bezel (overlay)
Top Cap for either Stick SK or A/T SK (overlay)
E-Brake Cap (replacement part, we mean to duplicate the cap)
Speedo Corners (overlay)
or
SK whole body for either Stick or A/T (core exchange)
E-Brake Handle (whole body) (core exchange)
Our thinking is after you upgrade the Spoke Cap, then you may also want to upgrade those items mentioned above. If we make them available for all possible materials that you may need (such as carbon look, color matching,....etc), then you can finish your interior.
Please let us know your comments again. Thanks.


 10-24-2007, 09:54 PM
#80
Premium Supporting Vendor
Thread Starter