My Cam & Supercharger Build Thread!
 05-20-2014, 10:33 AM
#41
Melting Slicks


oddly I have never heard of this 
Is it necessary for the LS2 timing chain?
I ran a melling pump and a LS2 double roller on my stock block for around 9000+ miles, so I will take a look when I get home to see if there was any "scoring" on the pump. (if I can find it)
I didn't do it on my forged build, but I have an idea that it is more common that guys don't do it than those that do.
 05-21-2014, 01:23 AM
#42
Burning Brakes

Thread Starter
 I'd be interested to see how your pump looks. It's probably fine.
05-21-2014, 01:35 AM
I'd be interested to see how your pump looks. It's probably fine.
05-21-2014, 01:35 AM
#43
Burning Brakes
Thread Starter
DAY ELEVEN - TIMING COVER AND BALANCER (1.5 hours)
I only had a couple of hours to work on the car tonight, but it was enough to get the timing cover and balancer in place and ready for pinning. I'm really looking forward to Memorial Day weekend so I can put in a bunch of time and hopefully get this thing fired up!
I cleaned up the timing cover mating surfaces and placed a bead of RTV at the corners where the pan, block, and timing cover meet. It may have been a bit too much as some squeezed out the sides, but hopefully there are no leaks!
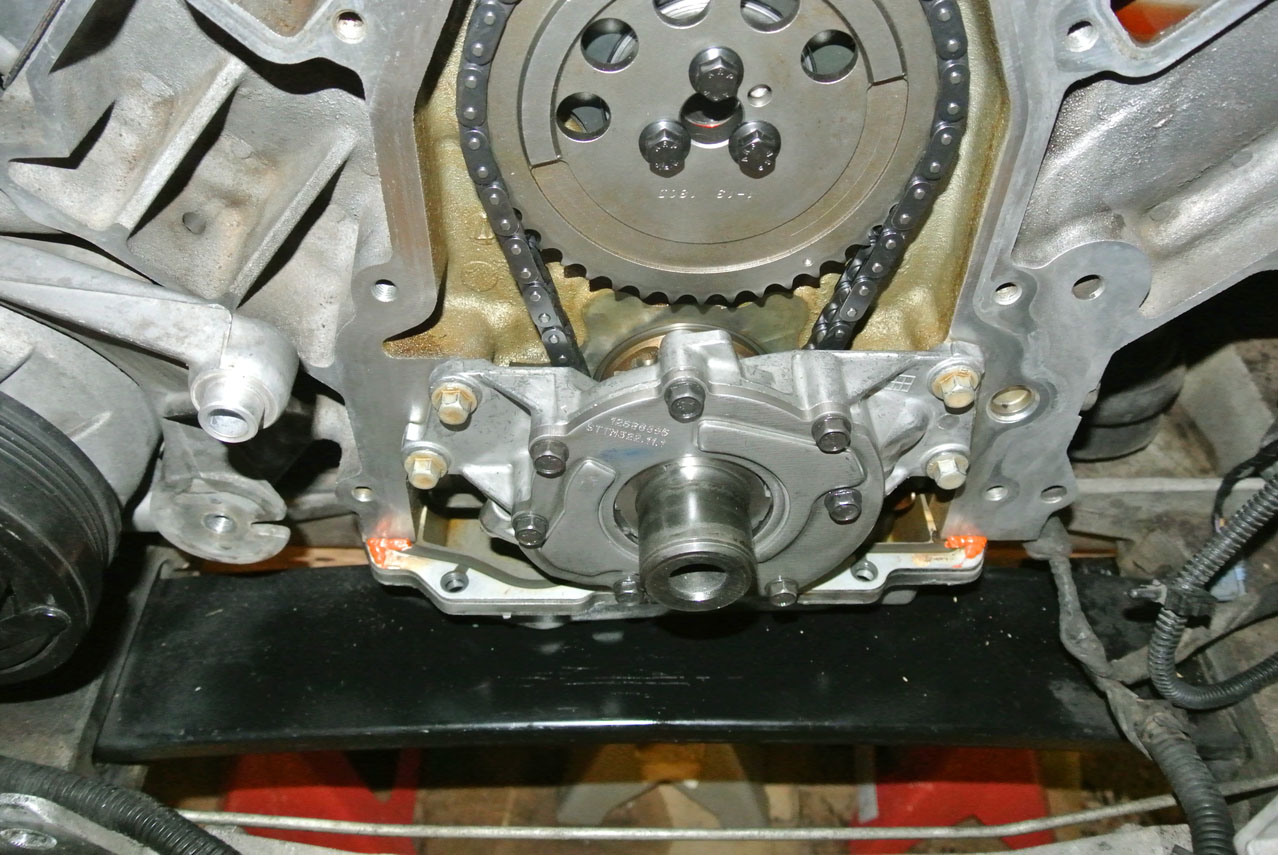
Timing cover in place and center aligned using Sac City Corvette's AlignIt tool. The tool worked well to install the new seal, too!
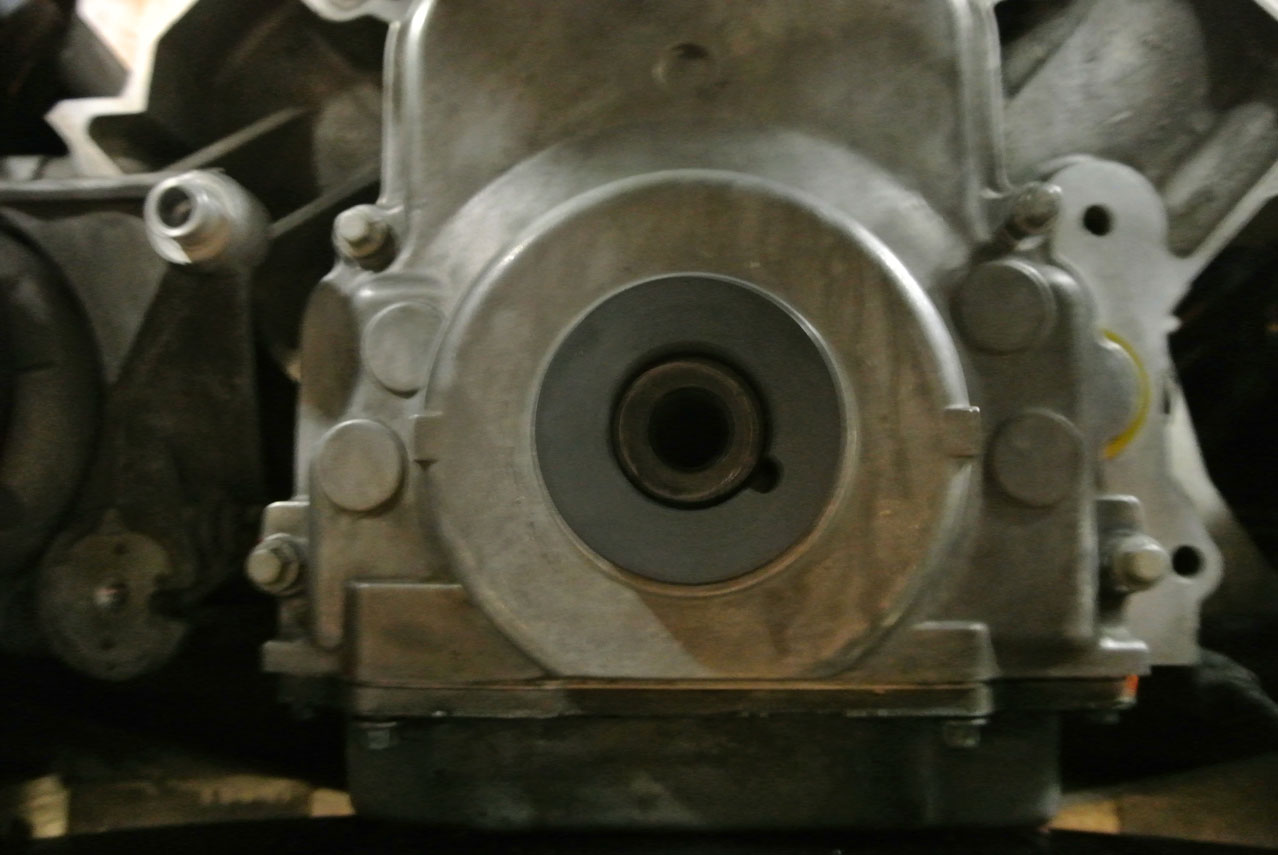
I torqued the cover to 18 ft/lbs, removed the tool and installed the new seal, and started pressing my balancer on. I didn't have enough washers for my homemade tool, but the old crank gear worked great as a spacer!
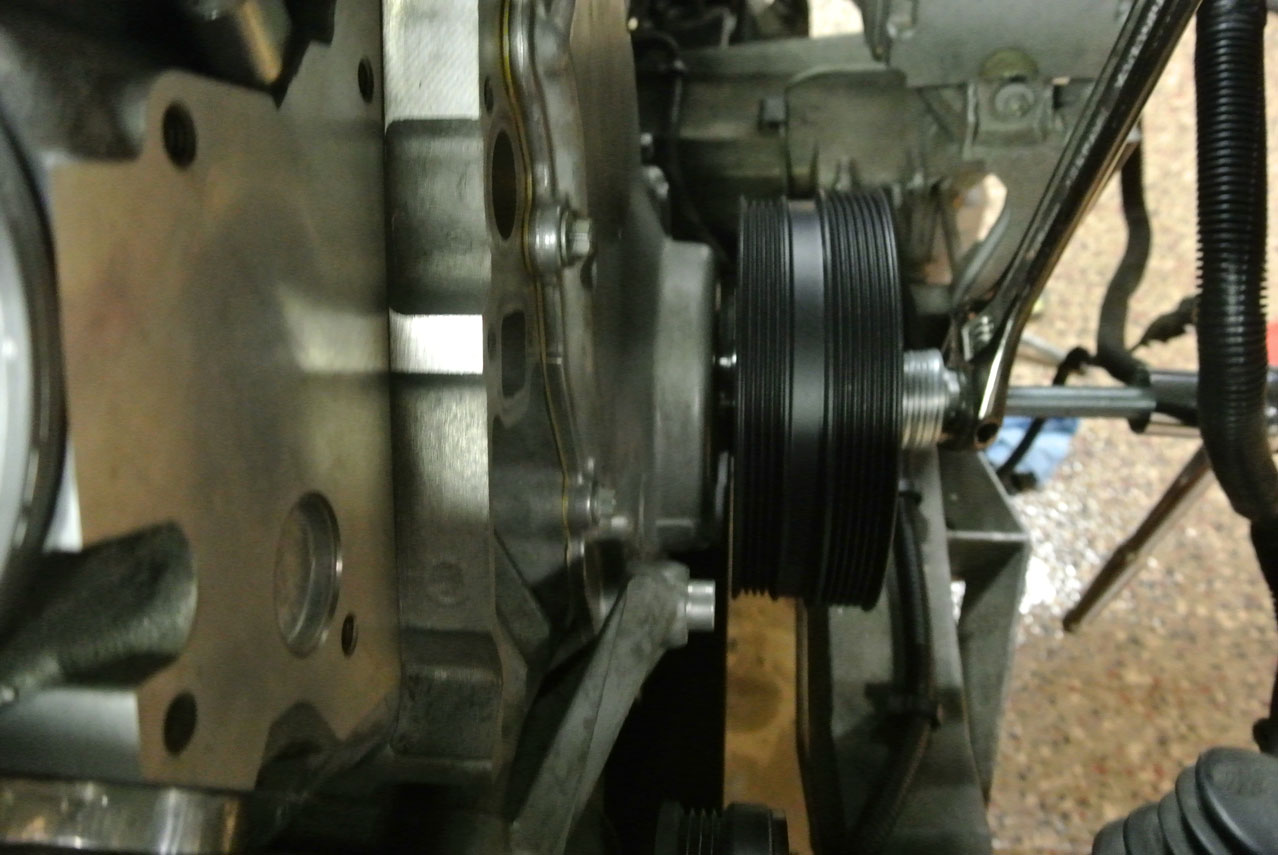
It was more time consuming then it was difficult to get the balancer all the way on. First I tightened it as much as I could then removed the tool and installed the factory bolt to 240 ft/lbs. After removing the bolt, I measured 0.140" from the face of the balancer to the crank snout, which falls within the 0.094" - 0.176" GM spec.
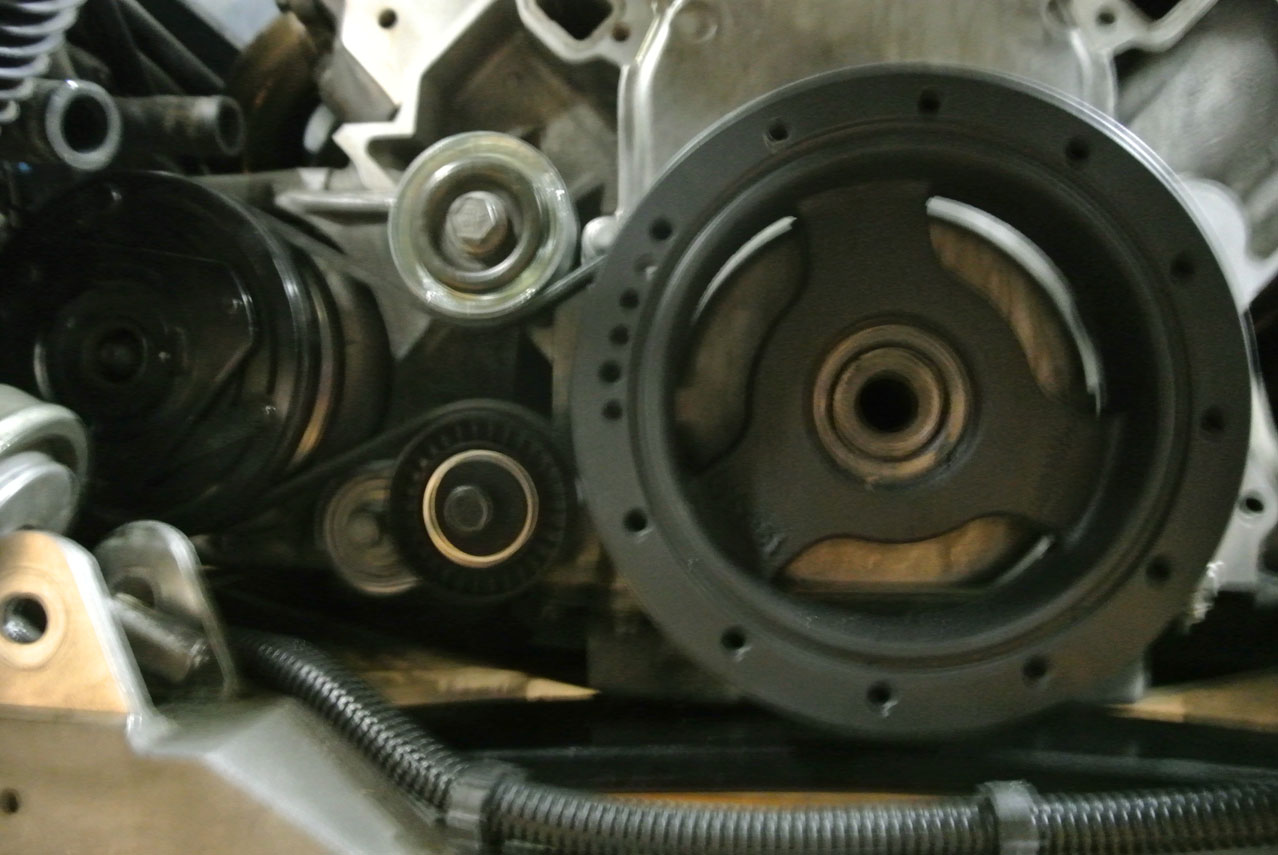
I'll probably pin the crank and install my new ARP crank bolt tomorrow at lunch if I can get away from my desk. Then hopefully on to putting the rack back in place and bolting up the supercharger!
I only had a couple of hours to work on the car tonight, but it was enough to get the timing cover and balancer in place and ready for pinning. I'm really looking forward to Memorial Day weekend so I can put in a bunch of time and hopefully get this thing fired up!
I cleaned up the timing cover mating surfaces and placed a bead of RTV at the corners where the pan, block, and timing cover meet. It may have been a bit too much as some squeezed out the sides, but hopefully there are no leaks!
Timing cover in place and center aligned using Sac City Corvette's AlignIt tool. The tool worked well to install the new seal, too!
I torqued the cover to 18 ft/lbs, removed the tool and installed the new seal, and started pressing my balancer on. I didn't have enough washers for my homemade tool, but the old crank gear worked great as a spacer!
It was more time consuming then it was difficult to get the balancer all the way on. First I tightened it as much as I could then removed the tool and installed the factory bolt to 240 ft/lbs. After removing the bolt, I measured 0.140" from the face of the balancer to the crank snout, which falls within the 0.094" - 0.176" GM spec.
I'll probably pin the crank and install my new ARP crank bolt tomorrow at lunch if I can get away from my desk. Then hopefully on to putting the rack back in place and bolting up the supercharger!
Last edited by RoccoC5; 04-27-2017 at 04:36 AM.
05-23-2014, 03:19 AM
#44
Burning Brakes
Thread Starter
DAY TWELVE - CRANK PINNING & MORE RE-ASSEMBLY (3 hours)
Hello Everyone!
Well, after getting done with work late I didn't feel like doing much on the vette tonight. But one thing led to another and I actually got some sh*t done!
I started by pinning the crank. Super easy job with the kit I bought off of a forum member. Speaking of, anyone looking for one?
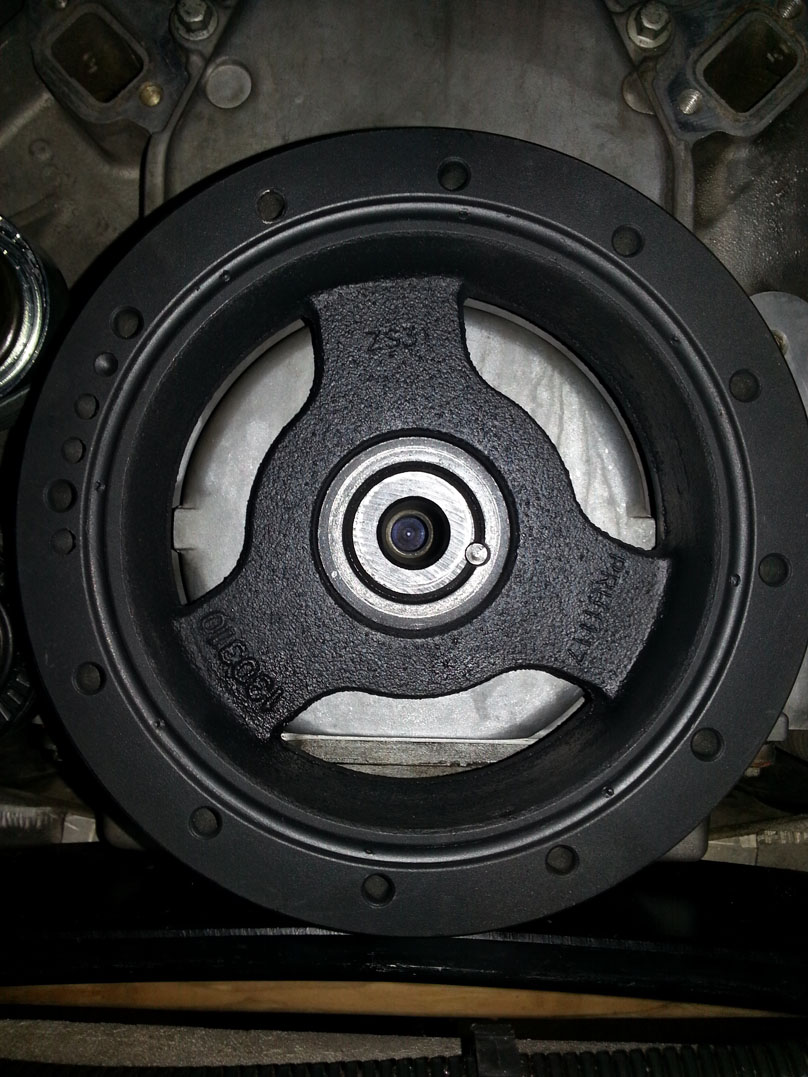
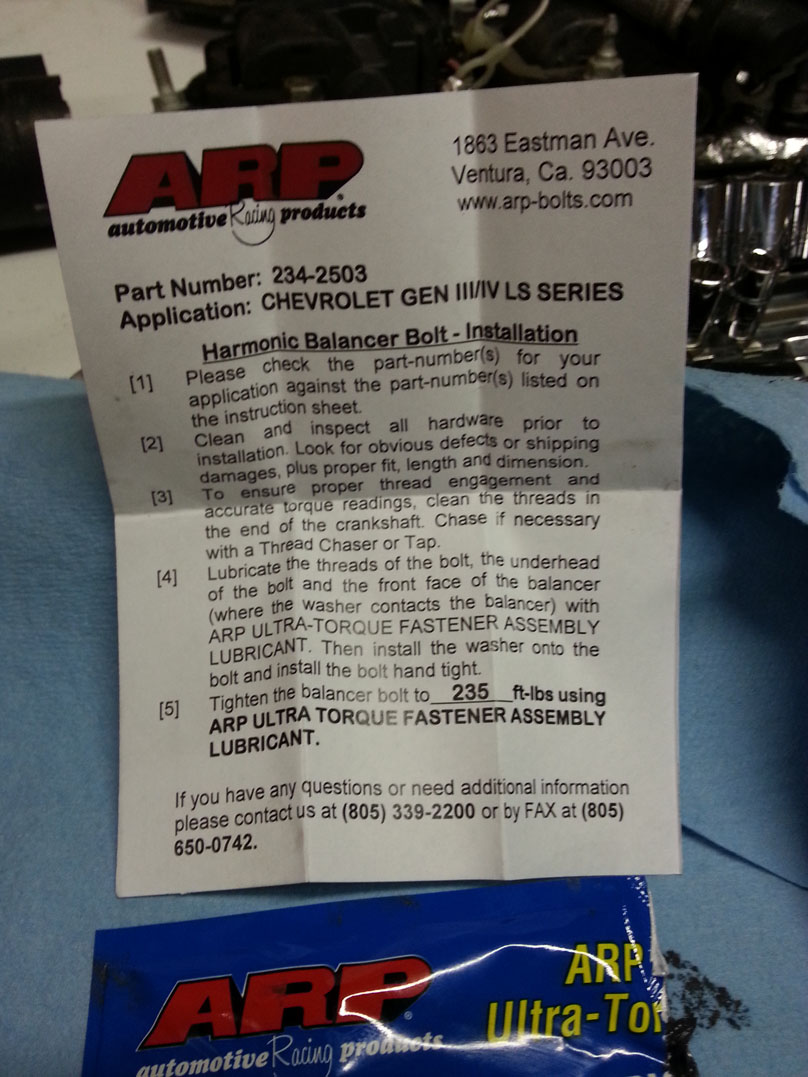
After that was done, I prepared to install the new ARP crank bolt:
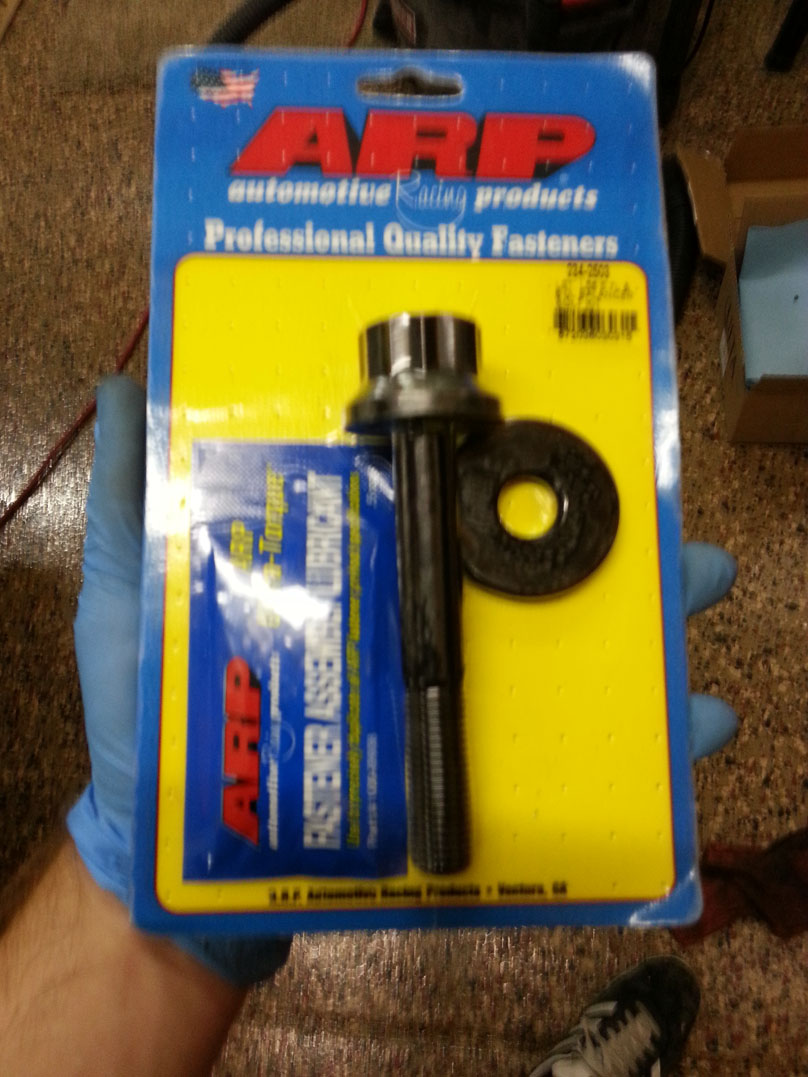
According to their instructions, I was to lube the bolt threads, head, and balancer face with the supplied "fastener assembly lubricant" and torque to 235 ft/lbs:
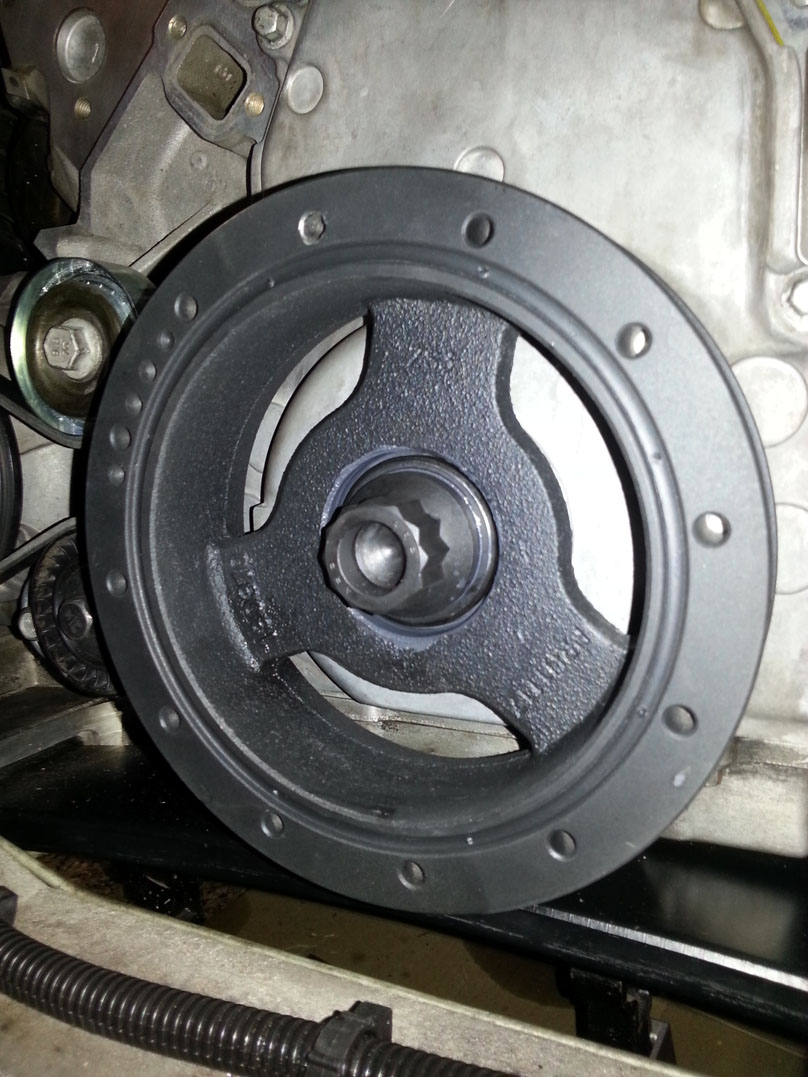
Like last time, I put the car in fourth gear and had an assistant press the brakes. I certainly didn't want to roll off the jackstands! Everything went smoothly and the bolt didn't argue about the 235 ft/lbs:
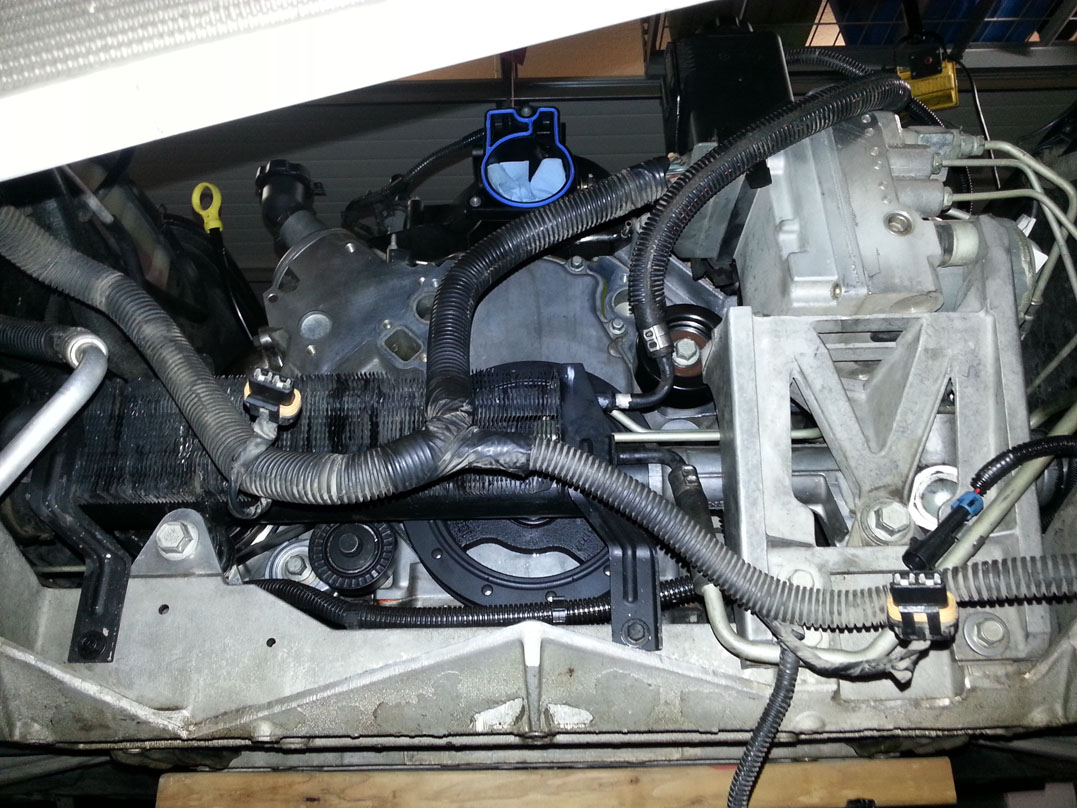
At this point I felt like I was on a roll, so I cranked through and got the rack in place. I struggled with this for about 20 minutes before getting a helping hand. It's a pain to maneuver the rack back into place while avoiding the ABS module and bracket, plus the passenger side mount with the bushing is a super tight fit. Got her done!
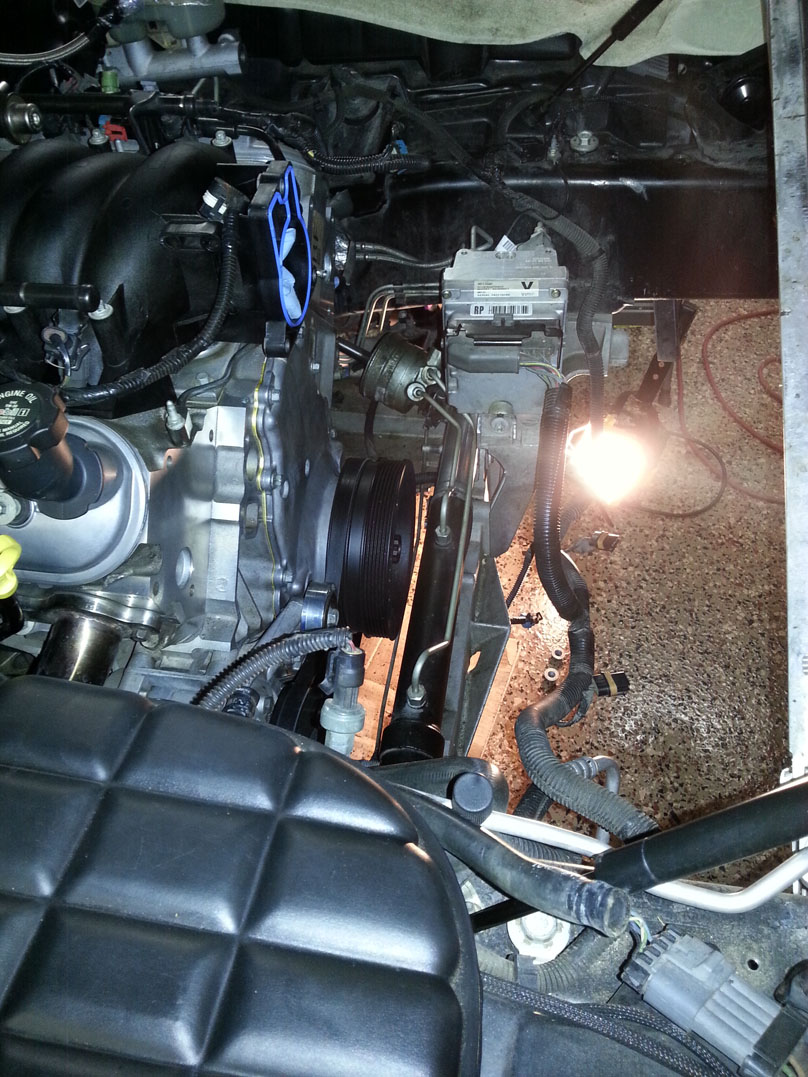
To finish up for the night, I bolted up the power steering/alternator bracket:
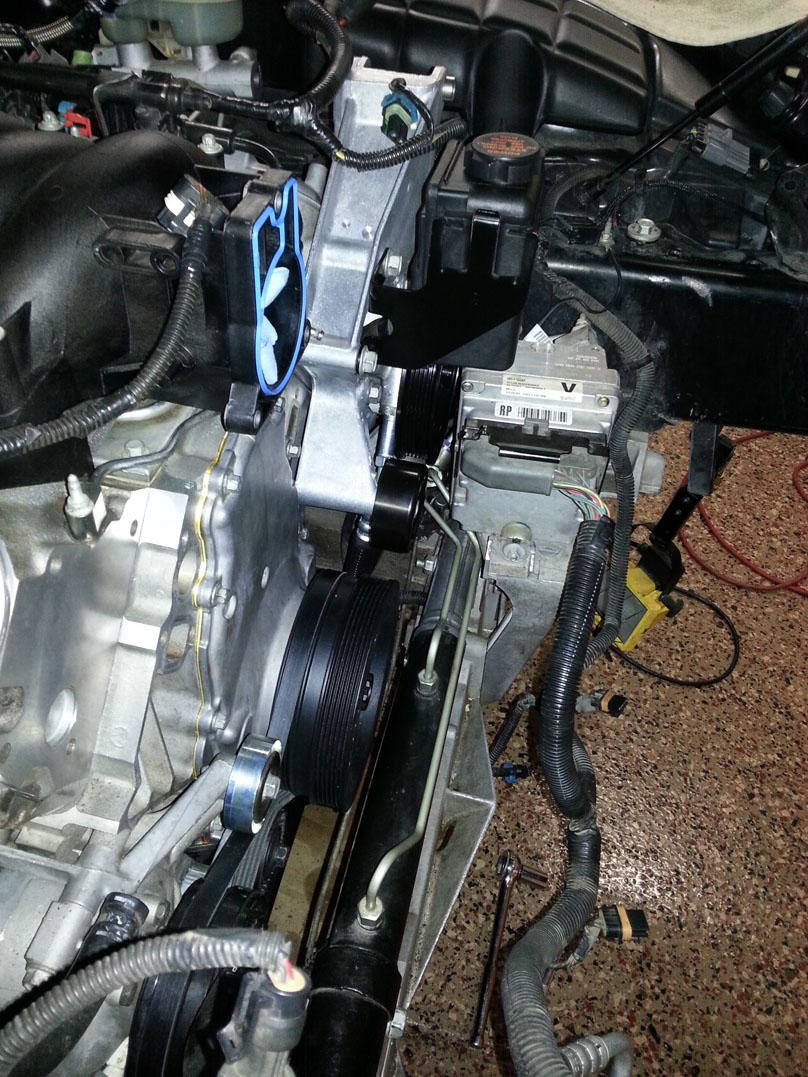
Man, there used to be so much more room down here!!!
Hopefully more updates tomorrow!
Hello Everyone!
Well, after getting done with work late I didn't feel like doing much on the vette tonight. But one thing led to another and I actually got some sh*t done!
I started by pinning the crank. Super easy job with the kit I bought off of a forum member. Speaking of, anyone looking for one?
After that was done, I prepared to install the new ARP crank bolt:
According to their instructions, I was to lube the bolt threads, head, and balancer face with the supplied "fastener assembly lubricant" and torque to 235 ft/lbs:
Like last time, I put the car in fourth gear and had an assistant press the brakes. I certainly didn't want to roll off the jackstands! Everything went smoothly and the bolt didn't argue about the 235 ft/lbs:
At this point I felt like I was on a roll, so I cranked through and got the rack in place. I struggled with this for about 20 minutes before getting a helping hand. It's a pain to maneuver the rack back into place while avoiding the ABS module and bracket, plus the passenger side mount with the bushing is a super tight fit. Got her done!
To finish up for the night, I bolted up the power steering/alternator bracket:
Man, there used to be so much more room down here!!!
Hopefully more updates tomorrow!
Last edited by RoccoC5; 04-27-2017 at 04:36 AM.
 05-23-2014, 10:31 AM
#46
Burning Brakes
Member Since: Mar 2011
Location: East Plano, Republic of Texas
Posts: 999
Likes: 0
Received 4 Likes
on
2 Posts
DAY TWELVE - CRANK PINNING & MORE RE-ASSEMBLY (3 hours)
Hello Everyone!
Well, after getting done with work late I didn't feel like doing much on the vette tonight. But one thing led to another and I actually got some sh*t done!
I started by pinning the crank. Super easy job with the kit I bought off of a forum member. Speaking of, anyone looking for one?
 05-24-2014, 05:50 PM
#48
Burning Brakes
Thread Starter
DAY THIRTEEN - TOP END ASSEMBLY (5 hours)
I almost forgot that I had valve springs to install!
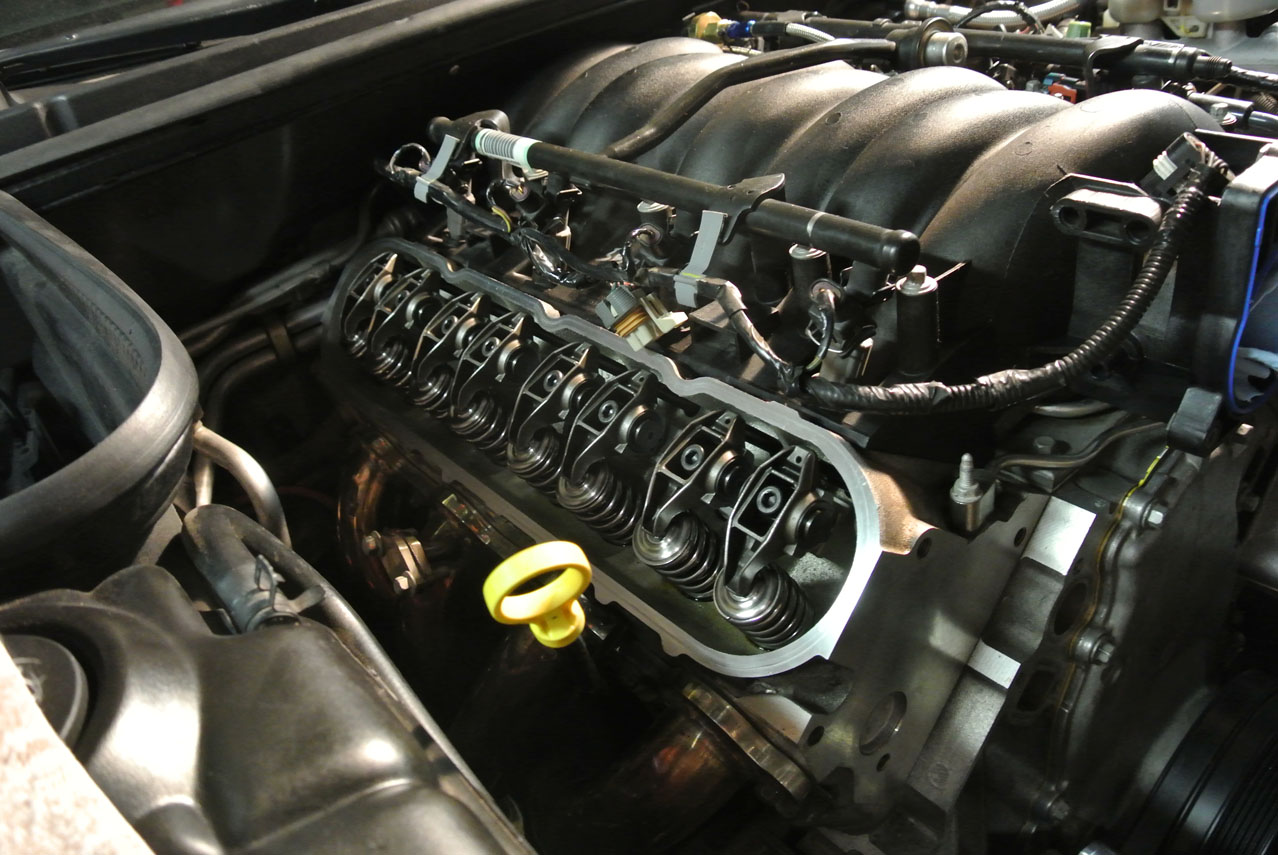
Late last night I spent a few hours out in the garage buttoning up the top end. Swapped the valve springs/seats/seals/retainers/locks and pushrods, plus installed my rocker arms which were freshened up with the Brian Tooley trunion upgrade. Finally, replaced the valve cover gaskets and bolt seals and snugged them up.
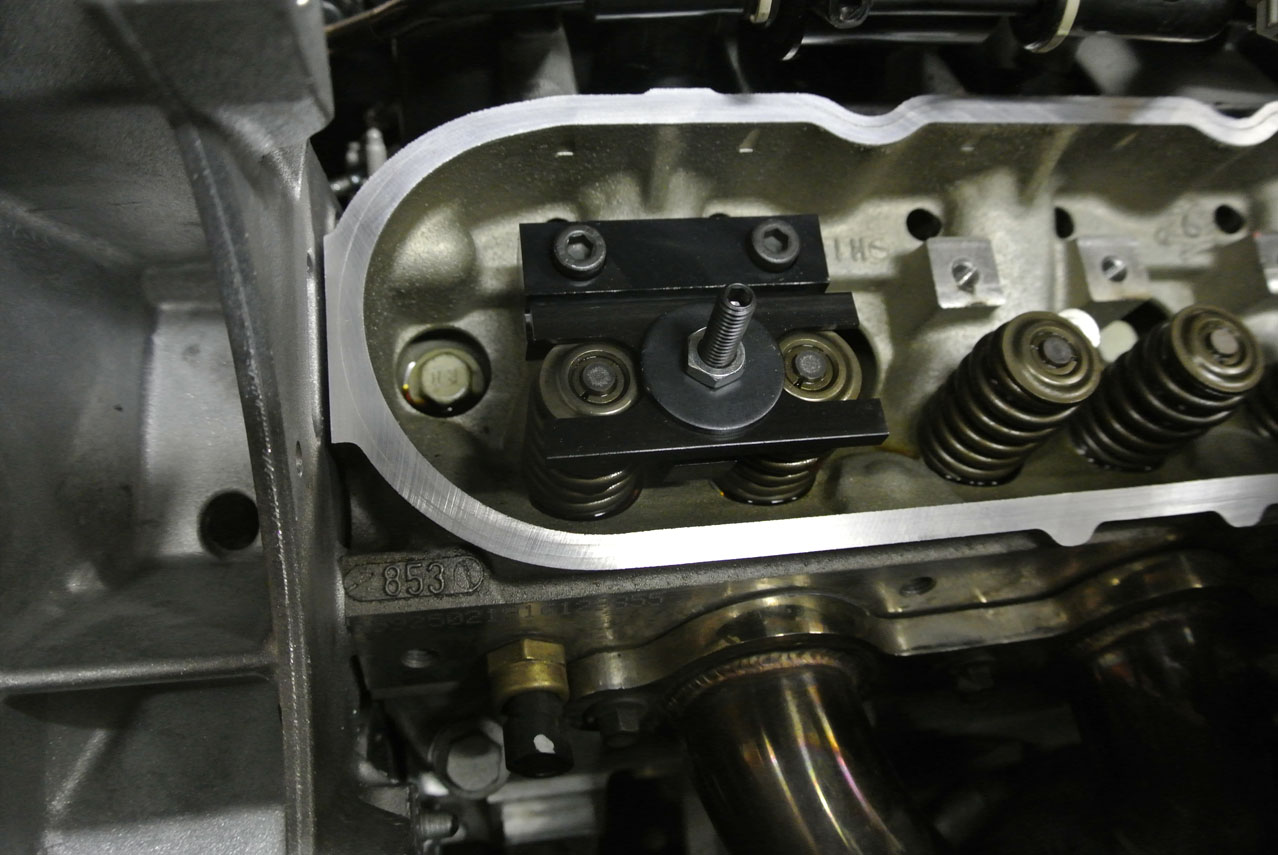
I used a Proform dual spring compressor (pretty much the same as the Comp Cams and Crane versions) to swap the springs. I also used a de-cored compression tester hose to fill the cylinder with air to keep the valves up, plus I put the piston at TDC just in case. Most of the springs needed a few whacks on the retainer to dislodge the locks, and once that was done, it was an easy but time-consuming job. It would have went faster if I wasn't worried about valves dropping and didn't set each cylinder to TDC before removing the springs. I ended up getting #1 to TDC and replacing springs on 1 & 6, rotating the crank 90, replacing 8 & 5, rotating 90, replacing 7 & 4, rotating 90, and then finishing up with 3 & 2. A straw inserted through the plug hole helped me verify that the piston was at or near the top of its stroke, and I kept the transmission in gear so the compressed air wouldn't be able to rotate the crank.
Here's the tool ready to work on cylinder #1:
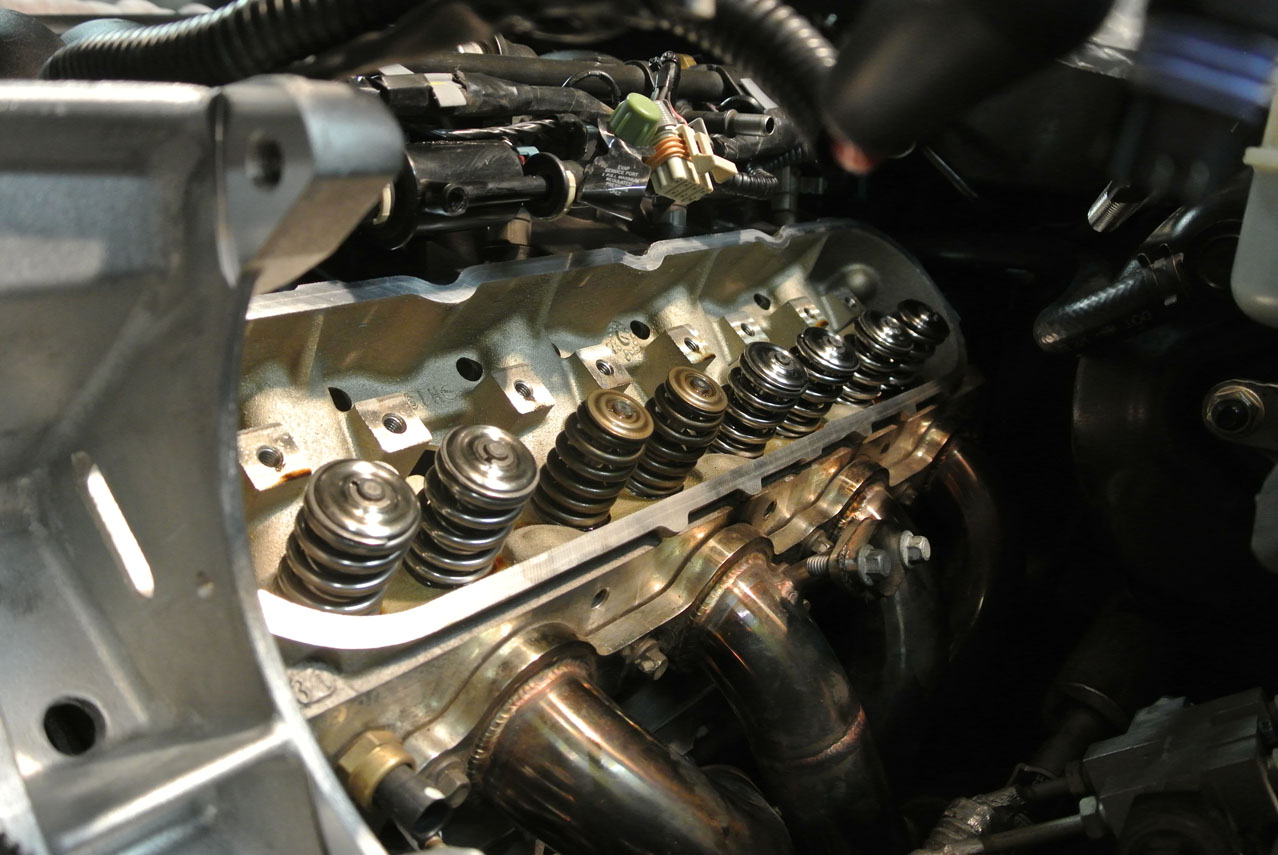
Old springs, seats, and seals out:
Three cylinders done on the driver's side (apparently I got carried away and didn't take any pictures of the new stuff going in):
My new pushrods:
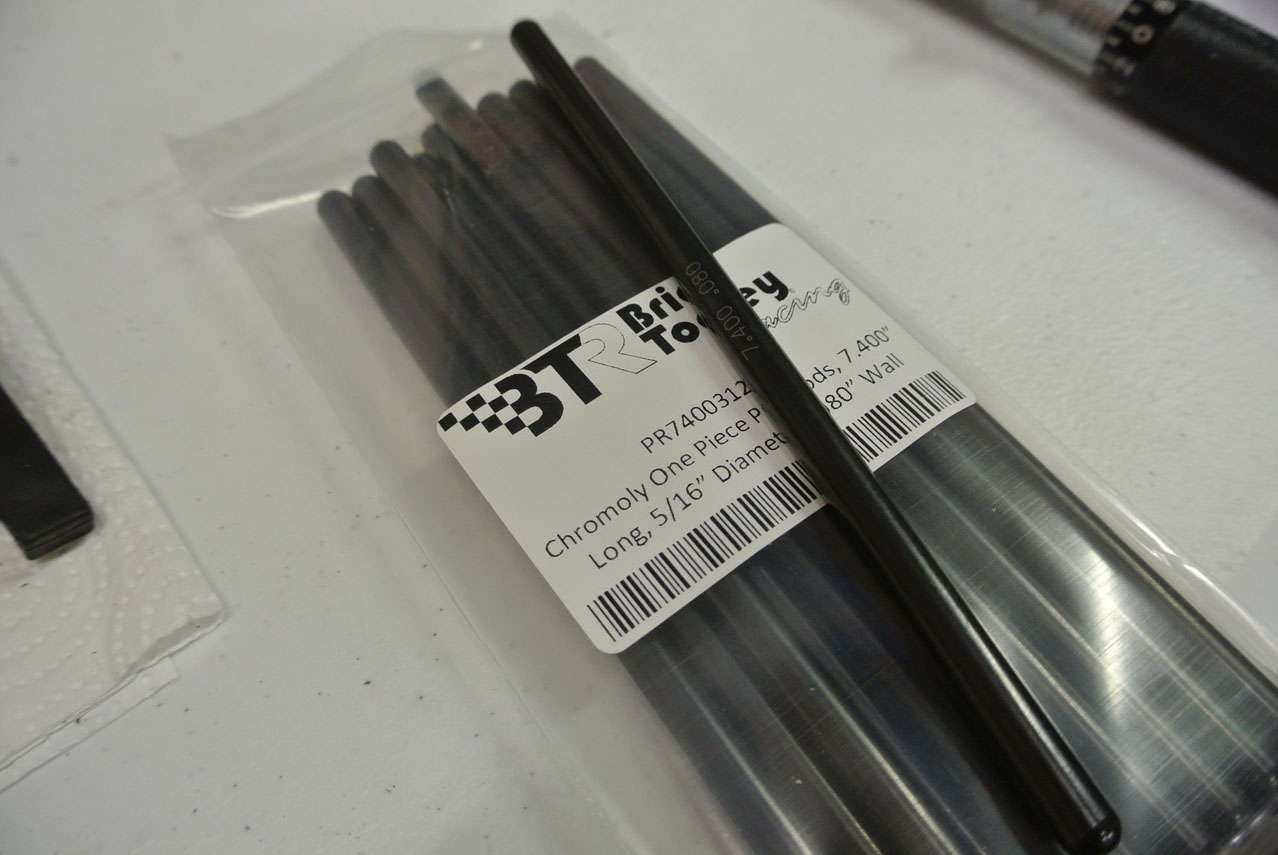
And a nice bag full of rockers! Thanks again to Joe and his team at Cordes Performance Racing for hooking me up with these.
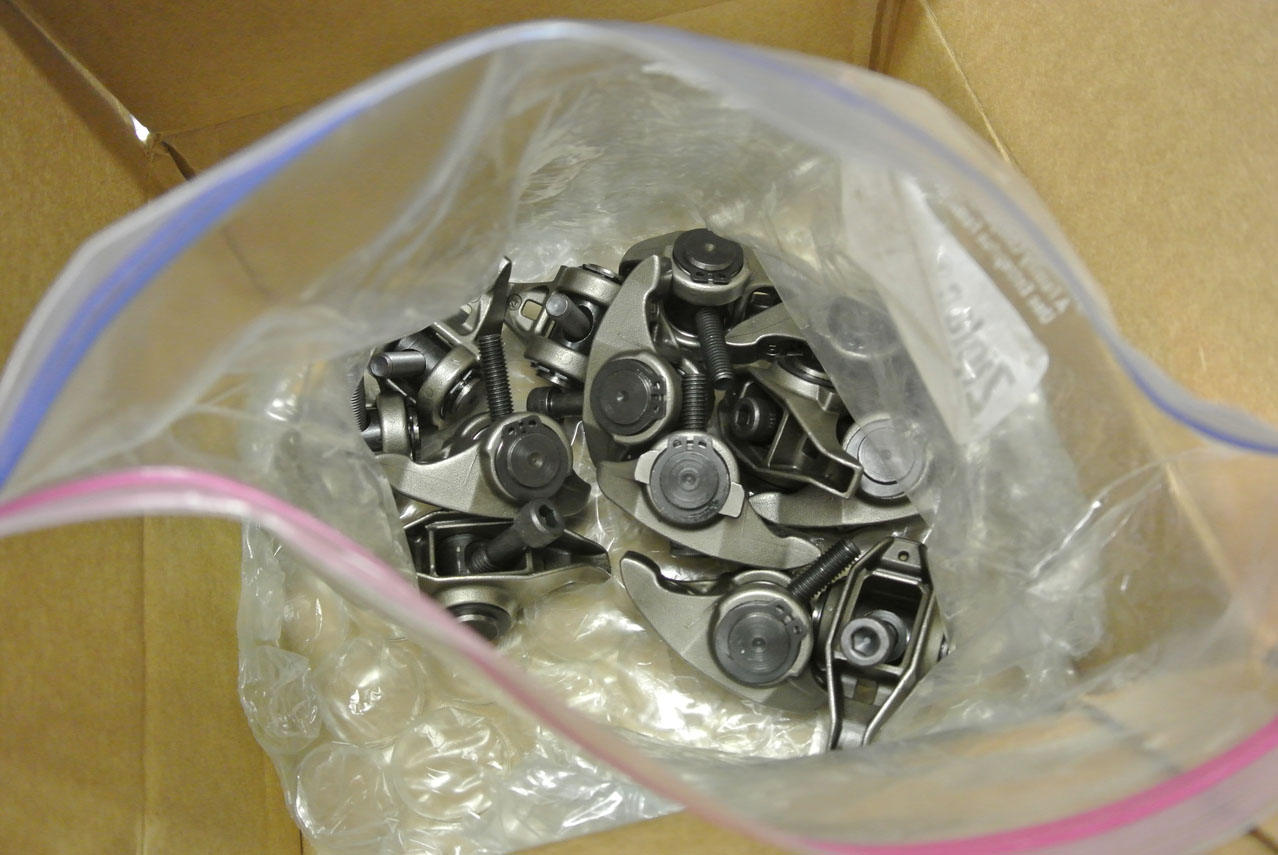
They look a lot tougher than the stockers now.
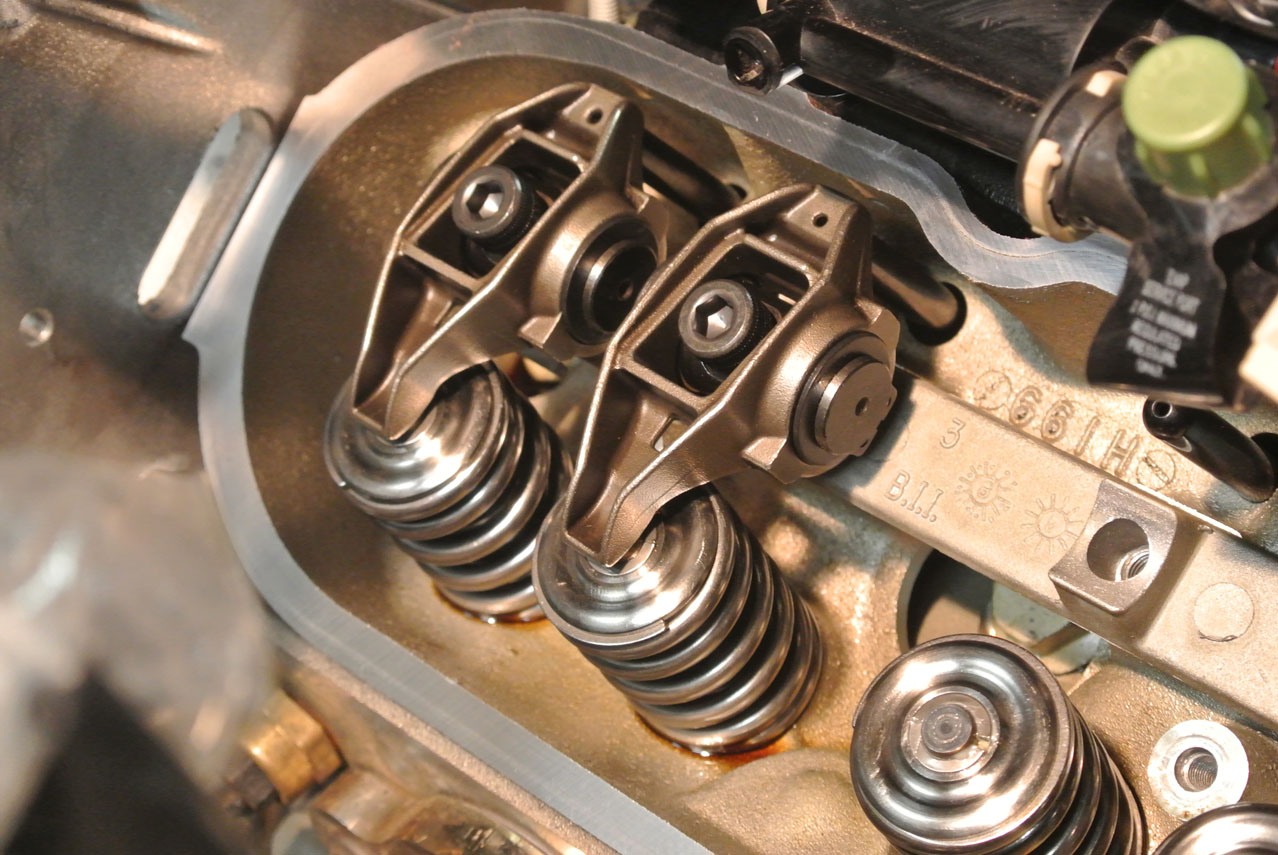
All torqued to 22 ft/lbs and ready for action:
Lastly, I bolted on the valve covers:
Oh, and I also replaced the plugs with NGK TR6 gapped to 0.035".
Water pump is next, and then I can start on the supercharger bracket. Now things are getting exciting!
I almost forgot that I had valve springs to install!
Late last night I spent a few hours out in the garage buttoning up the top end. Swapped the valve springs/seats/seals/retainers/locks and pushrods, plus installed my rocker arms which were freshened up with the Brian Tooley trunion upgrade. Finally, replaced the valve cover gaskets and bolt seals and snugged them up.
I used a Proform dual spring compressor (pretty much the same as the Comp Cams and Crane versions) to swap the springs. I also used a de-cored compression tester hose to fill the cylinder with air to keep the valves up, plus I put the piston at TDC just in case. Most of the springs needed a few whacks on the retainer to dislodge the locks, and once that was done, it was an easy but time-consuming job. It would have went faster if I wasn't worried about valves dropping and didn't set each cylinder to TDC before removing the springs. I ended up getting #1 to TDC and replacing springs on 1 & 6, rotating the crank 90, replacing 8 & 5, rotating 90, replacing 7 & 4, rotating 90, and then finishing up with 3 & 2. A straw inserted through the plug hole helped me verify that the piston was at or near the top of its stroke, and I kept the transmission in gear so the compressed air wouldn't be able to rotate the crank.
Here's the tool ready to work on cylinder #1:
Old springs, seats, and seals out:
Three cylinders done on the driver's side (apparently I got carried away and didn't take any pictures of the new stuff going in):
My new pushrods:
And a nice bag full of rockers! Thanks again to Joe and his team at Cordes Performance Racing for hooking me up with these.
They look a lot tougher than the stockers now.
All torqued to 22 ft/lbs and ready for action:
Lastly, I bolted on the valve covers:
Oh, and I also replaced the plugs with NGK TR6 gapped to 0.035".
Water pump is next, and then I can start on the supercharger bracket. Now things are getting exciting!
Last edited by RoccoC5; 04-27-2017 at 04:37 AM.
 05-29-2014, 12:41 AM
#51
Burning Brakes
Thread Starter
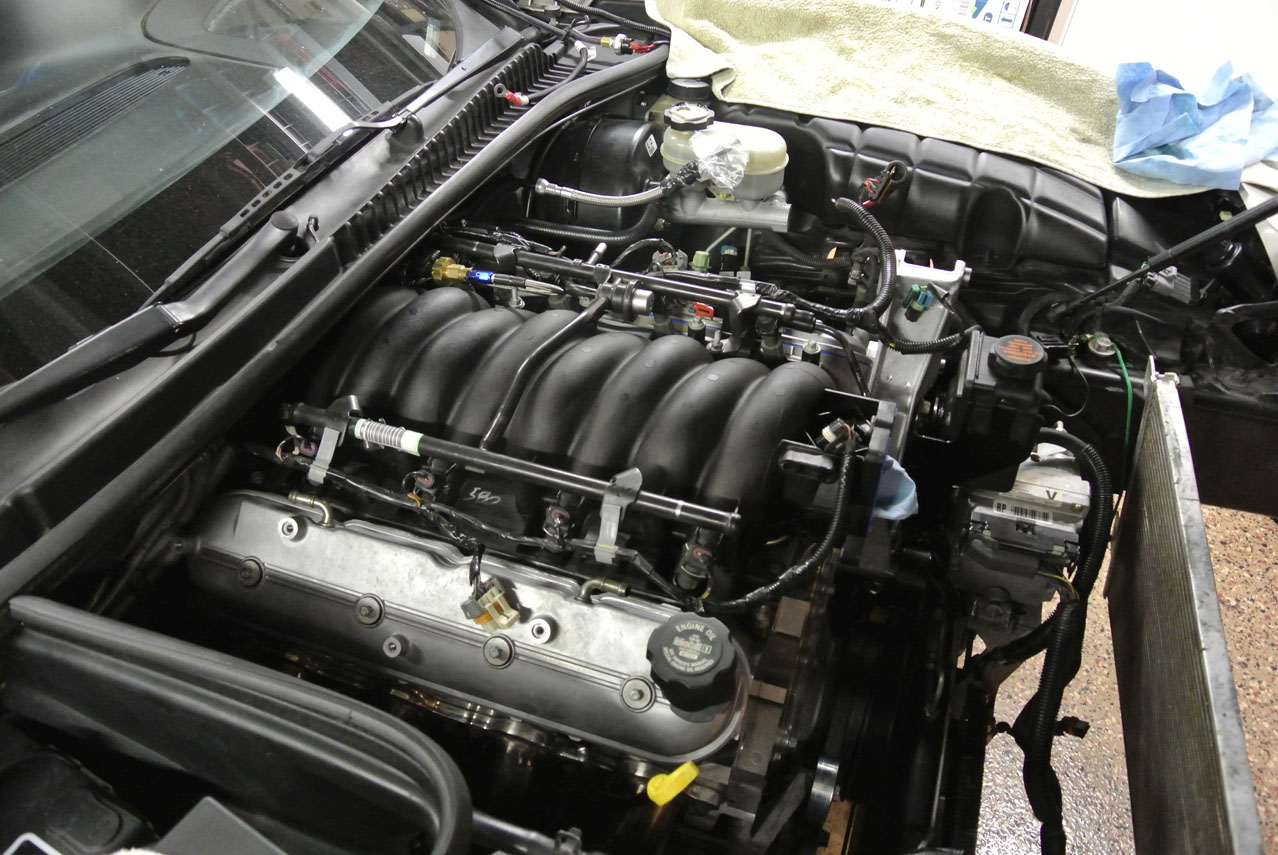
DAY FOURTEEN - WATER PUMP & THROTTLE BODY (1.5 hours)
Only had a few hours over the weekend to work on this. I wanted to get the rear supercharger bracket on today but it was not to be. However I did get a few steps closer.
So, before I tore into the car I thought my water pump was leaking. As it turns out, the driver side gasket was leaking. The bolts on that side were obviously exposed to coolant:
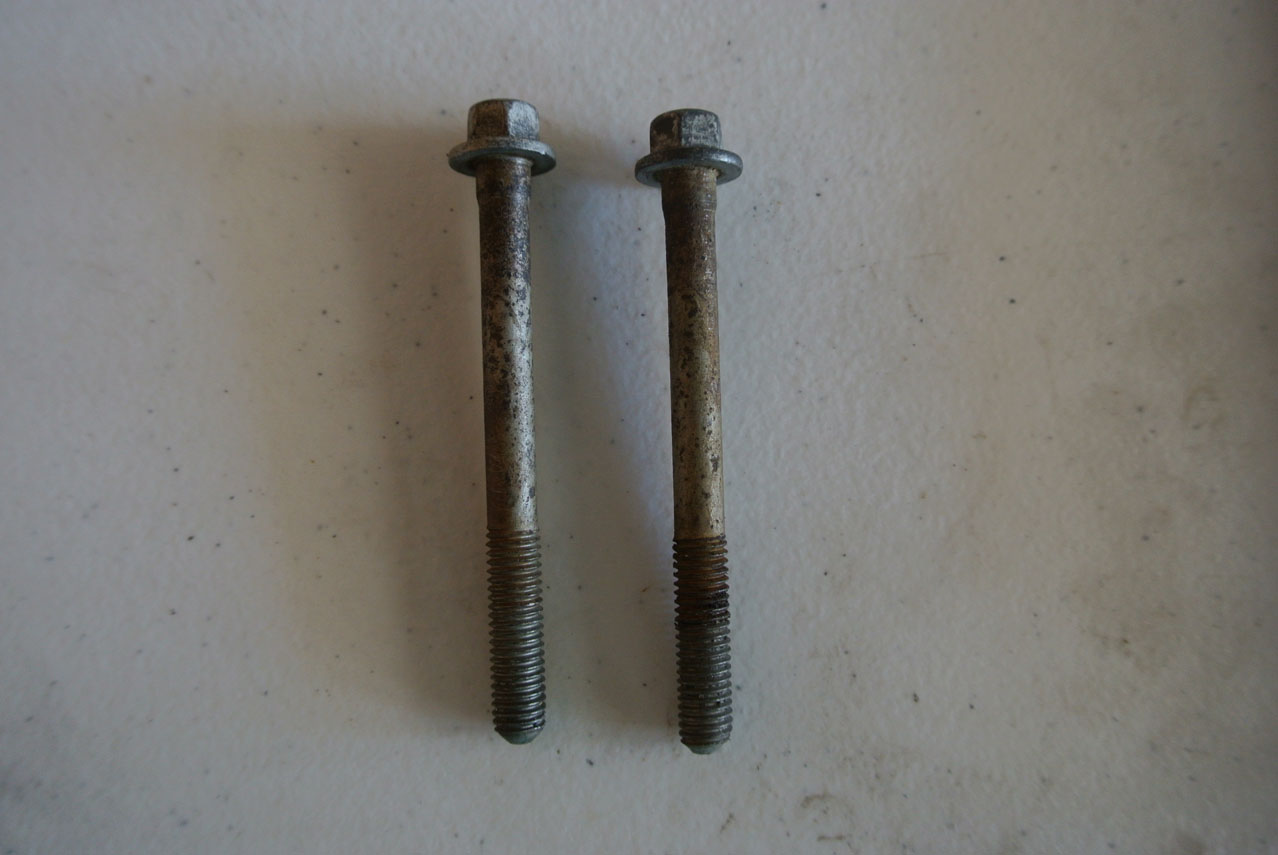
I cleaned them up with a wire wheel:
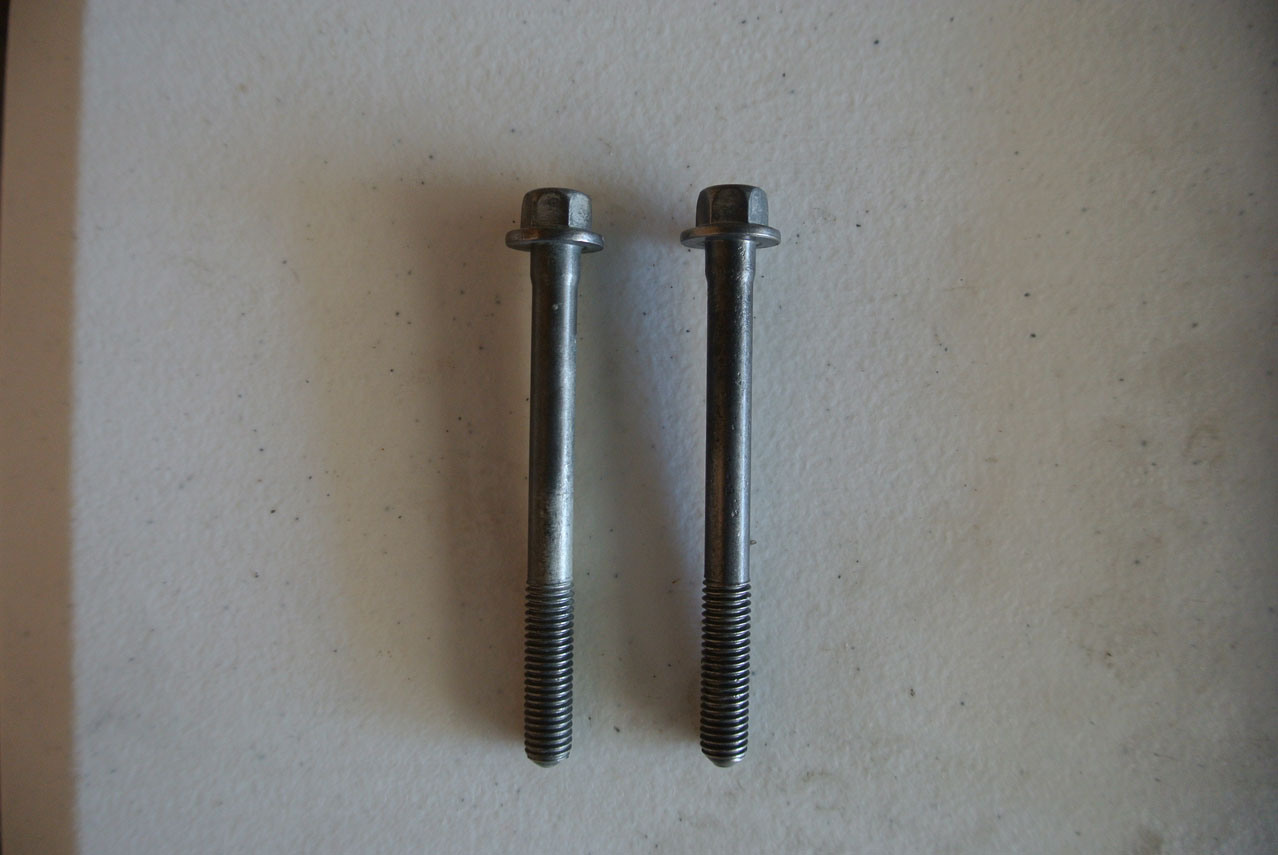
And then I bolted on the new pump using new gaskets. Not sure if anyone will be interested in my old pump with < 20K miles, but I'll throw it up in the FS section.
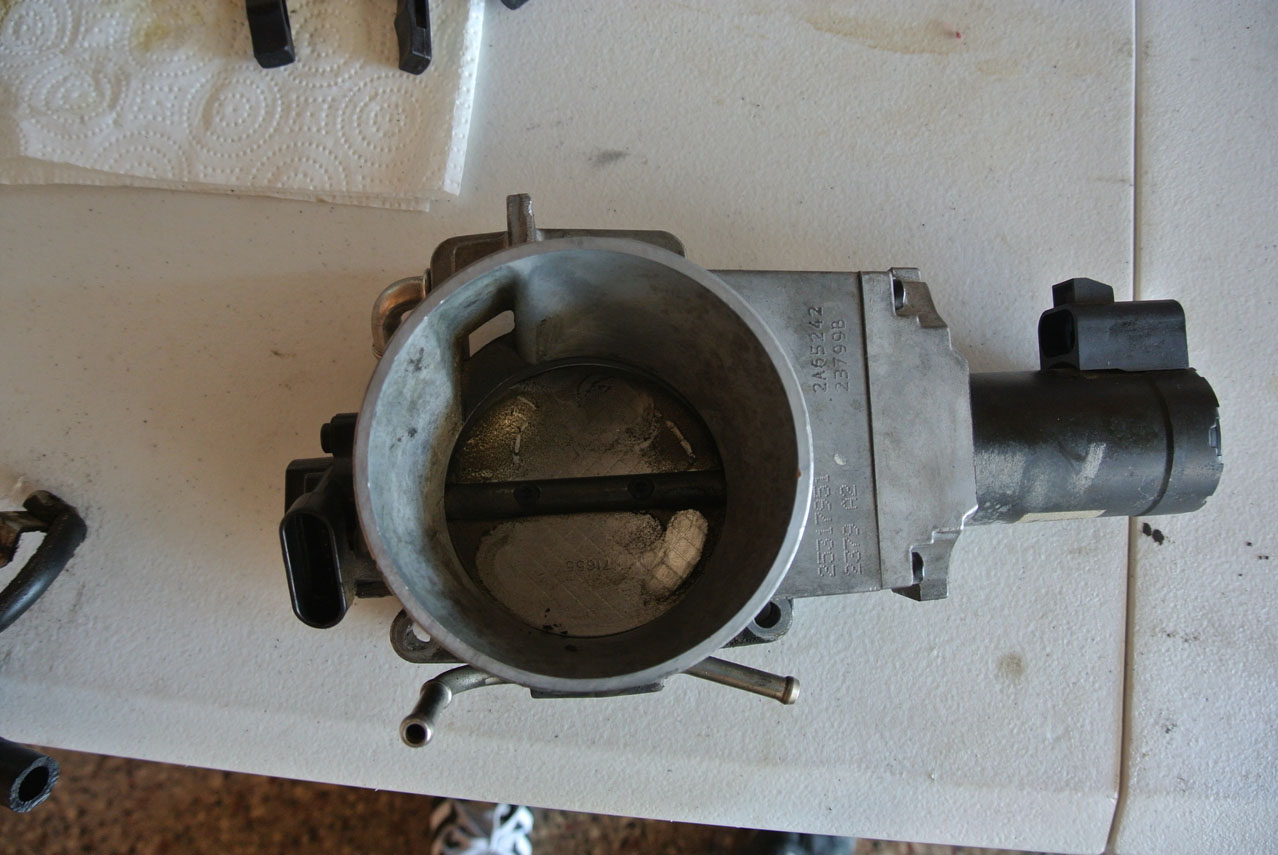
Next I installed the throttle body. It was pretty dirty so I cleaned it up before installing it.
And that does it for today.
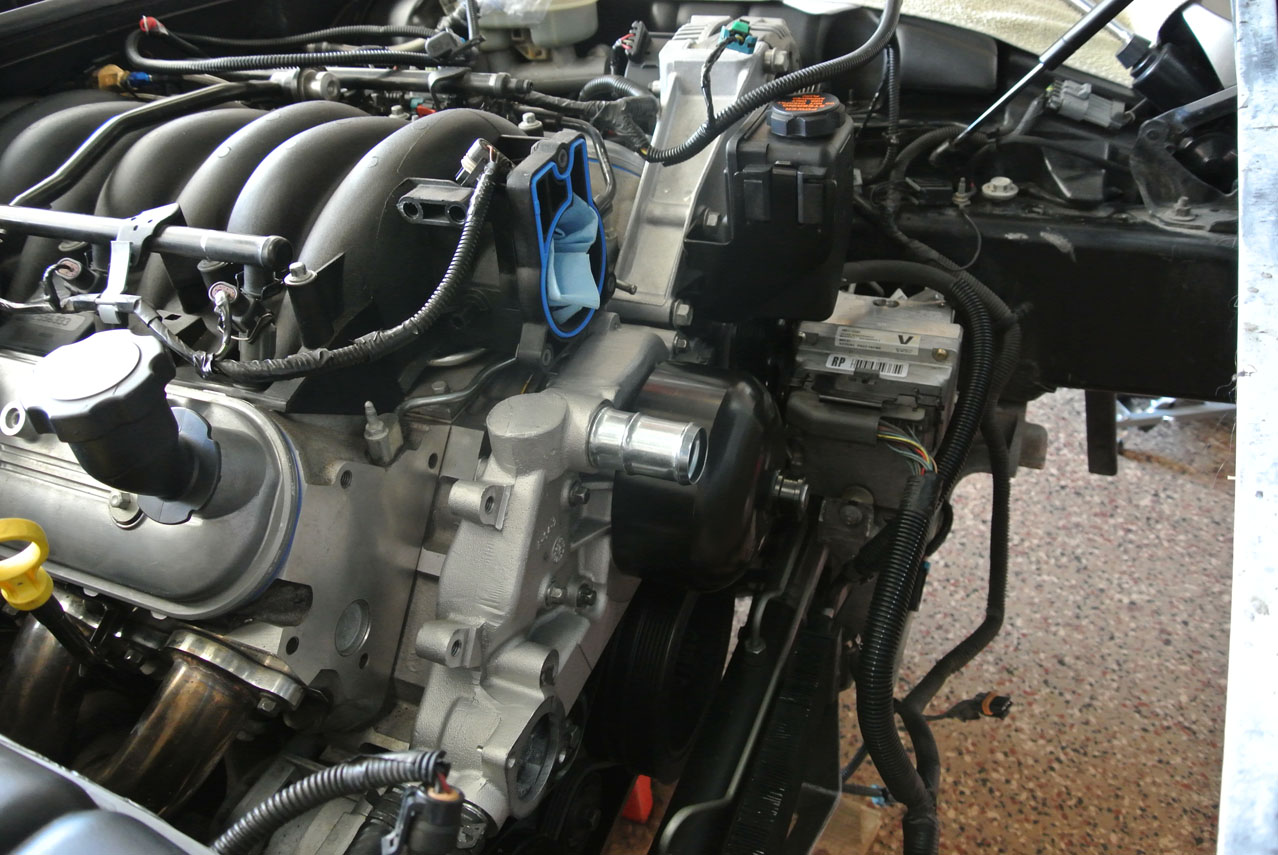
DAY FIFTEEN - SUPERCHARGER BRACKET (1 hour)
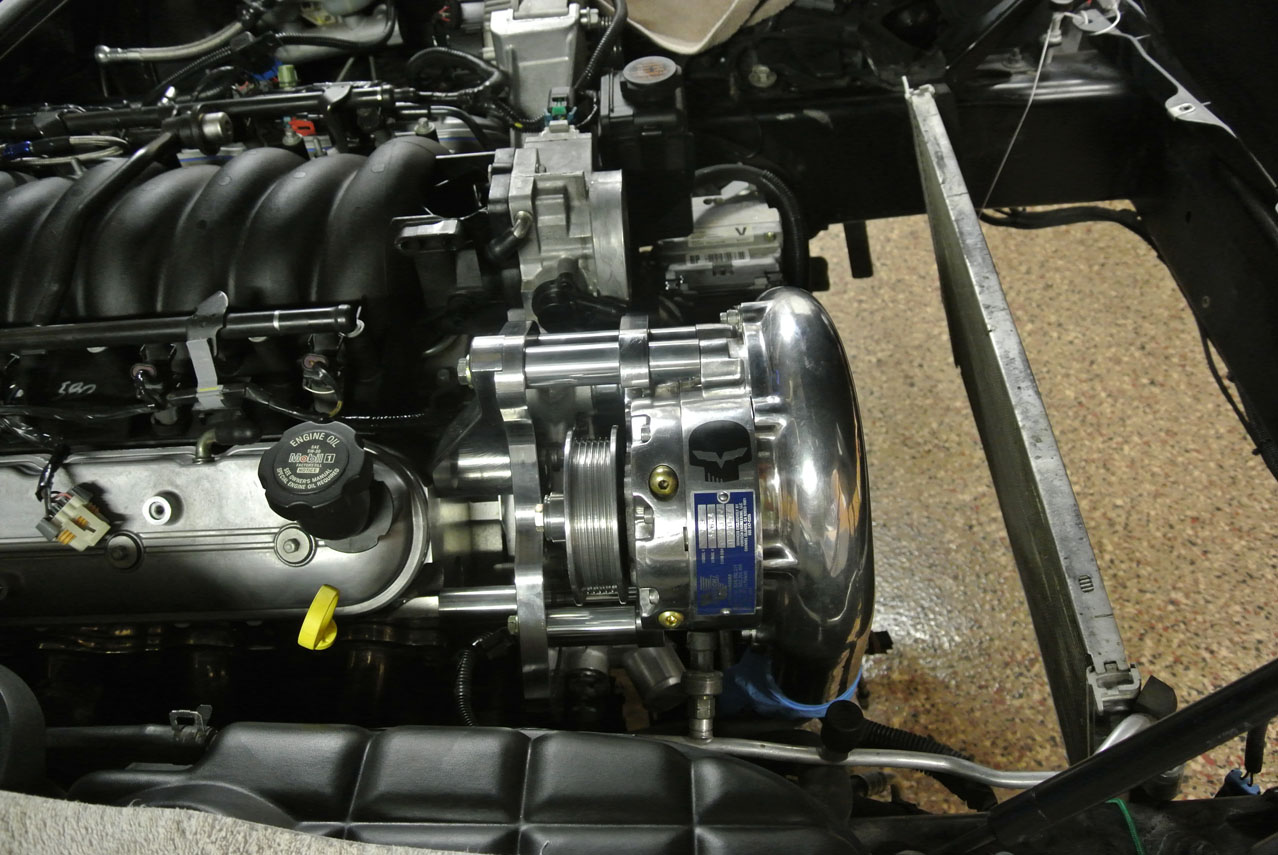
Ready to install the supercharger bracket, finally! The outboard accessory hole on the head was packed with crud, so I made an improvised thread chaser out of a 10mm x 1.5mm bolt. It worked pretty well to clean out the hole:

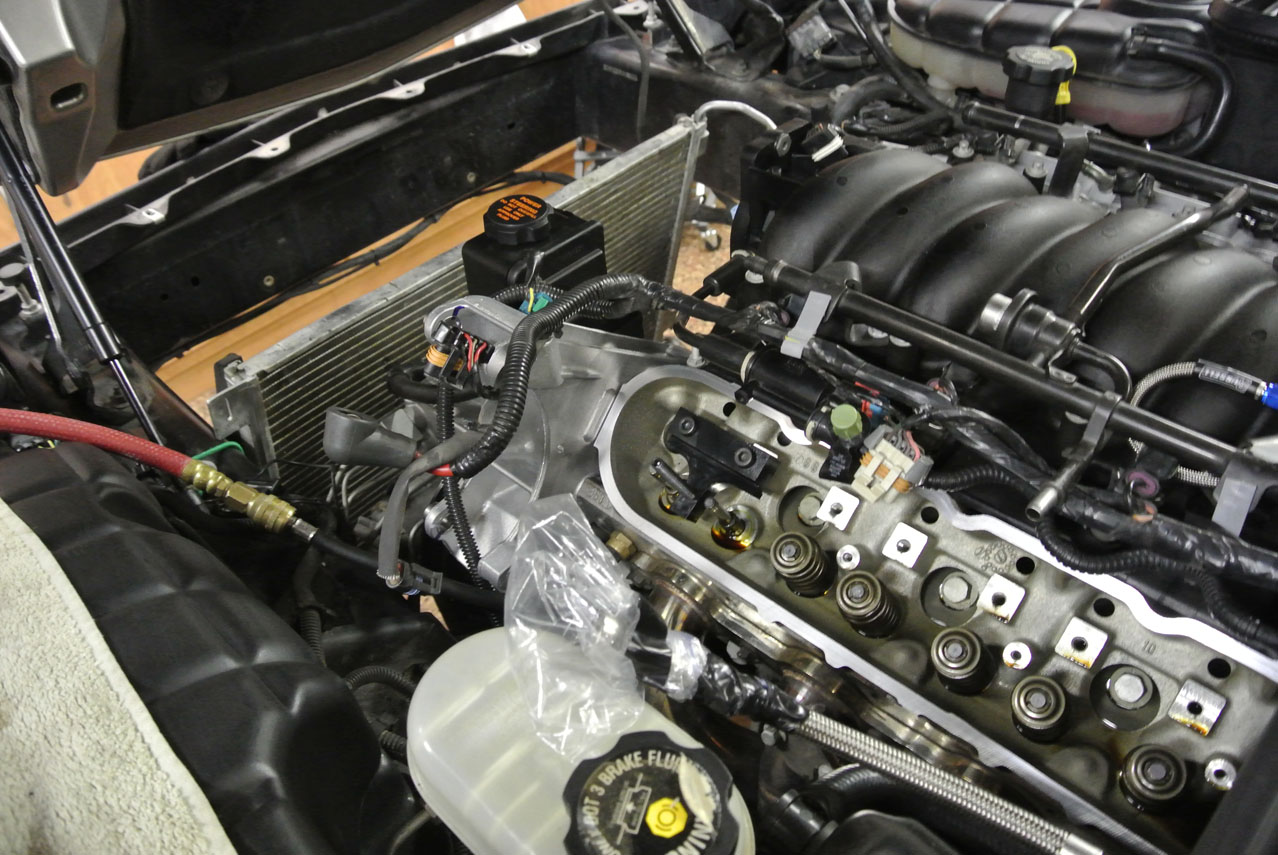
The bracket went on pretty easily:
I went ahead and bolted up the head unit even though I'll have to pull it off to install the belt and radiator. I couldn't help myself!
It's a used kit and the Jake sticker was free.
That does it for tonight. Here's a sneak peek for next time:
I think I'm on the home stretch now. Here's what is left to do...probably missing a few things:
Only had a few hours over the weekend to work on this. I wanted to get the rear supercharger bracket on today but it was not to be. However I did get a few steps closer.
So, before I tore into the car I thought my water pump was leaking. As it turns out, the driver side gasket was leaking. The bolts on that side were obviously exposed to coolant:
I cleaned them up with a wire wheel:
And then I bolted on the new pump using new gaskets. Not sure if anyone will be interested in my old pump with < 20K miles, but I'll throw it up in the FS section.
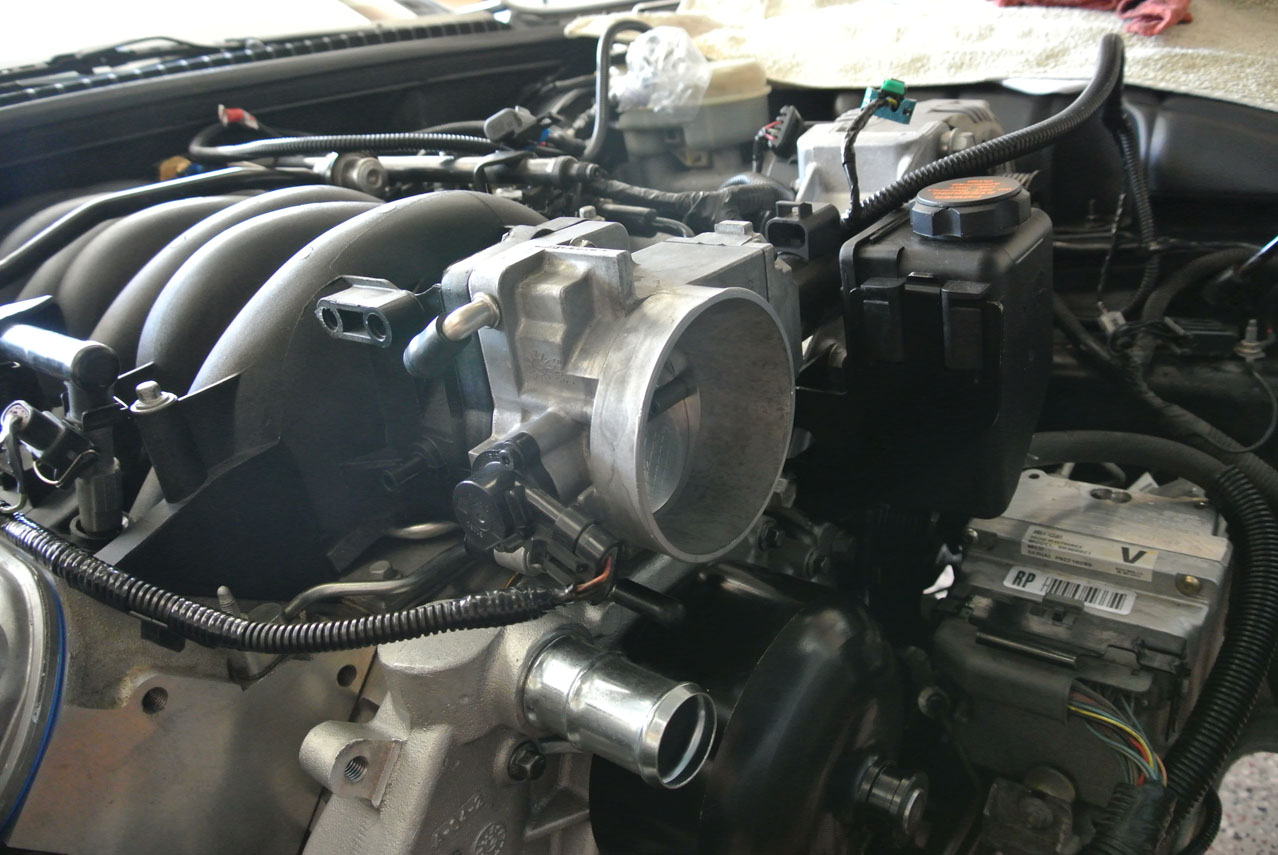
Next I installed the throttle body. It was pretty dirty so I cleaned it up before installing it.
And that does it for today.
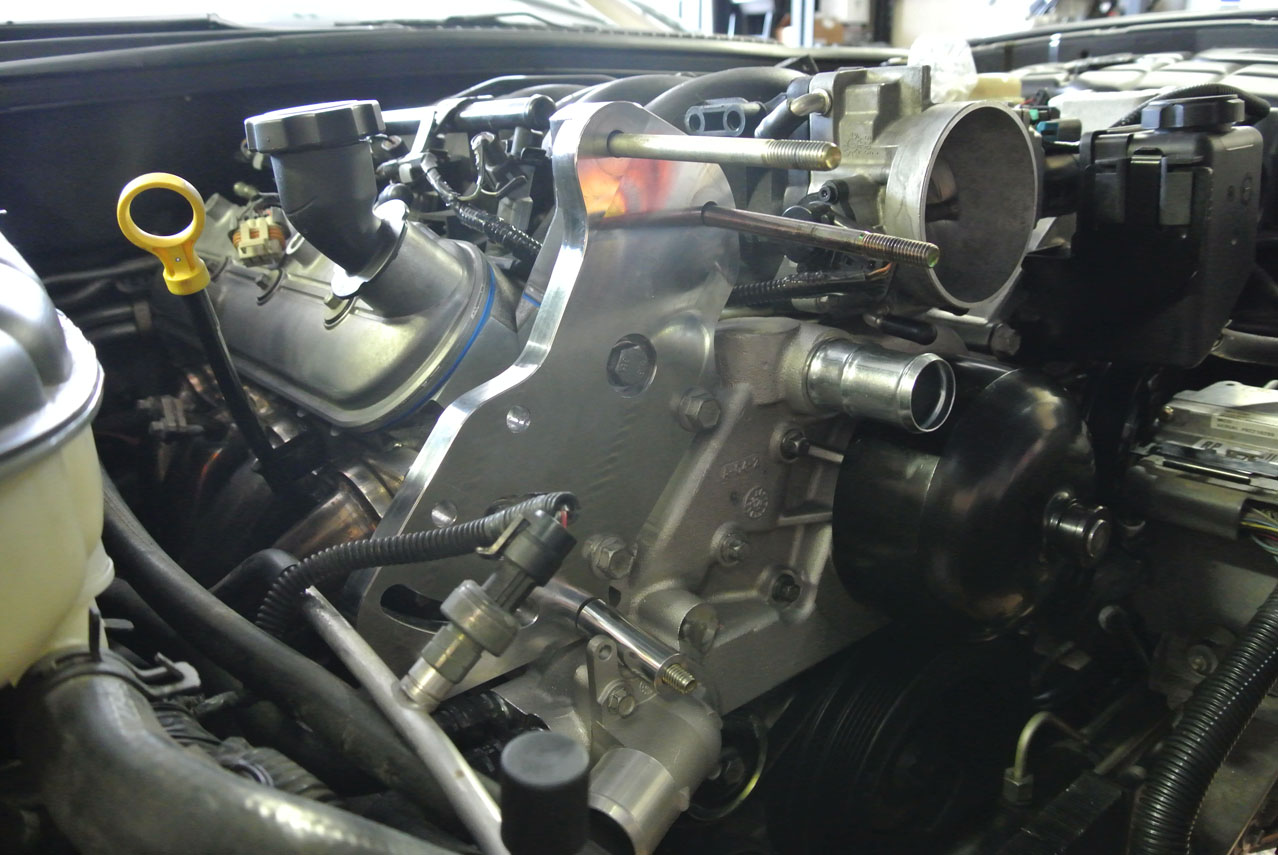
DAY FIFTEEN - SUPERCHARGER BRACKET (1 hour)
Ready to install the supercharger bracket, finally! The outboard accessory hole on the head was packed with crud, so I made an improvised thread chaser out of a 10mm x 1.5mm bolt. It worked pretty well to clean out the hole:
The bracket went on pretty easily:
I went ahead and bolted up the head unit even though I'll have to pull it off to install the belt and radiator. I couldn't help myself!
It's a used kit and the Jake sticker was free.
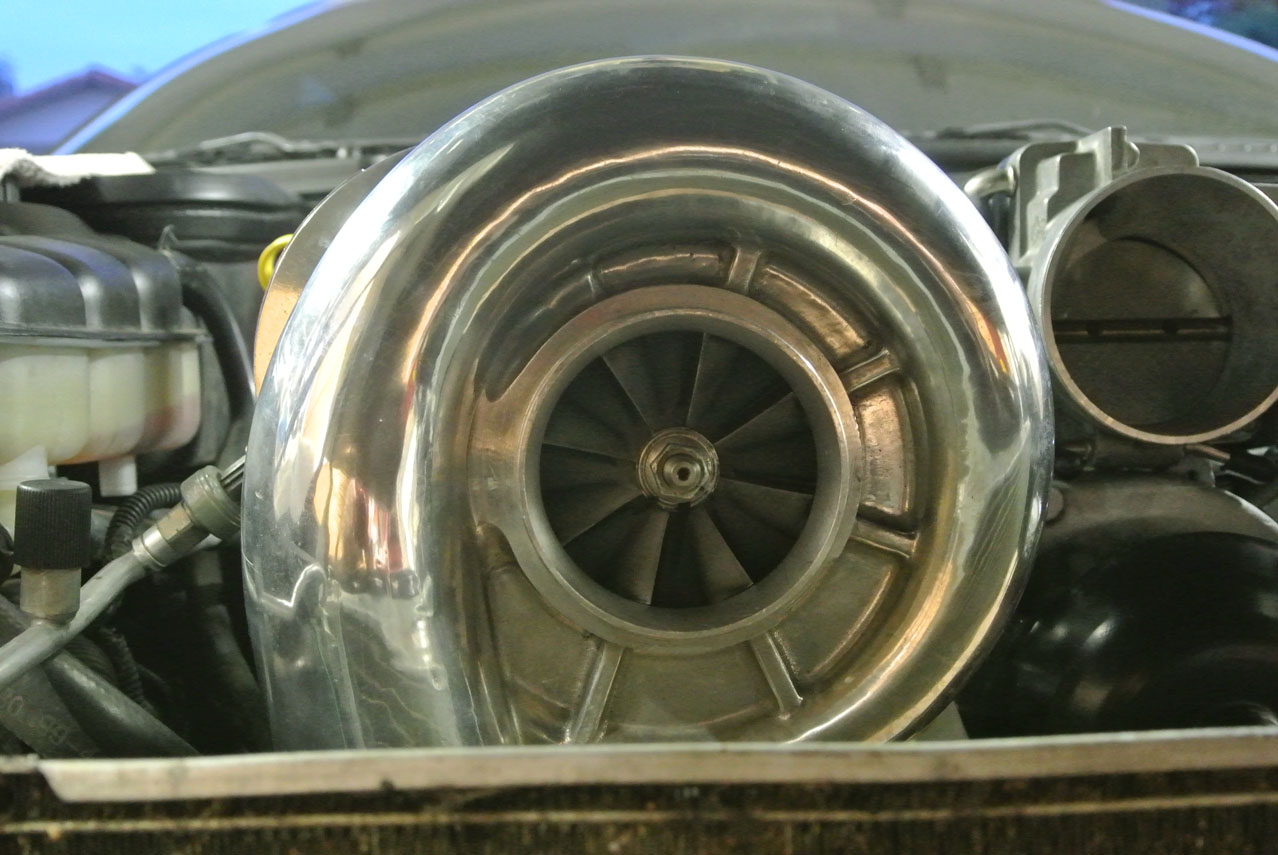
That does it for tonight. Here's a sneak peek for next time:
I think I'm on the home stretch now. Here's what is left to do...probably missing a few things:
- Install Radiator Support - I still need to have a friend lower the tabs (maybe?) and fix the underside where it's seen too many driveways
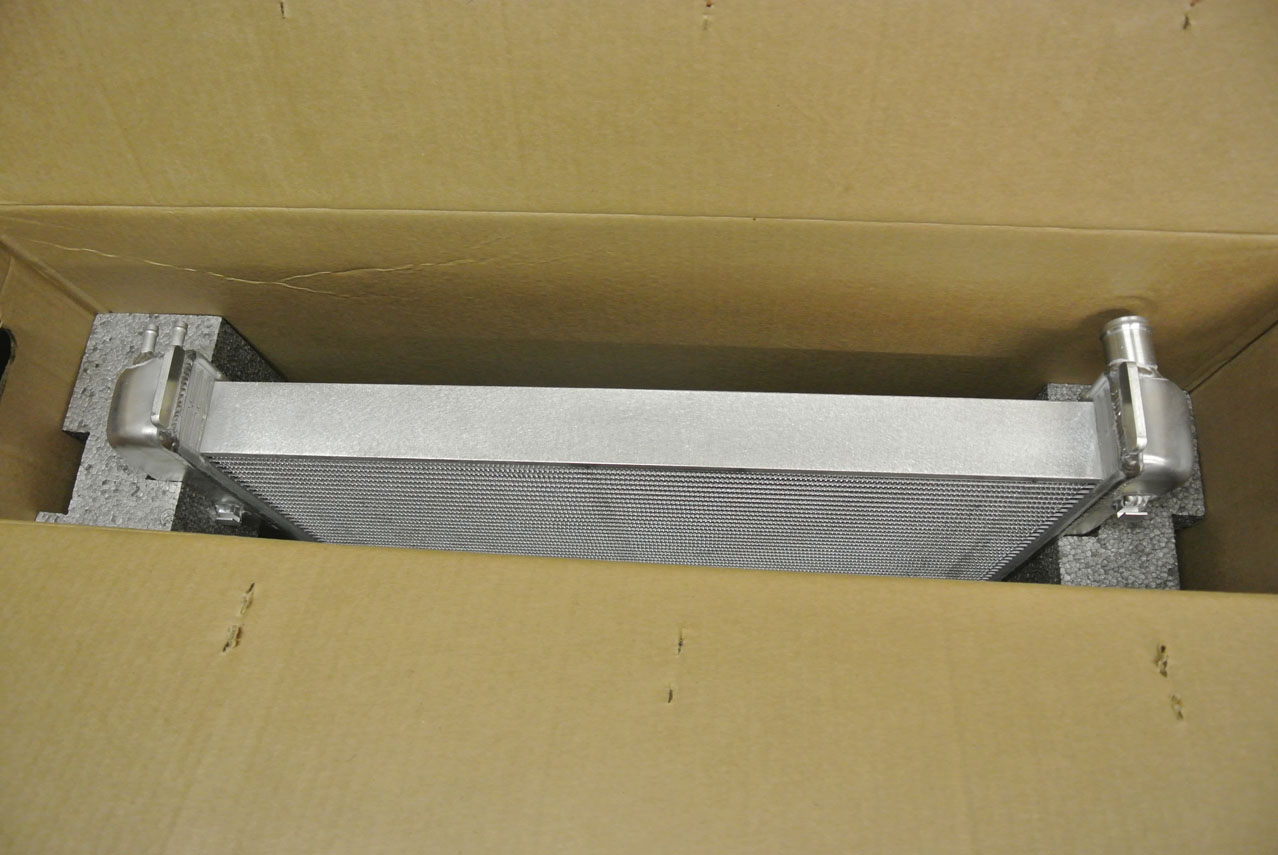
- Install DeWitt's Radiator and fans
- Install PCV hoses and catch can
- Install coilpacks
- Intercooler, hoses, BOV
- Put in the gaugepod with wideband, boost, and fuel pressure gauges
- Install Fascia
- Add fluids
- Swap injectors and get PCM base tune (not sure if I'll do this or just swap them at the shop)
Last edited by RoccoC5; 04-27-2017 at 04:38 AM.
05-30-2014, 06:55 PM
#52
Burning Brakes
Thread Starter
I dropped off the radiator support with my buddy last night. He's going to cleanup and reinforce the skid bars for me. We may end up lowering the tabs 1/2-1" or so, depending on how things line up with the cutdown radiator. We'll see.
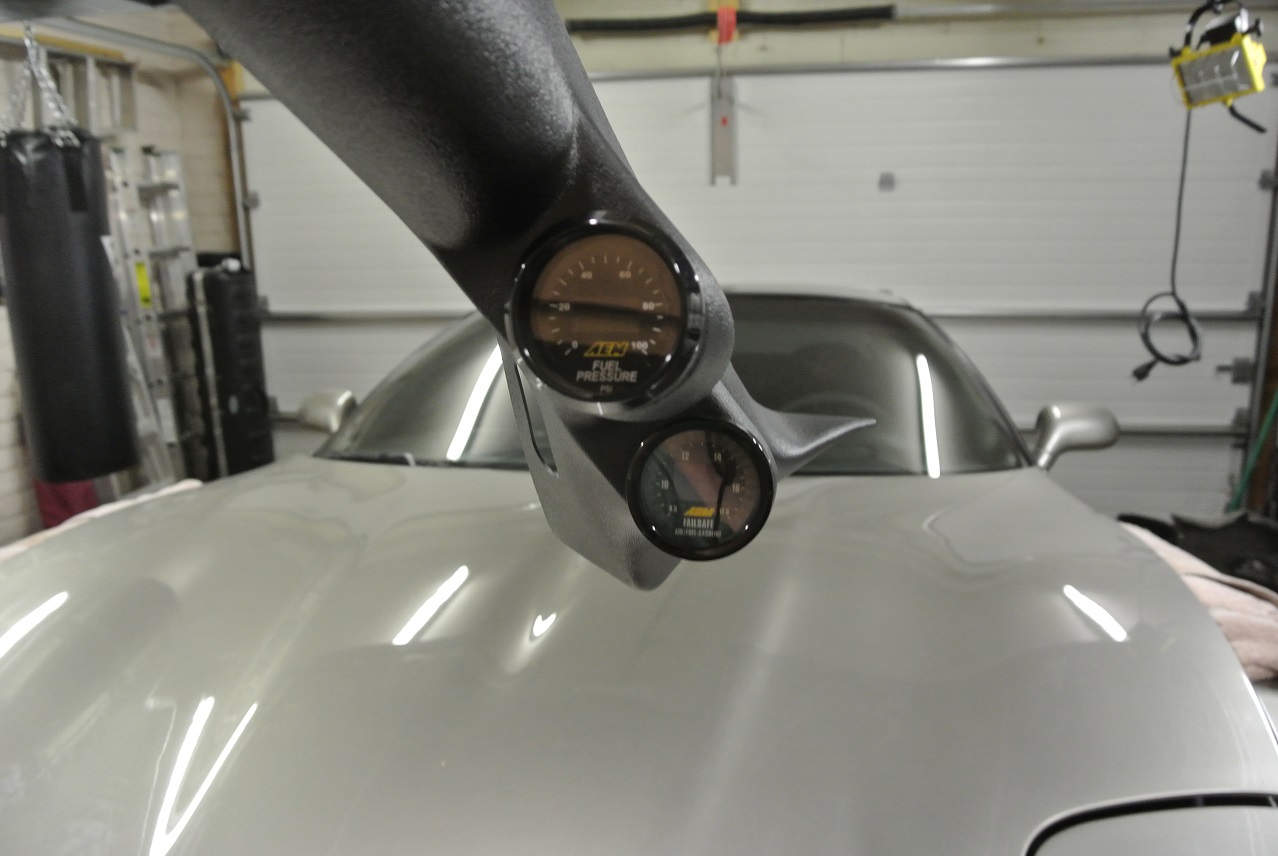
In the meantime I'm going to wire up the gauges. I went with an AEM fuel pressure and the wideband/boost failsafe gauge. Should look pretty sharp!
In the meantime I'm going to wire up the gauges. I went with an AEM fuel pressure and the wideband/boost failsafe gauge. Should look pretty sharp!
Last edited by RoccoC5; 04-27-2017 at 04:40 AM.
06-04-2014, 02:12 AM
#53
Burning Brakes
Thread Starter
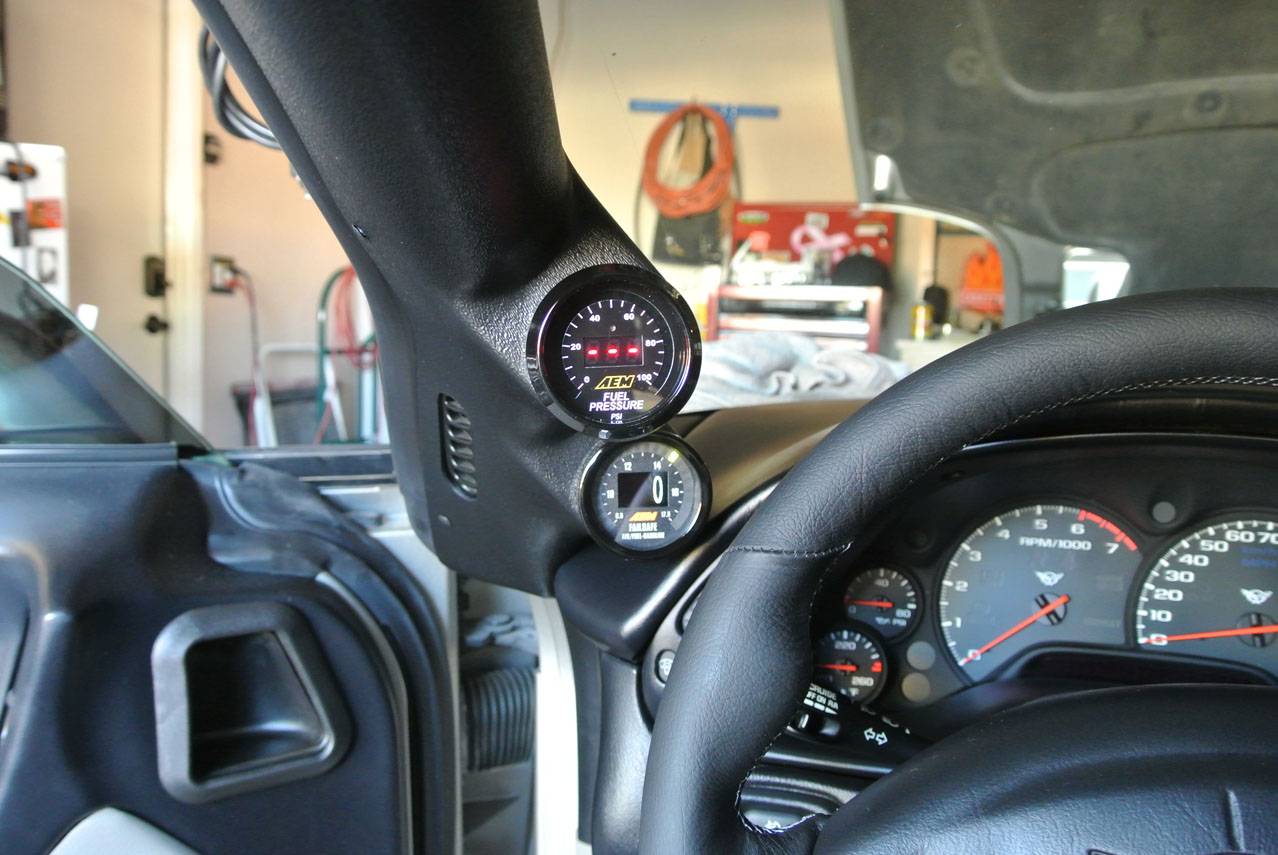
DAY SIXTEEN - GAUGES (4 hours)
I wired up my AEM fuel pressure and wideband/boost gauges over the weekend. Working inside the car was a welcome change from crawling around under the hood.
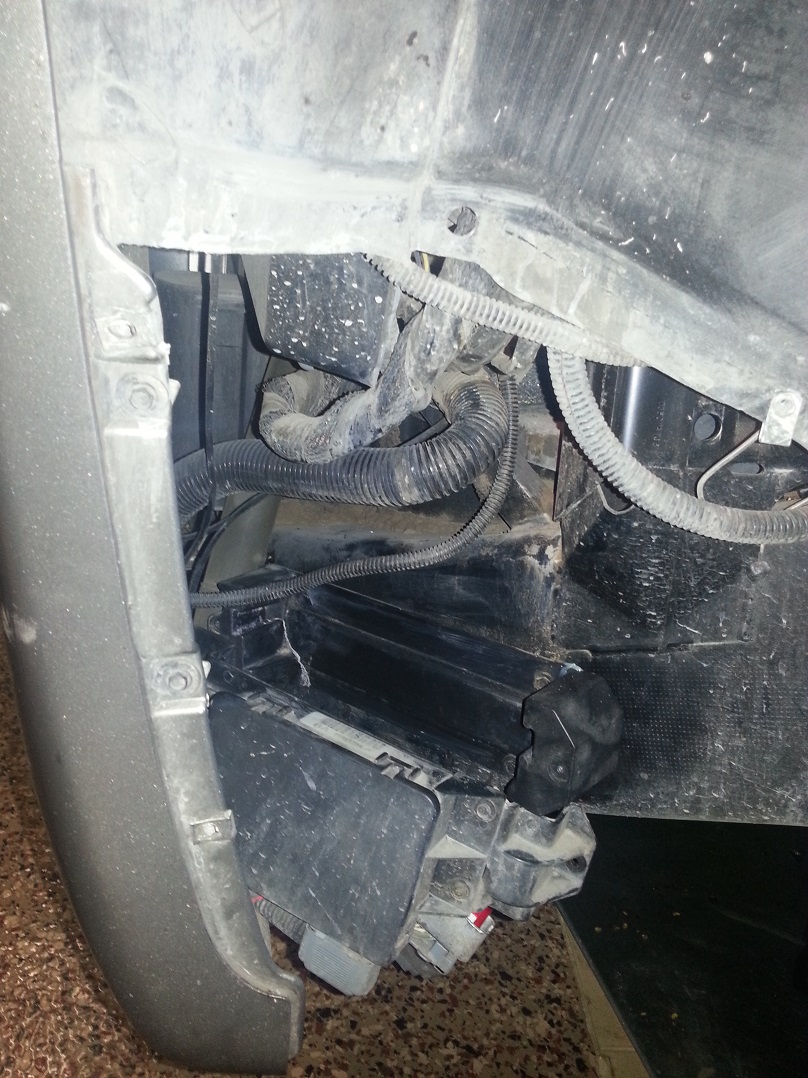
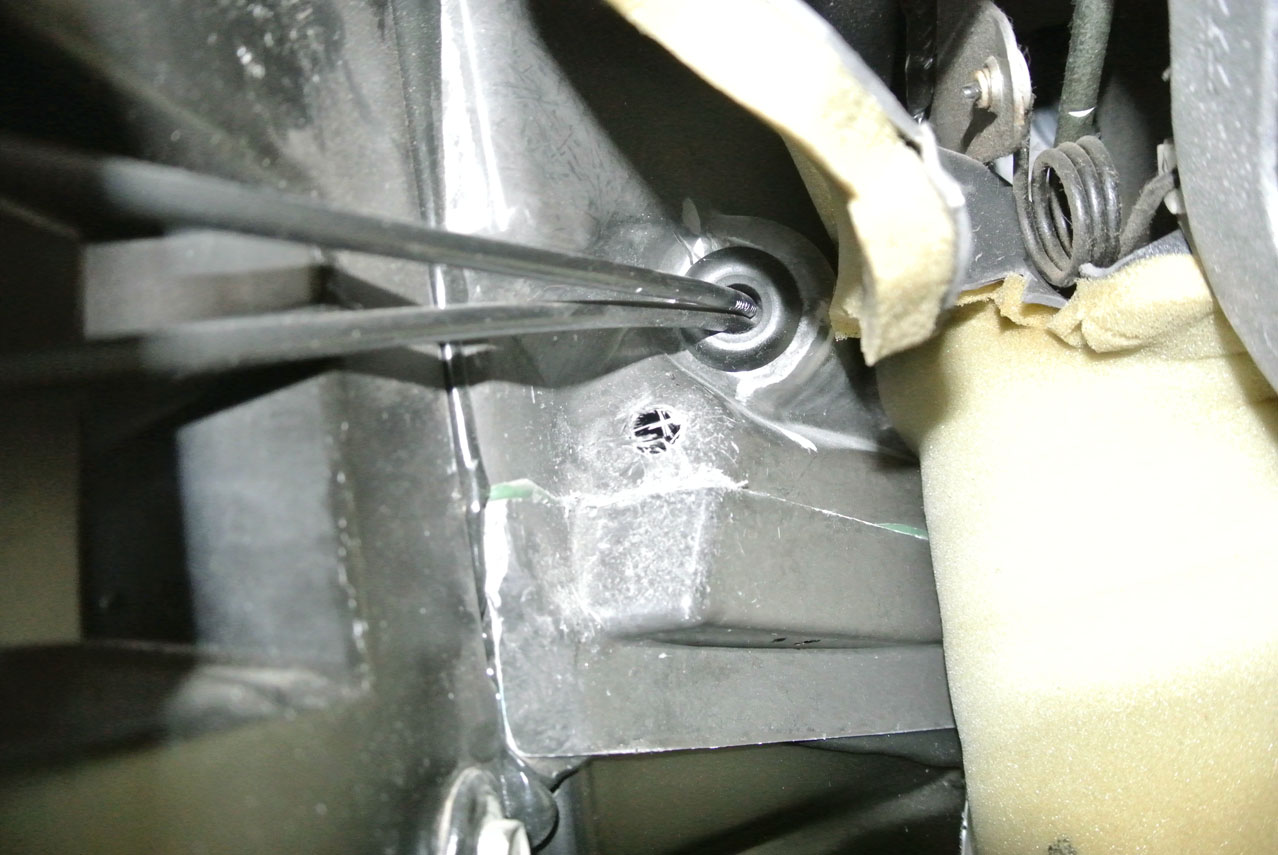
I started by drilling a hole into the engine compartment on the driver's side just below the hood release cables. This was for the vacuum hose for the boost gauge and the wire harnesses for the fuel pressure and wideband.
From inside the car:
And from outside the car, behind the fender liner:

I tapped into existing wires under the dash for switched 12 volts, ground, and dimmer. The AEM wideband failsafe gauge also wires into the tach signal (this gauge is pretty cool...it can log up to 2.5 hours of data, plotting engine speed against boost and A/F ratio). The tach signal wire can be found in the gauge cluster harness. I was able to reach my hand behind the cluster to remove the harness and then soldered in the connection to pin A17:
After that, I ran the wires for the fuel pressure sensor and wideband O2 sensor. Nothing too exciting here, so no pics.
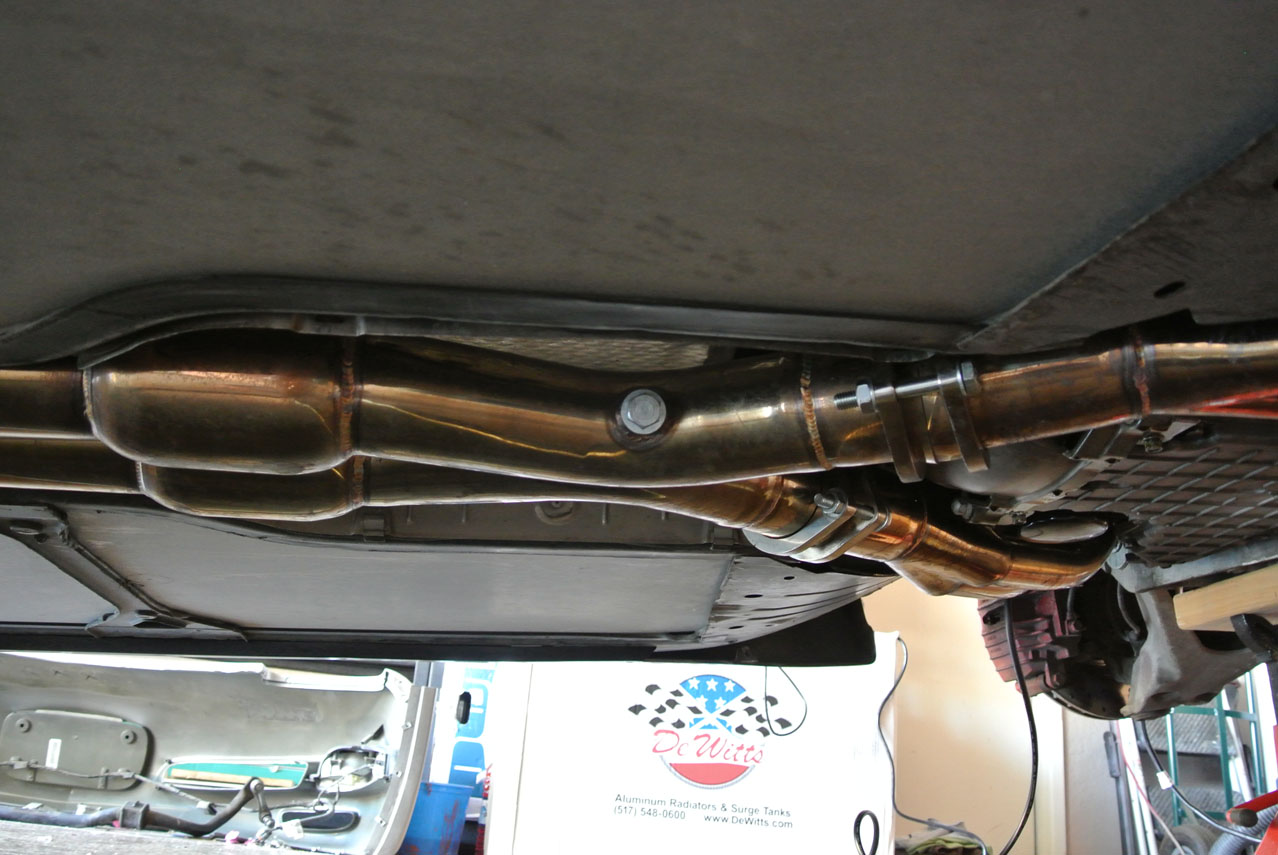
My XS Power x-pipe already had an extra bung for a wideband, so no need to weld one in:
All done!
I wired up my AEM fuel pressure and wideband/boost gauges over the weekend. Working inside the car was a welcome change from crawling around under the hood.
I started by drilling a hole into the engine compartment on the driver's side just below the hood release cables. This was for the vacuum hose for the boost gauge and the wire harnesses for the fuel pressure and wideband.
From inside the car:
And from outside the car, behind the fender liner:
I tapped into existing wires under the dash for switched 12 volts, ground, and dimmer. The AEM wideband failsafe gauge also wires into the tach signal (this gauge is pretty cool...it can log up to 2.5 hours of data, plotting engine speed against boost and A/F ratio). The tach signal wire can be found in the gauge cluster harness. I was able to reach my hand behind the cluster to remove the harness and then soldered in the connection to pin A17:
After that, I ran the wires for the fuel pressure sensor and wideband O2 sensor. Nothing too exciting here, so no pics.
My XS Power x-pipe already had an extra bung for a wideband, so no need to weld one in:
All done!
Last edited by RoccoC5; 04-27-2017 at 04:40 AM.
06-04-2014, 02:29 AM
#54
Burning Brakes
Thread Starter
DAY SEVENTEEN - INJECTORS, COIL PACKS (1 hour)
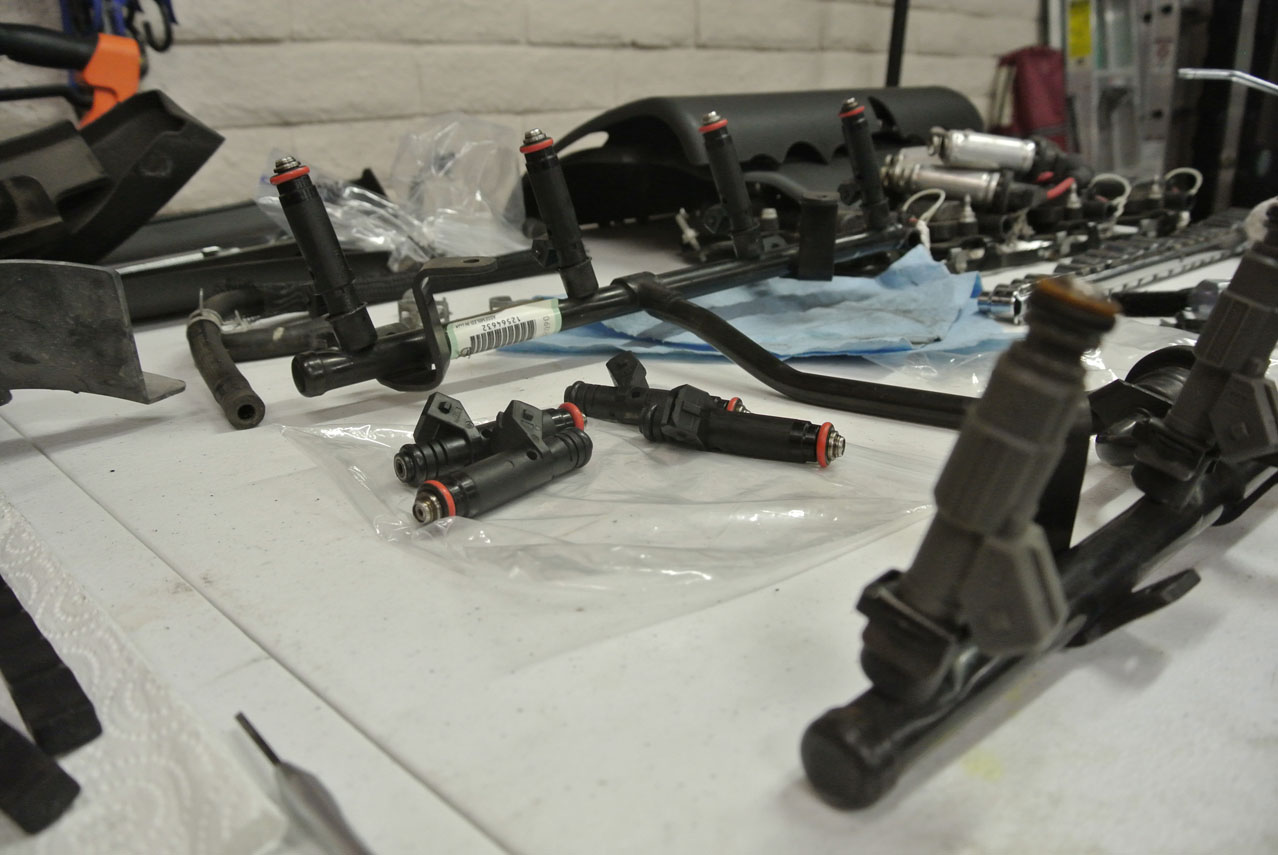
Only had a little time to work on the car tonight. I decided I'll be pulling my PCM to get a base tune rather than swapping my injectors at the shop, so I went ahead and installed the new Siemens Deka 60 pound injectors. The old ones were stuck in the rail pretty good and required a some muscle to break them free. When installing, I put a tiny bit of oil on the o-rings and the new injectors slid in easily.
One side done:
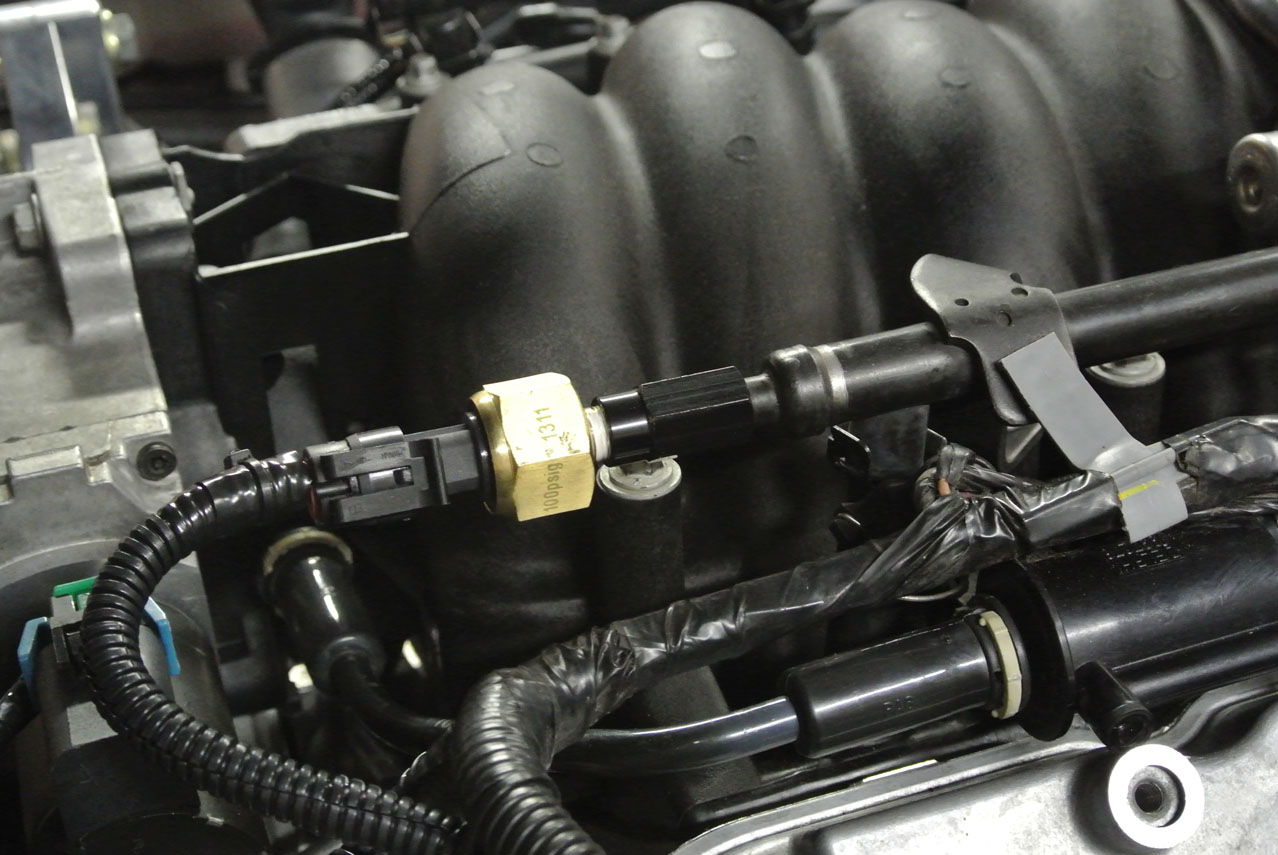
After reinstalling the rail, I removed the schrader valve core and installed the fuel pressure sensor. The sensor is 1/8" NPT male, so I had to use an adapter. Most of the adapters I'd seen use a couple of fittings to adapt from 1/8" NPT to schrader, but I was able to find a one piece fitting. It's made by Metco Motorsports, p/n MFF0001:
Lastly I reinstalled the coilpacks and spark plug wires to finish up this short session.
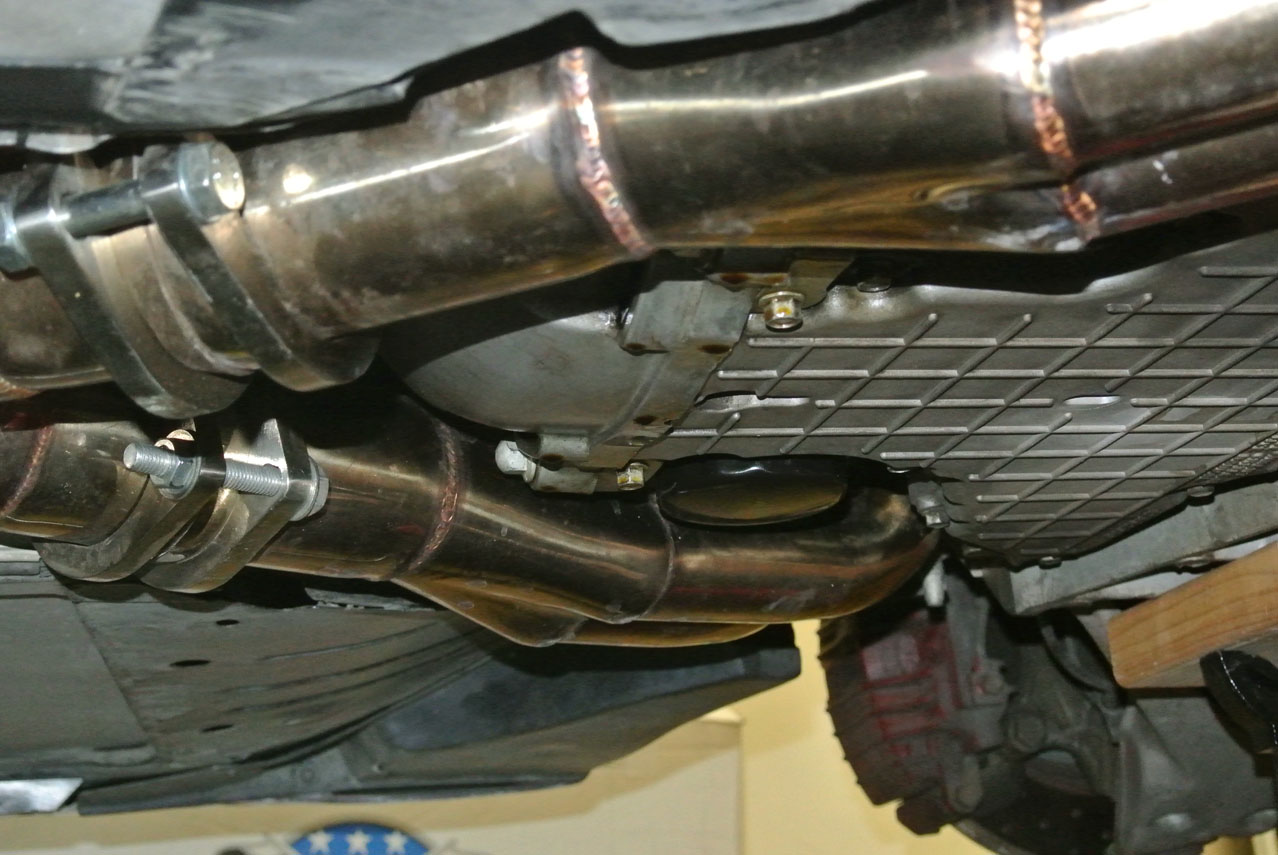
One thing I noticed tonight is that I have a leak coming from the rear of the oil pan. The rear cover and seal were just replaced when I did the clutch... maybe it's the pan gasket? I didn't drain the oil before starting the job; could it be oil seeping through the rear seal since the front has been up in the air for a month? It definitely didn't leak before I started...
Here you can see the oil dripping from the bellhousing:
Only had a little time to work on the car tonight. I decided I'll be pulling my PCM to get a base tune rather than swapping my injectors at the shop, so I went ahead and installed the new Siemens Deka 60 pound injectors. The old ones were stuck in the rail pretty good and required a some muscle to break them free. When installing, I put a tiny bit of oil on the o-rings and the new injectors slid in easily.
One side done:
After reinstalling the rail, I removed the schrader valve core and installed the fuel pressure sensor. The sensor is 1/8" NPT male, so I had to use an adapter. Most of the adapters I'd seen use a couple of fittings to adapt from 1/8" NPT to schrader, but I was able to find a one piece fitting. It's made by Metco Motorsports, p/n MFF0001:
Lastly I reinstalled the coilpacks and spark plug wires to finish up this short session.
One thing I noticed tonight is that I have a leak coming from the rear of the oil pan. The rear cover and seal were just replaced when I did the clutch... maybe it's the pan gasket? I didn't drain the oil before starting the job; could it be oil seeping through the rear seal since the front has been up in the air for a month? It definitely didn't leak before I started...
Here you can see the oil dripping from the bellhousing:
Last edited by RoccoC5; 04-27-2017 at 04:40 AM.


 06-05-2014, 04:41 PM
#57
Burning Brakes
Thread Starter
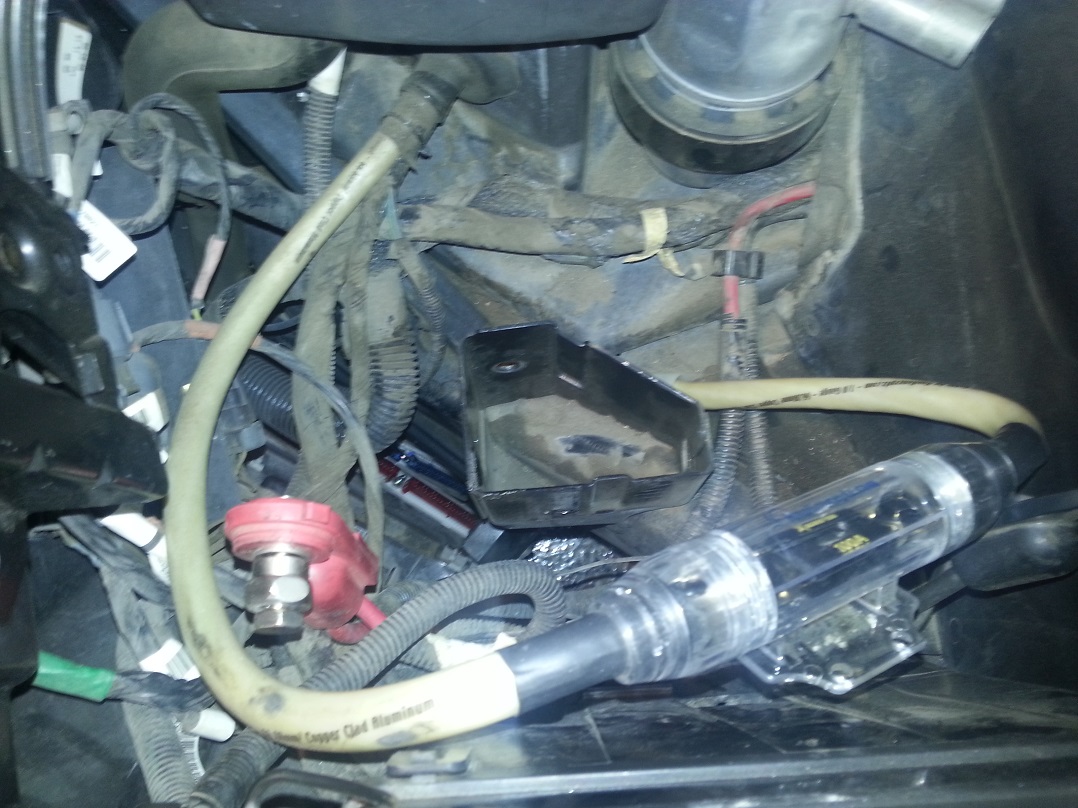
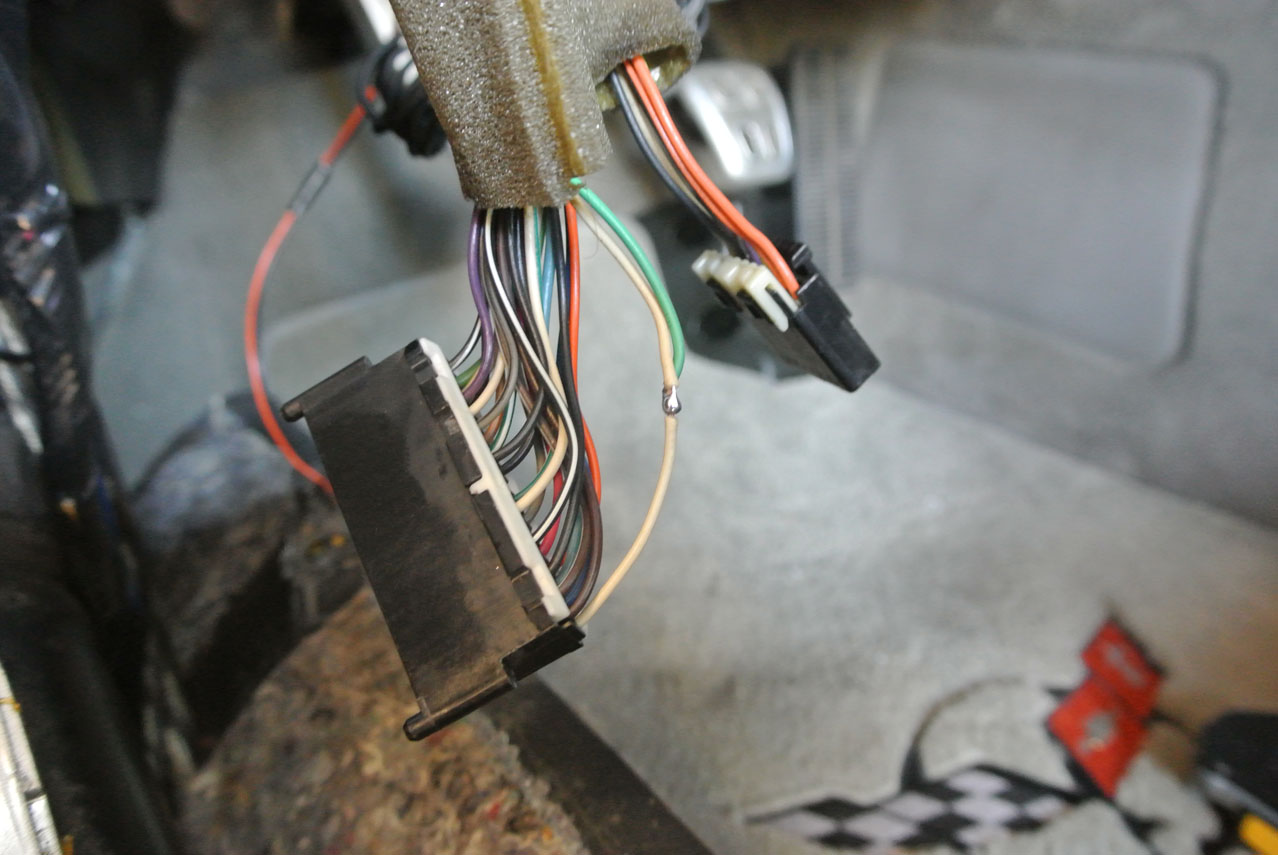
I removed my PCM yesterday so I could have a base tune applied for the larger injectors. Man, this thing is a mess! It was really stuck in the bracket and of course when I yanked it free part of the bracket came with it.  Epoxy time...
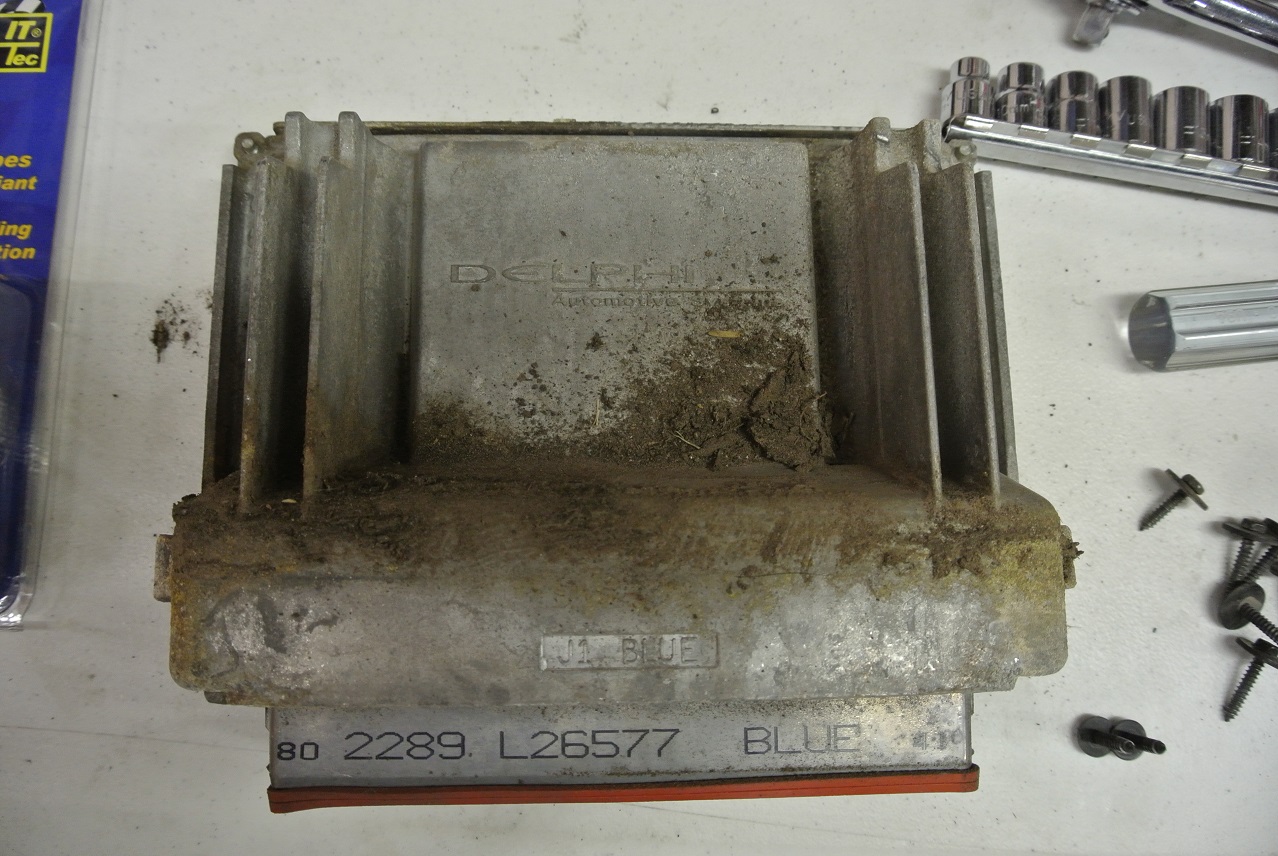
There's a bunch of this white chalky crap on the PCM... maybe the battery leaked at one time or another?
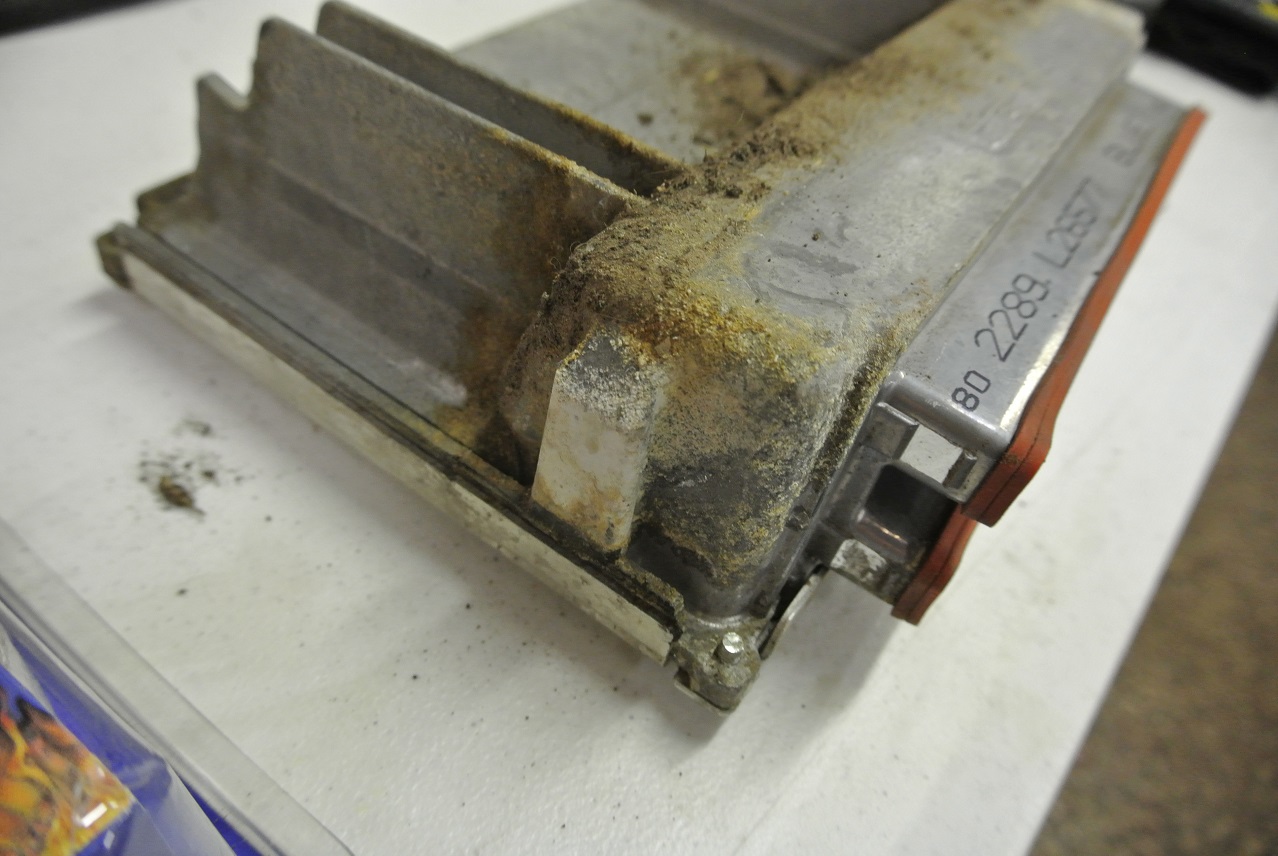
Epoxy time...There's a bunch of this white chalky crap on the PCM... maybe the battery leaked at one time or another?
Last edited by RoccoC5; 04-27-2017 at 04:41 AM.
 06-07-2014, 02:47 PM
#60
Burning Brakes
Thread Starter