
My Cam & Supercharger Build Thread!
 05-14-2014, 01:41 AM
#21
Burning Brakes

Thread Starter

DAY SEVEN/EIGHT - CLEAN INTAKE AND REMOVE TIMING SET (4 hours)
I decided to re-install the intake before continuing with disassembly. As mentioned before, it was full of oil so it required a good cleaning. I started by flushing it with a can of brake cleaner which loosened up the sticky stuff quite well. I finished with purple power and a hose and blew it dry with compressed air.
After installing the intake I went to work on removing the timing cover, oil pump, and timing gears.
First, let me introduce my assistant, Stella. She's too afraid to come out to the garage, but she meets me at the door when I come in for refreshments.
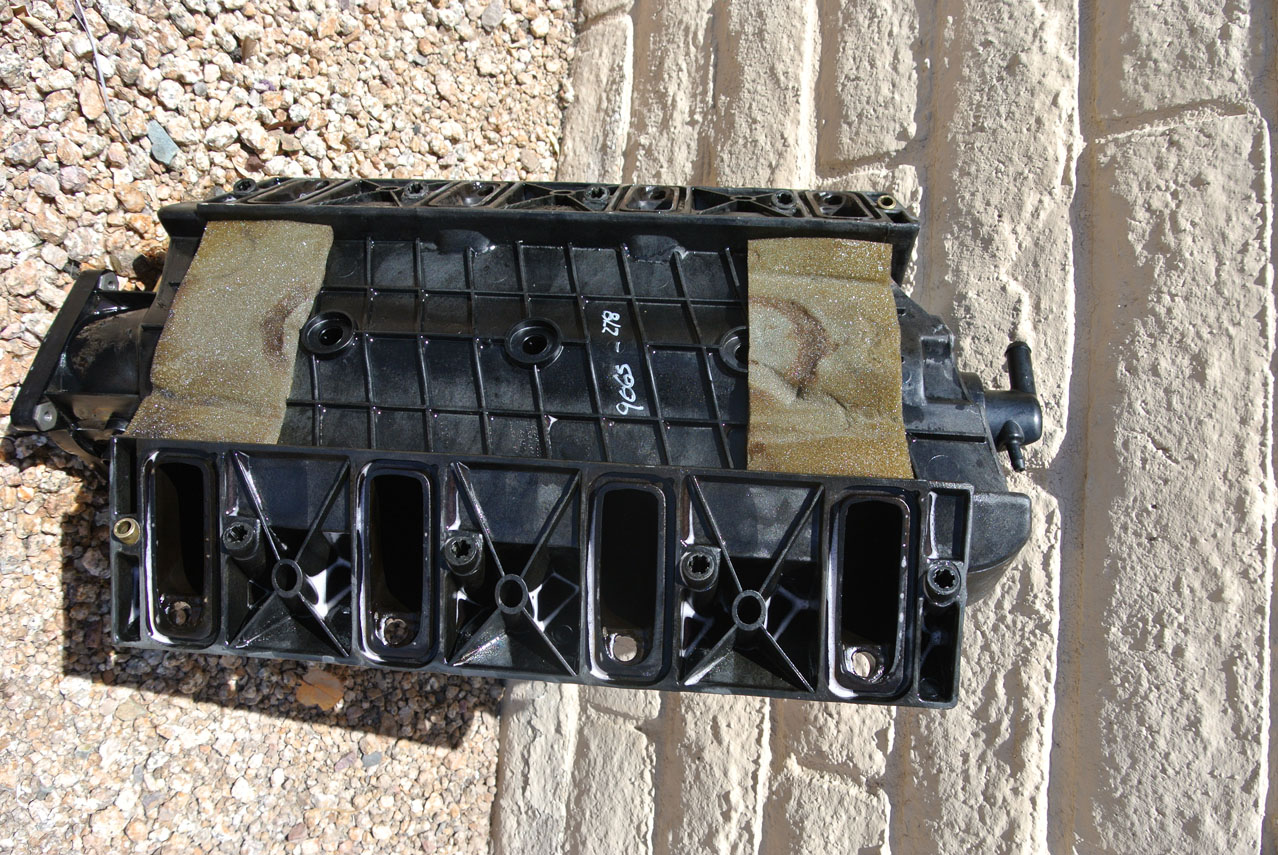
Time to clean up this bad boy:
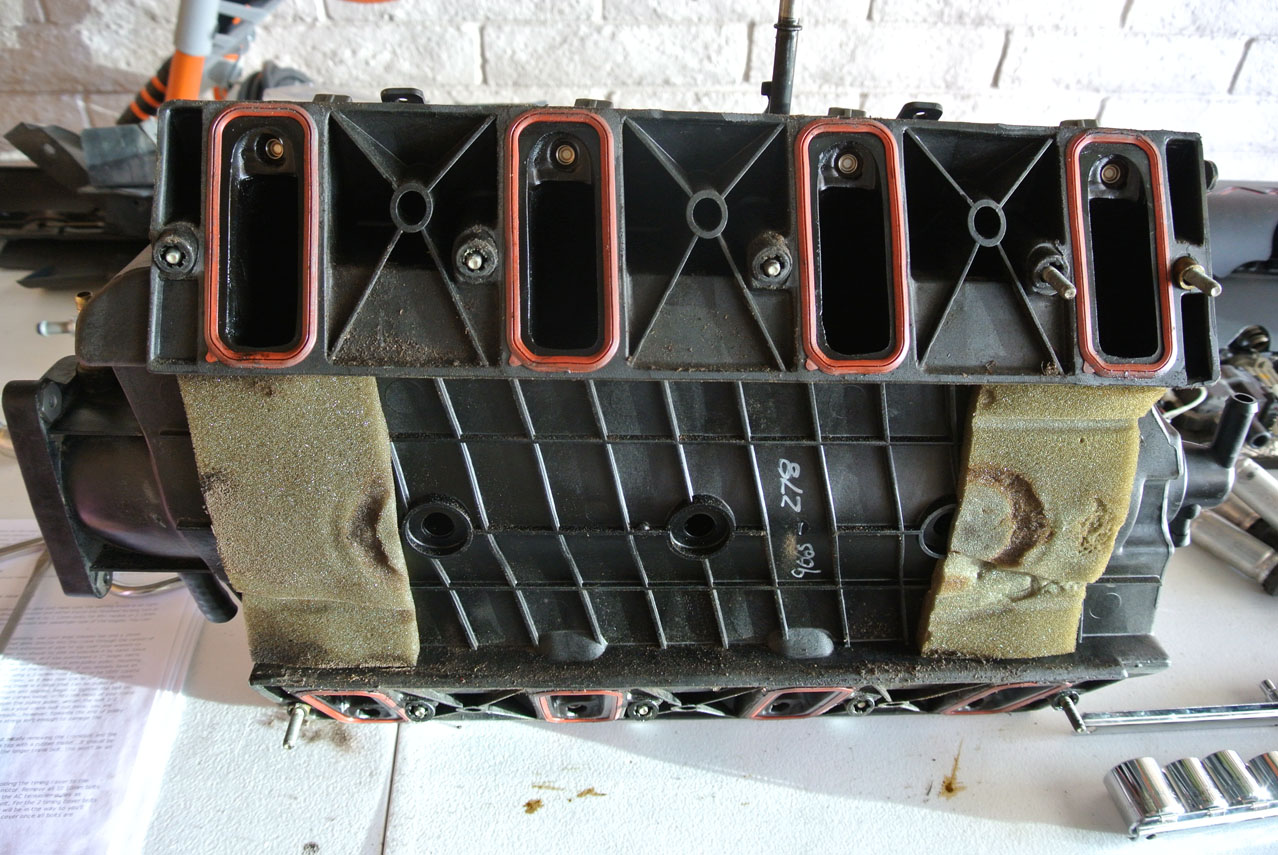
One can of brakleen later:
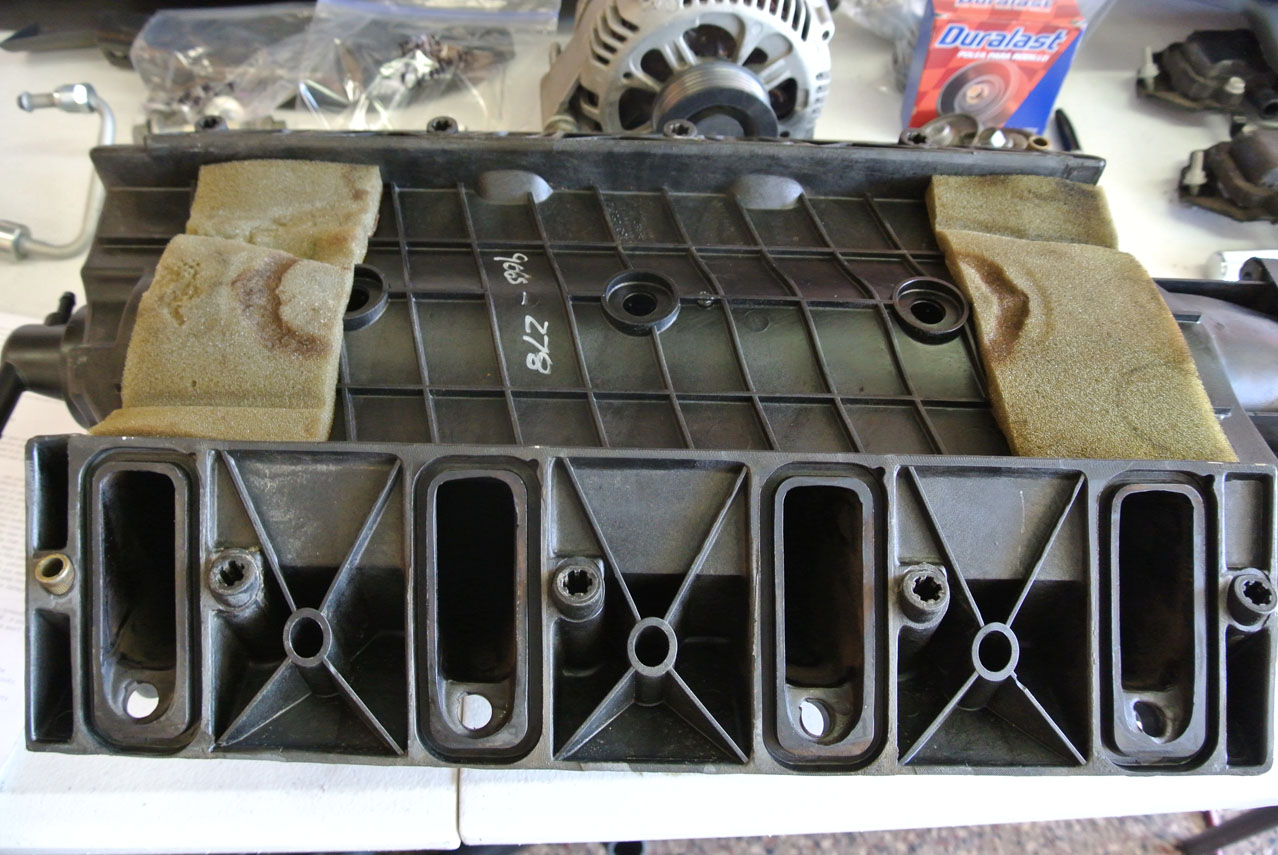
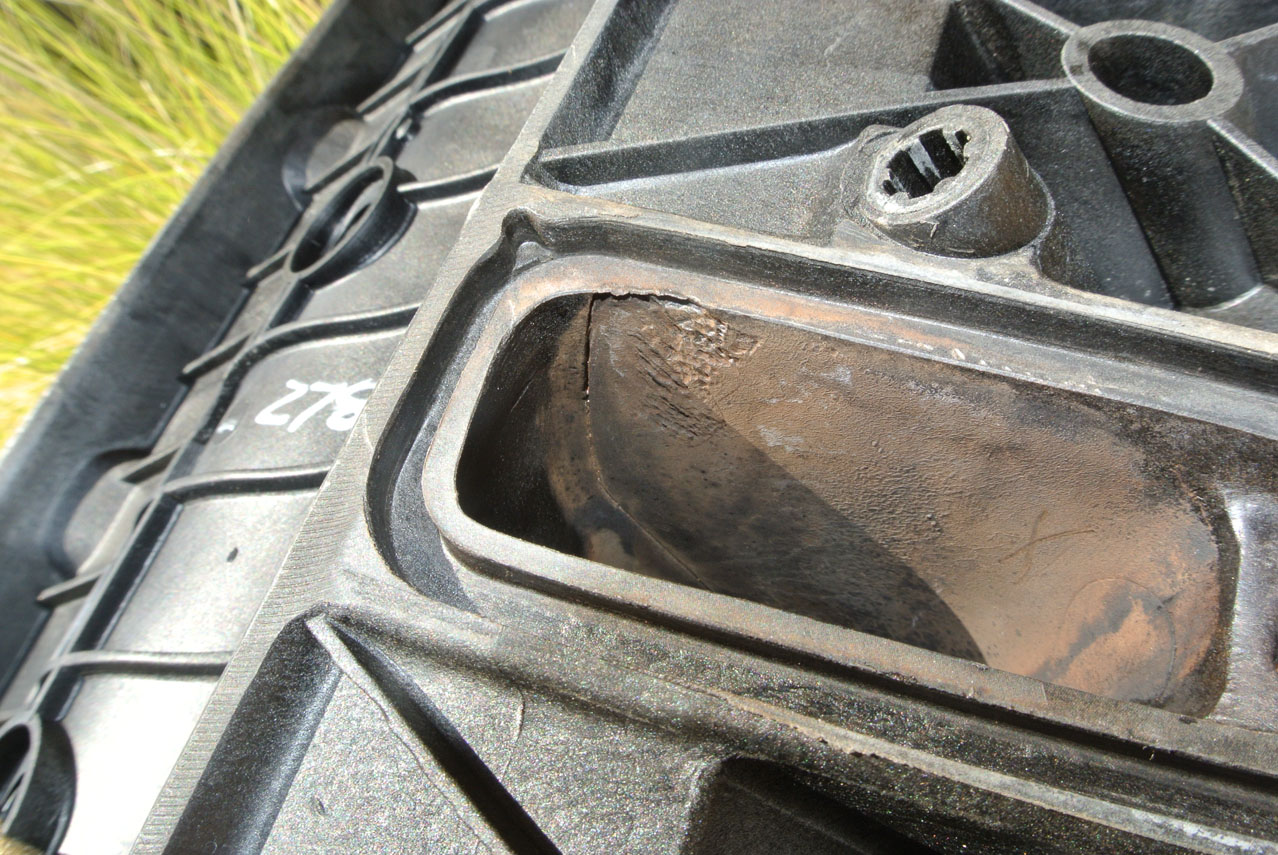
The ports are still a bit grimy:
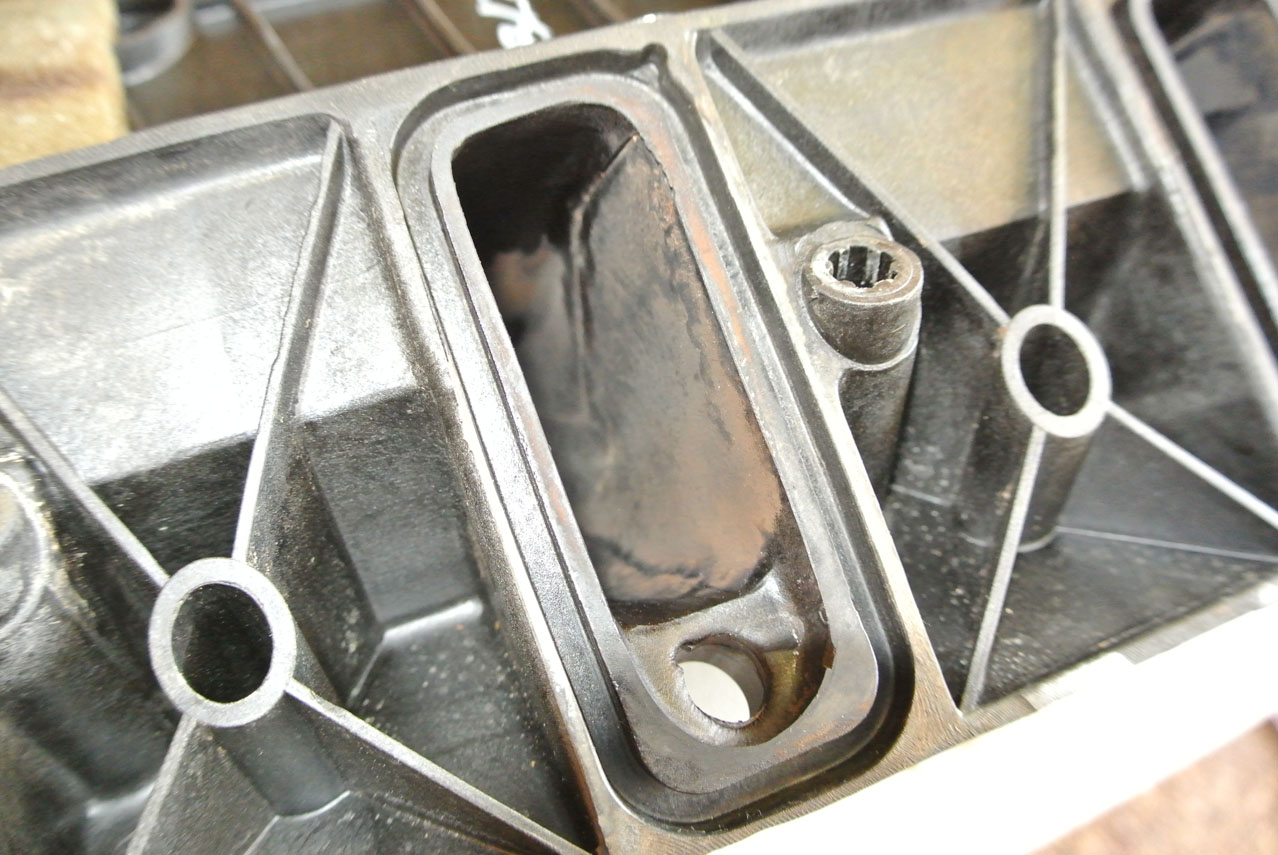
What the hell is this? I probably should have spent some time smoothing this out...surely it didn't come from the factory like this?
I ended up using Purple Power and a hose to get the intake clean:
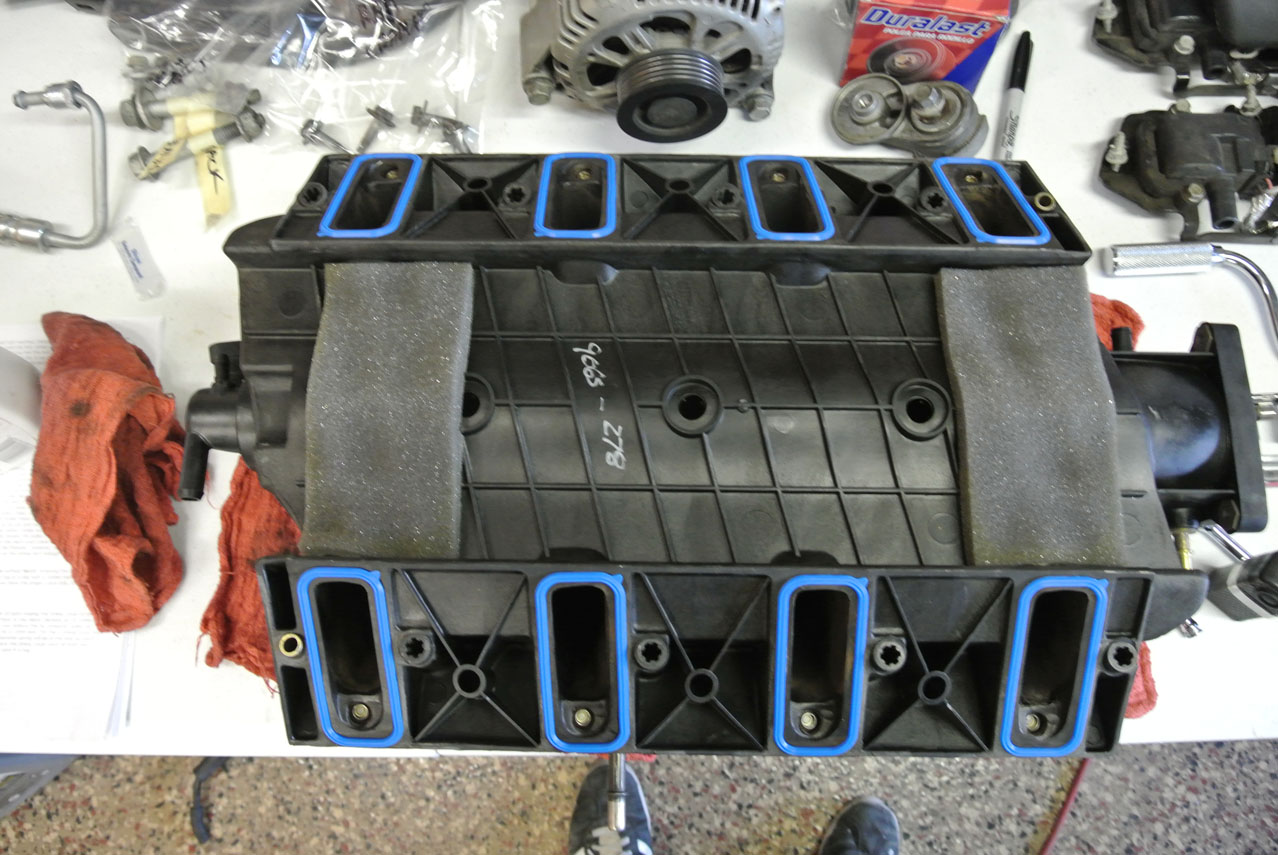
All clean! New foam and gaskets, too:
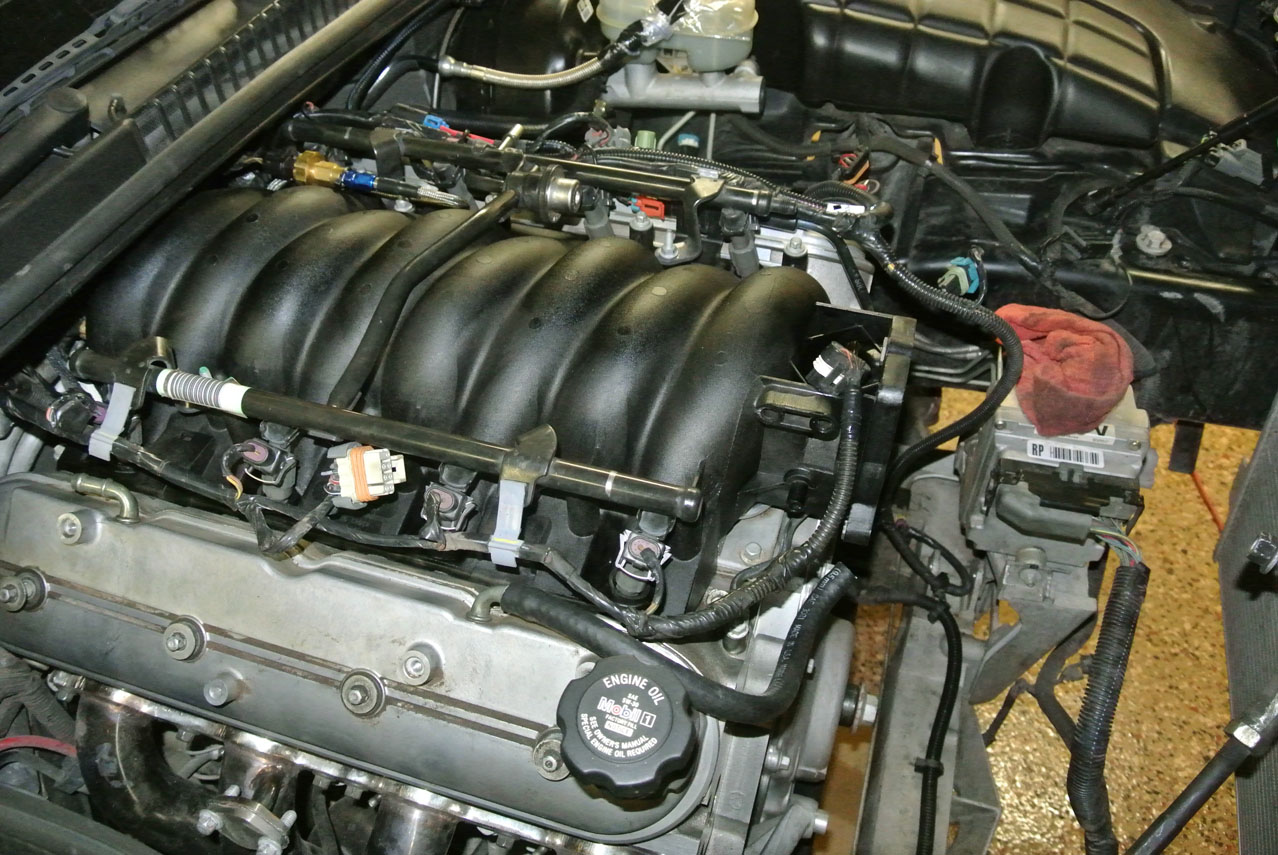
Intake and fuel rail installed. Torqued to 89 in/lbs in two passes.
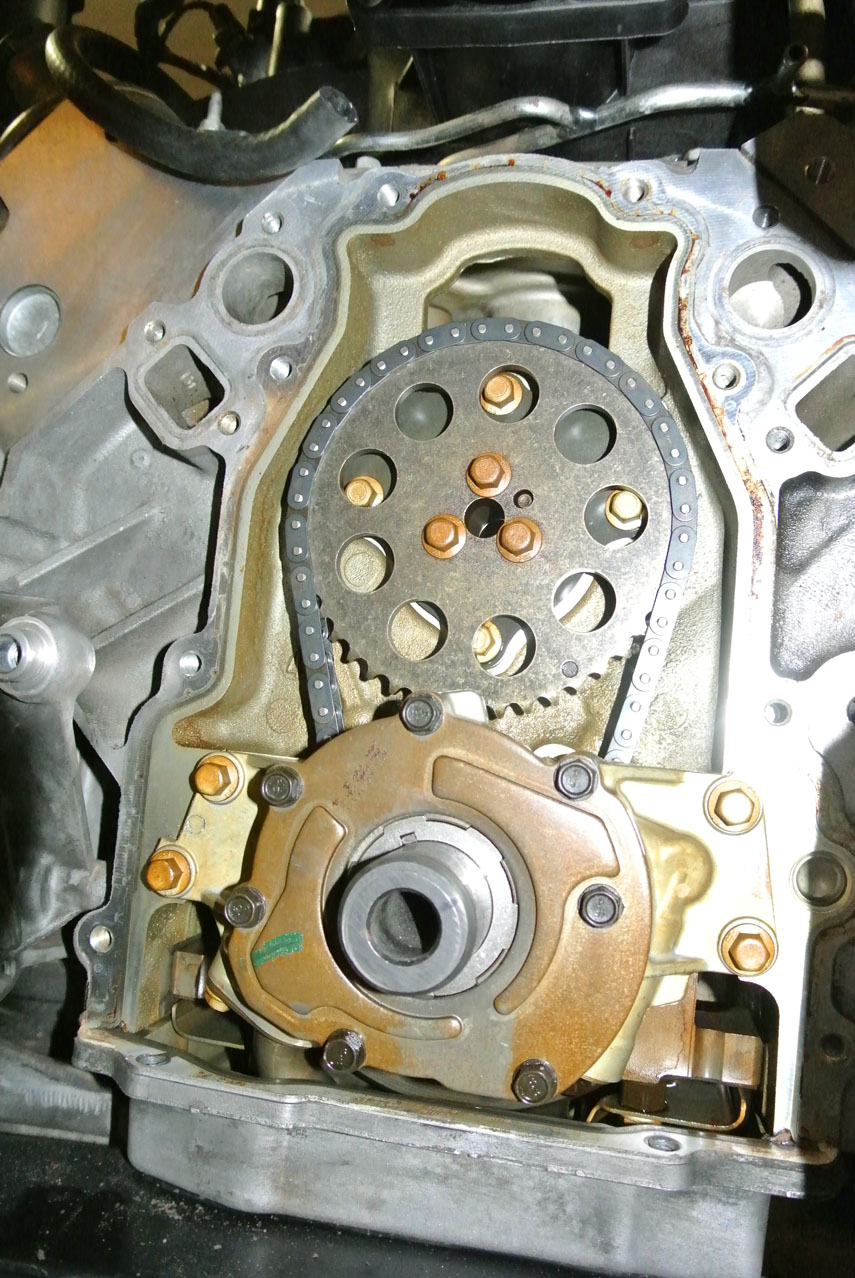
Now onto the the [more] fun stuff. Pulled the timing cover:
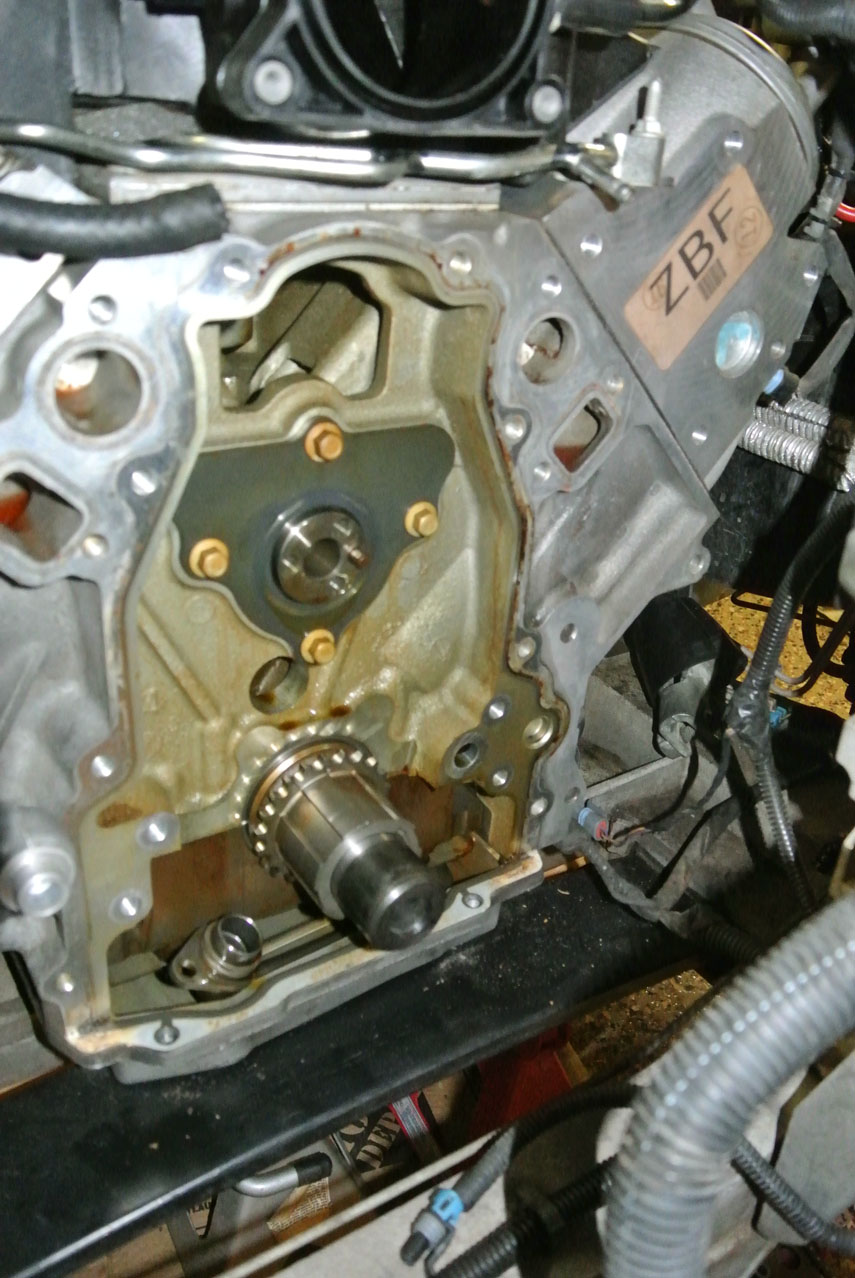
Removed the oil pump, cam gear and timing chain:
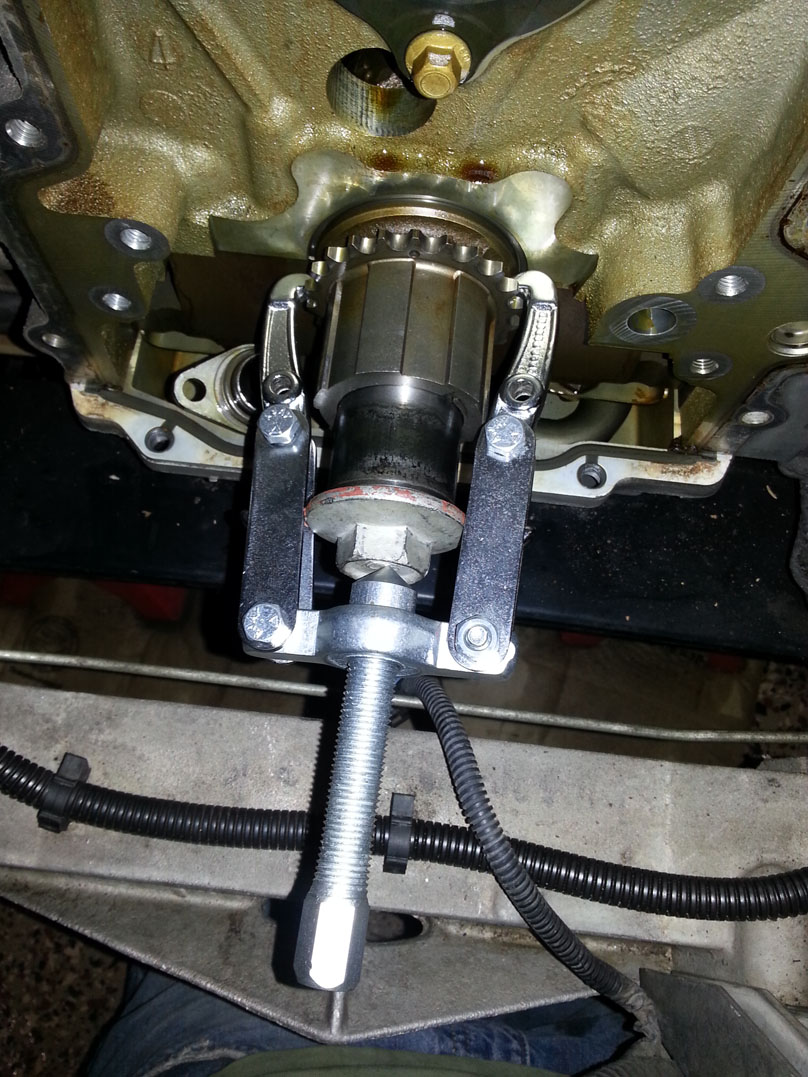
Then used a small two jaw puller to remove the crank gear:
Done for tonight!

I'm soooo close to getting the cam swapped. If my day job doesn't get in the way, next time I should be able to remove the rockers and pushrods and get the new camshaft in. Exciting!
I decided to re-install the intake before continuing with disassembly. As mentioned before, it was full of oil so it required a good cleaning. I started by flushing it with a can of brake cleaner which loosened up the sticky stuff quite well. I finished with purple power and a hose and blew it dry with compressed air.
After installing the intake I went to work on removing the timing cover, oil pump, and timing gears.
First, let me introduce my assistant, Stella. She's too afraid to come out to the garage, but she meets me at the door when I come in for refreshments.
Time to clean up this bad boy:
One can of brakleen later:
The ports are still a bit grimy:
What the hell is this? I probably should have spent some time smoothing this out...surely it didn't come from the factory like this?
I ended up using Purple Power and a hose to get the intake clean:
All clean! New foam and gaskets, too:
Intake and fuel rail installed. Torqued to 89 in/lbs in two passes.
Now onto the the [more] fun stuff. Pulled the timing cover:
Removed the oil pump, cam gear and timing chain:
Then used a small two jaw puller to remove the crank gear:
Done for tonight!
I'm soooo close to getting the cam swapped. If my day job doesn't get in the way, next time I should be able to remove the rockers and pushrods and get the new camshaft in. Exciting!
Last edited by RoccoC5; 04-27-2017 at 04:34 AM.
 05-14-2014, 05:40 AM
#22
Racer

Awesome thread! Whatever you do, PIN the crank pulley when you are done. Too much power makes the pulley spin on the crank and causes the bolt to walk out. Don't ask me how I know. ;-) Enjoy your new found power. Start saving for a new clutch. Don't ask me how I know about that either!
05-14-2014, 10:47 AM
#23
Burning Brakes
Thread Starter
Awesome thread! Whatever you do, PIN the crank pulley when you are done. Too much power makes the pulley spin on the crank and causes the bolt to walk out. Don't ask me how I know. ;-) Enjoy your new found power. Start saving for a new clutch. Don't ask me how I know about that either!


 05-15-2014, 02:05 AM
#26
Burning Brakes
Thread Starter
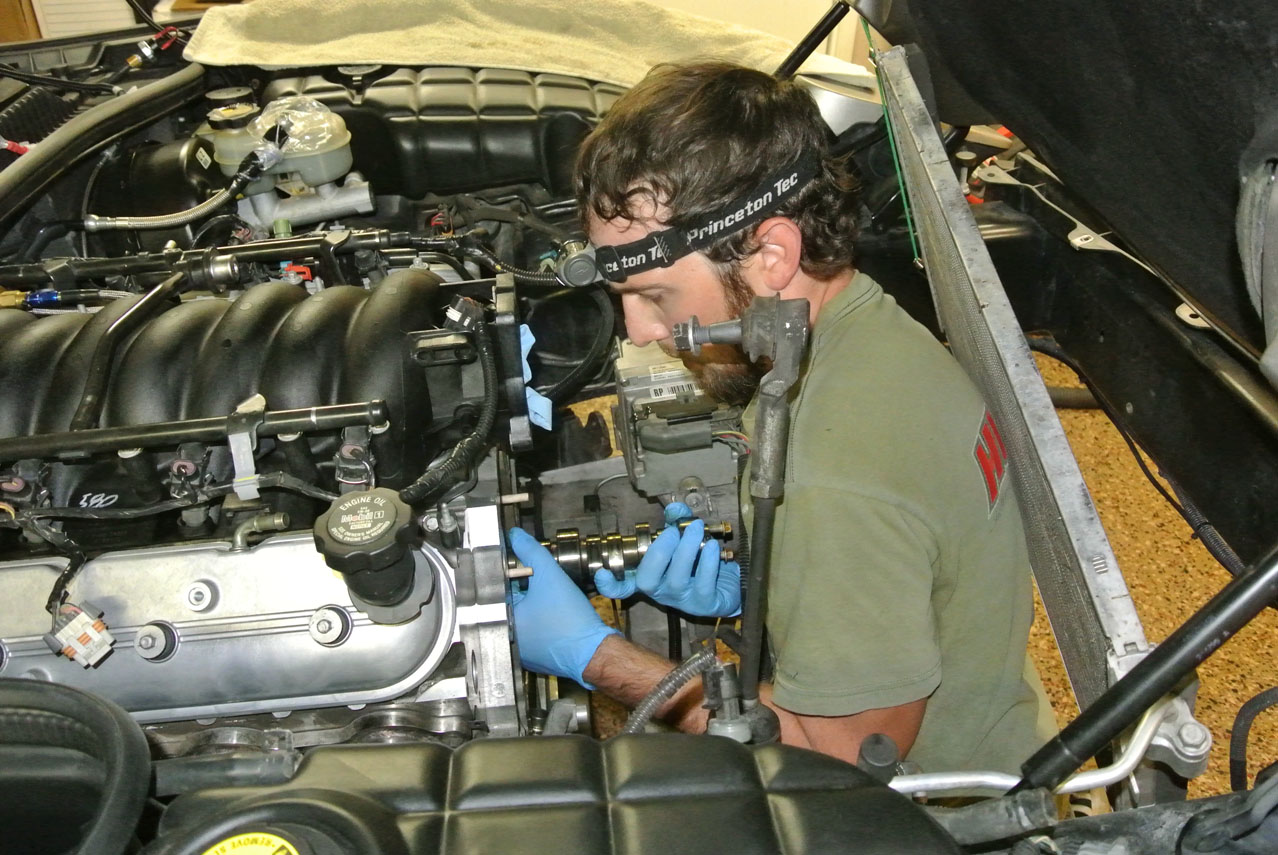
DAY NINE - CAM SWAP (2 hours)
Woo fricken hoo, I finally installed the new camshaft tonight. Didn't take me long, just had to remove the rocker arms, pushrods, and cam retainer plate, then pulled out the old cam and slid in the new one. Easier than I thought!
Only ran into a couple of scares tonight. First, when installing the new, freshly oiled camshaft, I bumped it into the dirty condenser and rained dirt all over the cam. Then, when installing the cam retainer plate, I dropped one of the bolts into the oil pan. Luckily I was able to retrieve it with a pen magnet.
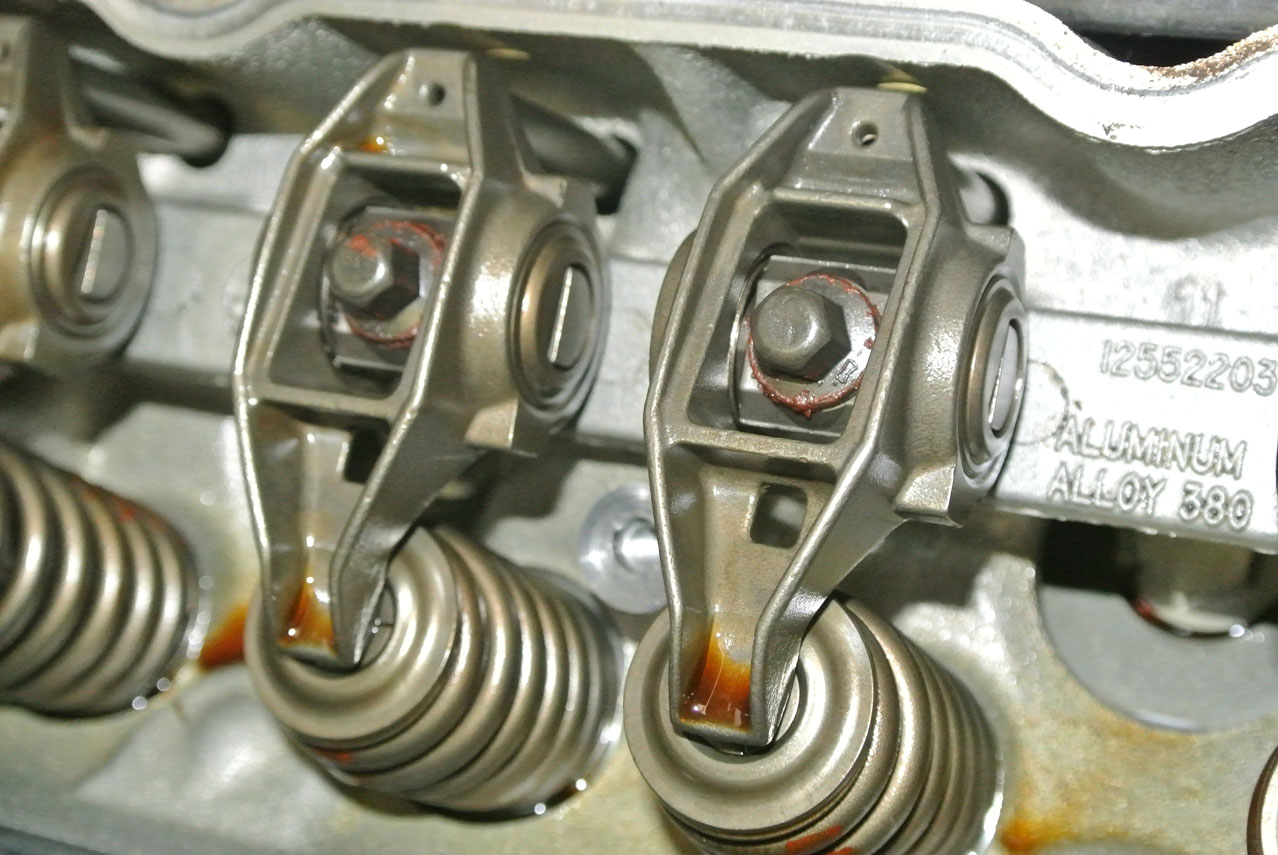
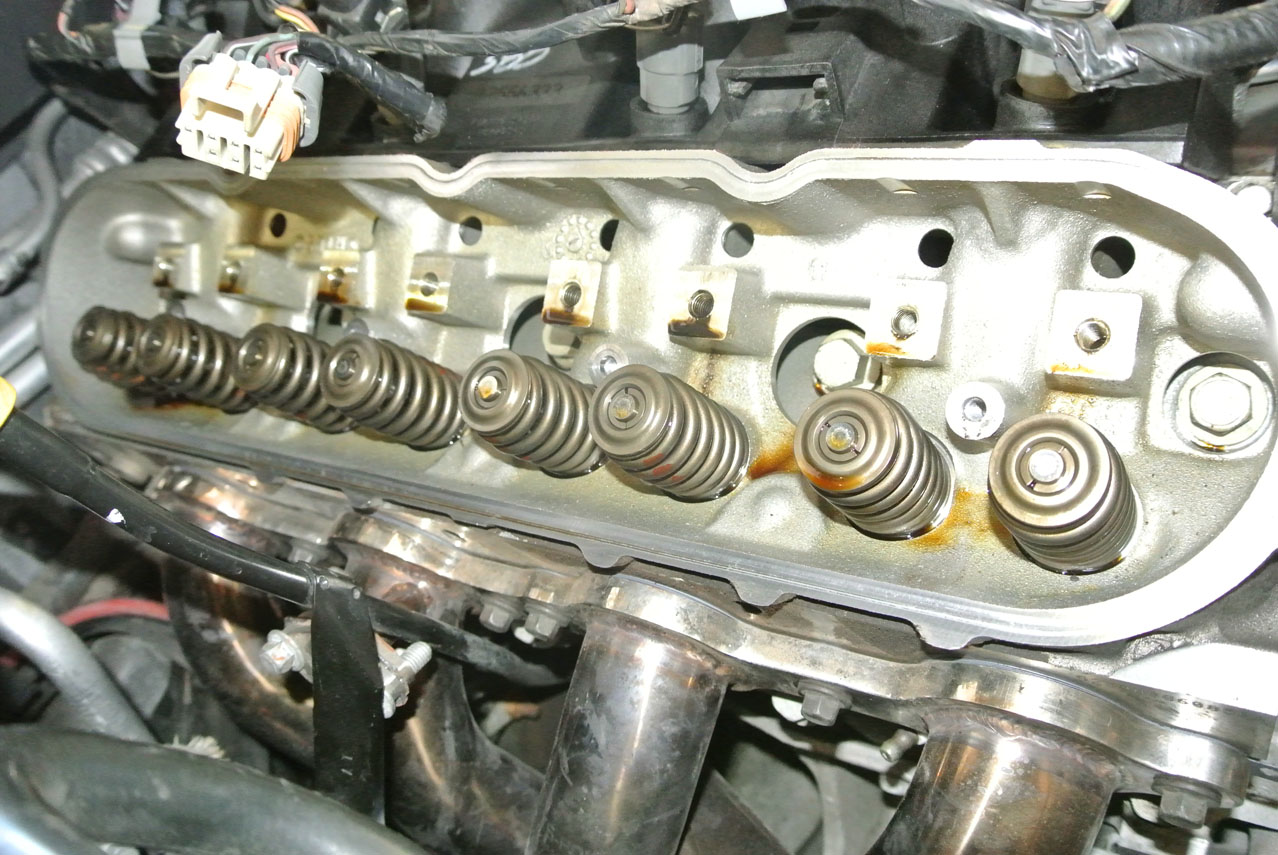
Rocker arms, begging to be removed:
Passenger side done!
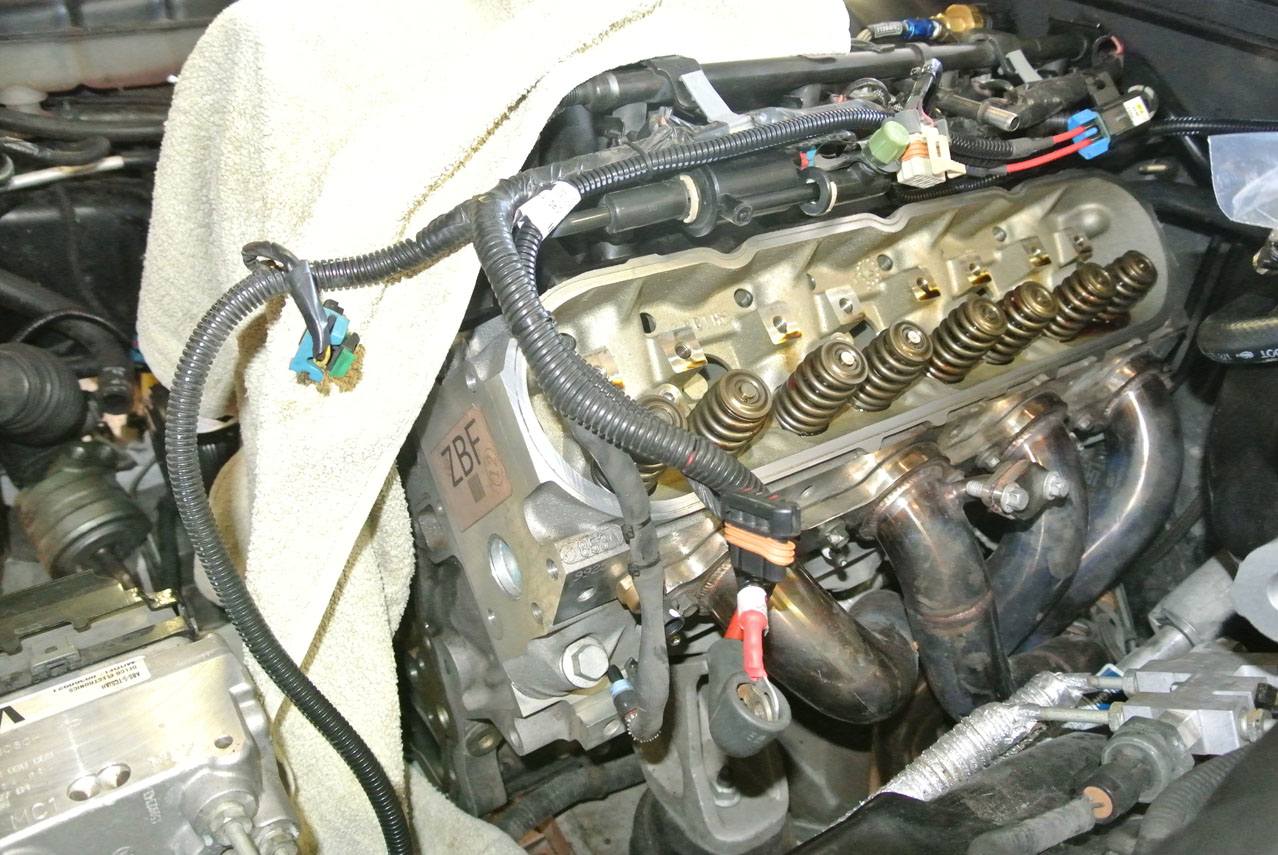
Driver side rockers removed:
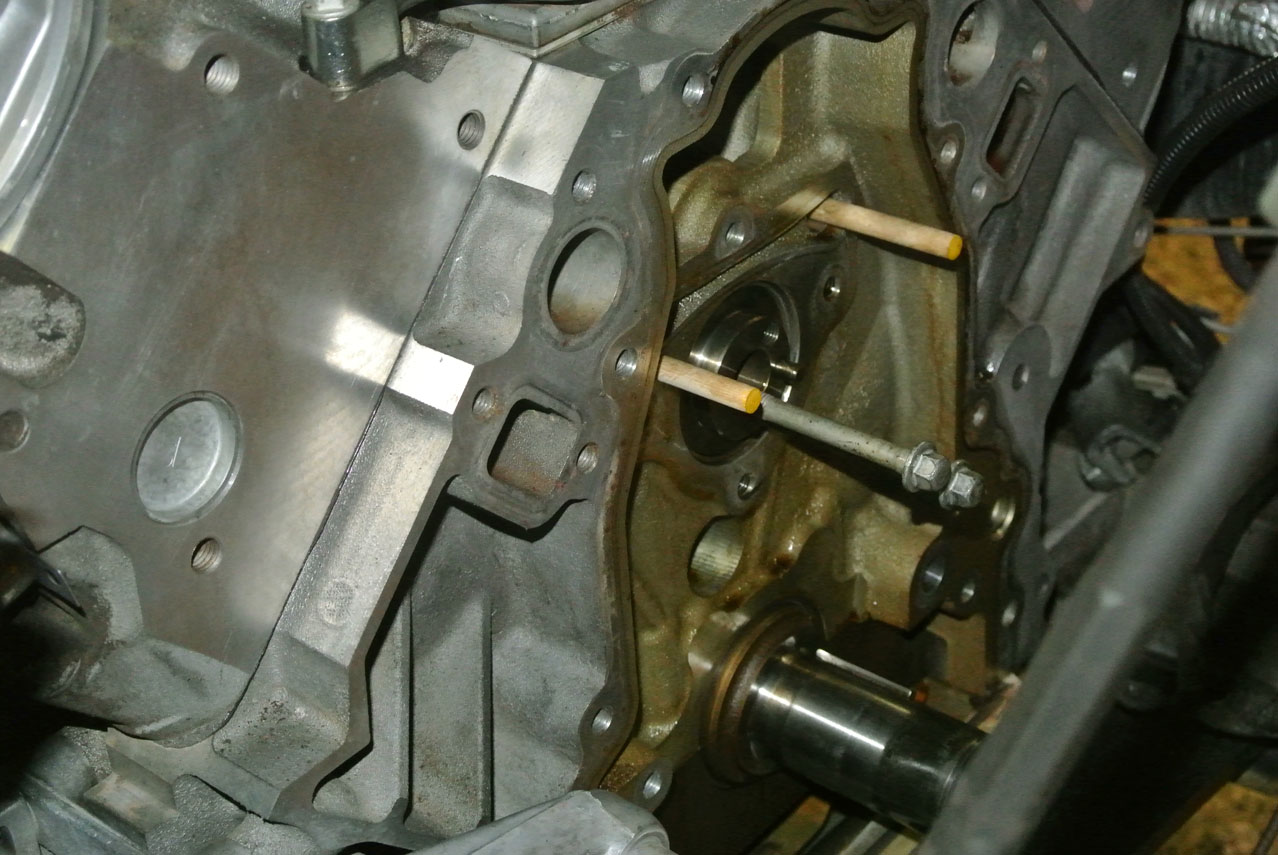
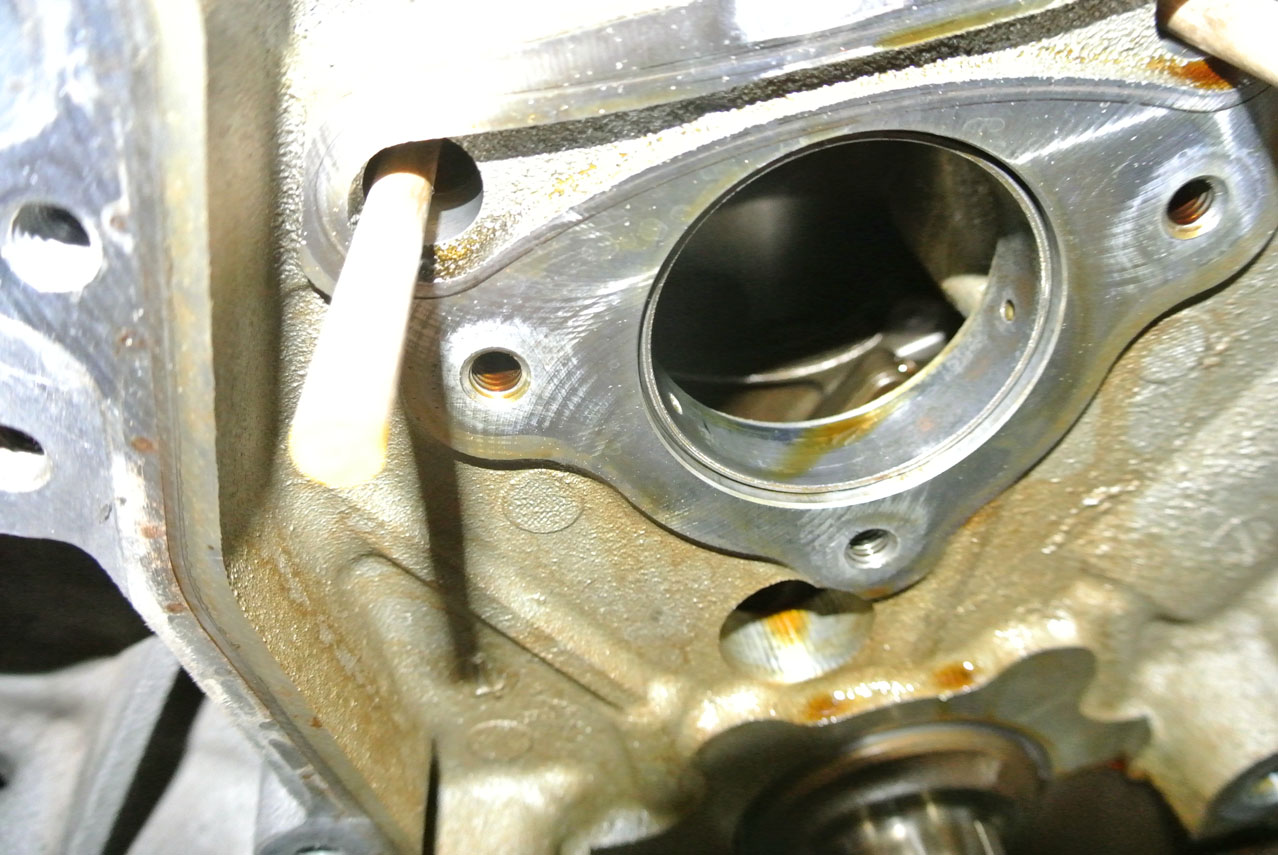
Removed the four 10mm bolts securing the cam retainer plate and slid in my 5/16" wood dowels to keep the lifters in place:
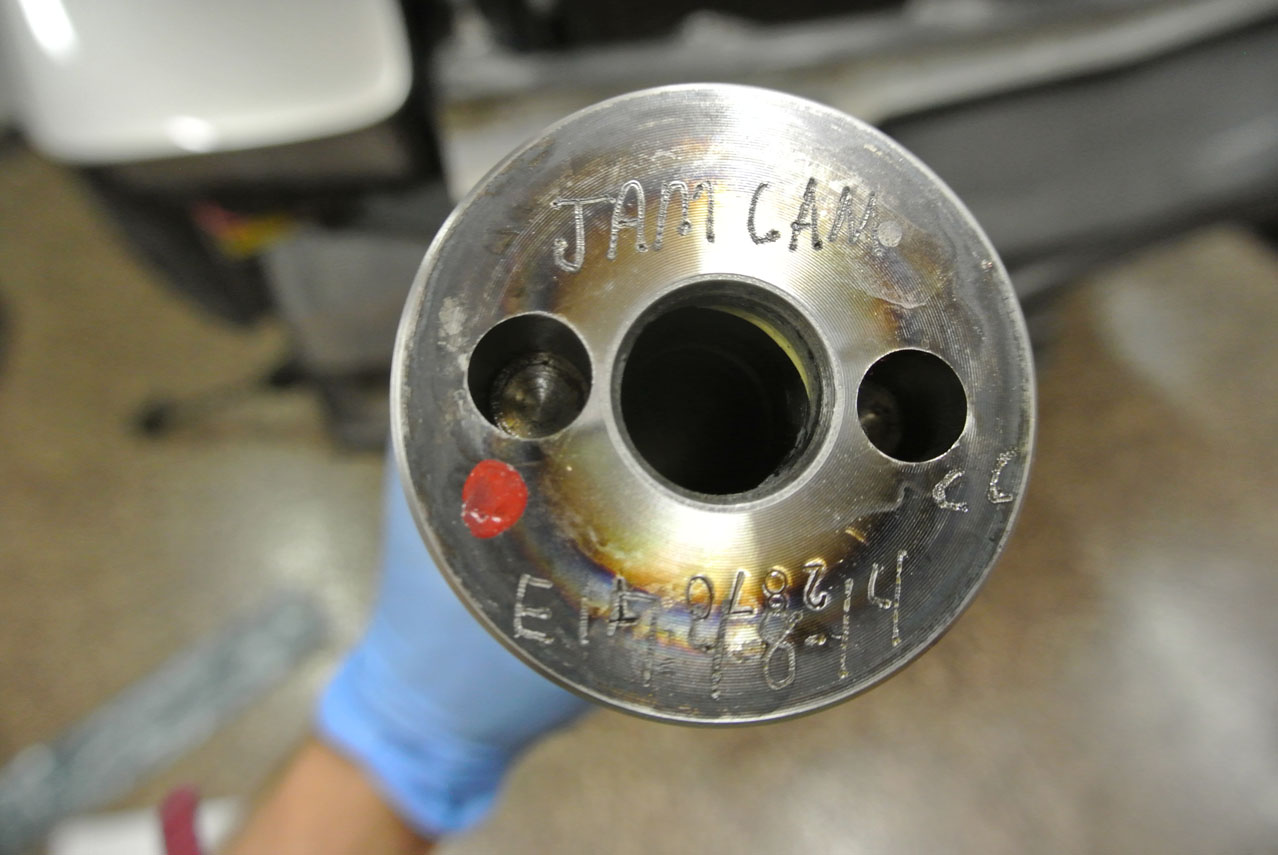
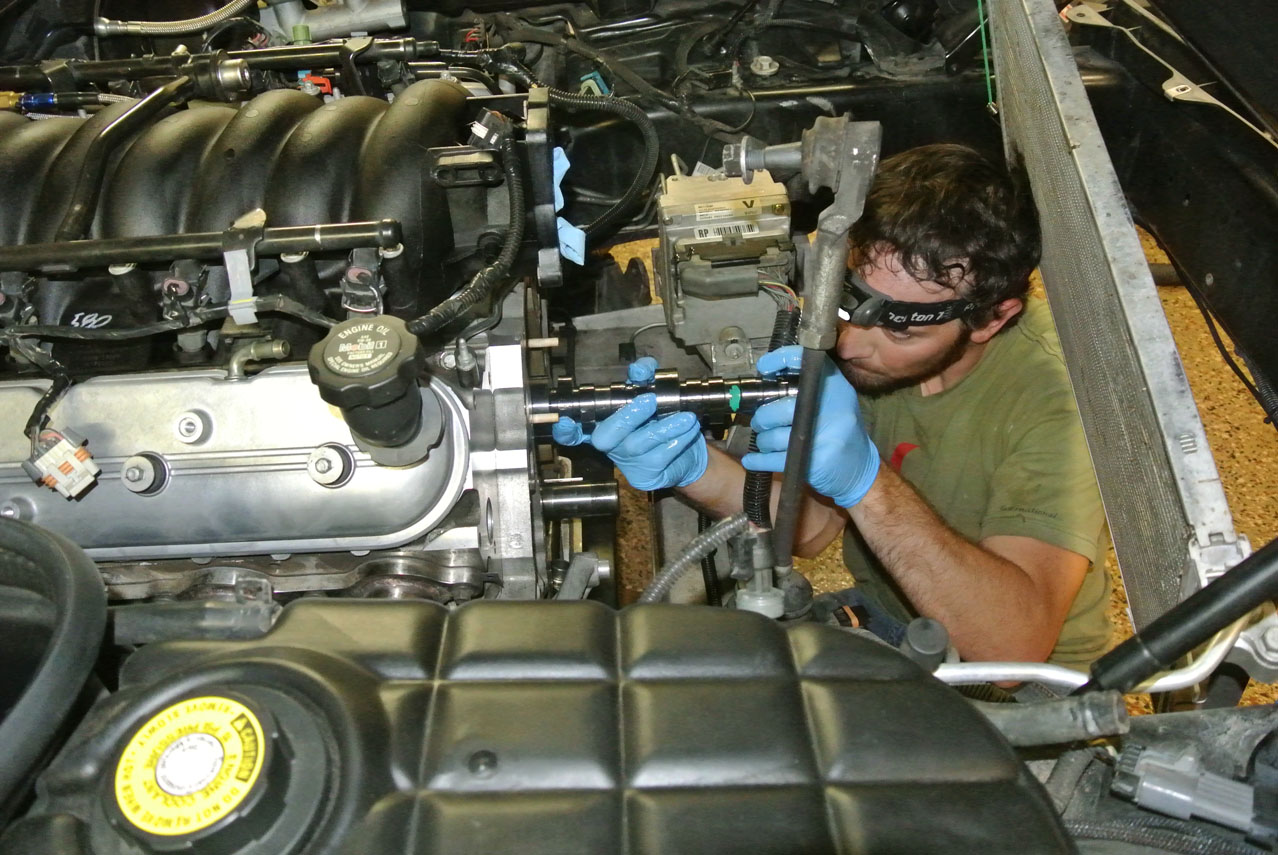
JAM CAM ready for action!
Old cam on it's way out. Headlamp for the win!
Hmm, looks like a bit of copper showing through on bearing number one? I searched the interwebs and found that this is actually pretty common and perhaps nothing to worry about? What say you?
New camshaft on it's way home (again, headlamp for the win):
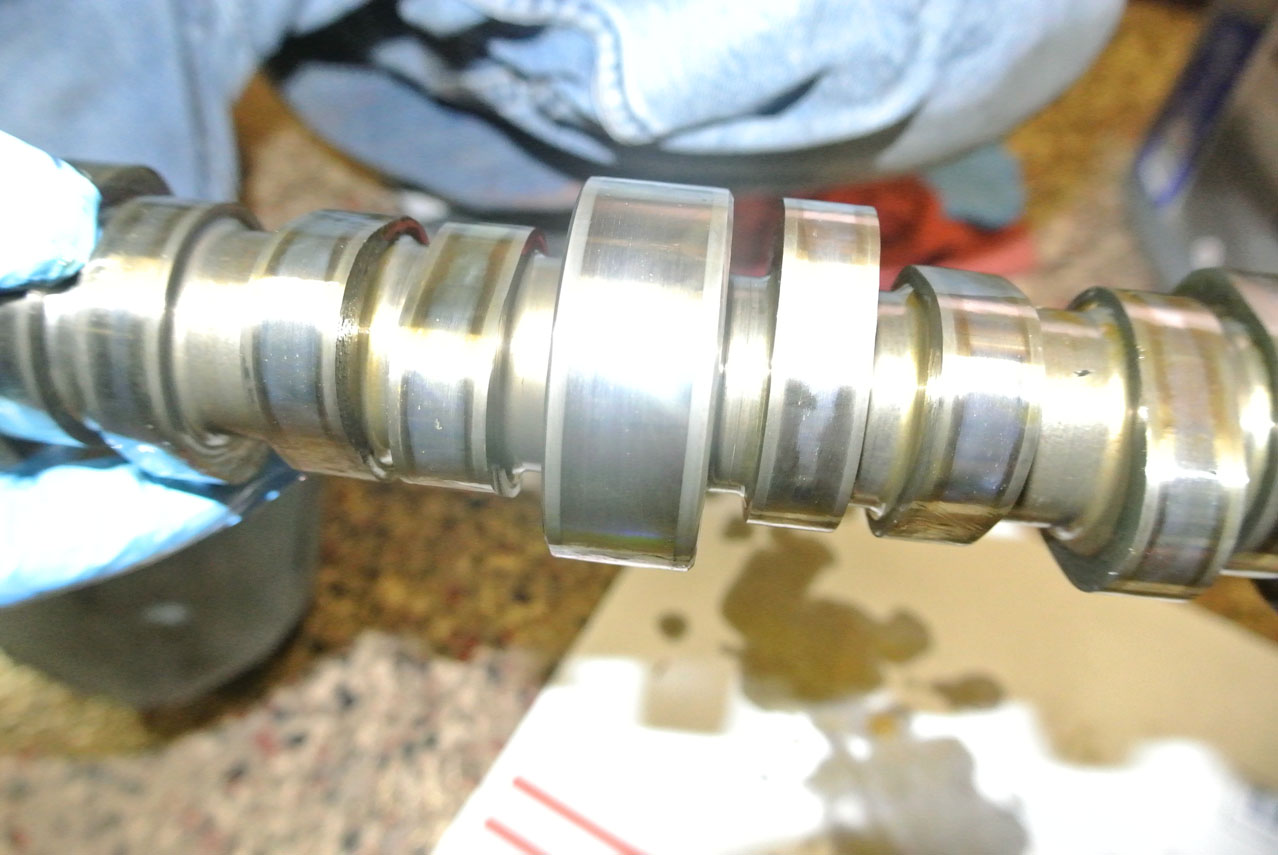
The old cam didn't look bad. No scoring or grooves. Does this wear pattern look OK for a cam with 100K+ miles?
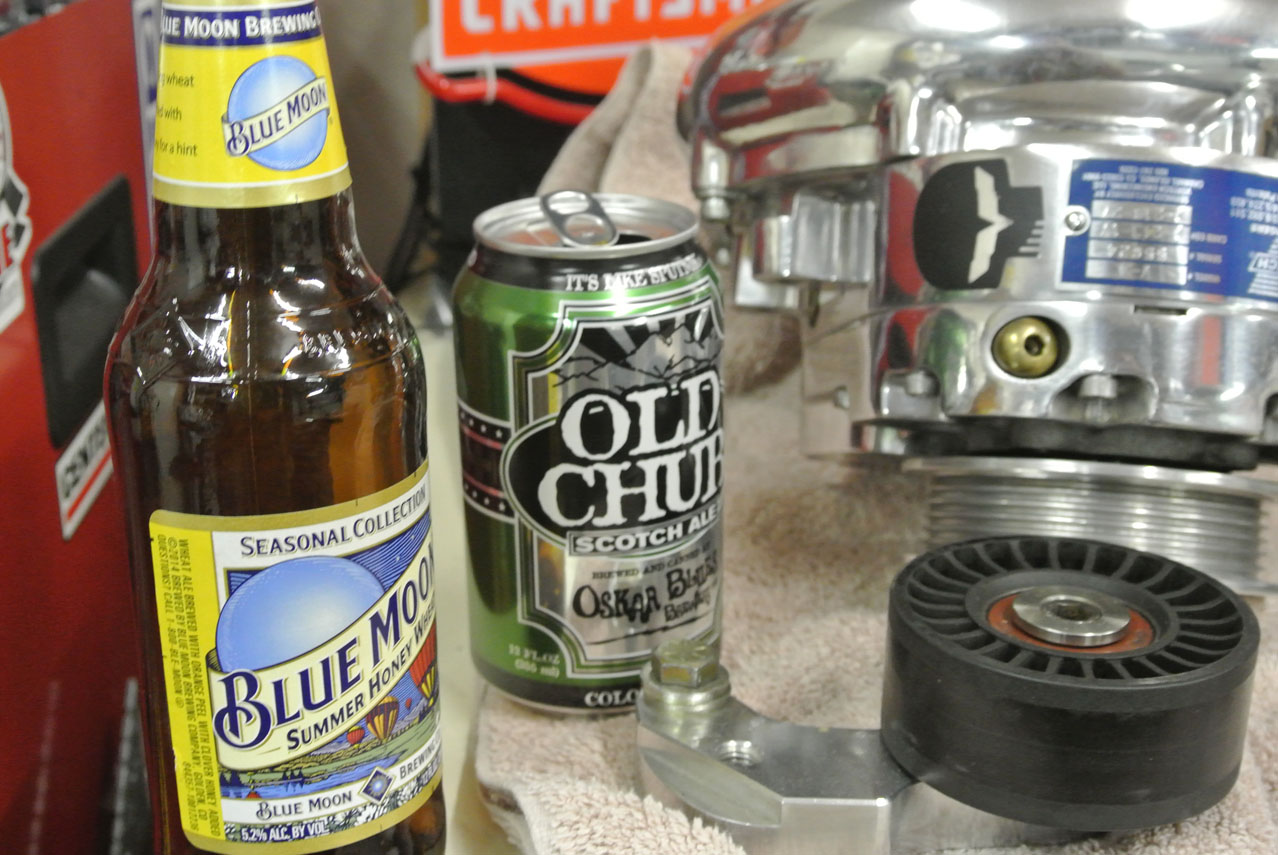
Just a couple of random beers tonight to keep my nerves calm during the cam install...
Up next: install timing set and oil pump; install balancer and pin crank.
Woo fricken hoo, I finally installed the new camshaft tonight.
Didn't take me long, just had to remove the rocker arms, pushrods, and cam retainer plate, then pulled out the old cam and slid in the new one. Easier than I thought!Only ran into a couple of scares tonight. First, when installing the new, freshly oiled camshaft, I bumped it into the dirty condenser and rained dirt all over the cam.
Then, when installing the cam retainer plate, I dropped one of the bolts into the oil pan. Luckily I was able to retrieve it with a pen magnet. Rocker arms, begging to be removed:
Passenger side done!
Driver side rockers removed:
Removed the four 10mm bolts securing the cam retainer plate and slid in my 5/16" wood dowels to keep the lifters in place:
JAM CAM ready for action!
Old cam on it's way out. Headlamp for the win!
Hmm, looks like a bit of copper showing through on bearing number one? I searched the interwebs and found that this is actually pretty common and perhaps nothing to worry about? What say you?
New camshaft on it's way home (again, headlamp for the win
):The old cam didn't look bad. No scoring or grooves. Does this wear pattern look OK for a cam with 100K+ miles?
Just a couple of random beers tonight to keep my nerves calm during the cam install...
Up next: install timing set and oil pump; install balancer and pin crank.
Last edited by RoccoC5; 04-27-2017 at 04:35 AM.
05-16-2014, 02:24 AM
#28
Burning Brakes
Thread Starter
05-16-2014, 02:37 AM
#29
Burning Brakes
Thread Starter
DAY TEN - TIMING SET AND OIL PUMP (2 hours)
I didn't get a whole lot done tonight, unfortunately. Just had time to install the timing set and new oil pump.
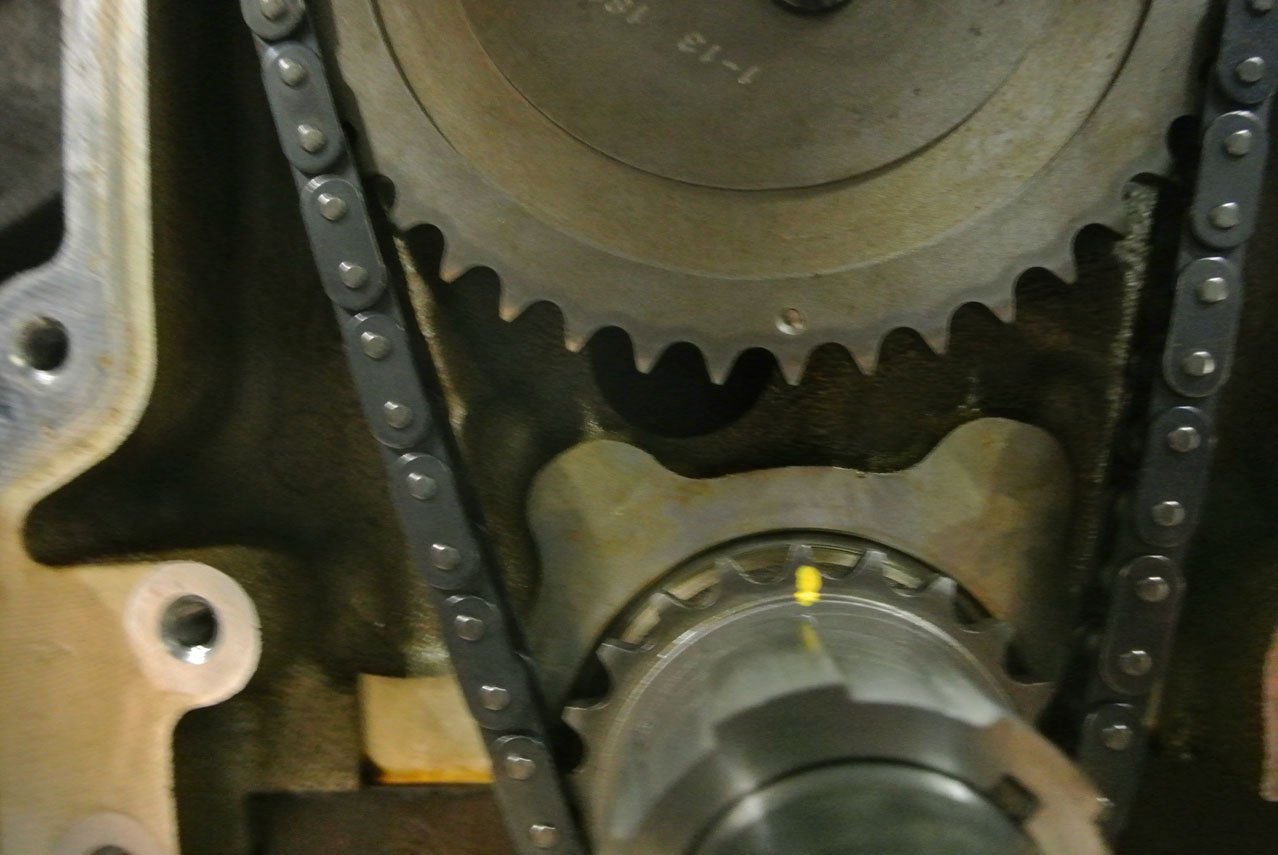
The new crank gear is keyed in three positions to offer +/- 2 degrees of cam advance/retard (I installed it in the factory position):
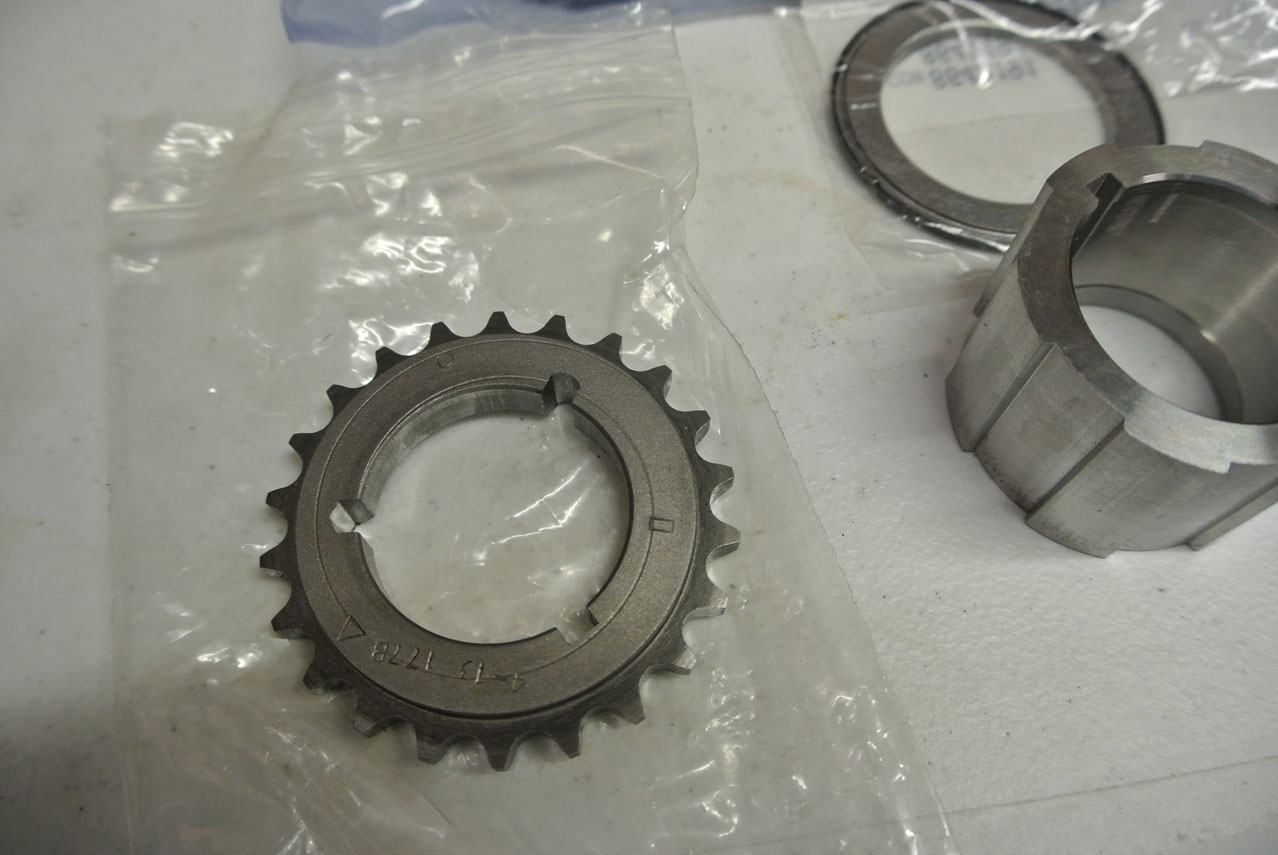
What's for dinner? Crank gear!
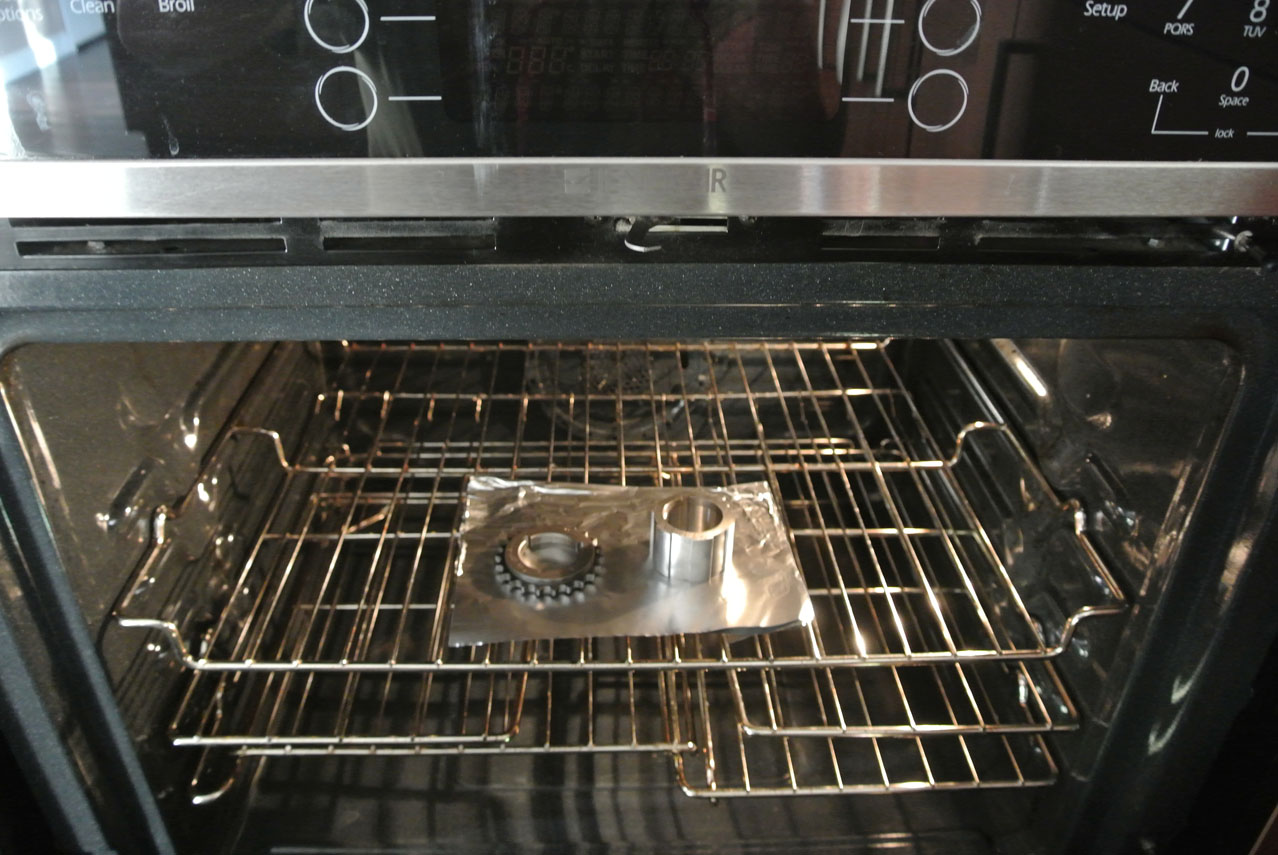
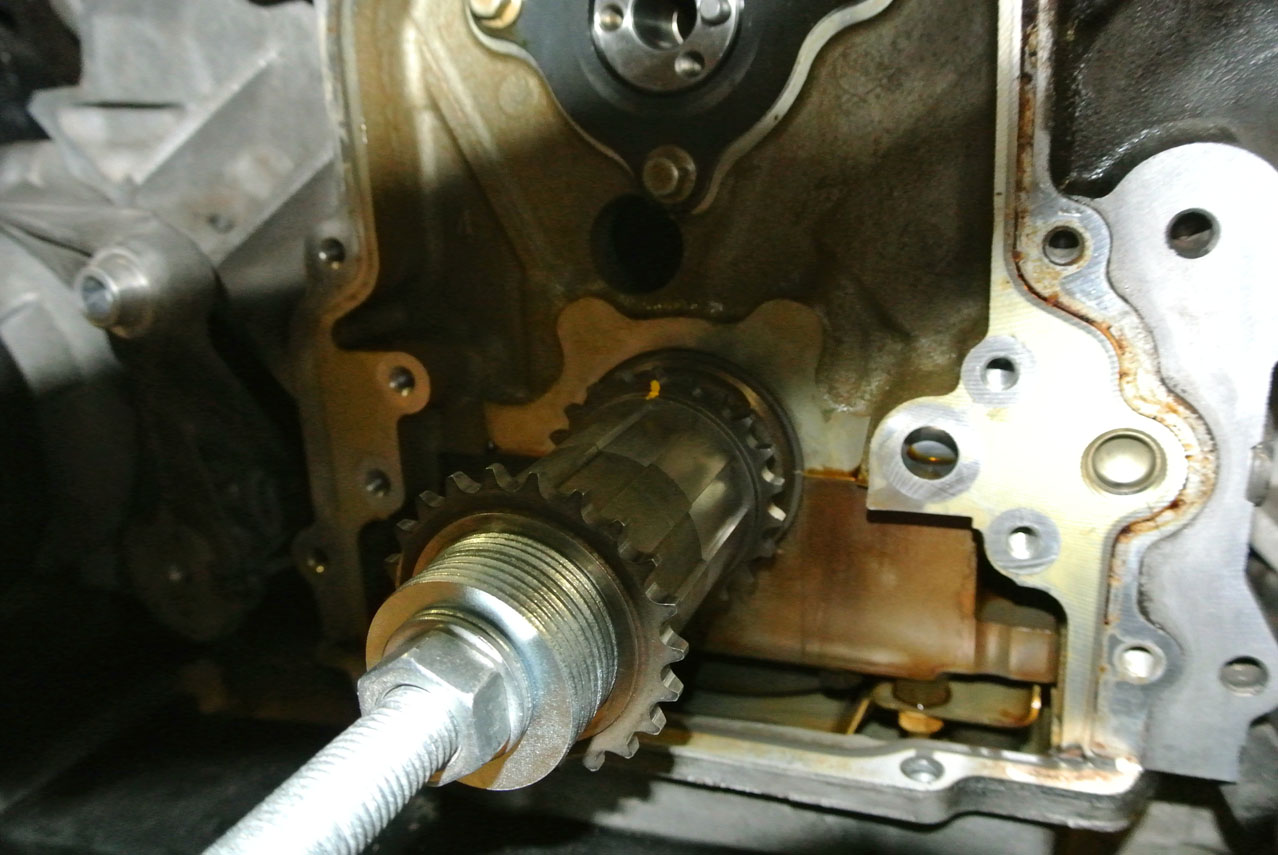
Okay, so heating the gear to 225 for 20 minutes didn't help. I ended up pressing it on with my homemade balancer installer and the old gear:
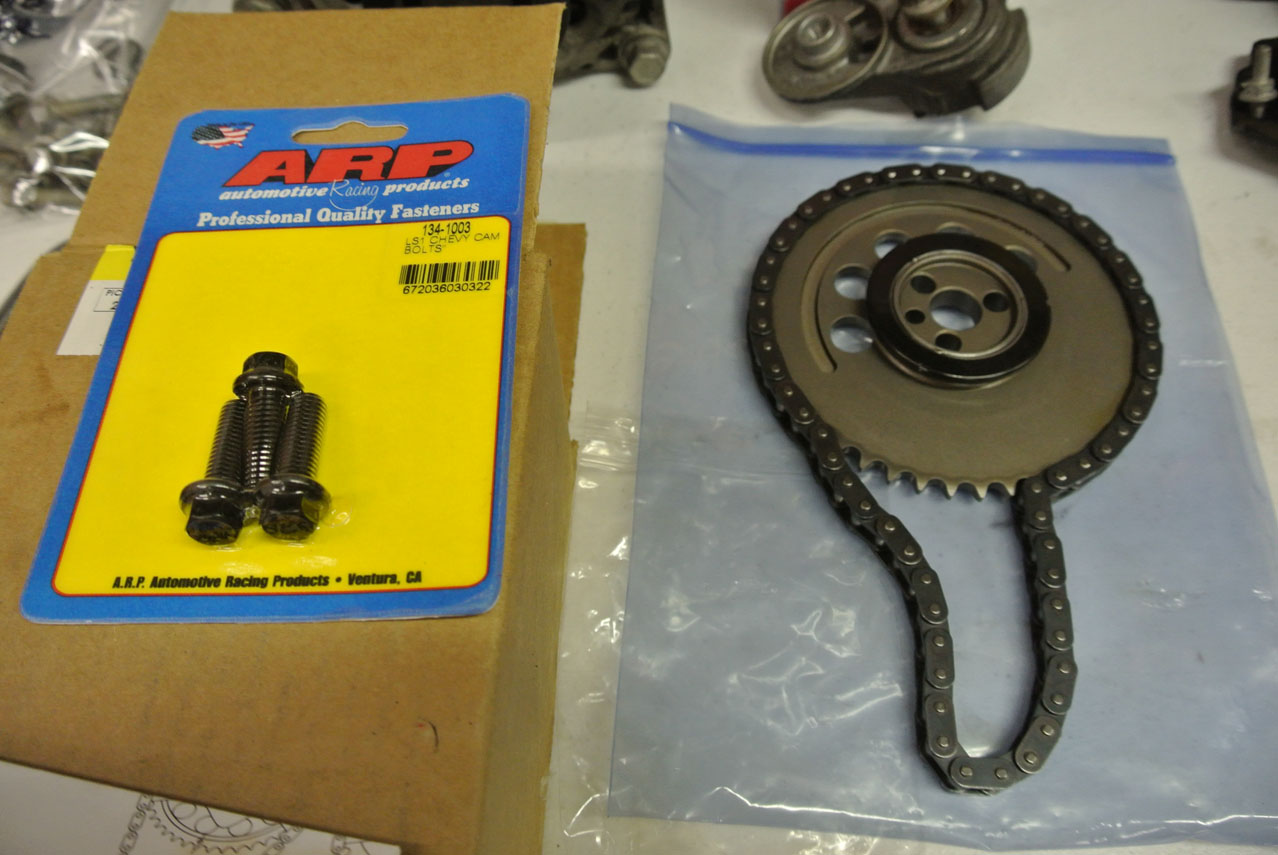
Here is the cam gear, chain, and some ARP bolts. This set included a thrust bearing for the back of the cam gear:
Installed and lined up:
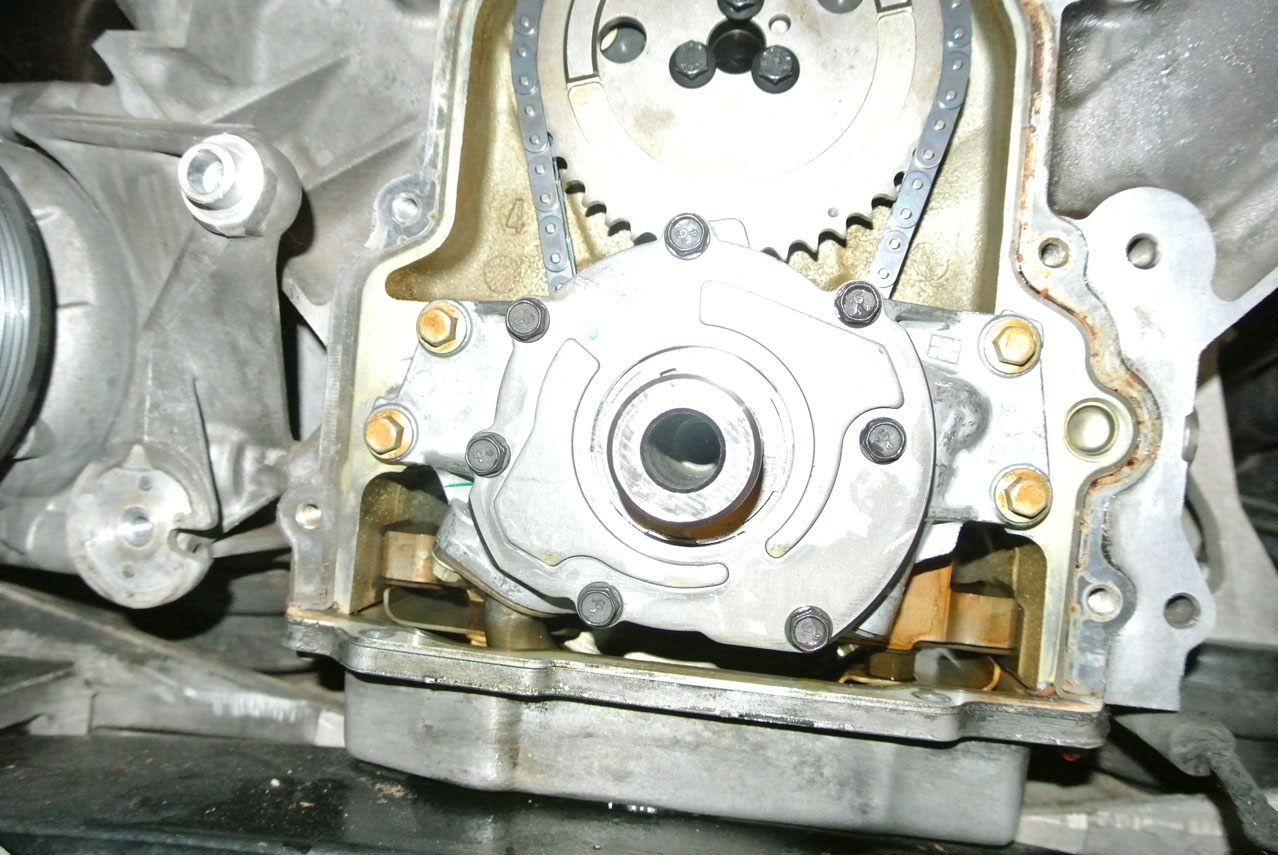
On to the oil pump. I went with a GM LS6 unit:

The included blue o-ring was a bit thicker than the one I removed, but with a little oil it slipped onto the pickup tube and into the pump without a fuss. Oil pump installed:
That does it for tonight! Next time I plan to get the timing cover and new balancer on, and then pin that SOB! At this rate, I should be done in a few months!
I didn't get a whole lot done tonight, unfortunately. Just had time to install the timing set and new oil pump.
The new crank gear is keyed in three positions to offer +/- 2 degrees of cam advance/retard (I installed it in the factory position):
What's for dinner? Crank gear!
Okay, so heating the gear to 225 for 20 minutes didn't help. I ended up pressing it on with my homemade balancer installer and the old gear:
Here is the cam gear, chain, and some ARP bolts. This set included a thrust bearing for the back of the cam gear:
Installed and lined up:
On to the oil pump. I went with a GM LS6 unit:
The included blue o-ring was a bit thicker than the one I removed, but with a little oil it slipped onto the pickup tube and into the pump without a fuss. Oil pump installed:
That does it for tonight! Next time I plan to get the timing cover and new balancer on, and then pin that SOB! At this rate, I should be done in a few months!
Last edited by RoccoC5; 04-27-2017 at 04:35 AM.
 05-16-2014, 11:58 PM
#33
Burning Brakes
Thread Starter

 05-17-2014, 04:19 PM
#35
Burning Brakes
Thread Starter
05-18-2014, 09:28 PM
#36
Safety Car


I would very seriously consider shimming the oil pump for more pressure. I would also seriously recommend replacing the lifters/trays in an engine with 100K miles, I think that's what I read, if you're installing a more aggressive camshaft.
05-19-2014, 06:24 PM
#38
Safety Car
That chain looks like the Cloyes setup I recently installed in my new engine. You will not have any clearance issues to worry about shimming for with that chain. Just shim the pump to increase the pressure a little. I bought mine shimmed and ported from texas speed.
05-19-2014, 07:27 PM
#39
Pro

That chain looks like the Cloyes setup I recently installed in my new engine. You will not have any clearance issues to worry about shimming for with that chain. Just shim the pump to increase the pressure a little. I bought mine shimmed and ported from texas speed.
Regards,
KoreaJon
05-19-2014, 07:54 PM
#40
Burning Brakes
Thread Starter
Regarding the "shimming" mentioned previously, I'm pretty sure the advise regarded not shimming the pump per se, rather to use the .0015 shims at several points between the crank and the pump, in order to ensure the alignment of the pump to the crank. (Of course the shim stock would be removed when the pump is tightened into place.)
Regards,
KoreaJon
Regards,
KoreaJon
Luckily another forum member pointed this out and stopped by with the Sac City alignment tool to help me get the pump properly aligned. Thanks, Phil (AZMotorhead)!
