
Roll bar and Sparco seats fab/install. PICS!!
 01-29-2013, 10:17 PM
#1

Hey folks here is my first project thread! I am rather new to the Corvette world but I have always had a thing for go-fast toys, mods and horsepower. I bought my car a couple years ago now and I have been slowly modding her out. I have been surfing this forum and been able to use a ton of great info from you all and now I thought I'd pass along some of the stuff I have been working on.
A little background:
I have always been a hands on DIY kind of guy and I work with metal for a living so I have some good experience. Plus, as I stated before I love modding stuff. I spent a good chunk of time helping a friend of mine fab up a roll cage for his formula drift car and after a little coaxing from him to manufacture my own rather than buy one I decided to make one for my C5!
I researched this thing to death and finally figured out the design and logistics of how I would do this. I knew it would be a bit tedious but I was ready to make the plunge and buy the material. After having completed most of the hard part I know there are about 846 things I would probably do differently to make things go smoother and a little faster but the patience will pay off in the end I am sure! I think my bill so far for the entire roll bar project is about 200 bucks. Not too shabby.
So here are a few pics of the project. Enjoy and feel free to ask any questions!
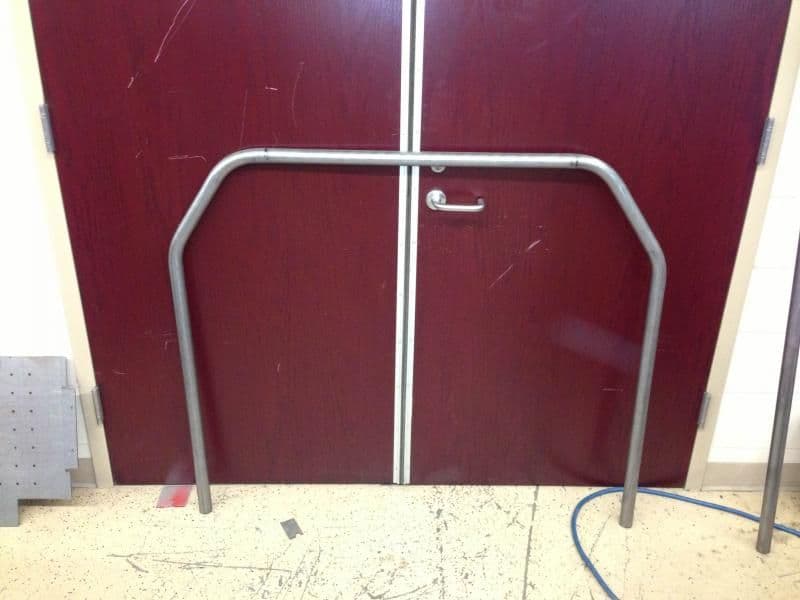
This is how I figured out where my bend points would be. Just tape a string to where you want the cage to start, then cut out a piece of cardboard the exact size of your tubing create intersections where you think the bends should be. Then just measure your lengths. Worked slick.

I measured up all the lengths of one side then just mirrored it for the other side. After drawing up everything on the computer we then used the program to generate angles and distances and such. Once we had that we sent those measurements to a laser cutter where we cut out an exact shape of the main hoop to make sure we got everything right. If you didn't have the ability to make such a device it's not the end of the world.....What's the old saying? Measure a few dozen times cut once? Er.....something?

This was before I decided that I wanted to mount it to the upper unibody behind the seats rather than drill through the floor of the car. Glad I went the route I did for sure!
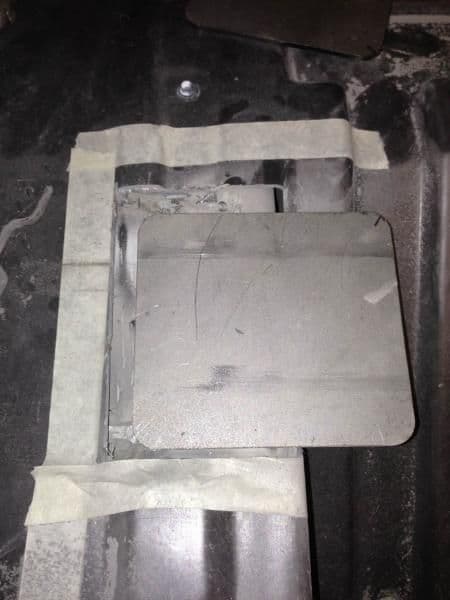
Here I ground away the glue to make room for the base plate that will get welded to the uni-body.

this is after we cut the access of the legs and bent them in to better contour the wall of the car

my buddies idea for the secondary base plate that the bar will get bolted to

cutting up a chunk of trailer frame that we had laying around. It worked great because it was .125 thick and had nice gussets on it.

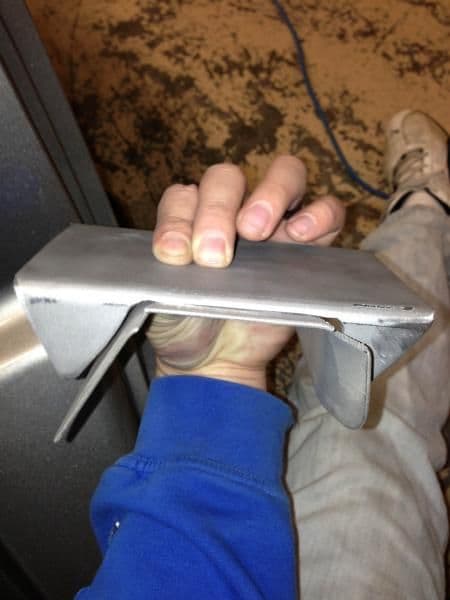
this is just a piece of steel we bent up to form to where the bar will be mounted


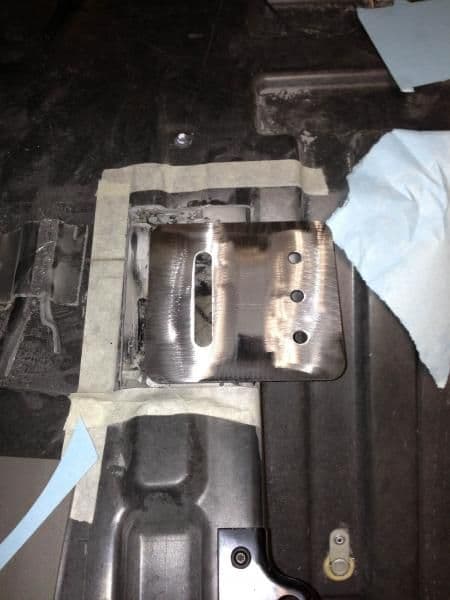
Here is the the bracket pre-weld. It turned out ok for getting plasma cut along a sharpie line haha. I will get the gaps filled in with weld and nobody will know.
Here is one bracket mocked up
gotta blast em to make it easy to weld and powder-coat later on

checking the levelness of the two brackets I made
This part took the most time......cutting material off the bottom of the bar to make sure that we got it as close to the roof as possible while making sure that we kept it level within .125 inches or less. I am **** and got it nearly dead nuts level once installed. Took forever though!

This part was probably the most nerve-wracking. I KNEW where the rear frame rails were and I KNEW all my measurements were right but I mean cmon I was cutting a chunk of the BODY out of my car......shivers..... haha

Made these plates for welding/mounting the rear support bars to the frame.
Made two plates like this (these will weld to the bottom of the rear brace arms).

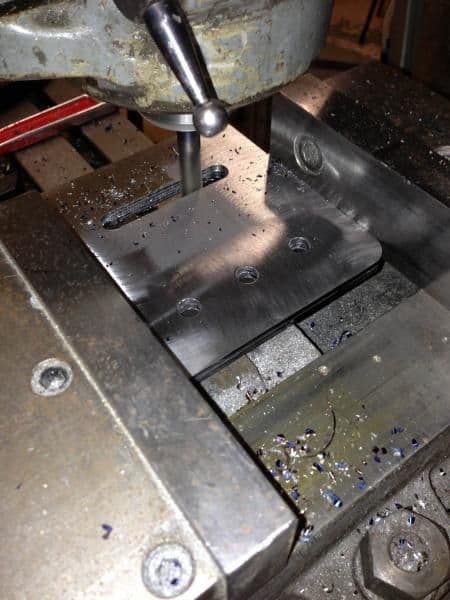
And made two plates like this. These get welded to the frame. I added a slot in them for more space to weld.
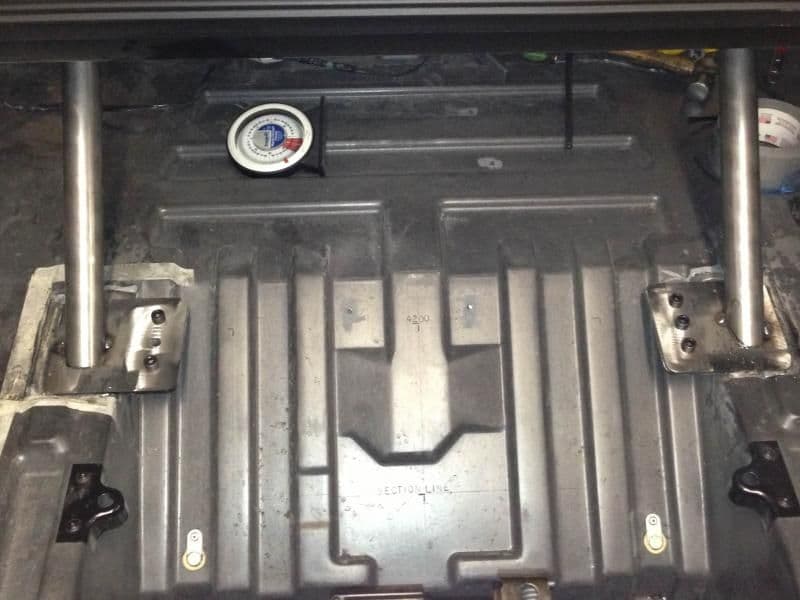
Base plates mocked up.
Here is the main hoop with the mounting plates tacked on to it. Forgot to rotate this pic....oops!
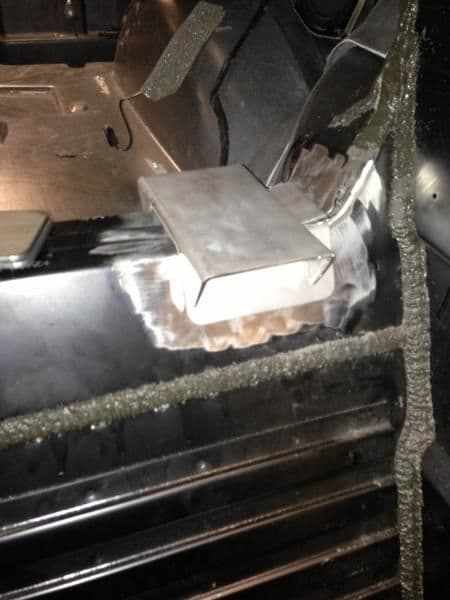
Here is one of the rear brace plates welded in......Had to go slow so we didnt start the body on fire! The slag buffed off real nice and it looks good.

Better pic of the bar tacked to the mounting plate

Used fire blankets to drape on everything to keep sparks from landing on the shiny stuff.....

mocking up the rear support bars

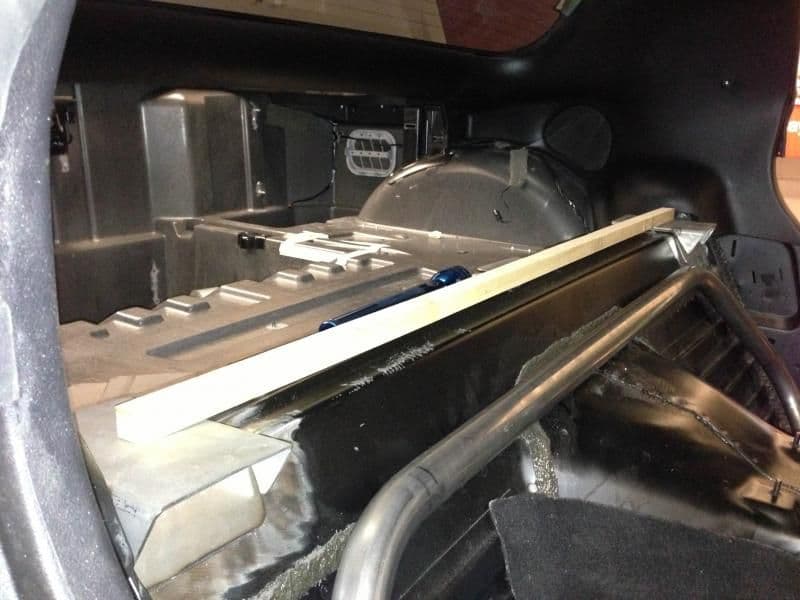
This cross member worked out beautifully because it ended up being the perfect height per NHRA regulations for where my harness will be mounted.

Harbor Freight special! 40 bucks for this notcher and 12 bucks for the hole saw. It.....worked.....wellish.

Here is a pic of the rear braces tacked to the top plate and bolted to the bottom plate. I would like to have at least two more bolts on there for a little more distribution of the bolting pressure but I haven't figured out exactly what I am going to do yet.
The rear cross member.

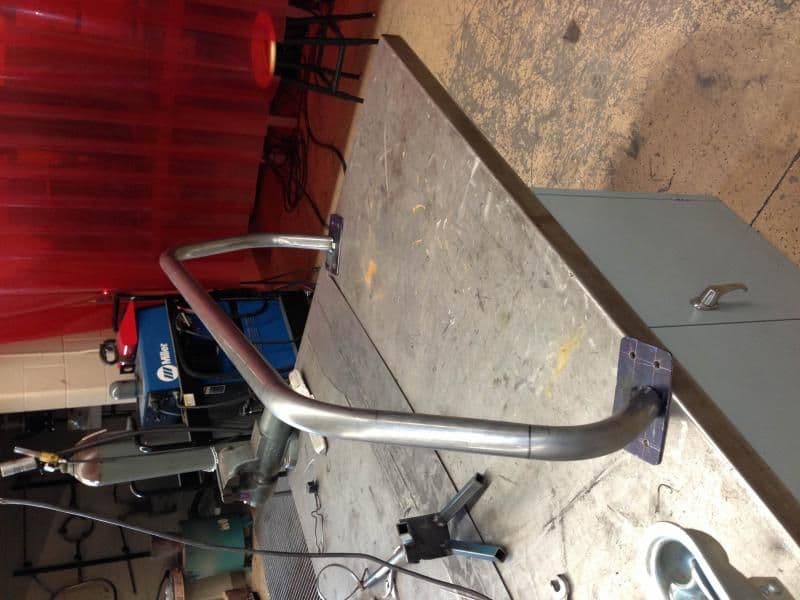
This is essentially what it is going to look like! I will be adding more to it later but I wanted to get these pics up now so I don't have a million pics to post later!

A little background:
I have always been a hands on DIY kind of guy and I work with metal for a living so I have some good experience. Plus, as I stated before I love modding stuff. I spent a good chunk of time helping a friend of mine fab up a roll cage for his formula drift car and after a little coaxing from him to manufacture my own rather than buy one I decided to make one for my C5!
I researched this thing to death and finally figured out the design and logistics of how I would do this. I knew it would be a bit tedious but I was ready to make the plunge and buy the material. After having completed most of the hard part I know there are about 846 things I would probably do differently to make things go smoother and a little faster but the patience will pay off in the end I am sure! I think my bill so far for the entire roll bar project is about 200 bucks. Not too shabby.
So here are a few pics of the project. Enjoy and feel free to ask any questions!
This is how I figured out where my bend points would be. Just tape a string to where you want the cage to start, then cut out a piece of cardboard the exact size of your tubing create intersections where you think the bends should be. Then just measure your lengths. Worked slick.
I measured up all the lengths of one side then just mirrored it for the other side. After drawing up everything on the computer we then used the program to generate angles and distances and such. Once we had that we sent those measurements to a laser cutter where we cut out an exact shape of the main hoop to make sure we got everything right. If you didn't have the ability to make such a device it's not the end of the world.....What's the old saying? Measure a few dozen times cut once? Er.....something?
This was before I decided that I wanted to mount it to the upper unibody behind the seats rather than drill through the floor of the car. Glad I went the route I did for sure!
Here I ground away the glue to make room for the base plate that will get welded to the uni-body.
this is after we cut the access of the legs and bent them in to better contour the wall of the car
my buddies idea for the secondary base plate that the bar will get bolted to
cutting up a chunk of trailer frame that we had laying around. It worked great because it was .125 thick and had nice gussets on it.
this is just a piece of steel we bent up to form to where the bar will be mounted
Here is the the bracket pre-weld. It turned out ok for getting plasma cut along a sharpie line haha. I will get the gaps filled in with weld and nobody will know.
Here is one bracket mocked up
gotta blast em to make it easy to weld and powder-coat later on
checking the levelness of the two brackets I made
This part took the most time......cutting material off the bottom of the bar to make sure that we got it as close to the roof as possible while making sure that we kept it level within .125 inches or less. I am **** and got it nearly dead nuts level once installed. Took forever though!
This part was probably the most nerve-wracking. I KNEW where the rear frame rails were and I KNEW all my measurements were right but I mean cmon I was cutting a chunk of the BODY out of my car......shivers..... haha
Made these plates for welding/mounting the rear support bars to the frame.
Made two plates like this (these will weld to the bottom of the rear brace arms).
And made two plates like this. These get welded to the frame. I added a slot in them for more space to weld.
Base plates mocked up.
Here is the main hoop with the mounting plates tacked on to it. Forgot to rotate this pic....oops!
Here is one of the rear brace plates welded in......Had to go slow so we didnt start the body on fire! The slag buffed off real nice and it looks good.
Better pic of the bar tacked to the mounting plate
Used fire blankets to drape on everything to keep sparks from landing on the shiny stuff.....
mocking up the rear support bars
This cross member worked out beautifully because it ended up being the perfect height per NHRA regulations for where my harness will be mounted.
Harbor Freight special! 40 bucks for this notcher and 12 bucks for the hole saw. It.....worked.....wellish.
Here is a pic of the rear braces tacked to the top plate and bolted to the bottom plate. I would like to have at least two more bolts on there for a little more distribution of the bolting pressure but I haven't figured out exactly what I am going to do yet.
The rear cross member.
This is essentially what it is going to look like! I will be adding more to it later but I wanted to get these pics up now so I don't have a million pics to post later!


 01-29-2013, 11:00 PM
#4

 01-30-2013, 03:34 AM
#10
Safety Car

Hi,
Nice work!
Questions. Have you welded the main hoop mounts in yet? It was hard to tell in the photos. The metal up there is somewhat flimsy.
The fuel tank is probably within 1/2" or less in that area. And it's plastic. Did you have them removed?
Are you making this for drag racing? NHRA legal? If so, you may get hassled if you don't have 4 bolts holding your bar to the plates.
What are your plans for the door bar?
I bought the RSD bar. What a pain. NHRA tech told me the main hoop is too low. Although it could only possibly be 1/2" higher or it's through the roof.
And, the door bar mounts to the floor....which is balsa and fiberglass. How RSD can say that is NHRA legal is beyond me. The tech guy didn't look at that....luckily.
If you are doing NHRA legal, consult the rule pook on how high to mount the cross bar the belts attach to. Tech guy said I was illegal there as well....
Ron
 01-31-2013, 10:13 AM
#13
Le Mans Master

Member Since: Sep 2003
Location: Farmington CT
Posts: 6,125
Received 160 Likes
on
125 Posts
Cruise-In VII Veteran

I'd say pull the tanks and cut out aft seat wall, make some plates so you get weld the bar at a 90 to the actual frame. This is how we do it.
It's a lot of work, but the sheer premise of a cage is something that 'should' be on the top of the priority list.
NOTE: the top channel you are welding to is also the crossover tube for the fuel tanks
It's a lot of work, but the sheer premise of a cage is something that 'should' be on the top of the priority list.
NOTE: the top channel you are welding to is also the crossover tube for the fuel tanks
01-31-2013, 02:31 PM
#14
Hi,
Nice work!
Questions. Have you welded the main hoop mounts in yet? It was hard to tell in the photos. The metal up there is somewhat flimsy.
The fuel tank is probably within 1/2" or less in that area. And it's plastic. Did you have them removed?
Are you making this for drag racing? NHRA legal? If so, you may get hassled if you don't have 4 bolts holding your bar to the plates.
What are your plans for the door bar?
I bought the RSD bar. What a pain. NHRA tech told me the main hoop is too low. Although it could only possibly be 1/2" higher or it's through the roof.
And, the door bar mounts to the floor....which is balsa and fiberglass. How RSD can say that is NHRA legal is beyond me. The tech guy didn't look at that....luckily.
If you are doing NHRA legal, consult the rule pook on how high to mount the cross bar the belts attach to. Tech guy said I was illegal there as well....
Ron
Nice work!
Questions. Have you welded the main hoop mounts in yet? It was hard to tell in the photos. The metal up there is somewhat flimsy.
The fuel tank is probably within 1/2" or less in that area. And it's plastic. Did you have them removed?
Are you making this for drag racing? NHRA legal? If so, you may get hassled if you don't have 4 bolts holding your bar to the plates.
What are your plans for the door bar?
I bought the RSD bar. What a pain. NHRA tech told me the main hoop is too low. Although it could only possibly be 1/2" higher or it's through the roof.
And, the door bar mounts to the floor....which is balsa and fiberglass. How RSD can say that is NHRA legal is beyond me. The tech guy didn't look at that....luckily.
If you are doing NHRA legal, consult the rule pook on how high to mount the cross bar the belts attach to. Tech guy said I was illegal there as well....
Ron
Thanks for the questions!
Welding in the hoop mounts:
We ended up stuffing a fire proof blanket up there, went real slow and kept it cool. No problems.
Drag racing NHRA legal?:
It will see the occasional track day and once I reach my power goals I will need it anyway. Besides, I have the opportunity to do things like that so why not?
 As for there not being 4 bolts on the rear frame rail mounts, I am going to add at least one or two more as I had stated in my pic description. I had the three on the side because I knew the brace would not interfere with those bolts during mock-up/tacking the braces in. There will be more added later. I can still take the hoop in and out of the car and tweak things.
Door bar:
I have extra tubing that I will bend up and attach to the hoop. In a nutshell, NHRA says the door bar has to cross between my shoulder and elbow and then attach to the floor/frame. Attaching them to the floor is perfectly ok as long as they are plated.
Head clearance:
I know what you are saying about height clearance! We made sure that it is as close to the roof as possible. I cant even fit my pinky finger between the hoop and the roof!
I bought a sparco seat that sits lower than the stock seats which makes me (even though I am 6'1") "fit" according to the rules. My head ends up being the right distance away from the hoop, and the right distance below the hoop while wearing a helmet. It sure is close though! There are even angles that have to be factored in when fitting these babies.

Cross bar:
Again, because I bought the seat that I did I now sit lower and my cross bar (where the harness will be mounted) is in the exact right position per NHRA rules. I was very pleased by that. I just need to make a little hook/hoop system to which I will loop my harness through.
Unless I get a **** of an inspector that sees something that I missed I think I would pass inspection.
Like I said in my post, there are a few things I would probably do differently but overall I am pleased with everything thus far. This is my first cage/hoop that I have made for my own car and if I happen to have messed up to the point that I need to re-do something then so be it (although I think I did just fine). I love learning/doing things like this. Thanks again man!
01-31-2013, 02:34 PM
#15
01-31-2013, 02:39 PM
#16
I'd say pull the tanks and cut out aft seat wall, make some plates so you get weld the bar at a 90 to the actual frame. This is how we do it.
It's a lot of work, but the sheer premise of a cage is something that 'should' be on the top of the priority list.
NOTE: the top channel you are welding to is also the crossover tube for the fuel tanks
It's a lot of work, but the sheer premise of a cage is something that 'should' be on the top of the priority list.
NOTE: the top channel you are welding to is also the crossover tube for the fuel tanks
Thanks for the input man. I always appreciate input from people that have been-there-done-that.
01-31-2013, 02:39 PM
#17

