C5 Tech Corvette Tech/Performance: LS1 Corvette Technical Info, Internal Engine, External Engine, Tech Topics, Basic Tech, Maintenance, How to Remove & Replace
Sponsored by:
Sponsored by:

[PROCEDURE] - C5 Corvette HVAC Dim Display Fix

Thread Tools
 
Search this Thread
 
Old 07-13-2014, 05:38 PM
  #61  
GoldenFlame
Pro
 
GoldenFlame's Avatar
 
Member Since: Aug 2010
Location: Indiana
Posts: 507
Received 33 Likes on 24 Posts

Default

Just fixed mine today
Old 07-21-2014, 04:58 PM
  #62  
RonSSNova
Safety Car
 
RonSSNova's Avatar
 
Member Since: Aug 2011
Location: Portland OR
Posts: 4,245
Received 322 Likes on 263 Posts

Default

Did mine too. Was clear under the microscope that most of the solder joints were fractured. Mine had dimmed to invisible!"

Now on to the ign switch and inside temp sensor short to ground code.

I guess it's C5 electronics day....

Ron
Old 02-16-2015, 01:32 AM
  #63  
starsandstripes
Advanced
 
starsandstripes's Avatar
 
Member Since: Jan 2015
Posts: 71
Received 2 Likes on 1 Post
Default

I just bought my C5 Z06 last week and after paying the seller and picking up the keys, as I'm about to leave he tells me the HVAC doesn't work lol. I was pretty frustrated because I am new to corvette's so I thought he was screwing me over, but he said it was an easy fix so I took his word.

Glad to see that it was an easy fix after all. Took mine apart last night and it works just like new now. Thank you for taking the time to make a step by step guide, it really helped me out. Thank you.
Old 02-16-2015, 09:59 AM
  #64  
Toque
Tech Contributor
Thread Starter
 
Toque's Avatar
 
Member Since: Jan 2004
Location: Wylie TX --> Less is More, except under the hood !
Posts: 20,003
Received 179 Likes on 99 Posts

Default

Originally Posted by cottoncandyek
I just bought my C5 Z06 last week and after paying the seller and picking up the keys, as I'm about to leave he tells me the HVAC doesn't work lol. I was pretty frustrated because I am new to corvette's so I thought he was screwing me over, but he said it was an easy fix so I took his word.

Glad to see that it was an easy fix after all. Took mine apart last night and it works just like new now. Thank you for taking the time to make a step by step guide, it really helped me out. Thank you.
Glad it worked out for you !

Enjoy the new to you Z06 !

Toque
Old 02-17-2015, 08:36 PM
  #65  
Stainsy
Instructor
 
Stainsy's Avatar
 
Member Since: May 2014
Location: Clinton Ontario
Posts: 158
Likes: 0
Received 0 Likes on 0 Posts
Default

Originally Posted by Toque
Glad it worked out for you !

Enjoy the new to you Z06 !

Toque
Yes Toque, yet another member that has benefitted from your tutelage on the HVAC repair. It was one of the first things that I fixed on mine, along with blowing out the condenser and rad. cottoncandyek, if you haven't done the rad blowout, you may want to. Congrats on your purchase and best of luck!
Old 04-22-2015, 03:05 PM
  #66  
finnfjr
5th Gear
 
finnfjr's Avatar
 
Member Since: Jul 2012
Posts: 5
Received 0 Likes on 0 Posts

Default

Fixed mine today. Had three floaters but fixed them back into position.

Thanks for the advise, it really helped
Old 05-05-2015, 08:54 AM
  #67  
alyaub
3rd Gear
 
alyaub's Avatar
 
Member Since: Jun 2012
Posts: 3
Likes: 0
Received 0 Likes on 0 Posts
Default Great fix, thx!

I just performed this repair and it worked perfectly!!! Thank you for the advice. Total time about 1 1/2 hours for un-install, repair re-install. The display is as good as new!
Old 05-05-2015, 11:51 AM
  #68  
jimcork1
Drifting
 
jimcork1's Avatar
 
Member Since: Jan 2001
Location: Slidell La
Posts: 1,347
Received 3 Likes on 3 Posts

Default

Mine is dim I knew about this thread but forgot how it was done. Mine can still be seen but next time I pull the console I'll do mine.
Old 05-05-2015, 12:23 PM
  #69  
alyaub
3rd Gear
 
alyaub's Avatar
 
Member Since: Jun 2012
Posts: 3
Likes: 0
Received 0 Likes on 0 Posts
Default read the entire string

Originally Posted by jimcork1
Mine is dim I knew about this thread but forgot how it was done. Mine can still be seen but next time I pull the console I'll do mine.
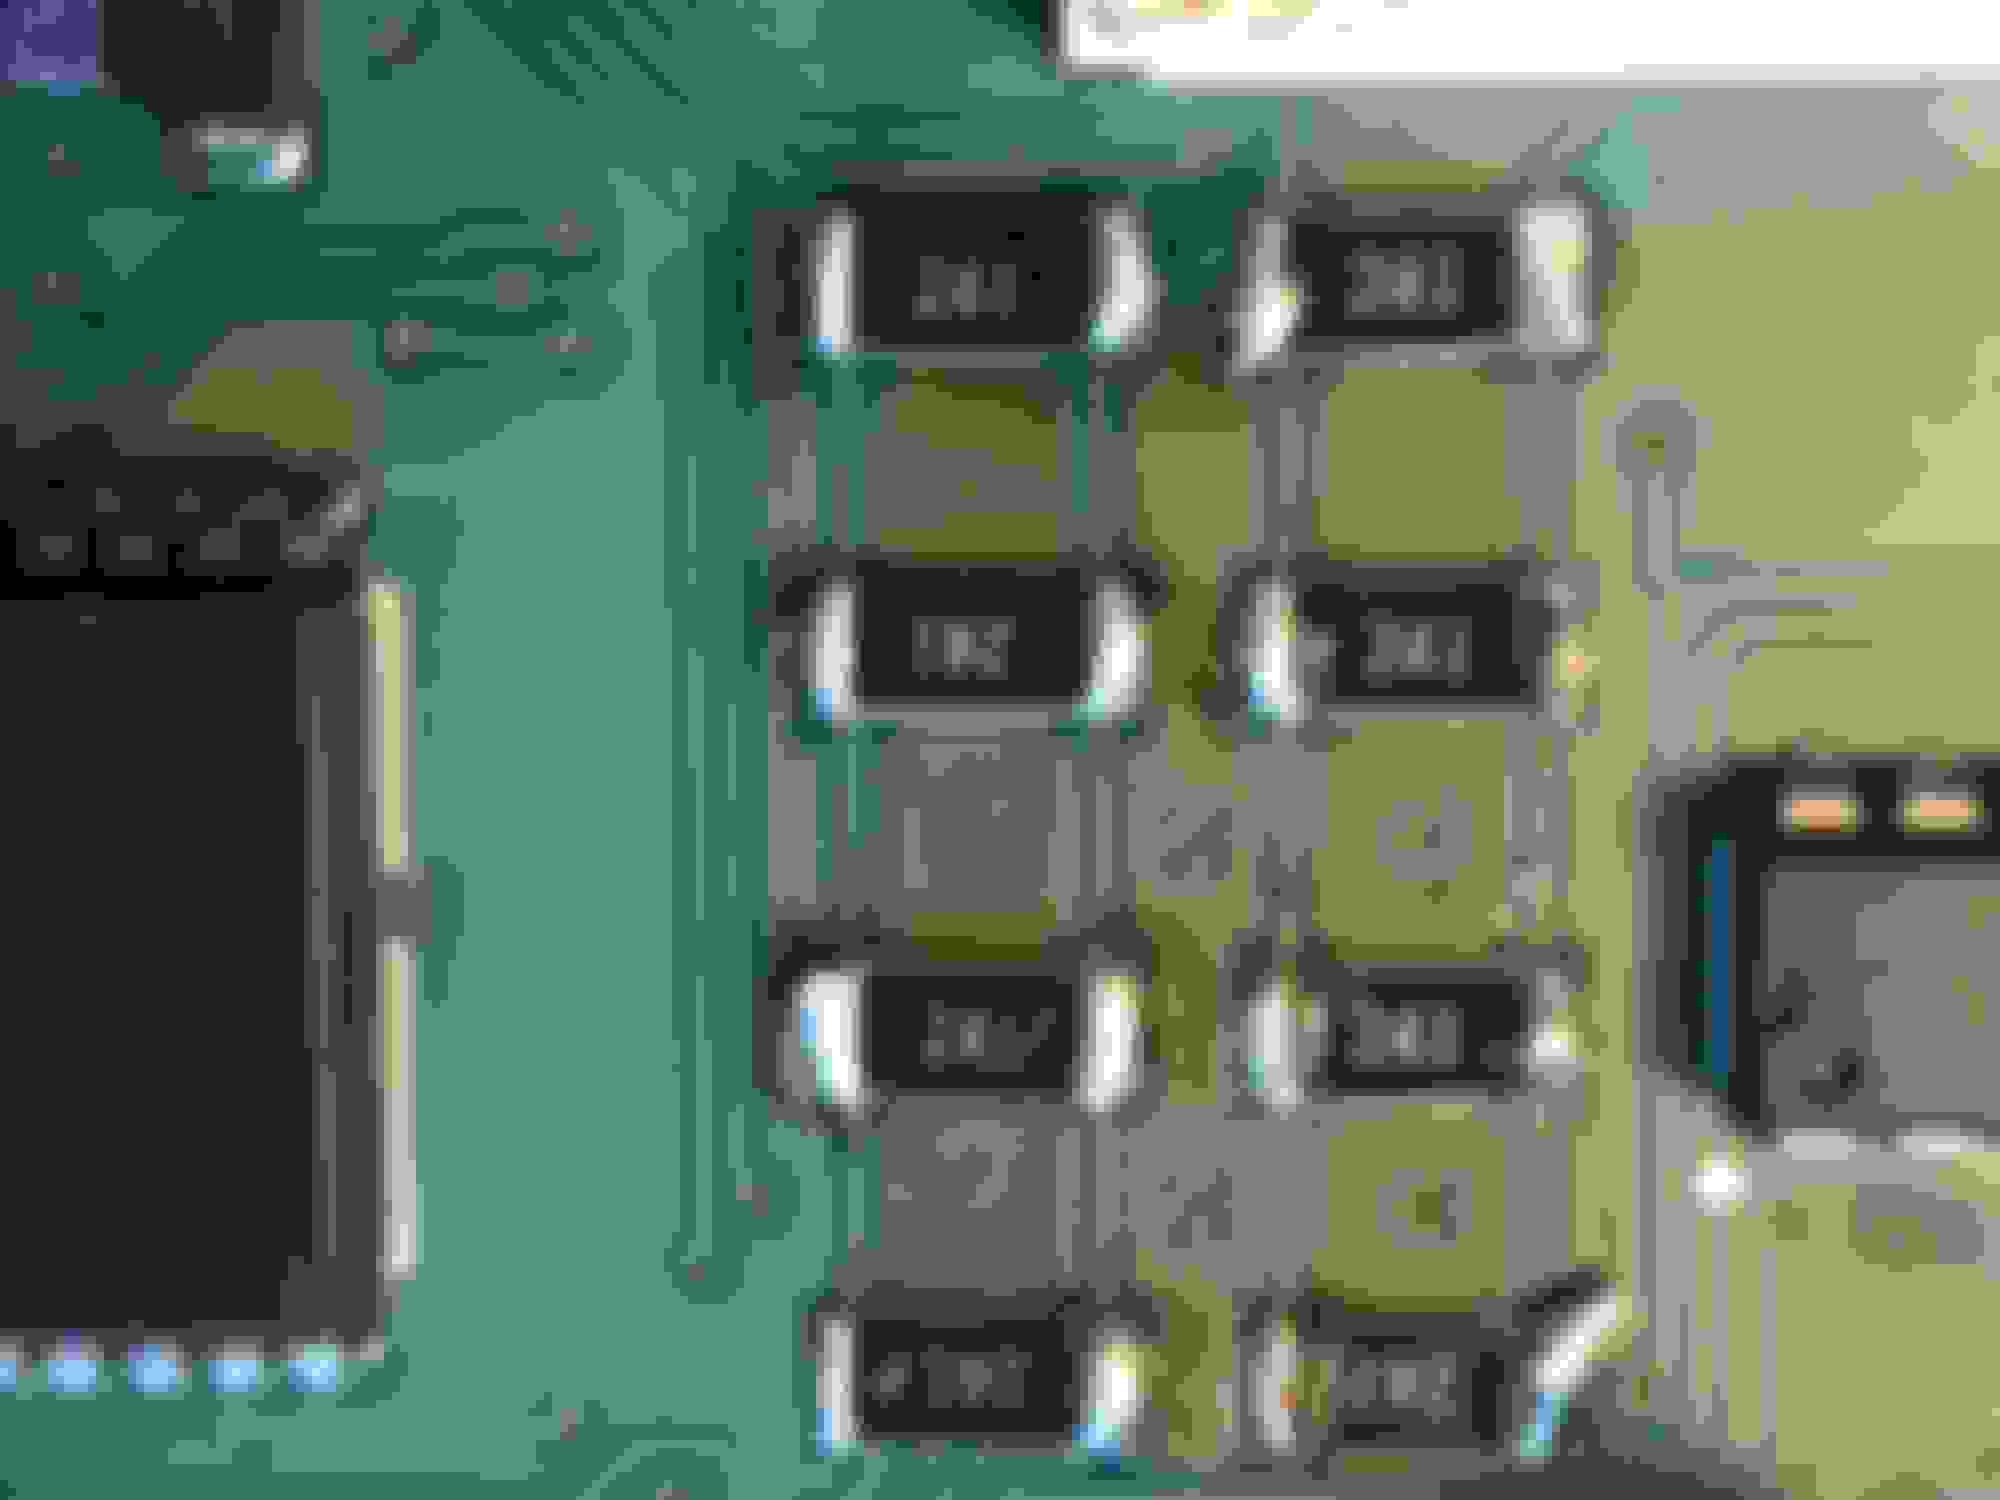
Make sure you note the earlier comment about the resistors being loose -- I found two that almost fell off the board and that while soldering the first side they easily slide -- try to use downward pressure on the soldered edge and not apply pressure to either side.
Old 05-05-2015, 09:15 PM
  #70  
Toque
Tech Contributor
Thread Starter
 
Toque's Avatar
 
Member Since: Jan 2004
Location: Wylie TX --> Less is More, except under the hood !
Posts: 20,003
Received 179 Likes on 99 Posts

Default

Originally Posted by alyaub
I just performed this repair and it worked perfectly!!! Thank you for the advice. Total time about 1 1/2 hours for un-install, repair re-install. The display is as good as new!
Glad to hear it worked for you !

Toque
Old 02-11-2016, 03:10 PM
  #71  
radar502
Safety Car
 
radar502's Avatar
 
Member Since: Dec 2009
Location: Birmingham Al
Posts: 3,940
Received 291 Likes on 224 Posts

Default

Thanks for the info fixed mine the temp works fine but have some bulbs that need to be replaced .. Anybody got info no how to blub replacement ..Thanks
Old 02-11-2016, 06:56 PM
  #72  
Toque
Tech Contributor
Thread Starter
 
Toque's Avatar
 
Member Since: Jan 2004
Location: Wylie TX --> Less is More, except under the hood !
Posts: 20,003
Received 179 Likes on 99 Posts

Default

Originally Posted by radar502
Thanks for the info fixed mine the temp works fine but have some bulbs that need to be replaced .. Anybody got info no how to blub replacement ..Thanks
Contact Tstar on here. He may have places to get stock bulbs.

Toque
Old 02-11-2016, 08:52 PM
  #73  
grantv
Le Mans Master
 
grantv's Avatar
 
Member Since: Sep 2014
Location: Kelowna BC
Posts: 5,280
Received 535 Likes on 491 Posts
Default

Originally Posted by Toque
Contact Tstar on here. He may have places to get stock bulbs.

Toque
Another success story... last weekend, took no time at all. One of these days I'll even put it back together.


Old 02-11-2016, 08:54 PM
  #74  
Toque
Tech Contributor
Thread Starter
 
Toque's Avatar
 
Member Since: Jan 2004
Location: Wylie TX --> Less is More, except under the hood !
Posts: 20,003
Received 179 Likes on 99 Posts

Default

Originally Posted by grantv
Another success story... last weekend, took no time at all. One of these days I'll even put it back together.


Congrats!
Its brighter than your radio now. Haha

Toque
Old 02-11-2016, 09:19 PM
  #75  
grantv
Le Mans Master
 
grantv's Avatar
 
Member Since: Sep 2014
Location: Kelowna BC
Posts: 5,280
Received 535 Likes on 491 Posts
Default

Originally Posted by Toque
Congrats!
Its brighter than your radio now. Haha

Toque
Yeah I know! WTH?
Love your site BTW, will be referring to it soon...
Old 02-11-2016, 09:28 PM
  #76  
Toque
Tech Contributor
Thread Starter
 
Toque's Avatar
 
Member Since: Jan 2004
Location: Wylie TX --> Less is More, except under the hood !
Posts: 20,003
Received 179 Likes on 99 Posts

Default

Originally Posted by grantv
Yeah I know! WTH?
Love your site BTW, will be referring to it soon...
Thanks. Glad you find it useful. 8-)

Toque
Old 02-12-2016, 12:02 AM
  #77  
radar502
Safety Car
 
radar502's Avatar
 
Member Since: Dec 2009
Location: Birmingham Al
Posts: 3,940
Received 291 Likes on 224 Posts

Default

Thanks for all the info ,I fixed my temp light the other day and it works great ,I may send it off to have the cool blue blubs in stalled .. Thanks
Old 10-14-2019, 11:07 AM
  #78  
Thera p
Racer
 
Thera p's Avatar
 
Member Since: Mar 2019
Posts: 355
Received 170 Likes on 82 Posts
Default

So I bought a $10 soldering iron yesterday and tore into it today. And IT'S FIXED! Many, many thanks to all of you that contributed to this thread!!!! What an amazing bunch of talent and 'brothers' out there. Best regards to al!!!


Quick Reply: [PROCEDURE] - C5 Corvette HVAC Dim Display Fix


All times are GMT -4. The time now is 07:34 AM.