
Got an auto trans? Watch out for this gremlin...
 01-06-2013, 12:24 PM
#41
Tech Contributor
Thread Starter
Member Since: Aug 1999
Location: Should this thoughtful, valuable contribution meet with no acknowledgement or 'thanks' this post----
Posts: 16,382
Received 399 Likes
on
257 Posts


The following users liked this post:
James2000 (01-31-2016)
The following users liked this post:
James2000 (01-31-2016)
The following users liked this post:
James2000 (01-31-2016)
The following users liked this post:
James2000 (01-31-2016)
01-06-2013, 03:27 PM
#47


It doesn't seem to be of much concern considering the thread I started after reading yours. 
http://forums.corvetteforum.com/c5-g...post1582751549
(thanks for the pic)
http://forums.corvetteforum.com/c5-g...post1582751549
(thanks for the pic)
01-06-2013, 03:35 PM
#48
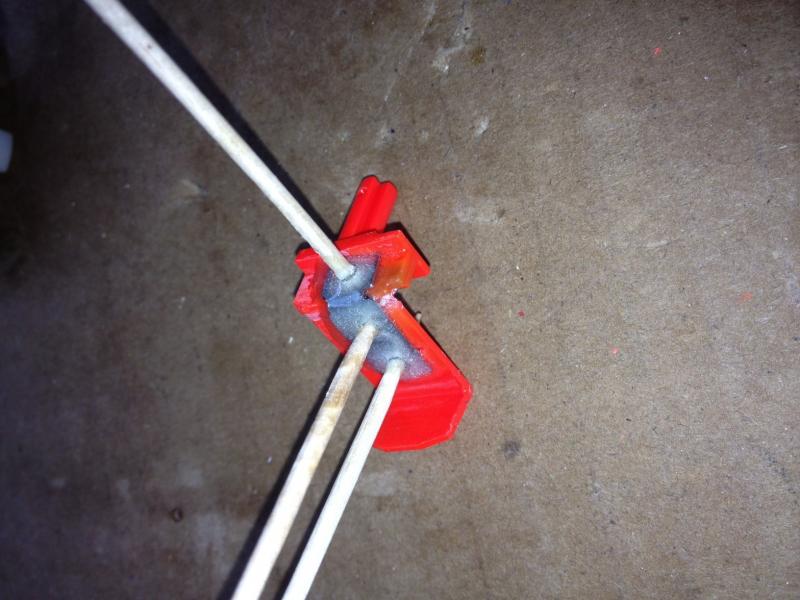
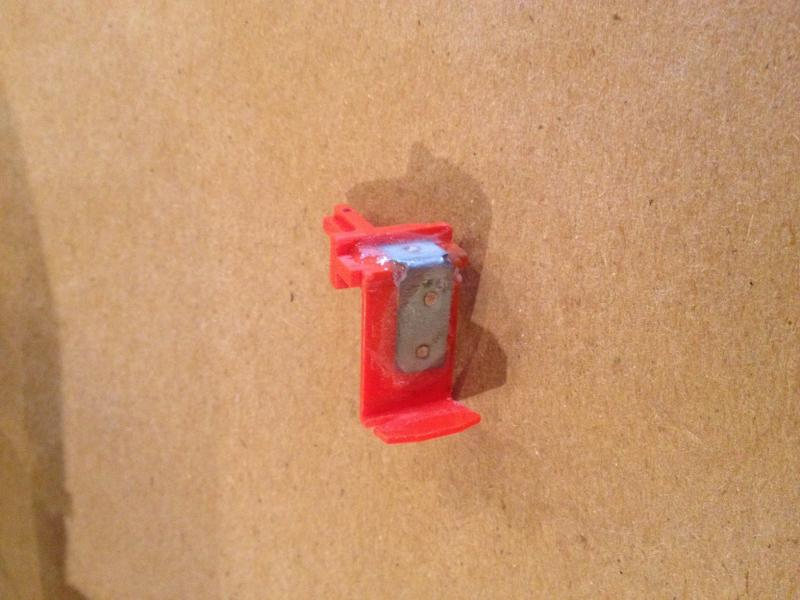
I've got to sand down the channel the indicator rides on before I put everything together. Adding the brace and epoxy increases the thickness on those areas. I used 1/64th metal to fabricate the fix.
01-06-2013, 05:01 PM
#49
Tech Contributor
Thread Starter
Member Since: Aug 1999
Location: Should this thoughtful, valuable contribution meet with no acknowledgement or 'thanks' this post----
Posts: 16,382
Received 399 Likes
on
257 Posts
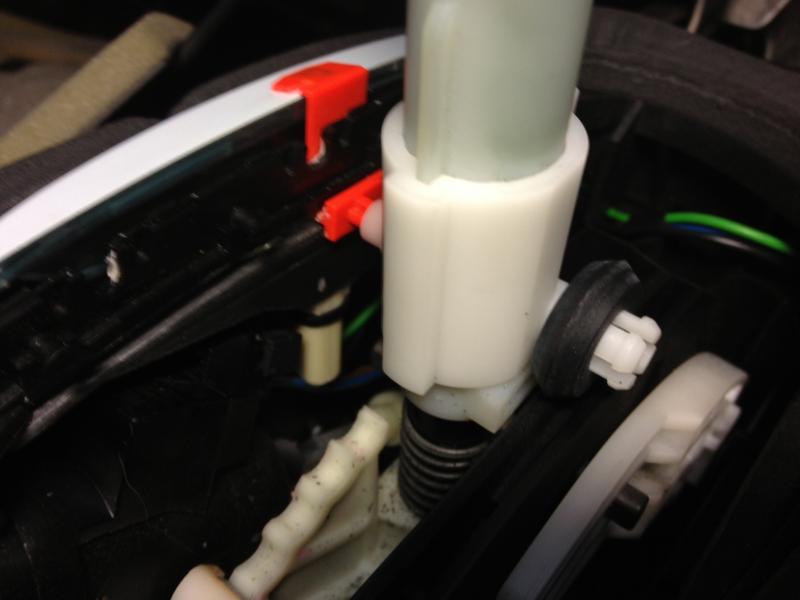
 that bugger has to slide freely in there once all is put back together...very tight tolerances....nice pics and a clever approach...maybe you can get this into the DIY vault pewter99 manages...talk to him.

 01-17-2013, 09:54 AM
#56
Drifting

Member Since: Nov 2011
Location: Summerville South Carolina
Posts: 1,401
Received 138 Likes
on
81 Posts
I saw all the ways to get a grip on it, but............
when I pull hard on the bulb, it looks like the socket it is in deforms. Is that possible? Could I break the socket and be SOL? Or can I pull on it as firmly as required to pull the bulb?
Quit laughing !! Every time I set out to fix something not broke, I break it !!!
Just FYI, the red piece looks just fine on mine, but then only 18K.
No need to disassemble console. Had the bulb exposed in a few minutes by using the suggested small screw driver and proceding carefully. Great input .
Last edited by David Shiel; 01-17-2013 at 09:57 AM.
01-17-2013, 02:09 PM
#57
CF "Young" Senior Member


So a while ago now I decided to take a look at my shifter to see what the story was, and it was just as cooked as something's was.
What I ended up doing was carefully disassembling the plastics (including the red tab) and grinding down the whole shifter backlight piece so that the just the top curved section was still there.
Then I took a 6" led strip I had laying around from another project and epoxied the thing (like crazy) to the back of the shifter strip, lining up the lights as best I could with the gear indicators.
Since the stock light housing was cooked to the point of disintigration, I snipped the wires and proceeded to wire in the seperate wiring hareness (two wires w/ connector) for the LED strip. This was probably the hardest part of the whole job due to space limitations within the shifter area.
The results, however, were well worth the effort. The entire shifter is incredibly bright now, such that you can clearly see the backlighting even during the day. It's like it should've been.
Sorry I don't have any photos of the work, it was very hands-on so I didn't have a free hand to take photos. If anyone's interested in doing this, I can photoshop up some reference stuff for you.
The following users liked this post:
CorvetteBrent (09-05-2018)
01-17-2013, 05:16 PM
#58
Tech Contributor
Thread Starter
Member Since: Aug 1999
Location: Should this thoughtful, valuable contribution meet with no acknowledgement or 'thanks' this post----
Posts: 16,382
Received 399 Likes
on
257 Posts
So a while ago now I decided to take a look at my shifter to see what the story was, and it was just as cooked as something's was.
What I ended up doing was carefully disassembling the plastics (including the red tab) and grinding down the whole shifter backlight piece so that the just the top curved section was still there.
Then I took a 6" led strip I had laying around from another project and epoxied the thing (like crazy) to the back of the shifter strip, lining up the lights as best I could with the gear indicators.
Since the stock light housing was cooked to the point of disintigration, I snipped the wires and proceeded to wire in the seperate wiring hareness (two wires w/ connector) for the LED strip. This was probably the hardest part of the whole job due to space limitations within the shifter area.
The results, however, were well worth the effort. The entire shifter is incredibly bright now, such that you can clearly see the backlighting even during the day. It's like it should've been.
Sorry I don't have any photos of the work, it was very hands-on so I didn't have a free hand to take photos. If anyone's interested in doing this, I can photoshop up some reference stuff for you.
What I ended up doing was carefully disassembling the plastics (including the red tab) and grinding down the whole shifter backlight piece so that the just the top curved section was still there.
Then I took a 6" led strip I had laying around from another project and epoxied the thing (like crazy) to the back of the shifter strip, lining up the lights as best I could with the gear indicators.
Since the stock light housing was cooked to the point of disintigration, I snipped the wires and proceeded to wire in the seperate wiring hareness (two wires w/ connector) for the LED strip. This was probably the hardest part of the whole job due to space limitations within the shifter area.
The results, however, were well worth the effort. The entire shifter is incredibly bright now, such that you can clearly see the backlighting even during the day. It's like it should've been.
Sorry I don't have any photos of the work, it was very hands-on so I didn't have a free hand to take photos. If anyone's interested in doing this, I can photoshop up some reference stuff for you.
 01-17-2013, 05:28 PM
#59
CF "Young" Senior Member
That was the other comment I was going to make regarding this little upgrade - before I put the LED's on the back of it, I didn't even realize the back light came whenever the car's on or the doors are opened, I thought it only came on when the headlights were on.
The following users liked this post:
CorvetteBrent (09-05-2018)
01-18-2013, 12:56 AM
#60
Racer


After reading this thread, I pried the PRNDL cover off in order to replace the 194 bulb with an LED. To my surprise - it came of easily and exposed the bulb. However, I could not get a good enough grip on the bulb to remove it from the socket. The bulb would move from side to side but wouldn't come loose. I tried pliers with the jaws taped, wrapped the bulb with rubber - nothing worked and I was afraid of breaking the bulb's glass envelope. I finally tried a piece of narrow, foam weather strip with adhesive on one side. I wrapped the bulb with the adhesive side against the glass envelope and got enough of a grip to pull the bulb. I hope this helps someone else remove the bulb without breaking the glass.
The following users liked this post:
CorvetteBrent (09-05-2018)