

 03-02-2015, 08:10 PM
Last edit by: IB Advertising
See related guides and technical advice from our community experts:
Browse all: Engine and Powertrain
- How to Relocate Coil Packs
Step by step instructions for do-it-yourselfers.
Browse all: Engine and Powertrain

How to relocate your Coil Packs! Many Pics!
12-25-2008, 12:13 PM
#1
Melting Slicks


Thread Starter
Member Since: Jul 2007
Location: Simpsonville SC
Posts: 2,939
Likes: 0
Received 4 Likes
on
4 Posts
St. Jude Donor '09-'10

I decided recently that I wanted to relocate my coil packs off of the valve covers. So, to do this, I had to do these preparations:
1. Locate the coil harness extensions. I found them at:
http://www.casperselectronics.com/st...oducts_id=1225
Here is what it looks like:

The Price: $44.95 x 2 = $88.90 (plus shipping of $10.95)
2. Next, I needed to get a new custom set of spark plug wires. I ordered these:
http://www.msdignition.com/product.a...15&terms=32079
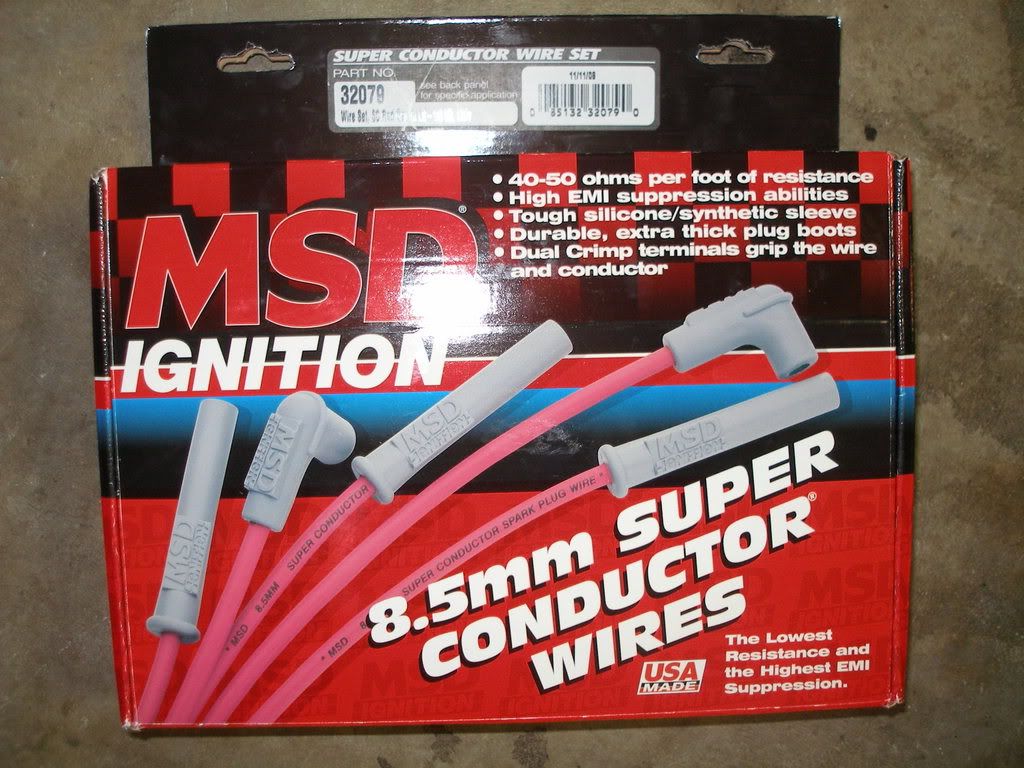
The Price: $142.90
3. I also needed a way to make ‘standoffs’ for the coil packs in their new location. So, I procured a �” x 6” pipe nipple at my local hardware store.
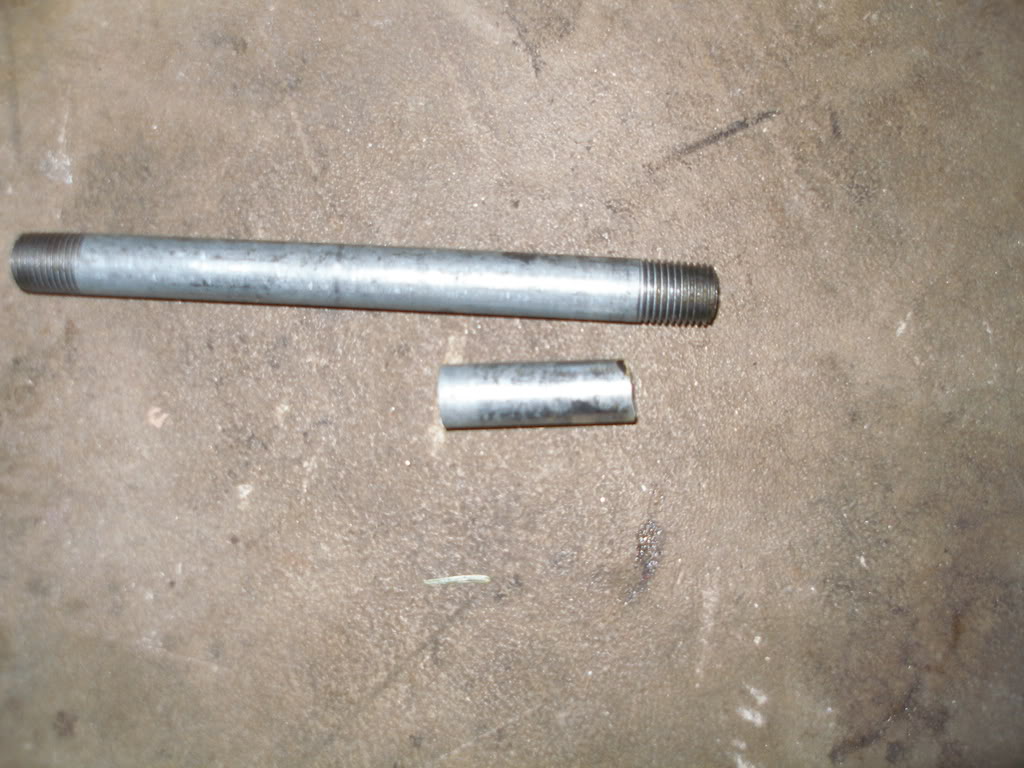
The Price: $2.50
4. Buy 4 bolts. I chose 7mm X 50mm long. Also get 8 flat washers and four lock washers.
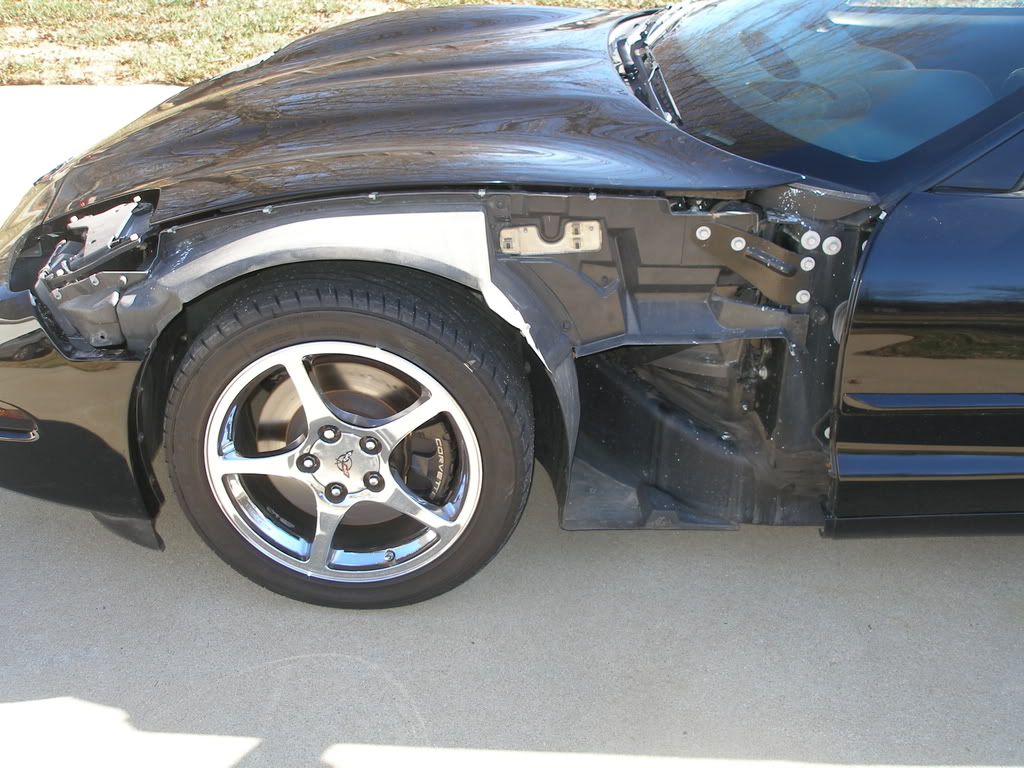
5. Take car to local body shop and have them remove both front fenders. This cost me $143.

Total cost for this project: $388.25
Procedure:
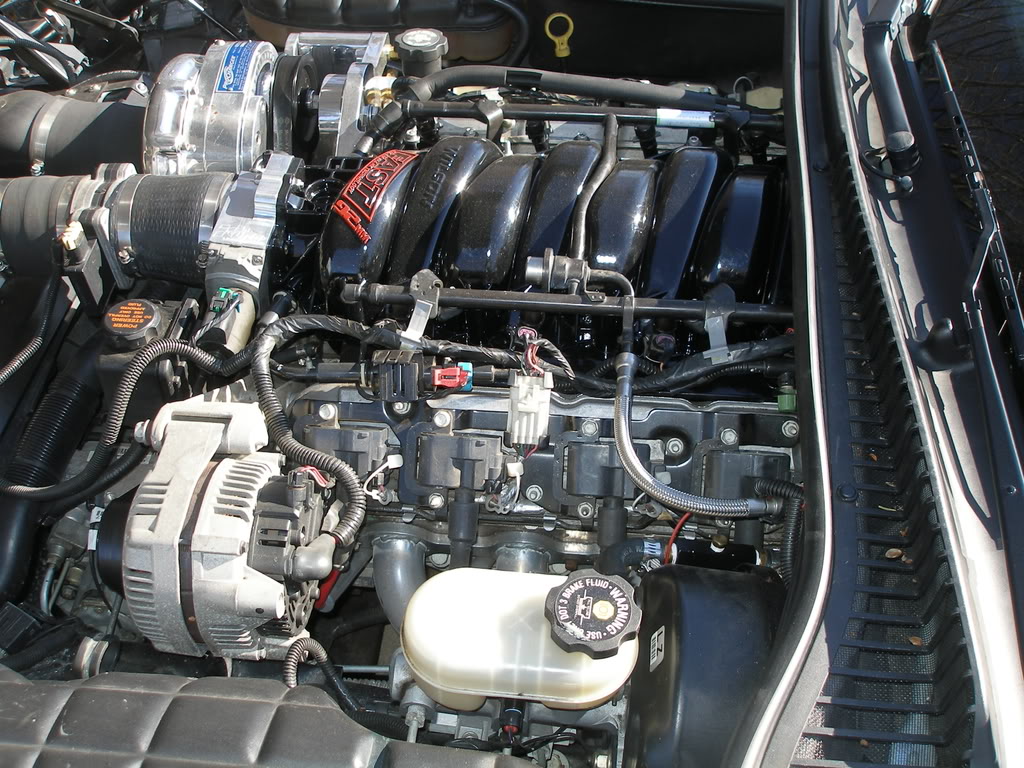
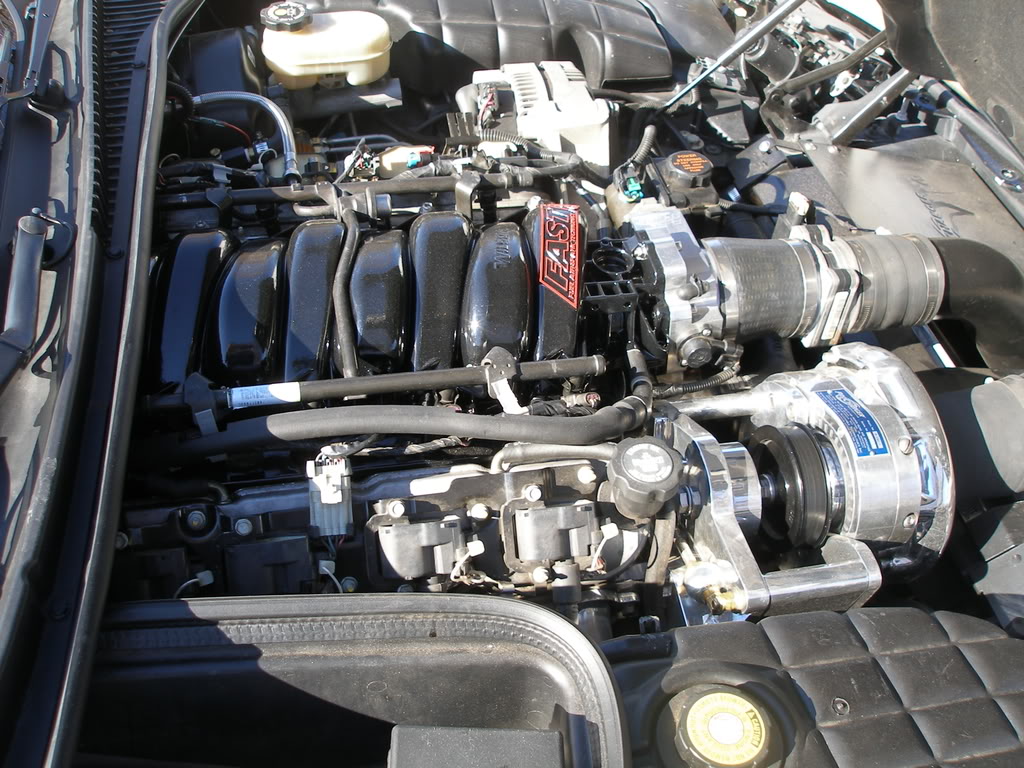
1. Here is where to start. The Driver’s side (with the fuel rail covers removed):
The passenger side:
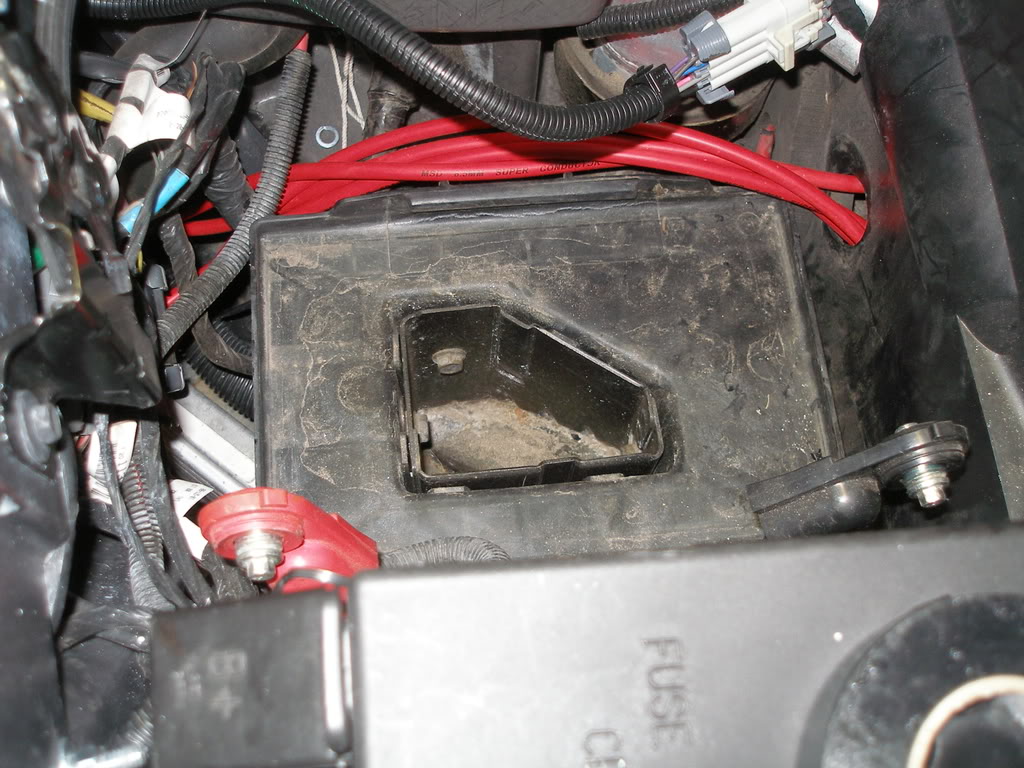
2. Remove the battery. Yes the whole battery. You will be running your passenger side wires under the battery compartment.
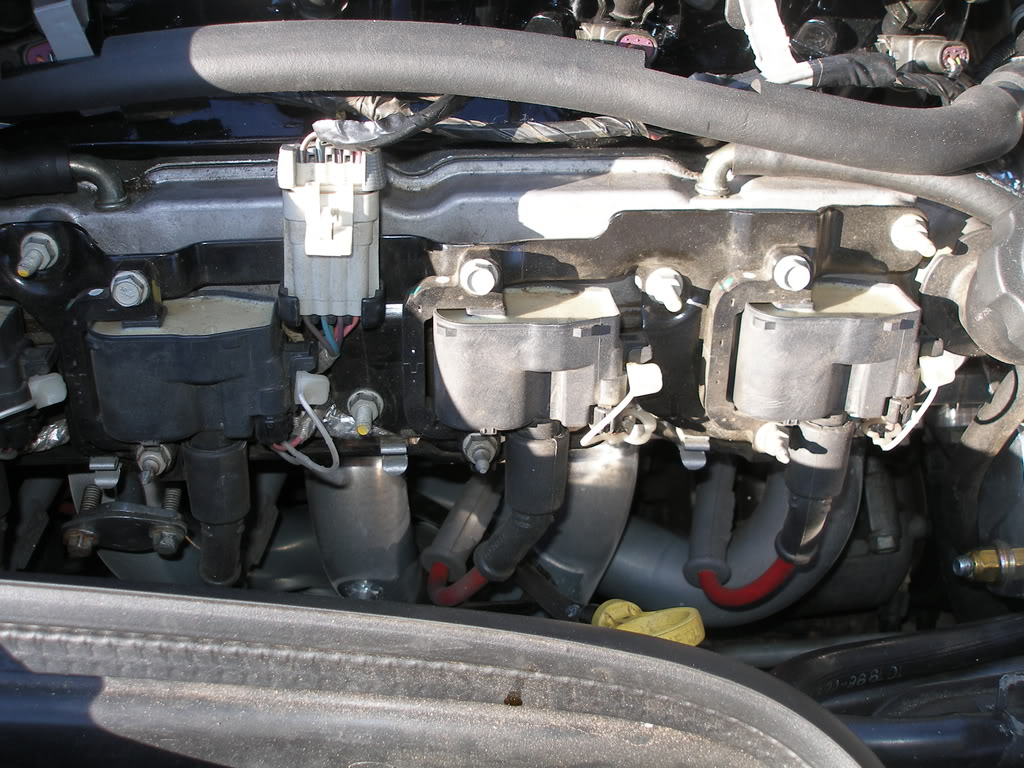
3. Unplug both coil-pack connectors. This is the large white connector in the center of the coil pack.
Before disconnect:
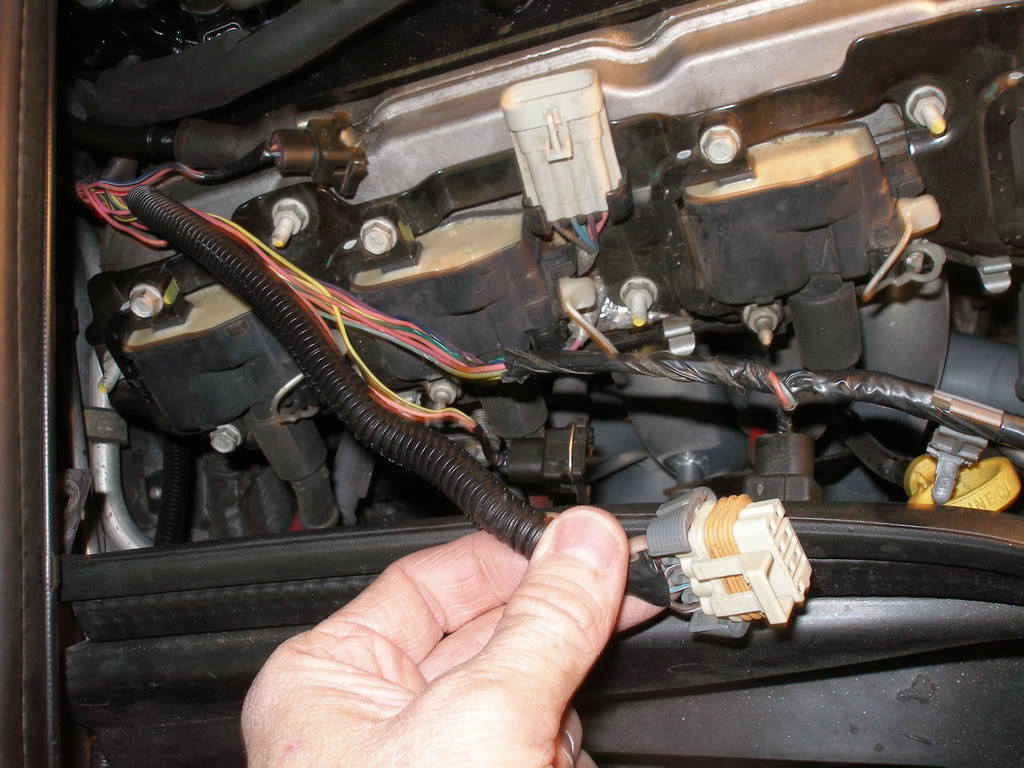
After Disconnecting:
4. Remove all eight spark plug wires. These will not be used after the relocation, so if they are fairly new, try to resell them; otherwise dispose of them.
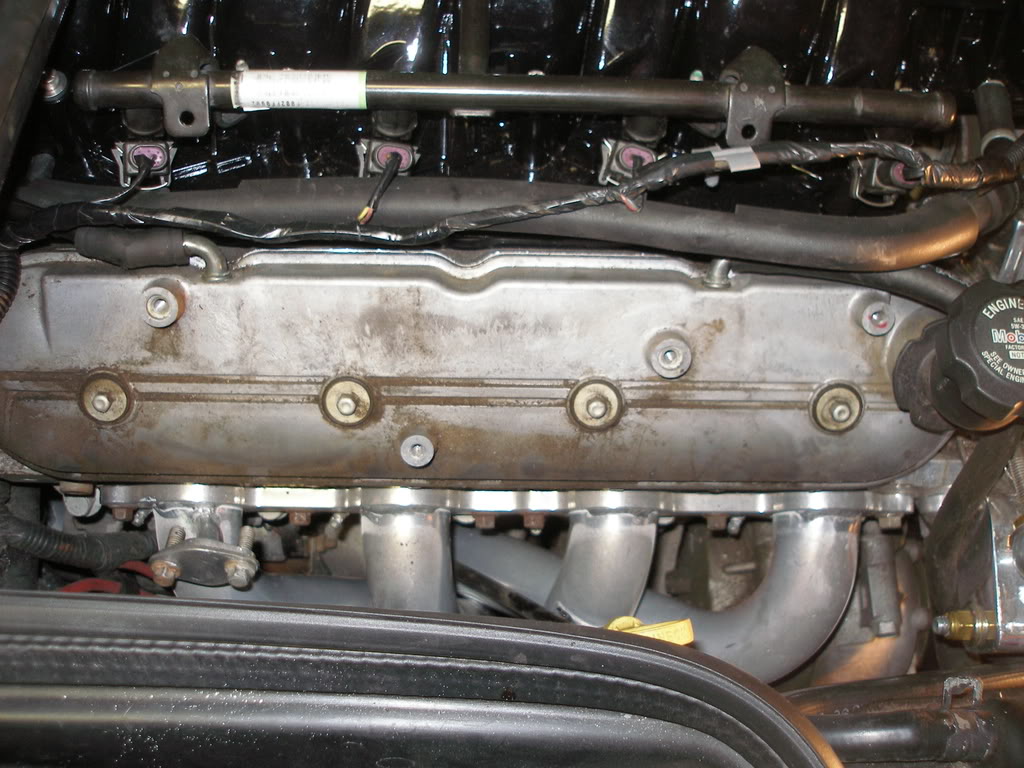
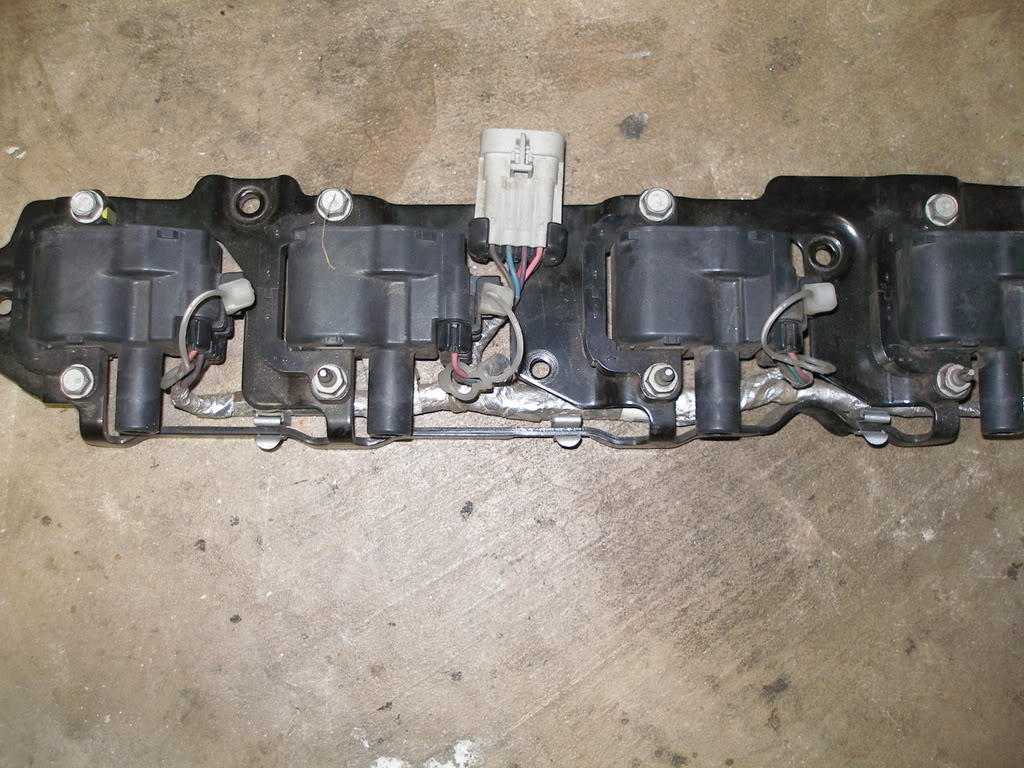
5. Unbolt the coil packs from the valve covers. There are five bolts in each one. This is what your valve cover will look like:
6. Here is the coil pack removed:
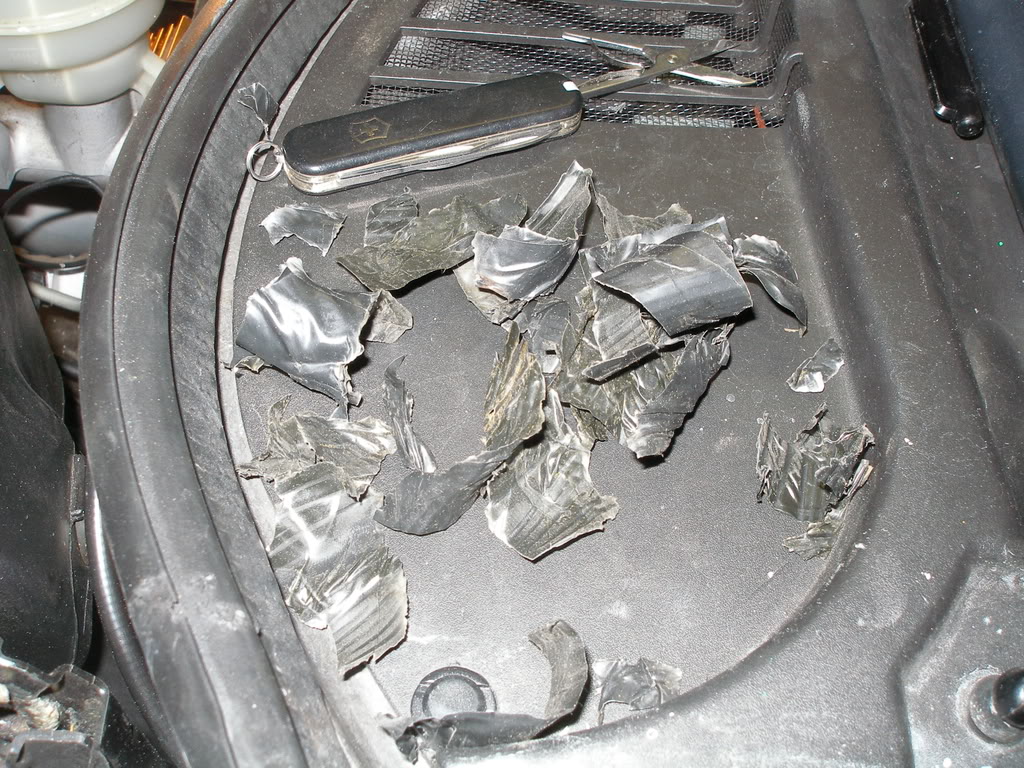
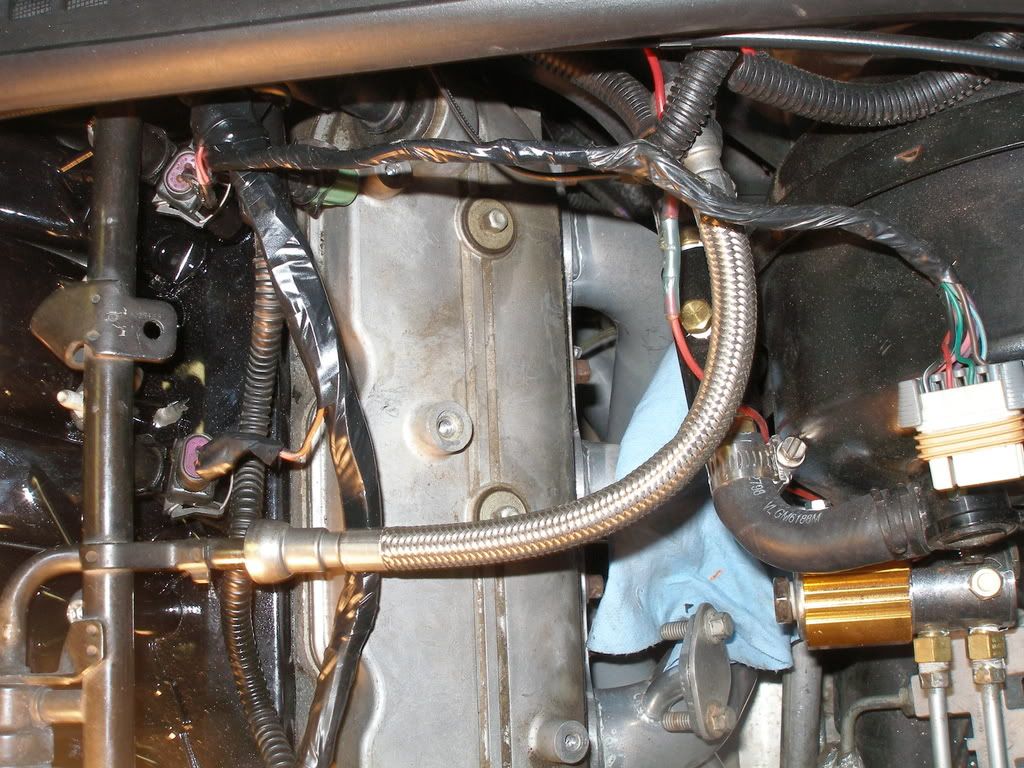
7. This step is to remove the electrical tape from the wiring harness where the coil connector is. It is wrapped with the fuel injector wires. Take your time, and carefully cut the tape and unwrap it back to the firewall. In this picture, notice I separated the coil connector and then covered the wires with wireloom:
Here is my pile of pieces of tape after I removed them. Also you will see I used the scissors in my Swiss army knife to cut the old tape:
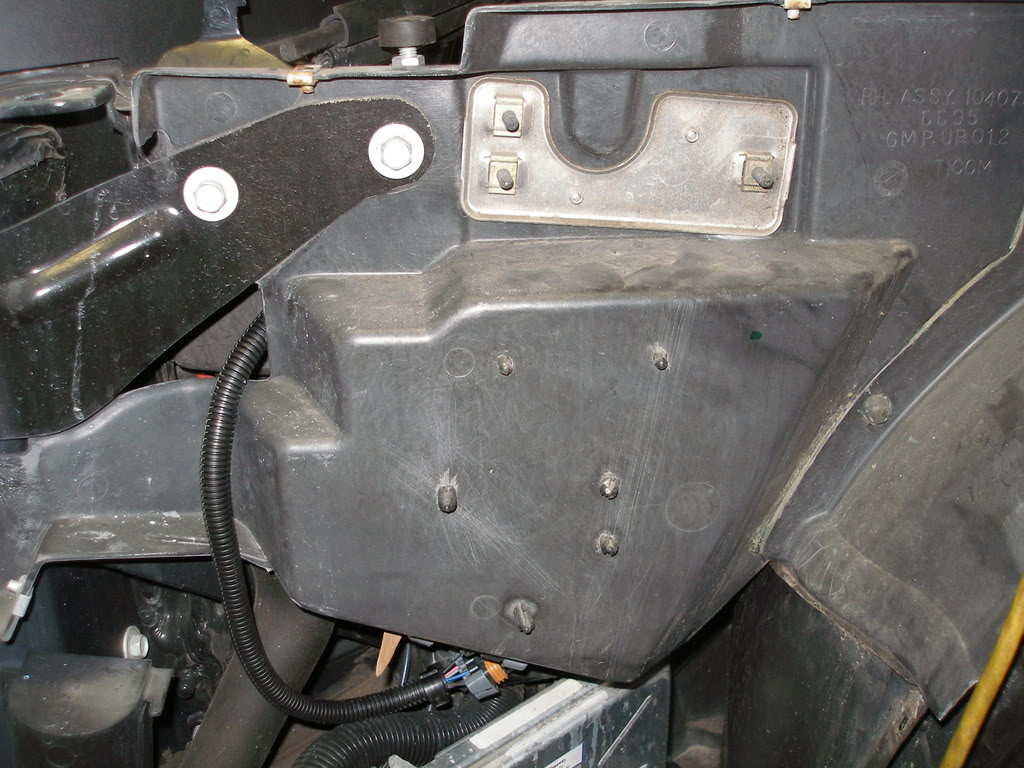
8. Next, locate where to mount the coil packs. For me, I am placing them inside the front fenders. Here is the passenger side area:
9. Wrap new electrical tape around the existing wires for the fuel injectors:
10. To mount the rails here, you will need some spacers to secure the rails. For me, I used the �” pipe, and held the coil pack where I wanted, and measured the distance for the spacer. Here is what I did:
11. Hold the coil pack up to the area, and mark at least two holes. Drill them out. I used a �” drill bit.
12. Mount the coil pack. Here is the completed pack: (sorry for the lack of lighting, but this is just to show the stand offs I made.)

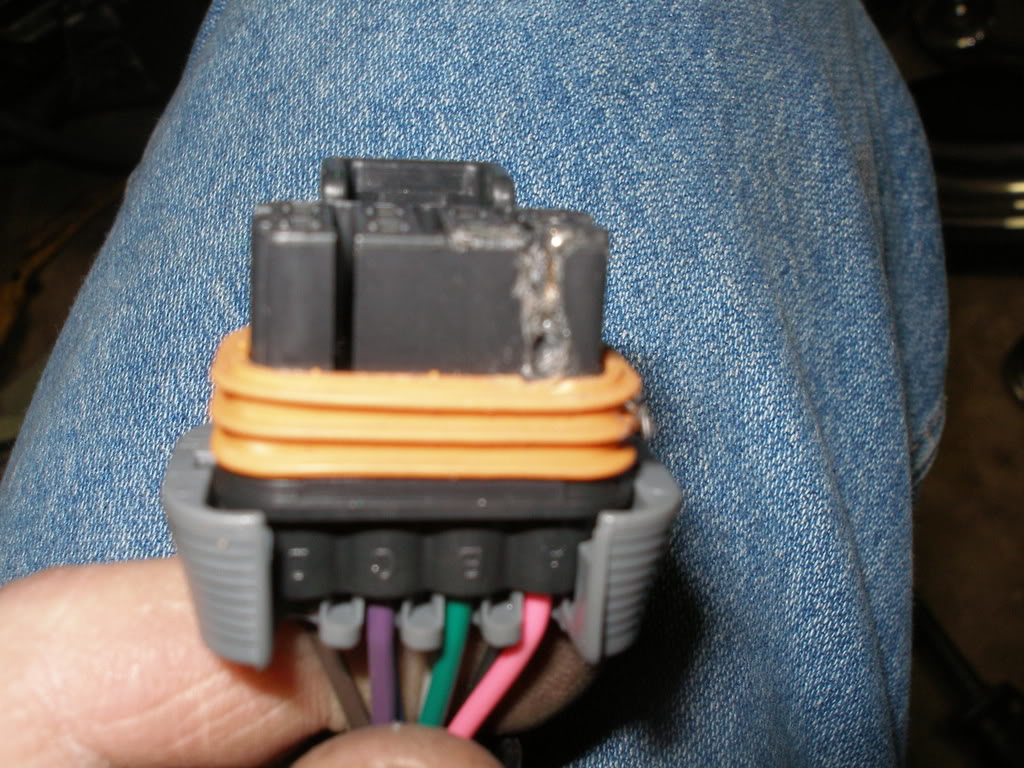
13. Plug the new extension cable into the existing coil plug that you separated. Stretch the extension behind the battery.
Unfortunately, the extension connector was not keyed correctly for my coil pack.
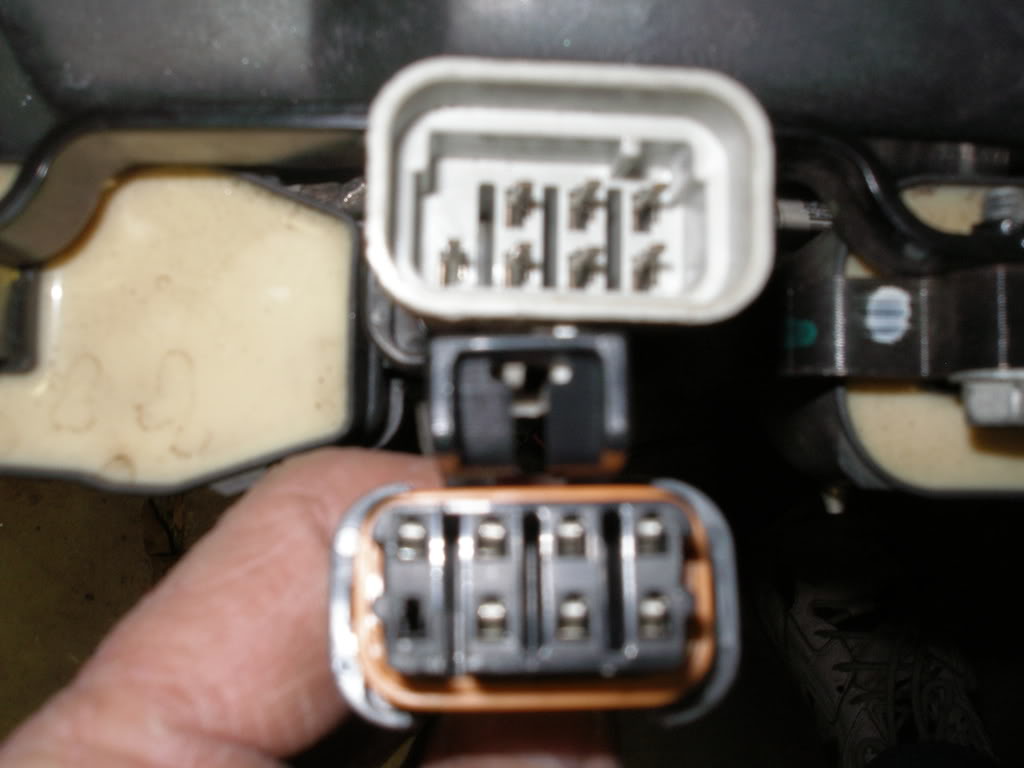
So, since I wanted to continue, I used a dremel tool to cut the correct slot in the connector:
14. Pull out the new spark plug wires. There are two pairs of each length. Separate the two sets so you won’t mix them up! Start with the shortest wire, and plug it into #8 spark plug. Route the wire low and into the new location. Use the included numbers to label this one #8. Do the same for #6, #4, and #2 on the passenger side. This is what mine looks like after routing:
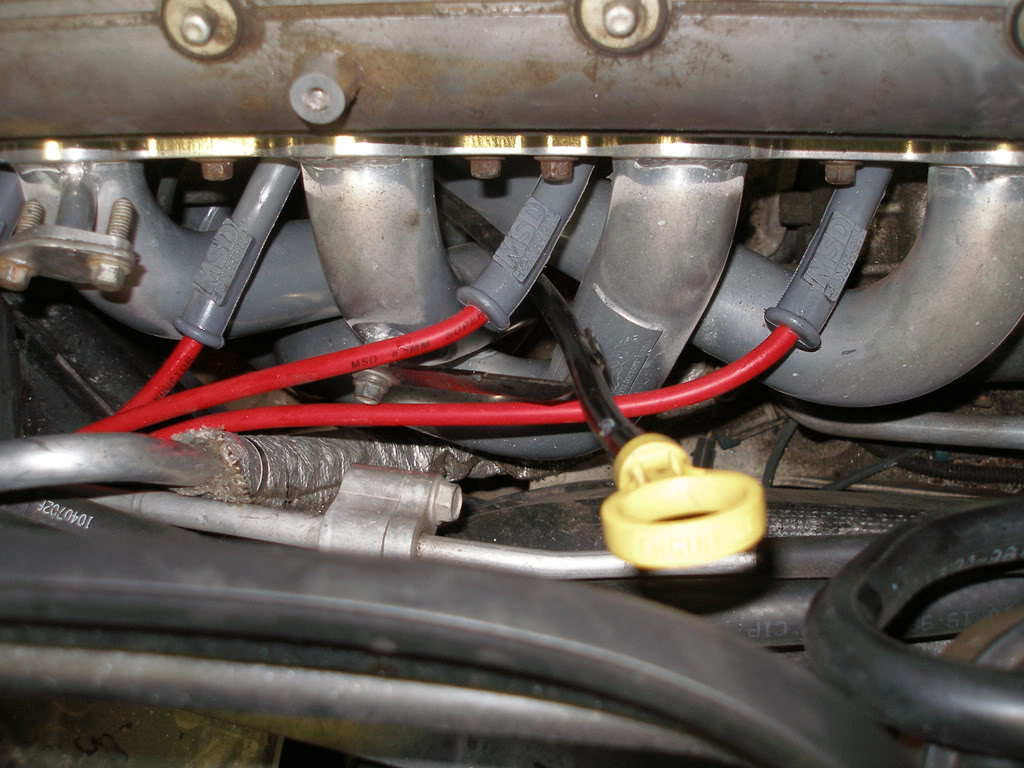

Make sure you use the dielectric grease in the boots!
15. Mount the coil pack on the driver’s side:
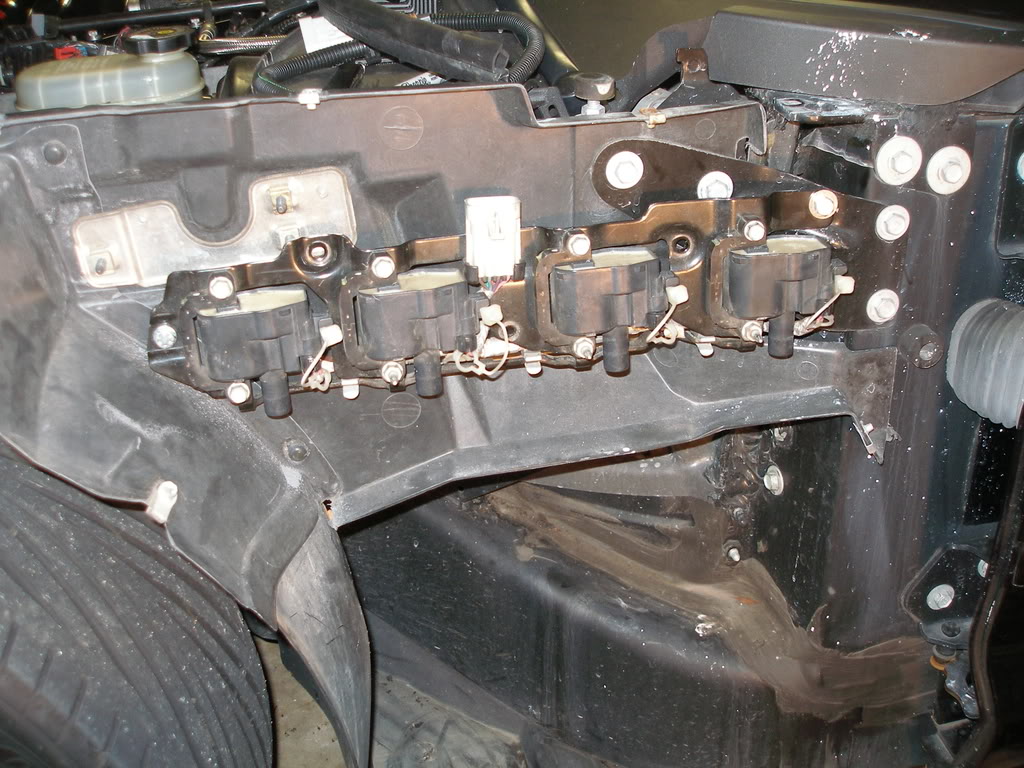
16. Separate the coil plug from the harness on this side too:
17. Route the second set of wires for this side, and make sure to label each as you go!
Continued on next message, due to a limit of 25 pictures per message….
1. Locate the coil harness extensions. I found them at:
http://www.casperselectronics.com/st...oducts_id=1225
Here is what it looks like:
The Price: $44.95 x 2 = $88.90 (plus shipping of $10.95)
2. Next, I needed to get a new custom set of spark plug wires. I ordered these:
http://www.msdignition.com/product.a...15&terms=32079
The Price: $142.90
3. I also needed a way to make ‘standoffs’ for the coil packs in their new location. So, I procured a �” x 6” pipe nipple at my local hardware store.
The Price: $2.50
4. Buy 4 bolts. I chose 7mm X 50mm long. Also get 8 flat washers and four lock washers.
5. Take car to local body shop and have them remove both front fenders. This cost me $143.
Total cost for this project: $388.25
Procedure:
1. Here is where to start. The Driver’s side (with the fuel rail covers removed):
The passenger side:
2. Remove the battery. Yes the whole battery. You will be running your passenger side wires under the battery compartment.
3. Unplug both coil-pack connectors. This is the large white connector in the center of the coil pack.
Before disconnect:
After Disconnecting:
4. Remove all eight spark plug wires. These will not be used after the relocation, so if they are fairly new, try to resell them; otherwise dispose of them.
5. Unbolt the coil packs from the valve covers. There are five bolts in each one. This is what your valve cover will look like:
6. Here is the coil pack removed:
7. This step is to remove the electrical tape from the wiring harness where the coil connector is. It is wrapped with the fuel injector wires. Take your time, and carefully cut the tape and unwrap it back to the firewall. In this picture, notice I separated the coil connector and then covered the wires with wireloom:
Here is my pile of pieces of tape after I removed them. Also you will see I used the scissors in my Swiss army knife to cut the old tape:
8. Next, locate where to mount the coil packs. For me, I am placing them inside the front fenders. Here is the passenger side area:
9. Wrap new electrical tape around the existing wires for the fuel injectors:
10. To mount the rails here, you will need some spacers to secure the rails. For me, I used the �” pipe, and held the coil pack where I wanted, and measured the distance for the spacer. Here is what I did:
11. Hold the coil pack up to the area, and mark at least two holes. Drill them out. I used a �” drill bit.
12. Mount the coil pack. Here is the completed pack: (sorry for the lack of lighting, but this is just to show the stand offs I made.)
13. Plug the new extension cable into the existing coil plug that you separated. Stretch the extension behind the battery.
Unfortunately, the extension connector was not keyed correctly for my coil pack.
So, since I wanted to continue, I used a dremel tool to cut the correct slot in the connector:
14. Pull out the new spark plug wires. There are two pairs of each length. Separate the two sets so you won’t mix them up! Start with the shortest wire, and plug it into #8 spark plug. Route the wire low and into the new location. Use the included numbers to label this one #8. Do the same for #6, #4, and #2 on the passenger side. This is what mine looks like after routing:
Make sure you use the dielectric grease in the boots!
15. Mount the coil pack on the driver’s side:
16. Separate the coil plug from the harness on this side too:
17. Route the second set of wires for this side, and make sure to label each as you go!
Continued on next message, due to a limit of 25 pictures per message….
Last edited by clif; 05-13-2009 at 10:30 AM. Reason: Casper changed their link!
 12-25-2008, 12:14 PM
#2
Melting Slicks
Thread Starter
Member Since: Jul 2007
Location: Simpsonville SC
Posts: 2,939
Likes: 0
Received 4 Likes
on
4 Posts
St. Jude Donor '09-'10
18. You must cut off the coil end of each wire, and install the included LS1 connectors. Slide the new boot on the wire. I had to grease up the cable to get this on:
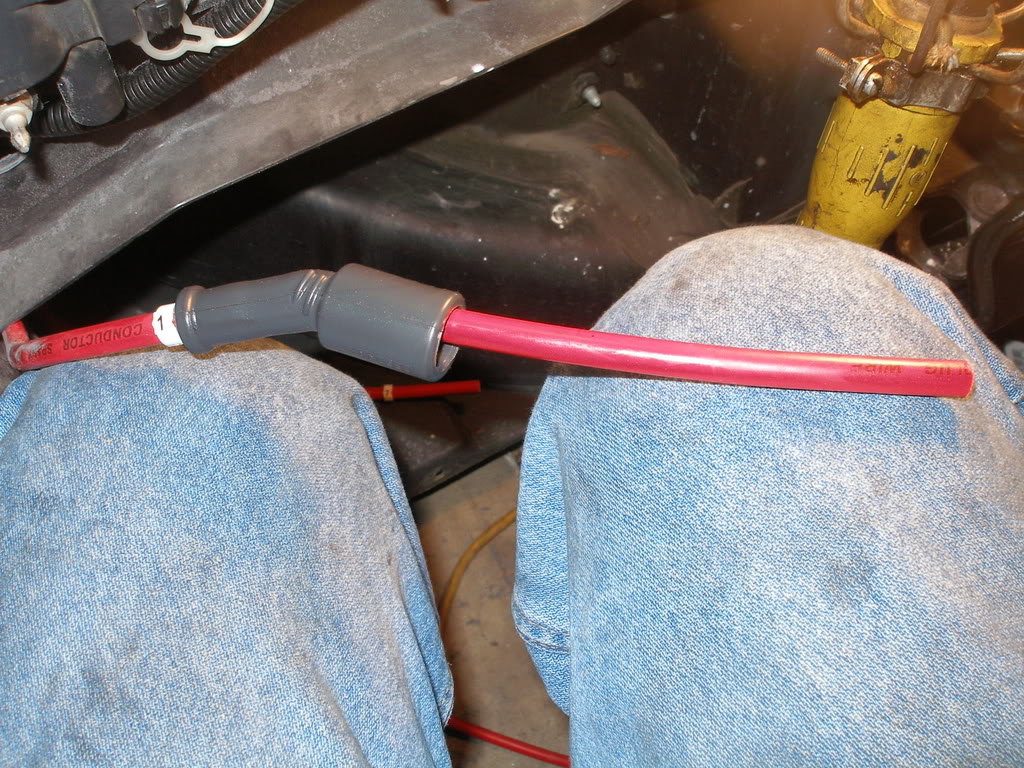
My wire kit was missing the stripper/crimper! So, I called MSD support. They told me I could strip the wires back 5/8” – �” and crimp with my crimpers. They will mail me the missing tool, but I won’t need it now!

Here is the connector. You have to bend the top tabs per the instructions:

Here it is, crimped in place:

Here is my routing on the Driver’s side:

Finally, here is the finished product on the driver’s side:

Finsihed Product:
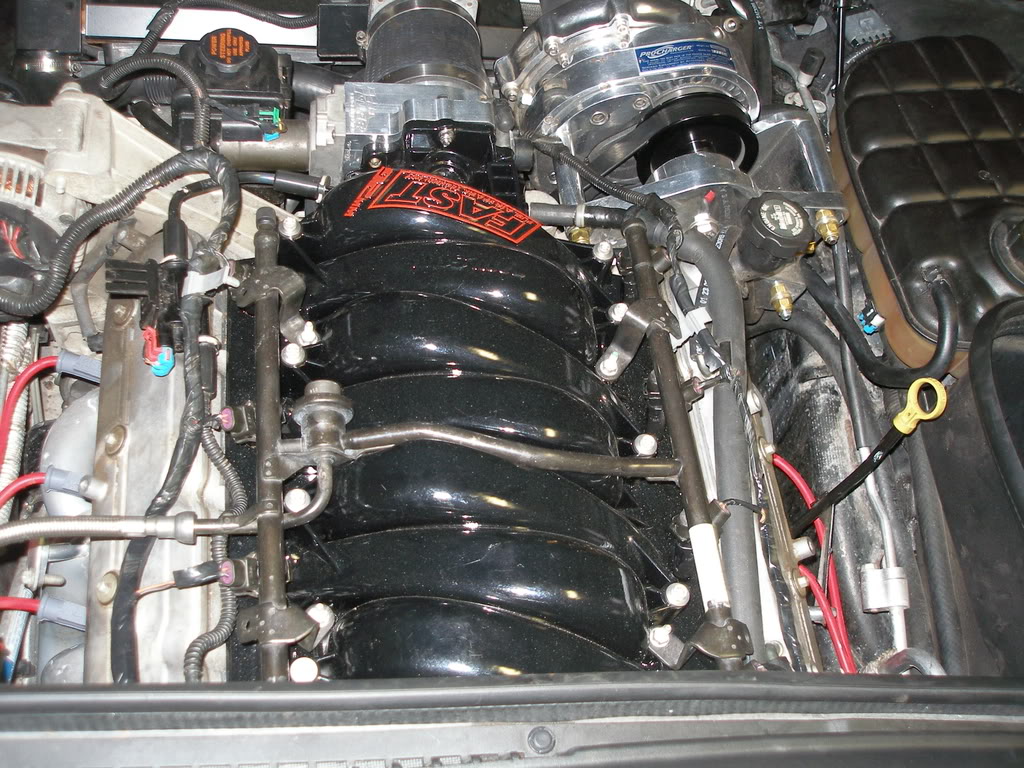
left to do: Find and install new billet valve covers!
Last edited by clif; 04-08-2009 at 08:39 AM.
12-25-2008, 12:15 PM
#3
Melting Slicks
Thread Starter
Member Since: Jul 2007
Location: Simpsonville SC
Posts: 2,939
Likes: 0
Received 4 Likes
on
4 Posts
St. Jude Donor '09-'10
While you have the fenders off, CLEAN YOUR UDDERS!
I checked the udders on the driver’s side, and both were stopped up with crud! So, I stuck my finder up inside each one and wiped them out. Here they are if you have never seen them:

There are two on the driver's side, and one on the passenger side.
Last edited by clif; 04-08-2009 at 08:40 AM.

The following users liked this post:
Viet_Vette47 (05-09-2016)
 12-25-2008, 01:27 PM
#6
Melting Slicks
Thread Starter
Member Since: Jul 2007
Location: Simpsonville SC
Posts: 2,939
Likes: 0
Received 4 Likes
on
4 Posts
St. Jude Donor '09-'10
This is true, BUT... I have never ever had a problem with my coils. More likely, after maybe 100,000 miles, I will need to replace the spark plug wires, but, that is so long away I am not worrying about it.
12-25-2008, 01:27 PM
#7
Drifting


Due to the presence of headers, I'd recommend some heat booties  Great write up and great photos
Great write up and great photos

 12-25-2008, 02:13 PM
#9
Melting Slicks
Thread Starter
Member Since: Jul 2007
Location: Simpsonville SC
Posts: 2,939
Likes: 0
Received 4 Likes
on
4 Posts
St. Jude Donor '09-'10
Yes, I paid $250 for the fender removal. The second reason is that I am also installing a methanol injection system. They methanol pump will be located insode the driver's side fender below the coil pack.
12-25-2008, 02:40 PM
#11

Yea I was asking the same question...WHY?
I guess some people have lots of time on their hands and just want something to do so they come up with these types of projects. I have a few friends that out a unbelievable amounts of "bling" on their cars to the point they look ridiculous. Nothing worse looking than a street driven Vette with way too much visual aftermarket crap on it.
IMHO the valve covers look ugly as hell in the pictures now all bare. I'd put different valve covers on or at least put the stock plastic rail covers over them but then no one would know you relocated the coil packs.
Last edited by briann510; 12-25-2008 at 02:47 PM.
12-25-2008, 02:55 PM
#12
Melting Slicks
Thread Starter
Member Since: Jul 2007
Location: Simpsonville SC
Posts: 2,939
Likes: 0
Received 4 Likes
on
4 Posts
St. Jude Donor '09-'10
All in good time. Everyone is entitled to their humble opinions. I just wanted to share with everyone how to relocate their coils. For me, I will be installing some nice looking valve covers in a month. I've already got my car over 500 HP, so now I am focusing on the looks.
Merry Christmas to all!
Merry Christmas to all!
12-25-2008, 11:07 PM
#13
Race Director

All in good time. Everyone is entitled to their humble opinions. I just wanted to share with everyone how to relocate their coils. For me, I will be installing some nice looking valve covers in a month. I've already got my car over 500 HP, so now I am focusing on the looks.
Merry Christmas to all!
Merry Christmas to all!
I'm looking to this when I swap out motors and install a turbo system.
 12-25-2008, 11:48 PM
#14

Great job with write-up and pics.
I can understand your goal of freeing up space under the hood, and I agree that problems with the coil packs are rare, but placing them in an area that's a major effort to access them doesn't appeal to me at all. Now maybe if you were to fabricate an easily removable access panel on the inside so that you could get into the fender by removing a few screws, it might make sense to me.
I applaud your tenacity and certainly think you deserve recognition for setting a goal and putting alot of effort into turning it into reality. For me, I'd rather not make maintenance and troubleshooting on my car any more difficult than it already is.
Please post pics after you get your new valve covers. If they look REALLY good, I might be inclined to be a little more flexible.
12-25-2008, 11:52 PM
#15
All in good time. Everyone is entitled to their humble opinions. I just wanted to share with everyone how to relocate their coils. For me, I will be installing some nice looking valve covers in a month. I've already got my car over 500 HP, so now I am focusing on the looks.
Merry Christmas to all!
Merry Christmas to all!
Last edited by briann510; 12-26-2008 at 12:06 AM.
12-26-2008, 12:10 AM
#16
Drifting
Member Since: Feb 2008
Location: St. Clair Shores Mi
Posts: 1,765
Likes: 0
Received 2 Likes
on
1 Post

takes what maybe 20 mins or so per fender to take off and a little longer to put on to re-align. With new valve covers that engine bay will look nice and clean. i like!
and seems like as mechanically inclined as u are why didn't u take the fenders off yourself? you'll **** yourself when u see how easy it is.
and seems like as mechanically inclined as u are why didn't u take the fenders off yourself? you'll **** yourself when u see how easy it is.
12-26-2008, 12:21 AM
#17
Instructor


Member Since: Nov 2008
Location: Manning SC
Posts: 156
Likes: 0
Received 0 Likes
on
0 Posts
Interesting project. I think the valve covers will look great. You could clean yours up and polish them I bet. I can't do this project on mine but it's very interesting. I wonder how you could pretty up the fuel rails and plumbing. It's so ugly compared to a 65 intake. IMO. I never even thought to move the coil paks. Kudos.
12-26-2008, 12:51 AM
#18
Tech Contributor
Well, you get full points for creativity. I can't help but wonder if the car will perform the same with the significant increase in plug wire length. Also, the way you have those wires routed by the headers without protection ,will surely lead to an early demise.
One of the neat things about late model cars I've enjoyed, to include my Silverado, is plug wire changes. No fitment issues, no matching wire for wire to get the right length, because they are all the same...so easy.
Kinda funny, but the way you've got your car setup now, is like taking a step back 25 years....except more difficult.
Enjoy
12-26-2008, 02:40 AM
#19
Racer
Member Since: Jun 2006
Location: Houston Tx
Posts: 470
Likes: 0
Received 0 Likes
on
0 Posts
Im doing the same thing. I do show the car so this will really set my engine compartment off. Very nice write-up. And yeah, your new valve covers will finish it all off nicely.. And your absolutly correct, everyone has their own opinions. So dont worry if everyone doesnt like your ideas. But, I certainly do... 
12-26-2008, 08:37 AM
#20
Melting Slicks
Thread Starter
Member Since: Jul 2007
Location: Simpsonville SC
Posts: 2,939
Likes: 0
Received 4 Likes
on
4 Posts
St. Jude Donor '09-'10
Interesting project. I think the valve covers will look great. You could clean yours up and polish them I bet. I can't do this project on mine but it's very interesting. I wonder how you could pretty up the fuel rails and plumbing. It's so ugly compared to a 65 intake. IMO. I never even thought to move the coil paks. Kudos.