
Got bored - refurbished alternator - pics inside
 02-17-2008, 04:42 PM
#1
Pro

Thread Starter
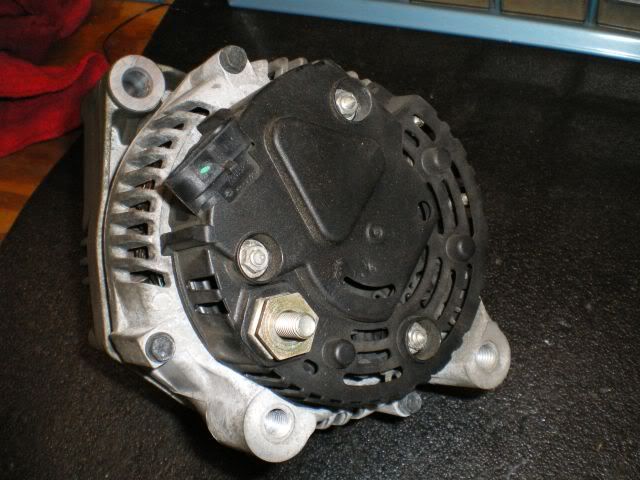
Well, its raining and I got a little bored today so I refurbished my alternator. It was looking kinda' corroded and just really screwed up the looks of the entire engine bay. I got a dead alternator in the Christmas "pay it forward" thread from Tiki340 down in Yorktown VA so I had the casings preped in advance. Thanks Howard.  I know in a previous post somewhere, Mike Mercury had chromed his alternator but I never checked his website to see the process so I thought I would post the steps for the "poor man" who doesn't have a "chromer droid" to do the tough part.
  Total time to complete without the cleaning and painting of the cases was 3 hours.
Anyway, here goes.
Disconnect battery (8mm, qty 2)
Disconnect Alternator (one connector, one 13mm nut)
loosen belt tensioner and remove belt from alternator
remove alt bolts (13mm, qty 2)
remove crappy looking alternator from engine bay

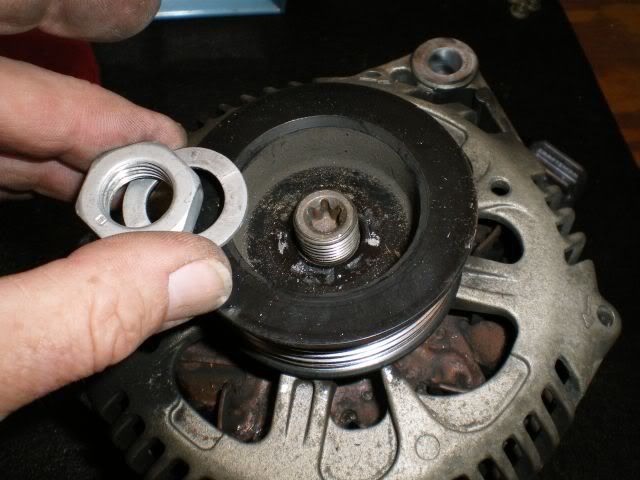
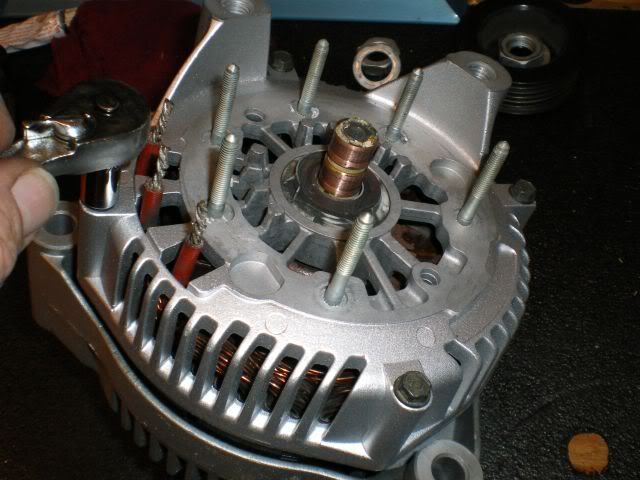
Lets remove the pulley now just to make sure we can get it off before we start messing with the solder terminals. I held the pulley in a vice with copper jaws so as not to damage it. Pulley shoud just pop off, no tools required on a 99 Valeo alternator. (15/16, qty 1)
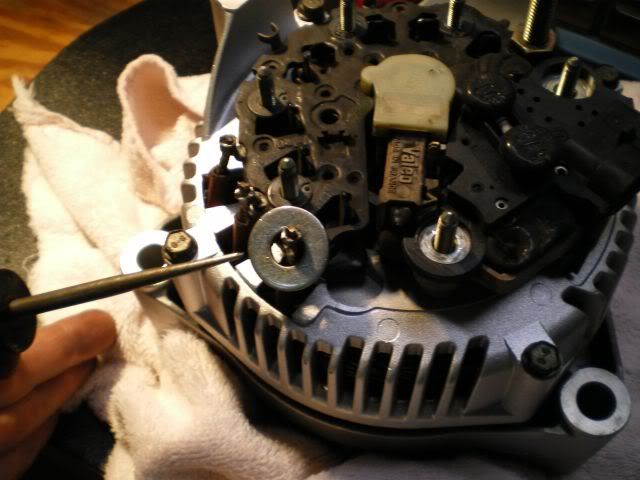
Ok, now for the fun parts. Remove the nuts holding black cover over the electronics. (5/16, qty 3). Now we need to unsolder the three terminals attached to the stator. You're either going to need a serious soldering iron (250 watts) or a propane torch. I had both and used both methods to find out if it could be done.
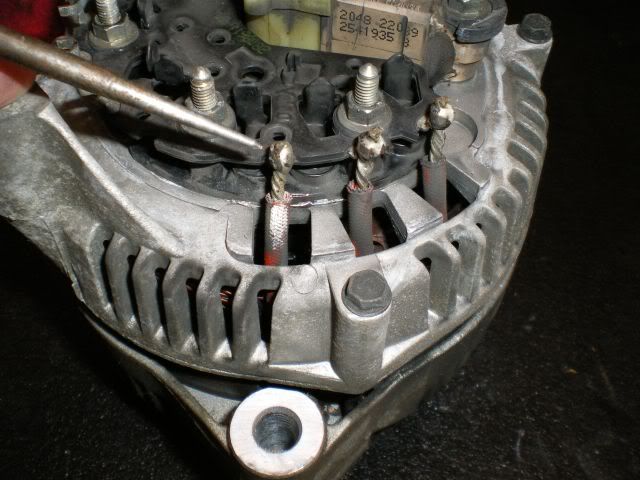
Heres a little trick I used when using a torch. Put a THICK washer over the terminal. It helps to keep the heat away from the adjacent plastic parts.
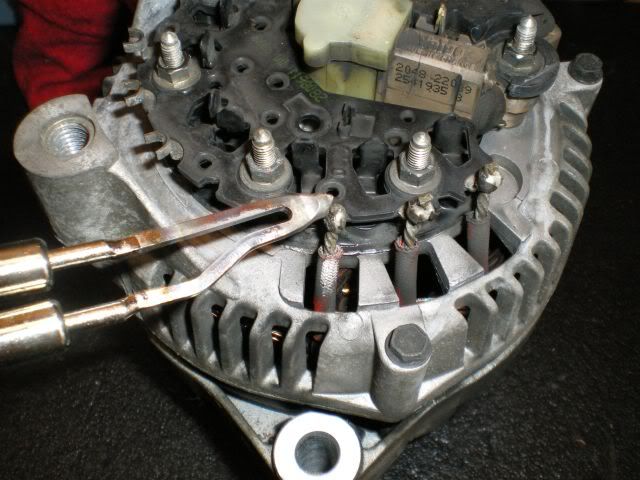
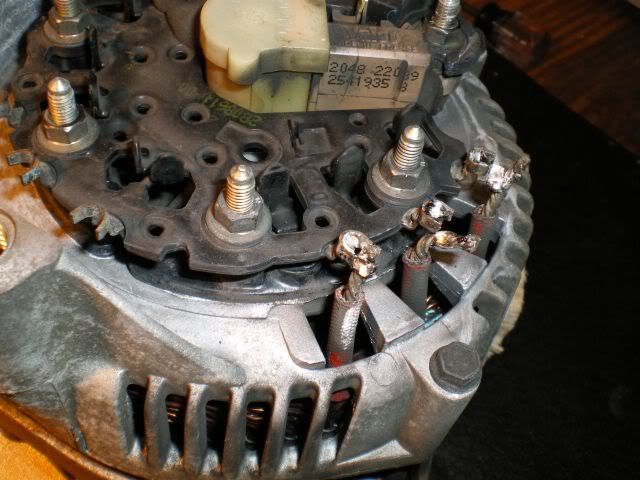
Heres the terminals unsoldered. We'll clean them up later while the paint dries.
Now that the terminals are disconnected, remove the nuts holding the electronics to the alternator body and remove the electronics. (5/16, qty 6)
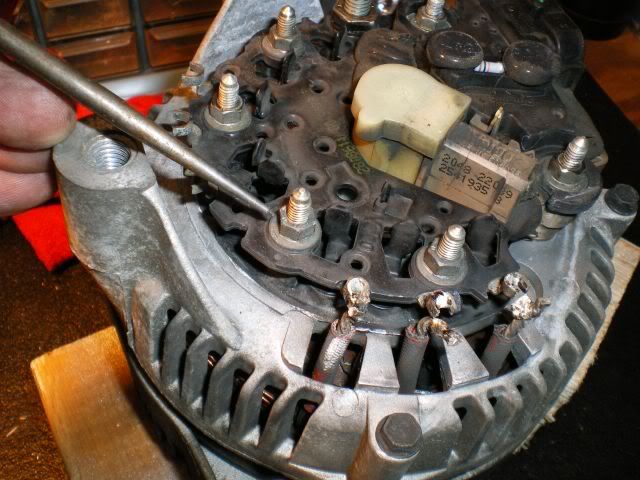
Now remove the four bolts holding the casing halves together. (5/16, qty 4)
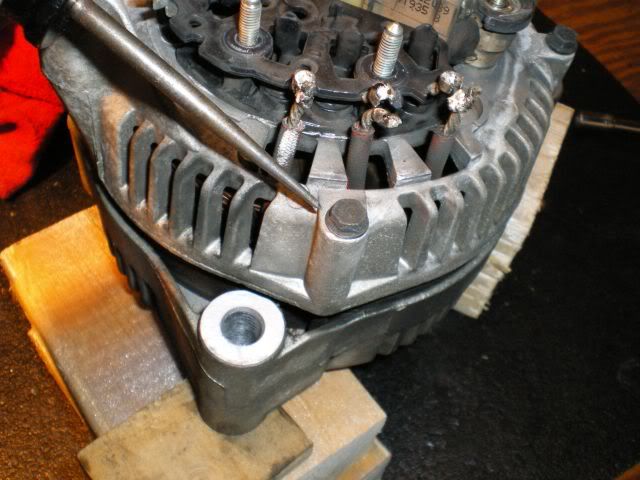
Now you're ready to separate the pieces. I used a small block of wood and a mallet to "persuade" the pieces to separate.
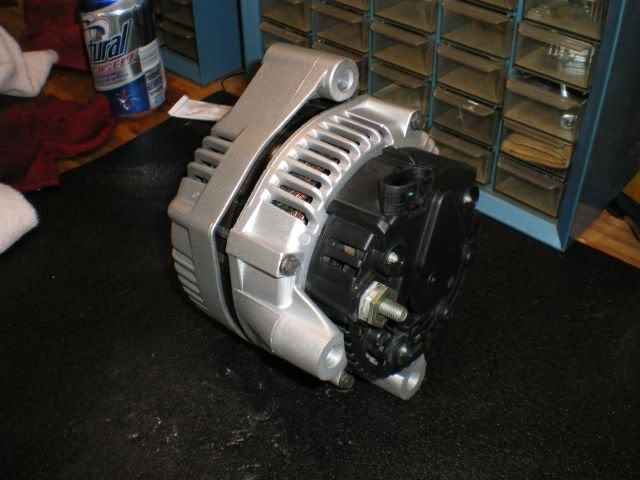
At this point, I scrubbed the parts really well, washed them with a 50/50 solution of vinegar and water to stop any corrosion, sprayed them with brake cleaner and painted them with three coats of "VHT Cast Aluminum" high temp paint. Don't get paint on the mating surface between the electronics and the alternator body. This is the "heat sink" area. The paint will cure to be chemical resistant after you've run the car through a few heat cycles.
Time to re-assemble.
Oh, heres a little gotcha I thought I'd mention. When you reinstall the electronics part, remove the cap and be sure to push the brushes back into their housings so that you don't break them when putting the electronics back on. Also, notice that the wires and terminals are all cleaned up at this point.
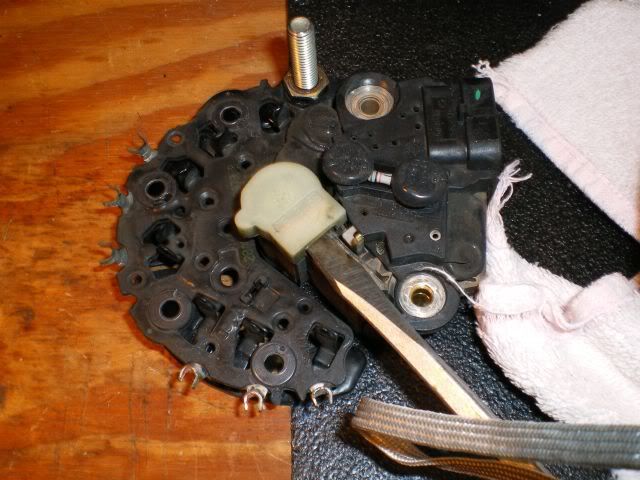
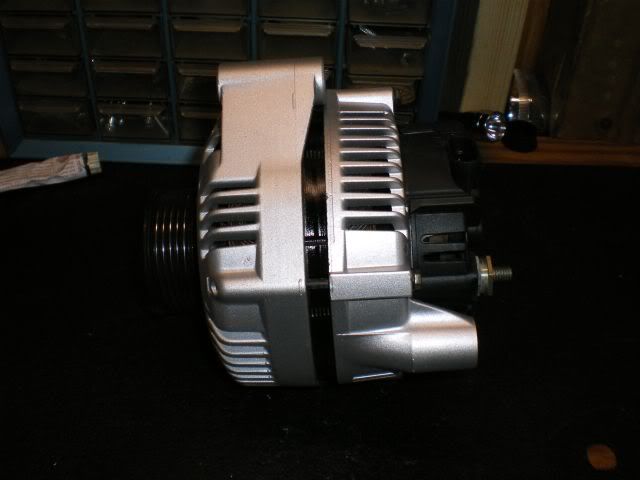
Well, solder the wires back into the terminals with rosin core solder (NOT acid core), finish reassembling the parts and enjoy.
I know in a previous post somewhere, Mike Mercury had chromed his alternator but I never checked his website to see the process so I thought I would post the steps for the "poor man" who doesn't have a "chromer droid" to do the tough part. Total time to complete without the cleaning and painting of the cases was 3 hours.Anyway, here goes.
Disconnect battery (8mm, qty 2)
Disconnect Alternator (one connector, one 13mm nut)
loosen belt tensioner and remove belt from alternator
remove alt bolts (13mm, qty 2)
remove crappy looking alternator from engine bay
Lets remove the pulley now just to make sure we can get it off before we start messing with the solder terminals. I held the pulley in a vice with copper jaws so as not to damage it. Pulley shoud just pop off, no tools required on a 99 Valeo alternator. (15/16, qty 1)
Ok, now for the fun parts. Remove the nuts holding black cover over the electronics. (5/16, qty 3). Now we need to unsolder the three terminals attached to the stator. You're either going to need a serious soldering iron (250 watts) or a propane torch. I had both and used both methods to find out if it could be done.
Heres a little trick I used when using a torch. Put a THICK washer over the terminal. It helps to keep the heat away from the adjacent plastic parts.
Heres the terminals unsoldered. We'll clean them up later while the paint dries.
Now that the terminals are disconnected, remove the nuts holding the electronics to the alternator body and remove the electronics. (5/16, qty 6)
Now remove the four bolts holding the casing halves together. (5/16, qty 4)
Now you're ready to separate the pieces. I used a small block of wood and a mallet to "persuade" the pieces to separate.
At this point, I scrubbed the parts really well, washed them with a 50/50 solution of vinegar and water to stop any corrosion, sprayed them with brake cleaner and painted them with three coats of "VHT Cast Aluminum" high temp paint. Don't get paint on the mating surface between the electronics and the alternator body. This is the "heat sink" area. The paint will cure to be chemical resistant after you've run the car through a few heat cycles.
Time to re-assemble.
Oh, heres a little gotcha I thought I'd mention. When you reinstall the electronics part, remove the cap and be sure to push the brushes back into their housings so that you don't break them when putting the electronics back on. Also, notice that the wires and terminals are all cleaned up at this point.
Well, solder the wires back into the terminals with rosin core solder (NOT acid core), finish reassembling the parts and enjoy.
Last edited by Uncle John; 02-17-2008 at 06:43 PM.


 02-17-2008, 05:23 PM
#6
Pro
Thread Starter
 02-17-2008, 05:27 PM
#8
Pro
Thread Starter
No, not really. I just laid it on its side, used a block of Oak and tapped off the electronics side first. It came of easily. I've taken two alternators apart. The pulley side on one came off with just a few taps on the pulley shaft while supporting the casing on 2x4 blocks. The other one needed heat, chemicals and brute force.

 .
02-17-2008, 06:37 PM
.
02-17-2008, 06:37 PM
#12
Pro
Thread Starter

 02-18-2008, 12:26 AM
#16
Burning Brakes


Does anybody sell the brushes and/or the electronics for this alternator?
02-18-2008, 06:32 PM
#17
Pro
Thread Starter
 02-18-2008, 06:57 PM
#19
Team Owner

Member Since: Apr 2001
Location: S.W. Ohio. . . . . . NRA Life Member
Posts: 54,199
Received 173 Likes
on
107 Posts

I went to polish mine and my metal polisher dewd talked me out of it. He said that polishing requires much upkeep; that I'd be doing it all over again in a few years. He suggested either painting it or chroming.
Did the chrome thing:
http://forums.corvetteforum.com/show....php?t=1608707
02-18-2008, 07:00 PM
#20
I was thinking the same thing that white90conv said. Somebody has got to be doing it and if they are, then there has got bt be parts available. Personally I'd like to make it run good as well as look good for the amount of work involved.